MERCEDES-BENZ GLS SUV 2020 Owners Manual
Manufacturer: MERCEDES-BENZ, Model Year: 2020, Model line: GLS SUV, Model: MERCEDES-BENZ GLS SUV 2020Pages: 549, PDF Size: 9.9 MB
Page 321 of 549
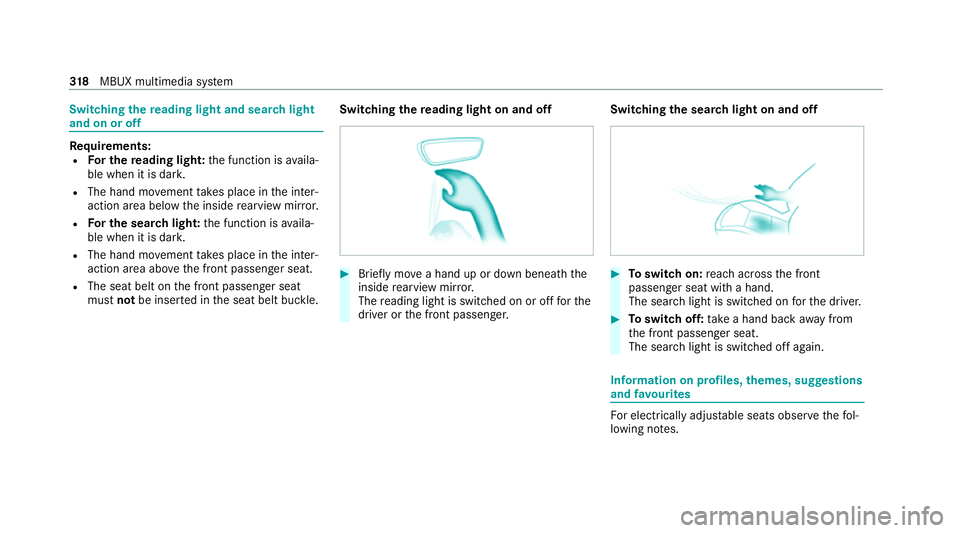
Switching
there ading light and sear chlight
and on or off Re
quirements:
R For the reading light: the function is availa‐
ble when it is dar k.
R The hand mo vement take s place in the inter‐
action area below the inside rearview mir ror.
R For the sear chlight: the function is availa‐
ble when it is dar k.
R The hand mo vement take s place in the inter‐
action area abo vethe front passenger seat.
R The seat belt on the front passenger seat
must notbe inser ted in the seat belt buckle. Switching
there ading light on and off #
Brief lymo vea hand up or down beneath the
inside rearview mir ror.
The reading light is swit ched on or off forthe
driver or the front passenger. Switching
the sear chlight on and off #
Toswitch on: reach across the front
passenger seat with a hand.
The sear chlight is switched on forth e driver. #
Toswitch off: take a hand back away from
th e front passenger seat.
The sear chlight is switched off again. Information on profiles,
themes, suggestions
and favo urites Fo
r electrical lyadjus table seats obser vethefo l‐
lowing no tes. 318
MBUX multimedia sy stem
Page 322 of 549
&
WARNING Risk of becoming trapped
du ring adjustment of the driver's seat
af te r calling up a driver profile
Selecting a user profile may trigger an
adju stment of the driver's seat tothe posi‐
tion sa ved under the user profile. You or
ot her vehicle occupants could be injured in
th e process. #
Make sure that when the position of
driver's seat is being adjus ted using the
multimedia sy stem, no people or body
parts are in the seat's range of mo ve‐
ment.
If th ere is a risk of someone becoming trap‐
ped, stop the adjustment process immedi‐
ately: #
a)Tapth ewa rning message on the
media displa y.
or #
b) Press a memory position button or a
seat adjustment switch on the driver's
door.
The adjustment process will be stop‐
ped. The driver's seat is equipped with an access pre‐
ve nter.
If th e driver's door is open, the driver's seat will
not be set af ter calling up the driver's profile.
Profiles store your vehicle settings and settings
fo rth e multimedia sy stem. If theve hicle is used
by several drivers, the driver can select their
ow n profile wi thout changing thestored profile
settings of other drivers.
% Information on profiles from Mercedes me
connect can be found in the Digital Opera‐
to r's Manual.
Ve hicle settings are, forex ample, driver's seat,
st eering wheel and mir ror settings, clima tecon‐
trol and ambient lighting. Forth e settings of the
multimedia sy stem, you can select, forex ample,
ra dio stations, pr evious destinations as well as
th emes, suggestions and favo urites. Fo
rre cur ring driving situations, su chas long
drives on the mo torw ay,yo u can sa veyour pre‐
fe rred settings in a theme in theve hicle. In a
th eme you can sa vethe display of the digital
map, your prefer redra dio station and prefer red
drive prog ram, forex ample.
The vehicle can learn the habits of the driver. It
th en of fers suggestions forth e most probable
navigation destinations, media sources, radio
st ations or con tacts. The pre-requirements for
th at are the selection of a profile, your consent
to there cording of da taand suf ficient collected
da ta.
Fa vourites pr ovide quick access toapplications
th at are used of ten. You can select favo urites
from categories or add them directly toan appli‐
cation. MBUX multimedia sy
stem 319
Page 323 of 549
Configuring profiles,
themes and sugges‐
tions Multimedia sy
stem:
4 © 5
f Profiles
Creating a new profile #
Select WCreate profile .#
Select an avatar. #
Enterth e name and confi rmwith a. #
Select Continue r. #
Select Current settings. #
Select Save. #
Activate Blu etoo th®
and select Connect
phone, toconnect a mobile phone wi th the
user profile . #
Select Finished.
Selecting profile options #
Select Äfor a profile.
The following functions are available:
R Editing, resetting or deleting a profile
R Resetting themes or favo urites R
Con figuring suggestions
Configuring suggestions #
Select Äfor a profile. #
Select Suggestions settings . #
Switch Allow destination suggestions, Allow
music suggestions andAllow contact sugges-
tions on or off. #
Todeactivate the learning function for
one da y:activate Deact. learn. for 24h .
Fo r24 hours no new actions will be trained
and no data recorded forth e active profile.
Suggestions will continue tobe shown.
Example: if the option is switched on and a
ro ute toa new destination has been calcula‐
te d, this destination would not be take n into
account forth e learning function.
Creating new themes #
Select ©. #
Select THEMES . #
Select WSet theme.
The settings which are sa ved in theth eme
are shown. #
Select Continue r. #
Select AudioandNavigation (Navigation) and
st ore the active settings in theth eme. #
Select Continue r. #
Select an entry screen. #
Select Continue r. #
Select an image. #
Enter the names into the entry field and con‐
fi rm with a. #
Select Save. Sy
stem settings Overview of
the sy stem settings menu In
the sy stem settings menu, you can make set‐
tings in thefo llowing menus and control ele‐
ments:
R Display
- Styles
- Instrument lighting
- Display brightness 320
MBUX multimedia sy stem
Page 324 of 549
-
Edge lighting
- Day/night design
R Control elements
- Keyboard language and handwriting rec‐
ognition
- Sensitivity of theTo uchpad
- Sensitivity of theTo uch Controls
R LINGU ATRO NIC
R Sound
- Enter tainment
- Navigation and traf fic announcements
- Telephone
- Voice amplification tothere ar
R Connectivity
- Wi-Fi, Blu etoo th®
, NFC
R MBUX Remo teControl
- Auth orising and deauthorising devices
R Time & date
R Language
R Units for dis tance R
Software upda tes
R Data import/expo rt
R PIN pr otection
R System Reset Information on important sy
stem upda tes Impor
tant sy stem updates may be necessary for
th e security of your multimedia sy stem's data.
Ins tallth ese updates, or else the security of your
multimedia sy stem cann otbe ensured.
A sy stem update consists of thre esteps:
R Downloading or copying of the data requ ired
fo r ins tallation
R Installation of the downloaded sy stem update
R Activation of the downloaded sy stem update
by restarting the sy stem
% If automatic software updates are activated,
th e sy stem updates will be downloaded auto‐
maticall y.
The multimedia sy stem pr ovides a message
when a sy stem update is available. Yo
u ha vethefo llowing selection options:
R Accept and install
The sy stem update will be downloaded in the
bac kground.
R Information
Info rm ation about the pending sy stem
update is displa yed.
R Later
The sy stem update can be downloaded man‐
ually at a later time.
Deep sy stem upda tes
Deep sy stem updates access vehicle or sy stem
settings and can therefore only be car ried out
when theve hicle is stationary and the ignition is
switched off.
If th e download of a deep sy stem update is com‐
ple ted and the downloaded sy stem update is
re ady for ins tallation, you will be informed of this
af te rth e next ignition cycle, forex ample.
% Park theve hicle safely in a suitable location
before starting the ins tallation. MBUX multimedia sy
stem 321
Page 325 of 549
Re
quirements forth e ins tallation:
R The ignition is switched off.
R Notes and warnings ha vebeen read and
accep ted.
R The elect ric pa rking brake is applied.
If all requirements ha vebeen fulfilled, the down‐
loaded sy stem update is ins talled. The multime‐
dia sy stem cann otbe operated while the down‐
loaded sy stem update is being ins talled and
ve hicle functions are restricted.
If er rors should occur during the ins tallation, the
multimedia sy stem automatically attem ptsto
re store the pr evious version. If restoration of the
pr ev ious version is not possible, a symbol
appears on the media displa y.Consult a quali‐
fi ed specialist workshop toresolve the problem. Setting up a
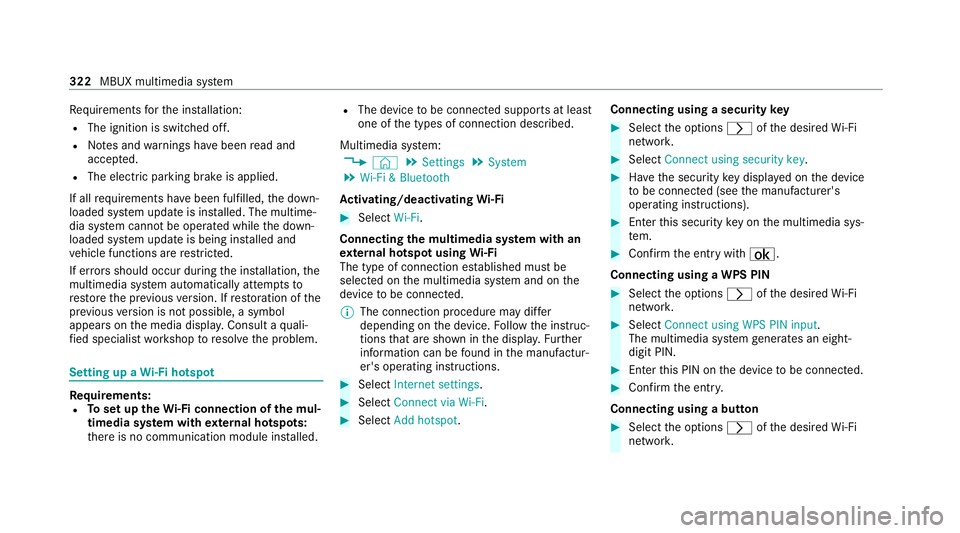
Wi-Fi hotspot Requ
irements:
R Toset up theWi -Fi connection of the mul‐
timedia sy stem with extern al hotspots:
th ere is no communication module ins talled. R
The device tobe connec ted supports at least
one of the types of connection described.
Multimedia sy stem:
4 © 5
Settings 5
System
5 Wi-Fi & Bluetooth
Ac tivating/deactivating Wi-Fi #
Select Wi-Fi.
Connecting the multimedia sy stem with an
ex tern al hotspot using Wi-Fi
The type of connection es tablished must be
selected on the multimedia sy stem and on the
device tobe connec ted.
% The connection procedure may dif fer
depending on the device. Follow the instruc‐
tions that are shown in the displa y.Fu rther
information can be found in the manufactur‐
er's operating instructions. #
Select Internet settings . #
Select Connect via Wi-Fi. #
Select Add hotspot. Connecting using a security
key #
Select the options rofthe desired Wi-Fi
networ k. #
Select Connect using security key . #
Have the security key displa yed on the device
to be connec ted (see the manufacturer's
operating instructions). #
Ente rth is security key on the multimedia sys‐
te m. #
Confirm the entry with¡.
Connecting using a WPS PIN #
Select the options rofthe desired Wi-Fi
networ k. #
Select Connect using WPS PIN input .
The multimedia sy stem generates an eight-
digit PIN. #
Enter this PIN on the device tobe connec ted. #
Confirm the entry.
Connecting using a but ton #
Select the options rofthe desired Wi-Fi
networ k. 322
MBUX multimedia sy stem
Page 326 of 549
#
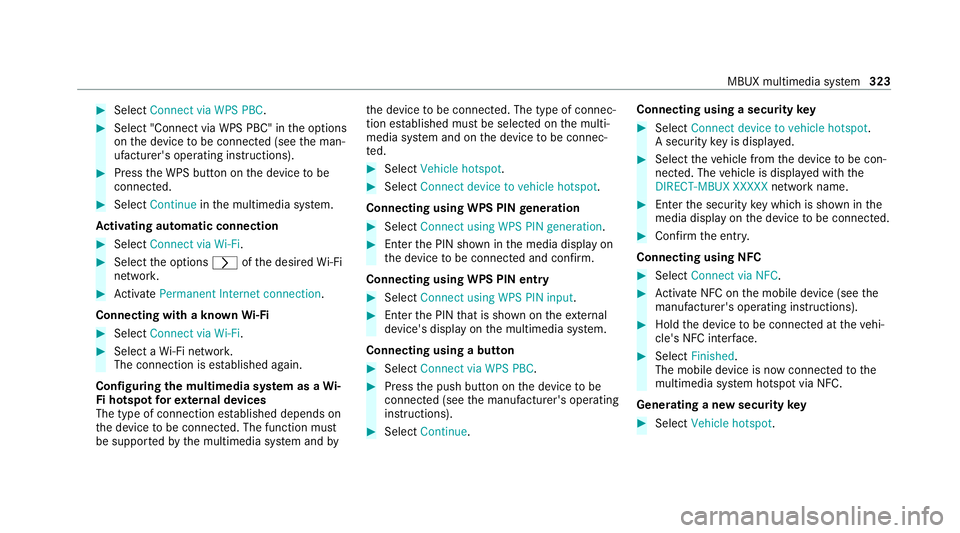
Select Connect via WPS PBC .#
Select "Connect via WPS PBC" in the options
on the device tobe connec ted (see the man‐
ufacturer's operating instructions). #
Press the WPS button on the device tobe
connec ted. #
Select Continue inthe multimedia sy stem.
Ac tivating automatic connection #
Select Connect via Wi-Fi . #
Select the options rofthe desired Wi-Fi
networ k. #
Activate Permanent Internet connection .
Connecting with a known Wi-Fi #
Select Connect via Wi-Fi . #
Select a Wi-Fi networ k.
The connection is es tablished again.
Configuring the multimedia sy stem as a Wi-
Fi hotspot forex tern al devices
The type of connection es tablished depends on
th e device tobe connec ted. The function must
be suppor tedby the multimedia sy stem and byth
e device tobe connec ted. The type of connec‐
tion es tablished must be selected on the multi‐
media sy stem and on the device tobe connec‐
te d. #
Select Vehicle hotspot. #
Select Connect device to vehicle hotspot .
Connecting using WPS PIN generation #
Select Connect using WPS PIN generation. #
Ente rth e PIN shown in the media display on
th e device tobe connec ted and con firm.
Connecting using WPS PIN entry #
Select Connect using WPS PIN input. #
Enterth e PIN that is shown on theex tern al
device's display on the multimedia sy stem.
Connecting using a button #
Select Connect via WPS PBC. #
Press the push button on the device tobe
connec ted (see the manufacturer's operating
instructions). #
Select Continue. Connecting using a security
key #
Select Connect device to vehicle hotspot .
A secu rity key is displa yed. #
Select theve hicle from the device tobe con‐
nec ted. The vehicle is displa yed with the
DIRECT-MBUX XXXXX network name. #
Enter the security key which is shown in the
media display on the device tobe connec ted. #
Confirm the entry.
Connecting using NFC #
Select Connect via NFC. #
Activate NFC on the mobile device (see the
manufacturer's operating instructions). #
Hold the device tobe connec ted at theve hi‐
cle's NFC inter face. #
Select Finished.
The mobile device is now connected tothe
multimedia sy stem hotspot via NFC.
Generating a new security key #
Select Vehicle hotspot. MBUX multimedia sy
stem 323
Page 327 of 549
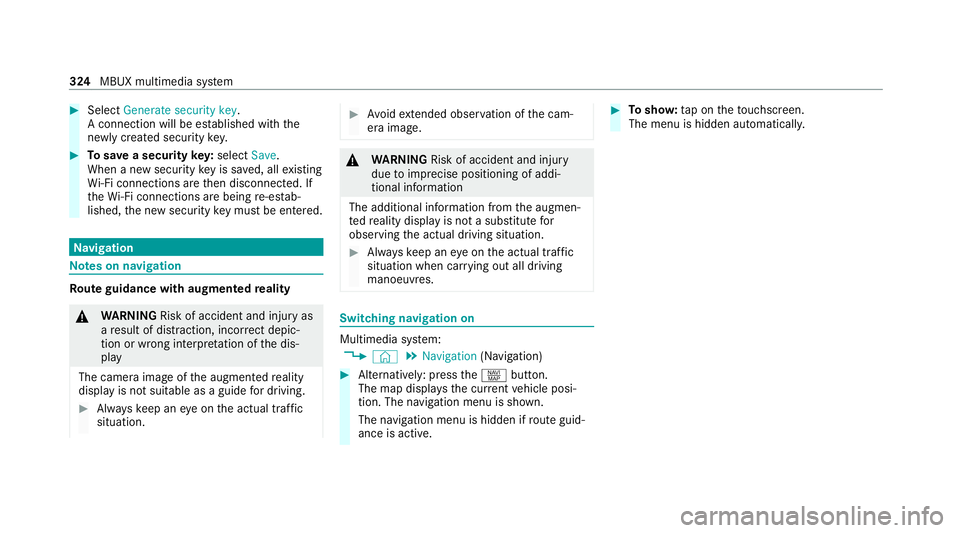
#
Select Generate security key .
A connection will be es tablished with the
newly crea ted security key. #
Tosave a security key:select Save.
When a new security key is sa ved, all existing
Wi -Fi connections are then disconnected. If
th eWi -Fi connections are being re-es tab‐
lished, the new security key must be en tere d. Na
vigation Note
s on navigation Ro
ute guidance with augmented reality &
WARNING Risk of accident and inju ryas
a re sult of distraction, incor rect depic‐
tion or wrong interpr etation of the dis‐
play
The camera image of the augmented reality
display is not suitable as a guide for driving. #
Alw ayske ep an eye on the actual traf fic
situation. #
Avoid extended obser vation of the cam‐
era image. &
WARNING Risk of accident and inju ry
due toimprecise positioning of addi‐
tional information
The additional information from the augmen‐
te dre ality display is not a substitute for
observing the actual driving situation. #
Alw ayske ep an eye on the actual traf fic
situation when car rying out all driving
manoeuvres. Switching navigation on
Multimedia sy
stem:
4 © 5
Navigation (Navigation) #
Alternatively: press thez button.
The map displa ys the cur rent vehicle posi‐
tion. The navigation menu is shown.
The navigation menu is hidden if route guid‐
ance is active. #
Tosho w:tap on theto uchsc reen.
The menu is hidden automaticall y.324
MBUX multimedia sy stem
Page 328 of 549
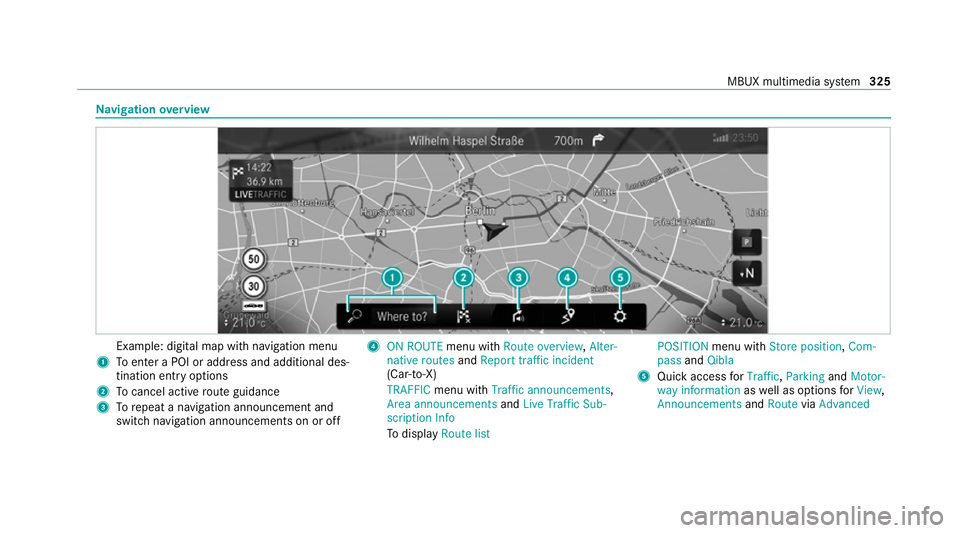
Na
vigation overview Example: digital map with navigation menu
1 Toenter a POI or address and additional des‐
tination entry options
2 Tocancel acti veroute guidance
3 Torepeat a navigation announcement and
switch navigation announcements on or off 4
ON ROUTE menu withRoute overview, Alter-
native routes andReport traffic incident
(Car-to-X)
TRAFFIC menu with Traffic announcements,
Area announcements andLive Traffic Sub-
scription Info
To display Route list POSITION
menu with Store position, Com-
pass andQibla
5 Quick access forTraffic, Parking andMotor-
way information aswell as options forView,
Announcements andRoute viaAdvanced MBUX multimedia sy
stem 325
Page 329 of 549
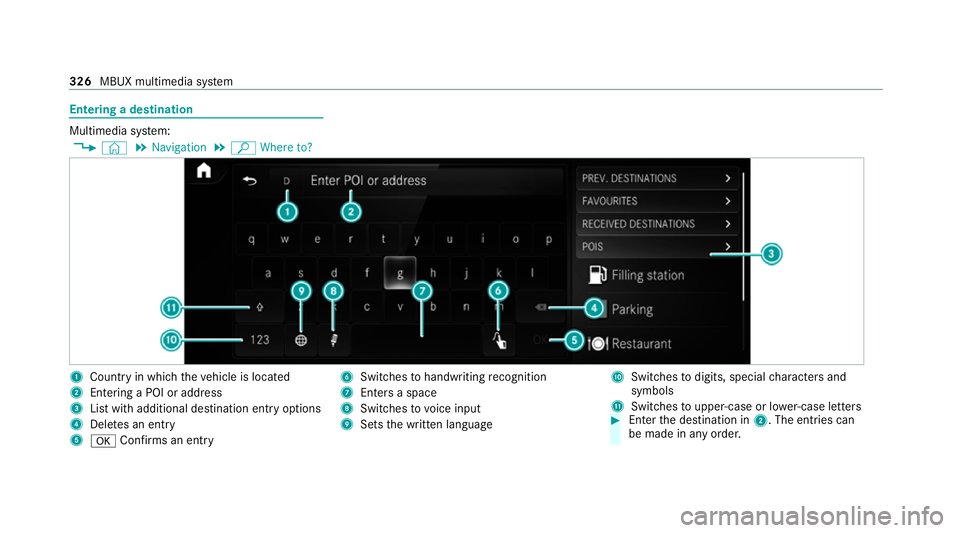
Entering a destination
Multimedia sy
stem:
4 © 5
Navigation 5
ª Where to? 1
Country in which theve hicle is located
2 Entering a POI or address
3 List with additional destination entry options
4 Dele tes an entry
5 a Confirms an entry 6
Switches tohandwriting recognition
7 Enters a space
8 Switches tovoice input
9 Sets the written language A
Switches todigits, special characters and
symbols
B Swit ches toupper-case or lo wer-case letters #
Enter the destination in 2. The entries can
be made in any order. 326
MBUX multimedia sy stem
Page 330 of 549
The
following ent ries can be made, forex ample:
R Town, stre et, house number
R Street,to wn
R Postcode
R POI name or POI catego ry, e.g. Parking
R Contact name #
Select a sear chresult in list 3. #
Calculate thero ute (/ page 327).
% You can find fur ther information about desti‐
nation entry , e.g. 3wordaddresses, in the
Digital Owner's Manual.
Changing country #
Select the count ryindicator in 1. #
Enterth e count ryindicator. #
Select the count ryin3.
Using online sear ch
Destination entry uses online map services. If
th e on-board sear chfinds no suitable de stina‐
tions or if youch ange countries, the online
sear chisavailable. Fo
rth e destination you can en ter an addre ss, a
POI or a 3 wordaddress. #
Select country indicator 1. #
Select the pr ovider forth e online service
from the count ries list.
or #
Ifth e on-board sear chdelivers no results,
enter the destination in input line 2. #
Select the destination in the list.
The de tailed view forth ero ute is displ ayed. Calculating a
route and using settings for
ro ute guidance Re
quirements:
R The destination has been entered.
R The destination address is shown. Multimedia sy
stem:
4 © 5
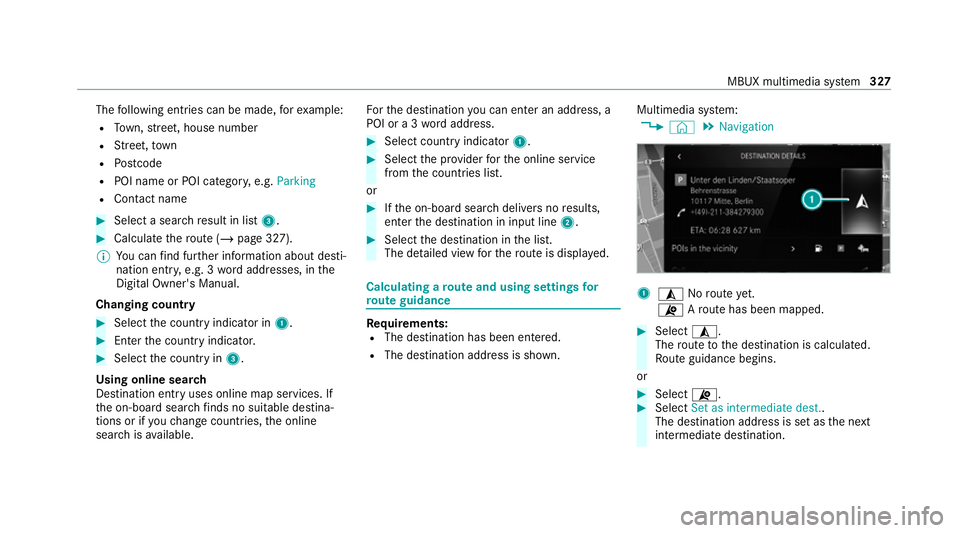
Navigation 1
¥ Noroute yet.
¦ Aro ute has been mapped. #
Select ¥.
The route tothe destination is calculated.
Ro ute guidance begins.
or #
Select ¦. #
Select Set as intermediate dest..
The destination address is set as the next
intermediate destination. MBUX multimedia sy
stem 327