warning lights MERCEDES-BENZ METRIS 2016 MY16 Operator’s Manual
[x] Cancel search | Manufacturer: MERCEDES-BENZ, Model Year: 2016, Model line: METRIS, Model: MERCEDES-BENZ METRIS 2016Pages: 310, PDF Size: 7.28 MB
Page 53 of 310
Occupant Classification System (OCS)
operation
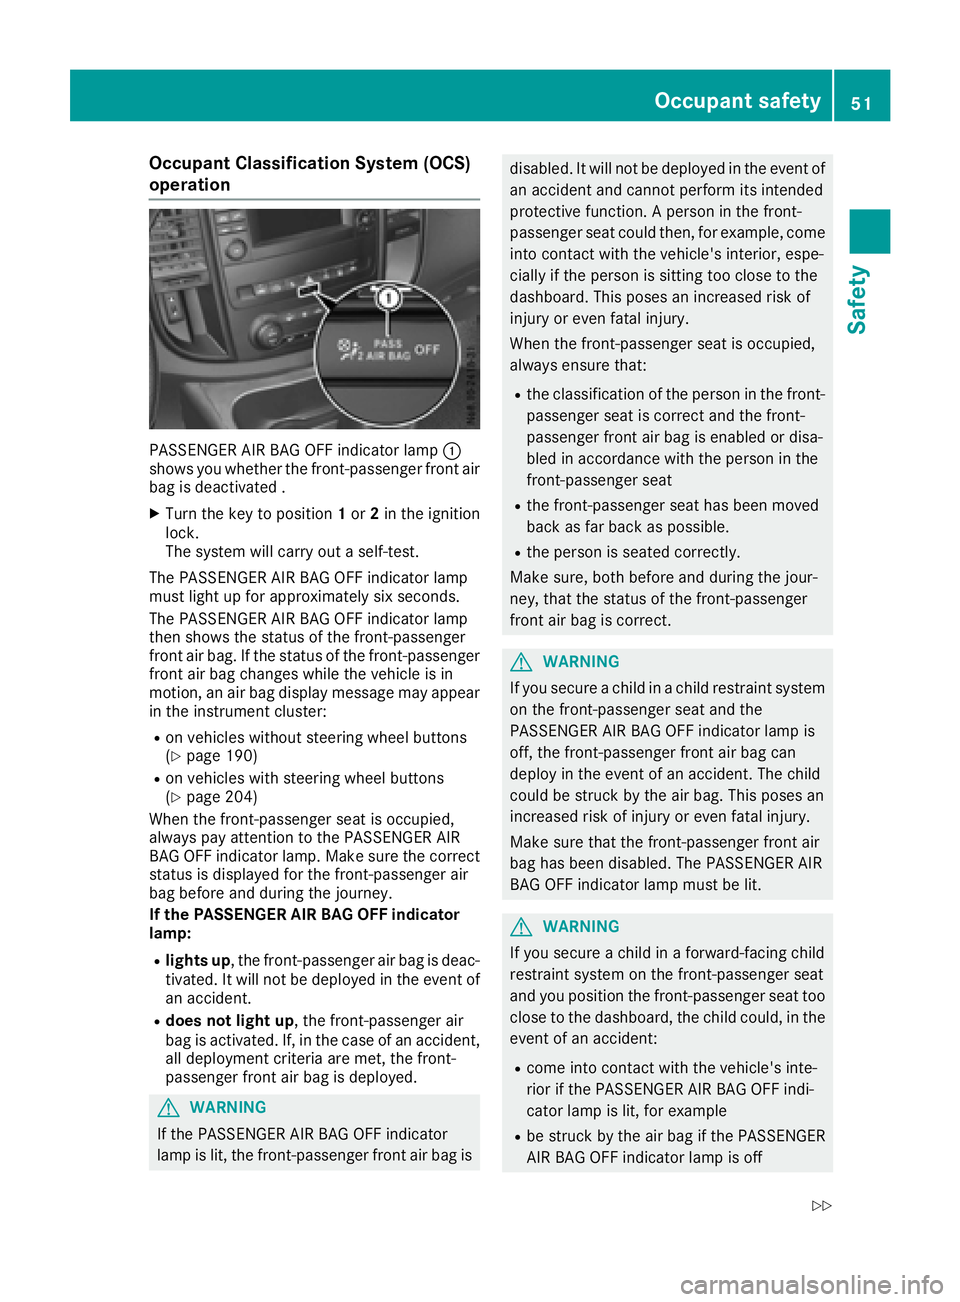
PASSENGER AIR BAG OFF indicator lamp:
shows you whether the front-passenger fronta ir
bag is deactivated .
XTurn the key to position 1or 2in the ignition
lock.
The system will carry out aself-test.
The PASSENGER AIR BAG OFF indicator lamp
must light up for approximately six seconds.
The PASSENGER AIR BAG OFF indicator lamp
then shows the status of the front-passenger
fronta ir bag. If the status of the front-passenger
fronta ir bag changes while the vehicle is in
motion ,anair bag display message may appear
in the instrument cluster:
Ron vehicles without steering wheel buttons
(Ypage 190)
Ron vehicles with steering wheel buttons
(Ypage 204)
When the front-passenger seat is occupied,
alwaysp ay attention to the PASSENGER AIR
BAG OFF indicator lamp. Make sure the correct
status is displayed for the front-passenger air
bag before and during the journey.
If the PASSENGER AIR BAG OFF indicator
lamp:
Rlights up ,the front-passenger air bag is deac-
tivated. It will not be deployed in the event of
an accident.
Rdoes not light up,t he front-passenger air
bag is activated. If, in the case of an accident,
all deployment criteria are met, the front-
passenger fronta ir bag is deployed.
GWARNING
If the PASSENGER AIR BAG OFF indicator
lamp is lit, the front-passenger fronta ir bag is
disabled. It will not be deployed in the event of
an accidenta nd cannot perform its intended
protective function .Aperson in the front-
passenger seat could then ,for example, come
into contact with the vehicle's interior, espe-
cially if the person is sitting too close to the
dashboard. This poses an increased risk of
injur yore ven fatal injury.
When the front-passenger seat is occupied,
alwayse nsure that:
Rthe classification of the person in the front-
passenger seat is correct and the front-
passenger fronta ir bag is enabled or disa-
bled in accordance with the person in the
front-passenger seat
Rthe front-passenger seat has been moved
back as far back as possible.
Rthe person is seated correctly.
Make sure, both before and during the jour-
ney, that the status of the front-passenger
fronta ir bag is correct.
GWARNING
If you secure achild in achild restraint system
on the front-passenger seat and the
PASSENGER AIR BAG OFF indicator lamp is
off, the front-passenger fronta ir bag can
deploy in the event of an accident. The child
could be struc kbythe air bag. This poses an
increased risk of injur yoreven fatal injury.
Make sure that the front-passenger fronta ir
bag has been disabled. The PASSENGER AIR
BAG OFF indicator lamp must be lit.
GWARNING
If you secure achild in aforward-facing child
restraint system on the front-passenger seat
and you position the front-passenger seat too close to the dashboard, the child could, in the
event of an accident:
Rcome into contact with the vehicle's inte-
rior if the PASSENGER AIR BAG OFF indi-
cator lamp is lit, for example
Rbe struck by the air bag if the PASSENGER
AIR BAG OFF indicator lamp is off
Occupant safety51
Safety
Z
Page 54 of 310
This poses an increased risk of injury or evenfatal injury.
Move the front-passenger seat as far back as
possible. Always make sure that the shoulder belt strap is correctly routed from the vehicle
belt sash guide to the shoulder belt guide on
the child restraint system. The shoulder belt
strap must be routed forwards and down-
wards from the vehicle belt sash guide. If nec-
essary, adjust the vehicle belt sash guide and
the front-passenger seat accordingly. Always
observe the child restraint system manufac-
turer's installation instructions.
If OCS determines that:
Rthe front-passenger seat is unoccupied, the
PASSENGER AIR BAG OFF indicator lamp
lights up after the system self-test and
remains lit. This indicates that the front-
passenger air bag has been deactivated.
Rthe front-passenger seat is occupied by a
child of up to 12 months old in astandard
child restraint system, the PASSENGER AIR
BAG OFF indicator lamp lights up after the
system self-test and remains lit. This indi-
cates that the front-passenger air bag has
been deactivated.
But even in the case of a12-month-old child in
as tandard child restraint system, the
PASSENGER AIR BAG OFF indicator lamp can
go out after the system self-test. This indi-
cates that the front-passenger air bag has
been activated. The classification depends,
among other things, on the child restraint sys-
tem and the size and weight of the child. In
this case, install the child restraint system on
as uitable rear seat.
Rthe front-passenger seat is occupied by aper-
son of smaller stature (e.g. ateenager or
small adult), the PASSENGER AIR BAG OFF
indicator lamp lights up and remains lit after
the system self-test depending on the result
of the classification or, alternatively, goes out.
-If the PASSENGER AIR BAG OFF indicator
lamp is not lit, move the front-passenger
seat as far back as possible. Alternatively, a person of smaller stature can sit on
arear
seat.
-If the PASSENGER AIR BAG OFF indicator
lamp is lit, aperson of smaller stature
should not use the front-passenger seat.
Rthe front-passenger seat is occupied by an
adult or aperson of astature corresponding
t o
that of an adult, the PASSENGER AIR BAG
OFF indicator lamp goes out after the system
self-test. This indicates that the front-
passenger air bag has been activated.
If children are also traveling in the vehicle,
please observe the instructions about “Children
in the vehicle” (
Ypage 56).
If OCS is malfunctioning, the red 6restraint
system warning lamp in the instrument cluster
and the PASSENGER AIR BAG OFF indicator
lamp light up simultaneously. This signals that
the front-passenger air bag has been deactiva-
ted and will not be deployed in the event of an
accident .Have the system checked by aquali-
fied technician as soon as possible. Consult a
Mercedes-Benz Commercial Van Center. The
front-passenger seat should only be repaired at aM ercedes-Benz Commercial Van Center.
If the front-passenger seat, the seat cover or the
upholstery is damaged, have the necessary
repair work carried out at aMercedes-Benz
Commercial Van Center.
For safety reasons, Mercedes-Benz recom-
mends that you only use seating accessories
that have been specially approved for
Mercedes-Benz vehicles.
If the driver's air bag deploys, this does not
mean the front-passenger air bag must also
deploy. The Occupant Classification System
(OCS) classifies occupantsont he front-
passenger seat. Dependin gonthe outcome, the
front-passenger air bag is either activated or
deactivated.
System self-test
GDANGER
If the PASSENGER AIR BAG OFF indicator
lamp does not light up during the system self-
test ,then the system is malfunctioning. The
front-passenger front air bag might be trig-
gered unintentionally or might not be trig-
gered at all in the event of an accident with
high deceleration. This poses an increased
risk of injury or even fatal injury.
52Occupant safety
Safety
Page 56 of 310
Problems with the Occupant Classification System (OCS)
Be sure to observe the notes on "System self-test"(Ypage 52).
ProblemPossible causes/consequences andMSolutions
The PASSENGER AIR
BAG OFF indicator lamp
lights up and remains lit,
even though the front-
passenger seat is occu-
pied by an adult oraper-
son of astature corre-
sponding to that of an
adult.The classification of the person on the front-passenger seat is incor-
rect.
XMake sure the conditionsf orac orrect classification of the person
on the front-passenger seat are met (Ypage 50).
XIf the PASSENGER AIR BAG OFF indicator lamp remains lit, the front-
passenger seat may not be used.
XHave OCS checked as soon as possible at aMercedes-Benz Com-
mercial Van Center.
The PASSENGER AIR
BAG OFF indicator lamp
does not light up and/or
does not stay on.
The front-passenger seat
is:
Runoccupied
Roccupied with the
weight of achild up to
twelve months old in a
child restraint system
OCS is malfunctioning.
XMake sure there is nothin gbetween the seat cushion and the child
seat.
XMake sure that the entire base of the child restraint system rests on
the seat cushion of the front-passenger seat. The backrest of the
forward-facing child restraint system must lie as flat as possible
against the backrest of the front-passenger seat. If necessary,
adjust the position of the front-passenger seat.
XWhen installing the child restraint system, make sure that the seat belt is tight. Do not pull the seat belt tight using the front-passenger
seat adjustment .This could result in the seat belt and the child
restraint system being pulled too tightly.
XCheck for correct installation of the child restraint system.
Make sure that the head restraint does not apply aload to the child
restraint system. If necessary, adjust the head restraint accord-
ingly.
XMake sure that no object sare applying additional weight onto the
seat.
XIf the PASSENGER AIR BAG OFF indicator lamp remains off, do not
install achild restraint system on the front-passenger seat. It is
recommended that you install the child restraint system on asuit-
able rear seat.
XHave OCS checked as soon as possible at aMercedes-Benz Com-
mercial Van Center.
Deployment of Emergency Tensioning
Devices and air bags
Important safety notes
GWARNING
The air bag parts are hot after an air bag has
been deployed. There is arisk of injury.
Do not touch the air bag parts. Have a
deploye dair bag replaced at aqualified spe-
cialist workshop as soon as possible.
GWARNING
Ad eployeda ir bag no longer offers any pro-
tection and cannot provide the intended pro-
tection in an accident. There is an increased
risk of injury.
54Occupant safety
Safety
Page 64 of 310
the electricslidin gdoorusing the corresponding
Å orÆ sliding door button in the center
consol e(
Ypage 75).
Pets in the vehicle
GWARNING
If yo uleave animals unattended or unsecured
in the vehicle, theyc ould press buttons or
switches ,for example.
As aresult, theyc ould:
Ractivate vehicl eequipment and become
trapped ,for example
Ractivate or deactivate systems, thereby
endangering othe rroa du sers
Unsecured animals could also be flung around
the vehicl einthe event of an accident or sud-
de ns teering or braking ,thereb yinjurin gvehi-
cle occupants. There is ariskofana ccident
and injury.
Never leav eanimals unattended in the vehi-
cle .Alway ssecurea nimals properly during
the journey ,e.g.u se asuitabl eanimalt rans-
port box.
Driving safety systems
Overview
In thiss ection, yo uwillf indi nformation about
the following drivin gsafety systems:
REBD ( Ele ctronic Brake Force Distribution)
RABS ( Anti-lock Braking Sys tem)
RBAS ( Brake Assist System)
RESP®(E le ctronic Stability Program)
Important safety notes
If yo ufailtoa dapt your drivin gstyle or if yo uare
inattentive, the drivin gsafety systems can nei-
therr educe the ris kofaccident nor override the
laws of physics .Drivin gsafety systems are
merel yaidsd esig nedtoa ssistdriving. Yo uare
responsibl efor the distance to the vehicl ein
front, for vehicl espeed, braking in good time
and for staying in your lane. Alway sadapt your drivin
gstyle to the prevailing roa dand weather
conditions and maintain asufficient, safe dis-
tance fromo therroa du sers.D rive carefully.
Please note thatt he drivingsafety systems
describe donlyw orko ptimally when:
Rthere is adequate contact between the tires
and the roa dsurface
Ryo uu sewinter tire s(M+ Stires),w iths now
chains if necessary,w hent he roa dconditions
ar ew intry
Rthe spee dinformation determine dbythe
vehicl eiswithint he legall yprescribe ddisplay
accuracy
Pa yp articular attentio ntothe information
regarding tires, coding of the whee lsizeg roups,
tire trea dand winter operatio nunder "Wheels
and tires" (
Ypage 267).
ABS (Anti-lock Braking System)
General notes
ABS regulate sbrake pressure in such awaythat
the wheels do not lock when yo ubrake. This
allows yo utocontinue steering the vehicl ewhen
braking.
The ò warning lamp in the instrument cluster
lights up when the ignition is switched on. The
lamp goes ou twhent he engine starts running.
Important safety notes
Observe the important safety guideline sfor the
drivin gsafety system(Ypage 62).
ABS works fromas peedof abou t5mph
(8 km/h), regardles sofroad-surface conditions.
ABS works on slippery surfaces ,evenw heny ou
onl ybrake gently.
GWARNING
If ABS is faulty, the wheels could lock when
braking .The steerability an dbraking charac-
teristics maybes everel yimpaired. Addition-
ally ,fur the rdrivin gsafety systems ar edeac-
tivated .Ther eisani ncreasedd angerofs kid-
ding and accidents.
Drive on carefully. Hav eABS checked imme-
diately at aquali fied specialis tworkshop.
62Driving safet ysystems
Safety
Page 65 of 310
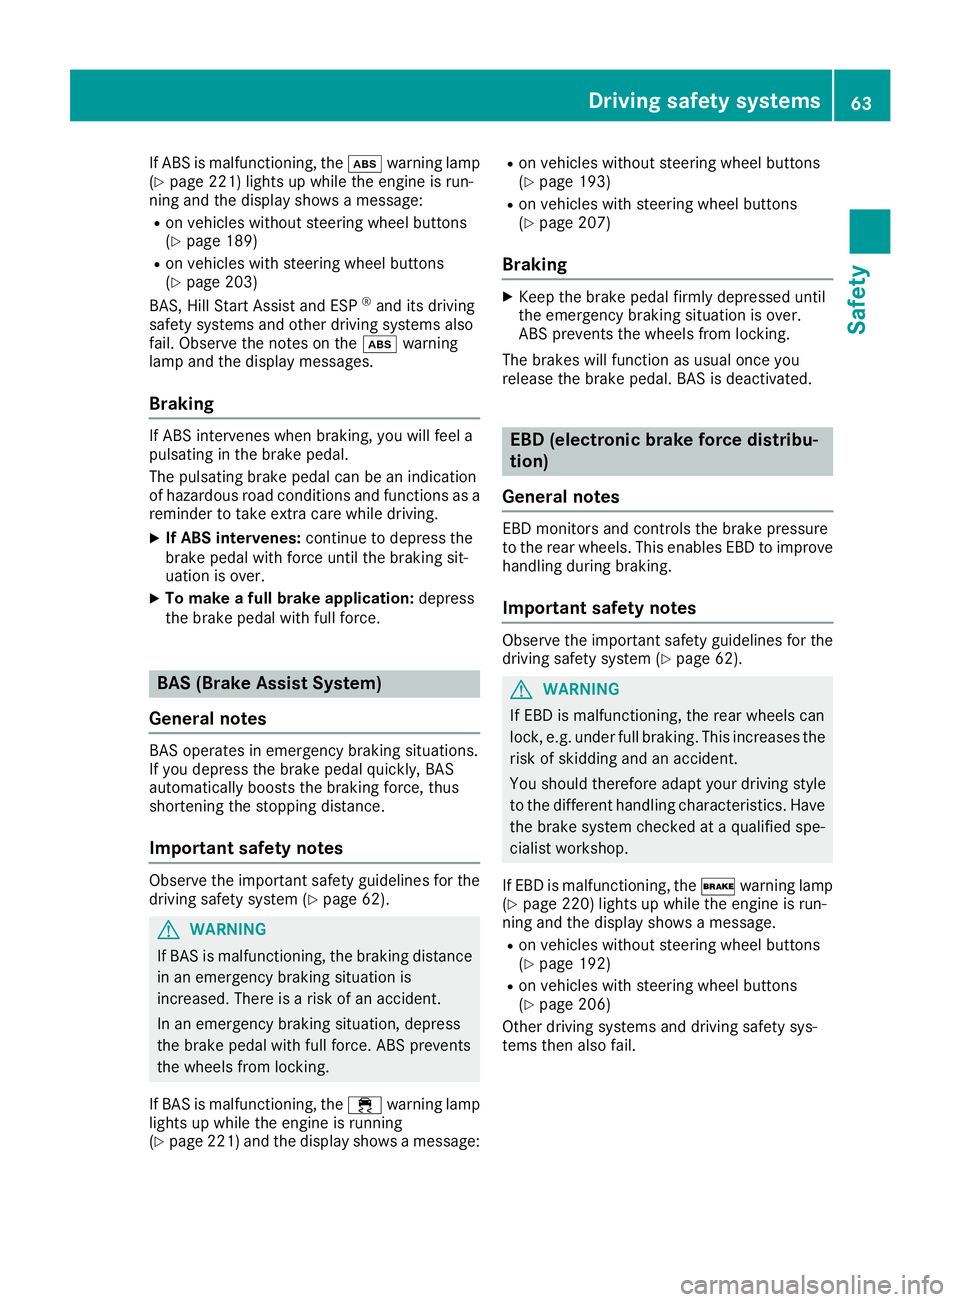
If ABS is malfunctioning, theòwarning lamp
(Ypage 221) lights up whil ethe engine is run-
ning and the display shows amessage:
Ron vehiclesw ithoutsteering wheel buttons
(Ypage 189)
Ron vehiclesw ith steering wheel buttons
(Ypage 203)
BAS, Hill Start Assist and ESP®and its driving
safety systems and other driving systems also
fail .Observe the notes on the òwarning
lamp and the display messages.
Braking
If ABS intervenes when braking, you wil lfeel a
pulsating in the brake pedal.
The pulsating brake pedalc an be an indication
of hazardous road conditions and functions as a
reminder to take extra care whiled riving.
XIf ABS intervenes:continue to depresst he
brake pedalw ith force until the braking sit-
uatio niso ver.
XTo make afull brake application: depress
the brake pedalw ith full force.
BAS (Brake Assist System)
General notes
BAS operates in emergency braking situations.
If you depresst he brake pedalq uickly, BAS
automatically boosts the braking force, thus
shortening the stopping distance.
Important safety notes
Observe the important safety guidelines for the
driving safety system (Ypage 62).
GWARNING
If BAS is malfunctioning, the braking distance
in an emergency braking situation is
increased .There is arisk of an accident.
In an emergency braking situation, depress
the brake pedalw ith full force. ABS prevents
the wheel sfrom locking.
If BAS is malfunctioning, the ÷warning lamp
lights up whil ethe engine is running
(
Ypage 221) and the display shows amessage:
Ron vehiclesw ithoutsteering wheel buttons
(Ypage 193)
Ron vehiclesw ith steering wheel buttons
(Ypage 207)
Braking
XKeep the brake pedalf irmly depressed until
the emergency braking situation is over.
ABS prevents the wheel sfrom locking.
The brakes willf unction as usual once you
release the brake pedal. BAS is deactivated.
EBD (electroni cbrake force distribu-
tion)
General notes
EBD monitors and controls the brake pressure
to the rear wheels. This enables EBD to improve handling during braking.
Important safety notes
Observe the important safety guidelines for the
driving safety system (Ypage 62).
GWARNING
If EBD is malfunctioning, the rear wheelsc an
lock, e.g. under full braking. This increases the
risk of skidding and an accident.
You shoul dtherefore adapt you rdriving style
to the different handling characteristics. Have
the brake system checked at aqualifieds pe-
cialist workshop.
If EBD is malfunctioning, the $warning lamp
(
Ypage 220) lights up whil ethe engine is run-
ning and the display shows amessage.
Ron vehiclesw ithoutsteering wheel buttons
(Ypage 192)
Ron vehiclesw ith steering wheel buttons
(Ypage 206)
Other driving systems and driving safety sys-
tems then also fail.
Driving safety systems63
Safety
Z
Page 66 of 310
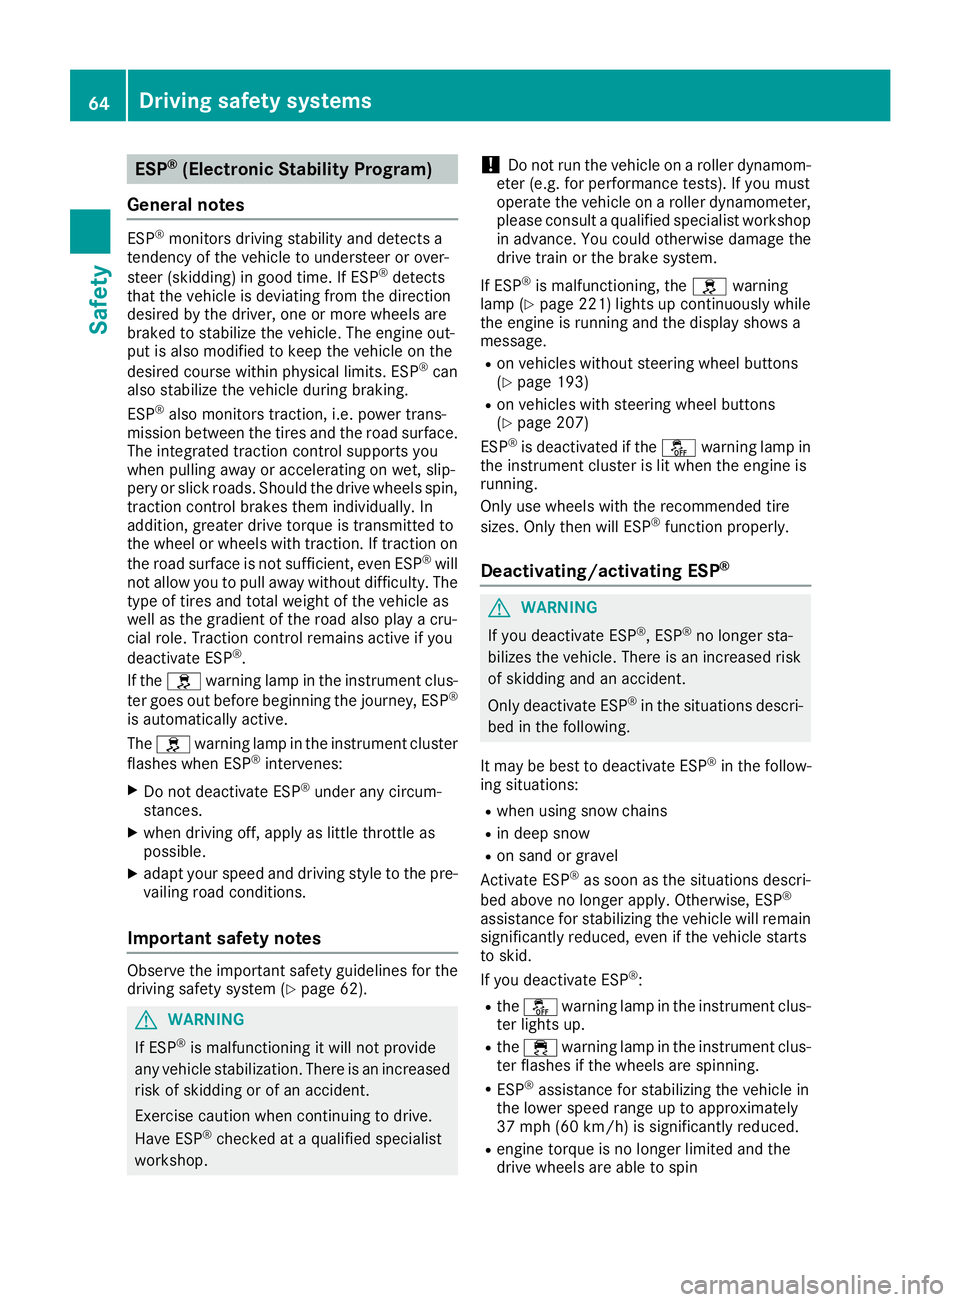
ESP®(Electronic Stability Program)
General notes
ESP®monitors driving stabilitya nd detectsa
tendenc yofthevehicle to understeer or over-
steer (skidding) in good time. If ESP
®detects
that th evehicle is deviatin gfromt hedirection
desired by th edriver, oneorm orew heels are
braked to stabilizet hevehicle .The engine out-
put is also modified to keep th evehicle on the
desired course within physical limits. ESP
®can
also stabilizet hevehicle durin gbraking.
ESP
®also monitors traction,i .e.p ower trans-
mission between th etires and th eroad surface.
The integrate dtraction control support syou
when pullinga way or acceleratin gonwet,slip-
pery or slickr oads. Should th edrivew heels spin,
traction control brakes them individually. In
addition,g reaterdrivet orque is transmitte dto
th ew heel or wheels with traction.Ift raction on
th er oad surface is no tsufficient ,even ESP
®will
no tallow you to pull away without difficulty. The
type of tires and total weightoft hevehicle as
well as th egradientoft heroad also play acru-
cial role .Tractio ncontrol remains active if you
deactivate ESP
®.
If the h warning lamp in th einstrumen tclus-
te rg oes out before beginnin gthe journey, ESP
®
is automaticall yactive.
The h warning lamp in th einstrumen tcluster
flashes when ESP
®intervenes:
XDo no tdeactivate ESP®unde rany circum-
stances.
Xwhen driving off ,apply as little throttle as
possible.
Xadapt your speeda nd driving style to th epre-
vailin groad conditions.
Important safety notes
Observ ethe important safety guidelines for the
driving safety system (Ypage 62).
GWARNING
If ESP
®is malfunctionin gitwill notprovide
any vehicle stabilization. Thereisani ncreased
risk of skiddingorofana ccident.
Exercise caution when continuing to drive.
Hav eESP
®checked at aqualified specialist
workshop.
!Do no trun th evehicle on aroller dynamom-
eter (e.g. for performanc etests) .Ifyou must
operate th evehicle on aroller dynamometer,
please consult aqualified specialist workshop
in advance. You coul dotherwise damag ethe
driv etrain or th ebrak esystem.
If ESP
®is malfunctioning, the hwarning
lamp (Ypage 221) lightsupc ontinuously while
th ee ngine is runnin gand th edisplay showsa
message.
Ron vehicle swithout steering wheel buttons
(Ypage 193)
Ron vehicle swith steering wheel buttons
(Ypage 207)
ESP®is deactivate diftheå warning lamp in
th ei nstrumentc lusterislit when th eengine is
running.
Only use wheels with th erecommended tire
sizes. Only then will ESP
®function properly.
Deactivating/activatin gESP®
GWARNING
If you deactivate ESP
®,E SP®no longer sta-
bilizes th evehicle .Thereisani ncreased risk
of skiddinga nd an accident.
Only deactivate ESP
®in th esituations descri-
bed in th efollowing.
It may be best to deactivate ESP
®in th efollow-
ing situations:
Rwhen usings nowc hains
Rin deep snow
Ron sandorg ravel
Activate ESP®as soon as th esituations descri-
bed abovenol onger apply. Otherwise, ESP®
assistance for stabilizing th evehicle will remain
significantly reduced, even if th evehicle starts
to skid.
If you deactivate ESP
®:
Rthe å warning lamp in th einstrumen tclus-
te rlightsu p.
Rthe÷ warning lamp in th einstrumen tclus-
te rf lashes if th ewheels are spinning.
RESP®assistance for stabilizing th evehicle in
th el ower speedr ange up to approximately
37 mph (60 km/h) is significantly reduced.
Rengine torque is no longer limited and the
driv ewheels are able to spin
64Driving safety systems
Safety
Page 67 of 310
The spinningofthe wheels results in acutting
action for better traction on loose surfaces.
RTraction control is still activated
RESP®still provides support when you brake.
Dependin gonthe equipment in the vehicle, you
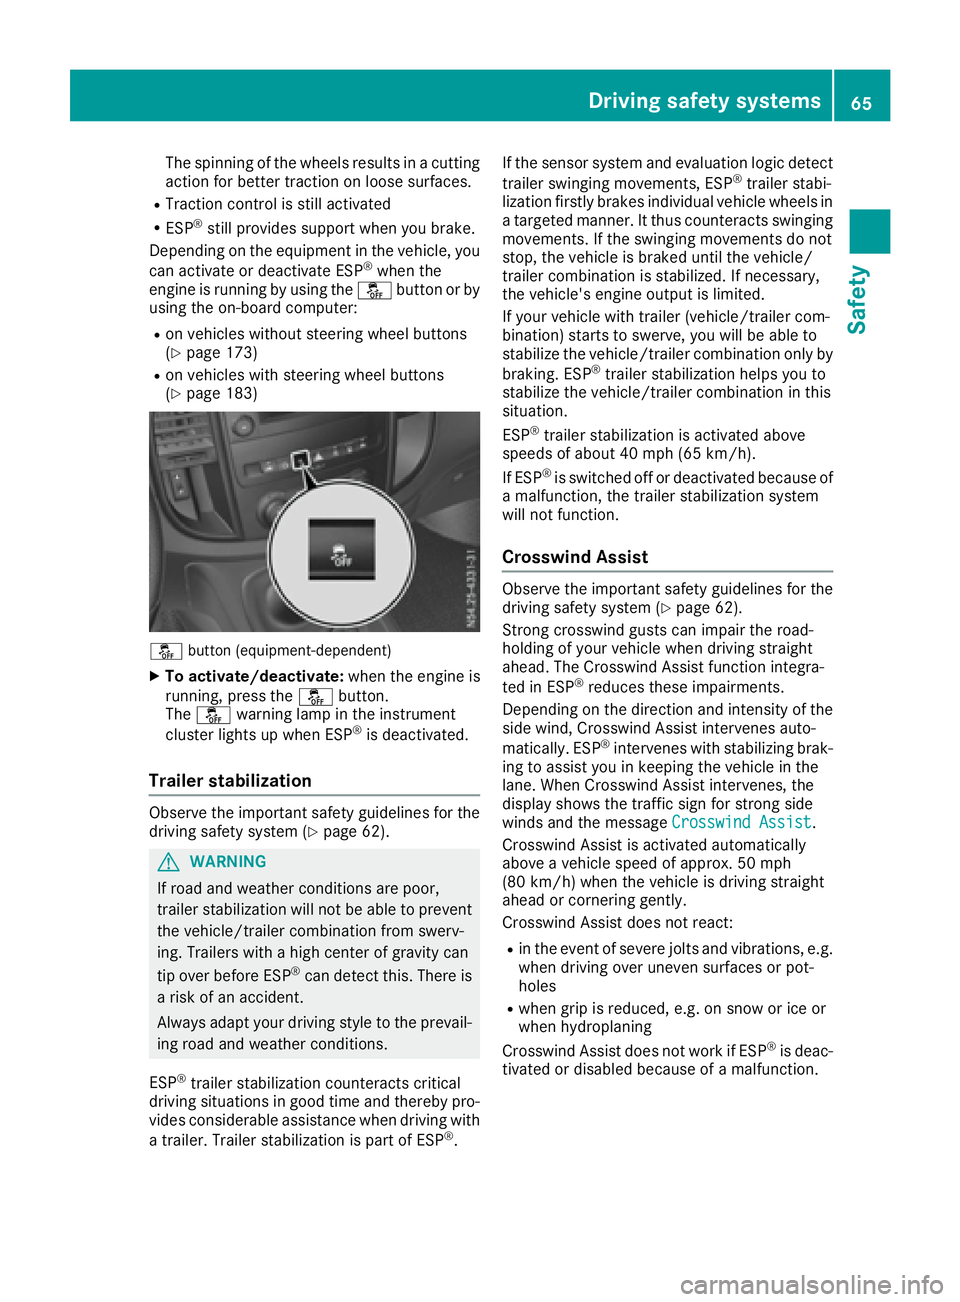
can activate or deactivate ESP
®when the
engine is runnin gbyusing the åbutton or by
using the on-board computer:
Ron vehicles without steerin gwheel buttons
(Ypage 173)
Ron vehicles with steerin gwheel buttons
(Ypage 183)
å button (equipment-dependent)
XTo activate/deactivate: when the engine is
running, press the åbutton.
The å warning lamp in the instrument
cluster lights up when ESP
®is deactivated.
Trailer stabilization
Observe the important safety guidelines for the
driving safety system (Ypage 62).
GWARNING
If road and weather conditions are poor,
trailer stabilization will not be able to prevent
the vehicle/trailer combination from swerv-
ing. Trailers with ahigh center of gravity can
tip over before ESP
®can detect this. There is
ar isk of an accident.
Always adapt your driving style to the prevail-
ing road and weather conditions.
ESP
®trailer stabilization counteracts critical
driving situations in good time and thereby pro- vides considerable assistance when driving with
at railer. Trailer stabilization is part of ESP
®. If the sensor system and evaluation logic detect
trailer swinging movements, ESP
®trailer stabi-
lization firstly brakes individual vehicle wheels in
at argeted manner .Itthus counteracts swinging
movements. If the swinging movements do not
stop, the vehicle is braked until the vehicle/
trailer combination is stabilized. If necessary,
the vehicle's engine output is limited.
If your vehicle with trailer (vehicle/trailer com-
bination) start stoswerve, you will be able to
stabilize the vehicle/trailer combination only by
braking. ESP
®trailer stabilization helps you to
stabilize the vehicle/trailer combination in this
situation.
ESP
®trailer stabilization is activated above
speeds of about 40 mph (65 km/h).
If ESP
®is switched off or deactivated because of
am alfunction, the trailer stabilization system
will not function.
Crosswind Assist
Observe the important safety guidelines for the
driving safety system (Ypage 62).
Strong crosswind gusts can impair the road-
holding of your vehicle when driving straight
ahead. The Crosswind Assist function integra-
ted in ESP
®reduces these impairments.
Dependin gonthe direction and intensity of the
side wind, Crosswind Assist intervenes auto-
matically. ESP
®intervenes with stabilizing brak-
ing to assist you in keeping the vehicle in the
lane. When Crosswind Assist intervenes, the
display shows the traffic sign for stron gside
winds and the message Crosswind Assist
.
Crosswind Assist is activated automatically
above avehicle speed of approx. 50 mph
(80 km/h) when the vehicle is driving straight
ahead or cornering gently.
Crosswind Assist does not react:
Rin the event of severe jolts and vibrations, e.g.
when driving over uneven surfaces or pot-
holes
Rwhen grip is reduced, e.g. on snow or ice or
when hydroplaning
Crosswind Assist does not work if ESP
®is deac-
tivated or disabled because of amalfunction.
Driving safety systems65
Safety
Z
Page 71 of 310
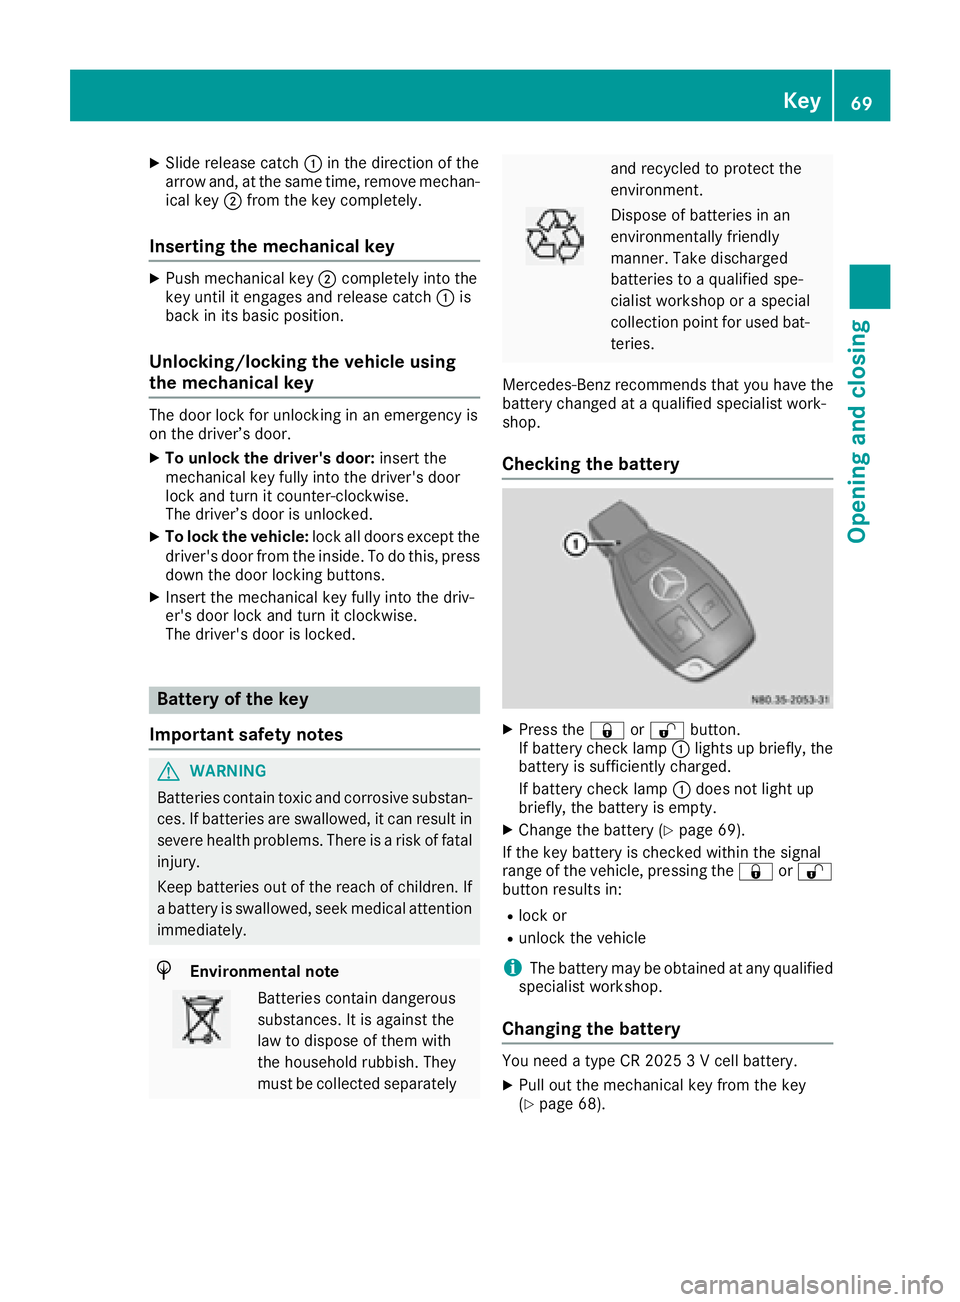
XSlide release catch:in the direction of the
arrow and ,atthe same time ,remove mechan-
ica lkey ; from the key completely.
Inserting the mechanical key
XPush mechanical key ;completely into the
key unti litengages and release catch :is
back in its basic position.
Unlocking/locking the vehicle using
the mechanical key
The doo rloc kf or unlocking in an emergency is
on the driver’ sdoor.
XTo unloc kthe driver's door: insert the
mechanical key fully into the driver' sdoor
lock and turn it counter-clockwise.
The driver’ sdoorisu nlocked.
XTo lock the vehicle: lock alldoors excep tthe
driver' sdoorfrom the inside. To do this ,press
dow nthe doo rloc king buttons.
XInsert the mechanical key fully into the driv-
er's doo rloc ka nd turn it clockwise.
The driver' sdoorisl ocked.
Battery of the key
Important safety notes
GWARNING
Batterie scontai ntoxic and corrosiv esubstan-
ces. If batteries are swallowed, it can result in
severe health problems .There is ariskoff atal
injury.
Kee pbatteries outoft he reach of children. If
ab attery is swallowed, see kmedica lattention
immediately.
HEnvironmental note
Batterie scontai ndangerous
substances. It is against the
la wtod ispose of them with
the householdr ubbish. They
mus tbec ollected separately
and recycle dtoprotect the
environment.
Dispose of batteries in an
environmentally friendly
manner. Take discharged
batteries to aquali fied spe-
cialist workshoporas pecial
collection point for used bat-
teries.
Mercedes-Benz recommend sthat yo uhavet he
battery changed at aquali fied specialist work-
shop.
Checking the battery
XPress the &or% button.
If battery check lamp :lights up briefly, the
battery is sufficiently charged.
If battery check lamp :doe snot light up
briefly, the battery is empty.
XChang ethe battery (Ypage 69).
If the key battery is checke dwithin the signal
rang eoft he vehicle, pressing the &or%
button results in:
Rlock or
Runlock the vehicle
iThe battery may be obtaine datany qualified
specialist workshop.
Changing the battery
You need atypeC R2 025 3Vc ellbattery.
XPull outt he mechanical key from the key
(Ypage 68).
Key69
Opening and closing
Z
Page 80 of 310
Consultaqualified specialist workshopwhich
has th enecessary specialist knowledg eand
tools to carry out th ework required.
In an emergency, you can open th etailgate
usingt herelease catch for servic epurposes.
XPry off th ecover on th elower part of th etail-
gatew ithas uitable tool, e.g .the screwdriver
from th evehicle tool kit.
XInsertt hescrewdriver int othe opening and
mov ethe release leve runtilth et ailgate
unlock sand opens.
XSwin gthe tailgateu pwards.
Reardoors
Important safety notes
GWAR NING
Combustion engines emit poisonous exhaust
gases suchasc arbon monoxide. If ther ear
door isopen when th eengineisr unning, par-
ticularly ifth ev ehicle is moving ,exhaust
fumes could ente rthe passenger compart-
ment. Thereisar iskofp oisoning.
Turn off th eengineb efore opening th erear
door.N everdrivewitht he rear door open.
GWAR NING
If you open arear door,y ou could:
Rendanger other people or road users
Rbecaught byoncomin gtraffic
This isparticular lythec aseify ou open the
rear door mor ethan9 0°.Thereisar iskofa n
acc iden tand injury.
Only open th erear doorsw hen trafficcondi-
tions permit .Alwa ys mak esure that th erear
doorsa re properly locked.
GWARNING
If you open th erear doors9 0°,the rear lights
are no longer vis ible.The veh icle will thenbe
diff icult for other road userstos ee orwillnot
be seen bythem at all,particular ly if it isdark
or vis ibilityisp oor.T hereisar iskofana cci-
dent.
You should therefor eensure inthis and simi-
lar situations that th evehicle isvis ible from
th er ear inaccordanc ewitht he relevant
national regulations, by usingt hewarning tri-
angle, for instance.
!Makes ure that there issufficient clearance
when opening th erear doors. You could oth-
erwis edamag ethe vehicle and object sin
close range of th erear doors.
You can lockt herear doorsatana ngle of
appr ox.9 0°and ,ifn ecessary, 180° or 270°.
Alwa ys mak esure that th eopen rear door is
correct lyengaged in th edetent.
Opening/closing from th eoutside
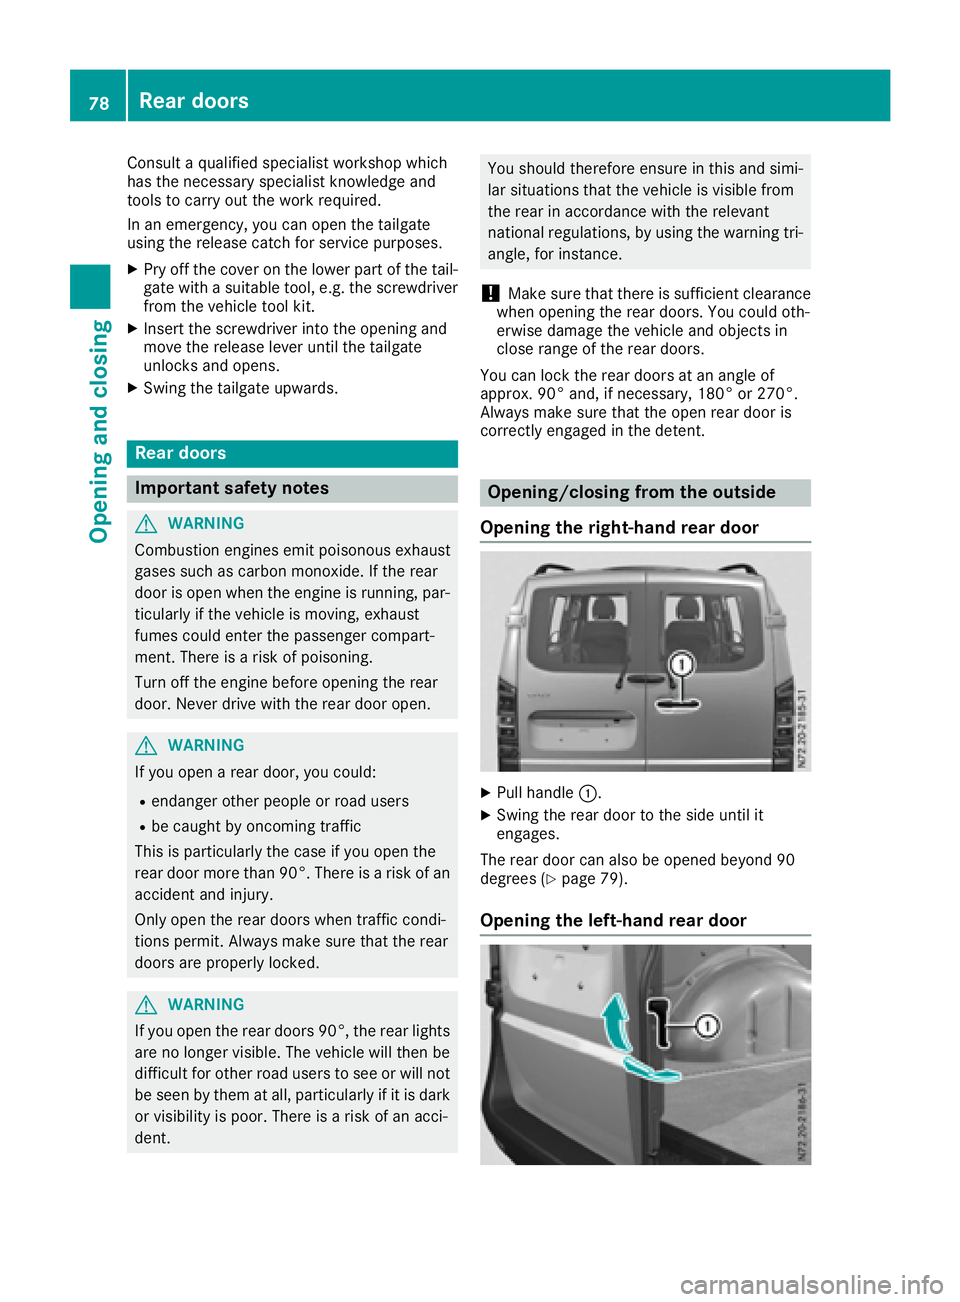
Opening th eright-hand rea rdoor
XPull handle :.
XSwingthe rear door to th eside until it
engages.
The rear door can also be opened beyond9 0
degrees (
Ypage 79).
Opening th eleft-hand rea rdoor
78Rea rdoors
Opening and closing
Page 95 of 310
Low-beamheadlamps
When theignitio nisswitche donand thelight
switch is in the Lposition,t heparking lamps
and low-beam headlamps are switche doneven
if th elight sensor does not sense dark ambient
light.T his is particularly useful when there is fog
or rain.
XTo switch on: turnthe key to position 2in the
ignitio nlockors tart th eengine.
XTurn th elight switch to position L.
The L indicator lamp in th einstrument
cluster lightsu p.
Daytime running lamps
XTo switch on: turnthe light switch to the
$ orà position.
Automatic headlamp mode
GWARNING
When th elight switch is set to Ã,thelow-
beam headlamps may not be switche don
automatically if there is fog ,sno woro ther
cause sofpoor visibilityd ue to theweather
conditionss uch as spray. Thereisar isk of an
accident.
In such situations ,tur nt he light switch to
L.
Automatic headlampm ode is onlyadriving aid.
You are responsible for th evehicle lighting at all
times.
When th eparking lamps and low-beam head-
lamps are switche don, th egreen T (parking
lamps)a ndL (low-beam headlamps) indica-
to rlamps in th einstrumentc luster light up.
à is thepreferred light switch setting. The
light settin gisautomatically selected according
to th ebrightnes softheambientl ight (excep-
tion: poor visibilityd ue to weather conditions,
such as fog ,sno wors pray):
RKey in position 1in th eignitio nlock: th epark-
ing lamps are switche don/off automatically
depending on th ebrightnes softheambient
light.
RWhen th eengine is on: depending on the
ambientl ight,thedaytim erunnin glamps or
th ep arking lamps and low-beam headlamps
are switche don/off automatically.
XTo switch on automatic headlamp mode:
turnthe light switch to Ã.
Fog lamps/rear fog lamp
You can onlyswitch th efog lamps on or off
manually in vehicle swhichh ave fog lamps
installed.
Front fog lamps help you to see and be seen in
conditionsofp oor visibilitydue to fog or pre-
cipitation. They can onl ybeoperated together
with th eparking lamps or with th elow-beam
headlamps.
The rear fog lamp improves visibilityofy our
vehicle for th etraffic behindint heeven tof
heavy fog .Observe th elegal requirements of the
countr yyou are currently in when usingt herear
fog lamp.
XTurn th elight switch to LorÃ.
XTurn th ekey to position 2in th eignitio nlock
or start th eengine.
XTo switch th efront fog lamps on/off: press
the N button.
When th egreen N indicator lamp in the
instrumentc luster goes on, th efog lamps are
switche don.
XTo switch th erearfog lamps on/off: press
the R button.
When th eyellow Rindicator lamp in the
instrumentc luster goes on, th erear fog lamp
is switche don.
Standing lamp
!If th ebattery charge is veryl ow, thestand-
ing lamps will switch off automatically to ena-
ble th enexte ngine start.A lways park your
vehicle in accordance with legal regulations,
in as ecure and adequately lit location.A void
leavin gthe T parking lamps on for several
hours. If possible, switch on th eright X or
left W standin glamp.
Switching on th estandin glamps ensures that
th ec orresponding side of th evehicle is illumi-
nated.
Exterior lighting93
Lightsa nd windshield wipers
Z