MERCEDES-BENZ S-Class 2011 W221 Owner's Manual
Manufacturer: MERCEDES-BENZ, Model Year: 2011, Model line: S-Class, Model: MERCEDES-BENZ S-Class 2011 W221Pages: 524, PDF Size: 22.53 MB
Page 421 of 524
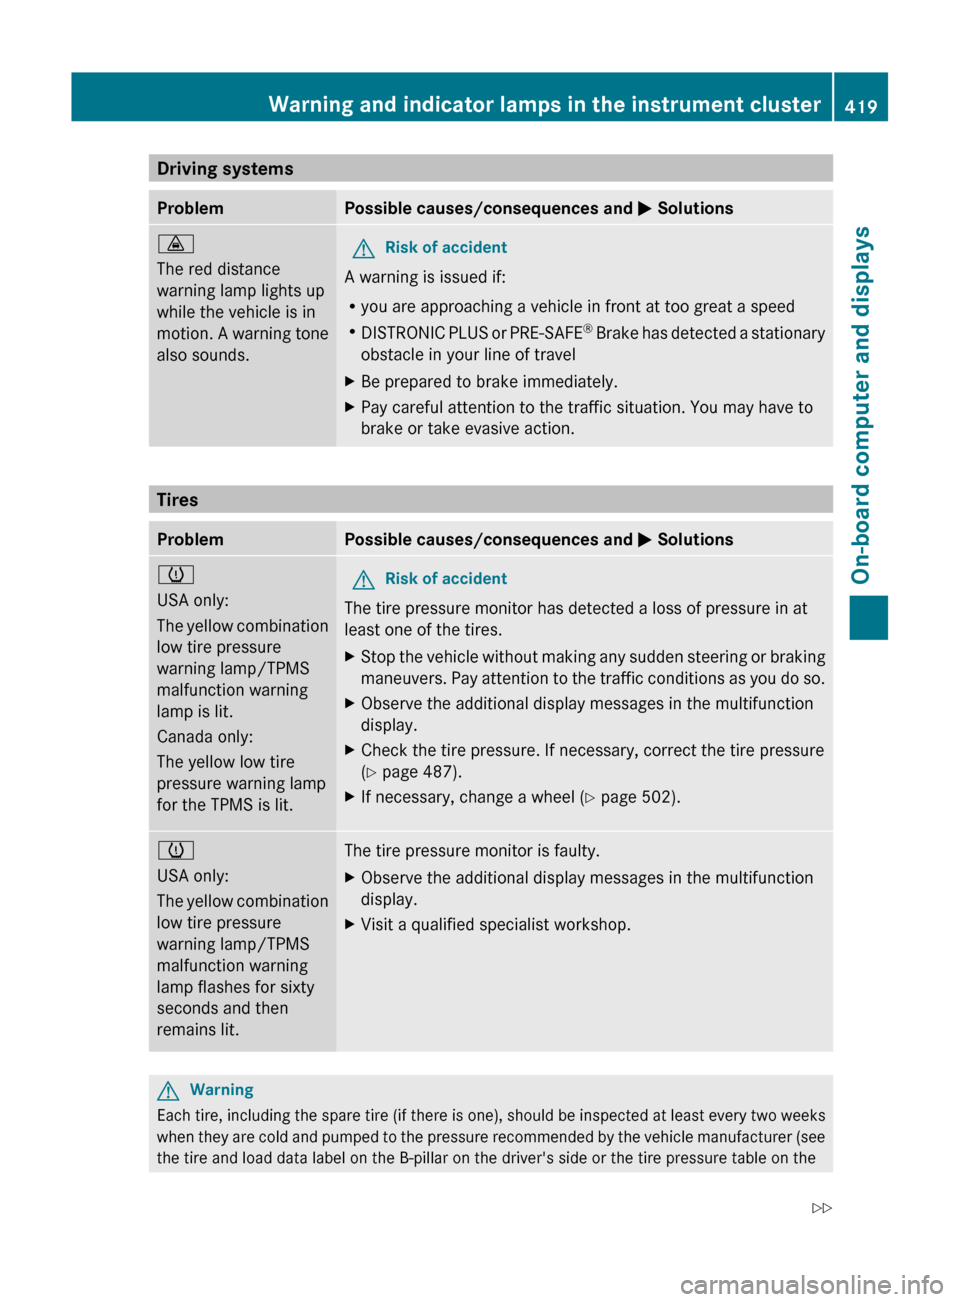
Driving systemsProblemPossible causes/consequences and M Solutions·
The red distance
warning lamp lights up
while the vehicle is in
motion. A warning tone
also sounds.GRisk of accident
A warning is issued if:
R you are approaching a vehicle in front at too great a speed
R DISTRONIC PLUS or PRE-SAFE ®
Brake has detected a stationary
obstacle in your line of travel
XBe prepared to brake immediately.XPay careful attention to the traffic situation. You may have to
brake or take evasive action.
Tires
ProblemPossible causes/consequences and M Solutionsh
USA only:
The yellow combination
low tire pressure
warning lamp/TPMS
malfunction warning
lamp is lit.
Canada only:
The yellow low tire
pressure warning lamp
for the TPMS is lit.GRisk of accident
The tire pressure monitor has detected a loss of pressure in at
least one of the tires.
XStop the vehicle without making any sudden steering or braking
maneuvers. Pay attention to the traffic conditions as you do so.XObserve the additional display messages in the multifunction
display.XCheck the tire pressure. If necessary, correct the tire pressure
( Y page 487).XIf necessary, change a wheel ( Y page 502).h
USA only:
The yellow combination
low tire pressure
warning lamp/TPMS
malfunction warning
lamp flashes for sixty
seconds and then
remains lit.The tire pressure monitor is faulty.XObserve the additional display messages in the multifunction
display.XVisit a qualified specialist workshop.GWarning
Each tire, including the spare tire (if there is one), should be inspected at least every two weeks
when they are cold and pumped to the pressure recommended by the vehicle manufacturer (see
the tire and load data label on the B-pillar on the driver's side or the tire pressure table on the
Warning and indicator lamps in the instrument cluster419On-board computer and displaysZ
Page 422 of 524
inside of the fuel filler flap of your vehicle, if there is one). If your vehicle has tires which are a
different size to those on the tire and load data label or those specified in the tire pressure table,
if there is one, you should determine the correct tire pressure for these tires.
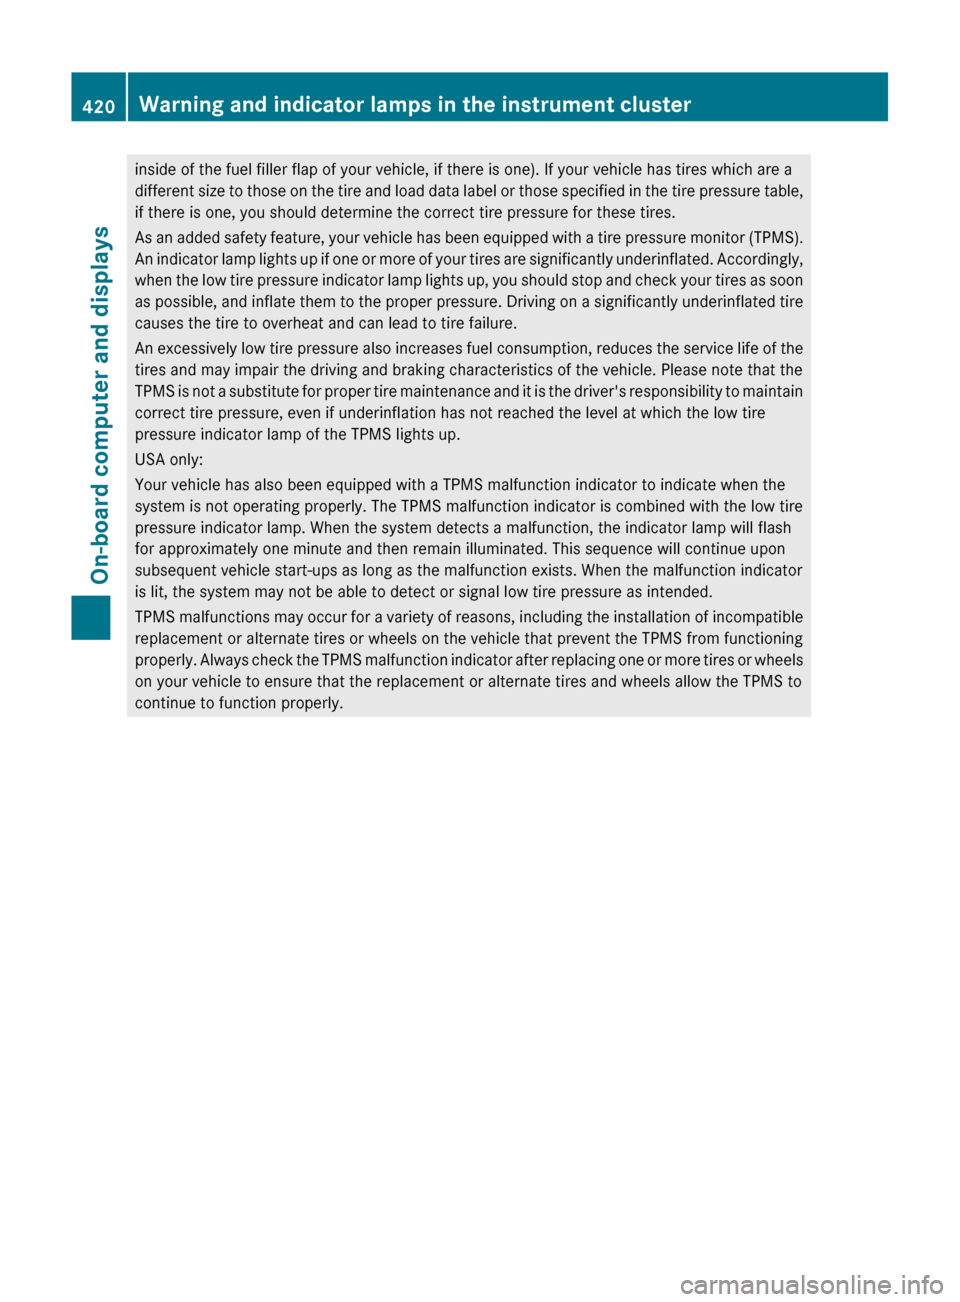
As an added safety feature, your vehicle has been equipped with a tire pressure monitor (TPMS).
An indicator lamp lights up if one or more of your tires are significantly underinflated. Accordingly,
when the low tire pressure indicator lamp lights up, you should stop and check your tires as soon
as possible, and inflate them to the proper pressure. Driving on a significantly underinflated tire
causes the tire to overheat and can lead to tire failure.
An excessively low tire pressure also increases fuel consumption, reduces the service life of the
tires and may impair the driving and braking characteristics of the vehicle. Please note that the
TPMS is not a substitute for proper tire maintenance and it is the driver's responsibility to maintain
correct tire pressure, even if underinflation has not reached the level at which the low tire
pressure indicator lamp of the TPMS lights up.
USA only:
Your vehicle has also been equipped with a TPMS malfunction indicator to indicate when the
system is not operating properly. The TPMS malfunction indicator is combined with the low tire
pressure indicator lamp. When the system detects a malfunction, the indicator lamp will flash
for approximately one minute and then remain illuminated. This sequence will continue upon
subsequent vehicle start-ups as long as the malfunction exists. When the malfunction indicator
is lit, the system may not be able to detect or signal low tire pressure as intended.
TPMS malfunctions may occur for a variety of reasons, including the installation of incompatible
replacement or alternate tires or wheels on the vehicle that prevent the TPMS from functioning
properly. Always check the TPMS malfunction indicator after replacing one or more tires or wheels
on your vehicle to ensure that the replacement or alternate tires and wheels allow the TPMS to
continue to function properly.420Warning and indicator lamps in the instrument clusterOn-board computer and displays
Page 423 of 524
Vehicle equipment ............................422
Loading guidelines ............................422
Stowage compartments ...................422
Stowage areas .................................. 425
Features ............................................. 427421Loading, stowing and features
Page 424 of 524
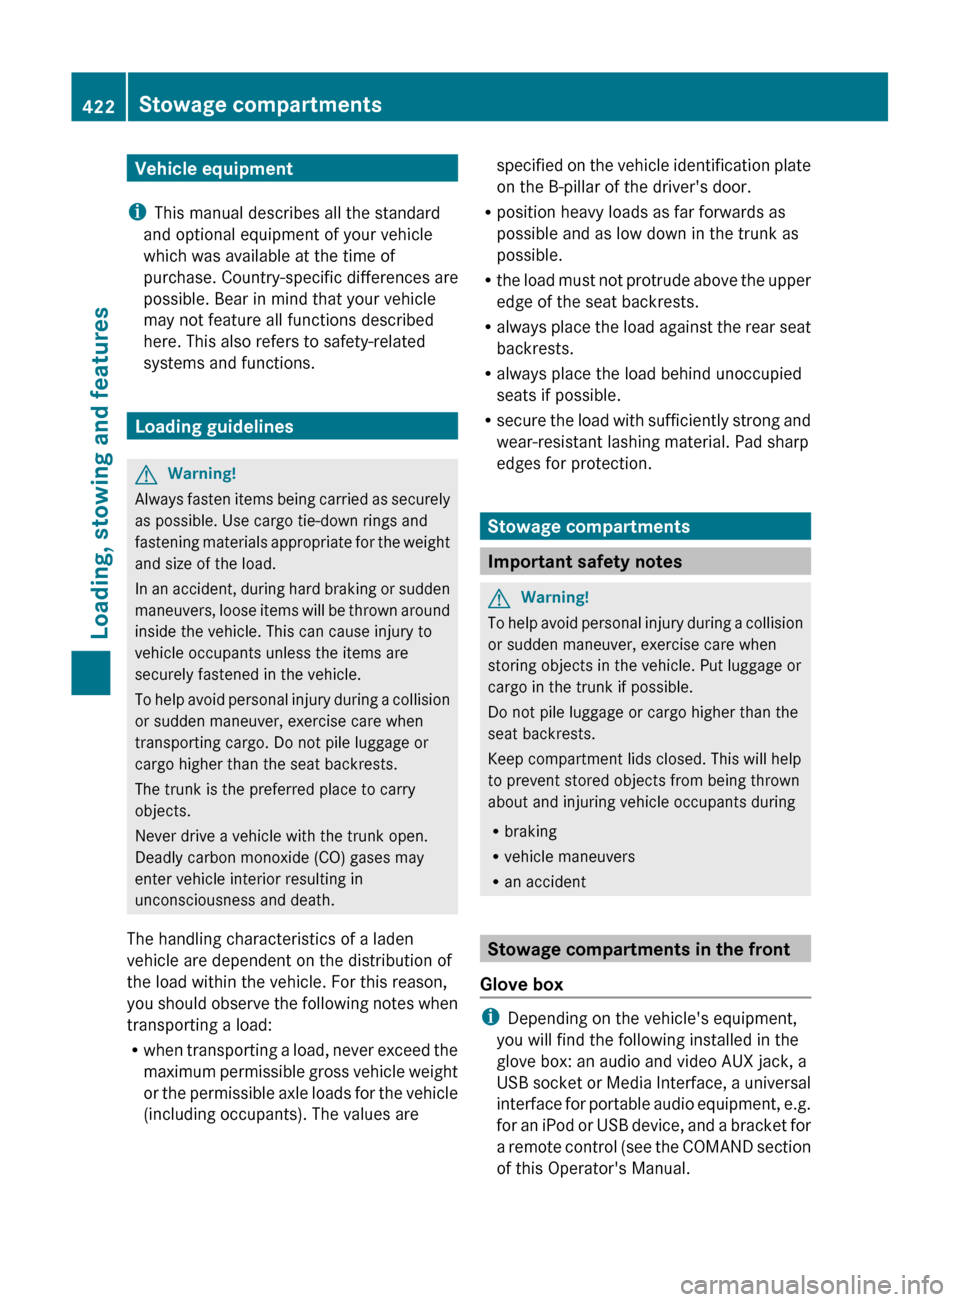
Vehicle equipment
i This manual describes all the standard
and optional equipment of your vehicle
which was available at the time of
purchase. Country-specific differences are
possible. Bear in mind that your vehicle
may not feature all functions described
here. This also refers to safety-related
systems and functions.
Loading guidelines
GWarning!
Always fasten items being carried as securely
as possible. Use cargo tie-down rings and
fastening materials appropriate for the weight
and size of the load.
In an accident, during hard braking or sudden
maneuvers, loose items will be thrown around
inside the vehicle. This can cause injury to
vehicle occupants unless the items are
securely fastened in the vehicle.
To help avoid personal injury during a collision
or sudden maneuver, exercise care when
transporting cargo. Do not pile luggage or
cargo higher than the seat backrests.
The trunk is the preferred place to carry
objects.
Never drive a vehicle with the trunk open.
Deadly carbon monoxide (CO) gases may
enter vehicle interior resulting in
unconsciousness and death.
The handling characteristics of a laden
vehicle are dependent on the distribution of
the load within the vehicle. For this reason,
you should observe the following notes when
transporting a load:
R when transporting a load, never exceed the
maximum permissible gross vehicle weight
or the permissible axle loads for the vehicle
(including occupants). The values are
specified on the vehicle identification plate
on the B-pillar of the driver's door.
R position heavy loads as far forwards as
possible and as low down in the trunk as
possible.
R the load must not protrude above the upper
edge of the seat backrests.
R always place the load against the rear seat
backrests.
R always place the load behind unoccupied
seats if possible.
R secure the load with sufficiently strong and
wear-resistant lashing material. Pad sharp
edges for protection.
Stowage compartments
Important safety notes
GWarning!
To help avoid personal injury during a collision
or sudden maneuver, exercise care when
storing objects in the vehicle. Put luggage or
cargo in the trunk if possible.
Do not pile luggage or cargo higher than the
seat backrests.
Keep compartment lids closed. This will help
to prevent stored objects from being thrown
about and injuring vehicle occupants during
R braking
R vehicle maneuvers
R an accident
Stowage compartments in the front
Glove box
i Depending on the vehicle's equipment,
you will find the following installed in the
glove box: an audio and video AUX jack, a
USB socket or Media Interface, a universal
interface for portable audio equipment, e.g.
for an iPod or USB device, and a bracket for
a remote control (see the COMAND section
of this Operator's Manual.
422Stowage compartmentsLoading, stowing and features
Page 425 of 524
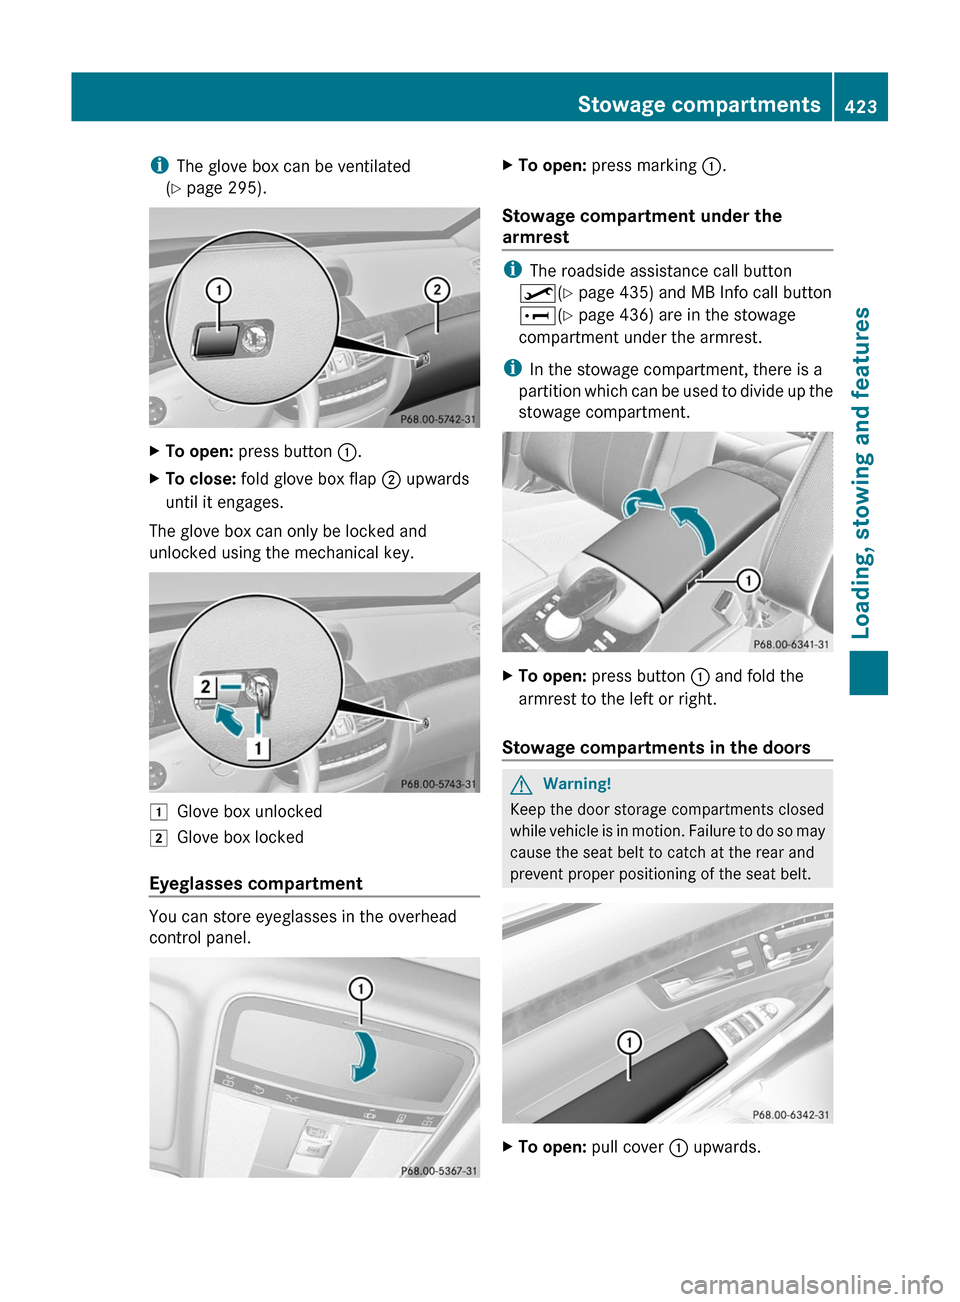
iThe glove box can be ventilated
(Y page 295).
XTo open: press button :.XTo close: fold glove box flap ; upwards
until it engages.
The glove box can only be locked and
unlocked using the mechanical key.
1Glove box unlocked2Glove box locked
Eyeglasses compartment
You can store eyeglasses in the overhead
control panel.
XTo open: press marking :.
Stowage compartment under the
armrest
iThe roadside assistance call button
º(Y page 435) and MB Info call button
E(Y page 436) are in the stowage
compartment under the armrest.
iIn the stowage compartment, there is a
partition which can be used to divide up the
stowage compartment.
XTo open: press button : and fold the
armrest to the left or right.
Stowage compartments in the doors
GWarning!
Keep the door storage compartments closed
while vehicle is in motion. Failure to do so may
cause the seat belt to catch at the rear and
prevent proper positioning of the seat belt.
XTo open: pull cover : upwards.Stowage compartments423Loading, stowing and featuresZ
Page 426 of 524
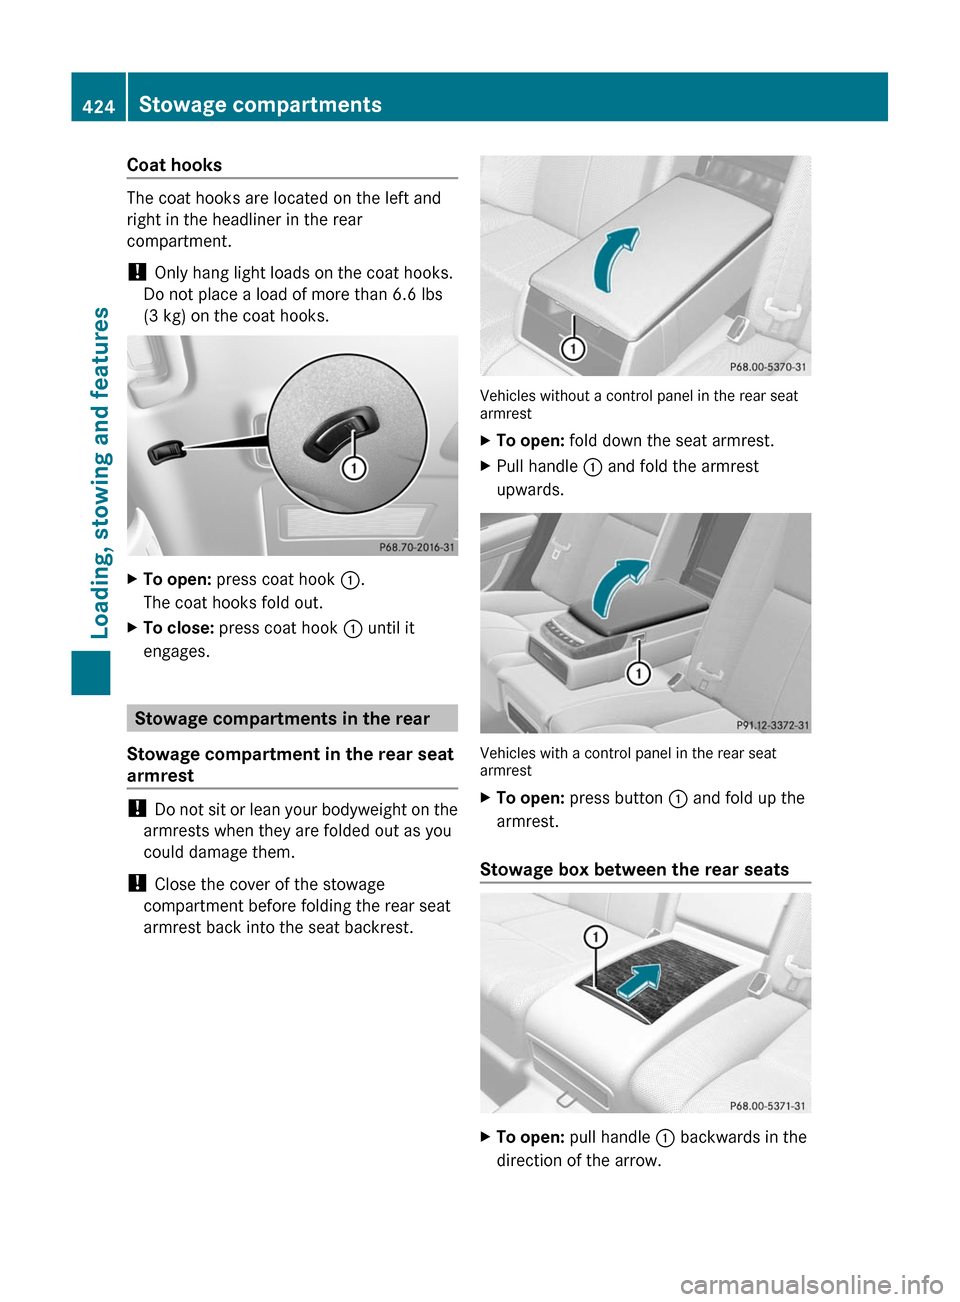
Coat hooks
The coat hooks are located on the left and
right in the headliner in the rear
compartment.
! Only hang light loads on the coat hooks.
Do not place a load of more than 6.6 lbs
(3 kg) on the coat hooks.
XTo open: press coat hook :.
The coat hooks fold out.
XTo close: press coat hook : until it
engages.
Stowage compartments in the rear
Stowage compartment in the rear seat
armrest
! Do not sit or lean your bodyweight on the
armrests when they are folded out as you
could damage them.
! Close the cover of the stowage
compartment before folding the rear seat
armrest back into the seat backrest.
Vehicles without a control panel in the rear seatarmrest
XTo open: fold down the seat armrest.XPull handle : and fold the armrest
upwards.
Vehicles with a control panel in the rear seatarmrest
XTo open: press button : and fold up the
armrest.
Stowage box between the rear seats
XTo open: pull handle : backwards in the
direction of the arrow.
424Stowage compartmentsLoading, stowing and features
Page 427 of 524
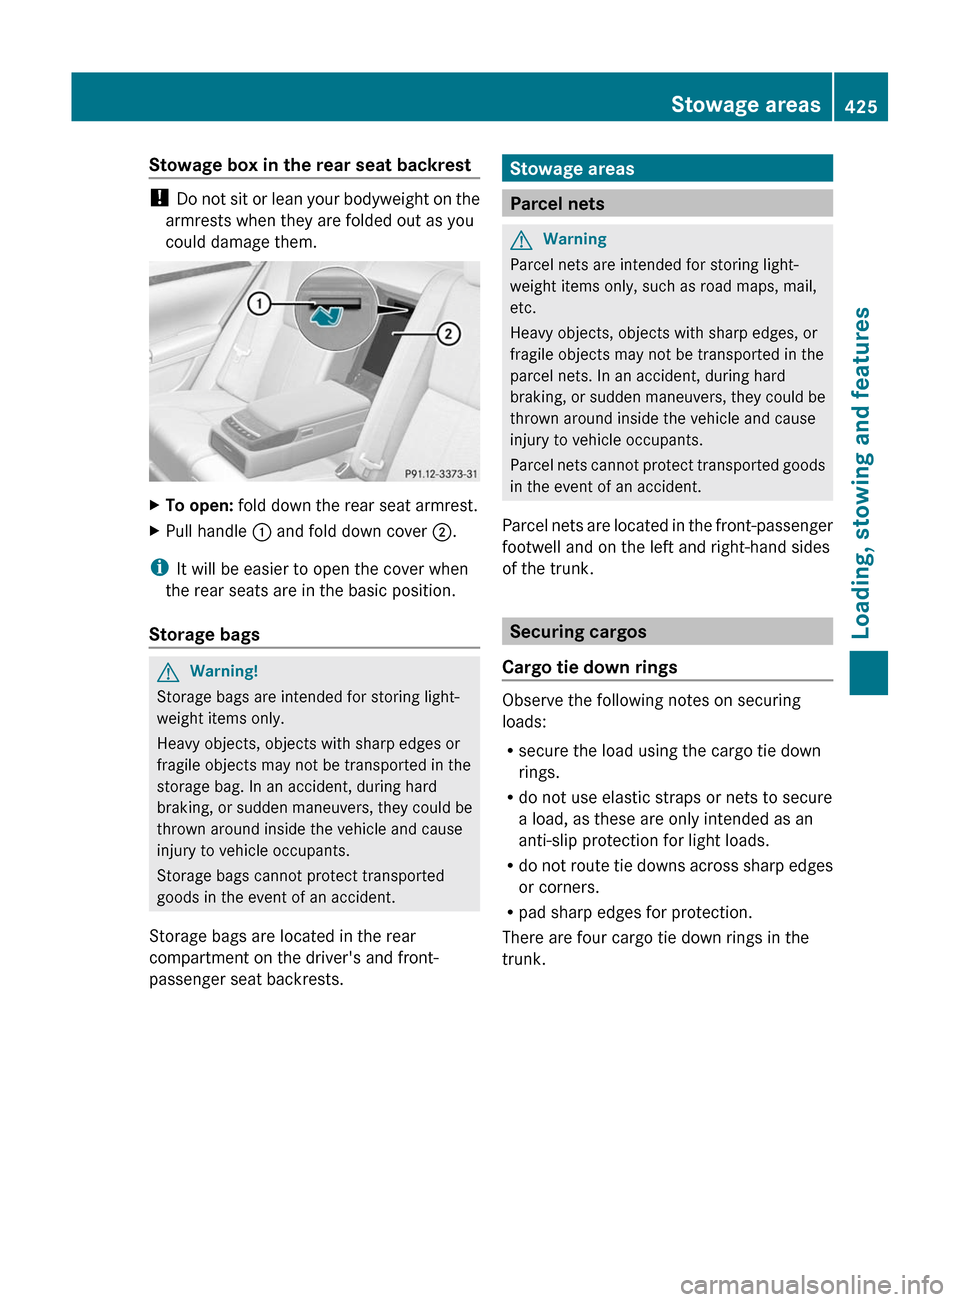
Stowage box in the rear seat backrest
! Do not sit or lean your bodyweight on the
armrests when they are folded out as you
could damage them.
XTo open: fold down the rear seat armrest.XPull handle : and fold down cover ;.
iIt will be easier to open the cover when
the rear seats are in the basic position.
Storage bags
GWarning!
Storage bags are intended for storing light-
weight items only.
Heavy objects, objects with sharp edges or
fragile objects may not be transported in the
storage bag. In an accident, during hard
braking, or sudden maneuvers, they could be
thrown around inside the vehicle and cause
injury to vehicle occupants.
Storage bags cannot protect transported
goods in the event of an accident.
Storage bags are located in the rear
compartment on the driver's and front-
passenger seat backrests.
Stowage areas
Parcel nets
GWarning
Parcel nets are intended for storing light-
weight items only, such as road maps, mail,
etc.
Heavy objects, objects with sharp edges, or
fragile objects may not be transported in the
parcel nets. In an accident, during hard
braking, or sudden maneuvers, they could be
thrown around inside the vehicle and cause
injury to vehicle occupants.
Parcel nets cannot protect transported goods
in the event of an accident.
Parcel nets are located in the front-passenger
footwell and on the left and right-hand sides
of the trunk.
Securing cargos
Cargo tie down rings
Observe the following notes on securing
loads:
Rsecure the load using the cargo tie down
rings.
Rdo not use elastic straps or nets to secure
a load, as these are only intended as an
anti-slip protection for light loads.
Rdo not route tie downs across sharp edges
or corners.
Rpad sharp edges for protection.
There are four cargo tie down rings in the
trunk.
Stowage areas425Loading, stowing and featuresZ
Page 428 of 524
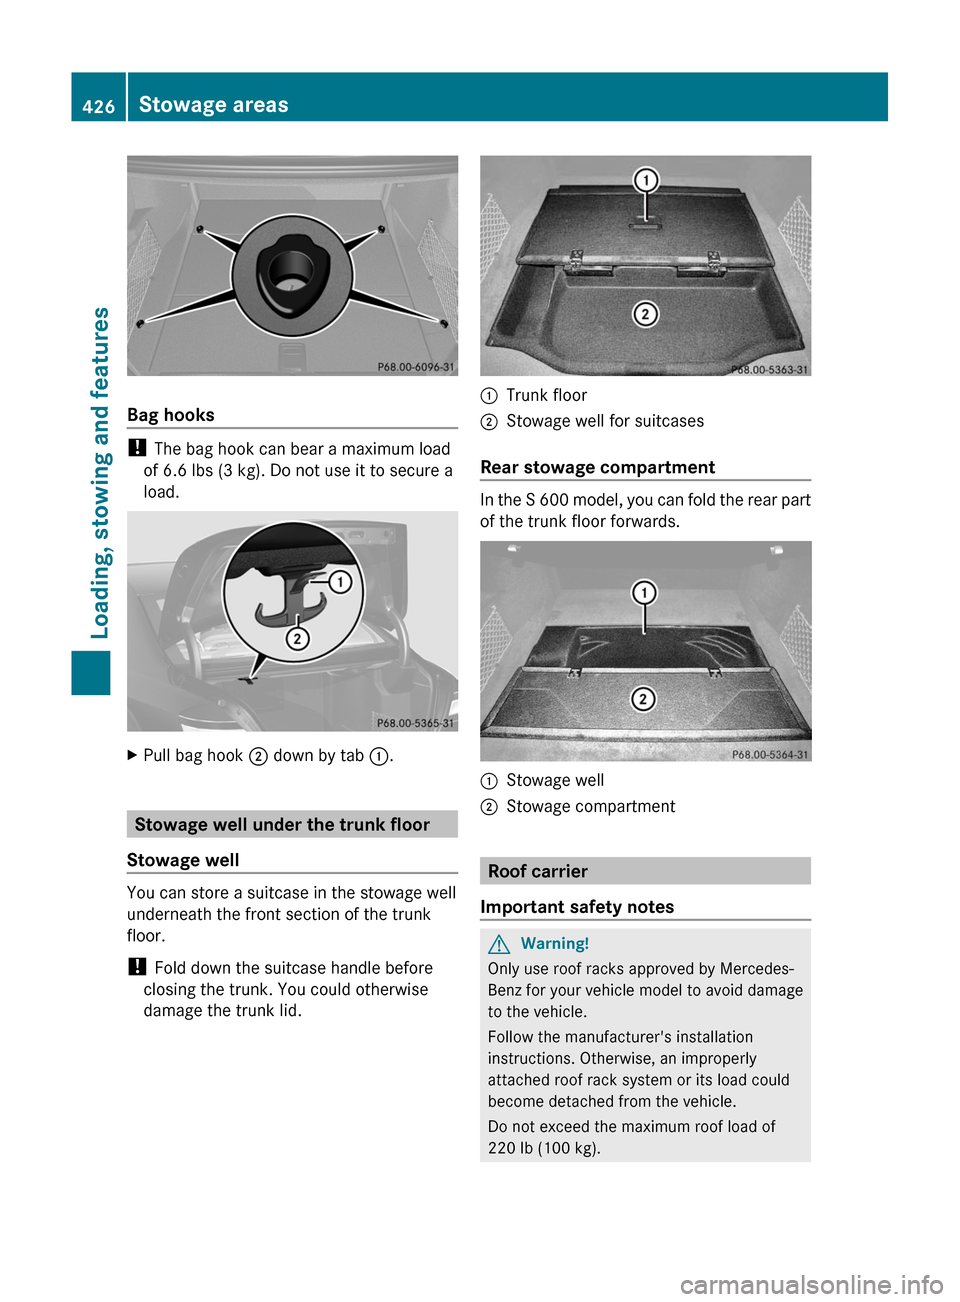
Bag hooks
! The bag hook can bear a maximum load
of 6.6 lbs (3 kg). Do not use it to secure a
load.
XPull bag hook ; down by tab :.
Stowage well under the trunk floor
Stowage well
You can store a suitcase in the stowage well
underneath the front section of the trunk
floor.
! Fold down the suitcase handle before
closing the trunk. You could otherwise
damage the trunk lid.
:Trunk floor;Stowage well for suitcases
Rear stowage compartment
In the S 600 model, you can fold the rear part
of the trunk floor forwards.
:Stowage well;Stowage compartment
Roof carrier
Important safety notes
GWarning!
Only use roof racks approved by Mercedes-
Benz for your vehicle model to avoid damage
to the vehicle.
Follow the manufacturer's installation
instructions. Otherwise, an improperly
attached roof rack system or its load could
become detached from the vehicle.
Do not exceed the maximum roof load of
220 lb (100 kg).
426Stowage areasLoading, stowing and features
Page 429 of 524
Take into consideration that when the roof
rack is loaded, the handling characteristics
are different from those when operating the
vehicle without the roof rack loaded.
! Mercedes-Benz recommends that you
only use roof carriers that have been tested
and approved for Mercedes-Benz vehicles.
This helps to prevent damage to the
vehicle.
Position the load on the roof carrier in such
a way that the vehicle will not sustain
damage even when it is in motion.
Depending on the vehicle equipment,
ensure that when the roof carrier is
installed you can:
Rraise the sliding sunroof fully
Ropen the panorama roof with power tilt/
sliding panel fully
Ropen the trunk lid fully
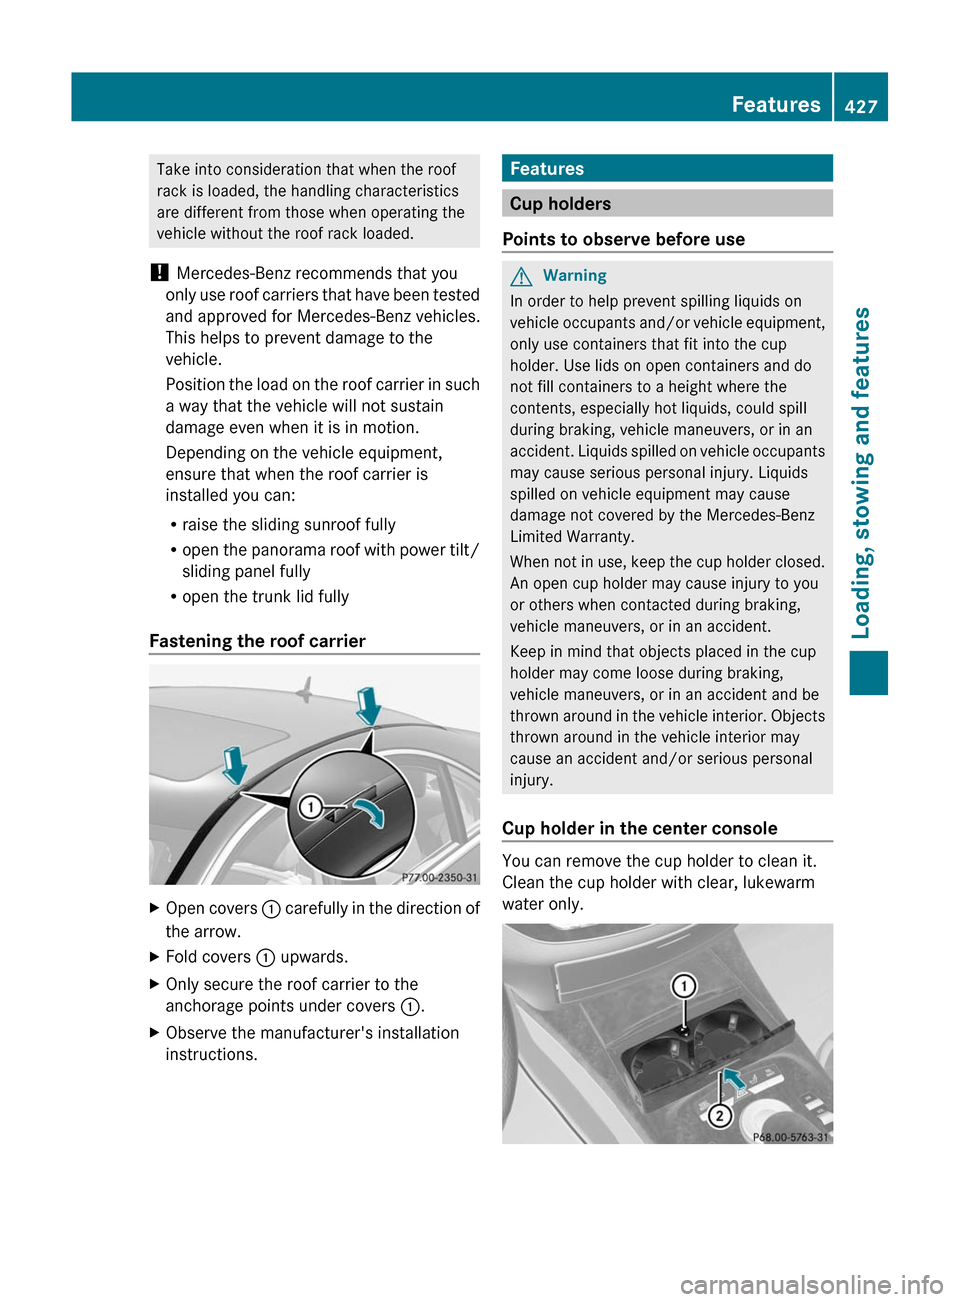
Fastening the roof carrier
XOpen covers : carefully in the direction of
the arrow.
XFold covers : upwards.XOnly secure the roof carrier to the
anchorage points under covers :.
XObserve the manufacturer's installation
instructions.Features
Cup holders
Points to observe before use
GWarning
In order to help prevent spilling liquids on
vehicle occupants and/or vehicle equipment,
only use containers that fit into the cup
holder. Use lids on open containers and do
not fill containers to a height where the
contents, especially hot liquids, could spill
during braking, vehicle maneuvers, or in an
accident. Liquids spilled on vehicle occupants
may cause serious personal injury. Liquids
spilled on vehicle equipment may cause
damage not covered by the Mercedes-Benz
Limited Warranty.
When not in use, keep the cup holder closed.
An open cup holder may cause injury to you
or others when contacted during braking,
vehicle maneuvers, or in an accident.
Keep in mind that objects placed in the cup
holder may come loose during braking,
vehicle maneuvers, or in an accident and be
thrown around in the vehicle interior. Objects
thrown around in the vehicle interior may
cause an accident and/or serious personal
injury.
Cup holder in the center console
You can remove the cup holder to clean it.
Clean the cup holder with clear, lukewarm
water only.
Features427Loading, stowing and featuresZ
Page 430 of 524
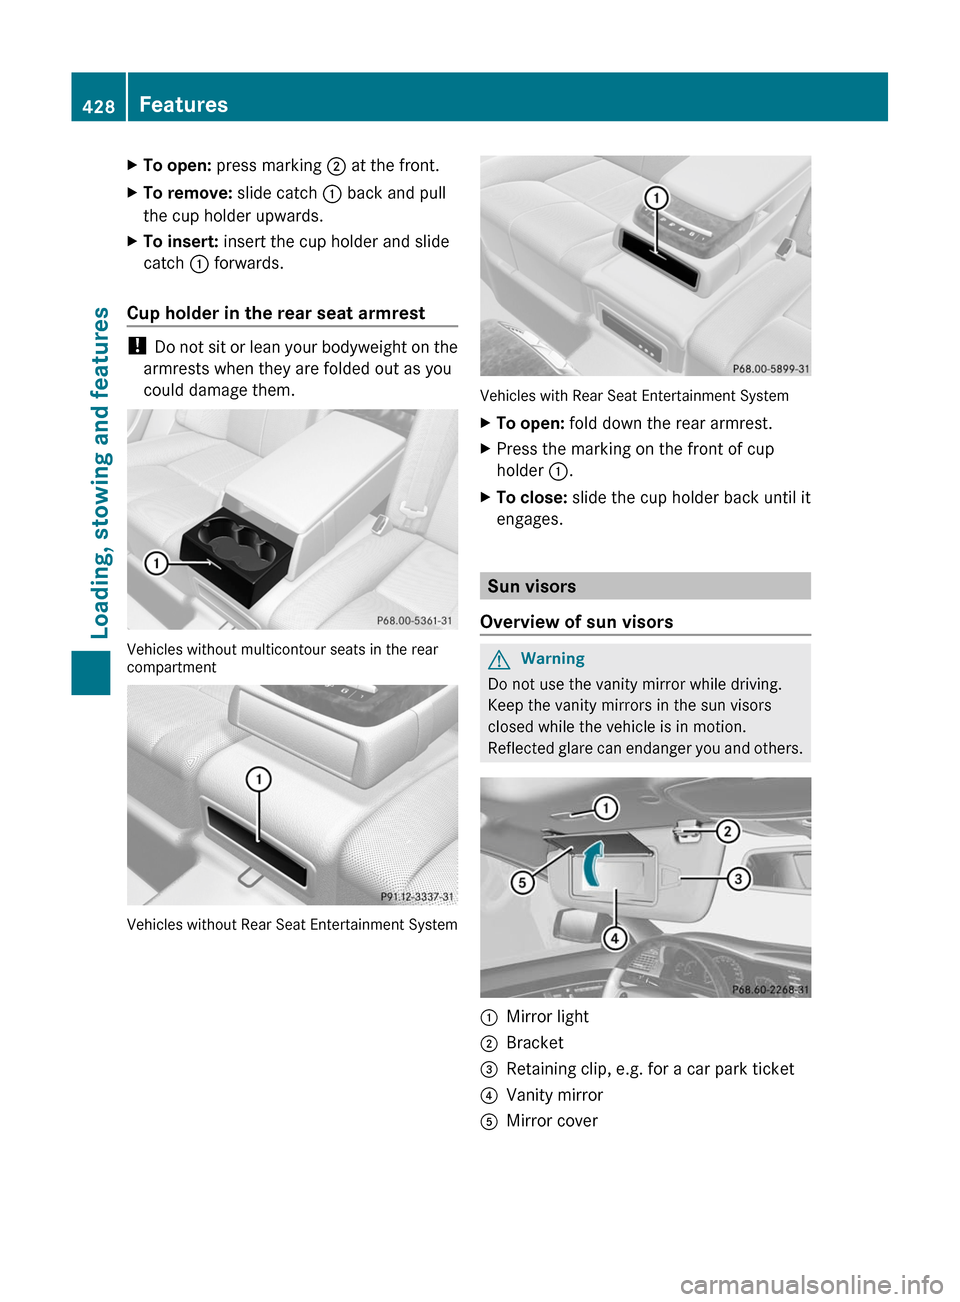
XTo open: press marking ; at the front.XTo remove: slide catch : back and pull
the cup holder upwards.
XTo insert: insert the cup holder and slide
catch : forwards.
Cup holder in the rear seat armrest
! Do not sit or lean your bodyweight on the
armrests when they are folded out as you
could damage them.
Vehicles without multicontour seats in the rearcompartment
Vehicles without Rear Seat Entertainment System
Vehicles with Rear Seat Entertainment System
XTo open: fold down the rear armrest.XPress the marking on the front of cup
holder :.
XTo close: slide the cup holder back until it
engages.
Sun visors
Overview of sun visors
GWarning
Do not use the vanity mirror while driving.
Keep the vanity mirrors in the sun visors
closed while the vehicle is in motion.
Reflected glare can endanger you and others.
:Mirror light;Bracket=Retaining clip, e.g. for a car park ticket?Vanity mirrorAMirror cover428FeaturesLoading, stowing and features