display MERCEDES-BENZ S-Class 2014 W222 Comand Manual
[x] Cancel search | Manufacturer: MERCEDES-BENZ, Model Year: 2014, Model line: S-Class, Model: MERCEDES-BENZ S-Class 2014 W222Pages: 278, PDF Size: 6.65 MB
Page 201 of 278

X
To switch the display off: select None
None.
In the basic display, Track 1
Track 1 ,Track 2
Track 2 etc.
are shown instead of the Gracenote ®
data,
for example.
X To switch on the display: press the
controller. Notes on audio/video mode
Permissible data carriers R
CD-R, CD-A and CD-RW
R DVD-R, DVD-V and DVD-RW
R SD memory card
R USB storage device
Permissible file systems R
ISO 9660/Joliet standard for CDs
R UDF for video DVDs
R FAT16, FAT32, exFAT and NTFS for SD
memory card and USB storage media
Multisession CDs For multisession CDs, the content of the first
session determines how COMAND will
process the CD. COMAND plays only one
session and gives priority to the audio CD
session.
File structure of a data carrier When you create a disc with compressed
music files, the tracks can be organized in
folders. A folder may also contain subfolders.
The disc may contain no more than eight
directory levels. Files beyond the eighth level
will not be recognized by the system.
i COMAND supports up to 50,000 files
from one data medium. For data media with
more than 64 GB, only files in the following
folders are supported: music, pictures,
videos. Track and file names When you create a disc with compressed
music files, you can assign names to the
tracks and folders.
If MP3 or WMA files are stored in the root
directory itself, the root directory will also be
treated as a folder.
You should observe the following when
assigning track names:
R
track names must have at least one
character.
R track names must have the ending of a
supported audio/video format, e.g. mp3,
aac or m4v.
R there must be a dot between the track
name and the extension.
Example of a correct track name:
"Track1.mp3".
Permissible formats COMAND supports the following audio
formats:
R
MP3
R WMA
R CD-A
R AAC formats: .aac, .mp4, .m4a and .m4b
Copy-protected iTunes music files with
the .m4p file ending are not supported.
COMAND supports the following video
formats:
R DVD-V
R MPEG
R wmv
R M4V
R AVI up to 720p.
Permissible bit and sampling rates COMAND supports MP3 files of the following
types:
R
fixed and variable bit rates from 32 kbit/s
to 320 kbit/s
R sampling rates of 8 kHz to 48 kHz Audio/video mode
199Media Z
Page 203 of 278
R
USB storage device
R Apple devices (folder, year and photos are
not available)
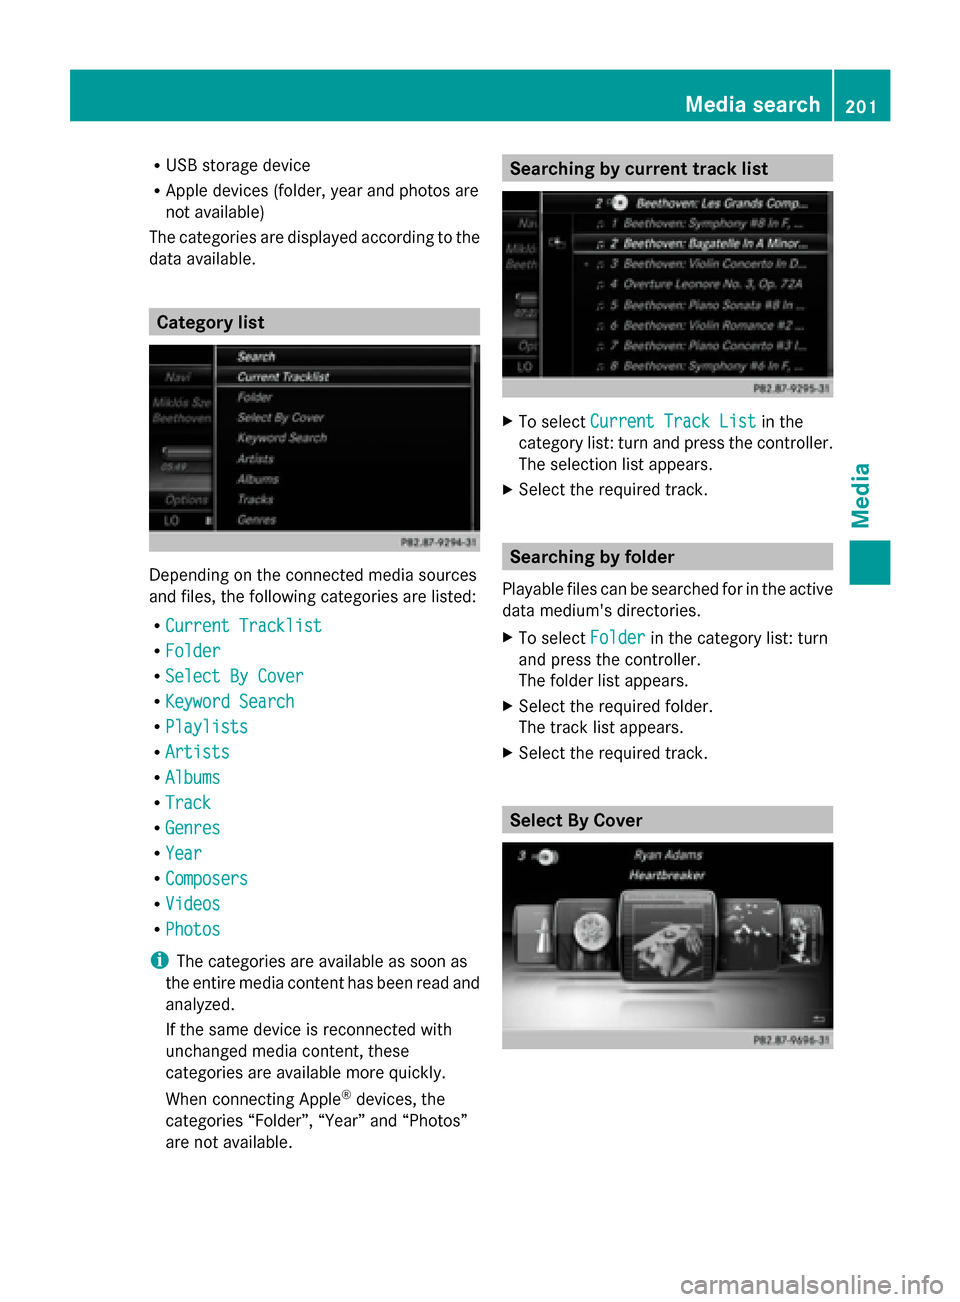
The categories are displayed according to the
data available. Category list
Depending on the connected media sources
and files, the following categories are listed:
R Current Tracklist
Current Tracklist
R Folder Folder
R Select By Cover
Select By Cover
R Keyword Search
Keyword Search
R Playlists
Playlists
R Artists
Artists
R Albums
Albums
R Track
Track
R Genres
Genres
R Year
Year
R Composers
Composers
R Videos
Videos
R Photos
Photos
i The categories are available as soon as
the entire media content has been read and
analyzed.
If the same device is reconnected with
unchanged media content, these
categories are available more quickly.
When connecting Apple ®
devices, the
categories “Folder”, “Year” and “Photos”
are not available. Searching by current track list
X
To select Current Track List Current Track List in the
category list: turn and press the controller.
The selection list appears.
X Select the required track. Searching by folder
Playable files can be searched for in the active
data medium's directories.
X To select Folder Folderin the category list: turn
and press the controller.
The folder list appears.
X Select the required folder.
The track list appears.
X Select the required track. Select By Cover Media search
201Media Z
Page 204 of 278
X
To select Search
SearchBy
ByCover
Cover in the category
list: turn and press the controller.
A menu with cover views appears.
X To move the desired folder to the front: turn
the controller.
The track list appears.
X To select the desired track: turn and press
the controller Searching by genre
X
To select Genre Genrein the category list: turn
and press the controller.
COMAND searches all media sources. A
selection list with Genre Genreand media
sources appears.
X Select the desired Genres Genres.
A selection list with music tracks from the
selected genre appears.
X Select a music track.
The track is played. The basic menu for the
active media source is shown.
X To exit the selection list: press the 0038
button. Keyword Search
X
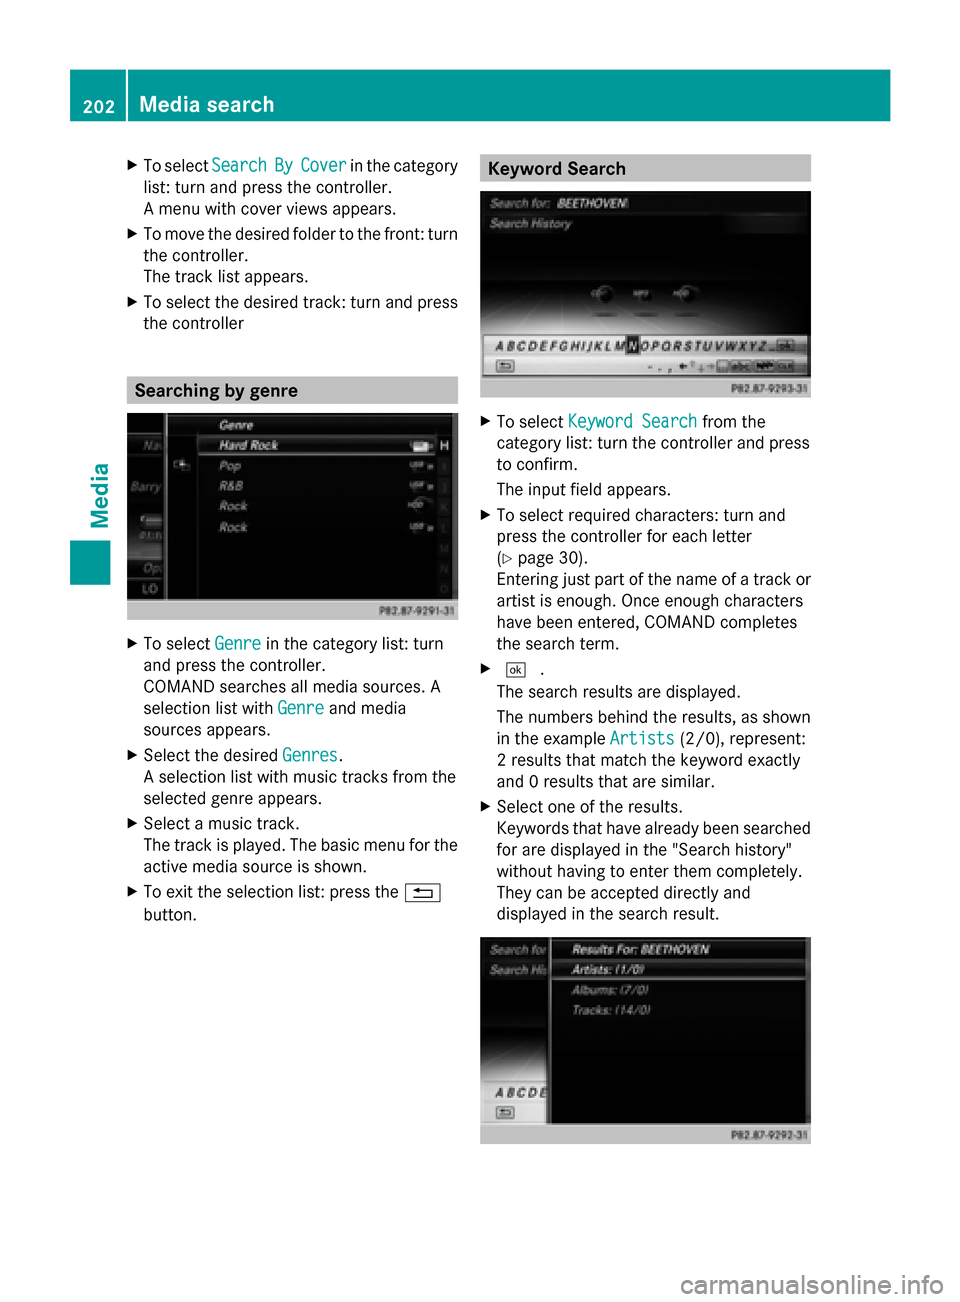
To select Keyword Search Keyword Search from the
category list: turn the controller and press
to confirm.
The input field appears.
X To select required characters: turn and
press the controller for each letter
(Y page 30).
Entering just part of the name of a track or
artist is enough. Once enough characters
have been entered, COMAND completes
the search term.
X 0054 .
The search results are displayed.
The numbers behind the results, as shown
in the example Artists
Artists (2/0), represent:
2 results that match the keyword exactly
and 0 results that are similar.
X Select one of the results.
Keywords that have already been searched
for are displayed in the "Search history"
without having to enter them completely.
They can be accepted directly and
displayed in the search result. 202
Media searchMedia
Page 205 of 278
X
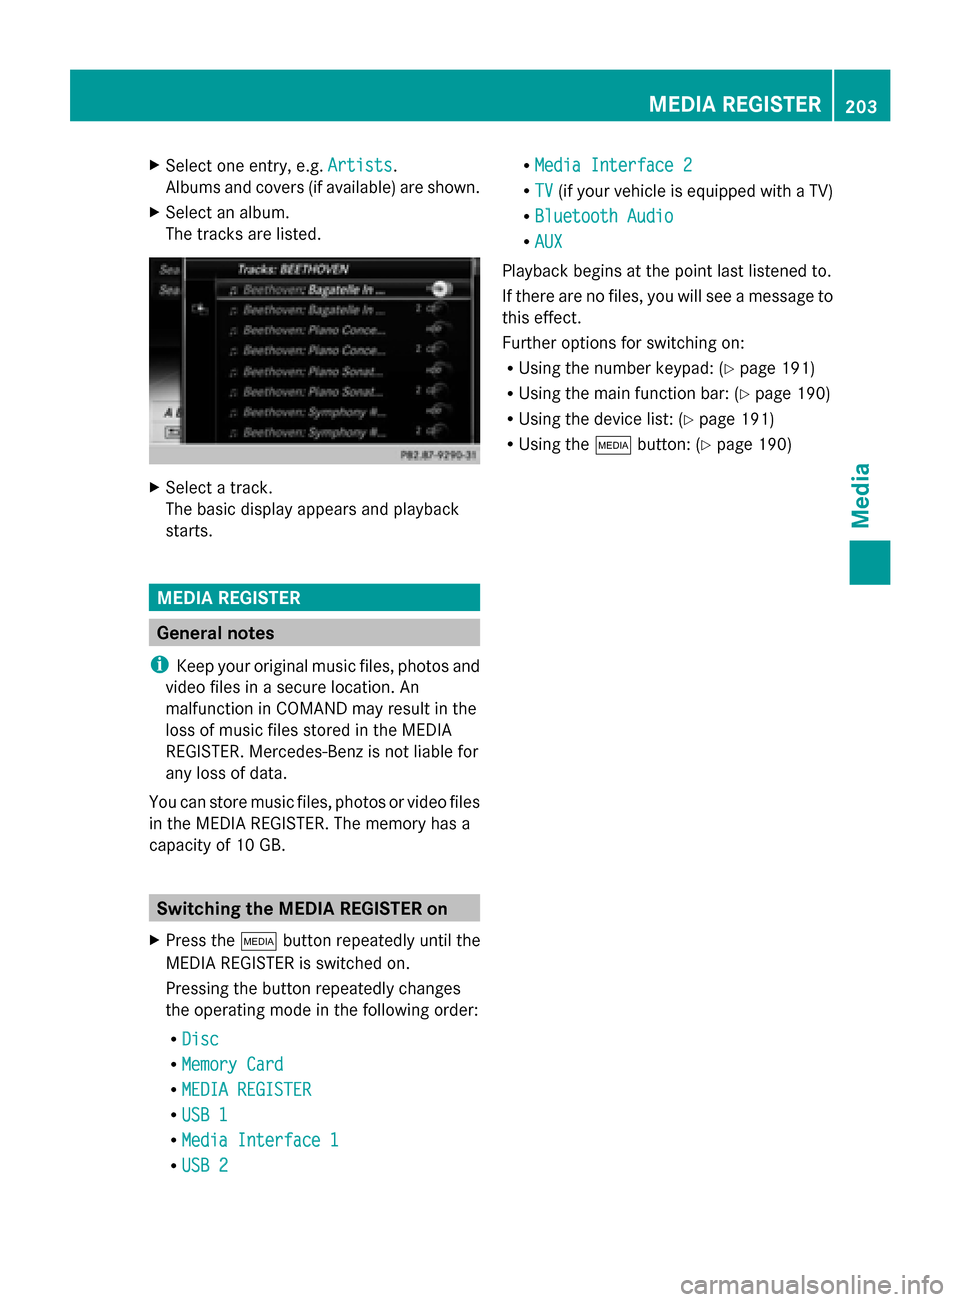
Select one entry, e.g. Artists
Artists.
Albums and covers (if available) are shown.
X Select an album.
The tracks are listed. X
Select a track.
The basic display appears and playback
starts. MEDIA REGISTER
General notes
i Keep your original music files, photos and
video files in a secure location. An
malfunction in COMAND may result in the
loss of music files stored in the MEDIA
REGISTER. Mercedes-Benz is not liable for
any loss of data.
You can store music files, photos or video files
in the MEDIA REGISTER. The memory has a
capacity of 10 GB. Switching the MEDIA REGISTER on
X Press the 00FDbutton repeatedly until the
MEDIA REGISTER is switched on.
Pressing the button repeatedly changes
the operating mode in the following order:
R Disc
Disc
R Memory Card Memory Card
R MEDIA REGISTER
MEDIA REGISTER
R USB 1
USB 1
R Media Interface 1
Media Interface 1
R USB 2
USB 2 R
Media Interface 2
Media Interface 2
R TV
TV (if your vehicle is equipped with a TV)
R Bluetooth Audio
Bluetooth Audio
R AUX
AUX
Playback begins at the point last listened to.
If there are no files, you will see a message to
this effect.
Further options for switching on:
R Using the number keypad: (Y page 191)
R Using the main function bar: (Y page 190)
R Using the device list: (Y page 191)
R Using the 00FDbutton: (Y page 190) MEDIA REGISTER
203Media Z
Page 206 of 278
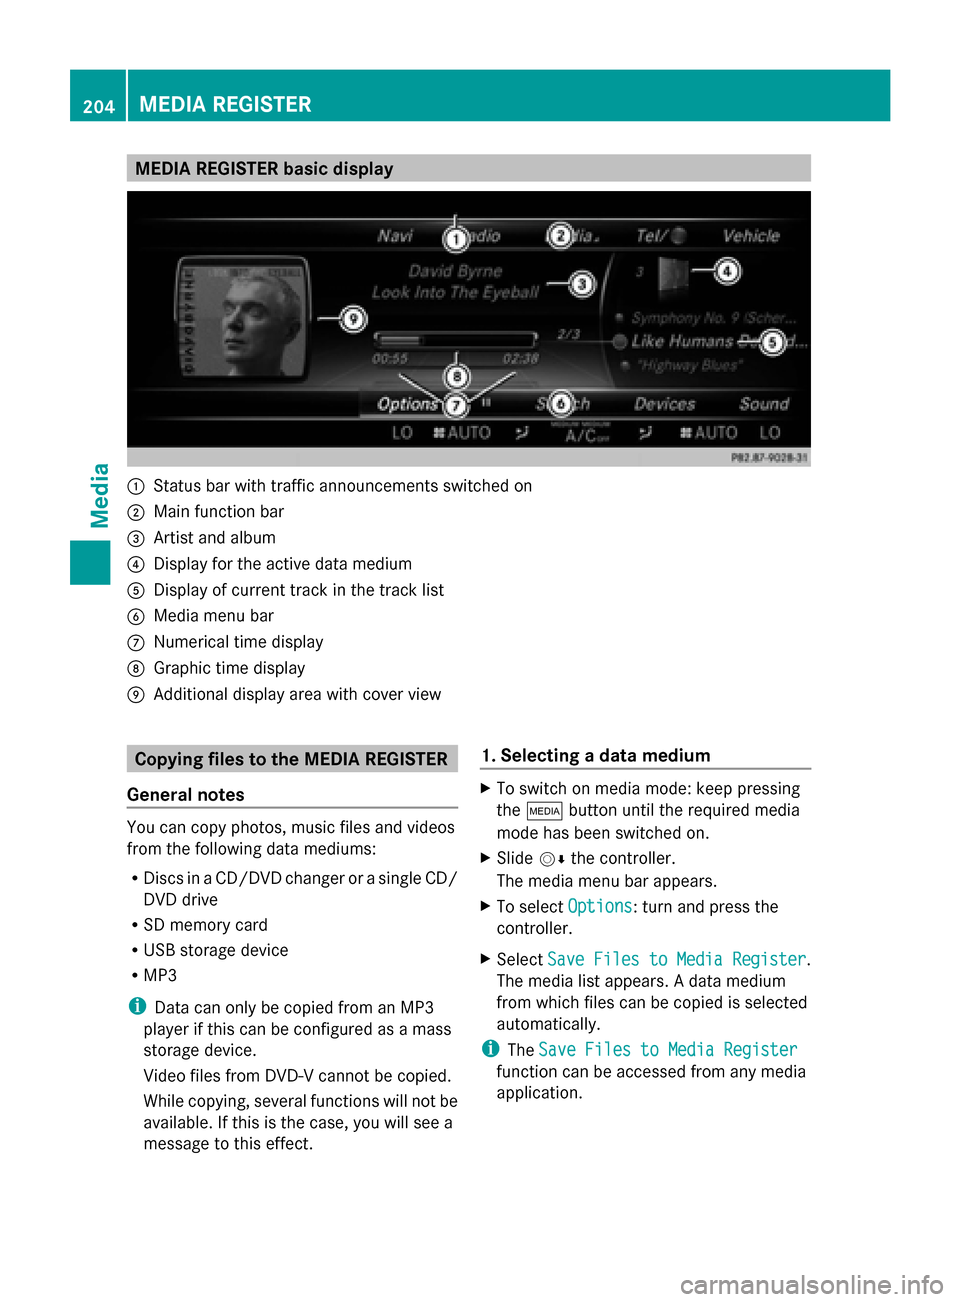
MEDIA REGISTER basic display
0043
Status bar with traffic announcements switched on
0044 Main function bar
0087 Artist and album
0085 Display for the active data medium
0083 Display of current track in the track list
0084 Media menu bar
006B Numerical time display
006C Graphic time display
006D Additional display area with cover view Copying files to the MEDIA REGISTER
General notes You can copy photos, music files and videos
from the following data mediums:
R Discs in a CD/DVD changer or a single CD/
DVD drive
R SD memory card
R USB storage device
R MP3
i Data can only be copied from an MP3
player if this can be configured as a mass
storage device.
Video files from DVD-V cannot be copied.
While copying, several functions will not be
available. If this is the case, you will see a
message to this effect. 1. Selecting a data medium X
To switch on media mode: keep pressing
the 00FD button until the required media
mode has been switched on.
X Slide 00520064the controller.
The media menu bar appears.
X To select Options Options: turn and press the
controller.
X Select Save Files to Media Register
Save Files to Media Register .
The media list appears. A data medium
from which files can be copied is selected
automatically.
i The Save Files to Media Register Save Files to Media Register
function can be accessed from any media
application. 204
MEDIA REGISTERMedia
Page 207 of 278
X
Select the displayed data medium.
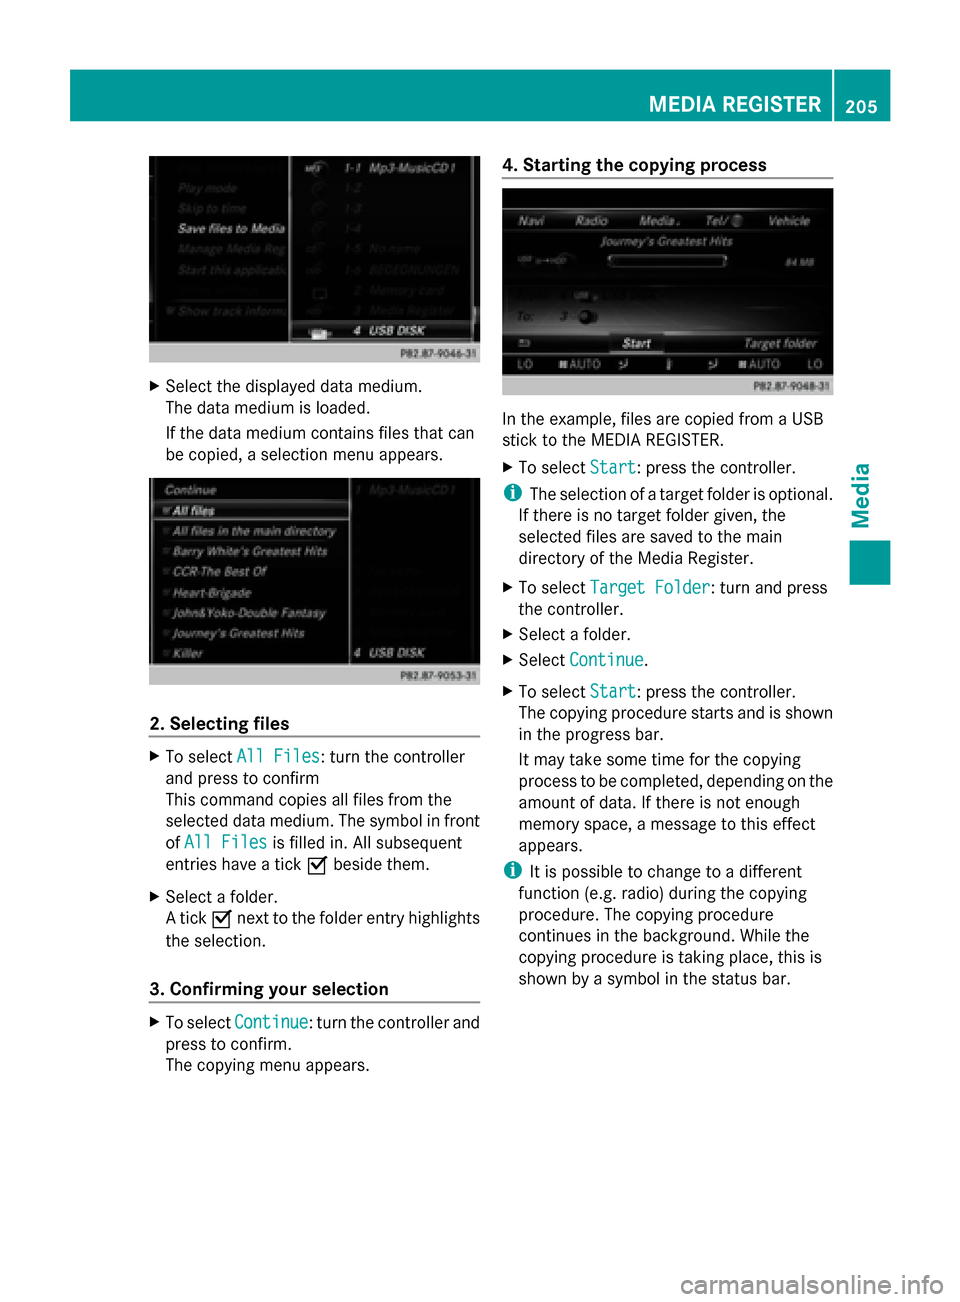
The data medium is loaded.
If the data medium contains files that can
be copied, a selection menu appears. 2. Selecting files
X
To select All Files All Files: turn the controller
and press to confirm
This command copies all files from the
selected data medium. The symbol in front
of All Files
All Files is filled in. All subsequent
entries have a tick 0073beside them.
X Select a folder.
A tick 0073next to the folder entry highlights
the selection.
3. Confirming your selection X
To select Continue Continue: turn the controller and
press to confirm.
The copying menu appears. 4. Starting the copying process
In the example, files are copied from a USB
stick to the MEDIA REGISTER.
X
To select Start Start: press the controller.
i The selection of a target folder is optional.
If there is no target folder given, the
selected files are saved to the main
directory of the Media Register.
X To select Target Folder Target Folder : turn and press
the controller.
X Select a folder.
X Select Continue
Continue.
X To select Start
Start: press the controller.
The copying procedure starts and is shown
in the progress bar.
It may take some time for the copying
process to be completed, depending on the
amount of data. If there is not enough
memory space, a message to this effect
appears.
i It is possible to change to a different
function (e.g. radio) during the copying
procedure. The copying procedure
continues in the background. While the
copying procedure is taking place, this is
shown by a symbol in the status bar. MEDIA REGISTER
205Media Z
Page 208 of 278
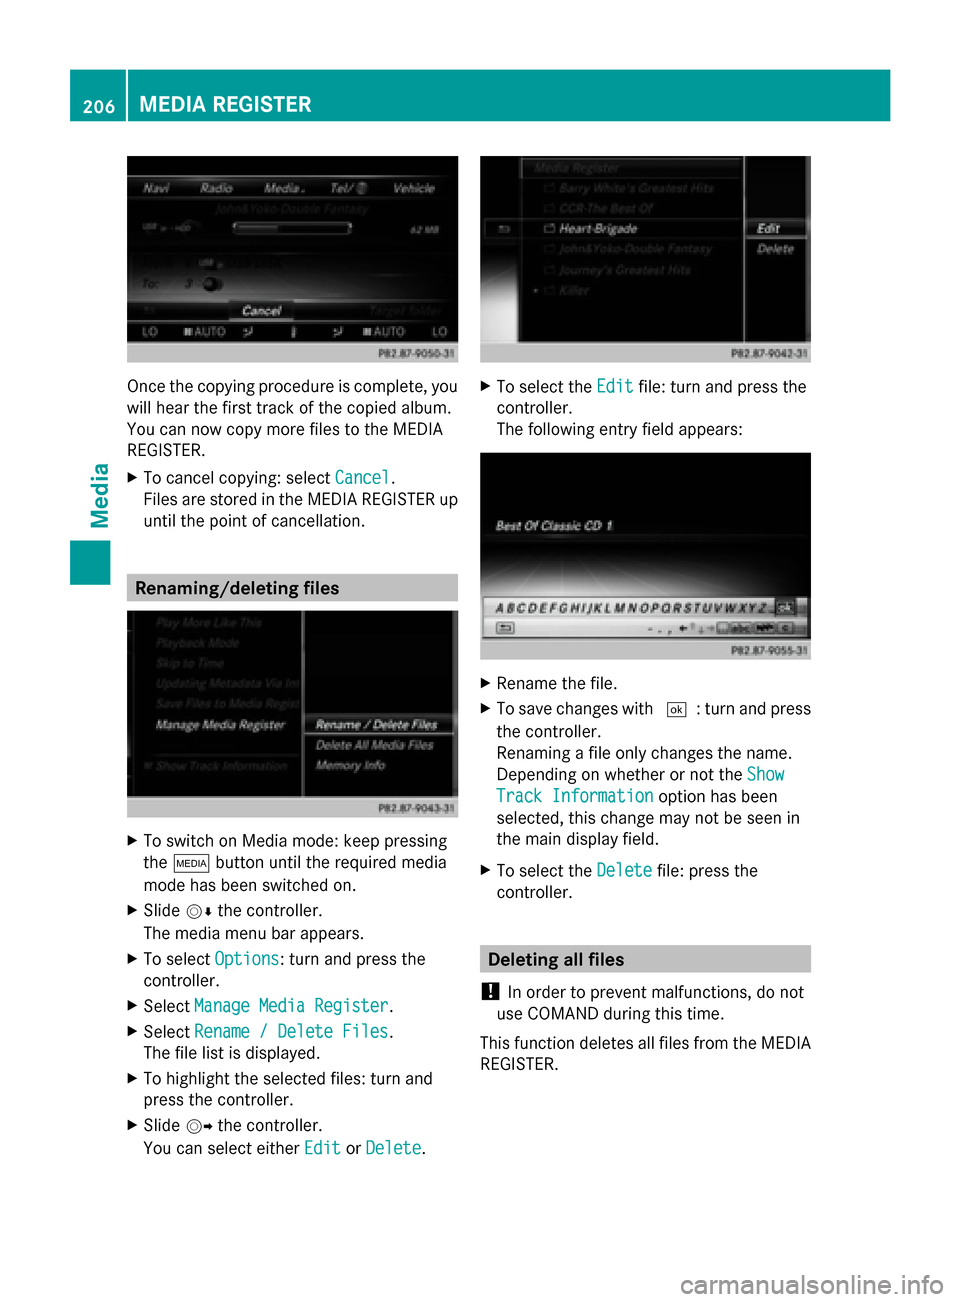
Once the copying procedure is complete, you
will hear the first track of the copied album.
You can now copy more files to the MEDIA
REGISTER.
X To cancel copying: select Cancel
Cancel.
Files are stored in the MEDIA REGISTER up
until the point of cancellation. Renaming/deleting files
X
To switch on Media mode: keep pressing
the 00FD button until the required media
mode has been switched on.
X Slide 00520064the controller.
The media menu bar appears.
X To select Options Options: turn and press the
controller.
X Select Manage Media Register
Manage Media Register.
X Select Rename / Delete Files
Rename / Delete Files.
The file list is displayed.
X To highlight the selected files: turn and
press the controller.
X Slide 00520096the controller.
You can select either Edit
Edit orDelete
Delete. X
To select the Edit
Editfile: turn and press the
controller.
The following entry field appears: X
Rename the file.
X To save changes with 0054: turn and press
the controller.
Renaming a file only changes the name.
Depending on whether or not the Show Show
Track Information
Track Information option has been
selected, this change may not be seen in
the main display field.
X To select the Delete Deletefile: press the
controller. Deleting all files
! In order to prevent malfunctions, do not
use COMAND during this time.
This function deletes all files from the MEDIA
REGISTER. 206
MEDIA REGISTERMedia
Page 209 of 278
X
To switch on media mode: keep pressing
the 00FD button until the required media
mode has been switched on.
X Slide 00520064the controller.
The media menu bar appears.
X To select Options
Options: turn and press the
controller.
X Select Manage Media Register
Manage Media Register.
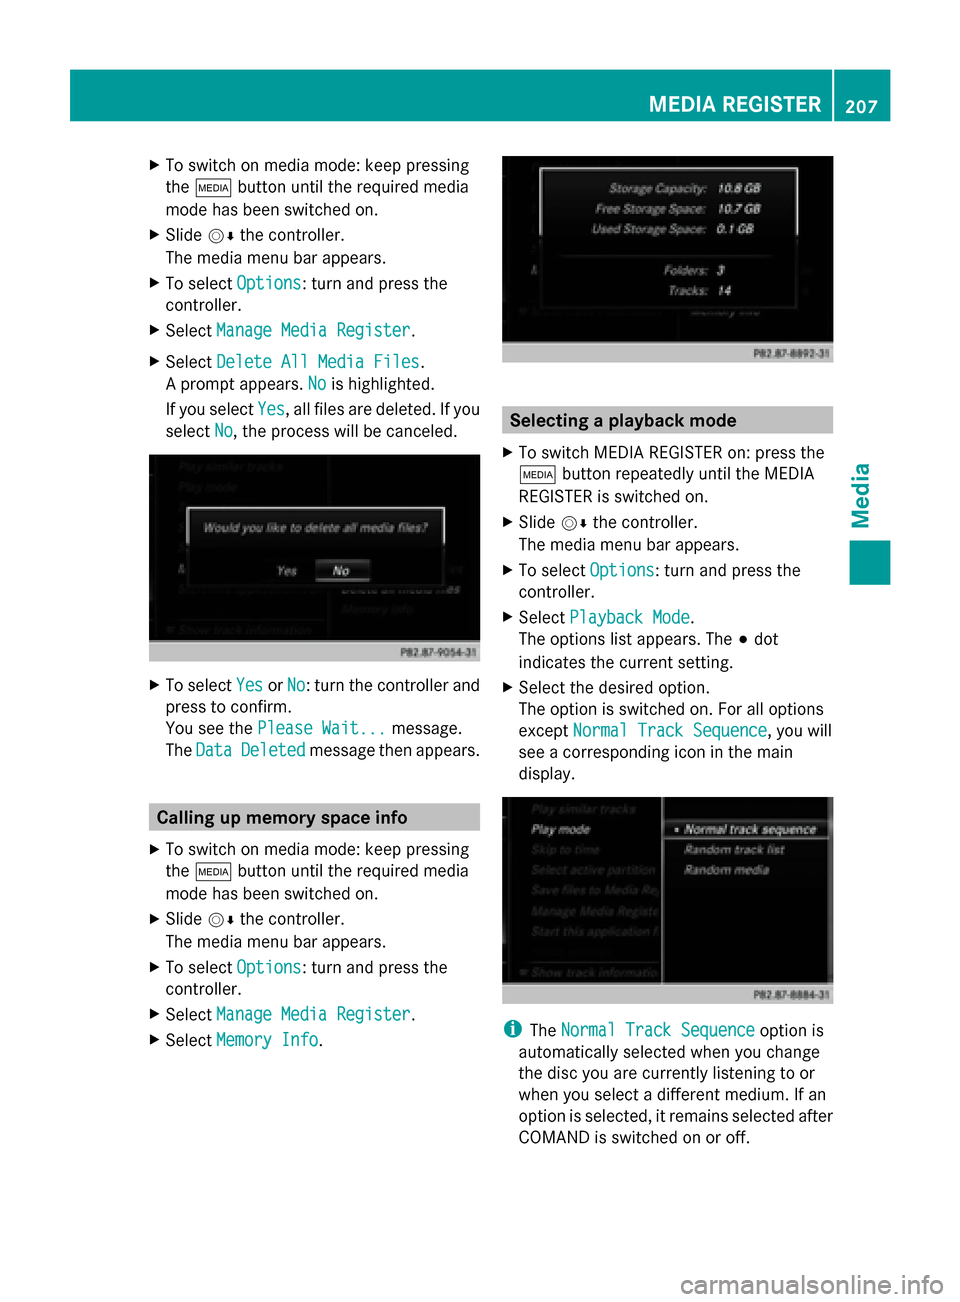
X Select Delete All Media Files
Delete All Media Files.
A prompt appears. No Nois highlighted.
If you select Yes
Yes, all files are deleted. If you
select No
No, the process will be canceled. X
To select Yes YesorNo No: turn the controller and
press to confirm.
You see the Please Wait... Please Wait... message.
The Data
Data Deleted
Deleted message then appears. Calling up memory space info
X To switch on media mode: keep pressing
the 00FD button until the required media
mode has been switched on.
X Slide 00520064the controller.
The media menu bar appears.
X To select Options
Options: turn and press the
controller.
X Select Manage Media Register
Manage Media Register.
X Select Memory Info
Memory Info. Selecting a playback mode
X To switch MEDIA REGISTER on: press the
00FD button repeatedly until the MEDIA
REGISTER is switched on.
X Slide 00520064the controller.
The media menu bar appears.
X To select Options
Options: turn and press the
controller.
X Select Playback Mode Playback Mode.
The options list appears. The 003Bdot
indicates the current setting.
X Select the desired option.
The option is switched on. For all options
except Normal Track Sequence Normal Track Sequence, you will
see a corresponding icon in the main
display. i
The Normal Track Sequence Normal Track Sequence option is
automatically selected when you change
the disc you are currently listening to or
when you select a different medium. If an
option is selected, it remains selected after
COMAND is switched on or off. MEDIA REGISTER
207Media Z
Page 211 of 278
i
If the mobile phone that is connected only
supports two Bluetooth ®
profiles at the
same time, COMAND functions may
behave as follows:
R when connecting to the Internet,
playback is stopped on the Bluetooth ®
audio device (Y page 159).
R when starting playback on the
Bluetooth ®
audio device, the Internet
connection is ended (Y page 160).Searching for and authorizing a
Bluetooth ®
audio device
Switching to Bluetooth ®
audio mode
X Press the 00FDbutton.
X To select Bluetooth Audio
Bluetooth Audio from the
menu: turn and press the controller.
A menu appears.
If you see the No Bluetooth Audio No Bluetooth Audio
Device Authorized
Device Authorized message, you will
need to authorize the Bluetooth ®
audio
device first.
X To select Options
Options from the Bluetooth ®
audio menu: slide 005200C5and press the
controller.
X To select Bluetooth Audio Devices
Bluetooth Audio Devices:
press the controller.
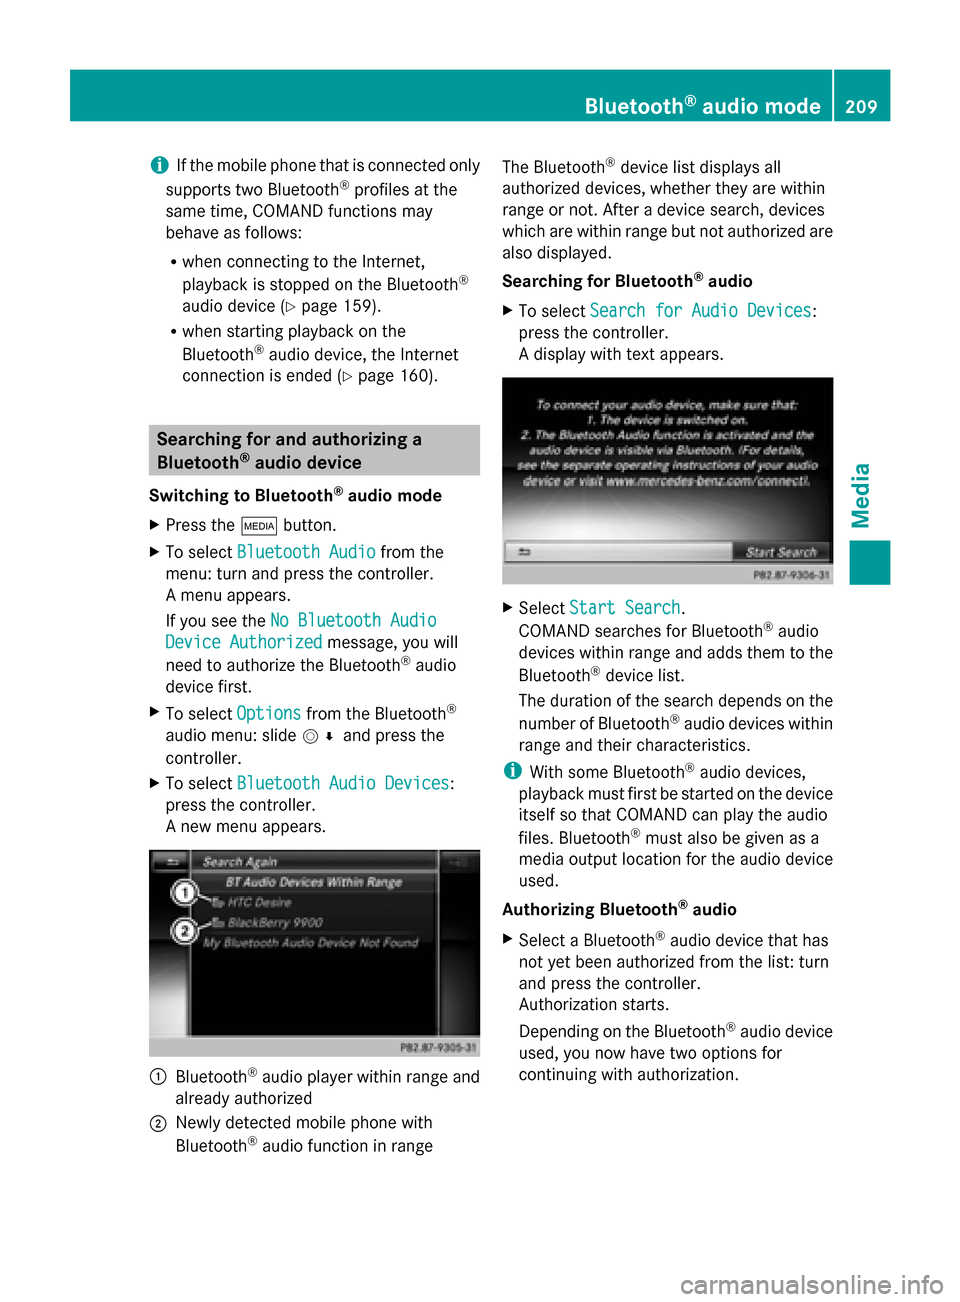
A new menu appears. 0043
Bluetooth ®
audio player within range and
already authorized
0044 Newly detected mobile phone with
Bluetooth ®
audio function in range The Bluetooth
®
device list displays all
authorized devices, whether they are within
range or not. After a device search, devices
which are within range but not authorized are
also displayed.
Searching for Bluetooth ®
audio
X To select Search for Audio Devices
Search for Audio Devices:
press the controller.
A display with text appears. X
Select Start Search Start Search.
COMAND searches for Bluetooth ®
audio
devices within range and adds them to the
Bluetooth ®
device list.
The duration of the search depends on the
number of Bluetooth ®
audio devices within
range and their characteristics.
i With some Bluetooth ®
audio devices,
playback must first be started on the device
itself so that COMAND can play the audio
files. Bluetooth ®
must also be given as a
media output location for the audio device
used.
Authorizing Bluetooth ®
audio
X Select a Bluetooth ®
audio device that has
not yet been authorized from the list: turn
and press the controller.
Authorization starts.
Depending on the Bluetooth ®
audio device
used, you now have two options for
continuing with authorization. Bluetooth
®
audio mode 209Media Z
Page 212 of 278
Option 1: entering the passkey
X
You can find information on this in the
"Authorizing (registering) a mobile phone"
section (Y page 125).
After successful authorization, the
Bluetooth ®
audio device is connected and
starts playing.
Option 2: Secure Simple Pairing
i The Bluetooth ®
audio device must
support Bluetooth ®
version 2.1 for
connection via Secure Simple Pairing.
COMAND creates a six-digit code, which is
displayed on both devices that are to be
connected
For some Bluetooth ®
audio devices, the
pairing must be confirmed within 10
seconds.
X If the number code displayed on
COMAND and on the Bluetooth ®
audio
device is the same, select Yes Yes: press the
controller.
If you select Yes
Yes, authorization continues
and the Bluetooth ®
audio device is
connected. Playback starts.
If you select No
No, authorization will be
canceled. External authorization
If COMAND does not find your Bluetooth ®
audio device, this may be due to particular
security settings on your Bluetooth ®
audio
device. In this case, check whether your
Bluetooth ®
audio device can locate
COMAND.
The Bluetooth ®
device name of COMAND is
MB Bluetooth
MB Bluetooth.
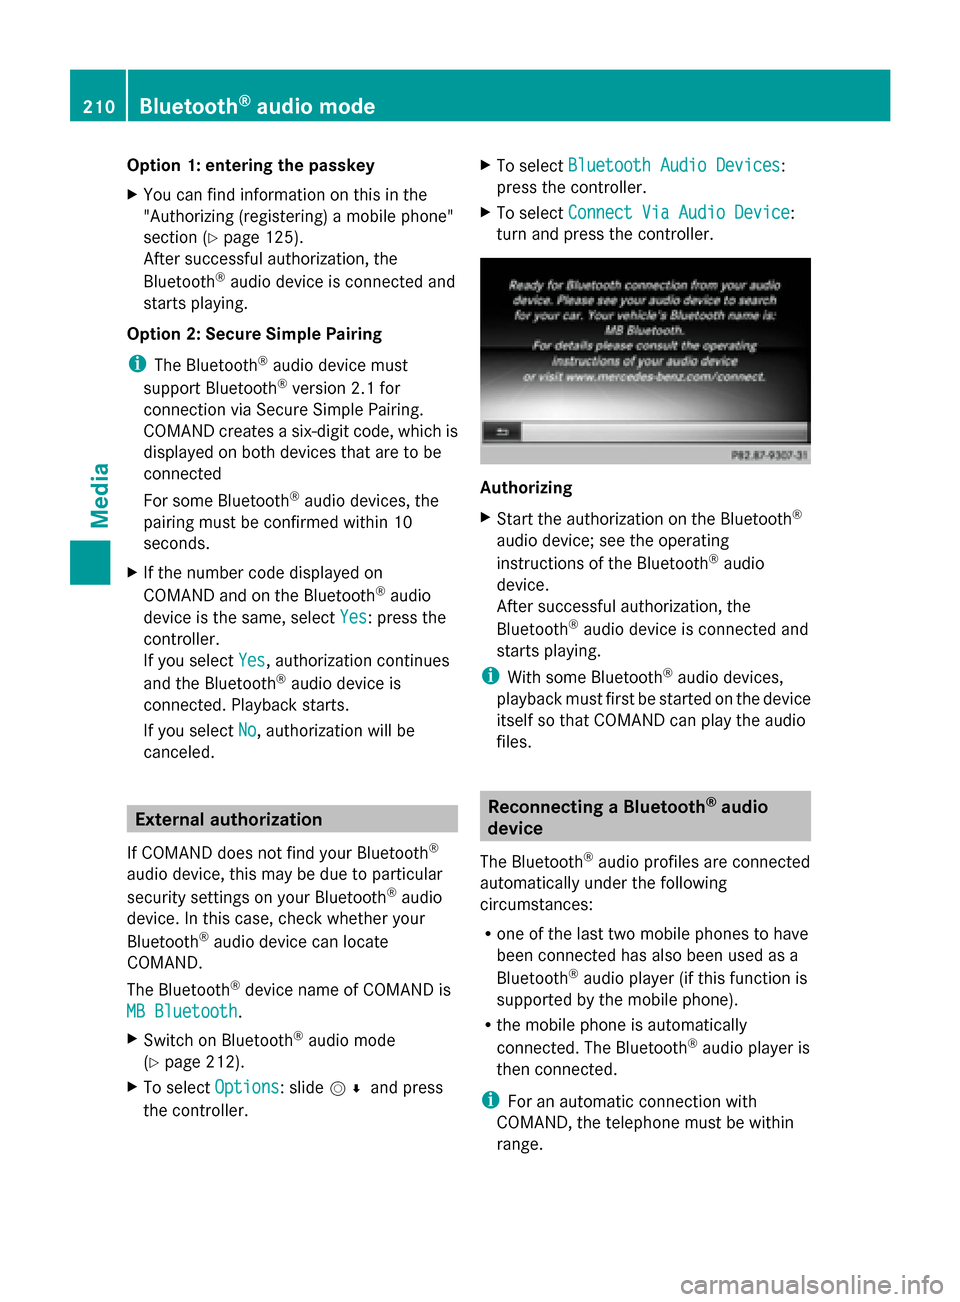
X
Switch on Bluetooth ®
audio mode
(Y page 212).
X To select Options Options: slide 005200C5and press
the controller. X
To select Bluetooth Audio Devices Bluetooth Audio Devices:
press the controller.
X To select Connect Via Audio Device Connect Via Audio Device:
turn and press the controller. Authorizing
X
Start the authorization on the Bluetooth ®
audio device; see the operating
instructions of the Bluetooth ®
audio
device.
After successful authorization, the
Bluetooth ®
audio device is connected and
starts playing.
i With some Bluetooth ®
audio devices,
playback must first be started on the device
itself so that COMAND can play the audio
files. Reconnecting a Bluetooth
®
audio
device
The Bluetooth ®
audio profiles are connected
automatically under the following
circumstances:
R one of the last two mobile phones to have
been connected has also been used as a
Bluetooth ®
audio player (if this function is
supported by the mobile phone).
R the mobile phone is automatically
connected. The Bluetooth ®
audio player is
then connected.
i For an automatic connection with
COMAND, the telephone must be within
range. 210
Bluetooth ®
audio modeMedia