display MERCEDES-BENZ S-Class 2014 W222 Comand Manual
[x] Cancel search | Manufacturer: MERCEDES-BENZ, Model Year: 2014, Model line: S-Class, Model: MERCEDES-BENZ S-Class 2014 W222Pages: 278, PDF Size: 6.65 MB
Page 141 of 278
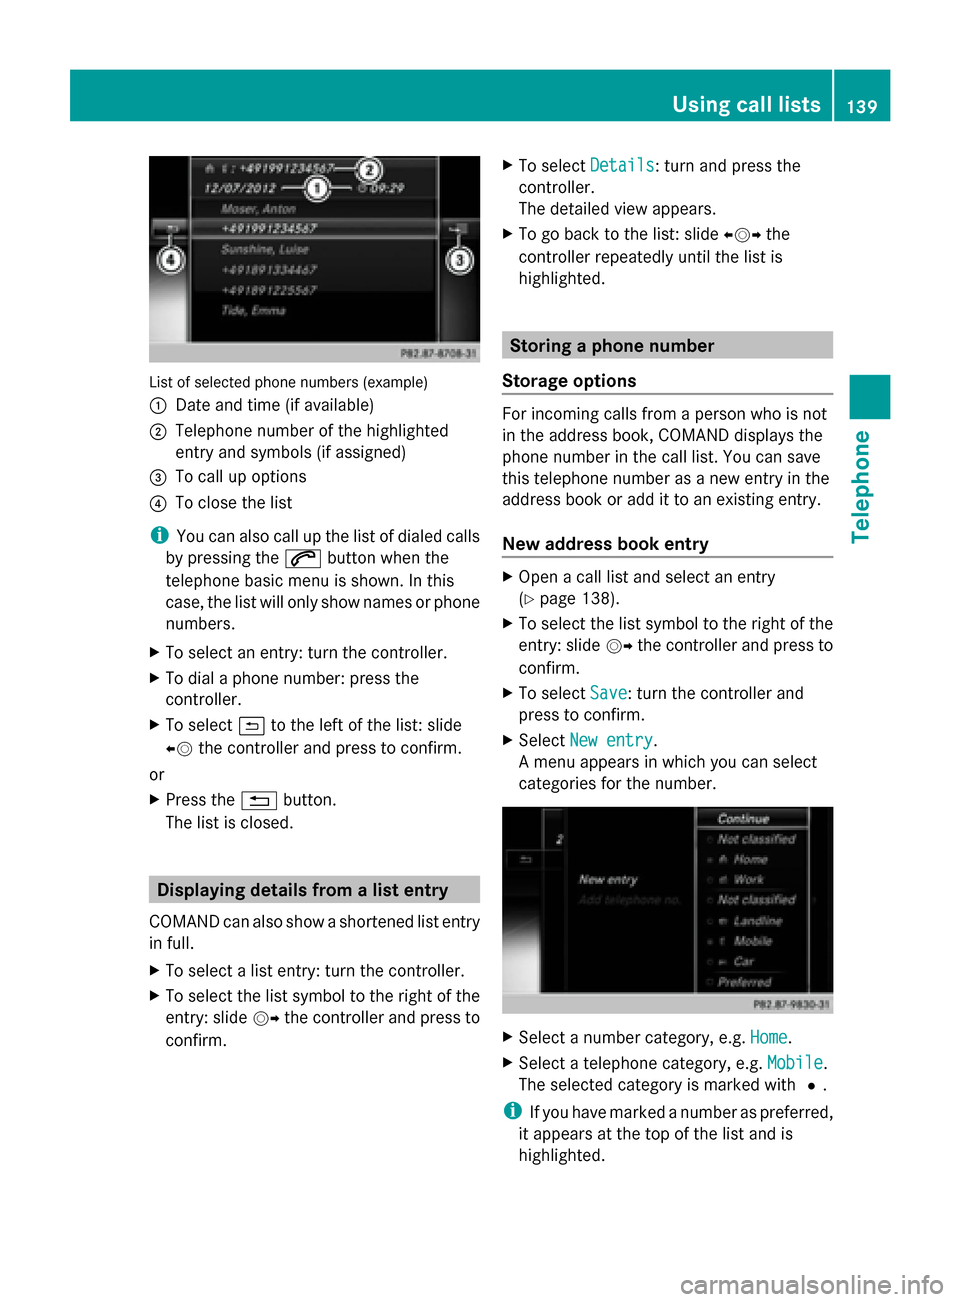
List of selected phone numbers (example)
0043 Date and time (if available)
0044 Telephone number of the highlighted
entry and symbols (if assigned)
0087 To call up options
0085 To close the list
i You can also call up the list of dialed calls
by pressing the 0061button when the
telephone basic menu is shown. In this
case, the list will only show names or phone
numbers.
X To select an entry: turn the controller.
X To dial a phone number: press the
controller.
X To select 0039to the left of the list: slide
00950052 the controller and press to confirm.
or
X Press the 0038button.
The list is closed. Displaying details from a list entry
COMAND can also show a shortened list entry
in full.
X To select a list entry: turn the controller.
X To select the list symbol to the right of the
entry: slide 00520096the controller and press to
confirm. X
To select Details Details: turn and press the
controller.
The detailed view appears.
X To go back to the list: slide 009500520096the
controller repeatedly until the list is
highlighted. Storing a phone number
Storage options For incoming calls from a person who is not
in the address book, COMAND displays the
phone number in the call list. You can save
this telephone number as a new entry in the
address book or add it to an existing entry.
New address book entry
X
Open a call list and select an entry
(Y page 138).
X To select the list symbol to the right of the
entry: slide 00520096the controller and press to
confirm.
X To select Save Save: turn the controller and
press to confirm.
X Select New entry
New entry.
A menu appears in which you can select
categories for the number. X
Select a number category, e.g. Home Home.
X Select a telephone category, e.g. Mobile Mobile.
The selected category is marked with 0036.
i If you have marked a number as preferred,
it appears at the top of the list and is
highlighted. Using call lists
139Telephone Z
Page 142 of 278
X
To select Preferred
Preferred: turn and press the
controller.
X Select Continue
Continue.
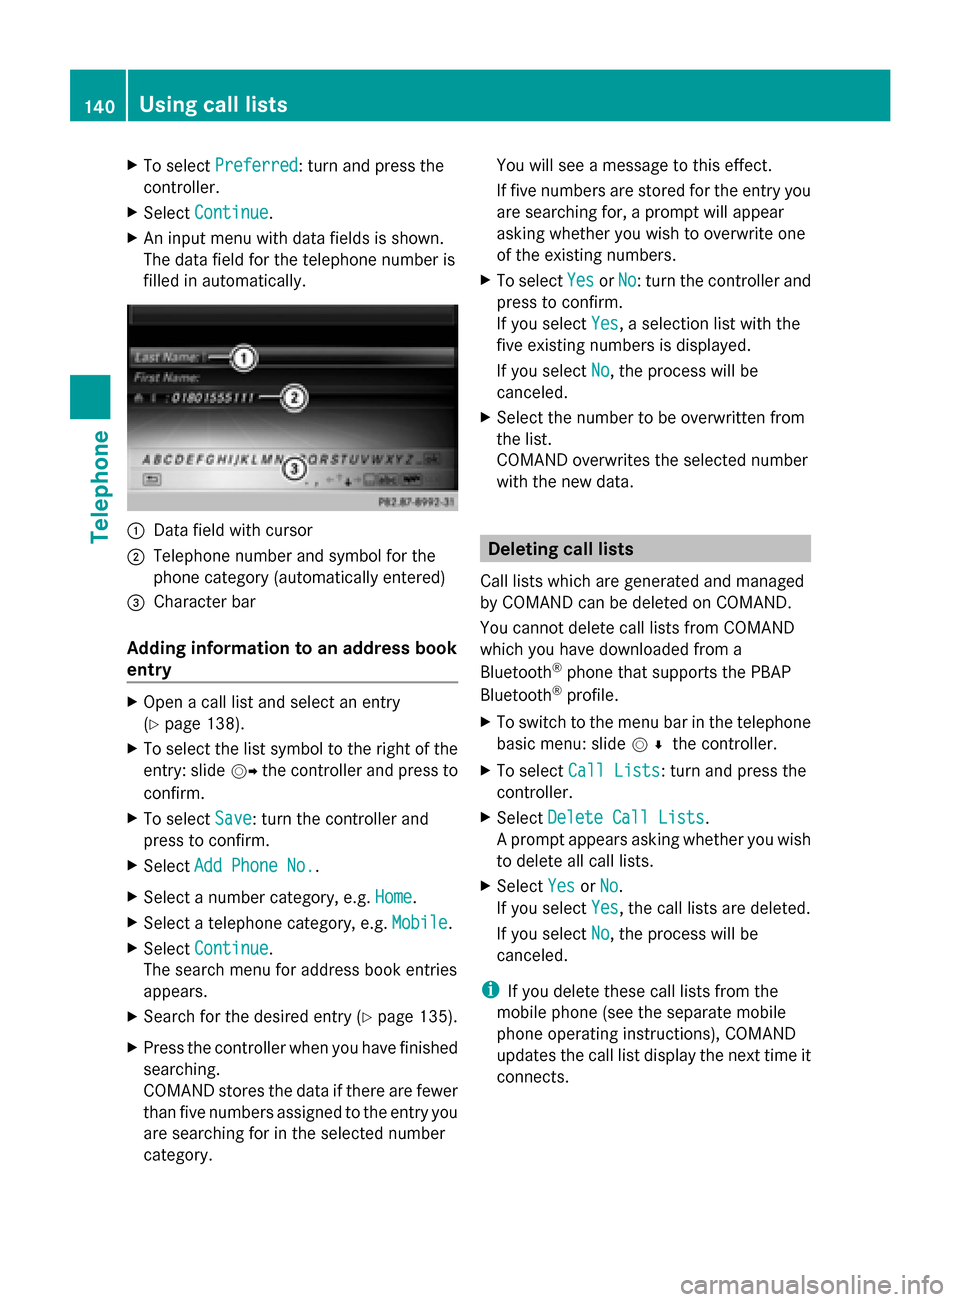
X An input menu with data fields is shown.
The data field for the telephone number is
filled in automatically. 0043
Data field with cursor
0044 Telephone number and symbol for the
phone category (automatically entered)
0087 Character bar
Adding information to an address book
entry X
Open a call list and select an entry
(Y page 138).
X To select the list symbol to the right of the
entry: slide 00520096the controller and press to
confirm.
X To select Save
Save: turn the controller and
press to confirm.
X Select Add Phone No.
Add Phone No..
X Select a number category, e.g. Home
Home.
X Select a telephone category, e.g. Mobile Mobile.
X Select Continue
Continue.
The search menu for address book entries
appears.
X Search for the desired entry (Y page 135).
X Press the controller when you have finished
searching.
COMAND stores the data if there are fewer
than five numbers assigned to the entry you
are searching for in the selected number
category. You will see a message to this effect.
If five numbers are stored for the entry you
are searching for, a prompt will appear
asking whether you wish to overwrite one
of the existing numbers.
X To select Yes
Yes orNo No: turn the controller and
press to confirm.
If you select Yes Yes, a selection list with the
five existing numbers is displayed.
If you select No No, the process will be
canceled.
X Select the number to be overwritten from
the list.
COMAND overwrites the selected number
with the new data. Deleting call lists
Call lists which are generated and managed
by COMAND can be deleted on COMAND.
You cannot delete call lists from COMAND
which you have downloaded from a
Bluetooth ®
phone that supports the PBAP
Bluetooth ®
profile.
X To switch to the menu bar in the telephone
basic menu: slide 005200C5the controller.
X To select Call Lists Call Lists: turn and press the
controller.
X Select Delete Call Lists
Delete Call Lists.
A prompt appears asking whether you wish
to delete all call lists.
X Select Yes YesorNo
No.
If you select Yes
Yes, the call lists are deleted.
If you select No
No, the process will be
canceled.
i If you delete these call lists from the
mobile phone (see the separate mobile
phone operating instructions), COMAND
updates the call list display the next time it
connects. 140
Using call listsTelephone
Page 144 of 278
Option 1:
X
Hold down one of the number keys for
longer than two seconds.
The telephone basic menu displays the
selected entry. This initiates dialing.
Option 2:
X Call up the telephone basic menu
(Y page 129).
X To switch to the menu bar: slide 00520064the
controller.
X To select Call Lists
Call Lists: turn and press the
controller.
X Select Speed Dial Preset List
Speed Dial Preset List.
The speed dial list appears.
X Select a preset.
The telephone basic menu displays the
selected entry. This initiates dialing. Deleting a speed dial number
Deleting a speed dial preset:
X To select an entry: turn the controller.
X To switch to the menu: slide 00520096the
controller.
X To select Delete Speed Dial Preset
Delete Speed Dial Preset:
turn the controller and press to confirm.
A prompt appears asking whether the
speed dial preset should be deleted.
X Select Yes
Yes orNo No.
If you select Yes
Yes, the speed dial will be
deleted from the speed dial list.
If you select No
No, the process will be
canceled.
Deleting all speed dial presets:
X To select Delete all Speed Dial Delete all Speed Dial
Presets
Presets in the speed dial menu: turn
controller and press to confirm.
You will be asked if you would like to delete
all speed dial presets.
X Select Yes
Yes orNo No.
If you select Yes
Yes, all speed dial presets will
be deleted from the speed dial list. If you select
No
No, the process will be
canceled. Messages (text messages and e-
mails)
Information and requirements
The following conditions must be met in order
to use the message functions (text messages
and e-mails):
R For text messages and e-mails:
The Bluetooth ®
mobile phone supports the
MAP Bluetooth ®
profile (Message Access
Profile).
R For e-mails:
-
The Bluetooth ®
mobile phone
(smartphone) supports the e-mail
function.
- An e-mail account is set up on the mobile
phone (see the mobile phone operating
instructions).
Once the messages have been downloaded
from the phone, COMAND shows the 100
newest text messages and the 100 newest e-
mails.
Any new messages received during the
journey are indicated by COMAND with an
audible signal and the 008Fsymbol. Once you
have read all the messages, the symbol is no
longer displayed. The úmail symbol is
displayed if the mobile phone's message
memory is full. The symbol disappears once
you delete at least one message.
i Not all mobile phones available on the
market are equally suitable. You can obtain
more detailed information about suitable
mobile phones on the Internet at
http://www.mbusa-mobile.com. Or call
the Mercedes-Benz Customer Assistance
Center at 1-800-FOR-MERCedes
(1-800-367-6372 )(for the USA) or
Customer Relations at 1-800-387-0100
(for Canada). 142
Messages (text messages and e-mails)Telephone
Page 145 of 278
Settings for receiving messages
Calling up the settings menu for
messages X
To call up the telephone basic menu: press
the 002B button once or repeatedly.
X To switch to the menu bar: slide 005200C5the
controller.
X To select 0082: turn and press the
controller.
The message menu appears.
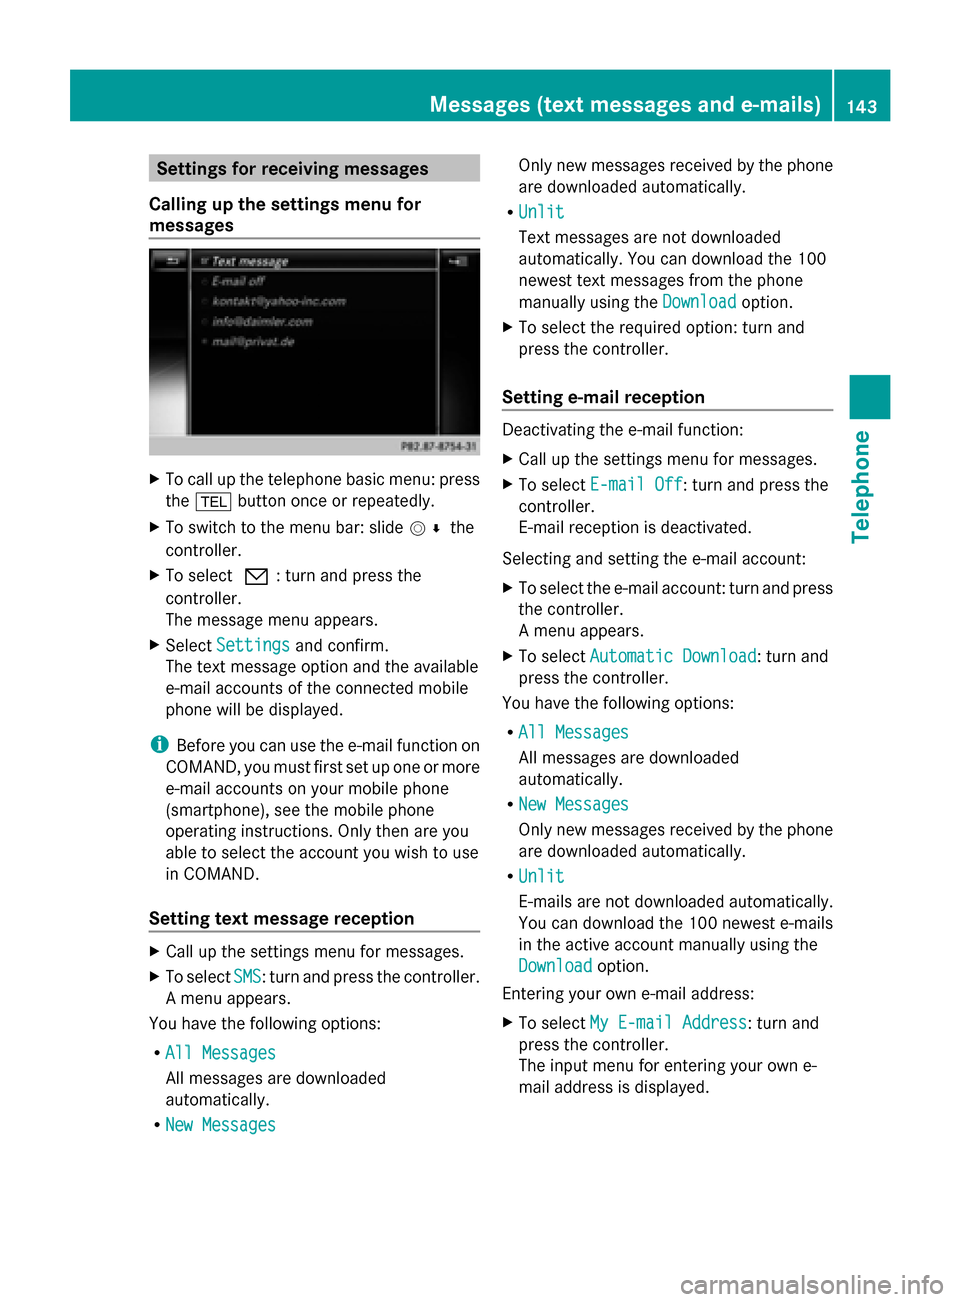
X Select Settings
Settings and confirm.
The text message option and the available
e-mail accounts of the connected mobile
phone will be displayed.
i Before you can use the e-mail function on
COMAND, you must first set up one or more
e-mail accounts on your mobile phone
(smartphone), see the mobile phone
operating instructions. Only then are you
able to select the account you wish to use
in COMAND.
Setting text message reception X
Call up the settings menu for messages.
X To select SMS SMS: turn and press the controller.
A menu appears.
You have the following options:
R All Messages
All Messages
All messages are downloaded
automatically.
R New Messages New Messages Only new messages received by the phone
are downloaded automatically.
R Unlit Unlit
Text messages are not downloaded
automatically. You can download the 100
newest text messages from the phone
manually using the Download Downloadoption.
X To select the required option: turn and
press the controller.
Setting e-mail reception Deactivating the e-mail function:
X
Call up the settings menu for messages.
X To select E-mail Off E-mail Off: turn and press the
controller.
E-mail reception is deactivated.
Selecting and setting the e-mail account:
X To select the e-mail account: turn and press
the controller.
A menu appears.
X To select Automatic Download Automatic Download: turn and
press the controller.
You have the following options:
R All Messages All Messages
All messages are downloaded
automatically.
R New Messages New Messages
Only new messages received by the phone
are downloaded automatically.
R Unlit Unlit
E-mails are not downloaded automatically.
You can download the 100 newest e-mails
in the active account manually using the
Download Download option.
Entering your own e-mail address:
X To select My E-mail Address My E-mail Address: turn and
press the controller.
The input menu for entering your own e-
mail address is displayed. Messages (text messages and e-mails)
143Telephone Z
Page 146 of 278
Downloading messages manually
X To select Download
Download in the message menu:
turn and press the controller.
Downloading text messages and e-mails from
the phone:
X Select From Phone
From Phone.
The messages are downloaded. If you have
selected Automatic Download
Automatic Download in the e-
mail settings, manual downloading is not
possible and you receive a message to this
effect (Y page 143).
Update from the e-mail server by the mobile
phone:
X Select From E-mail Server
From E-mail Server .
The e-mails in the mobile phone are
updated.
This function is not supported by all mobile
phones. Displaying messages
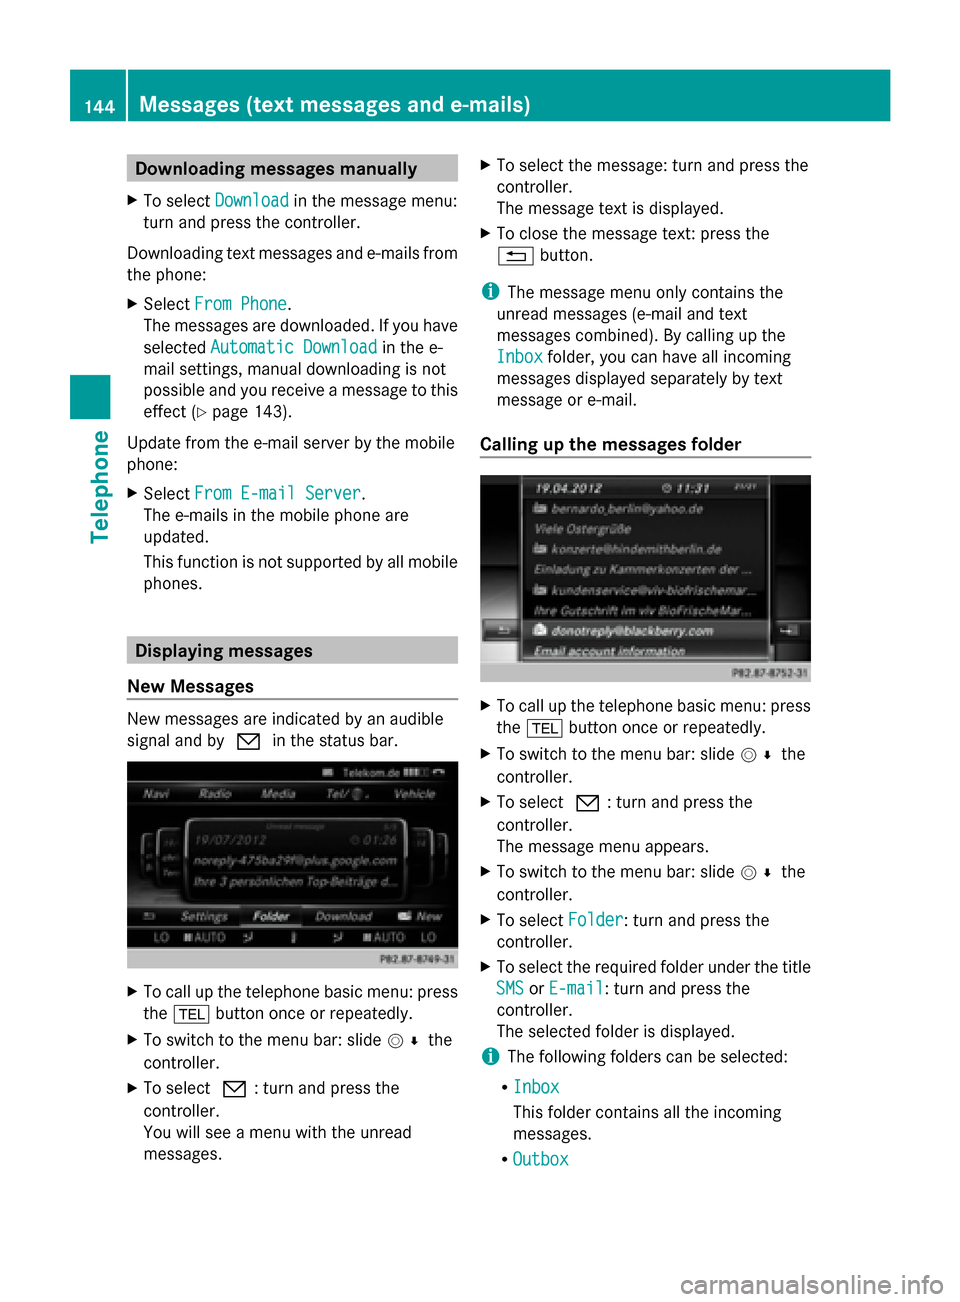
New Messages New messages are indicated by an audible
signal and by 0082in the status bar. X
To call up the telephone basic menu: press
the 002B button once or repeatedly.
X To switch to the menu bar: slide 005200C5the
controller.
X To select 0082: turn and press the
controller.
You will see a menu with the unread
messages. X
To select the message: turn and press the
controller.
The message text is displayed.
X To close the message text: press the
0038 button.
i The message menu only contains the
unread messages (e-mail and text
messages combined). By calling up the
Inbox
Inbox folder, you can have all incoming
messages displayed separately by text
message or e-mail.
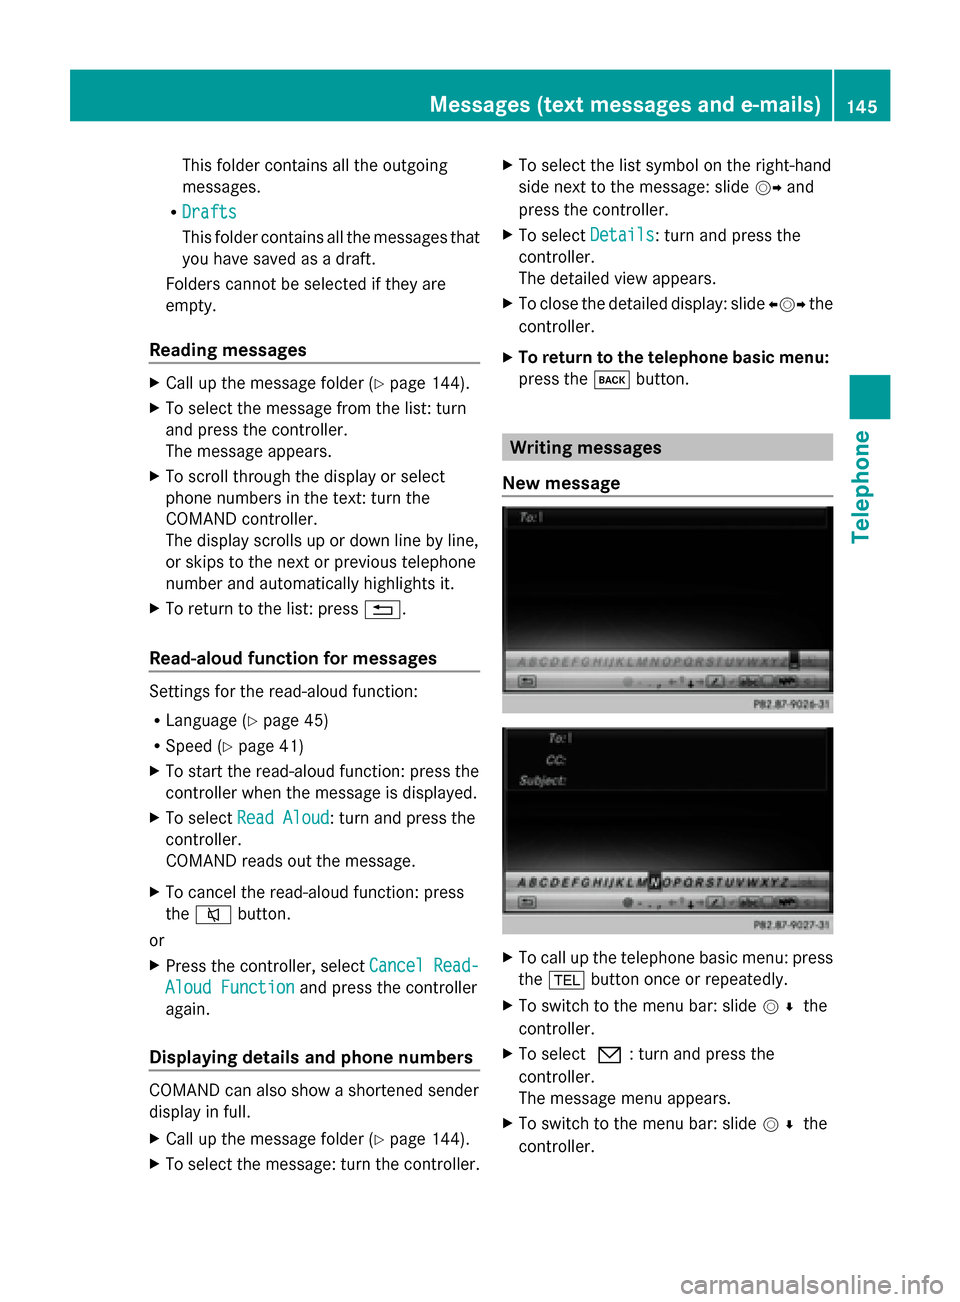
Calling up the messages folder X
To call up the telephone basic menu: press
the 002B button once or repeatedly.
X To switch to the menu bar: slide 005200C5the
controller.
X To select 0082: turn and press the
controller.
The message menu appears.
X To switch to the menu bar: slide 005200C5the
controller.
X To select Folder
Folder : turn and press the
controller.
X To select the required folder under the title
SMS SMS orE-mail
E-mail : turn and press the
controller.
The selected folder is displayed.
i The following folders can be selected:
R Inbox Inbox
This folder contains all the incoming
messages.
R Outbox Outbox 144
Messages (text
messages and e-mails)Telephone
Page 147 of 278
This folder contains all the outgoing
messages.
R Drafts Drafts
This folder contains all the messages that
you have saved as a draft.
Folders cannot be selected if they are
empty.
Reading messages X
Call up the message folder (Y page 144).
X To select the message from the list: turn
and press the controller.
The message appears.
X To scroll through the display or select
phone numbers in the text: turn the
COMAND controller.
The display scrolls up or down line by line,
or skips to the next or previous telephone
number and automatically highlights it.
X To return to the list: press 0038.
Read-aloud function for messages Settings for the read-aloud function:
R
Language (Y page 45)
R Speed (Y page 41)
X To start the read-aloud function: press the
controller when the message is displayed.
X To select Read Aloud
Read Aloud: turn and press the
controller.
COMAND reads out the message.
X To cancel the read-aloud function: press
the 0063 button.
or
X Press the controller, select Cancel Read-
Cancel Read-
Aloud Function
Aloud Function and press the controller
again.
Displaying details and phone numbers COMAND can also show a shortened sender
display in full.
X Call up the message folder (Y page 144).
X To select the message: turn the controller. X
To select the list symbol on the right-hand
side next to the message: slide 00520096and
press the controller.
X To select Details
Details: turn and press the
controller.
The detailed view appears.
X To close the detailed display: slide 009500520096the
controller.
X To return to the telephone basic menu:
press the 003Dbutton. Writing messages
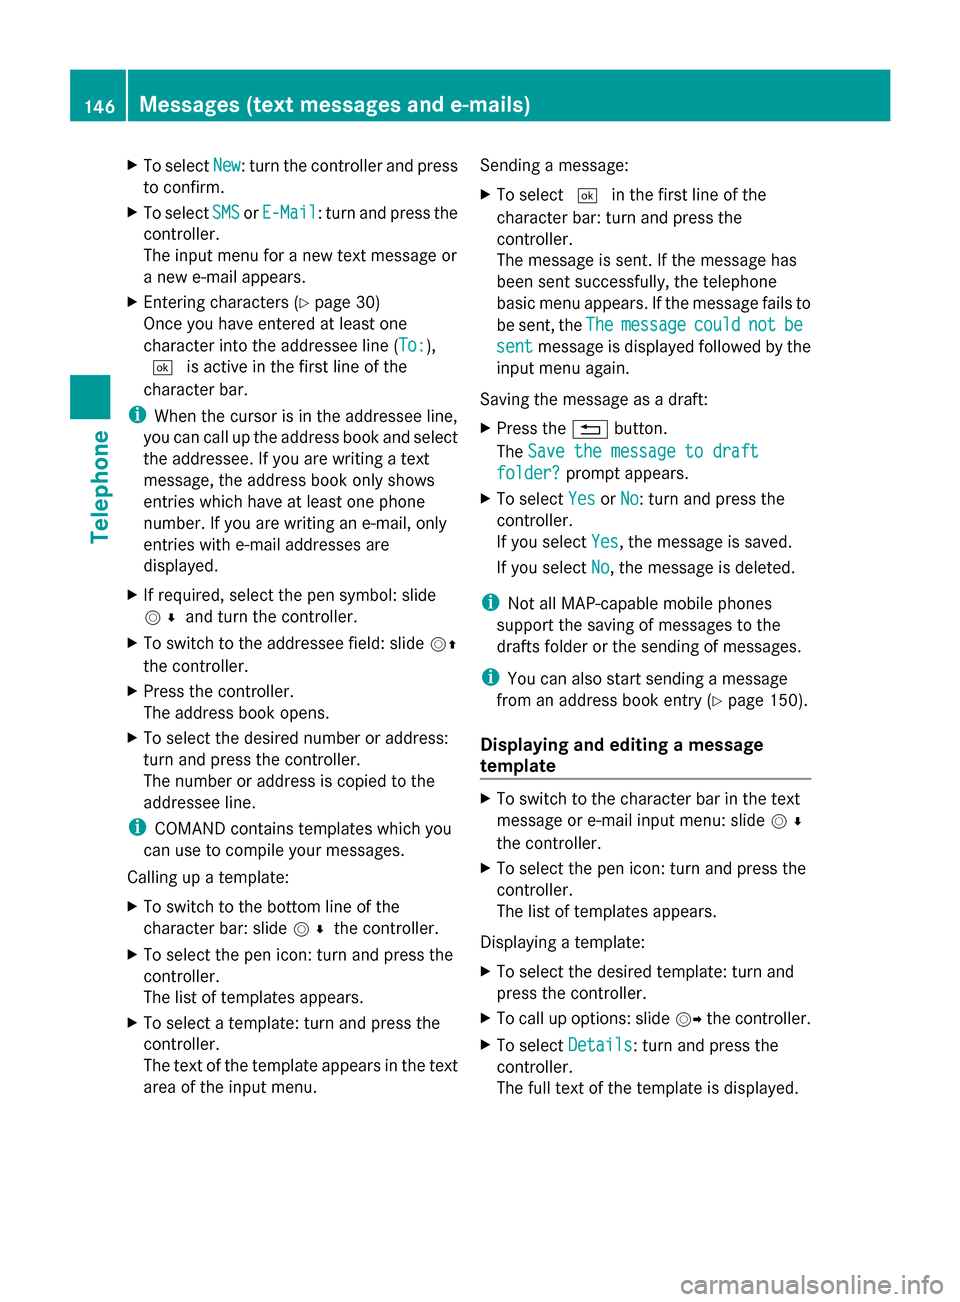
New message X
To call up the telephone basic menu: press
the 002B button once or repeatedly.
X To switch to the menu bar: slide 005200C5the
controller.
X To select 0082: turn and press the
controller.
The message menu appears.
X To switch to the menu bar: slide 005200C5the
controller. Messages (text messages and e-mails)
145Telephone Z
Page 148 of 278
X
To select New
New: turn the controller and press
to confirm.
X To select SMS
SMSorE-Mail
E-Mail: turn and press the
controller.
The input menu for a new text message or
a new e-mail appears.
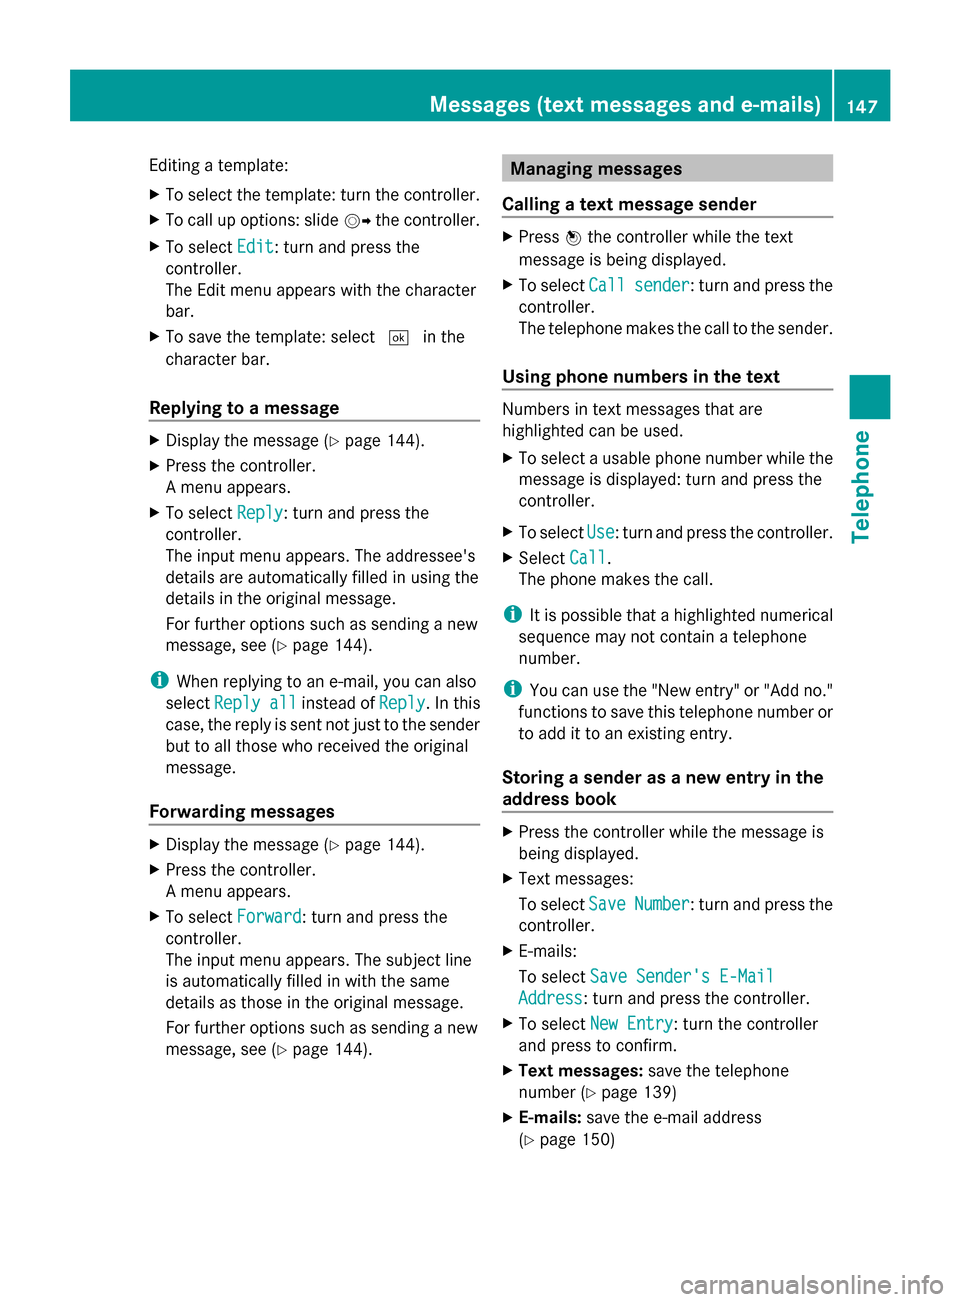
X Entering characters (Y page 30)
Once you have entered at least one
character into the addressee line (To: To:),
0054 is active in the first line of the
character bar.
i When the cursor is in the addressee line,
you can call up the address book and select
the addressee. If you are writing a text
message, the address book only shows
entries which have at least one phone
number. If you are writing an e-mail, only
entries with e-mail addresses are
displayed.
X If required, select the pen symbol: slide
005200C5 and turn the controller.
X To switch to the addressee field: slide 00520097
the controller.
X Press the controller.
The address book opens.
X To select the desired number or address:
turn and press the controller.
The number or address is copied to the
addressee line.
i COMAND contains templates which you
can use to compile your messages.
Calling up a template:
X To switch to the bottom line of the
character bar: slide 005200C5the controller.
X To select the pen icon: turn and press the
controller.
The list of templates appears.
X To select a template: turn and press the
controller.
The text of the template appears in the text
area of the input menu. Sending a message:
X
To select 0054in the first line of the
character bar: turn and press the
controller.
The message is sent. If the message has
been sent successfully, the telephone
basic menu appears. If the message fails to
be sent, the The
The message message could
couldnot
notbe
be
sent
sent message is displayed followed by the
input menu again.
Saving the message as a draft:
X Press the 0038button.
The Save the message to draft Save the message to draft
folder?
folder? prompt appears.
X To select Yes
YesorNo
No: turn and press the
controller.
If you select Yes Yes, the message is saved.
If you select No
No, the message is deleted.
i Not all MAP-capable mobile phones
support the saving of messages to the
drafts folder or the sending of messages.
i You can also start sending a message
from an address book entry (Y page 150).
Displaying and editing a message
template X
To switch to the character bar in the text
message or e-mail input menu: slide 005200C5
the controller.
X To select the pen icon: turn and press the
controller.
The list of templates appears.
Displaying a template:
X To select the desired template: turn and
press the controller.
X To call up options: slide 00520096the controller.
X To select Details Details: turn and press the
controller.
The full text of the template is displayed. 146
Messages (text messages and e-mails)Telephone
Page 149 of 278
Editing a template:
X
To select the template: turn the controller.
X To call up options: slide 00520096the controller.
X To select Edit Edit: turn and press the
controller.
The Edit menu appears with the character
bar.
X To save the template: select 0054in the
character bar.
Replying to a message X
Display the message (Y page 144).
X Press the controller.
A menu appears.
X To select Reply
Reply: turn and press the
controller.
The input menu appears. The addressee's
details are automatically filled in using the
details in the original message.
For further options such as sending a new
message, see (Y page 144).
i When replying to an e-mail, you can also
select Reply all Reply all instead ofReply
Reply. In this
case, the reply is sent not just to the sender
but to all those who received the original
message.
Forwarding messages X
Display the message (Y page 144).
X Press the controller.
A menu appears.
X To select Forward
Forward: turn and press the
controller.
The input menu appears. The subject line
is automatically filled in with the same
details as those in the original message.
For further options such as sending a new
message, see (Y page 144). Managing messages
Calling a text message sender X
Press 0098the controller while the text
message is being displayed.
X To select Call Callsender
sender: turn and press the
controller.
The telephone makes the call to the sender.
Using phone numbers in the text Numbers in text messages that are
highlighted can be used.
X
To select a usable phone number while the
message is displayed: turn and press the
controller.
X To select Use Use: turn and press the controller.
X Select Call Call.
The phone makes the call.
i It is possible that a highlighted numerical
sequence may not contain a telephone
number.
i You can use the "New entry" or "Add no."
functions to save this telephone number or
to add it to an existing entry.
Storing a sender as a new entry in the
address book X
Press the controller while the message is
being displayed.
X Text messages:
To select Save SaveNumber
Number: turn and press the
controller.
X E-mails:
To select Save Sender's E-Mail
Save Sender's E-Mail
Address Address: turn and press the controller.
X To select New Entry
New Entry: turn the controller
and press to confirm.
X Text messages: save the telephone
number (Y page 139)
X E-mails: save the e-mail address
(Y page 150) Messages (text messages and e-mails)
147Telephone Z
Page 150 of 278
Adding the sender to an address book
entry X
Press 0098the controller while the message
is being displayed.
X Text messages:
To select Save
Save Number Number : turn and press the
controller.
X E-mails:
To select Save Sender's E-Mail
Save Sender's E-Mail
Address Address: turn and press the controller.
X To select Add
Add: turn and press the controller.
X Proceed from the step "Selecting a
category" ( Ypage 137).
Deleting messages X
Call up the message folder ( Ypage 144).
X To select the message: turn and press the
controller.
X To select the list symbol on the right-hand
side next to the message: slide 00520096and
press the controller.
X To select Delete
Delete : turn and press the
controller.
A deletion prompt appears.
X To select Yes
Yes orNo No: turn and press the
controller.
If you select Yes
Yes , the message is deleted.
If you select No
No, the process will be
canceled.
i This delete function is not supported by
all mobile phones. The Delete Failed Delete Failed
message appears. Using the address book
Introduction
Always pay attention to traffic conditions.
Before starting the journey, familiarize
yourself with the address book functions.
Only use COMAND when the road and traffic
conditions permit. You could otherwise become involved in an accident in which you
or others could be injured.
The address book organizes and stores
entries that are entered from different
sources (mobile phone, memory card, USB
device, COMAND phone book, navigation
system).
You can use these entries to make telephone
calls and for navigation.
i Number of contacts in the address
book: the address book can store a total of
5000 contacts.
Of these:
R 2000 entries are reserved for
permanently saved contacts and
R 3000 entries are reserved for contacts
that you can load from the mobile phone.
i Display of mobile phone contacts:
contacts downloaded from the mobile
phone will no longer be displayed in the
address book if you disconnect the mobile
phone from COMAND. However, the
contact data of the last two mobile phones
connected are still stored in an internal
memory. When the relevant mobile phone
is reconnected, the contacts are displayed
immediately. When automatic download is
activated (Y page 153), COMAND
downloads the mobile phone contacts
again and updates the address book.
When the mobile phone is removed, only
the phone book entries from the mobile
phone are removed from the address book.
The remaining entries are retained. For this
reason, delete your personal data using the
reset function before selling your vehicle,
for example (Y page 48). Calling up the address book
Using the telephone button:
X Press the 002Bbutton one or more times. 148
Using the address bookTelephone
Page 152 of 278
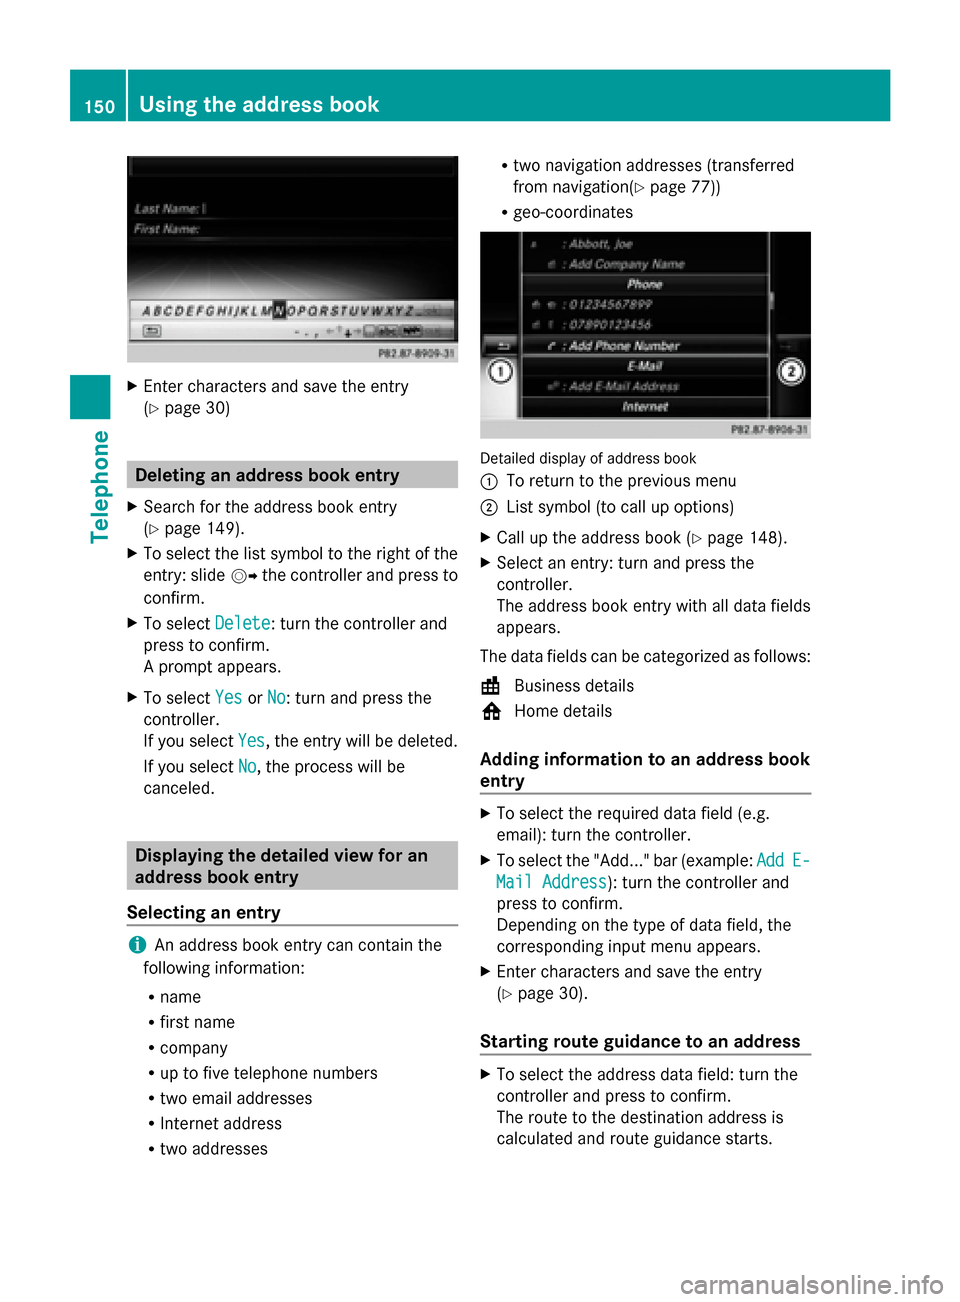
X
Enter characters and save the entry
(Y page 30) Deleting an address book entry
X Search for the address book entry
(Y page 149).
X To select the list symbol to the right of the
entry: slide 00520096the controller and press to
confirm.
X To select Delete
Delete : turn the controller and
press to confirm.
A prompt appears.
X To select Yes
Yes orNo No: turn and press the
controller.
If you select Yes
Yes , the entry will be deleted.
If you select No
No, the process will be
canceled. Displaying the detailed view for an
address book entry
Selecting an entry i
An address book entry can contain the
following information:
R name
R first name
R company
R up to five telephone numbers
R two email addresses
R Internet address
R two addresses R
two navigation addresses (transferred
from navigation( Ypage 77))
R geo-coordinates Detailed display of address book
0043
To return to the previous menu
0044 List symbol (to call up options)
X Call up the address book (Y page 148).
X Select an entry: turn and press the
controller.
The address book entry with all data fields
appears.
The data fields can be categorized as follows:
\ Business details
0088 Home details
Adding information to an address book
entry X
To select the required data field (e.g.
email): turn the controller.
X To select the "Add..." bar (example: Add AddE-
E-
Mail Address
Mail Address): turn the controller and
press to confirm.
Depending on the type of data field, the
corresponding input menu appears.
X Enter characters and save the entry
(Y page 30).
Starting route guidance to an address X
To select the address data field: turn the
controller and press to confirm.
The route to the destination address is
calculated and route guidance starts. 150
Using the address bookTelephone