ESP MERCEDES-BENZ S-Class 2014 W222 Comand Manual
[x] Cancel search | Manufacturer: MERCEDES-BENZ, Model Year: 2014, Model line: S-Class, Model: MERCEDES-BENZ S-Class 2014 W222Pages: 278, PDF Size: 6.65 MB
Page 70 of 278
Your COMAND equipment
These operating instructions describe all
standard and optional equipment available
for your COMAND system at the time of
purchase. Country-specific differences are
possible. Please note that your
COMAND system may not be equipped with
all the features described. This also applies to
safety-relevant systems and functions.
Therefore, the equipment on your COMAND
system may differ from that in the
descriptions and illustrations. Should you
have any questions concerning equipment
and operation, please consult an authorized
Mercedes-Benz Center. Introduction
Important safety notes
G
WARNING
If you operate information systems and
communication equipment integrated in the
vehicle while driving, you will be distracted
from traffic conditions. You could also lose
control of the vehicle. There is a risk of an
accident.
Only operate the equipment when the traffic
situation permits. If you are not sure that this
is possible, park the vehicle paying attention
to traffic conditions and operate the
equipment when the vehicle is stationary.
You must observe the legal requirements for
the country in which you are currently driving
when operating COMAND.
COMAND calculates the route to the
destination without taking account of the
following, for example:
R traffic lights
R stop and give way signs
R merging lanes
R parking or stopping in a no parking/no
stopping zone R
other road and traffic rules and regulations
R narrow bridges
COMAND can give incorrect navigation
commands if the actual street/traffic
situation does not correspond with the digital
map's data. Digital maps do not cover all
areas nor all routes in an area. For example,
a route may have been diverted or the
direction of a one-way street may have
changed.
For this reason, you must always observe
road and traffic rules and regulations during
your journey. Road and traffic rules and
regulations always have priority over the
system's driving recommendations.
Navigation announcements are intended to
direct you while driving without diverting your
attention from the road and driving.
Please always use this feature instead of
consulting the map display for directions.
Looking at the icons or map display can
distract you from traffic conditions and
driving, and increase the risk of an accident. General notes
Operational readiness of the navigation
system The navigation system must determine the
position of the vehicle before first use or
whenever operational status is restored.
Therefore, you may have to drive for a while
before precise route guidance is possible.
GPS reception Among other things, correct functioning of
the navigation system depends on GPS
reception. In certain situations, GPS
reception may be impaired, there may be
interference or there may be no reception at
all, e.g. in tunnels or parking garages.
i Using roof carriers may impair the correct
functioning of a roof antenna (phone,
satellite radio, GPS). 68
Int
roductionNavigation
Page 73 of 278

Route guidance is active: the destination has been entered, the route has been calculated.
The display shows the route, changes of direction and lane recommendations. Navigation
announcements guide you to your destination. X
To hide: press the 0038button.
or
X Slide 00970052the controller.
Full screen symbol 0043appears.
X Press the controller. Moving the map
Requirement: the map is in full screen mode, the menu is faded out (Y
page 70).
X Slide 009500520096,009700520064 or009100520078 the controller.
The crosshair is shown. The map moves in the corresponding direction under the crosshair. Int
roduction
71Navigation Z
Page 74 of 278
Basic settings
Setting route type and route options
X To switch to navigation mode: press the
00BE button.
X To show the menu: press the controller.
X Select Settings
Settings: turn and press the
controller.
X Select Route Settings
Route Settings.
X Select a route type.
A filled circle indicates the current
selection.
R
Active route guidance: COMAND
calculates a new route.
R Inactive route guidance: COMAND uses
the selection as the new setting.
i Route guidance active: a destination has
been entered and the route has been
calculated.
Route guidance inactive: no destination
has been entered yet and no route has been
calculated yet. Fast Route Fast Route COMAND calculates a route
with a short journey time.
Dynamic Dynamic
Traffic Traffic
Route Route Based on the
Fast Route
Fast Route
route type and includes
traffic reports on the route
for the route guidance. Economic Economic
Route Route COMAND calculates an
economical route. The
journey may take slightly
longer compared to taking
the fast route.
Short Short
Route Route COMAND calculates a
shorter route.
X
To calculate alternative routes: select
Calculate Alternative Routes Calculate Alternative Routes .
Switch the function on 0073or off 0053.
Function activated: after each route
calculation, route alternatives are offered that correspond to the local conditions
(Y
page 97).
i If desired, you can have COMAND
calculate alternative routes even during
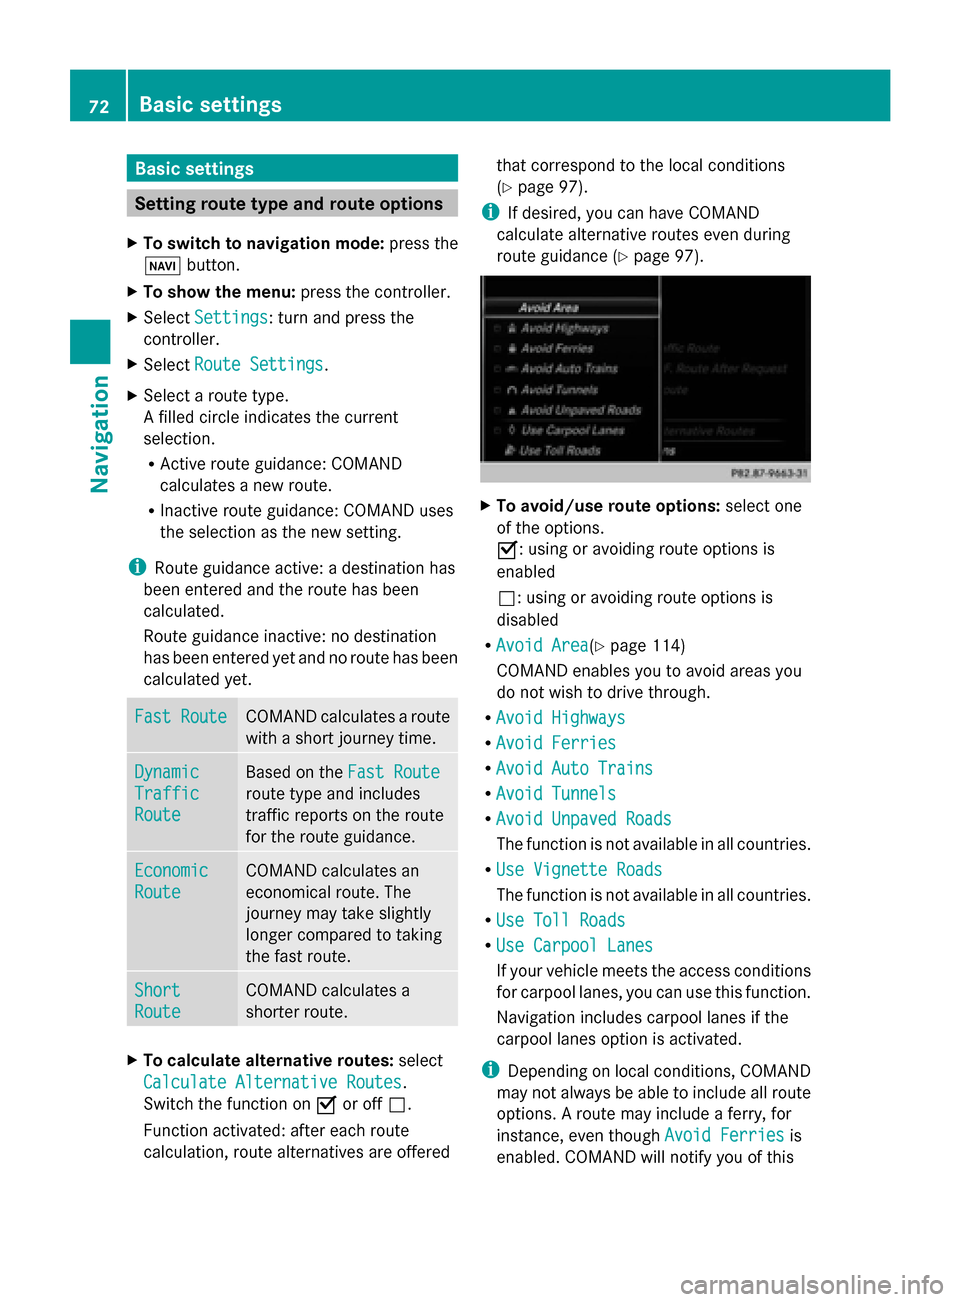
route guidance (Y page 97). X
To avoid/use route options: select one
of the options.
0073: using or avoiding route options is
enabled
0053: using or avoiding route options is
disabled
R Avoid Area Avoid Area(Y page 114)
COMAND enables you to avoid areas you
do not wish to drive through.
R Avoid Highways Avoid Highways
R Avoid Ferries
Avoid Ferries
R Avoid Auto Trains
Avoid Auto Trains
R Avoid Tunnels
Avoid Tunnels
R Avoid Unpaved Roads
Avoid Unpaved Roads
The function is not available in all countries.
R Use Vignette Roads Use Vignette Roads
The function is not available in all countries.
R Use Toll Roads Use Toll Roads
R Use Carpool Lanes
Use Carpool Lanes
If your vehicle meets the access conditions
for carpool lanes, you can use this function.
Navigation includes carpool lanes if the
carpool lanes option is activated.
i Depending on local conditions, COMAND
may not always be able to include all route
options. A route may include a ferry, for
instance, even though Avoid Ferries Avoid Ferriesis
enabled. COMAND will notify you of this 72
Basic settingsNavigation
Page 91 of 278
regulations always have priority over system
driving recommendations.
COMAND calculates the route to the
destination without taking account of the
following, for example:
R traffic lights
R stop and give way signs
R merging lanes
R parking or stopping in a no parking/no
stopping zone
R other road and traffic rules and regulations
R narrow bridges
COMAND may give differing navigation
commands if the actual street/traffic
situation does not correspond with the digital
map's data. For example, if the road layout or
the direction of a one-way street has been
changed.
For this reason, you must always observe
road and traffic rules and regulations during
your journey. Road and traffic rules and
regulations always have priority over the
system's driving recommendations.
Route guidance begins once a route has been
calculated (Y page 78).
COMAND guides you to your destination by
means of navigation announcements in the
form of audible navigation announcements
and route guidance displays.
The route guidance displays can be seen if the
display is switched to navigation mode.
If you do not follow the navigation
announcements or if you leave the calculated
route, COMAND automatically calculates a
new route to the destination.
If the digital map contains the corresponding
information, the following applies:
R during route guidance, COMAND tries to
avoid roads with restricted access. Those
roads, for example, that are closed to
through-traffic.
R roads that have time restrictions (e.g.
closed on Sundays and public holidays) are
considered for route guidance on days when they are open. For this purpose, the
relevant times must be correctly stored in
the database. Route guidance
89Navigation Z
Page 102 of 278
Traffic jam function
X
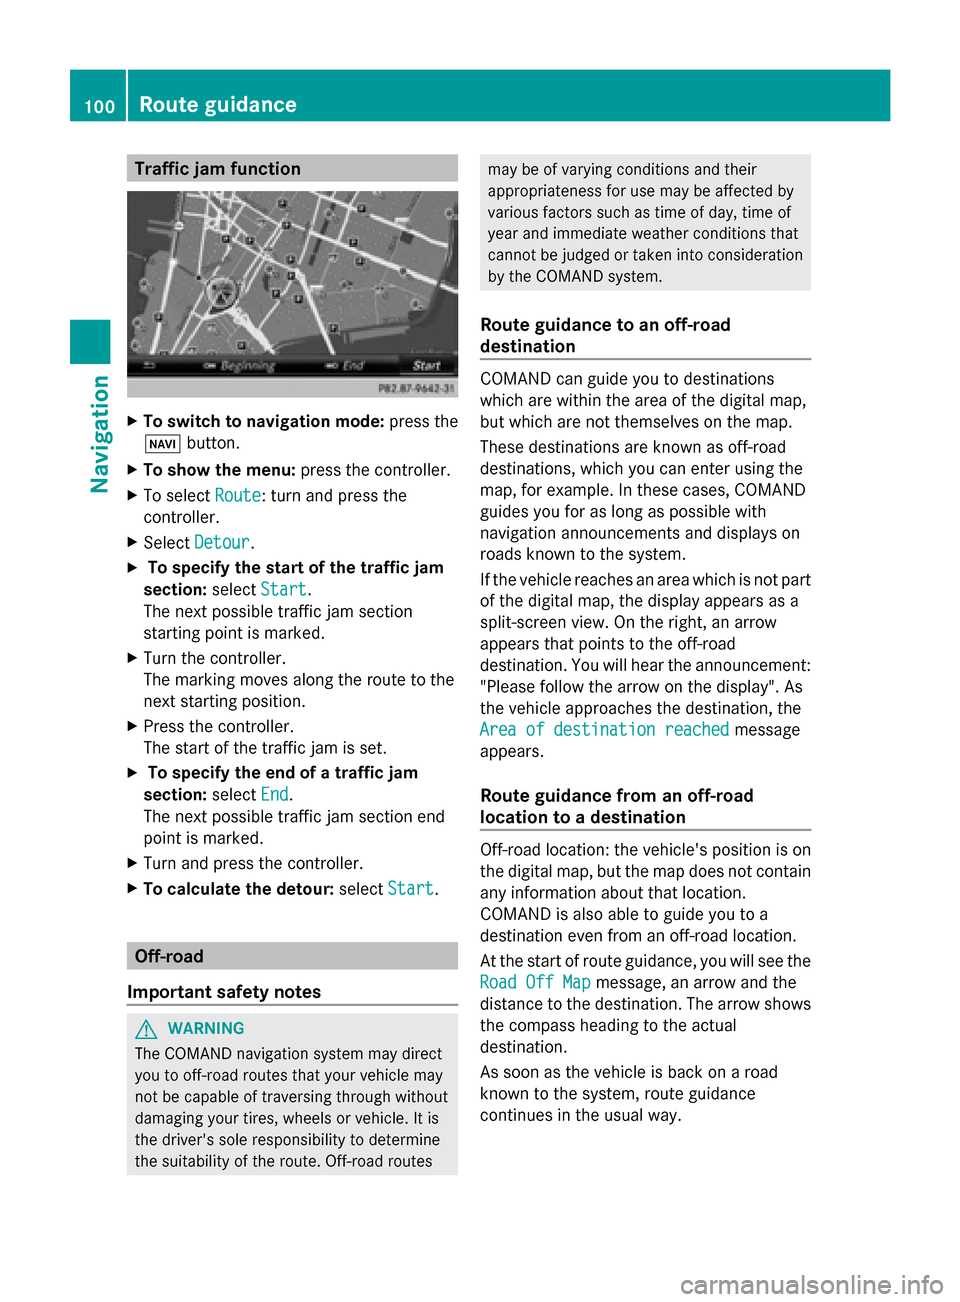
To switch to navigation mode: press the
00BE button.
X To show the menu: press the controller.
X To select Route
Route: turn and press the
controller.
X Select Detour
Detour .
X To specify the start of the traffic jam
section: selectStart
Start.
The next possible traffic jam section
starting point is marked.
X Turn the controller.
The marking moves along the route to the
next starting position.
X Press the controller.
The start of the traffic jam is set.
X To specify the end of a traffic jam
section: selectEnd
End .
The next possible traffic jam section end
point is marked.
X Turn and press the controller.
X To calculate the detour: selectStart Start. Off-road
Important safety notes G
WARNING
The COMAND navigation system may direct
you to off-road routes that your vehicle may
not be capable of traversing through without
damaging your tires, wheels or vehicle. It is
the driver's sole responsibility to determine
the suitability of the route. Off-road routes may be of varying conditions and their
appropriateness for use may be affected by
various factors such as time of day, time of
year and immediate weather conditions that
cannot be judged or taken into consideration
by the COMAND system.
Route guidance to an off-road
destination COMAND can guide you to destinations
which are within the area of the digital map,
but which are not themselves on the map.
These destinations are known as off-road
destinations, which you can enter using the
map, for example. In these cases, COMAND
guides you for as long as possible with
navigation announcements and displays on
roads known to the system.
If the vehicle reaches an area which is not part
of the digital map, the display appears as a
split-screen view. On the right, an arrow
appears that points to the off-road
destination. You will hear the announcement:
"Please follow the arrow on the display". As
the vehicle approaches the destination, the
Area of destination reached Area of destination reached
message
appears.
Route guidance from an off-road
location to a destination Off-road location: the vehicle's position is on
the digital map, but the map does not contain
any information about that location.
COMAND is also able to guide you to a
destination even from an off-road location.
At the start of route guidance, you will see the
Road Off Map Road Off Map message, an arrow and the
distance to the destination. The arrow shows
the compass heading to the actual
destination.
As soon as the vehicle is back on a road
known to the system, route guidance
continues in the usual way. 100
Route guidanceNavigation
Page 110 of 278
Map functions
General notes
Company logos displayed on the map are trademarks of the respective companies and used
solely for the purpose of indicating the locations of these companies. The use of such logos
on the map does not indicate approval of, support of or advertising by these companies for
the navigation system itself. Map settings
Setting the map scale Requirement: the map is in full screen mode, the menu is faded out (Y
page 70).
The lower left-hand section of the map shows the currently set map scale and compass needle.
Right-hand-drive vehicles: the currently set map scale and compass needle are displayed in
the lower right-hand section of the map.
Displaying the map in full screen mode
X To hide the menu: press the 0038button.
or
X Slide 00970052and press the controller.
X To set the map scale: as soon as you turn the controller, the scale bar appears on the
bottom of the display.
X Turn the controller until the desired scale is set.
The needle points to the currently selected scale.
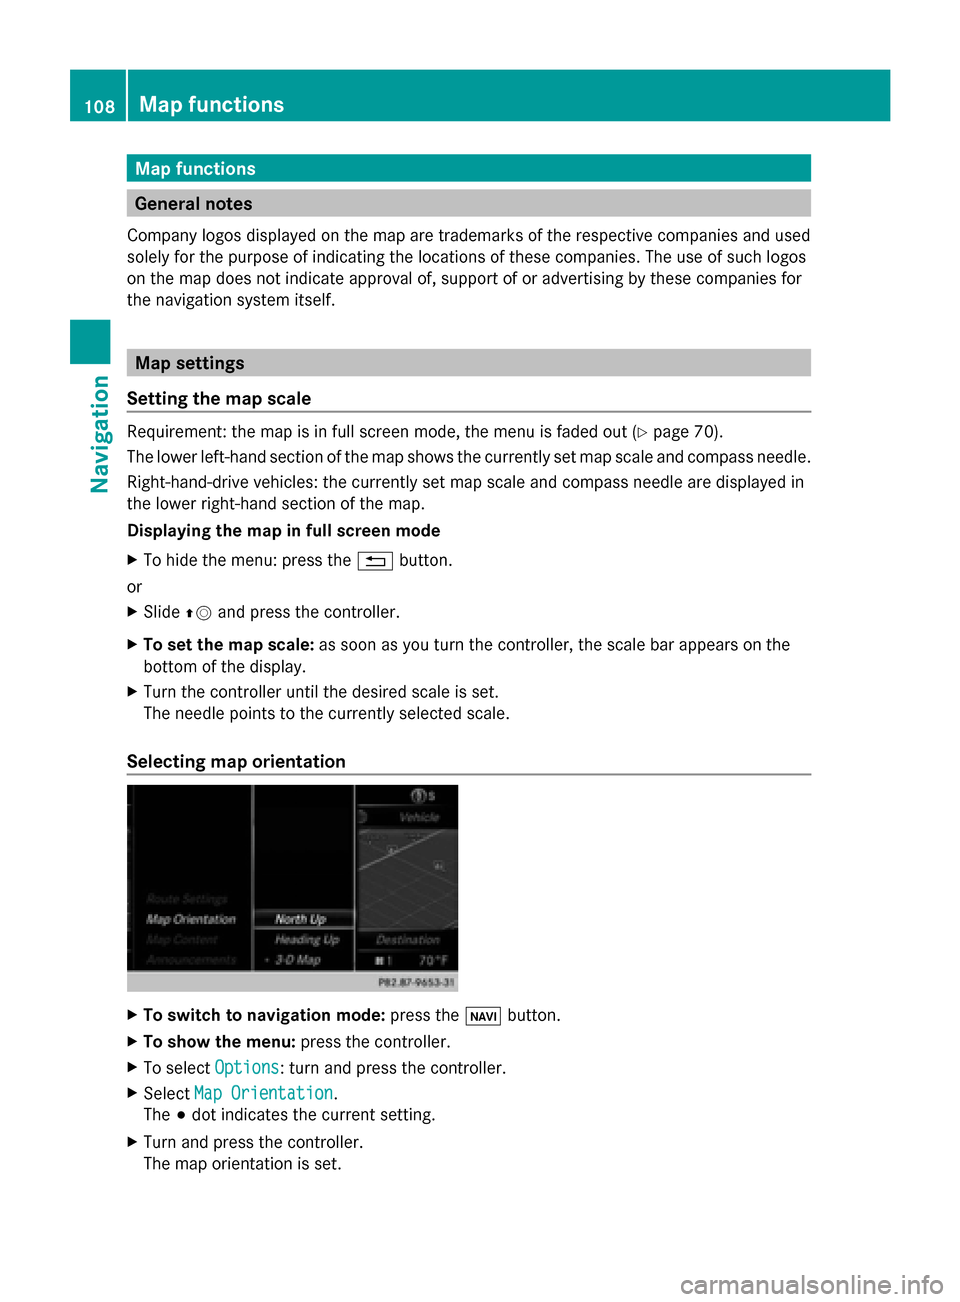
Selecting map orientation X
To switch to navigation mode: press the00CBbutton.
X To show the menu: press the controller.
X To select Options
Options : turn and press the controller.
X Select Map Orientation
Map Orientation.
The 003Bdot indicates the current setting.
X Turn and press the controller.
The map orientation is set. 108
Map functionsNavigation
Page 133 of 278
i
You can also accept a call as described
above when another main function is
switched on in COMAND. Once you have
accepted the call, the display switches to
the telephone display. After the call is
finished, you see the display of the previous
main application again.
The display does not switch to telephone
mode if you:
R accept the call via the Voice Control
System (see the separate operating
instructions).
R accept the call using the 0061button on
the multifunction steering wheel
Rejecting a call X
Press the 0076button on COMAND or on
the multifunction steering wheel. Making a call
Using the number keypad X
Call up the telephone basic menu
(Y page 129).
X Enter the digits using the number keypad.
i As soon as one of the numbers is touched,
the corresponding button is highlighted in
the display.
X To connect the call: press the0061
button on COMAND or on the multifunction
steering wheel.
Using the telephone basic menu X
Call up the telephone basic menu
(Y page 129).
X To select all numbers one after the other:
turn and press the controller each time.
Dialing a number:
X Press the 0061button on COMAND or on
the multifunction steering wheel. Redial X
Call up the telephone basic menu
(Y page 129).
X To select °from the character list: turn
the controller and press to confirm.
or
X If the telephone basic menu is displayed,
press the 0061button on COMAND.
The list of dialed numbers appears. The
most recently dialed number is at the top.
X To select a call: turn the controller.
X To make a call: press the controller.
Using the call list or COMAND phone
book X
Open a call list and select an entry
(Y page 138).
or
X Call up the COMAND phone book and
select an entry (Y page 135).
X To make a call: press the controller or the
0061 button.
Making a call via speed dial You can save entries from the phone book in
the speed dial list and call them using speed
dial numbers (Y
page 141).
Option 1:
X Hold down one of the number keys for
longer than two seconds.
The telephone basic menu displays the
selected entry. This initiates dialing.
Option 2:
X To select a digit from the digit bar in the
basic telephone menu: turn the controller.
X Press the controller for longer than two
seconds.
The telephone basic menu displays the
selected entry. This initiates dialing. Using the telephone
131Telephone Z
Page 134 of 278
Option 3:
X
Call up the telephone basic menu
(Y page 129).
X To switch to the menu bar: slide 00520064the
controller.
X To select Call Lists Call Lists: turn and press the
controller.
A menu appears.
X Select Speed Dial Preset List
Speed Dial Preset List.
The speed dial list appears.
X Select a preset.
The telephone basic menu displays the
selected entry. This initiates dialing. Functions available during a call
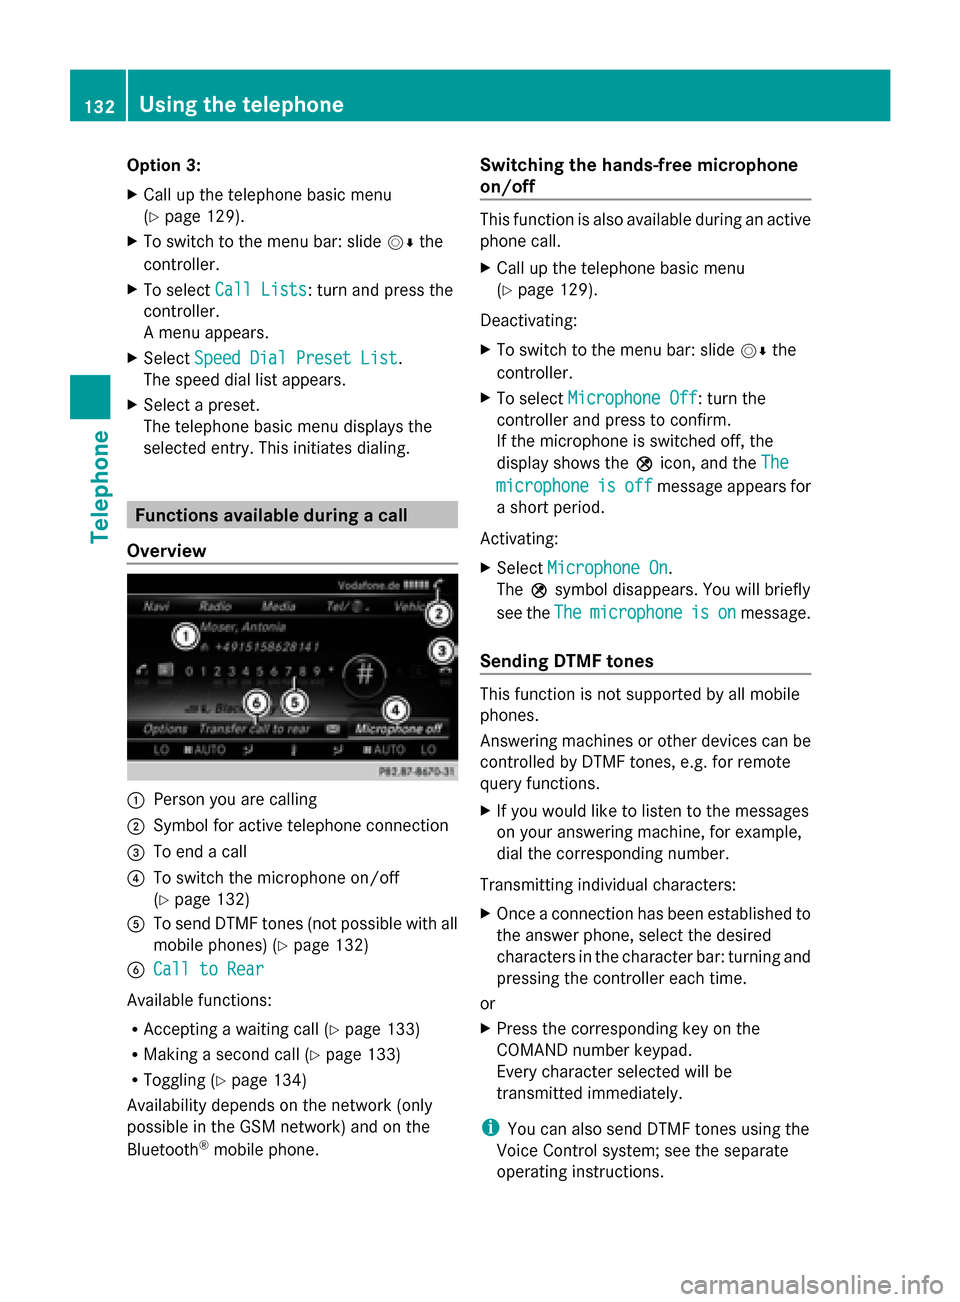
Overview 0043
Person you are calling
0044 Symbol for active telephone connection
0087 To end a call
0085 To switch the microphone on/off
(Ypage 132)
0083 To send DTMF tones (not possible with all
mobile phones) (Y page 132)
0084 Call to Rear Call to Rear
Available functions:
R Accepting a waiting call (Y page 133)
R Making a second call (Y page 133)
R Toggling (Y page 134)
Availability depends on the network (only
possible in the GSM network) and on the
Bluetooth ®
mobile phone. Switching the hands-free microphone
on/off This function is also available during an active
phone call.
X
Call up the telephone basic menu
(Y page 129).
Deactivating:
X To switch to the menu bar: slide 00520064the
controller.
X To select Microphone Off Microphone Off: turn the
controller and press to confirm.
If the microphone is switched off, the
display shows the 004Dicon, and the The The
microphone
microphone is
isoff
off message appears for
a short period.
Activating:
X Select Microphone On Microphone On.
The 004Dsymbol disappears. You will briefly
see the The
Themicrophone
microphone is
ison
onmessage.
Sending DTMF tones This function is not supported by all mobile
phones.
Answering machines or other devices can be
controlled by DTMF tones, e.g. for remote
query functions.
X
If you would like to listen to the messages
on your answering machine, for example,
dial the corresponding number.
Transmitting individual characters:
X Once a connection has been established to
the answer phone, select the desired
characters in the character bar: turning and
pressing the controller each time.
or
X Press the corresponding key on the
COMAND number keypad.
Every character selected will be
transmitted immediately.
i You can also send DTMF tones using the
Voice Control system; see the separate
operating instructions. 132
Using the telephoneTelephone
Page 140 of 278
If you select
No
No, the process will be
canceled.
X To select the number to be overwritten:
turn the controller and press to confirm.
An input menu appears. The data field for
entering the new phone number is
highlighted.
X Enter characters and save the entry
(Y page 30). Storing the phone number as a speed
dial number
You can assign a speed dial to an existing
phone number.
X To select an entry from the selection list:
turn the controller and press to confirm.
X To select the desired telephone number:
turn the controller.
X To select the list symbol to the right of the
entry: slide 00520096the controller and press to
confirm.
X To select Speed Dial
Speed Dial: turn the controller
and press to confirm.
You can now store the number in one of the
ten speed dial presets (Y page 141).Using call lists
Introduction
When making calls using COMAND, incoming
and outgoing calls (including missed calls) are
stored in separate lists. Call lists are not
available unless a mobile phone is connected
to COMAND.
COMAND supports the PBAP Bluetooth ®
profile. The system behavior differs as
follows:
R Bluetooth ®
telephone with PBAP
Bluetooth ®
profile:
The call lists are downloaded automatically
from the mobile phone by COMAND as soon as the mobile phone is connected to
COMAND.
R Bluetooth ®
telephone without PBAP
Bluetooth ®
profile:
The call lists are created, displayed and
stored by COMAND.
i For Bluetooth ®
telephones without the
PBAP Bluetooth ®
profile, the call lists in
COMAND are not synchronized with those
on your mobile phone. These calls may or
may not be listed on your mobile phone,
depending on the model.
i If no mobile phone is connected, then the
Call Lists
Call Lists menu item is grayed out and
cannot be selected. If you connect a mobile
phone other than the previous one to
COMAND the previously available call lists
will be deleted automatically. The call lists
are still available on the mobile phone itself.
i If COMAND has not saved any call lists for
the phone connected: you cannot select
the respective menu items until calls have
been received or made.
Displaying missed calls in the COMAND
display is not supported by all mobile
phones. Opening the call list and selecting an
entry
X To call up the basic telephone menu: press
the 002B button one or more times.
X To switch to the menu bar: slide 00520064the
controller.
X To select Call Lists Call Lists: turn and press the
controller.
A menu appears.
X To select Entered EnteredorSelected
Selected: turn the
controller and press to confirm.
The corresponding list appears. 138
Using call listsTelephone
Page 151 of 278
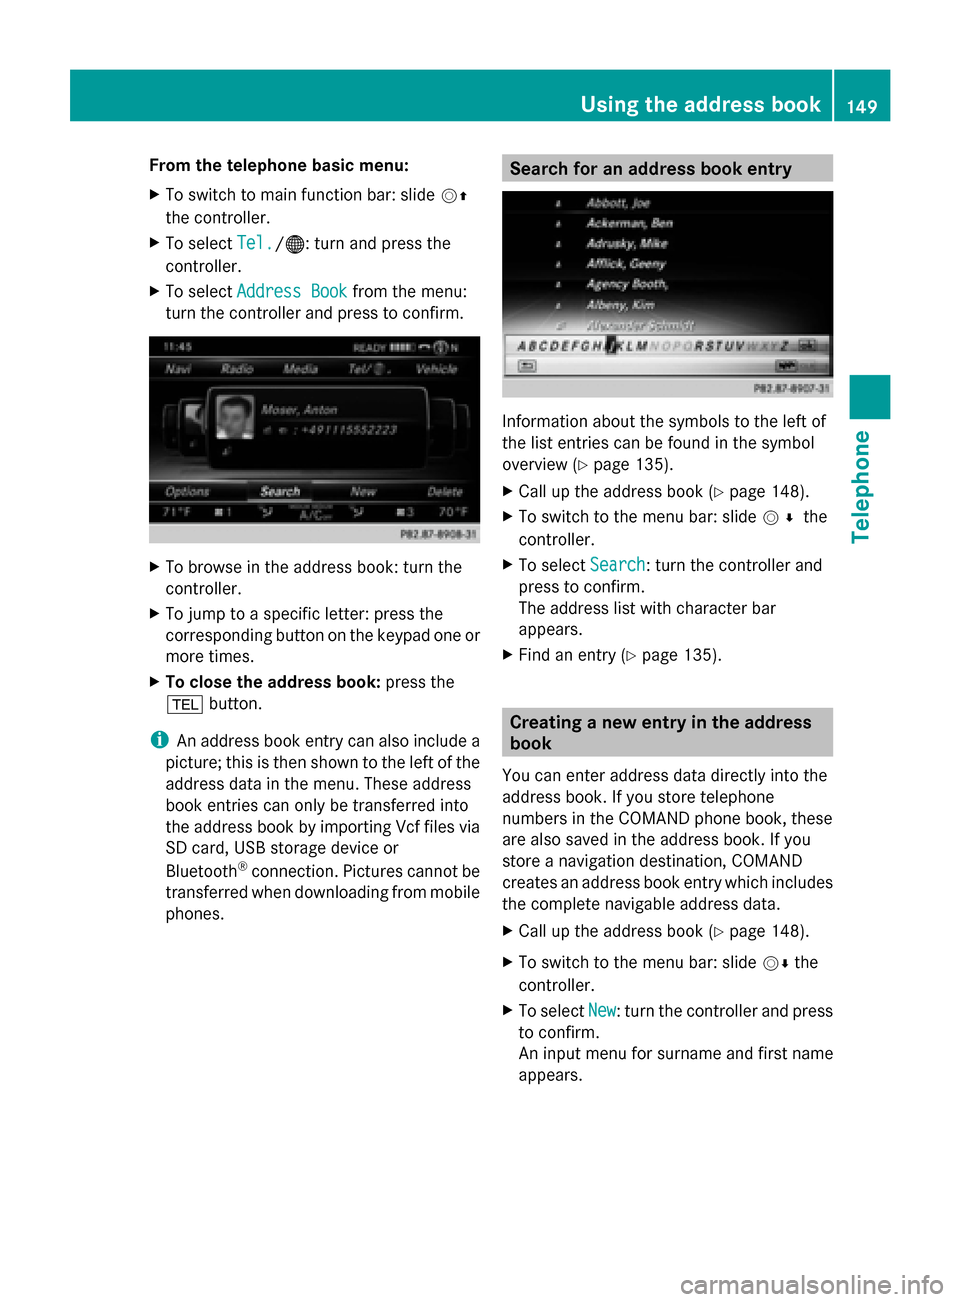
From the telephone basic menu:
X
To switch to main function bar: slide 00520097
the controller.
X To select Tel.
Tel./00A7 : turn and press the
controller.
X To select Address Book Address Book from the menu:
turn the controller and press to confirm. X
To browse in the address book: turn the
controller.
X To jump to a specific letter: press the
corresponding button on the keypad one or
more times.
X To close the address book: press the
002B button.
i An address book entry can also include a
picture; this is then shown to the left of the
address data in the menu. These address
book entries can only be transferred into
the address book by importing Vcf files via
SD card, USB storage device or
Bluetooth ®
connection. Pictures cannot be
transferred when downloading from mobile
phones. Search for an address book entry
Information about the symbols to the left of
the list entries can be found in the symbol
overview (Y
page 135).
X Call up the address book (Y page 148).
X To switch to the menu bar: slide 005200C5the
controller.
X To select Search
Search : turn the controller and
press to confirm.
The address list with character bar
appears.
X Find an entry (Y page 135). Creating a new entry in the address
book
You can enter address data directly into the
address book. If you store telephone
numbers in the COMAND phone book, these
are also saved in the address book. If you
store a navigation destination, COMAND
creates an address book entry which includes
the complete navigable address data.
X Call up the address book (Y page 148).
X To switch to the menu bar: slide 00520064the
controller.
X To select New
New : turn the controller and press
to confirm.
An input menu for surname and first name
appears. Using the address book
149Telephone Z