ESP MERCEDES-BENZ S-Class 2014 W222 Comand Manual
[x] Cancel search | Manufacturer: MERCEDES-BENZ, Model Year: 2014, Model line: S-Class, Model: MERCEDES-BENZ S-Class 2014 W222Pages: 278, PDF Size: 6.65 MB
Page 258 of 278
see a corresponding display in the display/
selection window.
i If you switch the data carrier which you
are currently listening to, the Normal
Normal
Track Sequence
Track Sequence option is activated
automatically. If an option is selected, it
remains selected after the system is
switched on or off. Switching track information on/off
If the function is switched on, the information
saved in the audio files, such as track, artist
or album, will be shown (if available).
If the function is switched off, the names of
the files and folders on the disc are shown.
X Select Options
Options using the 006400590065
buttons and press the 008Bbutton to confirm.
X Select Display Track Information
Display Track Information
using the 00630064 buttons and press the
008B button to confirm.
The function is switched on 0073or off 0053,
depending on the previous status. Video DVD mode
Important safety notes
G
WARNING
The CD/DVD drive is a class 1 laser product.
If you open the CD/DVD drive housing, you
could be exposed to invisible laser radiation.
This laser radiation could damage your retina.
There is a risk of injury.
Never open the housing. Always have
maintenance and repair work carried out at a
qualified specialist workshop. General notes
DVD playback conditions Playback problems may occur when playing
copied discs. There is a large variety of discs,
DVD authoring software, writing software and writers available. This variety means that
there is no guarantee that the system will be
able to play video DVDs you have copied
yourself.
Further information (Y
page 221).
Function restrictions Depending on the DVD, certain functions or
actions may be temporarily blocked or not
function at all. As soon as you try to activate
these functions, you will see the
0047symbol
in the display. Switching to video DVD mode
X Insert a video DVD (Y page 244).
The system loads the disc.
If disc mode was the last mode selected, it
will now be active.
X Manually switch to video DVD mode:
repeatedly press the 00FDbutton on the
remote control until the video DVD mode is
switched on.
If the video DVD fulfills the playback
criteria, the film starts automatically or the
DVD menu appears. If the DVD menu
appears, you must start the film manually.
X Select the corresponding menu item in the
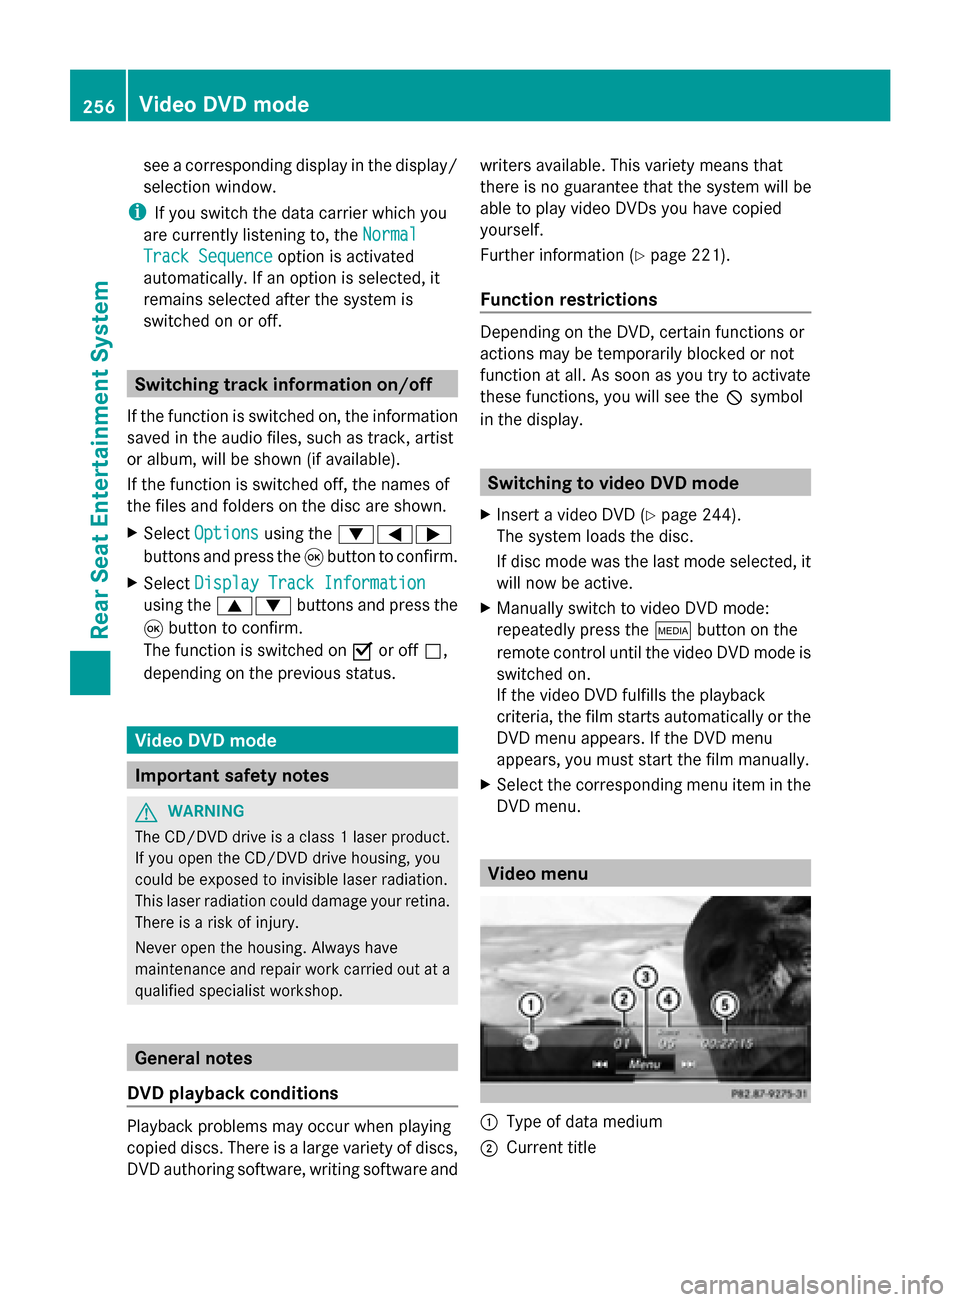
DVD menu. Video menu
0043
Type of data medium
0044 Current title 256
Video DVD modeRear Seat Entertainment System
Page 260 of 278
Selecting a scene/chapter
General notes Observe the information on DVD video mode
(Y page 226).
Skipping forwards/backwards X
Press 0059or0065 on the remote control.
The control menu appears for
approximately eight seconds.
Selecting a scene/chapter directly These examples illustrate how to select
scene/chapter 5.
X
Option 1: while the film is playing, press
the 007E button on the remote control.
X Press the corresponding number key, such
as 5.
X Option 2: while the film is playing, press
the 008Bbutton on the remote control and
show the menu.
X Select Menu
Menu and press the 008Bbutton to
confirm.
The DVD menu appears.
X Select Scene Selection
Scene Selection and press the
008B button to confirm.
X Using button 0063or0064, select 5
5 and
press the 008Bbutton to confirm.
In both cases, playback will begin from the
5th scene/chapter after a brief pause. Selecting a film/title
Option 1:
X Press the 008Bbutton on the remote control
and show the menu.
X Select Menu
Menu using the
0063006400590065 buttons on the
remote control and press the 008Bbutton to
confirm.
The DVD menu appears. X
Select Track Selection Track Selection using the
0063006400590065 buttons on the
remote control and press the 008Bbutton to
confirm.
X To call up the selection list: press the
008B button.
X Select a film/title.
Option 2:
Example: selecting film 2
X Press button 2.
After a brief pause, the second film is
played. DVD menu
Calling up the DVD menu The DVD menu is the menu stored on the DVD
itself. It is structured in various ways
according to the individual DVD and permits
certain actions and settings.
In the case of multi-language DVDs, for
example, you can change the DVD language
in the DVD menu.
X Press the 008Bbutton on the remote control
and show the menu.
X Select Menu Menuusing the
0063006400590065 buttons on the
remote control and press the 008Bbutton to
confirm.
The DVD menu appears.
Selecting menu items in the DVD menu X
Select a menu item using the
0063006400590065 buttons on the
remote control and press the 008Bbutton to
confirm.
X Select Select
Select using the
0063006400590065 buttons on the258
Video DVD modeRear Seat Entertainment System
Page 261 of 278
remote control and press the
008Bbutton to
confirm.
The system executes the function or shows
a submenu.
X If available, additional options can now be
selected.
The system then switches back to the DVD
menu.
i Menu items which cannot be selected are
shown in gray.
i Depending on the DVD, certain menu
items may not function. For example, the
menu items:
R Back (to movie) Back (to movie)
R Play
Play
R Stop
Stop
R 0048
R 0049
R Go Up
Go Up.
To indicate this, the 0047symbol then
appears in the display.
Stopping a film or skipping to the
beginning or end of a scene X
Select any menu item from the DVD menu.
The menu appears.
X To stop the film: select theStop Stopmenu
item and press the 008Bbutton on the remote
control to confirm.
X To skip to the end of a scene: select the
0049 menu item and press 008Bto confirm.
X To skip to the start of a scene: select the
0048 menu item and press 008Bto confirm.
Moving up one level in the DVD menu X
Show the DVD menu.
X Press the 0038back button on the remote
control or select the corresponding menu
item in the DVD menu. Back to the movie X
Press the 0038button repeatedly until you
see the movie. Setting the audio format
This function is not available on all DVDs. If it
is available, you can set the audio language
or the audio format. The number of settings
is determined by the DVD content. It may also
be possible to access the settings from the
DVD menu.
X Press the 008Bbutton on the remote control
and show the menu.
X Select DVD-Video
DVD-Video using the
0063006400590065 buttons on the
remote control and press the 008Bbutton to
confirm.
X Select DVD Functions
DVD Functions and press the008B
button to confirm.
X Select Audio Language
Audio Language and press the008B
button to confirm.
A menu appears after a short while.
The 0036dot in front of an entry indicates the
currently selected language.
X Select the language using the 00630064
buttons and press the 008Bbutton to confirm.
X To exit the menu: press the0059
or 0065 button. Subtitles and camera angle
These functions are not available on all DVDs.
The number of subtitle languages and camera
angles available depends on the content of
the DVD. It may also be possible to access
the settings from the DVD menu.
X Press the 008Bbutton on the remote control
and show the menu.
X Select Video DVD
Video DVD using the
0063006400590065 buttons on the
remote control and press the 008Bbutton to
confirm. Video DVD mode
259Rear Seat Entertainment System Z
Page 262 of 278
X
Select DVD Functions
DVD Functions and press the008B
button to confirm.
X Select Subtitles
Subtitles orCamera Angle
Camera Angle and
press the 008Bbutton to confirm.
In both cases, a menu appears after a few
seconds. The 0036dot in front of an entry
indicates the current setting.
X Select the setting using the 00630064
buttons and press the 008Bbutton to confirm.
X To exit the menu: press the0059
or 0065 button. Interactive content
DVDs can also contain interactive content
(e.g. a video game). In a video game, you may
be able to influence events by selecting and
triggering actions. The type and number of
actions depend on the DVD.
X Select an action using the
006300650064 buttons on the
remote control and press the 008Bbutton to
execute it.
A menu appears and the first entry,
Select
Select , is highlighted.
X Press the 008Bbutton. AUX mode
General information
You can connect an external video source in
the rear compartment.
Depending on the vehicle model and
equipment level, the AUX jacks are found:
R in the stowage box between the rear seats
or
R in the rear-compartment armrest
(Y page 245).
Please see the corresponding operating
instructions for information on how to
operate the external video source. For further details about external video
sources, please consult an authorized
Mercedes-Benz Center. Connecting AUX equipment
Audio and video connection X
Insert the audio plugs for the left and right
signals into the corresponding Land R
jacks.
X Insert the video plug into the Vjack. Activating AUX mode
AUX drive X
Select Aux Auxusing the 006300590065
buttons on the remote control and press
the 008Bbutton to confirm.
The AUX source is switched on once the
AUX device is active. 260
AUX modeRear Seat Entertainment System
Page 267 of 278
X
Select a location, e.g. Daytona Beach
Daytona Beach.
The information chart shows the weather
forecast for the selected area. The data is
supplied by the nearest weather station.
Option 2: selecting the area in the
weather map X
Call up the weather map (Y page 265).
X Move the weather map so that the
crosshair is over the desired area
(Y page 265).
X Press the controller.
The information chart shows the weather
forecast for the selected area. The data is
supplied by the nearest weather station. Memory functions
Storing the area in the weather memory You can save locations that are called up
frequently in ten preset positions (0, 1-9) in
the weather memory.
X In the weather memory: select the area
for the weather forecast (Y page 263).
The selected location appears at the top in
the status bar.
X To select Position
Position in the information
chart: turn and press the controller.
X Select Presets Presets.
X Select a preset using the controller.
X Press and hold the controller until you hear
a tone.
The area is entered on the selected preset.
X To store rapidly: in the daily forecast
(Y page 262) press and hold a number key,
e.g. 0082, until the preset position number
is shown in the status bar in front of the
area name.
i You can also use this function in the five-
day forecast (Y page 262), and in the
detailed information view (Y page 263).Selecting an area from the weather
memory X
To select directly from the weather
memory: selectPosition Position in the
information chart: turn and press the
controller.
X Select Presets Presets.
X Select the memory position which contains
the location you require.
The weather data for the selected area is
displayed.
X Rapid selection: if there is an entry
available in the weather memory, e.g. when
the daily forecast is shown, briefly press a
number key, such as 0082.
The weather data for the selected area is
displayed. Weather map
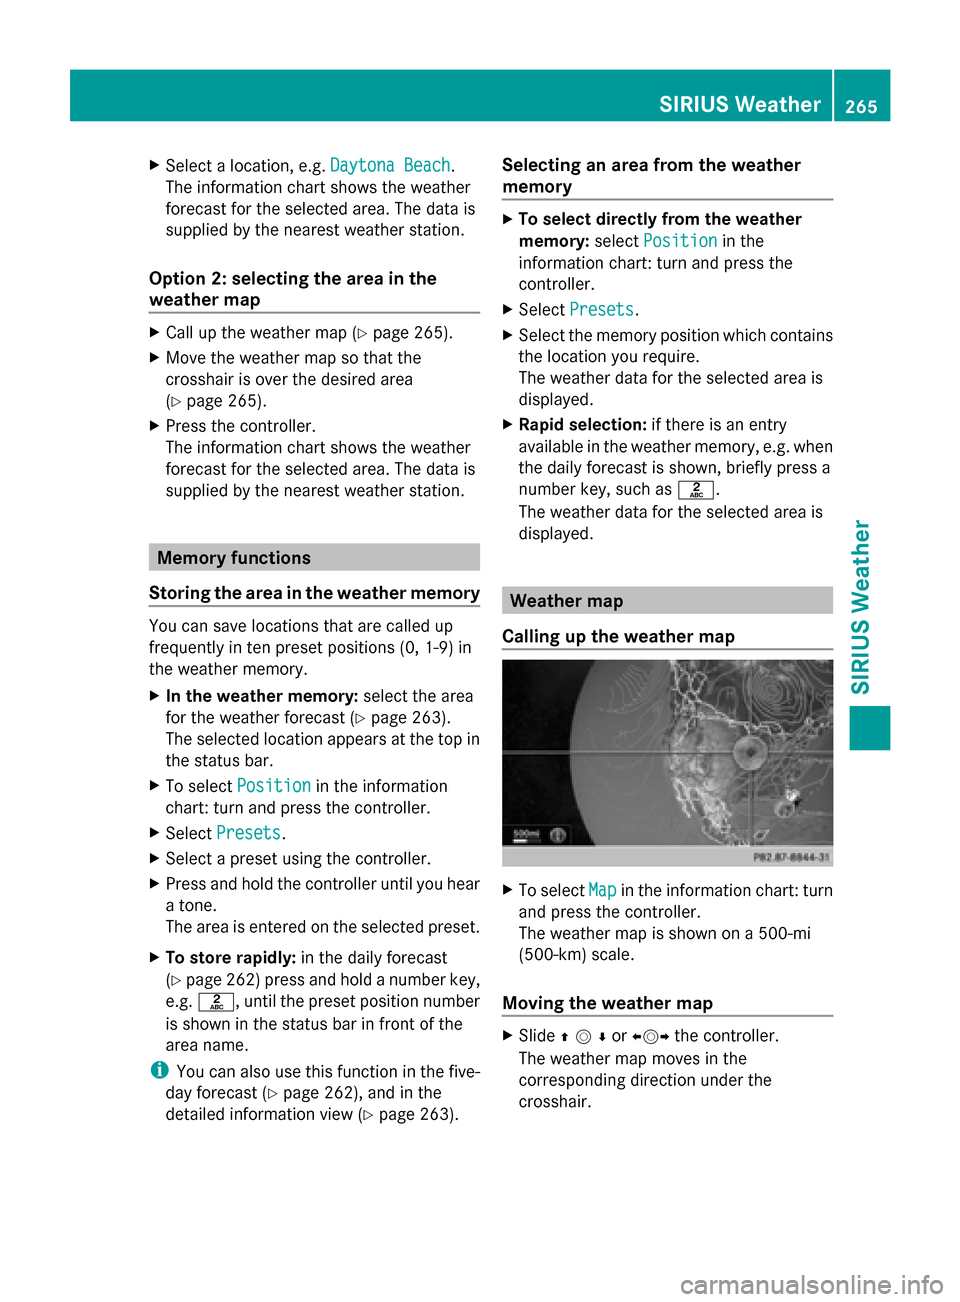
Calling up the weather map X
To select Map Mapin the information chart: turn
and press the controller.
The weather map is shown on a 500-mi
(500-km) scale.
Moving the weather map X
Slide 009700520064or 009500520096the controller.
The weather map moves in the
corresponding direction under the
crosshair. SIRIUS Weather
265SIRIUS Weather
Page 273 of 278
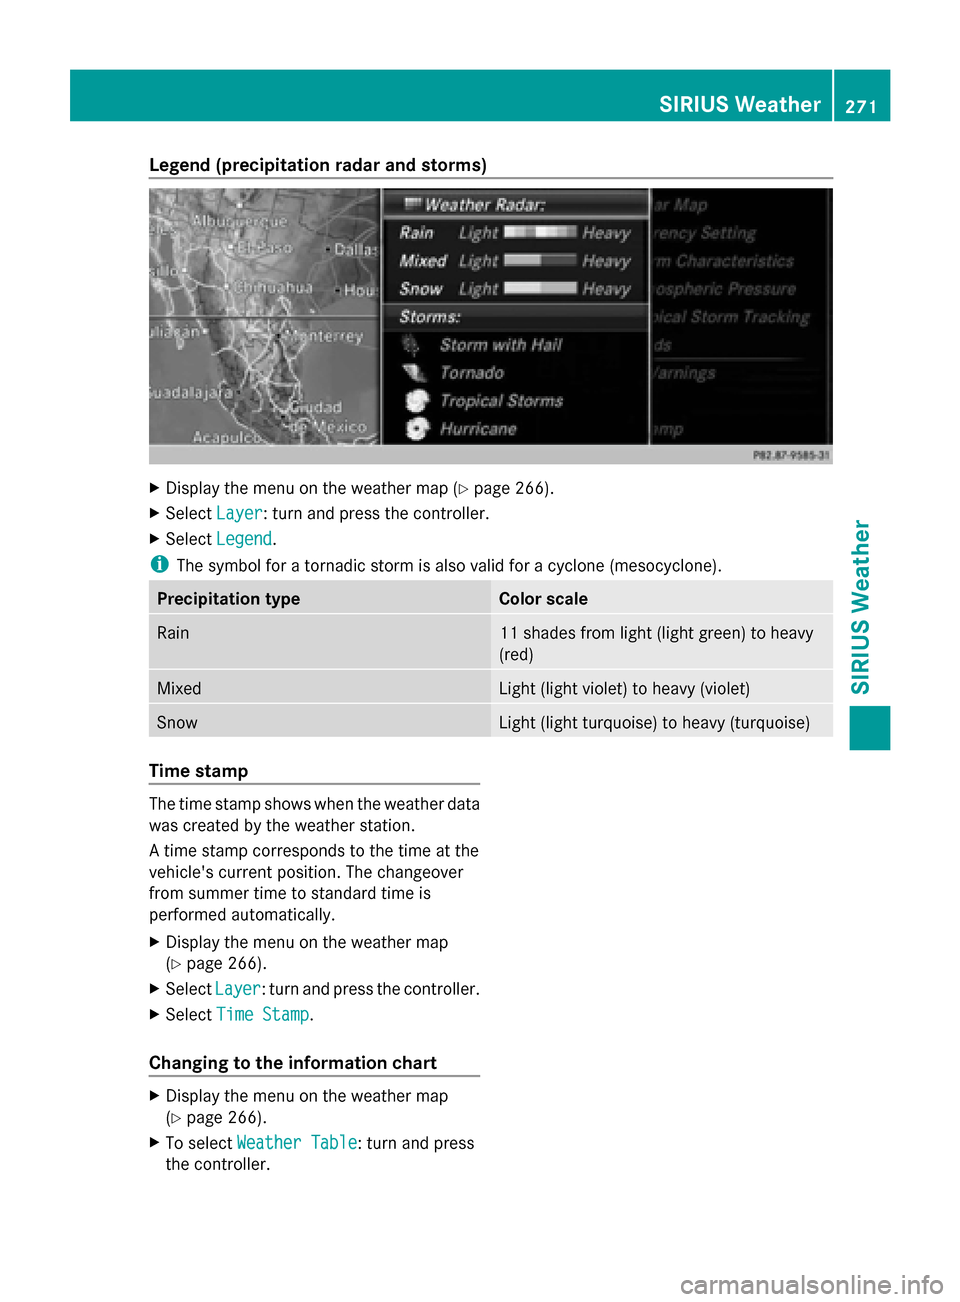
Legend (precipitation radar and storms)
X
Display the menu on the weather map (Y page 266).
X Select Layer Layer: turn and press the controller.
X Select Legend Legend .
i The symbol for a tornadic storm is also valid for a cyclone (mesocyclone). Precipitation type Color scale
Rain 11 shades from light (light green) to heavy
(red)
Mixed Light (light violet) to heavy (violet)
Snow Light (light turquoise) to heavy (turquoise)
Time stamp
The time stamp shows when the weather data
was created by the weather station.
A time stamp corresponds to the time at the
vehicle's current position. The changeover
from summer time to standard time is
performed automatically.
X Display the menu on the weather map
(Y page 266).
X Select Layer Layer: turn and press the controller.
X Select Time Stamp
Time Stamp.
Changing to the information chart X
Display the menu on the weather map
(Y page 266).
X To select Weather Table Weather Table: turn and press
the controller. SIRIUS Weather
271SIRIUS Weather