two MERCEDES-BENZ S-Class 2015 W222 Comand Manual
[x] Cancel search | Manufacturer: MERCEDES-BENZ, Model Year: 2015, Model line: S-Class, Model: MERCEDES-BENZ S-Class 2015 W222Pages: 298, PDF Size: 6.39 MB
Page 6 of 298
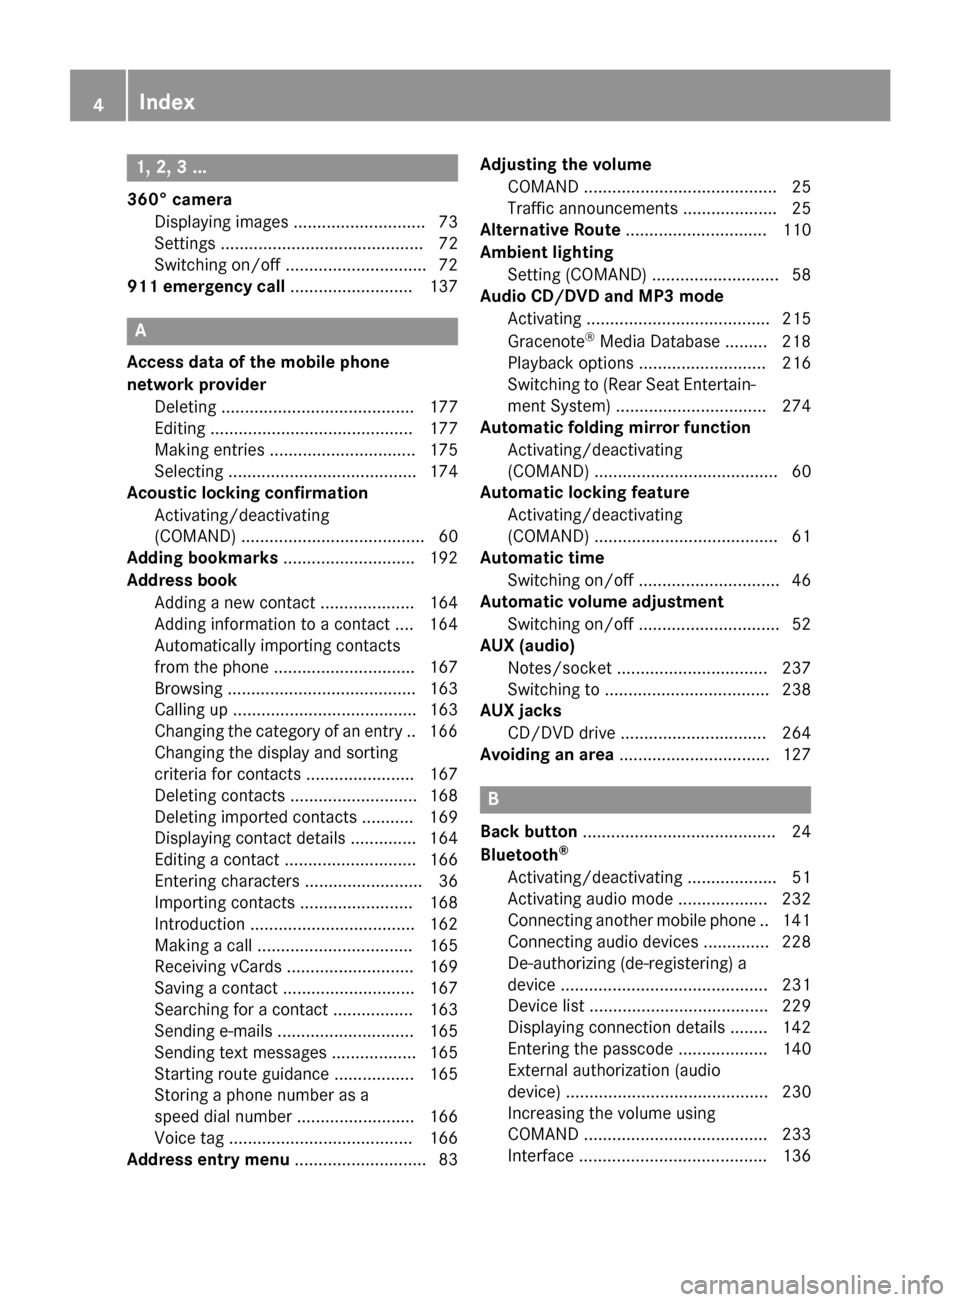
1, 2, 3 ...
360° camera Displaying images ............................ 73
Settings ...........................................72
Switching on/of f.............................. 72
911 emergency call .......................... 137A
Access data of the mobile phone
network provider Deleting ......................................... 177
Editing ........................................... 177
Making entries ............................... 175
Selecting ........................................ 174
Acoustic locking confirmation
Activating/deactivating
(COMAND) ....................................... 60
Adding bookmarks ............................ 192
Address book Adding a new contact .................... 164
Adding information to a contact .... 164
Automatically importing contacts
from the phone .............................. 167
Browsing ........................................ 163
Calling up ....................................... 163
Changing the category of an entry .. 166 Changing the display and sorting
criteria for contacts ....................... 167
Deleting contacts ........................... 168
Deleting imported contacts ........... 169
Displaying contact details .............. 164
Editing a contact ............................ 166
Entering characters ......................... 36
Importing contacts ........................ 168
Introduction ................................... 162
Making a call ................................. 165
Receiving vCards ........................... 169
Saving a contact ............................ 167
Searching for a contact ................. 163
Sending e-mails ............................. 165
Sending text messages .................. 165
Starting route guidance ................. 165
Storing a phone number as a
speed dial number ......................... 166
Voice tag ....................................... 166
Address entry menu ............................ 83 Adjusting the volume
COMAND ......................................... 25
Traffic announcements .................... 25
Alternative Route .............................. 110
Ambient lighting Setting (COMAND) ........................... 58
Audio CD/DVD and MP3 mode
Activating ....................................... 215
Gracenote ®
Media Database ......... 218
Playback options ........................... 216
Switching to (Rear Seat Entertain-
ment System) ................................ 274
Automatic folding mirror function
Activating/deactivating
(COMAND) ....................................... 60
Automatic locking feature
Activating/deactivating
(COMAND) ....................................... 61
Automatic time
Switching on/of f.............................. 46
Automatic volume adjustment
Switching on/of f.............................. 52
AUX (audio)
Notes/socket ................................ 237
Switching to ................................... 238
AUX jacks
CD/DVD drive ............................... 264
Avoiding an area ................................ 127 B
Back button ......................................... 24
Bluetooth ®
Activating/deactivating ................... 51
Activating audio mode ................... 232
Connecting another mobile phone .. 141
Connecting audio devices .............. 228
De-authorizing (de-registering) a
device ............................................ 231
Device list ...................................... 229
Displaying connection details ........ 142
Entering the passcode ................... 140
External authorization (audio
device) ........................................... 230
Increasing the volume using
COMAND ....................................... 233
Interface ........................................ 136 4
Index
Page 9 of 298
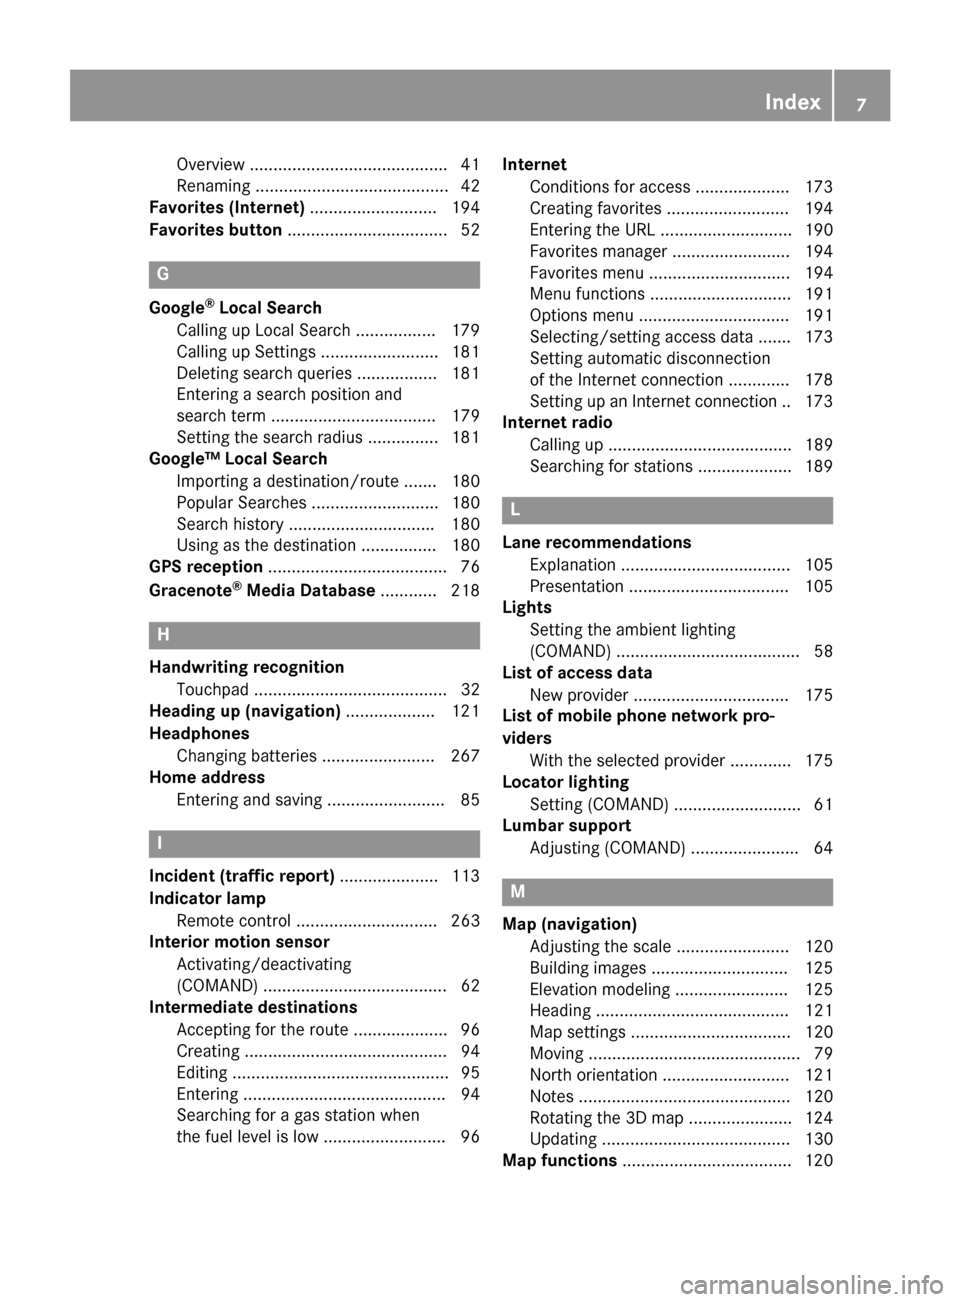
Overview .......................................... 41
Renaming ......................................... 42
Favorites (Internet) ........................... 194
Favorites button ..................................52 G
Google ®
Local Search
Calling up Local Search ................. 179
Calling up Settings ......................... 181
Deleting search queries ................. 181
Entering a search position and
search term ................................... 179
Setting the search radius ............... 181
Google™ Local Search
Importing a destination/route ....... 180
Popular Searches ........................... 180
Search history .............................. .180
Using as the destination ................ 180
GPS reception ...................................... 76
Gracenote ®
Media Database ............ 218 H
Handwriting recognition Touchpa d......................................... 32
Heading up (navigation) ................... 121
Headphones Changing batteries ........................ 267
Home address
Entering and saving ......................... 85 I
Incident (traffic report) ..................... 113
Indicator lamp Remote control .............................. 263
Interior motion sensor
Activating/deactivating
(COMAND) ....................................... 62
Intermediate destinations
Accepting for the route .................... 96
Creating ........................................... 94
Editing .............................................. 95
Entering ........................................... 94
Searching for a gas station when
the fuel level is lo w.......................... 96 Internet
Conditions for access .................... 173
Creating favorites .......................... 194
Entering the UR L............................ 190
Favorites manager ......................... 194
Favorites menu .............................. 194
Menu functions .............................. 191
Options menu ................................ 191
Selecting/setting access data ....... 173
Setting automatic disconnection
of the Internet connection ............. 178
Setting up an Internet connection .. 173
Internet radio
Calling up ....................................... 189
Searching for stations .................... 189 L
Lane recommendations Explanation .................................... 105
Presentation .................................. 105
Lights
Setting the ambient lighting
(COMAND) ....................................... 58
List of access data
New provider ................................. 175
List of mobile phone network pro-
viders
With the selected provider ............. 175
Locator lighting
Setting (COMAND) ........................... 61
Lumbar support
Adjusting (COMAND) ....................... 64 M
Map (navigation) Adjusting the scale ........................ 120
Building images ............................. 125
Elevation modeling ........................ 125
Heading ......................................... 121
Map settings .................................. 120
Moving ............................................. 79
North orientation ........................... 121
Notes ............................................. 120
Rotating the 3D map ...................... 124
Updating ........................................ 130
Map functions .................................... 120 Index
7
Page 11 of 298
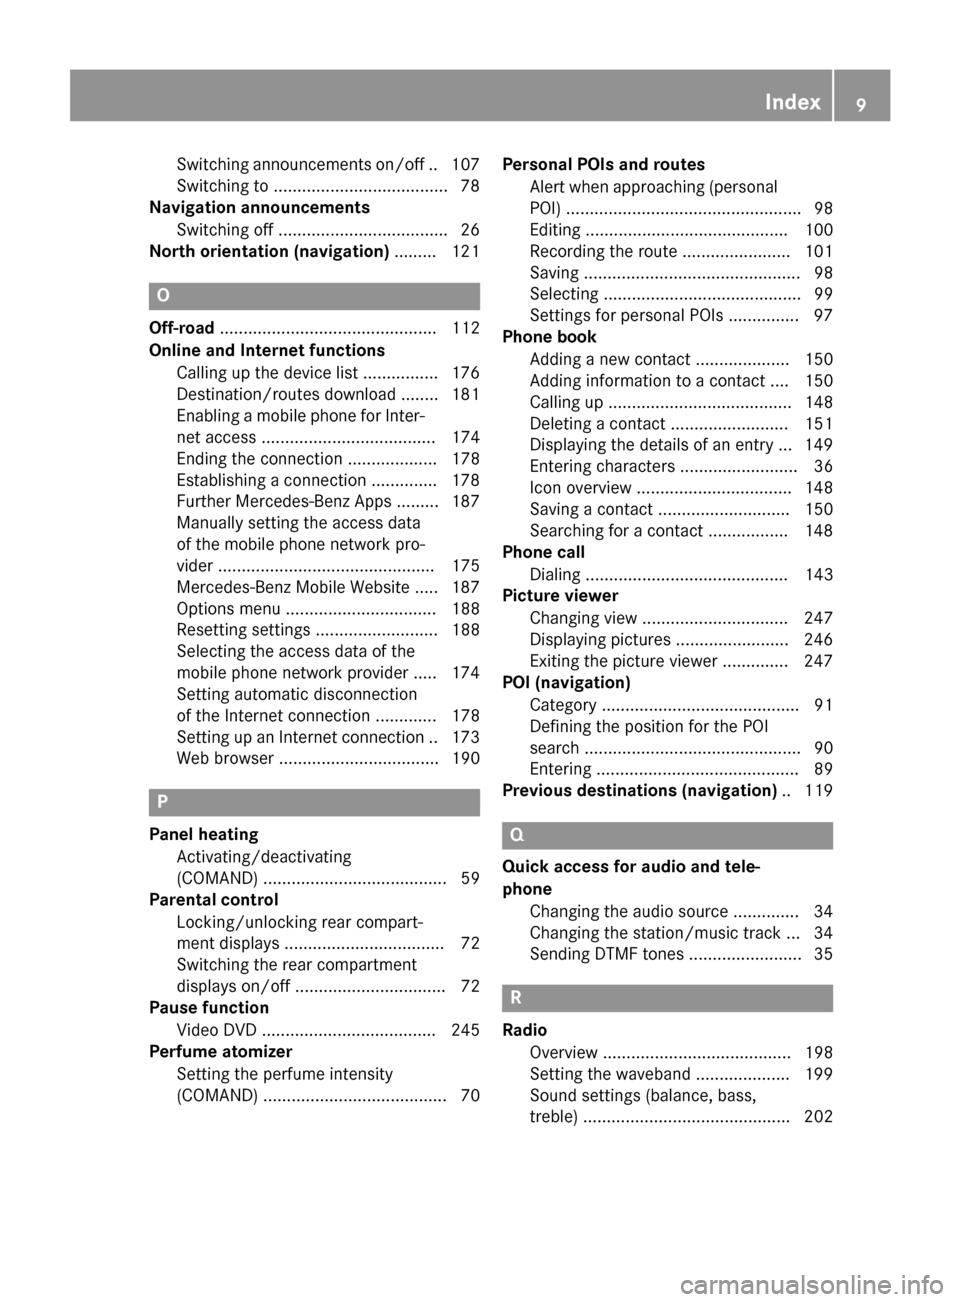
Switching announcements on/of
f..1 07
Switching to ..................................... 78
Navigation announcements
Switching off ................................... .26
North orientation (navigation) ......... 121O
Off-road .............................................. 112
Online and Internet functions Calling up the device list ................ 176
Destination/routes download ........ 181
Enabling a mobile phone for Inter-
net acces s..................................... 174
Ending the connection ................... 178
Establishing a connection .............. 178
Further Mercedes-Benz App s......... 187
Manually setting the access data
of the mobile phone network pro-
vider .............................................. 175
Mercedes-Benz Mobile Website ..... 187
Options menu ................................ 188
Resetting settings .......................... 188
Selecting the access data of the
mobile phone network provider ..... 174
Setting automatic disconnection
of the Internet connection ............. 178
Setting up an Internet connection .. 173 Web browser .................................. 190 P
Panel heating Activating/deactivating
(COMAND) ....................................... 59
Parental control
Locking/unlocking rear compart-
ment display s.................................. 72
Switching the rear compartment
displays on/off ................................ 72
Pause function
Video DVD ..................................... 245
Perfume atomizer
Setting the perfume intensity
(COMAND) ....................................... 70 Personal POIs and routes
Alert when approaching (personal
POI) .................................................. 98
Editing ........................................... 100
Recording the route ....................... 101
Saving .............................................. 98
Selecting .......................................... 99
Settings for personal POI s............... 97
Phone book
Adding a new contact .................... 150
Adding information to a contact .... 150
Calling up ....................................... 148
Deleting a contact ......................... 151
Displaying the details of an entry ... 149
Entering characters ......................... 36
Icon overview ................................. 148
Saving a contact ............................ 150
Searching for a contact ................. 148
Phone call
Dialing ........................................... 143
Picture viewer
Changing view ............................... 247
Displaying pictures ........................ 246
Exiting the picture viewe r.............. 247
POI (navigation)
Category .......................................... 91
Defining the position for the POI
search .............................................. 90
Entering ........................................... 89
Previous destinations (navigation) .. 119 Q
Quick access for audio and tele-
phone Changing the audio source .............. 34
Changing the station/music track ... 34
Sending DTMF tones ........................ 35 R
Radio Overview ........................................ 198
Setting the waveband .................... 199
Sound settings (balance, bass,
treble) ............................................ 202 Index
9
Page 17 of 298
Declarations of conformity
Vehicle components which receive
and/or transmit radio waves
USA only: The wireless devices of this vehicle
comply with Part 15 of the FCC Rules. Oper-
ation is subject to the following two condi-
tions:
1) These devices may not cause interference, and
2) These devices must accept any interfer-
ence, including interference that may cause
undesired operation of the device.
Changes or modifications not expressly
approved by the party responsible for com-
pliance could void the user's authority to
operate the equipment.
Canada only: The wireless devices of this
vehicle comply with Industry Canada license-
exempt RSS standard(s). Operation is subject to the following two conditions:
1) These devices may not cause interference,
and
2) These devices must accept any interfer-
ence, including interference that may cause
undesired operation of the device. Correct use
G
WARNING
Modifications to electronic components, their software as well as wiring can impair their
function and/or the function of other net-
worked components. In particular, systems
relevant to safety could also be affected. As a
result, these may no longer function as
intended and/or jeopardize the operating
safety of the vehicle. There is an increased
risk of an accident and injury.
Never tamper with the wiring as well as elec-
tronic components or their software. You
should have all work to electrical and elec-
tronic equipment carried out at a qualified
specialist workshop. Observe the following information when using
COMAND:
R the safety notes in this manual
R traffic rules and regulations
R laws and safety standards pertaining to
motor vehicles
Roof antenna functionality (telephone, satel-
lite radio, GPS) can be affected by the use of roof carrier systems.
Attaching metalized retrofit film to the wind-
shield may affect radio reception and have a
negative impact on all other antennas (e.g.
emergency antenna) in the vehicle interior.
Protection against theft: this device is
equipped with technical provisions to protect
it against theft. Further information on pro-
tection against theft can be obtained from an authorized Mercedes-Benz Center. Data stored in the vehicle
A wide range of electronic components in
your vehicle contain data memories.
These data memories temporarily or perma-
nently store technical information about:
R The vehicle's operating state
R Incidents
R Malfunctions
In general, this technical information docu-
ments the state of a component, a module, a
system or the surroundings.
These include, for example:
R operating conditions of system compo-
nents, e.g. fluid levels
R the vehicle's status messages and those of
its individual components, e.g. number of
wheel revolutions/speed, deceleration in
movement, lateral acceleration, accelera-
tor pedal position
R malfunctions and defects in important sys-
tem components, e.g. lights, brakes
R malfunctions in important system compo-
nents. e.g. lights, brakes Operating safety
15 Z
Page 18 of 298
R
vehicle reactions and operating conditions
in special driving situations, e.g. air bag
deployment, intervention of stability
control systems
R ambient conditions, e.g. outside tempera-
ture
This data is of an exclusively technical nature and can be used to:
R assist in recognizing and rectifying mal-
functions and defects
R assist in recognizing and rectifying mal-
functions
R analyze vehicle functions, e.g. after an acci-
dent
R optimize vehicle function
The data cannot be used to trace the vehicle's movements.
When your vehicle is serviced, technical infor-
mation can be read from the event data mem- ory and malfunction data memory.
Services include, for example:
R repair services
R service processes
R warranties
R quality assurance
It is read by employees of the service network (including manufacturers) using special diag-
nostic devices. More detailed information is
obtained from it, if required.
After a malfunction has been rectified, the
information is deleted from the malfunction
memory or is continually overwritten.
When operating the vehicle, situations are
conceivable in which this technical data, in
connection with other information (if neces-
sary, under consultation with an authorized
expert), could be traced to a person.
Examples include:
R accident reports
R damage to the vehicle
R witness statements
Further additional functions that have been
contractually agreed upon with the customer allow certain vehicle data to be conveyed by
the vehicle as well. The additional functions
include, for example, vehicle location in case
of an emergency. Qualified specialist workshop
Read the information on qualified specialist
workshops in the vehicle Operator's Manual. Information on copyright
General information
Information on licenses for free and Open
Source software used in your vehicle and in
the electronic components can be found on
this website: http://www.mercedes-
benz.com/opensource . Your COMAND equipment
These operating instructions describe all
standard and optional equipment available
for your COMAND system at the time of pur-
chase. Country-specific differences are pos-
sible. Please note that your COMAND system
may not be equipped with all the features
described. This also applies to safety-relevant systems and functions. Therefore, the equip-
ment on your COMAND system may differ
from that in the descriptions and illustrations. Should you have any questions concerning
equipment and operation, please consult an
authorized Mercedes-Benz Center. Function restrictions
For safety reasons, some functions are
restricted or unavailable while the vehicle is in
motion. You will notice this, for example,
because either you will not be able to select
certain menu items or a message will appear
to this effect. 16
Operating safety
Page 26 of 298
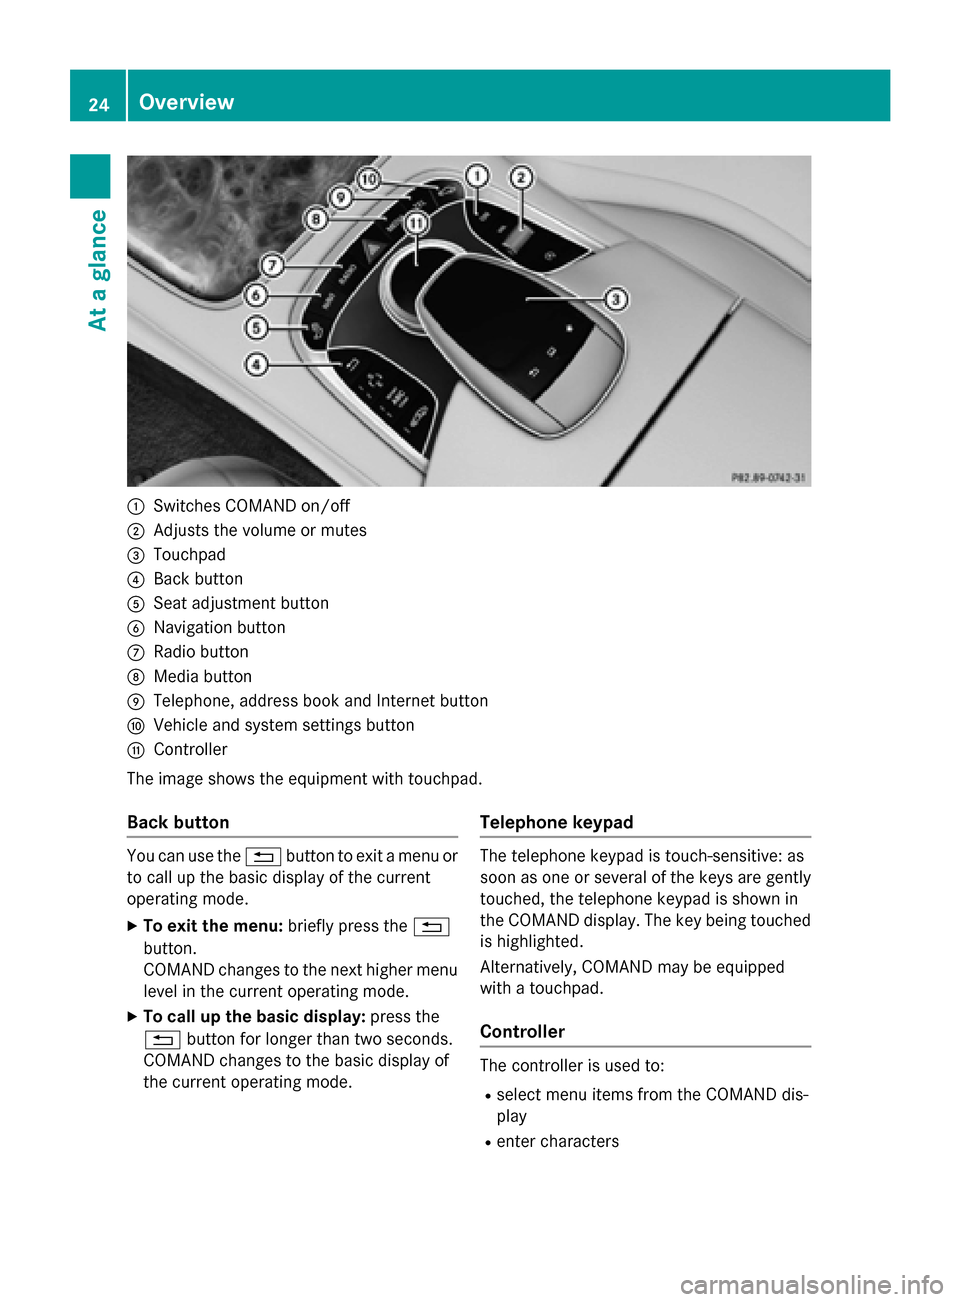
0043
Switches COMAND on/off
0044 Adjusts the volume or mutes
0087 Touchpad
0085 Back button
0083 Seat adjustment button
0084 Navigation button
006B Radio button
006C Media button
006D Telephone, address book and Internet button
006E Vehicle and system settings button
006F Controller
The image shows the equipment with touchpad.
Back button You can use the
0038button to exit a menu or
to call up the basic display of the current
operating mode.
X To exit the menu: briefly press the0038
button.
COMAND changes to the next higher menu
level in the current operating mode.
X To call up the basic display: press the
0038 button for longer than two seconds.
COMAND changes to the basic display of
the current operating mode. Telephone keypad The telephone keypad is touch-sensitive: as
soon as one or several of the keys are gently touched, the telephone keypad is shown in
the COMAND display. The key being touched
is highlighted.
Alternatively, COMAND may be equipped
with a touchpad.
Controller The controller is used to:
R select menu items from the COMAND dis-
play
R enter characters 24
OverviewAt a glance
Page 33 of 298
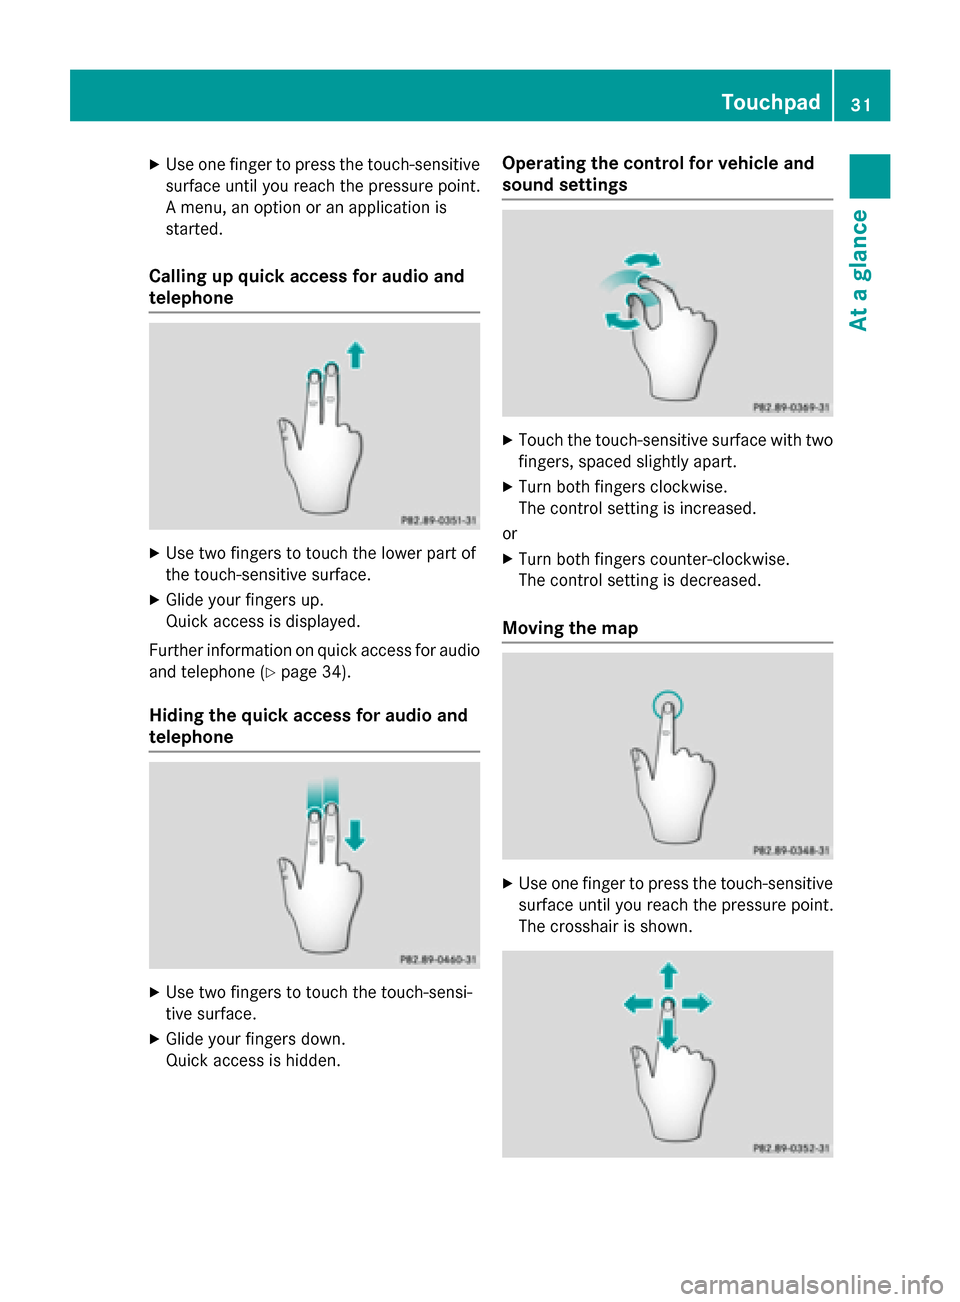
X
Use one finger to press the touch-sensitive
surface until you reach the pressure point.
A menu, an option or an application is
started.
Calling up quick access for audio and
telephone X
Use two fingers to touch the lower part of
the touch-sensitive surface.
X Glide your fingers up.
Quick access is displayed.
Further information on quick access for audio
and telephone (Y page 34).
Hiding the quick access for audio and
telephone X
Use two fingers to touch the touch-sensi-
tive surface.
X Glide your fingers down.
Quick access is hidden. Operating the control for vehicle and
sound settings
X
Touch the touch-sensitive surface with two
fingers, spaced slightly apart.
X Turn both fingers clockwise.
The control setting is increased.
or X Turn both fingers counter-clockwise.
The control setting is decreased.
Moving the map X
Use one finger to press the touch-sensitive
surface until you reach the pressure point.
The crosshair is shown. Touchpad
31At a glance
Page 34 of 298
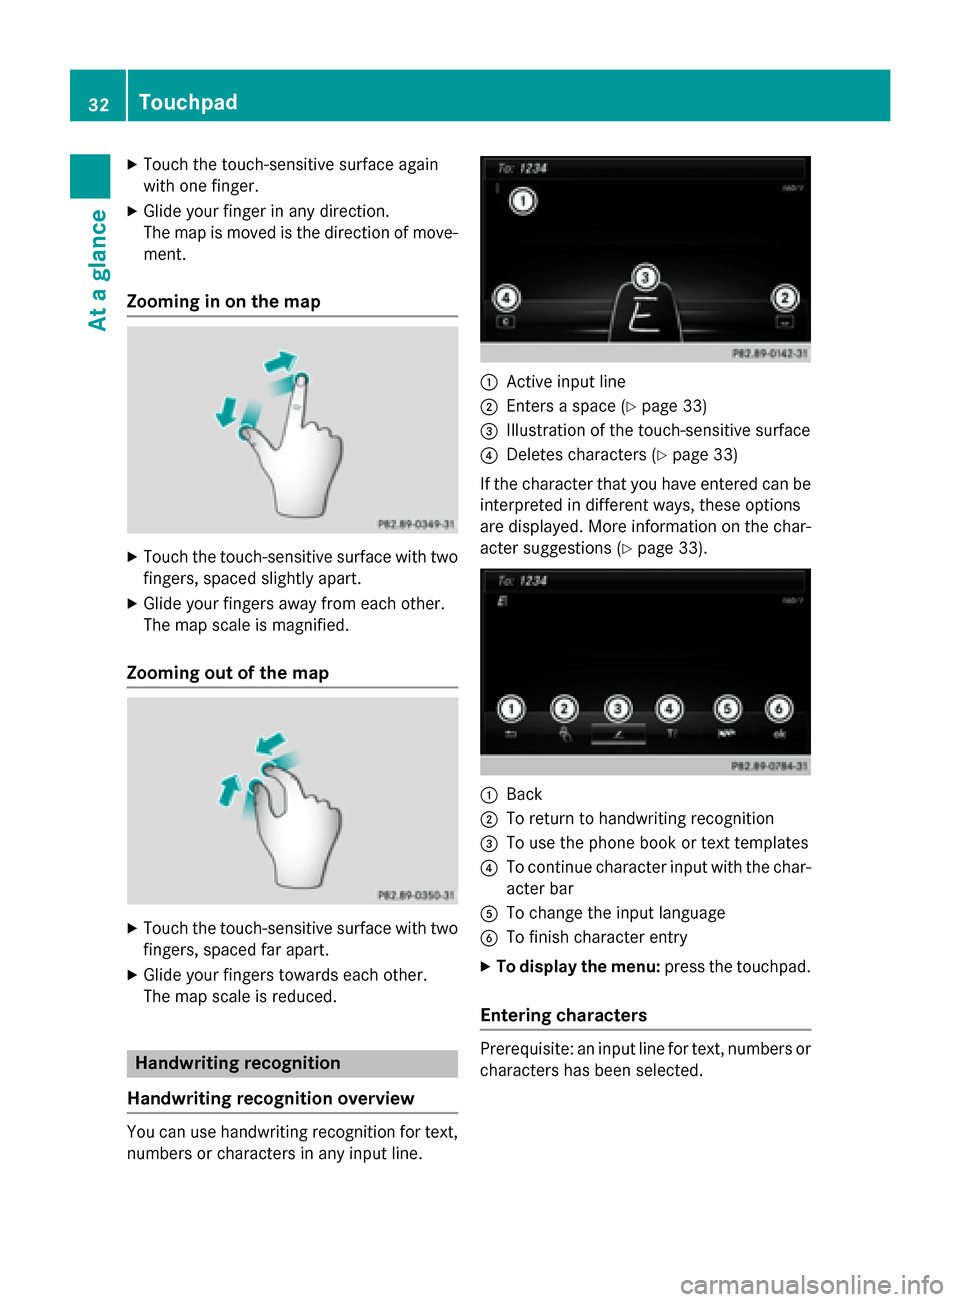
X
Touch the touch-sensitive surface again
with one finger.
X Glide your finger in any direction.
The map is moved is the direction of move-
ment.
Zooming in on the map X
Touch the touch-sensitive surface with two
fingers, spaced slightly apart.
X Glide your fingers away from each other.
The map scale is magnified.
Zooming out of the map X
Touch the touch-sensitive surface with two
fingers, spaced far apart.
X Glide your fingers towards each other.
The map scale is reduced. Handwriting recognition
Handwriting recognition overview You can use handwriting recognition for text,
numbers or characters in any input line. 0043
Active input line
0044 Enters a space (Y page 33)
0087 Illustration of the touch-sensitive surface
0085 Deletes characters (Y page 33)
If the character that you have entered can be interpreted in different ways, these options
are displayed. More information on the char-
acter suggestions (Y page 33). 0043
Back
0044 To return to handwriting recognition
0087 To use the phone book or text templates
0085 To continue character input with the char-
acter bar
0083 To change the input language
0084 To finish character entry
X To display the menu: press the touchpad.
Entering characters Prerequisite: an input line for text, numbers or
characters has been selected. 32
TouchpadAt a glance
Page 46 of 298
Your COMAND equipment
These operating instructions describe all
standard and optional equipment available
for your COMAND system at the time of pur-
chase. Country-specific differences are pos-
sible. Please note that your COMAND system may not be equipped with all the features
described. This also applies to safety-relevant
systems and functions. Therefore, the equip-
ment on your COMAND system may differ
from that in the descriptions and illustrations. Should you have any questions concerning
equipment and operation, please consult an
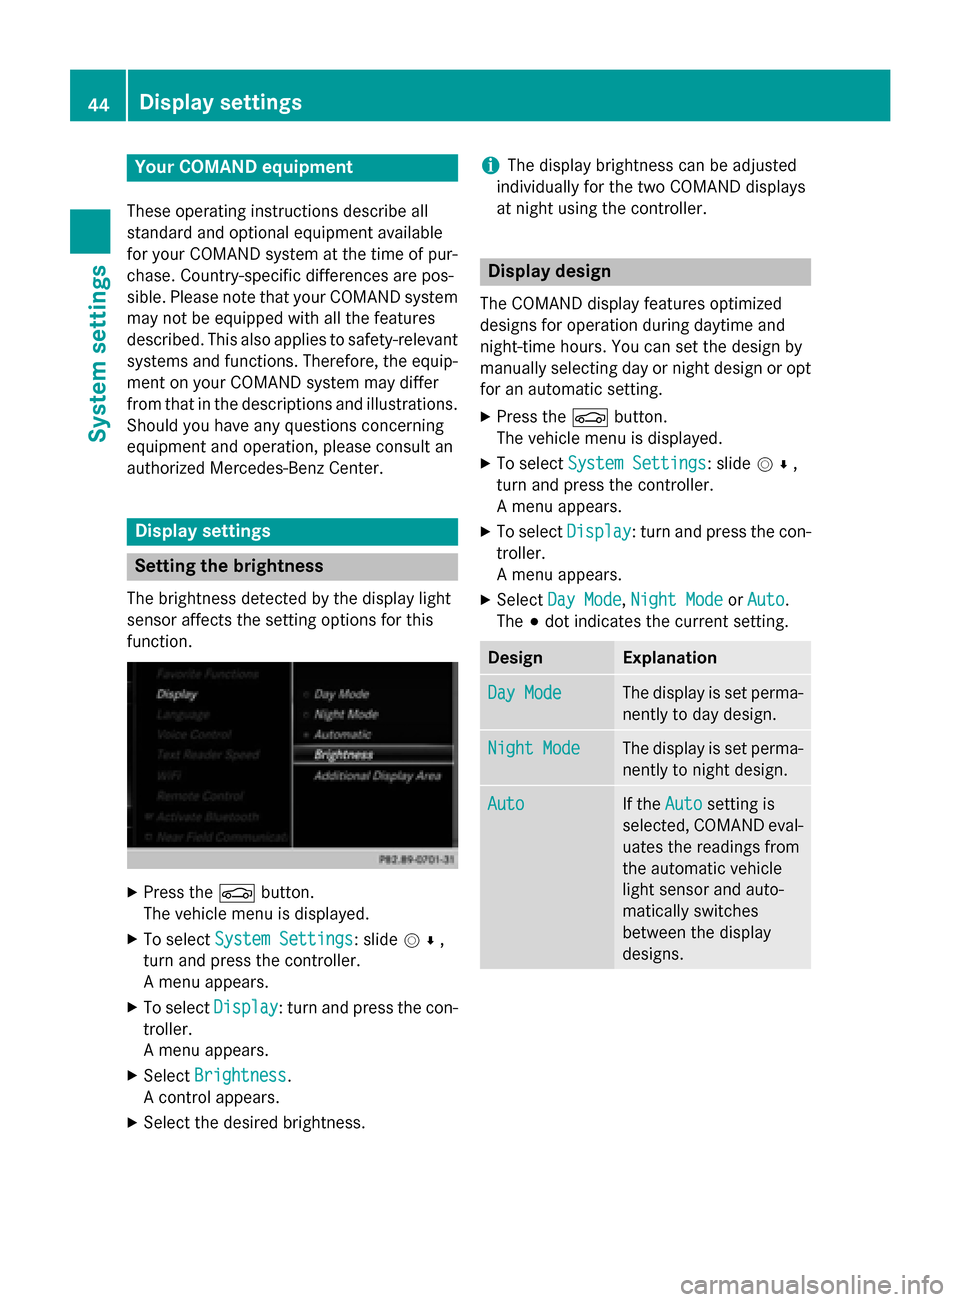
authorized Mercedes-Benz Center. Display settings
Setting the brightness
The brightness detected by the display light
sensor affects the setting options for this
function. X
Press the 00D4button.
The vehicle menu is displayed.
X To select System Settings
System Settings : slide005200C5,
turn and press the controller.
A menu appears.
X To select Display
Display : turn and press the con-
troller.
A menu appears.
X Select Brightness Brightness .
A control appears.
X Select the desired brightness. i
The display brightness can be adjusted
individually for the two COMAND displays
at night using the controller. Display design
The COMAND display features optimized
designs for operation during daytime and
night-time hours. You can set the design by
manually selecting day or night design or opt
for an automatic setting.
X Press the 00D4button.
The vehicle menu is displayed.
X To select System Settings System Settings : slide005200C5,
turn and press the controller.
A menu appears.
X To select Display Display: turn and press the con-
troller.
A menu appears.
X Select Day Mode
Day Mode ,Night Mode Night Mode orAuto
Auto .
The 003Bdot indicates the current setting. Design Explanation
Day Mode
Day Mode The display is set perma-
nently to day design. Night Mode
Night Mode The display is set perma-
nently to night design. Auto
Auto If the
Auto
Autosetting is
selected, COMAND eval-
uates the readings from
the automatic vehicle
light sensor and auto-
matically switches
between the display
designs. 44
Display set
tingsSystem settings
Page 49 of 298
Setting Function
Automatic
Automatic The summer and
standard time are
automatically
changed over.
On On The clock is
advanced one hour
ahead of standard
time.
Off Off The standard time
for the chosen time
zone is selected.
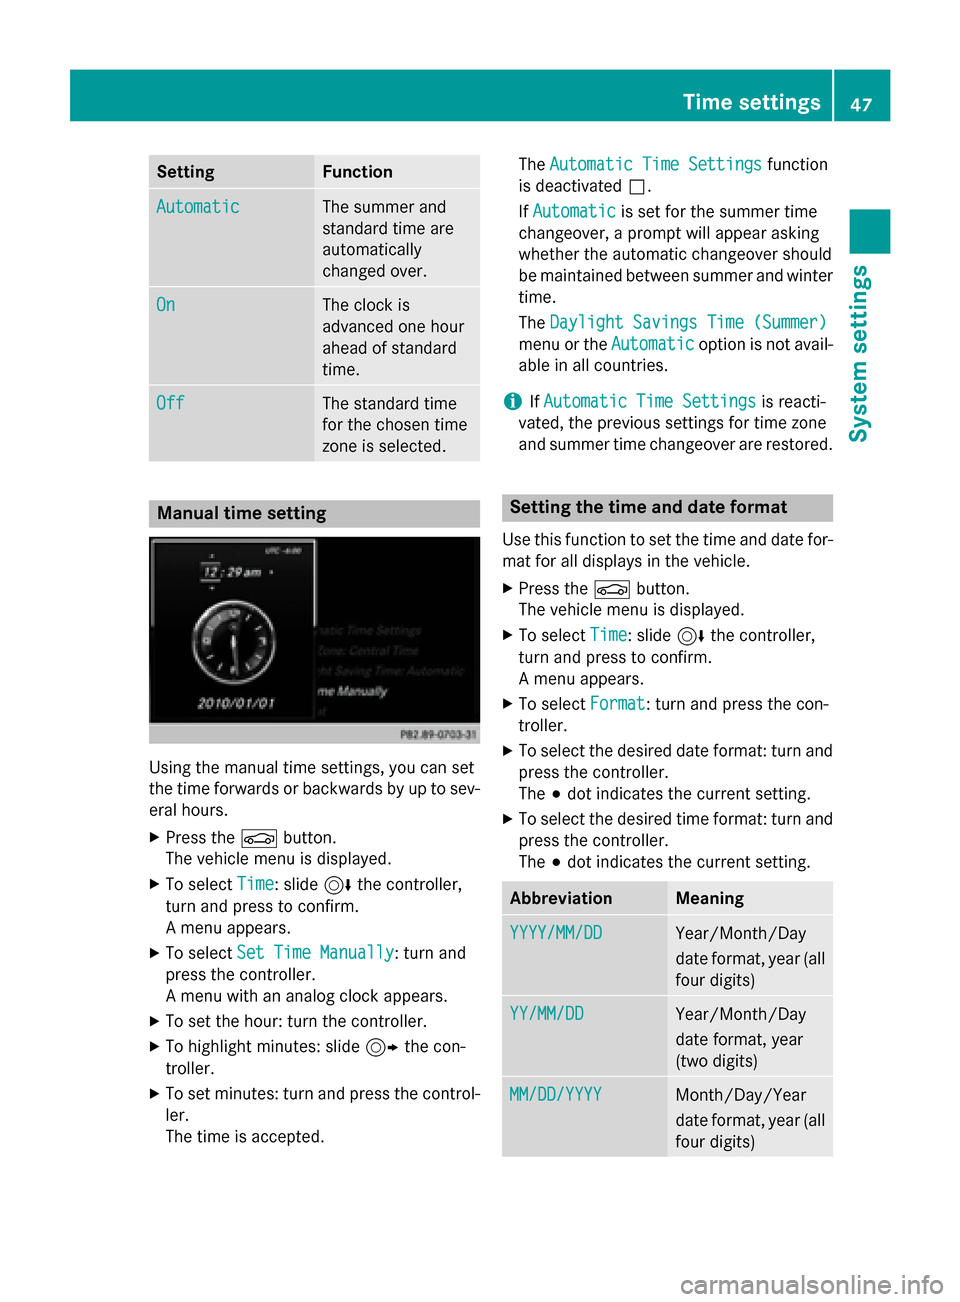
Manual time setting
Using the manual time settings, you can set
the time forwards or backwards by up to sev- eral hours.
X Press the 00D4button.
The vehicle menu is displayed.
X To select Time Time: slide 6the controller,
turn and press to confirm.
A menu appears.
X To select Set Time Manually Set Time Manually: turn and
press the controller.
A menu with an analog clock appears.
X To set the hour: turn the controller.
X To highlight minutes: slide 9the con-
troller.
X To set minutes: turn and press the control-
ler.
The time is accepted. The
Automatic Time Settings Automatic Time Settings function
is deactivated 0053.
If Automatic
Automatic is set for the summer time
changeover, a prompt will appear asking
whether the automatic changeover should
be maintained between summer and winter
time.
The Daylight Savings Time (Summer) Daylight Savings Time (Summer)
menu or the Automatic
Automaticoption is not avail-
able in all countries.
i If
Automatic Time Settings
Automatic Time Settings is reacti-
vated, the previous settings for time zone
and summer time changeover are restored. Setting the time and date format
Use this function to set the time and date for-
mat for all displays in the vehicle.
X Press the 00D4button.
The vehicle menu is displayed.
X To select Time Time: slide 6the controller,
turn and press to confirm.
A menu appears.
X To select Format Format: turn and press the con-
troller.
X To select the desired date format: turn and
press the controller.
The 003Bdot indicates the current setting.
X To select the desired time format: turn and
press the controller.
The 003Bdot indicates the current setting. Abbreviation Meaning
YYYY/MM/DD YYYY/MM/DD Year/Month/Day
date format, year (all
four digits) YY/MM/DD YY/MM/DD Year/Month/Day
date format, year
(two digits)
MM/DD/YYYY MM/DD/YYYY Month/Day/Year
date format, year (all
four digits) Time settings
47System settings