ESP MERCEDES-BENZ SL-Class 2014 R131 Comand Manual
[x] Cancel search | Manufacturer: MERCEDES-BENZ, Model Year: 2014, Model line: SL-Class, Model: MERCEDES-BENZ SL-Class 2014 R131Pages: 274, PDF Size: 5.76 MB
Page 55 of 274
X
Select the sea t(Ypage 52).
X Select Seat Surface by turning
003C0012003Dthe
COMAND Controller and press 0037to
confirm.
As cale appears.
X Turn 003C0012003D or slide 003600120008the COMAND
controlle rand press 0037to confirm.
X To exit the menu: press the000Aback
button.
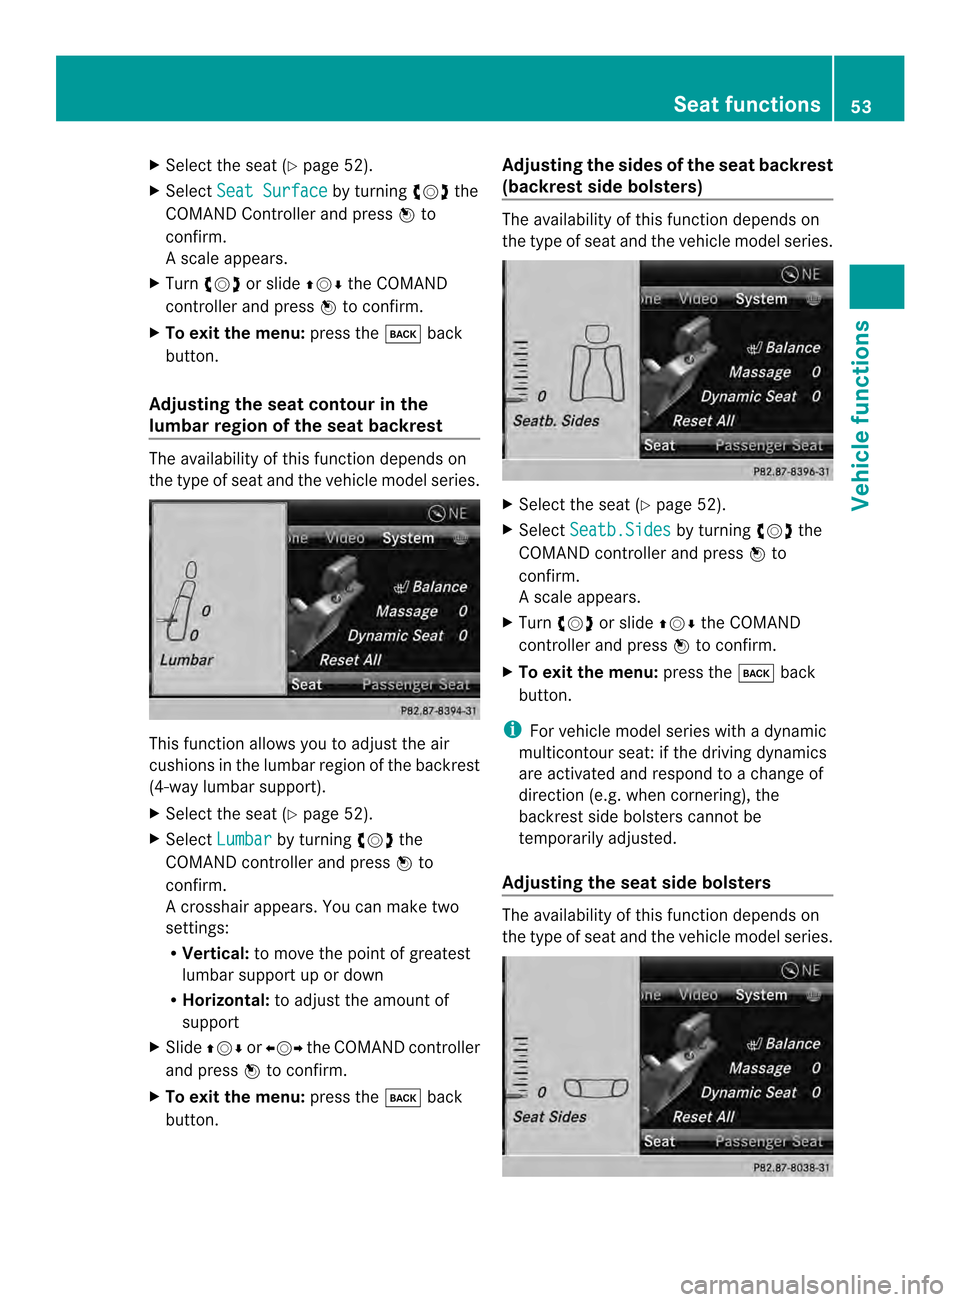
Adjusting the seat contour in the
lumbar region of the seat backrest The availability of this functio
ndepends on
the type of seat and the vehicle model series. This function allows you to adjust the air
cushions in the lumbar region of the backrest
(4-way lumbar support).
X Select the seat (Y page 52).
X Select Lumbar by turning
003C0012003Dthe
COMAND controller and press 0037to
confirm.
Ac rosshair appears. You can make two
settings:
R Vertical: to move the point of greatest
lumbar support up or down
R Horizontal: to adjust the amount of
support
X Slide 003600120008 or003400120035 the COMAND controller
and press 0037to confirm.
X To exit the menu: press the000Aback
button. Adjusting the sides of the seat backrest
(backrest side bolsters) The availability of this function depends on
the type of seat and the vehicle model series.
X
Select the seat (Y page 52).
X Select Seatb.Sides by turning
003C0012003Dthe
COMAND controller and press 0037to
confirm.
As cale appears.
X Turn 003C0012003D or slide 003600120008the COMAND
controlle rand press 0037to confirm.
X To exit the menu: press the000Aback
button.
i For vehicle model series with a dynamic
multicontour seat: if the driving dynamics
are activated and respond to a change of
direction (e.g. when cornering), the
backres tside bolsters cannot be
temporarily adjusted.
Adjusting the seat side bolsters The availability of this function depends on
the type of seat and the vehicle model series. Seat functions
53Vehicle functions
Page 57 of 274
X
Turn 003C0012003D or slide 003600120008the COMAND
controller and press 0037to confirm.
The massage function runs for
approximately 15 to 25 minutes,
depending on the setting.
X To exit the menu: press the000Aback
button.
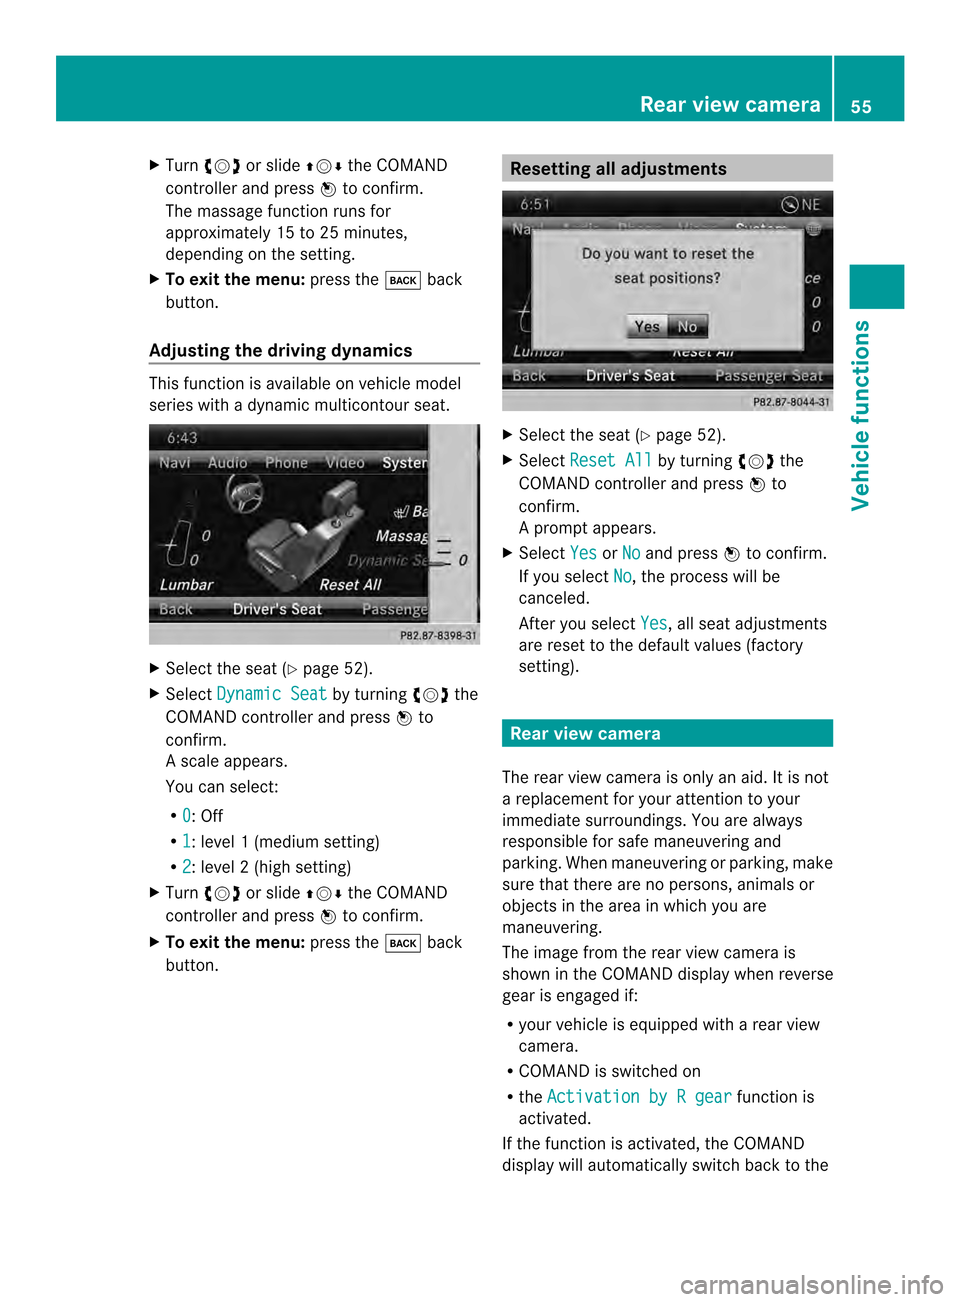
Adjusting the driving dynamics This function is available on vehicle model
series with a dynamic multicontour seat. X
Select the seat (Y page 52).
X Select Dynamic Seat by turning
003C0012003Dthe
COMAND controller and press 0037to
confirm.
As cale appears.
You can select:
R 0 : Off
R 1 :l
evel 1(mediu msetting)
R 2 :l
evel 2(high setting)
X Turn 003C0012003D or slide 003600120008the COMAND
controller and press 0037to confirm.
X To exit the menu: press the000Aback
button. Resetting all adjustments
X
Select the seat (Y page 52).
X Select Reset All by turning
003C0012003Dthe
COMAND controller and press 0037to
confirm.
Ap rompt appears.
X Select Yes or
No and press
0037to confirm.
If you select No , the process will be
canceled.
After you select Yes , all seat adjustments
are reset to the default values (factory
setting). Rear view camera
The rear view camera is only an aid.Iti s not
a replacement for your attention to your
immediate surroundings. You are always
responsible for safe maneuvering and
parking. When maneuvering or parking, make
sure that there are no persons, animals or
objects in the area in which you are
maneuvering.
The image from the rear view camera is
shown in the COMAND displayw hen reverse
gear is engaged if:
R your vehicle is equipped with a rear view
camera.
R COMAND is switched on
R the Activation by R gear function is
activated.
If the function is activated, the COMAND
display will automatically switch back to the Rear view camera
55Vehicle functions
Page 58 of 274
previously selected display as soon as you
shift out of reverse gear.
i
For further information on the rear view
camera, see separate vehicle Operator's
Manual.
X Press the 000Bfunction button.
The system menu appears.
X Select Settings by turning
003C0012003Dthe
COMAND controller and press 0037to
confirm.
X Select Rear View Camera and press
0037to
confirm.
X Select Activation by R gear and press
0037 to confirm.
The function is switched on 0010or off 0003,
depending on the previous status. Night View Assist Plus
On vehicles with Night View Assist Plus you
can have the image from Night View Assist
Plus shown on the COMAND display.
X Switch on COMAND (Y page 29).
X Activate Night View Assist Plus, see the
separate operating instructions.
The image from Night View Assist Plus
appears in the COMAND display.
X To adjust the brightness: select
Brightness by turning
003C0012003Dthe COMAND
controller and press 0037to confirm.
X Turn 003C0012003D the COMAND controller and
press 0037to confirm.
X To switch off the display: selectBack and
press 0037to confirm or press the 000A
button. 360° camera
Important notes
The 360° camera is only an aid. It is not a
replacement for your attention to your immediate surroundings. You are always
responsible for safe maneuvering and
parking. When maneuvering or parking, make
sure that there are no persons, animals or
objects in the area in which you are
maneuvering.
Overview
The 360 °camera surveys the vehicle
surroundings and assists you, for example
when parking or at exits with reduced
visibility.
The 360° camera images can be shown in full
scree nmode or in seven different split-screen
views on the COMAND display .Asplit-screen
view also includes a top view of the vehicle.
This view is calculated from the data supplied
by the installed cameras (virtual camera). Displaying the 360° camera image
The 360 °camera image can be displayed if:
R your vehicle is equipped with a 360°
camera
R COMAND is switched on (Y page 29)
R the 360° Camera function is activated
You can activate the 360° display by:
R engaging reverse gear (only possible if the
Activation by R gear option is
activated)
R selecting the 360° Camera menu item in
the System menu
R pressing and holding the 000Bfunction
button
As soon as your vehicle exceeds a speed of
19 mph (30 km/h) with the function
activated, the function switches off .The
COMAND display switches back to the
previously selected view.
You can also switch the display by selecting
the 0024 symbol in the display and pressing
0037 the COMAND controller. 56
360° cameraVehicle functions
Page 62 of 274
Your COMAND equipment
These operating instructions describe all the
standard and optional equipmen tfor your
COMAND system, as available at the time of
going to print. Country-specific differences
are possible. Please note that your COMAND
system may not be equipped with all the
features described. Introduction
Important safety notes
G
WARNING
If you operate information systems and
communication equipment integrated in the
vehicle while driving, you will be distracted
from traffic conditions. You could also lose
control of the vehicle. There is a risk of an
accident.
Only operate the equipment when the traffic
situation permits. If you are not sure that this
is possible, park the vehicle paying attention
to traffic conditions and operate the
equipment when the vehicle is stationary.
You must observe the legal requirements for
the country in which you are currently driving
when operating COMAND.
COMAND calculates the route to the
destination without taking account of the
following, for example:
R traffic lights
R stop and give way signs
R merging lanes
R parking or stopping in a no parking/no
stopping zone
R other road and traffic rules and regulations
R narrow bridges
COMAND can give incorrect navigation
commands if the actual street/traffic
situation does not correspond with the digital
map's data. Digital maps do not cover all
areas nor all routes in an area. For example, a route may have been diverted or the
direction of a one-way street may have
changed.
For this reason, you must always observe
road and traffic rules and regulations during
your journey. Road and traffic rules and
regulations always have priority over the
system's driving recommendations.
Navigation announcements are intended to
direct you while driving without diverting your
attention from the road and driving.
Please always use this feature instead of
consulting the map display for directions.
Looking at the icons or map display can
distract you from traffic conditions and
driving, and increase the risk of an accident.
General notes
Operational readiness of the navigation
system The navigation system must determine the
position of the vehicle before first use or
whenever operational status is restored.
Therefore, you may have to drive for a while
before precise route guidance is possible.
GPS reception
Among other things, correct functioning of
the navigation system depends on GPS
reception .Incertain situations, GPS
reception may be impaired, there may be
interference or there may be no reception at
all, e.g. in tunnels or parking garages.
i Using roof carriers may impair the correct
functioning of a roof antenna (phone,
satellite radio, GPS).
Entry restriction On vehicles for certain countries, there is a
restriction on entering data.
The restriction is active from a vehicle speed
of above approximately 3 mph (5 km/h). As
soon as the speed falls below approximately 60
IntroductionNavigation
Page 67 of 274
X
To select alist : turn 003C0012003Dthe COMAND
controller and press 0037to confirm.
The list of selected states/provinces
appears.
X To select astate/province: turn003C0012003D the
COMAND controller and press 0037to
confirm.
The address entry menu appears again. The
state/province selected has now been
entered.
Entering acity
X Call up the address entry menu
(Y page 64).
X Select City in the address entry menu by
turning 003C0012003Dthe COMAND controller and
press 0037to confirm.
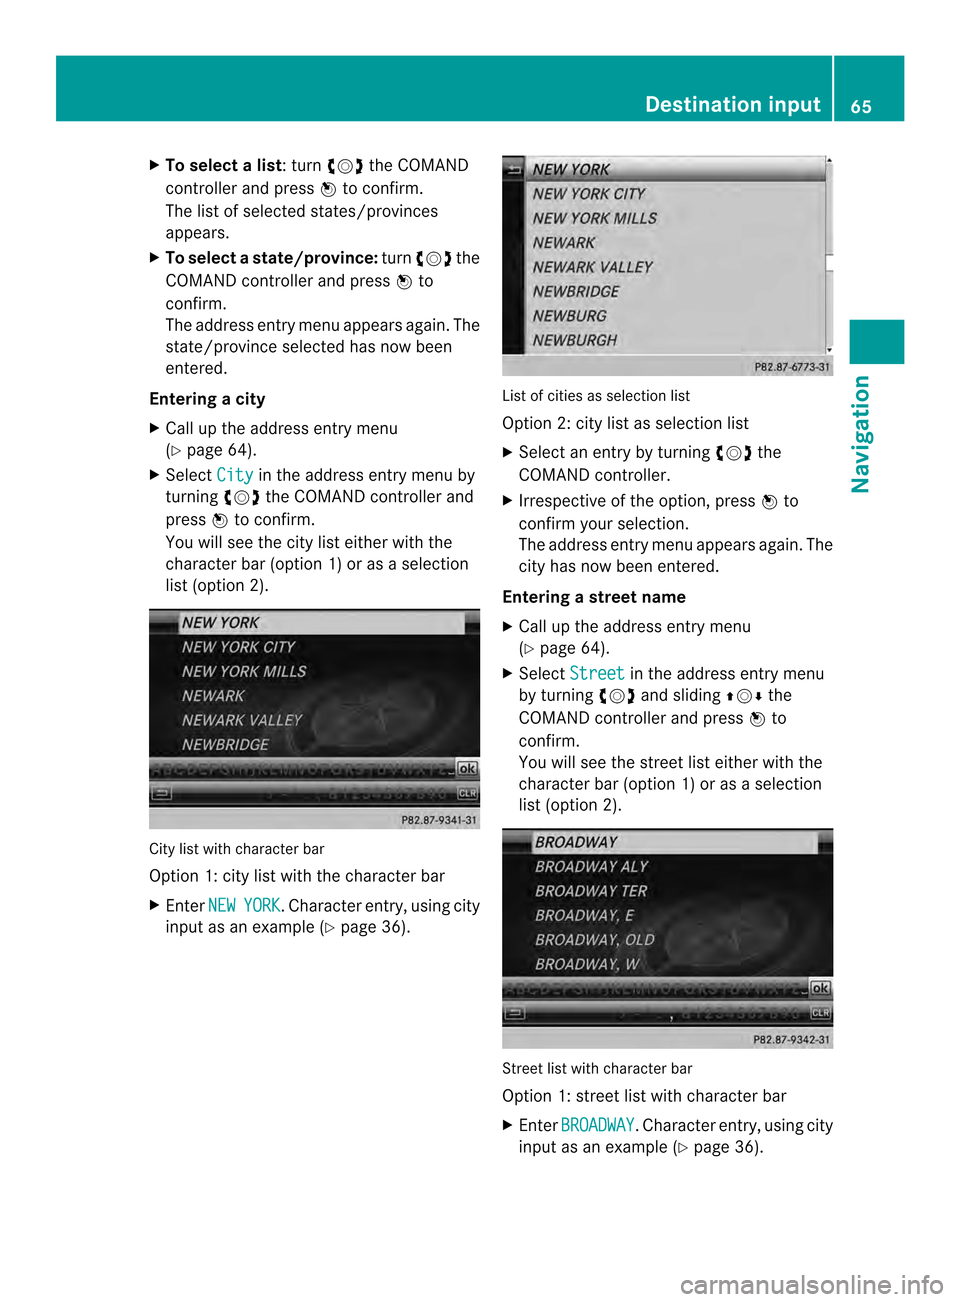
You will see the city list eithe rwith the
character bar (option 1) or as a selection
list (option 2). City list with character bar
Option 1: city list with the character bar
X Enter NEW YORK .C
haracter entry, using city
input as an example (Y page 36). List of cities as selection list
Option 2: city list as selection list
X
Select an entry by turning 003C0012003Dthe
COMAND controller.
X Irrespective of the option, press 0037to
confirm your selection.
The address entry menu appears again. The
city has now been entered.
Entering a street name
X Call up the address entry menu
(Y page 64).
X Select Street in the address entry menu
by turning 003C0012003Dand sliding 003600120008the
COMAND controller and press 0037to
confirm.
You will see the street list either with the
character bar (option 1) or as a selection
list (option 2). Street list with character bar
Option 1: street list with character bar
X
Enter BROADWAY .C
haracter entry, using city
input as an example (Y page 36). Destination input
65Navigation Z
Page 68 of 274
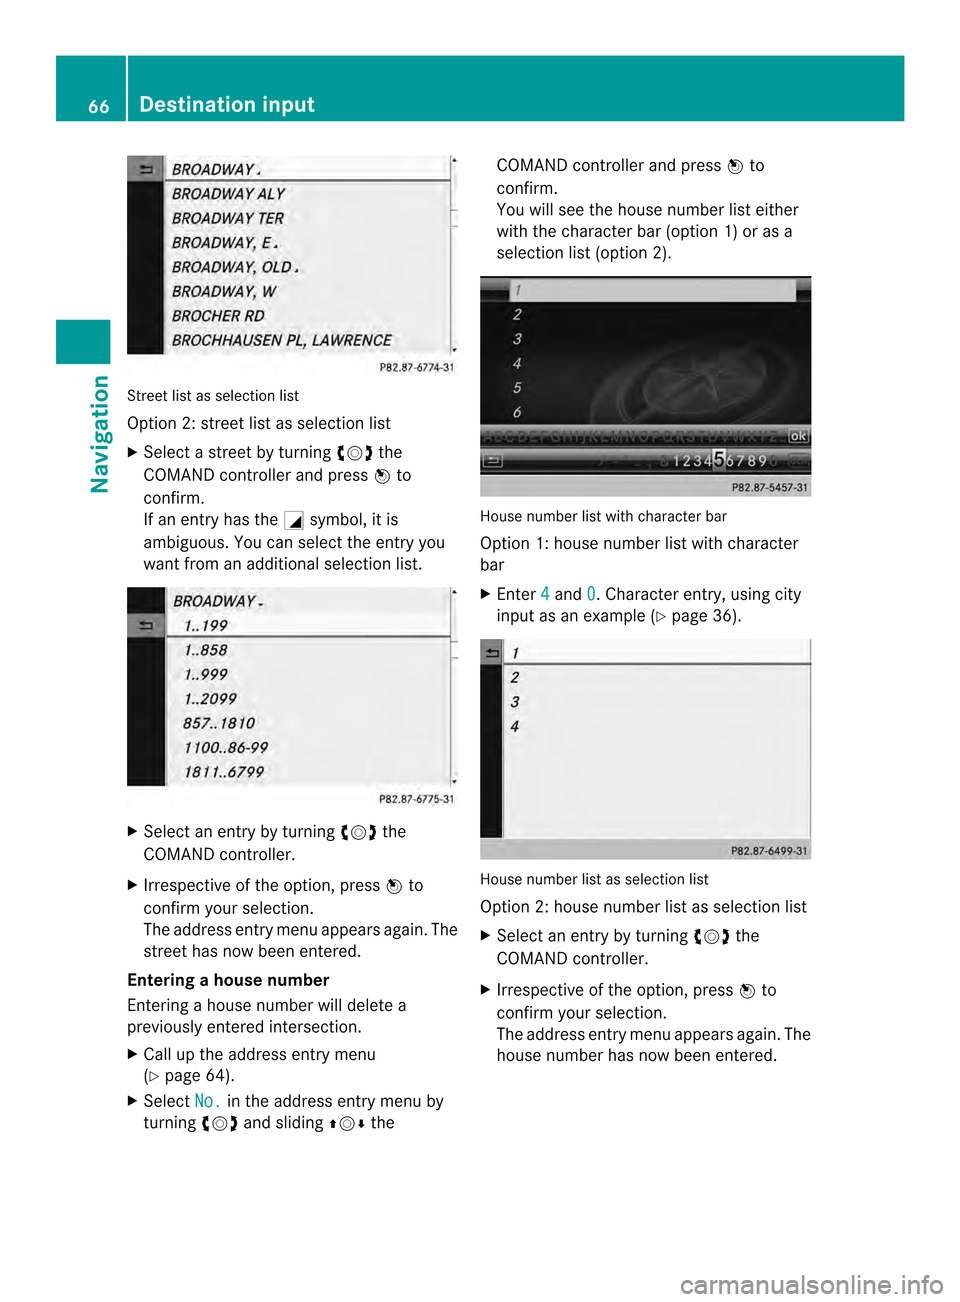
Street list as selectio
nlist
Option 2: street list as selection list
X Select a street by turning 003C0012003Dthe
COMAN Dcontroller and press 0037to
confirm.
If an entry has the 0002symbol, it is
ambiguous. You can select the entry you
want from an additional selection list. X
Select an entry by turning 003C0012003Dthe
COMAND controller.
X Irrespective of the option, press 0037to
confirm your selection.
The address entry menu appears again. The
street has now been entered.
Entering ahouse number
Entering a house number will delete a
previously entered intersection.
X Call up the address entry menu
(Y page 64).
X Select No. in the address entry menu by
turning 003C0012003Dand sliding 003600120008the COMAND controller and press
0037to
confirm.
You will see the house number list either
with the character bar (option 1) or as a
selectio nlist (option 2). House number list with character bar
Option 1: house number list with character
bar
X
Enter 4 and
0 . Character entry, using city
input as an example (Y page 36). House number list as selection list
Option 2: house number list as selection list
X
Select an entry by turning 003C0012003Dthe
COMAND controller.
X Irrespective of the option, press 0037to
confirm your selection.
The address entry menu appears again. The
house number has now been entered. 66
Destination inputNavigation
Page 69 of 274
Entering the ZIP code, center and
intersection Entering
aZIP code
X Call up the address entry menu
(Y page 64).
X Select ZIP in the address entry menu by
turning 003C0012003Dand sliding 003600120008the
COMAND controller and press 0037to
confirm.
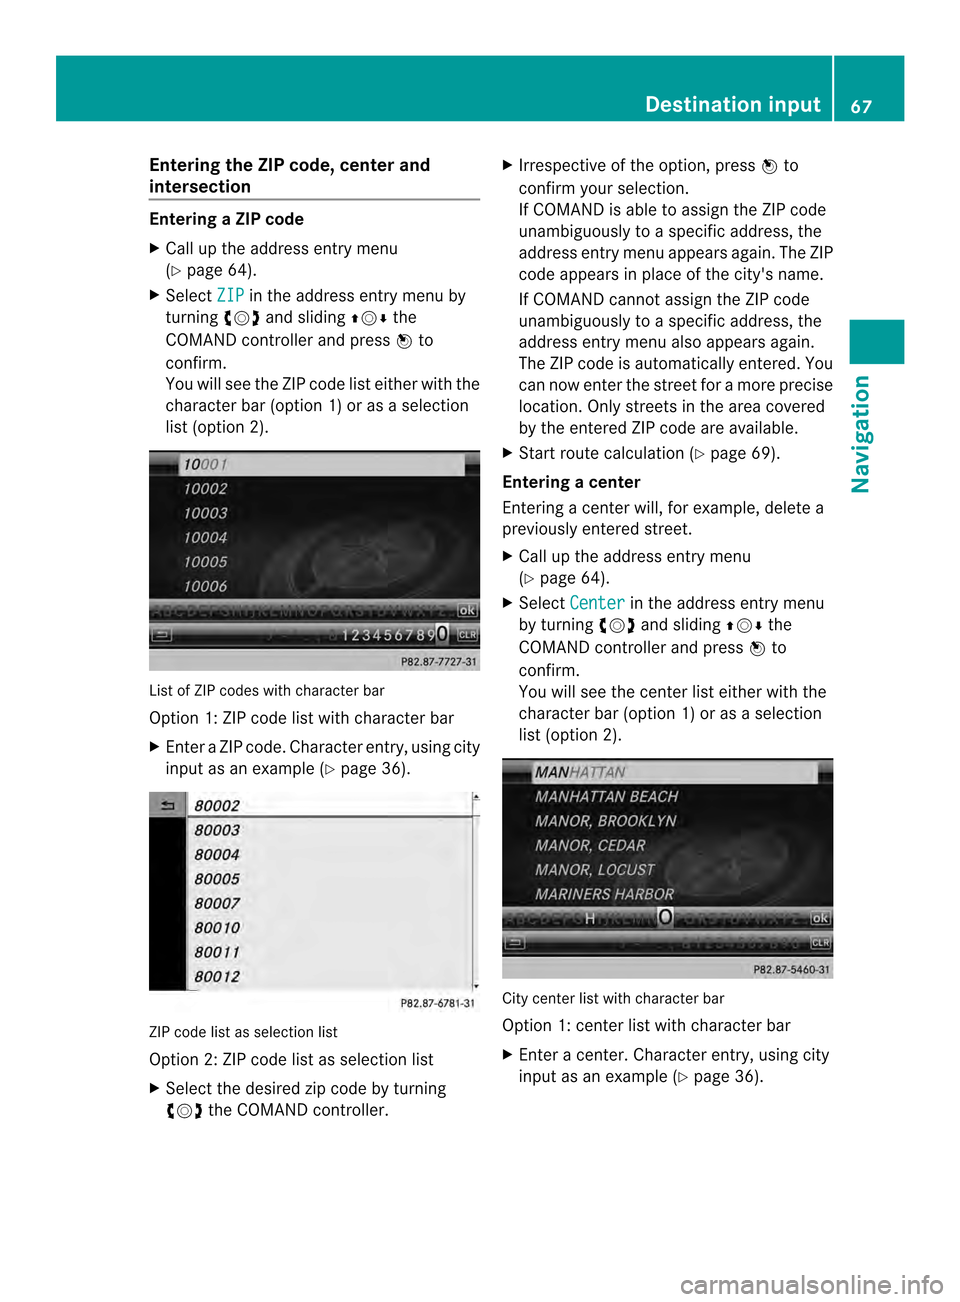
You will see the ZIP code list either with the
characte rbar (option 1) or as a selection
list (option 2). Lis
tofZ IP codes with character bar
Option 1: ZIP code list with character bar
X Enter a ZIP code. Character entry, using city
input as an example (Y page 36).ZIP code list as selection list
Option 2: ZIP code list as selection list
X Select the desired zip code by turning
003C0012003D the COMAND controller. X
Irrespective of the option, press 0037to
confirm yours election.
If COMAND is able to assign the ZIP code
unambiguously to a specific address, the
address entry menu appears again. The ZIP
code appears in place of the city's name.
If COMAND cannot assign the ZIP code
unambiguously to a specific address, the
address entry menu also appears again.
The ZIP code is automatically entered. You
can now enter the street for a more precise
location .Only streets in the area covered
by the entered ZIP code are available.
X Start route calculation (Y page 69).
Entering acenter
Entering a center will, for example, delete a
previously entered street.
X Call up the address entry menu
(Y page 64).
X Select Center in the address entry menu
by turning 003C0012003Dand sliding 003600120008the
COMAND controller and press 0037to
confirm.
You will see the center list either with the
character bar (option 1) or as a selection
list (option 2). City center list with character bar
Option 1: center list with character bar
X
Enter a center. Character entry, using city
input as an example (Y page 36). Destination input
67Navigation Z
Page 70 of 274
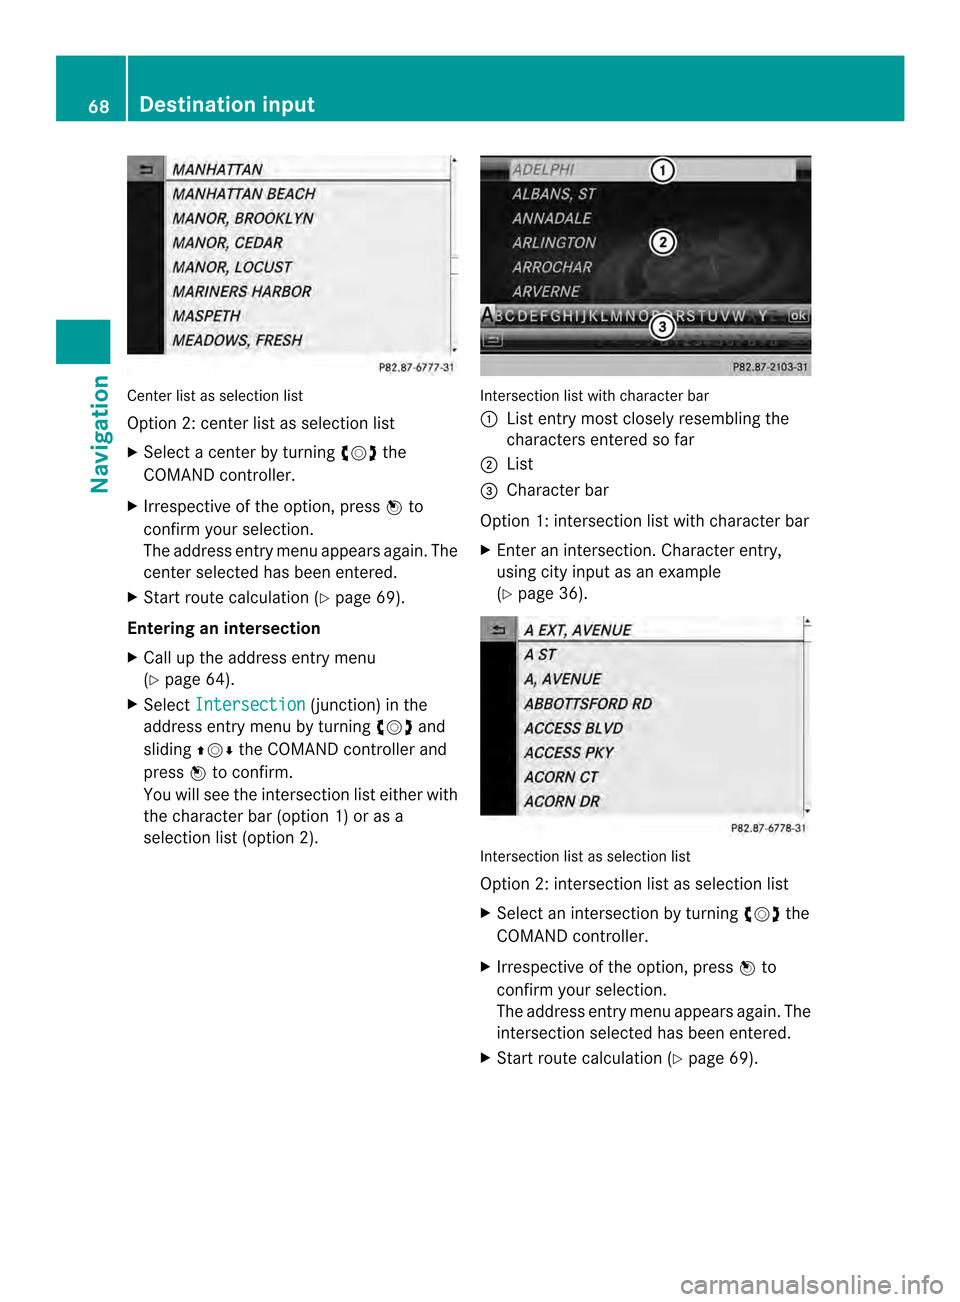
Center list as selectio
nlist
Option 2: center list as selection list
X Select a center by turning 003C0012003Dthe
COMAND controller.
X Irrespective of the option, press 0037to
confirm your selection.
The address entry menu appears again. The
center selected has been entered.
X Start route calculation (Y page 69).
Entering an intersection
X Call up the address entry menu
(Y page 64).
X Select Intersection (junction) in the
address entry menu by turning 003C0012003Dand
sliding 003600120008the COMAND controller and
press 0037to confirm.
You will see the intersection list eithe rwith
the character bar (option 1) or as a
selection list (option 2). Intersection list with character bar
0001
List entry most closely resembling the
characters entered so far
0002 List
0014 Character bar
Option 1: intersection list with character bar
X Enter an intersection. Character entry,
using city input as an example
(Y page 36). Intersection list as selection list
Option 2: intersection list as selection list
X
Select an intersection by turning 003C0012003Dthe
COMAND controller.
X Irrespective of the option, press 0037to
confirm your selection.
The address entry menu appears again. The
intersection selected has been entered.
X Start route calculation (Y page 69).68
Destination inputNavigation
Page 73 of 274
X
Select My Address by turning
003C0012003Dthe
COMAND controller.
X Irrespective of the option, press 0037to
confirm your selection.
The address entry menu appears again.
"My Address" has been entered.
X To start route calculation: selectStart and press
0037to confirm. Entering
adestination from the list of
last destinations
X To switch to navigation mode: press the
0012 button.
X To show the menu: press0037the COMAND
controller.
X Select Destination in the navigation
system menu bar by turning 003C0012003Dthe
COMAND controller and pressing 0037to
confirm. X
Select From Last Destinations and
press 0037to confirm.
X Select the desired destination by turning
003C0012003D the COMAND controller and press
0037 to confirm.
The address entry menu appears again .The
destination address selected has been
entered.
X To start route calculation: selectStart and press
0037to confirm.
Once the route has been calculated, route
guidance begins (Y page 69). i
“Last destinations” memory
(Y page 107). Entering
adestination usin gthe map
Calling up the map X
To switch to navigation mode: press the
0012 button.
X To show the menu: press0037the COMAND
controller.
X Select Destination in the navigation
system menu bar by turning 003C0012003Dthe
COMAND controlle rand pressing 0037to
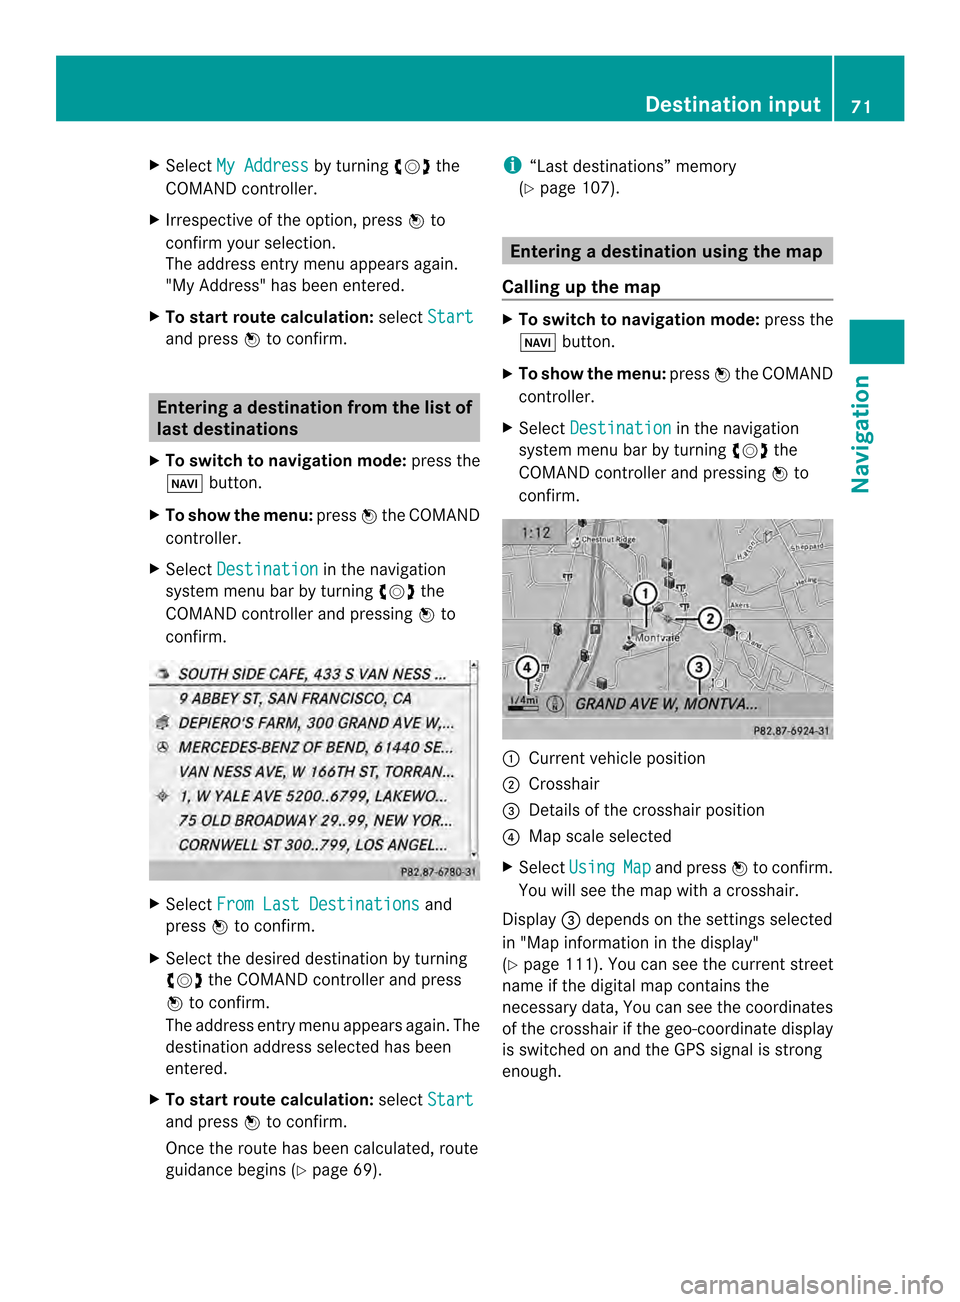
confirm. 0001
Current vehicle position
0002 Crosshair
0014 Details of the crosshair position
0013 Map scale selected
X Select Using Map and press
0037to confirm.
You will see the map with acrosshair.
Display 0014depends on the settings selected
in "Map information in the display"
(Y page1 11). You can see the current street
name if the digital map contains the
necessary data, You can see the coordinates
of the crosshair if the geo-coordinate display
is switched on and the GPS signal is strong
enough. Destination input
71Navigation Z
Page 85 of 274
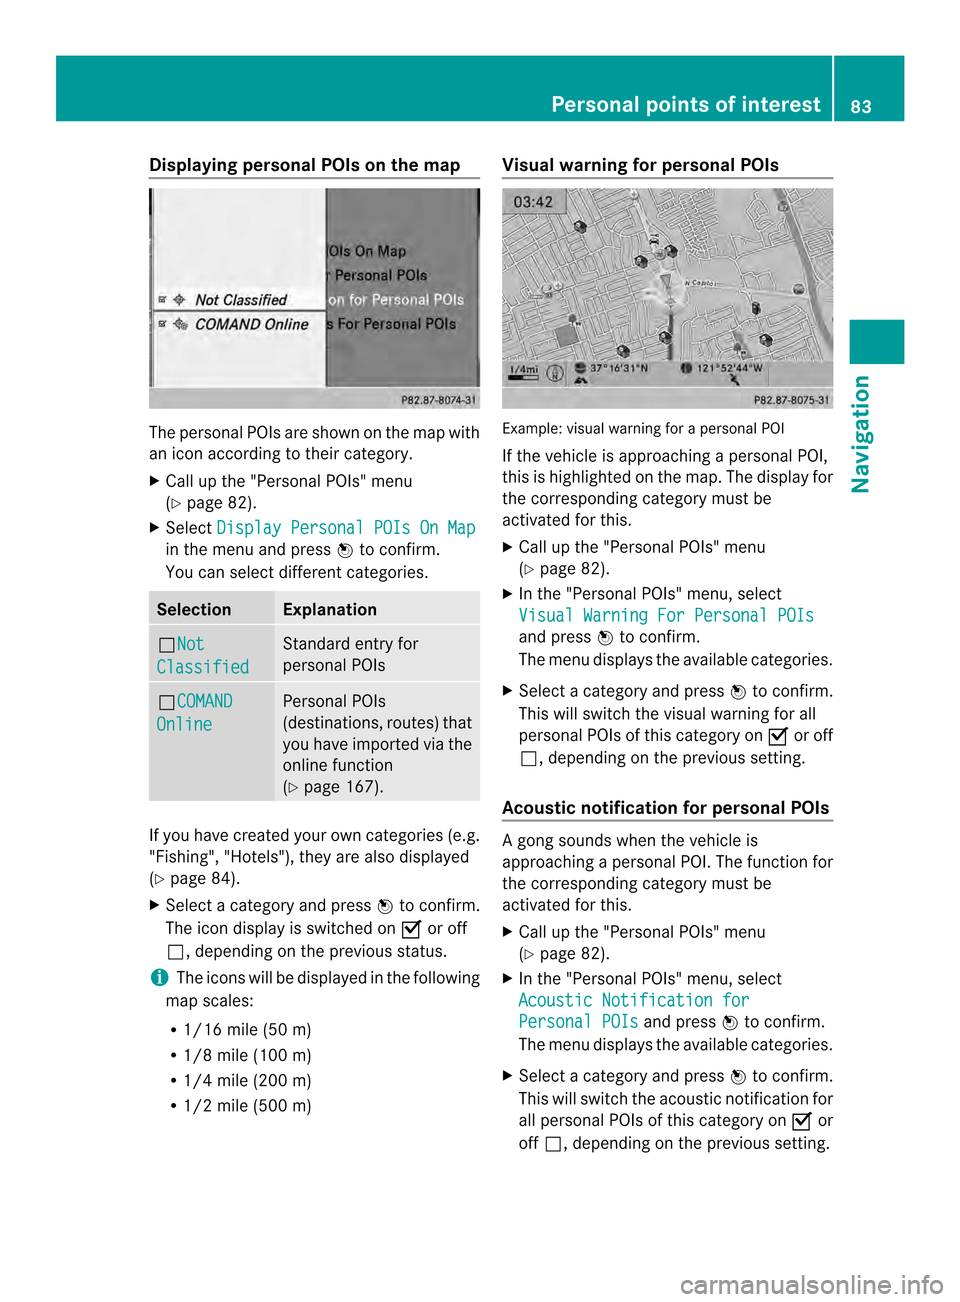
Displaying personal POIs on the map
The personal POIs are shown on the map with
an icon according to their category.
X
Call up the "Personal POIs" menu
(Y page 82).
X Select Display Personal POIs On Map in the menu and press
0037to confirm.
You can selec tdifferen tcategories. Selection Explanation
0003Not
Classified Standard entry for
personal POIs
0003COMAND
Online Personal POIs
(destinations, routes) that
you have imported via the
online function
(Y
page 167). If you have created your own categories (e.g.
"Fishing", "Hotels"), they are also displayed
(Y page 84).
X Select a category and press 0037to confirm.
The ico ndisplay is switched on 0010or off
0003, depending on the previous status.
i The icons will be displayed in the following
map scales:
R 1/16 mile (50 m)
R 1/8 mile (100 m)
R 1/4 mile (200 m)
R 1/2 mile (500 m) Visual warning for personal POIs
Example: visual warning for a personal POI
If the vehicle is approaching a personal POI,
this is highlighted on the map. The display for
the corresponding category must be
activated for this.
X
Call up the "Personal POIs" menu
(Y page 82).
X In the "Personal POIs" menu, select
Visual Warning For Personal POIs and press
0037to confirm.
The menu displays the available categories.
X Selec tacategory and press 0037to confirm.
This will switch the visual warning for all
personal POIs of this category on 0010or off
0003, depending on the previous setting.
Acoustic notification for personal POIs Ag
ong sounds when the vehicle is
approaching a personal POI. The function for
the corresponding category must be
activated for this.
X Call up the "Personal POIs" menu
(Y page 82).
X In the "Personal POIs" menu, select
Acoustic Notification for Personal POIs and press
0037to confirm.
The menu displays the available categories.
X Select a category and press 0037to confirm.
This will switch the acoustic notification for
all personal POIs of this category on 0010or
off 0003, depending on the previous setting. Personal points of interest
83Navigation Z