MERCEDES-BENZ SL ROADSTER 2012 Owners Manual
Manufacturer: MERCEDES-BENZ, Model Year: 2012, Model line: SL ROADSTER, Model: MERCEDES-BENZ SL ROADSTER 2012Pages: 637, PDF Size: 20.68 MB
Page 511 of 637
Teletext
Introduction
Teletext and data service functions are not
supported by all TV standards in all countries.
Teletext can only be received if there is no
interference in the picture reception. The tel-
etext or data service functions receive and
save all teletext pages for the currently selec- ted channel in the system memory. This
excludes any subpages. If you set a different
channel, the memory is cleared and refilled.
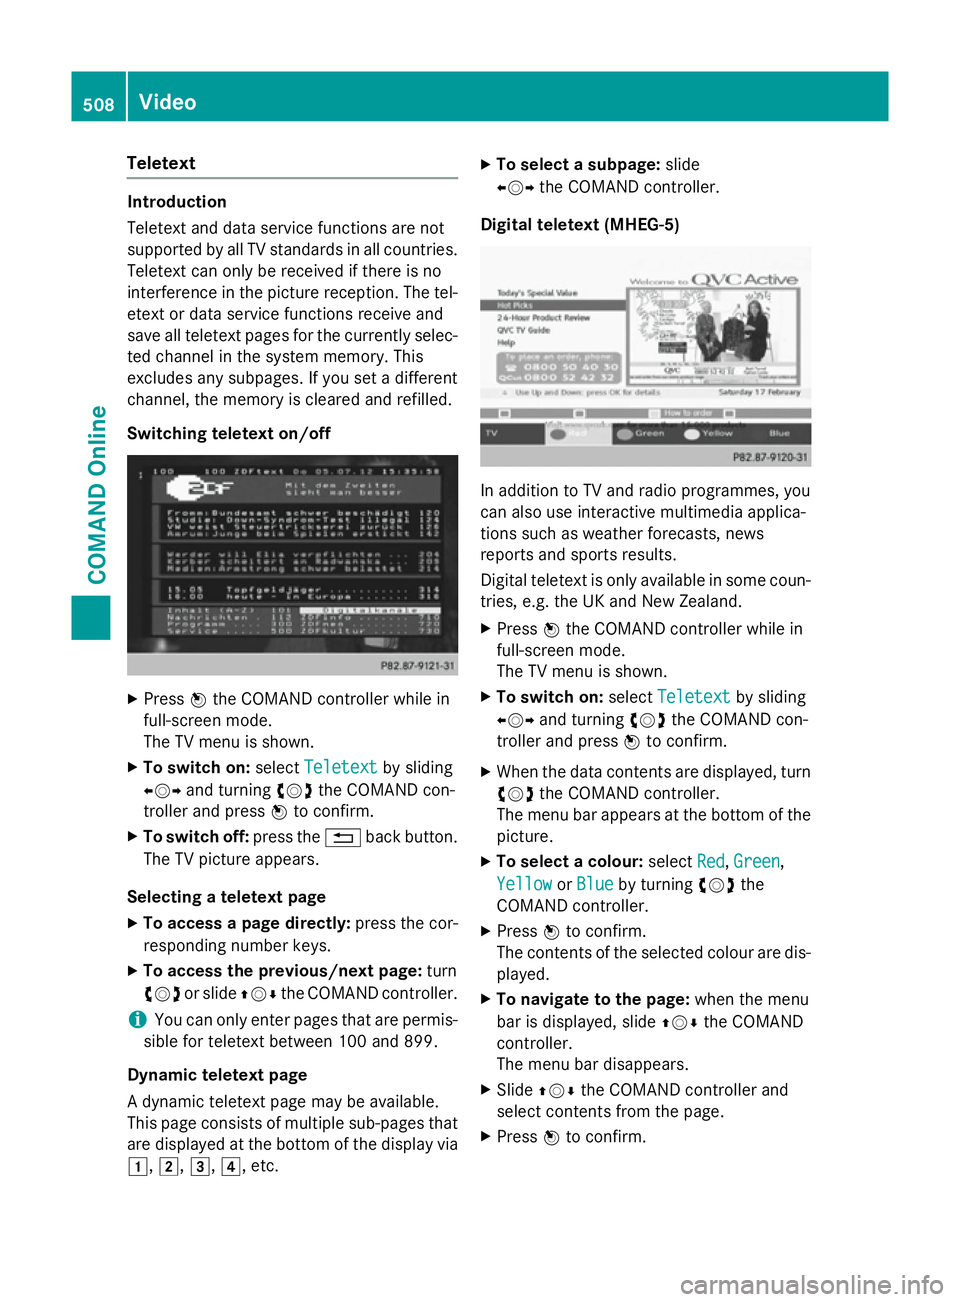
Switching teletext on/off X
Press Wthe COMAND controller while in
full-screen mode.
The TV menu is shown.
X To switch on: selectTeletext Teletext by sliding
XVY and turning cVdthe COMAND con-
troller and press Wto confirm.
X To switch off: press the%back button.
The TV picture appears.
Selecting a teletext page
X To access a page directly: press the cor-
responding number keys.
X To access the previous/next page: turn
cVd or slide ZVÆthe COMAND controller.
i You can only enter pages that are permis-
sible for teletext between 100 and 899.
Dynamic teletext page
A dynamic teletext page may be available.
This page consists of multiple sub-pages that are displayed at the bottom of the display via
1, 2,3,4, etc. X
To select a subpage: slide
XVY the COMAND controller.
Digital teletext (MHEG-5) In addition to TV and radio programmes, you
can also use interactive multimedia applica-
tions such as weather forecasts, news
reports and sports results.
Digital teletext is only available in some coun-
tries, e.g. the UK and New Zealand.
X Press Wthe COMAND controller while in
full-screen mode.
The TV menu is shown.
X To switch on: selectTeletext Teletext by sliding
XVY and turning cVdthe COMAND con-
troller and press Wto confirm.
X When the data contents are displayed, turn
cVd the COMAND controller.
The menu bar appears at the bottom of the
picture.
X To select a colour: selectRed
Red,Green
Green,
Yellow
Yellow orBlue
Blue by turning cVdthe
COMAND controller.
X Press Wto confirm.
The contents of the selected colour are dis- played.
X To navigate to the page: when the menu
bar is displayed, slide ZVÆthe COMAND
controller.
The menu bar disappears.
X Slide ZVÆ the COMAND controller and
select contents from the page.
X Press Wto confirm. 508
VideoCOMAND Online
Page 512 of 637
X
To return to the TV programme: turn
cVd the COMAND controller.
X Select TV
TVby turning cVdthe COMAND
controller.
or
X Press and hold the %back button on the
left next to the COMAND controller.
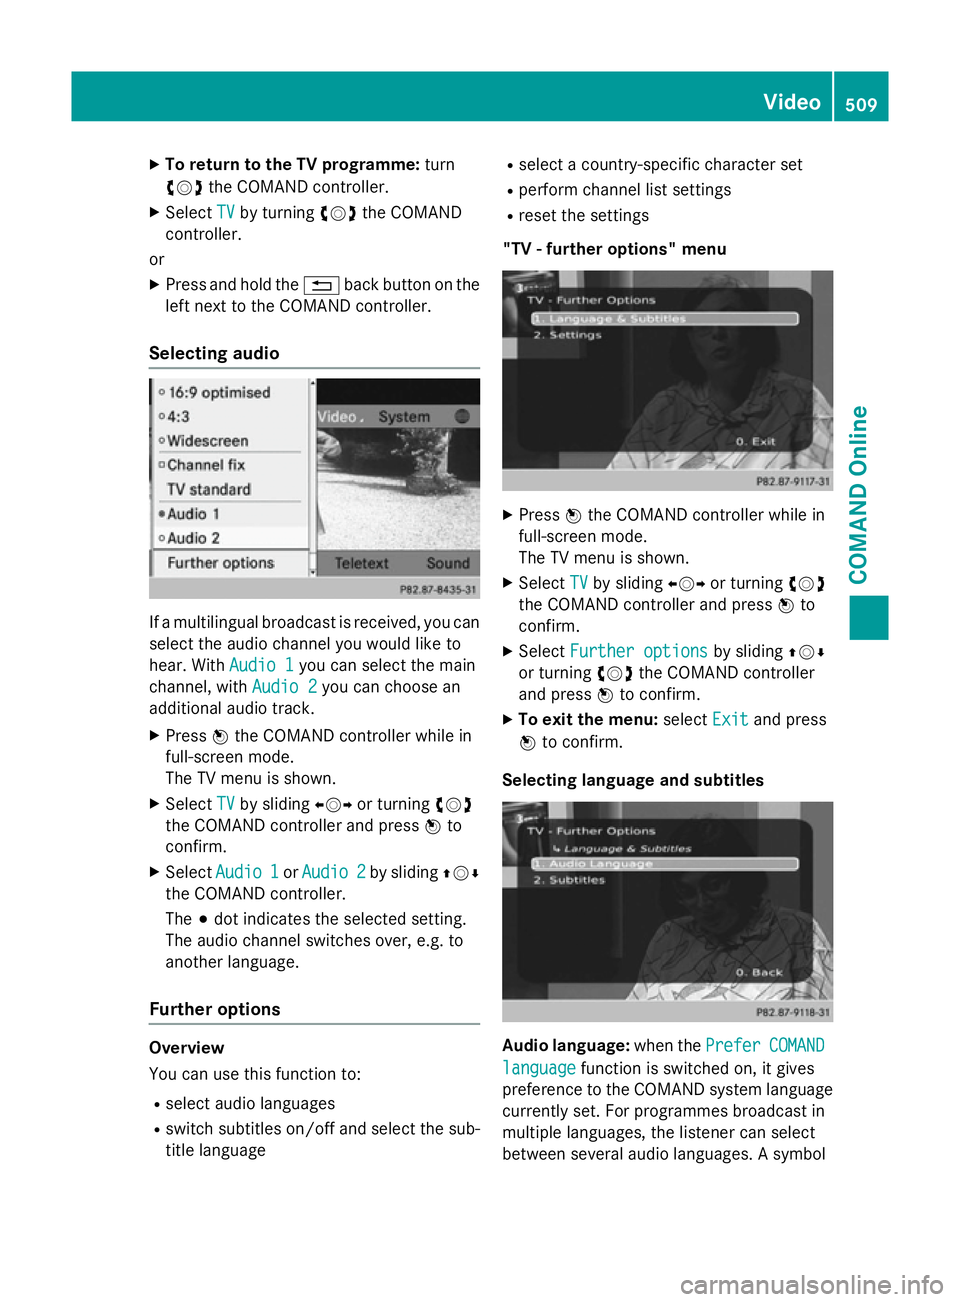
Selecting audio If a multilingual broadcast is received, you can
select the audio channel you would like to
hear. With Audio 1
Audio 1you can select the main
channel, with Audio 2
Audio 2you can choose an
additional audio track.
X Press Wthe COMAND controller while in
full-screen mode.
The TV menu is shown.
X Select TV TVby sliding XVYor turning cVd
the COMAND controller and press Wto
confirm.
X Select Audio 1
Audio 1 orAudio 2
Audio 2 by sliding ZVÆ
the COMAND controller.
The #dot indicates the selected setting.
The audio channel switches over, e.g. to
another language.
Further options Overview
You can use this function to:
R select audio languages
R switch subtitles on/off and select the sub-
title language R
select a country-specific character set
R perform channel list settings
R reset the settings
"TV - further options" menu X
Press Wthe COMAND controller while in
full-screen mode.
The TV menu is shown.
X Select TV TVby sliding XVYor turning cVd
the COMAND controller and press Wto
confirm.
X Select Further options
Further options by slidingZVÆ
or turning cVdthe COMAND controller
and press Wto confirm.
X To exit the menu: selectExit
Exitand press
W to confirm.
Selecting language and subtitles Audio language:
when thePrefer
PreferCOMAND
COMAND
language
language function is switched on, it gives
preference to the COMAND system language currently set. For programmes broadcast in
multiple languages, the listener can select
between several audio languages. A symbol Video
509COMAND Online Z
Page 513 of 637
for programme transmission may appear in
front of the audio language: with audio
explanations (for the visually impaired) in
stereo or for the hearing impaired. If a symbol
does not appear, the programme is either
broadcast in mono or the transmission prop-
erties are unknown.
Subtitles: when this function is activated,
shows subtitles in the selected language for
the programme currently broadcast (if avail-
able).
X In the "Tuner - Further Options" menu, con-
firm Language & Subtitles Language & Subtitles by pressing
W the COMAND controller (Y page 509).
A menu appears.
X To select the language: confirmAudio
Audio
Language
Language by pressing Wthe COMAND
controller.
X Select Prefer COMAND language Prefer COMAND language or one
of the available audio languages.
Switch the setting on Oor off ªor select
an available audio language.
If you select one of the available audio lan-
guages, e.g. English, this setting is used for
the current program only.
X To select subtitles: selectSubtitles Subtitles by
sliding ZVÆor turning cVdthe COMAND
controller and press Wto confirm.
X Select Subtitles
Subtitles and pressWto confirm.
Switch the subtitles on Oor off ª.
X Select Prefer COMAND language
Prefer COMAND language or one
of the available languages for subtitles.
Switch the setting on Oor off ªor select
an available language for subtitles.
If you select one of the available languages
for subtitles, e.g. English, this setting is
used for the current programme.
X To exit the menu: selectBack
Back and press
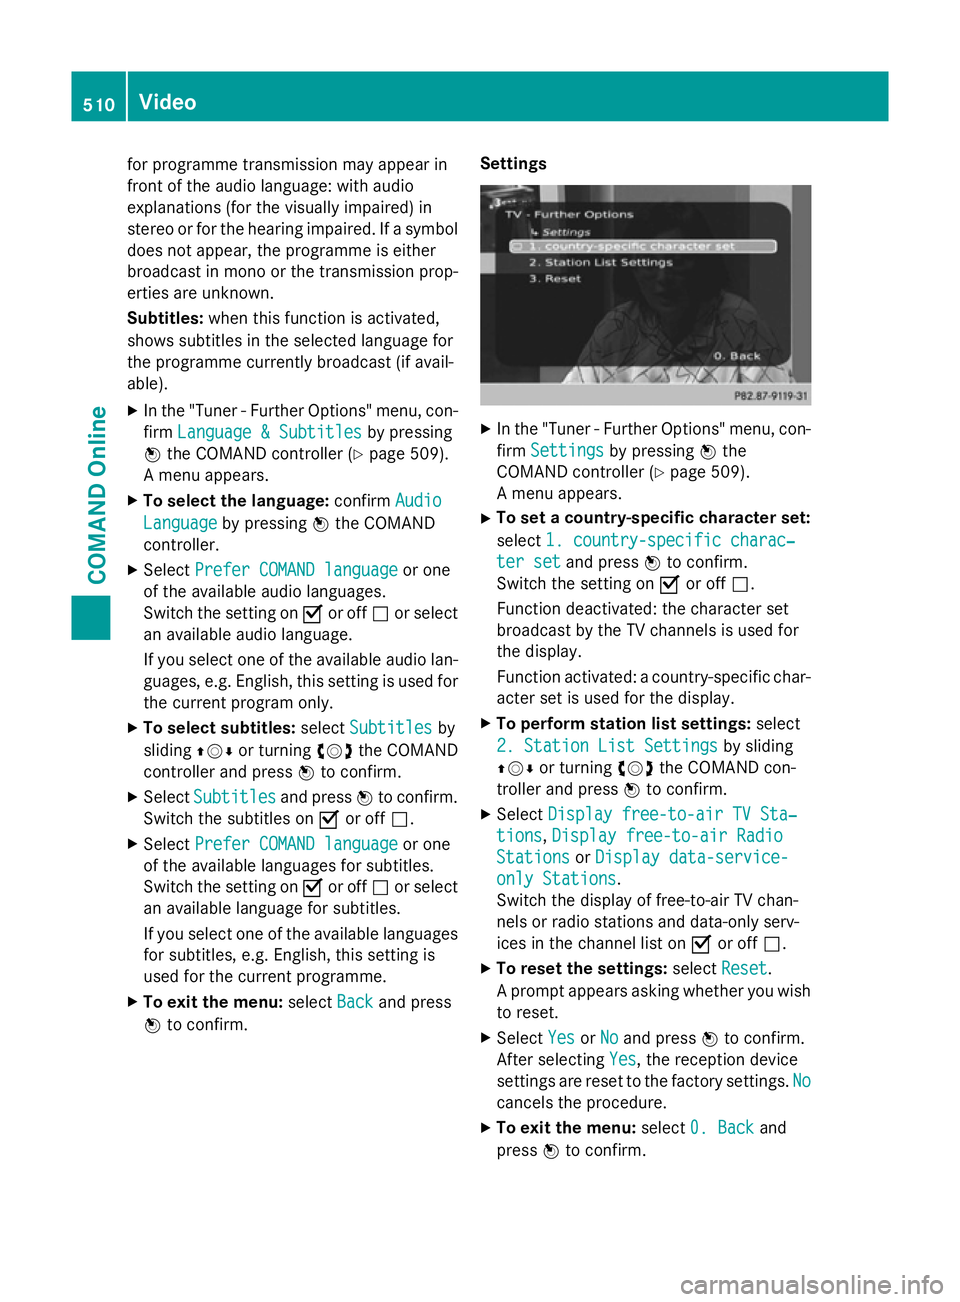
W to confirm. Settings X
In the "Tuner - Further Options" menu, con-
firm Settings Settings by pressing Wthe
COMAND controller (Y page 509).
A menu appears.
X To set a country-specific character set:
select 1. country-specific charac‐ 1. country-specific charac‐
ter set
ter set and press Wto confirm.
Switch the setting on Oor off ª.
Function deactivated: the character set
broadcast by the TV channels is used for
the display.
Function activated: a country-specific char-
acter set is used for the display.
X To perform station list settings: select
2. Station List Settings 2. Station List Settings by sliding
ZVÆ or turning cVdthe COMAND con-
troller and press Wto confirm.
X Select Display free-to-air TV Sta‐
Display free-to-air TV Sta‐
tions
tions, Display free-to-air Radio
Display free-to-air Radio
Stations
Stations orDisplay data-service-
Display data-service-
only Stations
only Stations.
Switch the display of free-to-air TV chan-
nels or radio stations and data-only serv-
ices in the channel list on Oor off ª.
X To reset the settings: selectReset Reset.
A prompt appears asking whether you wish to reset.
X Select Yes
YesorNo
No and press Wto confirm.
After selecting Yes Yes, the reception device
settings are reset to the factory settings. No No
cancels the procedure.
X To exit the menu: select0. Back
0. Back and
press Wto confirm. 510
VideoCOMAND Online
Page 514 of 637
Video DVD mode
Important safety notes G
WARNING
The CD/DVD drive is a class 1 laser product. If you open the housing of the CD/DVD drive,
invisible laser beams may be released. These laser beams may damage your retina. There is
a risk of injury.
You must not open the casing. Always have
maintenance work and repairs carried out at a
qualified specialist workshop. G
WARNING
Handling discs while driving will distract you
from traffic conditions. You could then lose
control of the vehicle. There is a risk of an
accident.
Handle discs only when the vehicle is station- ary.
Bear in mind that, at a speed of only 50 km/h, your vehicle is already covering a distance of
14 m per second.
Notes on discs !
Do not affix stickers or labels to the discs.
They could peel off and damage
COMAND Online. Stickers can cause the
disc to bend, which can result in read errors
and disc recognition problems.
! COMAND Online is designed to play discs
which comply with the EN 60908 standard. Therefore, you can only use discs with a
maximum thickness of 1.3 mm.
If you insert thicker discs, e.g. those that
contain data on both sides (DVD on one
side and audio data on the other), they can-
not be ejected and can damage the device.
Only use round discs with a diameter of
12 cm. Do not use discs with a diameter of
8 cm, even with an adapter.
You may encounter playback problems when
playing copied discs. There are a large variety of discs, DVD authoring software, writing software and writers available. This variety
means that there is no guarantee that the
system will be able to play discs that you have
copied yourself.
DVD playback requirements There are video DVDs available on the market
that do not conform to the current standards. Such DVDs may have picture, sound or other playback problems.
COMAND Online is capable of playing back
video DVDs produced according to the fol-
lowing standards:
R Region code 2 (for Europe) or region code 0
(no region code)
R PAL or NTSC standard
You will generally find the relevant details
either on the DVD itself or on the DVD case.
i If you insert a video DVD with a different
region code, you will see a message to this
effect.
i COMAND Online is set to region code 2 at
the factory. This setting can be changed at
a Mercedes-Benz Service Centre. This will
allow you to play video DVDs with a differ-
ent region code, provided that they are pro-
duced in accordance with the PAL or NTSC standard. The region code can be changed
a maximum of five times.
Function restrictions Depending on the DVD, it is possible that cer-
tain functions or actions will be temporarily
blocked or may not function at all. As soon as
you try to activate these functions or actions, you will see the Ksymbol in the display.
Inserting and removing DVDs X
Proceed as described in the "Inserting and
ejecting CDs and DVDs" section
(Y page 469). Video
511COMAND Online Z
Page 515 of 637
Switching to video DVD mode
Switching on automatically
X Single DVD drive: insert a video DVD.
COMAND loads the medium inserted and
starts to play it.
X DVD changer: insert a video DVD.
X Press h.
or
X Press the %back button.
COMAND Online loads the medium inser-
ted and starts to play it.
Switching on with the function button X Press the hfunction button.
COMAND Online switches to the disc oper-
ating mode previously set.
By pressing the function button repeatedly,
you can change the operating mode in the
following order:
R audio CD/DVD/video DVD/MP3 in the
DVD changer or single DVD drive (disc
mode)
R memory card mode
R MUSIC REGISTER
R USB memory
R Media Interface or audio AUX mode
R operation with Bluetooth ®
audio
X DVD changer: selectMedia
Media by sliding VÆ
and turning cVdthe COMAND controller
and press Wto confirm.
Single DVD drive: selectMedia Media by sliding
VÆ and turning cVdthe COMAND con-
troller and press Wto confirm.
X Select a ývideo DVD from the media list
(Y page 514).
Switching on with the video menu X Select Video
Videoin the main function bar by
sliding ZVand turning cVdthe COMAND
controller and press Wto confirm.
If video DVD mode was the last mode selec-
ted, it will now be active. If another video source is switched on, you
can now switch to video DVD mode in the
video menu.
X Select Video Videoby sliding ZVthe COMAND
controller and press Wto confirm.
The video menu appears.
X Select DVD-V DVD-Vand press Wto confirm.
Showing/hiding the control menu X
To show: in video DVD mode, slide ZVÆ
the COMAND controller.
X To hide: slideZVÆ the COMAND control-
ler.
or
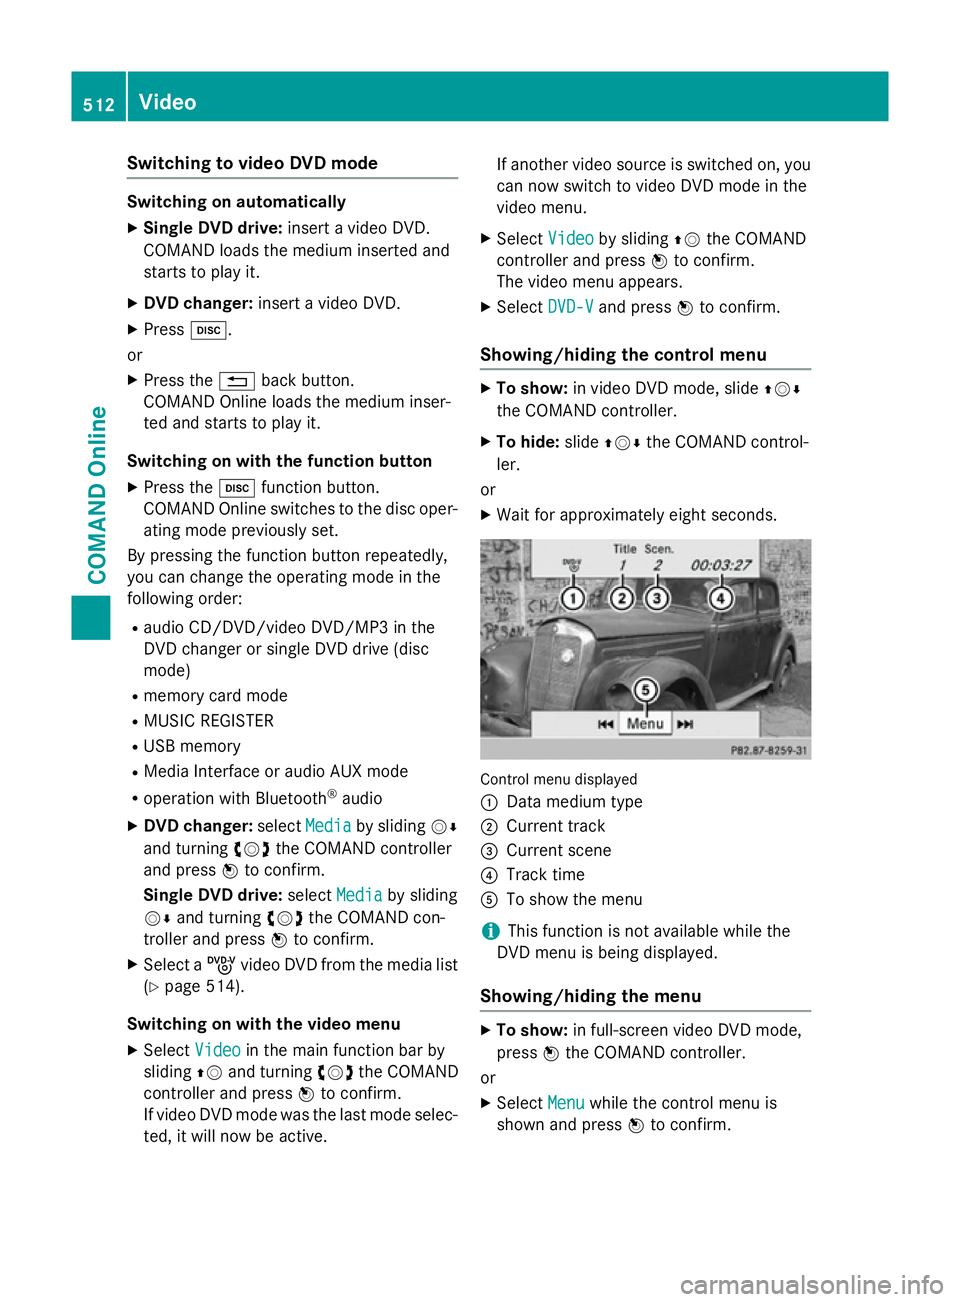
X Wait for approximately eight seconds. Control menu displayed
:
Data medium type
; Current track
= Current scene
? Track time
A To show the menu
i This function is not available while the
DVD menu is being displayed.
Showing/hiding the menu X
To show: in full-screen video DVD mode,
press Wthe COMAND controller.
or
X Select Menu
Menu while the control menu is
shown and press Wto confirm. 512
VideoCOMAND Online
Page 516 of 637
X
To hide: slide the ZVCOMAND controller
and confirm Full screen
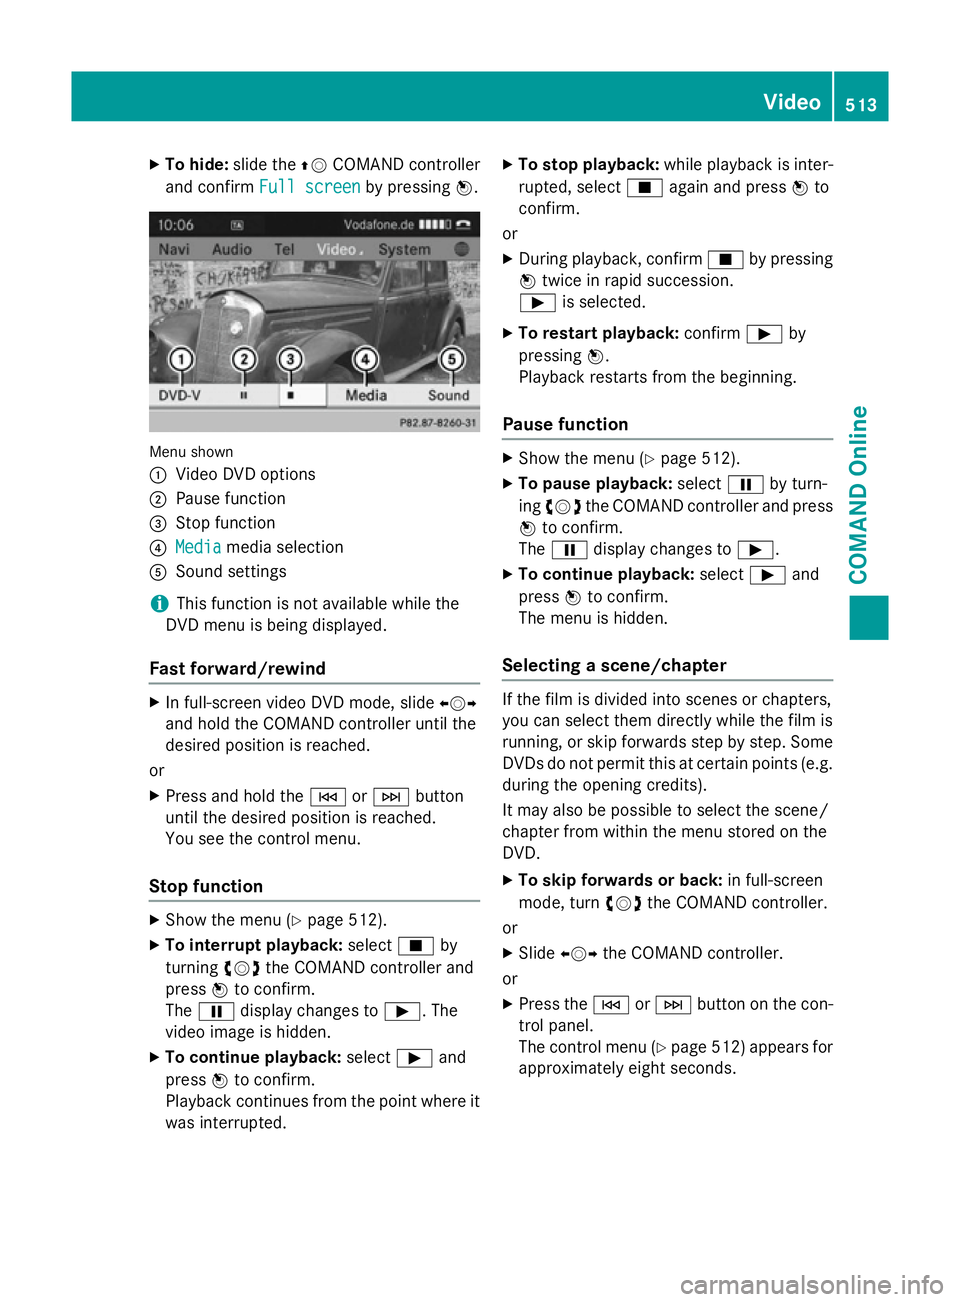
Full screen by pressingW. Menu shown
:
Video DVD options
; Pause function
= Stop function
? Media Media media selection
A Sound settings
i This function is not available while the
DVD menu is being displayed.
Fast forward/rewind X
In full-screen video DVD mode, slide XVY
and hold the COMAND controller until the
desired position is reached.
or X Press and hold the EorF button
until the desired position is reached.
You see the control menu.
Stop function X
Show the menu (Y page 512).
X To interrupt playback: selectÉby
turning cVdthe COMAND controller and
press Wto confirm.
The Ë display changes to Ì. The
video image is hidden.
X To continue playback: selectÌand
press Wto confirm.
Playback continues from the point where it was interrupted. X
To stop playback: while playback is inter-
rupted, select Éagain and press Wto
confirm.
or
X During playback, confirm Éby pressing
W twice in rapid succession.
Ì is selected.
X To restart playback: confirmÌby
pressing W.
Playback restarts from the beginning.
Pause function X
Show the menu (Y page 512).
X To pause playback: selectËby turn-
ing cVd the COMAND controller and press
W to confirm.
The Ë display changes to Ì.
X To continue playback: selectÌand
press Wto confirm.
The menu is hidden.
Selecting a scene/chapter If the film is divided into scenes or chapters,
you can select them directly while the film is
running, or skip forwards step by step. Some
DVDs do not permit this at certain points (e.g. during the opening credits).
It may also be possible to select the scene/
chapter from within the menu stored on the
DVD.
X To skip forwards or back: in full-screen
mode, turn cVdthe COMAND controller.
or X Slide XVY the COMAND controller.
or X Press the EorF button on the con-
trol panel.
The control menu (Y page 512) appears for
approximately eight seconds. Video
513COMAND Online Z
Page 517 of 637
X
On the multifunction steering wheel:
switch to video DVD mode in
COMAND Online (Y page 512).
X Use the =or; button to select the
Audio Audio menu.
X Press the 9or: button to select a
scene/chapter.
If you press and hold the 9or:
button for an extended period, rapid scroll-
ing begins.
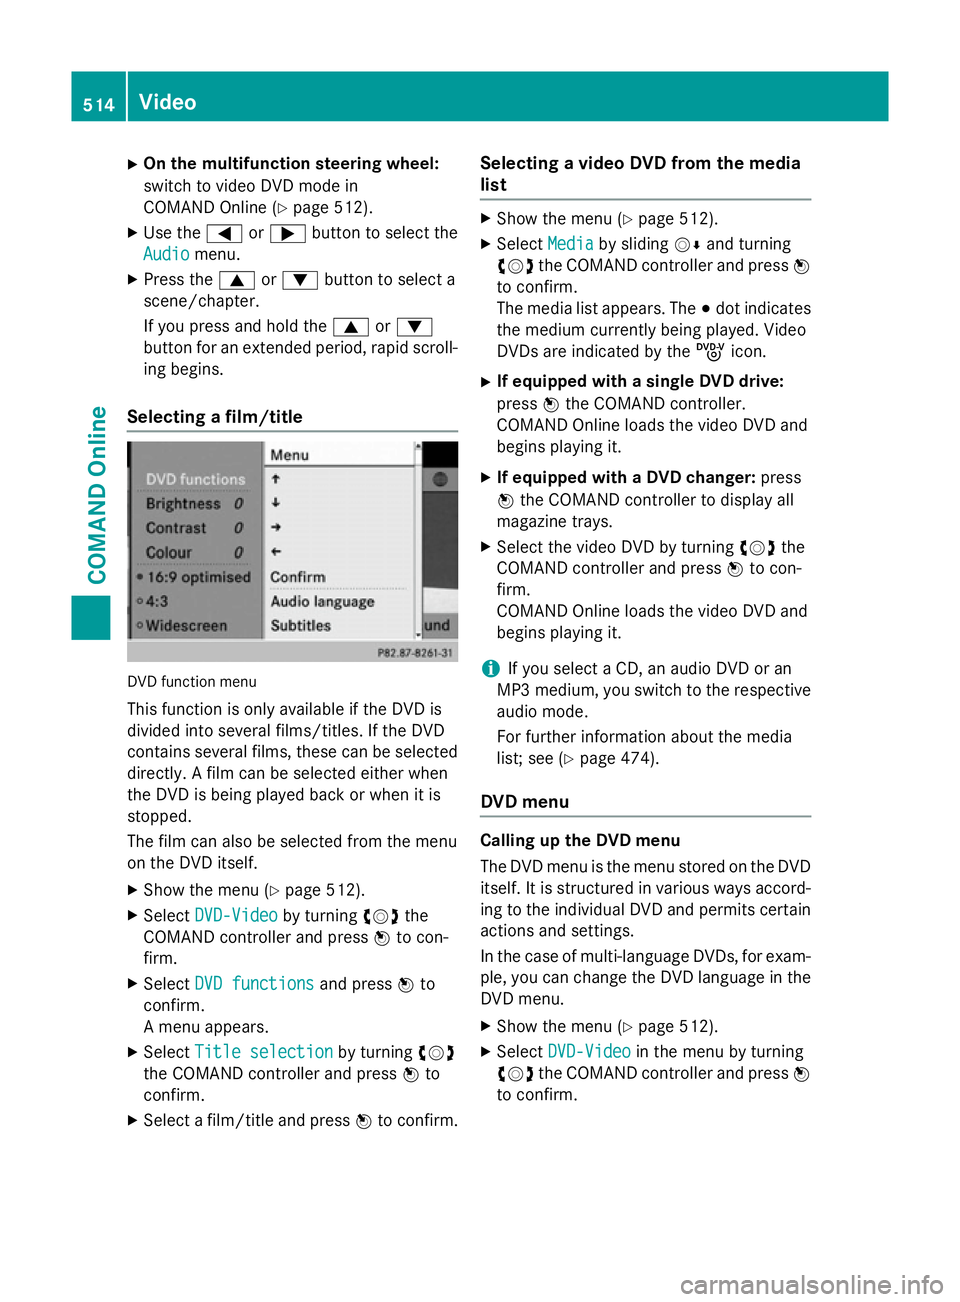
Selecting a film/title DVD function menu
This function is only available if the DVD is
divided into several films/titles. If the DVD
contains several films, these can be selected
directly. A film can be selected either when
the DVD is being played back or when it is
stopped.
The film can also be selected from the menu
on the DVD itself.
X Show the menu (Y page 512).
X Select DVD-Video DVD-Video by turningcVdthe
COMAND controller and press Wto con-
firm.
X Select DVD functions
DVD functions and pressWto
confirm.
A menu appears.
X Select Title selection
Title selection by turningcVd
the COMAND controller and press Wto
confirm.
X Select a film/title and press Wto confirm. Selecting a video DVD from the media
list X
Show the menu (Y page 512).
X Select Media Mediaby sliding VÆand turning
cVd the COMAND controller and press W
to confirm.
The media list appears. The #dot indicates
the medium currently being played. Video
DVDs are indicated by the ýicon.
X If equipped with a single DVD drive:
press Wthe COMAND controller.
COMAND Online loads the video DVD and
begins playing it.
X If equipped with a DVD changer: press
W the COMAND controller to display all
magazine trays.
X Select the video DVD by turning cVdthe
COMAND controller and press Wto con-
firm.
COMAND Online loads the video DVD and
begins playing it.
i If you select a CD, an audio DVD or an
MP3 medium, you switch to the respective
audio mode.
For further information about the media
list; see (Y page 474).
DVD menu Calling up the DVD menu
The DVD menu is the menu stored on the DVD
itself. It is structured in various ways accord-
ing to the individual DVD and permits certain actions and settings.
In the case of multi-language DVDs, for exam-
ple, you can change the DVD language in the DVD menu.
X Show the menu (Y page 512).
X Select DVD-Video DVD-Video in the menu by turning
cVd the COMAND controller and press W
to confirm. 514
VideoCOMAND Online
Page 518 of 637
X
Select DVD functions
DVD functions and pressWto
confirm.
X Select Menu
Menu and press Wto confirm.
The DVD menu appears.
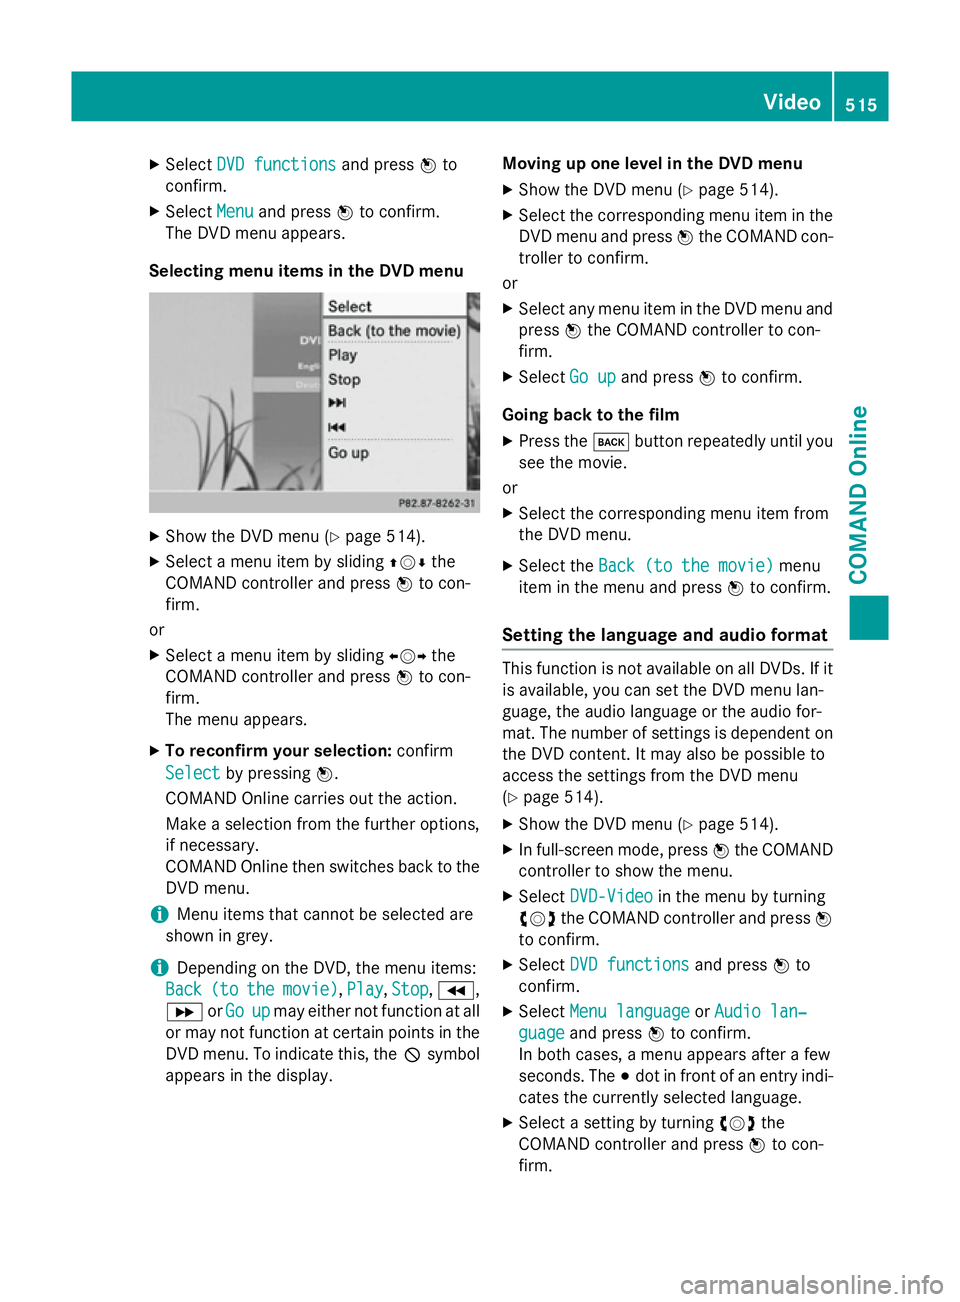
Selecting menu items in the DVD menu X
Show the DVD menu (Y page 514).
X Select a menu item by sliding ZVÆthe
COMAND controller and press Wto con-
firm.
or X Select a menu item by sliding XVYthe
COMAND controller and press Wto con-
firm.
The menu appears.
X To reconfirm your selection: confirm
Select Select by pressing W.
COMAND Online carries out the action.
Make a selection from the further options,
if necessary.
COMAND Online then switches back to the
DVD menu.
i Menu items that cannot be selected are
shown in grey.
i Depending on the DVD, the menu items:
Back
Back (to (tothe
themovie)
movie) ,Play
Play, Stop
Stop,K,
L orGo
Go up
upmay either not function at all
or may not function at certain points in the
DVD menu. To indicate this, the Ksymbol
appears in the display. Moving up one level in the DVD menu
X Show the DVD menu (Y page 514).
X Select the corresponding menu item in the
DVD menu and press Wthe COMAND con-
troller to confirm.
or
X Select any menu item in the DVD menu and
press Wthe COMAND controller to con-
firm.
X Select Go up
Go up and press Wto confirm.
Going back to the film
X Press the kbutton repeatedly until you
see the movie.
or
X Select the corresponding menu item from
the DVD menu.
X Select the Back (to the movie)
Back (to the movie) menu
item in the menu and press Wto confirm.
Setting the language and audio format This function is not available on all DVDs. If it
is available, you can set the DVD menu lan-
guage, the audio language or the audio for-
mat. The number of settings is dependent on
the DVD content. It may also be possible to
access the settings from the DVD menu
(Y page 514).
X Show the DVD menu (Y page 514).
X In full-screen mode, press Wthe COMAND
controller to show the menu.
X Select DVD-Video DVD-Video in the menu by turning
cVd the COMAND controller and press W
to confirm.
X Select DVD functions
DVD functions and pressWto
confirm.
X Select Menu language
Menu language orAudio lan‐
Audio lan‐
guage
guage and press Wto confirm.
In both cases, a menu appears after a few
seconds. The #dot in front of an entry indi-
cates the currently selected language.
X Select a setting by turning cVdthe
COMAND controller and press Wto con-
firm. Video
515COMAND Online Z
Page 519 of 637
Subtitles and camera angle
These functions are not available on all DVDs.
The number of subtitle languages and camera
angles available depends on the content of
the DVD. It may also be possible to access the settings from the DVD menu.
X Show the DVD menu (Y page 514).
X Select DVD-Video DVD-Video in the menu by turning
cVd the COMAND controller and press W
to confirm.
X Select DVD functions
DVD functions and pressWto
confirm.
X Select Subtitles
Subtitles orCamera angle
Camera angle and
press Wto confirm.
In both cases, a menu appears. The #dot in
front of an entry indicates the current set-
ting.
X Select a setting by turning cVdthe
COMAND controller and press Wto con-
firm.
Interactive content DVDs may contain interactive content (e.g. a
video game). In a video game, for example,
you may be able to influence events by select- ing and triggering actions. The type and num- ber of actions depend on the DVD.
X Select an action by sliding ZVÆorXVY the
COMAND controller and press Wto exe-
cute it.
A menu appears and the first entry, Select Select,
is highlighted.
X Press Wthe COMAND controller. Video AUX operation
Connecting external video sources External video sources may have different
volumes, which can mean that system mes-
sages such as traffic announcements and
navigation system announcements are much louder. If necessary, deactivate the system
messages or adjust their volume manually. If your vehicle is equipped with the Media
Interface, you can connect an external video
source.
You require an additional audio/video cable
set to connect an external video source to the
Media Interface.
For more details, please contact a Mercedes- Benz Service Centre or visit http://
www.mercedes-benz.com/connect . Then,
follow the instructions in the "Media Inter-
face" section.
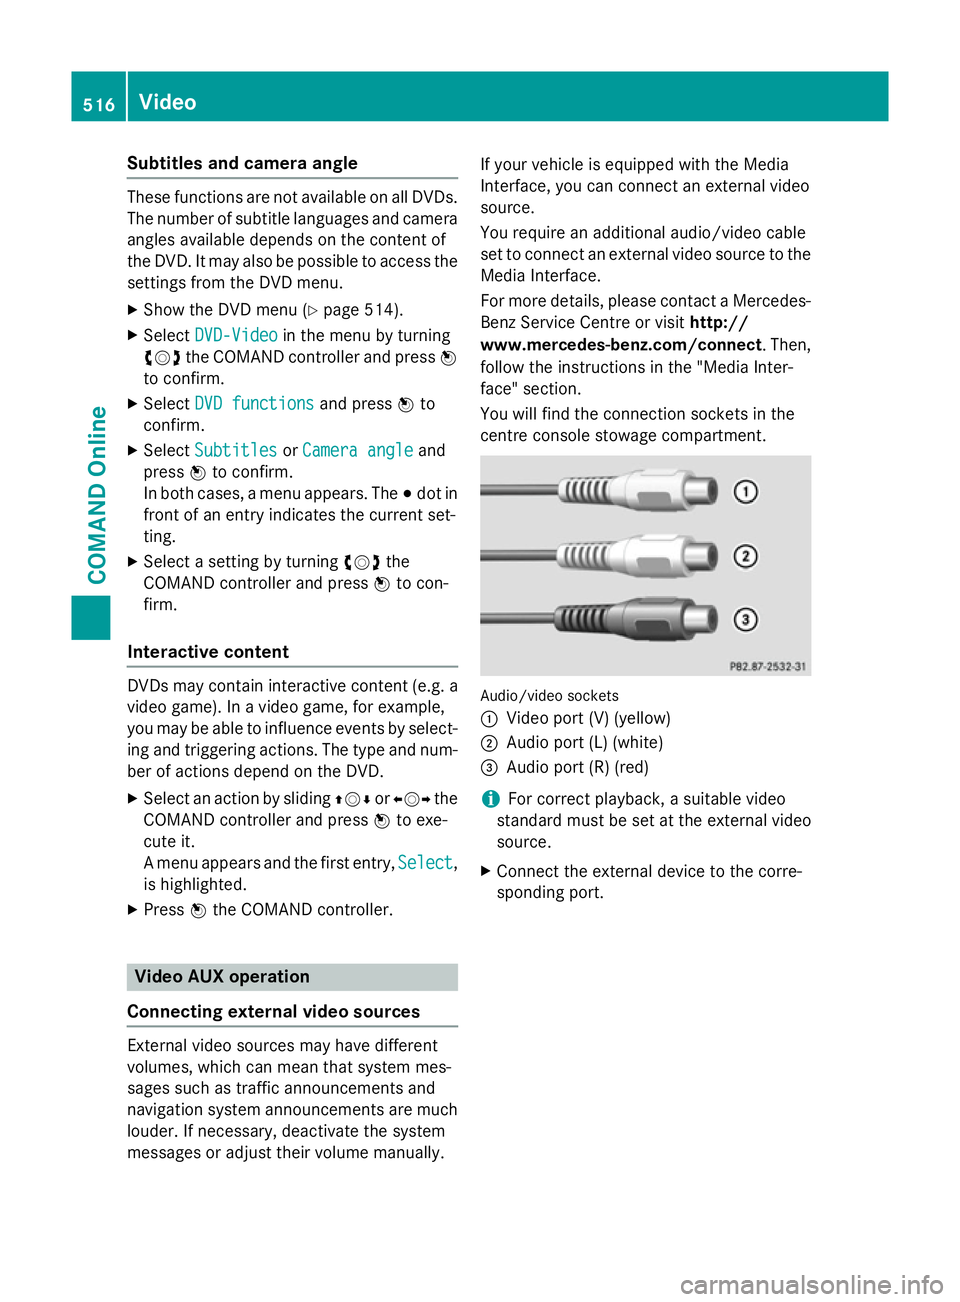
You will find the connection sockets in the
centre console stowage compartment. Audio/video sockets
:
Video port (V) (yellow)
; Audio port (L) (white)
= Audio port (R) (red)
i For correct playback, a suitable video
standard must be set at the external video
source.
X Connect the external device to the corre-
sponding port. 516
VideoCOMAND Online
Page 520 of 637
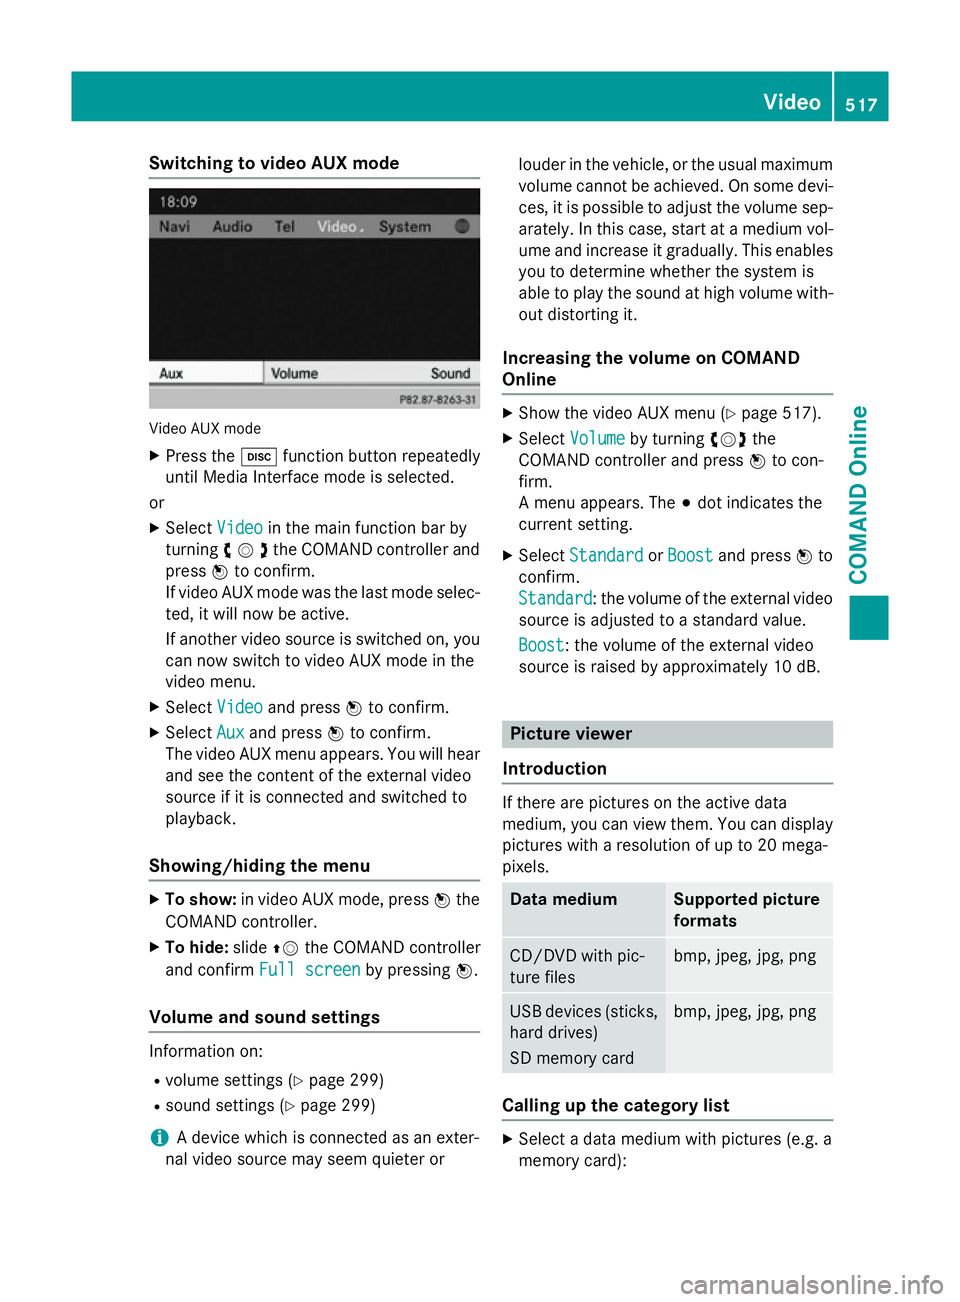
Switching to video AUX mode
Video AUX mode
X Press the hfunction button repeatedly
until Media Interface mode is selected.
or
X Select Video
Videoin the main function bar by
turning cVdthe COMAND controller and
press Wto confirm.
If video AUX mode was the last mode selec-
ted, it will now be active.
If another video source is switched on, you can now switch to video AUX mode in the
video menu.
X Select Video Videoand press Wto confirm.
X Select Aux
Aux and press Wto confirm.
The video AUX menu appears. You will hear
and see the content of the external video
source if it is connected and switched to
playback.
Showing/hiding the menu X
To show: in video AUX mode, press Wthe
COMAND controller.
X To hide: slideZVthe COMAND controller
and confirm Full screen Full screen by pressingW.
Volume and sound settings Information on:
R volume settings (Y page 299)
R sound settings (Y page 299)
i A device which is connected as an exter-
nal video source may seem quieter or louder in the vehicle, or the usual maximum
volume cannot be achieved. On some devi-
ces, it is possible to adjust the volume sep-
arately. In this case, start at a medium vol- ume and increase it gradually. This enables
you to determine whether the system is
able to play the sound at high volume with-
out distorting it.
Increasing the volume on COMAND
Online X
Show the video AUX menu (Y page 517).
X Select Volume Volume by turning cVdthe
COMAND controller and press Wto con-
firm.
A menu appears. The #dot indicates the
current setting.
X Select Standard Standard orBoost
Boost and press Wto
confirm.
Standard Standard: the volume of the external video
source is adjusted to a standard value.
Boost
Boost: the volume of the external video
source is raised by approximately 10 dB. Picture viewer
Introduction If there are pictures on the active data
medium, you can view them. You can display
pictures with a resolution of up to 20 mega-
pixels. Data medium Supported picture
formats
CD/DVD with pic-
ture files bmp, jpeg, jpg, png
USB devices (sticks,
hard drives)
SD memory card bmp, jpeg, jpg, png
Calling up the category list
X
Select a data medium with pictures (e.g. a
memory card): Video
517COMAND Online Z