service reset MERCEDES-BENZ SLK ROADSTER 2014 Owners Manual
[x] Cancel search | Manufacturer: MERCEDES-BENZ, Model Year: 2014, Model line: SLK ROADSTER, Model: MERCEDES-BENZ SLK ROADSTER 2014Pages: 357, PDF Size: 10.22 MB
Page 7 of 357
1, 2, 3 ...
12 V socket see Sockets A
ABS (Anti-lock Braking System) Display message ............................ 223
Function/notes ................................ 60
Important safety notes .................... 60
Warning lamp .................................2 52
Accident
Automatic measures after an acci-
dent ................................................. 51
Activating/deactivating air-recir-
culation mode ................................... .134
Activating/deactivating cooling
with air dehumidification ................. 129
Active light function ......................... 114
ADAPTIVE BRAKE ................................. 66
Adaptive brake lights .......................... 62
Adaptive Highbeam Assist
Display message ............................ 234
Function/notes ............................ .115
Switching on/off ........................... 116
Additional speedometer ................... 213
Additives (engine oil) ........................ 347
Adjusting the headlamp range ......... 112
Air conditioning
General notes ................................ 126
Air filter (white display message) .... 237
Air pressure
see Tyre pressure
Air vents
Important safety notes .................. 135
Setting .......................................... .135
Setting the blower output of the
AIRSCARF vents ............................ .136
Setting the centre air vents ........... 136
Setting the side air vents .............. .136
Switching AIRSCARF on/off .......... 100
Air-conditioning system
see Climate control
Airbag
Headbag .......................................... 47
Introduction ..................................... 45 PASSENGER AIR BAG OFF indica-
tor lamp ..........................................
.41
Airbags
Front airbag (driver, front
passenger ) ....................................... 46
Important safety gu idelines ............ .45
Sidebag ............................................ 47
Triggering ......................................... 47
AIRGUIDE ............................................. 91
AIRSCARF
Problem (malfunction) ................... 100
Switching on/of f........................... 100
AIRSCARF vents
Setting the blower output .............. 136
Alarm
ATA (Anti-Theft Alarm system )......... 68
Switching off (ATA) .......................... 68
Switching the function on/off
(ATA) ................................................ 68
Alarm system
see ATA (Anti-Theft Alarm system)
Ambient lighting
Setting the brightness (on-board
computer) ...................................... 215
AMG menu (on-board computer) ..... 219
Anti-glare film .................................... 277
Anti-lock braking system
see ABS (Anti-lock Braking System)
Anti-Theft Alarm system
see ATA (Anti-Theft Alarm system)
Aquaplaning ....................................... 167
Ashtray ............................................... 268
Assistance display (on-board com-
puter) .................................................. 210
Assistance menu (on-board com-
puter) .................................................. 210
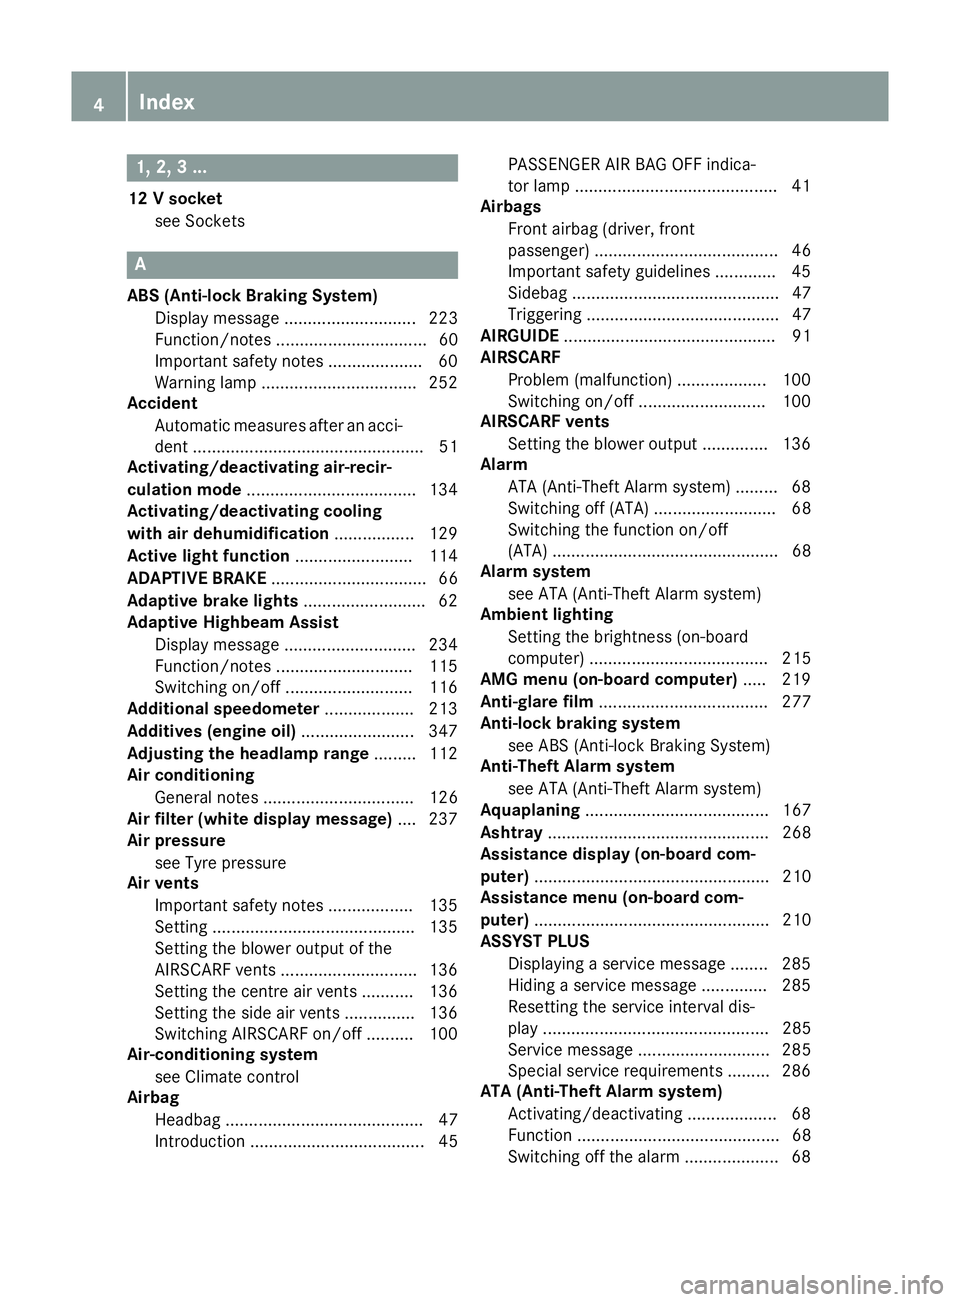
ASSYST PLUS
Displaying a service message ........ 285
Hiding a service message .............. 285
Resetting the service interval dis-
play ................................................ 285
Service message ............................ 285
Special service requirements ......... 286
ATA (Anti-Theft Alarm system)
Activating/deactivating ................... 68
Function ........................................... 68
Switching off the alarm .................... 68 4
Index
Page 16 of 357
Switching the daytime driving
lights on/off (on-board com-
puter) ............................................. 214
Switching the exterior lighting
delayed switch-off on/off (on-
board computer) ............................ 215
Switching the surround lighting
on/off (on-board computer) .......... 215
Turn signals ................................... 113
see Interior lighting
see Replacing bulbs
LIM indicator lamp
Cruise control ................................ 169
DISTRONIC PLUS ........................... 173
Variable SPEEDTRONIC ................. 181
Limiting the speed
see SPEEDTRONIC
Locking
see Central locking
Locking (doors)
Automatic ........................................ 80
Emergency locking ........................... 80
From inside (central locking but-
ton) .................................................. 79
Locking centrally
see Central locking
Locking verification signal (on-
board computer) ............................... 217
Luggage cover
see Boot separator
Lumbar support ................................... 99 M
M+S tyres ........................................... 316
MAGIC SKY CONTROL ......................... 92
Main-beam headlamps
Changing bulb s.............................. 119
Display message ............................ 232
Switching on/of f........................... 113
Manual transmission
Engaging reverse gear ................... 151
Gear lever ...................................... 151
Pulling away ................................... 144
Shift recommendation ................... 152
Starting the engine ........................ 144
Matt finish (cleaning instructions) .. 288Media Interface
see Separate operating instructions
Memory card (audio) ......................... 207
Memory function ............................... 106
Mercedes-Benz Service Centre
see Qualified specialist workshop
Message memory (on-board com-
puter) .................................................. 222
Messages
see Display messages
Mirrors
see Exterior mirrors
see Rear-view mirror
see Vanity mirror (in sun visor)
Mobile phone
Frequencies ................................... 340
Installation ..................................... 340
Menu (on-board computer) ............ 208
Notes/placing in the bracket ......... 270
Transmission output (maximum) .... 340
Modifying the programming (key) ..... 74
MOExtended tyres ............................. 296
Motorway mode ................................ 114
MP3
see Separate operating instructions
Multifunction display
Function/note s............................. 202
Permanent display ......................... 213
Multifunction steering wheel
Operating the on-board compute r..2 01
Overview .......................................... 33 N
Navigation Menu (on-board computer) ............ 205
NECK-PRO head restraints
Important safety notes .................... 49
Operation ......................................... 49
Resetting after being triggered ....... .50
Notes on running in a new vehicle .. 140 O
Occupant safety Automatic measures after an acci-
dent ................................................. 51
Children in the vehicle ..................... 51 Index
13
Page 19 of 357
Roof lining and carpets (cleaning
instructions)
...................................... 292
Roof switch .......................................... 88 S
Safety Child restraint systems .................... 52
Children in the vehicle ..................... 51
Safety system
see Driving safety systems
Seat belt
Correct usage .................................. 43
Switching belt adjustment on/off
(on-board computer) ...................... 217
Seat belts
Adjusting the driver's and front-
passenger seat belt ......................... 45
Cleaning ......................................... 292
Fastening ......................................... 44
Important safety guidelines ............. 42
Introduction ..................................... 42
Releasing ......................................... 44
Warning lamp ................................. 251
Warning lamp (function) ................... 45
Seats
Adjusting (electrically) ..................... 98
Adjusting (manually) ........................ 98
Adjusting the 4-way lumbar sup-
port .................................................. 99
Adjusting the head restraint ............ 98
Cleaning the cover ......................... 291
Correct driver's seat position ........... 96
Important safety notes .................... 97
Overview .......................................... 97
Seat heating problem ...................... 99
Storing settings (memory func-
tion) ............................................... 106
Switching AIRSCARF on/off .......... 100
Switching seat heating on/off ......... 99
Selector lever
Cleaning ......................................... 291
Sensors (cleaning instructions) ....... 290
Service
see ASSYST PLUS
Service Centre
see Qualified specialist workshop Service menu (on-board com-
puter)
.................................................. 212
Service products
Brake fluid ..................................... 348
Coolant (engine) ............................ 348
Engine oil ....................................... 346
Fuel ................................................ 343
Important safety notes .................. 342
Washer fluid ................................... 349
Setting the air distribution ............... 132
Setting the airflow ............................ 132
Settings
Factory (on-board computer) ......... 218
On-board compute r....................... 213
SETUP (on-board computer) ............. 219
Side lamps
Switching on/of f........................... 112
Side windows
Convenience closing ........................ 85
Important safety notes .................... 83
Opening/closing (front) ................... 84
Opening/closing all ......................... 84
Overview .......................................... 83
Problem (malfunction) ..................... 87
Resetting ......................................... 86
Sidebag ................................................ 47
Snow chains ...................................... 317
Socket
Under the armrest ......................... 269
Sockets
Centre console .............................. 269
General notes ................................ 269
Spare wheel
Storing ........................................... 335
Specialist workshop ............................ 24
Spectacles compartment ................. 265
Speed Limit Assist
Activating/deactivating the warn-ing function .................................... 211
Display message ............................ 237
Display message in the multifunc-tion display .................................... 193
Displaying ...................................... 211
Function/note s............................. 192
Important safety notes .................. 192
Speed, controlling
see Cruise control 16
Index
Page 21 of 357
Function ........................................... 69
Tow-starting
Emergency engine starting ............ 309
Fitting the towing eye .................... 307
Important safety notes .................. 306
Removing the towing eye ............... 308
Towing
Important safety notes .................. 306
With the rear axle raised ................ 308
Towing away
Fitting the towing eye .................... 307
Removing the towing eye ............... 308
With both axles on the ground ....... 308
Transmission
Selector lever ................................ 152
see Automatic transmission
see Manual transmission
Transporting the vehicle .................. 308
Trim pieces (cleaning instruc-
tions) .................................................. 291
Trip computer (on-board com-
puter) .................................................. 204
Trip meter
Calling up ....................................... 204
Resetting (on-board computer) ...... 205
Turn signals
Changing bulbs (front) ................... 120
Switching on/off ........................... 113
TV
Operating (on-board computer) ..... 208
Two-way radio
Frequencies ................................... 340
Installation ..................................... 340
Transmission output (maximum) .... 340
Type identification plate
see Vehicle identification plate
Tyre pressure
Calling up (on-board computer) ..... 320
Display messag e............................ 243
Important safety notes .................. 320
Not reached (TIREFIT) .................... 299
Reached (TIREFIT) .......................... 299
Recommended ............................... 318
Tyre pressure loss warning
General notes ................................ 319
Important safety notes .................. 319
Restarting ...................................... 320 Tyre pressure monitor
Checking the tyre pressure elec-
tronically ........................................ 321
Function/note s............................. 320
General notes ................................ 320
Important safety notes .................. 320
Radio type approval for the tyre
pressure monitor ........................... 323
Restarting ...................................... 322
Warning lamp ................................. 261
Warning message .......................... 322
Tyres
Changing a whee l.......................... 323
Checking ........................................ 315
Direction of rotation ...................... 324
Display message ............................ 243
Important safety notes .................. 314
M+S tyres ...................................... 316
MOExtended tyre s......................... 316
Overview ........................................ 314
Replacing ....................................... 323
Service life ..................................... 315
Storing ........................................... 324
Summer tyres ................................ 316
Tyre size (data ).............................. 328
Tyre tread ...................................... 315
Wheel and tyre combinations ........ 330
see Flat tyre U
Unlocking Emergency unlocking ....................... 80
From inside the vehicle (central
unlocking button) ............................. 79 V
Vanity mirror (in sun visor) .............. 268
Variable SPEEDTRONIC
see SPEEDTRONIC
Vehicle
Correct use ...................................... 24
Data acquisition ............................... 25
Display message ............................ 245
Electronics ..................................... 340
Equipment ....................................... 22
Implied warranty .............................. 25
Individual settings .......................... 213 18
Index
Page 27 of 357
G
WARNING
If you connect equipment to a diagnostics
connection in the vehicle, it can affect the
operation of the vehicle systems. This may
affect the operating safety of the vehicle.
There is a risk of an accident.
Do not connect any equipment to a diagnos-
tics connection in the vehicle. G
WARNING
Objects in the driver's footwell may restrict
the clearance around the pedals or block a
depressed pedal. This jeopardises the oper-
ating and road safety of the vehicle. There is a risk of an accident.
Stow all objects securely in the vehicle so that
they do not get into the driver's footwell.
Always fit the floormats securely and as pre-
scribed in order to ensure that there is always sufficient room for the pedals. Do not use
loose floormats and do not place several floor- mats on top of one another.
! If the engine is switched off and equip-
ment on the diagnostics connection is
used, the starter battery may discharge.
Connecting equipment to the diagnostics
connection can lead to emissions monitoring information being reset, for example. This
may lead to the vehicle failing to meet the
requirements of the next emissions test dur-
ing the main inspection. Qualified specialist workshop
A qualified specialist workshop has the nec-
essary special skills, tools and qualifications
to correctly carry out any necessary work on
your vehicle. This particularly applies to work
relevant to safety.
Observe the notes in the Service Booklet.
Always have the following work carried out at a qualified specialist workshop:
R work relevant to safety
R service and maintenance work R
repair work
R modifications, installations and conver-
sions
R work on electronic components
Mercedes-Benz recommends that you use a
Mercedes-Benz Service Centre. Vehicle registration
Mercedes-Benz may ask its Service Centres
to carry out technical inspections on certain
vehicles. The quality or safety of the vehicle is
improved as a result of the inspection.
Mercedes-Benz can only inform you about
vehicle checks if it has your registration data.
It is possible that your vehicle has not yet
been registered in your name in the following
cases:
R if your vehicle was not purchased at an
authorised specialist dealer.
R if your vehicle has not yet been examined at
a Mercedes-Benz Service Centre.
It is advisable to register your vehicle with a
Mercedes-Benz Service Centre.
Inform Mercedes-Benz as soon as possible
about any change in address or vehicle own-
ership. You can do this at a Mercedes-Benz
Service Centre, for example. Correct use
If you remove any warning stickers, you or
others could fail to recognise certain dangers.
Leave warning stickers in position.
Observe the following information when driv- ing your vehicle:
R the safety notes in this manual
R the technical data in this manual
R traffic rules and regulations
R laws and safety standards pertaining to
motor vehicles 24
Introduction
Page 52 of 357
gitudinal body members are hit, and sufficient
deceleration occurs as a result.
If the restraint system control unit detects a
side impact or an overturn situation, the rel-
evant restraint system components are acti-
vated independently of one another depend-
ing on the apparent type of accident. If addi-
tional protection for the vehicle occupants is determined in this situation, the belt tension-
ers are also triggered.
R Sidebag on the side on which the impact
occurs, independently of the belt tensioner
and of the use of the seat belt
Vehicles with automatic child seat recog-
nition on the front-passenger seat: the
sidebag on the front-passenger side
deploys under the following conditions:
- an occupant is detected on the front-
passenger seat or
- the belt tongue has engaged in the belt
buckle of the front-passenger seat.
R Headbag on the side on which the impact
occurs, independently of the use of the seat
belt and independently of whether the
front-passenger seat is occupied
R Headbags on the driver's and front-
passenger sides in certain overturn situa-
tions if the system determines that they
can offer additional protection to that pro-
vided by the seat belt
i Not all airbags are deployed in an acci-
dent. The various airbag systems work
independently of one another.
How the airbag system works is deter-
mined by the severity of the accident detec- ted, especially the vehicle deceleration or
acceleration, and the apparent type of acci- dent:
R frontal collision
R side impact
R overturn NECK-PRO head restraints
Important safety notes G
WARNING
The function of the head restraint may be
impaired if you:
R attach objects such as coat hangers to the
head restraints, for example
R use unsuitable head restraint covers
If you do so, the head restraints cannot fulfil
their intended protective function in the event of an accident. In addition, objects attached
to the head restraints could endanger other
vehicle occupants. This poses an increased
risk of injury.
Do not attach any objects to the head
restraints and only use suitable head restraint
covers.
Consult a Mercedes-Benz Service Centre
regarding the availability of suitable seat or
head restraint covers.
Operation NECK-PRO head restraints reduce the likeli-
hood of head and chest injuries. The NECK-
PRO head restraints on the driver's and front-
passenger seats are moved forwards and
upwards in the event of a rear-end collision of
a certain severity. This provides better head
support.
If the NECK-PRO head restraints have been
triggered in an accident, you must reset the
NECK-PRO head restraints on the driver’s and
front-passenger seat (Y page 50). Other-
wise, the additional protection will not be
available in the event of another rear-end col-
lision. You can recognise when NECK-PRO
head restraints have been triggered by the
fact that they have moved forwards and can
no longer be adjusted.
Mercedes-Benz recommends that you have
the NECK-PRO head restraints checked for
functionality at a qualified specialist work-
shop after a rear-end collision. Occupant safety
49Safety Z
Page 288 of 357
The washer fluid reservoir is used for both the
windscreen washer system and the headlamp cleaning system.
On vehicles with the headlamp cleaning sys-
tem, the recommended minimum washer
fluid level is 3.5 litres.
On vehicles with the headlamp cleaning sys-
tem, the recommended minimum washer
fluid level is 1 litre.
If the washer fluid level drops below 1 litre, amessage appears in the multifunction display
prompting you to refill the washer fluid
(Y page 249).
Further information on windscreen washer
fluid/antifreeze (Y page 349). ASSYST PLUS
Service messages
The ASSYST PLUS service interval display
informs you of the next service due date.
Information on the type of service and service
intervals (see separate Service Booklet).
You can obtain further information from a
Mercedes-Benz Service Centre.
i The ASSYST PLUS service interval display
does not show any information on the
engine oil level. Observe the notes on the
engine oil level (Y page 282).
The multifunction display shows a service
message for a few seconds, e.g.:
R Service A in .. days
Service A in .. days
R Service A due Service A due
R Service A overdue by .. days
Service A overdue by .. days
Depending on the operating conditions of the vehicle, the remaining time or distance until
the next service due date is displayed.
The letter indicates which service is due. A A
stands for a minor service and B
Bfor a major
service. A number or another letter may be
displayed after the letter.
Only for certain countries: the position after
the letter A
A or B Bindicates any necessary addi- tional maintenance work to be performed. If
you notify a qualified specialist workshop of
this display, you will receive a statement on
the associated costs.
The ASSYST PLUS service interval display
does not take into account any periods of
time during which the battery is disconnec-
ted.
Maintaining the time-dependent service
schedule:
X Note down the service due date displayed
in the multifunction display before discon-
necting the battery.
or X After reconnecting the battery, subtract
the battery disconnection periods from the
service date shown on the display. Hiding a service message
X Press the aor% button on the steer-
ing wheel. Displaying a service message
X Switch the ignition on.
X Press the =or; button on the steer-
ing wheel to select the Serv. Serv.menu.
X Press the 9or: button to select the
ASSYST PLUS
ASSYST PLUS submenu and confirm by
pressing the abutton.
The service due date appears in the multi-
function display. Information about Service
Resetting the ASSYST PLUS service
interval display !
If the ASSYST PLUS service interval dis-
play has been inadvertently reset, this set-
ting can be corrected at a qualified special-
ist workshop. ASSYST PLUS
285Maintenance and care Z
Page 289 of 357
Have service work carried out as described
in the Service Booklet. This may otherwise
lead to increased wear and damage to the
major assemblies or the vehicle.
A qualified specialist workshop, e.g. a
Mercedes-Benz Service Centre, will reset the ASSYST PLUS service interval display after
the service work has been carried out. You
can also obtain further information on main-
tenance work, for example.
Special service requirements The prescribed service interval is based on
normal operation of the vehicle. Service work
will need to be performed more often if the
vehicle is operated under arduous conditions or increased loads, for example:
R regular city driving with frequent intermedi-
ate stops
R if the vehicle is primarily used to travel
short distances
R for frequent operation in mountainous ter-
rain or on poor road surfaces
R if the engine is often left idling for long peri-
ods
In these or similar operating conditions, have
the air filter, engine oil and oil filter, for exam-
ple, changed more frequently. The tyres must be checked more frequently if the vehicle is
operated under increased loads. Further
information can be obtained at a qualified
specialist workshop, e.g. a Mercedes-Benz
Service Centre.
Driving abroad An extensive Mercedes-Benz Service network
is also available in other countries. You can
obtain further information from any
Mercedes-Benz Service Centre. Care
Notes on care
H
Environmental note
Dispose of empty packaging and cleaning
cloths in an environmentally responsible man- ner.
! For cleaning your vehicle, do not use any
of the following:
R dry, rough or hard cloths
R abrasive cleaning agents
R solvents
R cleaning agents containing solvents
Do not scrub.
Do not touch the surfaces or protective
films with hard objects, e.g. a ring or ice
scraper. You could otherwise scratch or
damage the surfaces and protective film.
! Do not park up the vehicle for an extended
period straight after cleaning it, particularly after having cleaned the wheels with wheel cleaner. Wheel cleaners could cause
increased corrosion of the brake discs and
brake pads/linings. For this reason, you
should drive for a few minutes after clean-
ing. Braking heats the brake discs and the
brake pads/linings, thus drying them. The
vehicle can then be parked up.
Regular care of your vehicle is a condition for
retaining the quality in the long term.
Use care products and cleaning agents rec-
ommended and approved by Mercedes-Benz. Washing the vehicle and cleaning the
paintwork
Automatic car wash G
WARNING
Braking efficiency is reduced after the vehicle has been washed. There is a risk of an acci-
dent. 286
CareMaintenance and care
Page 306 of 357
i
If the power supply has been interrupted,
e.g. if the battery was discharged, you will
have to:
R set the clock; see the separate operating
instructions.
On vehicles with COMAND Online and a
navigation system, the clock is set auto-
matically.
R reset the function for folding the exterior
mirrors in/out automatically, by folding
the mirrors out once (Y page 104).Charging the battery
G
WARNING
During charging and jump-starting, explosive
gases can escape from the battery. There is a risk of an explosion.
Particularly avoid fire, naked flames, creating
sparks and smoking. Ensure there is sufficient
ventilation while charging and jump-starting.
Do not lean over a battery. G
WARNING
Battery acid is caustic. There is a risk of injury. Avoid contact with the skin, eyes or clothing.
Do not inhale any battery gases. Do not lean
over the battery. Keep children away from
batteries. Wash battery acid immediately with water and seek medical attention. G
WARNING
A discharged battery can freeze at tempera-
tures below freezing point. When jump-start-
ing the vehicle or charging the battery, gases can escape from the battery. There is a risk of
an explosion.
Allow the frozen battery to thaw out before
charging it or jump-starting.
! Only charge the installed battery with a
battery charger which has been tested and
approved by Mercedes-Benz. These battery chargers allow the battery to be charged
while still installed in the vehicle. !
Only use battery chargers with a maxi-
mum charging voltage of 14.8 V.
! Only
charge the battery using the jump-
start connection point.
The jump-starting connection point is in the
engine compartment.
If the indicator/warning lamps do not light up at low temperatures, it is very likely that the
discharged battery has frozen. In this case
you may neither jump-start the vehicle nor
charge the battery. The service life of a bat-
tery that has been thawed may be reduced.
The starting characteristics may be impaired,
especially at low temperatures. Have the
thawed battery checked at a qualified spe-
cialist workshop.
Read the battery charger's operating instruc- tions before charging the battery.
X Open the bonnet.
X Connect the battery charger to the positive
terminal and earth point in the same order
as when connecting the donor battery in
the jump-starting procedure (Y page 304). Battery (vehicle)
303Breakdown assistance Z