MERCEDES-BENZ SPRINTER 2011 MY11 Operator’s Manual
Manufacturer: MERCEDES-BENZ, Model Year: 2011, Model line: SPRINTER, Model: MERCEDES-BENZ SPRINTER 2011Pages: 292, PDF Size: 6.75 MB
Page 81 of 292
Using the steering wheel buttons
X
Press the 0059 or 0058 button repeatedly
until the Settings menu appears in the
display.
X Press the 0048 reset button for about three
seconds.
You will see a message in the display
prompting you to
press the 0048 reset button
again to confirm.
X Press the 0048 reset button again.
The functions of all submenus are reset to
the factory settings.
i If you do not press the 0048 reset button a
second time to confirm, the settings are
retained. The Settings menu appears
again after approximately five seconds.
For safety reasons, it is not possible to
reset all of the functions while the vehicle
is in motion. For example, the Hdlmp
mode function in the Lighting submenu
remains unchanged.
Resetting the functions of a submenu You can reset the functions of an individual
submenu to the factory settings.
Using the steering wheel buttons
X
Press the 0059 or 0058 button repeatedly
until the Settings menu appears in the
display.
X Press 0029 to switch to the submenu
selection.
X Press 005A or 005B to select a submenu.
X Press the 0048 reset button for about three
seconds.
You will see a message in the display
prompting you
to
press the 0048 reset button
again to confirm.
X Press the 0048 reset button again.
All functions of the submenu are reset to
the factory settings.
i If you do not press the 0048 reset button a
second time to confirm, the settings are retained. The Settings menu appears
again after approximately five seconds.
For safety reasons, it is not possible to
reset all of the functions while the vehicle
is in motion. For example, the Hdlmp
mode function in the
Lighting submenu
remains unchanged.
Submenus in the Settings menu Using the steering wheel buttons
X
Press the 0059 or 0058 button repeatedly
until the Settings menu appears in the
display.
X Press 0029 to switch to the submenu
selection.
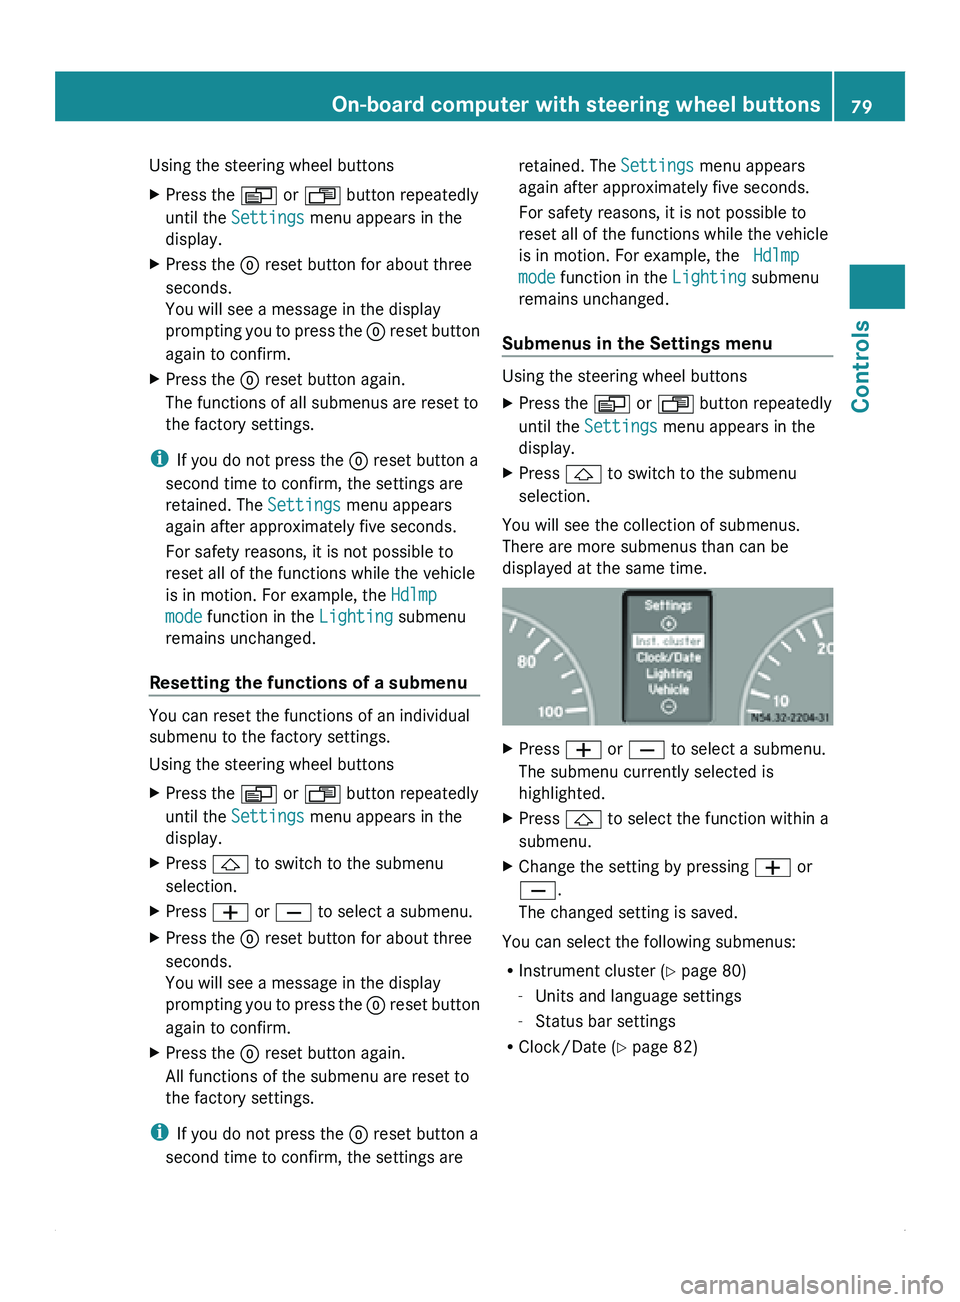
You will see the collection of submenus.
There are more submenus than can be
displayed at the same time. X
Press 005A or 005B to select a submenu.
The submenu currently selected is
highlighted.
X Press 0029 to select the function within a
submenu.
X Change the setting by pressing 005A or
005B.
The changed setting is saved.
You can select the following submenus:
R Instrument cluster ( Y
page 80)
- Units and language settings
- Status bar settings
R Clock/Date (Y page 82) On-board computer with steering wheel buttons
79
Controls Z
Page 82 of 292
R
Lighting (Y page 82)
-Activating/deactivating daytime running
lamp
mode and surround lighting (locator
lighting)
- Setting the exterior lighting delayed
switch-off
R Vehicle ( Y page 84)
- Setting the radio station selection
- Setting the windshield wiper sensitivity
R Auxiliary heating( Y page 104)
R Convenience(Y page 85)
-Key-dependent settings
Instrument cluster submenu Selecting the unit for temperature
Using the steering wheel buttons
X
Press the 0059 or 0058 button repeatedly
until the Settings menu appears in the
display.
X Press 0029 to switch to the submenu
selection.
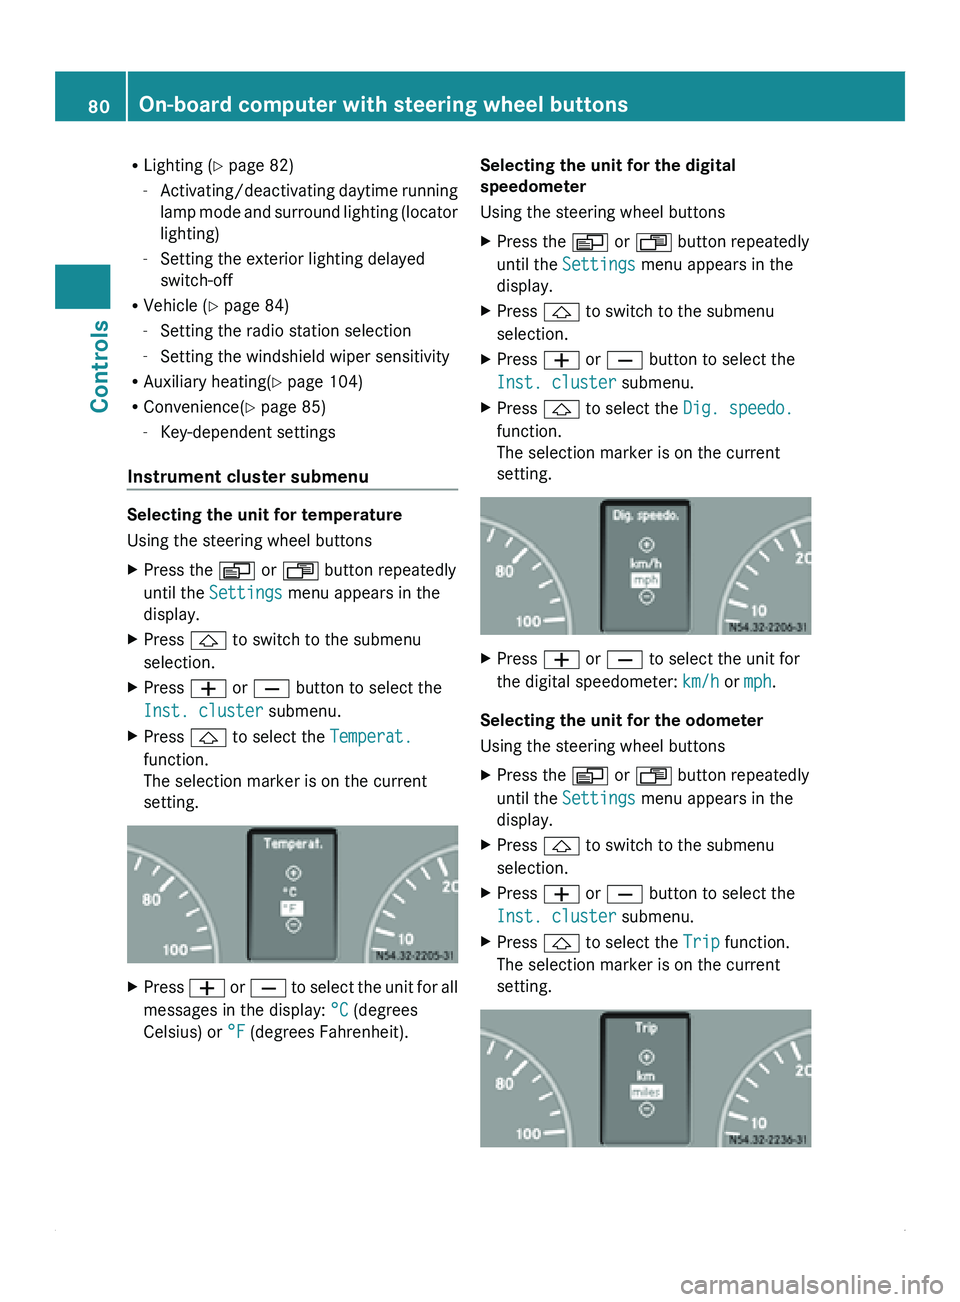
X Press 005A or 005B button to select the
Inst. cluster submenu.
X Press 0029 to select the Temperat.
function.
The selection marker is on the current
setting. X
Press 005A or 005B
to select the unit for all
messages in the display: °C (degrees
Celsius) or °F (degrees Fahrenheit). Selecting the unit for the digital
speedometer
Using the steering wheel buttons
X
Press the 0059 or 0058 button repeatedly
until the Settings menu appears in the
display.
X Press 0029 to switch to the submenu
selection.
X Press 005A or 005B button to select the
Inst. cluster submenu.
X Press 0029 to select the Dig. speedo.
function.
The selection marker is on the current
setting. X
Press 005A or 005B to select the unit for
the digital speedometer: km/h or mph.
Selecting the unit for the odometer
Using the steering wheel buttons
X Press the 0059 or 0058 button repeatedly
until the Settings menu appears in the
display.
X Press 0029 to switch to the submenu
selection.
X Press 005A or 005B button to select the
Inst. cluster submenu.
X Press 0029 to select the Trip function.
The selection marker is on the current
setting. 80
On-board computer with steering wheel buttons
Controls
Page 83 of 292
X
Press 005A or 005B to select the unit for all
messages in the display: km (kilometers) or
miles.
Selecting the language
Using the steering wheel buttons
X Press the 0059 or 0058 button repeatedly
until the Settings menu appears in the
display.
X Press 0029 to switch to the submenu
selection.
X Press 005A or 005B button to select the
Inst. cluster submenu.
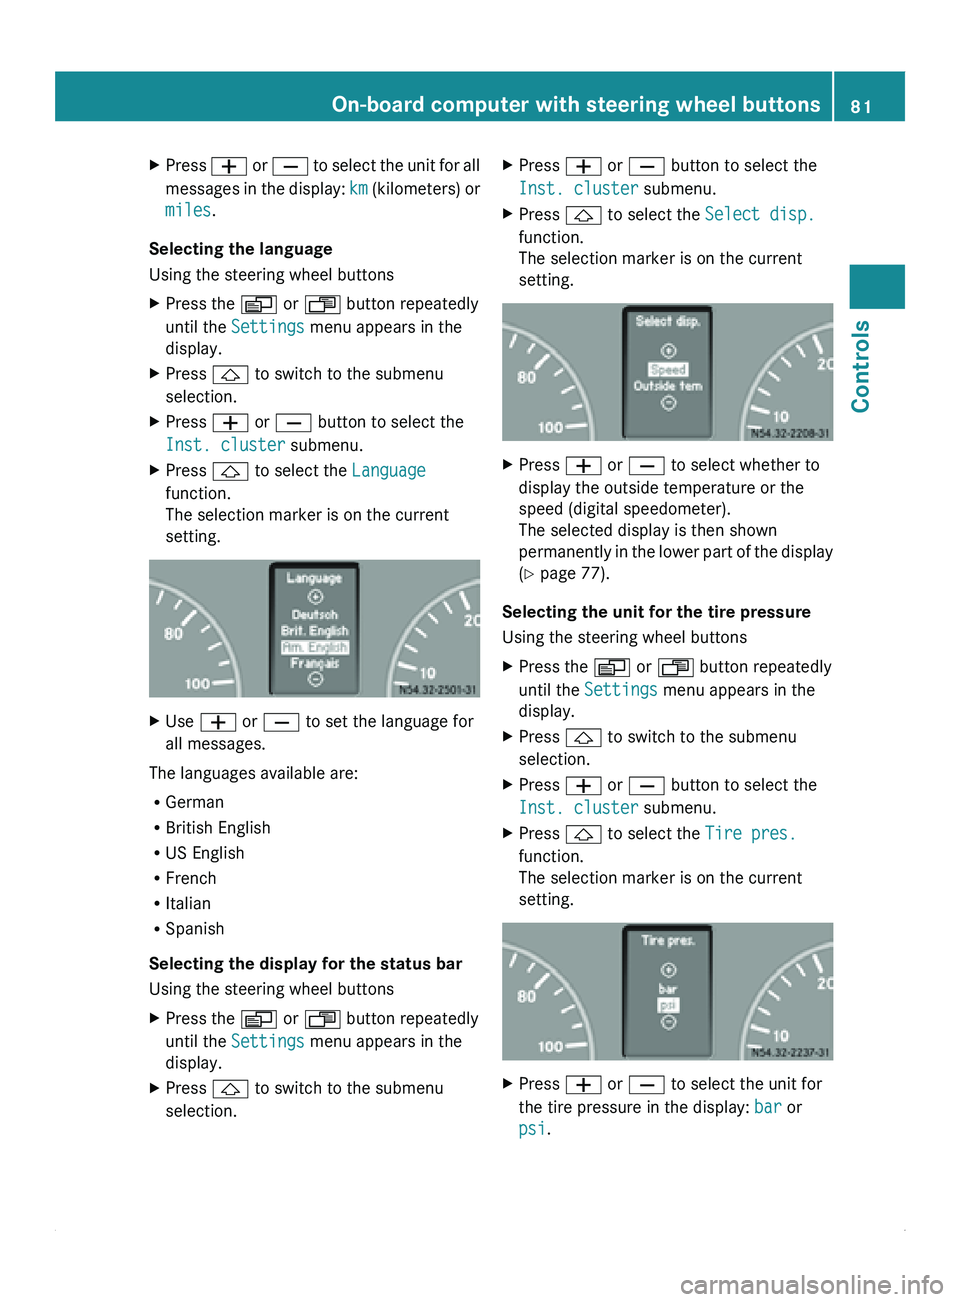
X Press 0029 to select the Language
function.
The selection marker is on the current
setting. X
Use 005A or 005B to set the language for
all messages.
The languages available are:
R German
R British English
R US English
R French
R Italian
R Spanish
Selecting the display for the status bar
Using the steering wheel buttons
X Press the 0059 or 0058 button repeatedly
until the Settings menu appears in the
display.
X Press 0029 to switch to the submenu
selection. X
Press 005A or 005B button to select the
Inst. cluster submenu.
X Press 0029 to select the Select disp.
function.
The selection marker is on the current
setting. X
Press 005A or 005B to select whether to
display the outside temperature or the
speed (digital speedometer).
The selected display is then shown
permanently in the
lower part of the display
(Y page 77).
Selecting the unit for the tire pressure
Using the steering wheel buttons
X Press the 0059 or 0058 button repeatedly
until the Settings menu appears in the
display.
X Press 0029 to switch to the submenu
selection.
X Press 005A or 005B button to select the
Inst. cluster submenu.
X Press 0029 to select the Tire pres.
function.
The selection marker is on the current
setting. X
Press 005A or 005B to select the unit for
the tire pressure in the display: bar or
psi. On-board computer with steering wheel buttons
81
Controls Z
Page 84 of 292
Clock/Date submenu
Setting the clock
Using the steering wheel buttons
X
Press the 0059 or 0058 button repeatedly
until the Settings menu appears in the
display.
X Press 0029 to switch to the submenu
selection.
X Press 005A or 005B to select the Clock/
Date submenu.
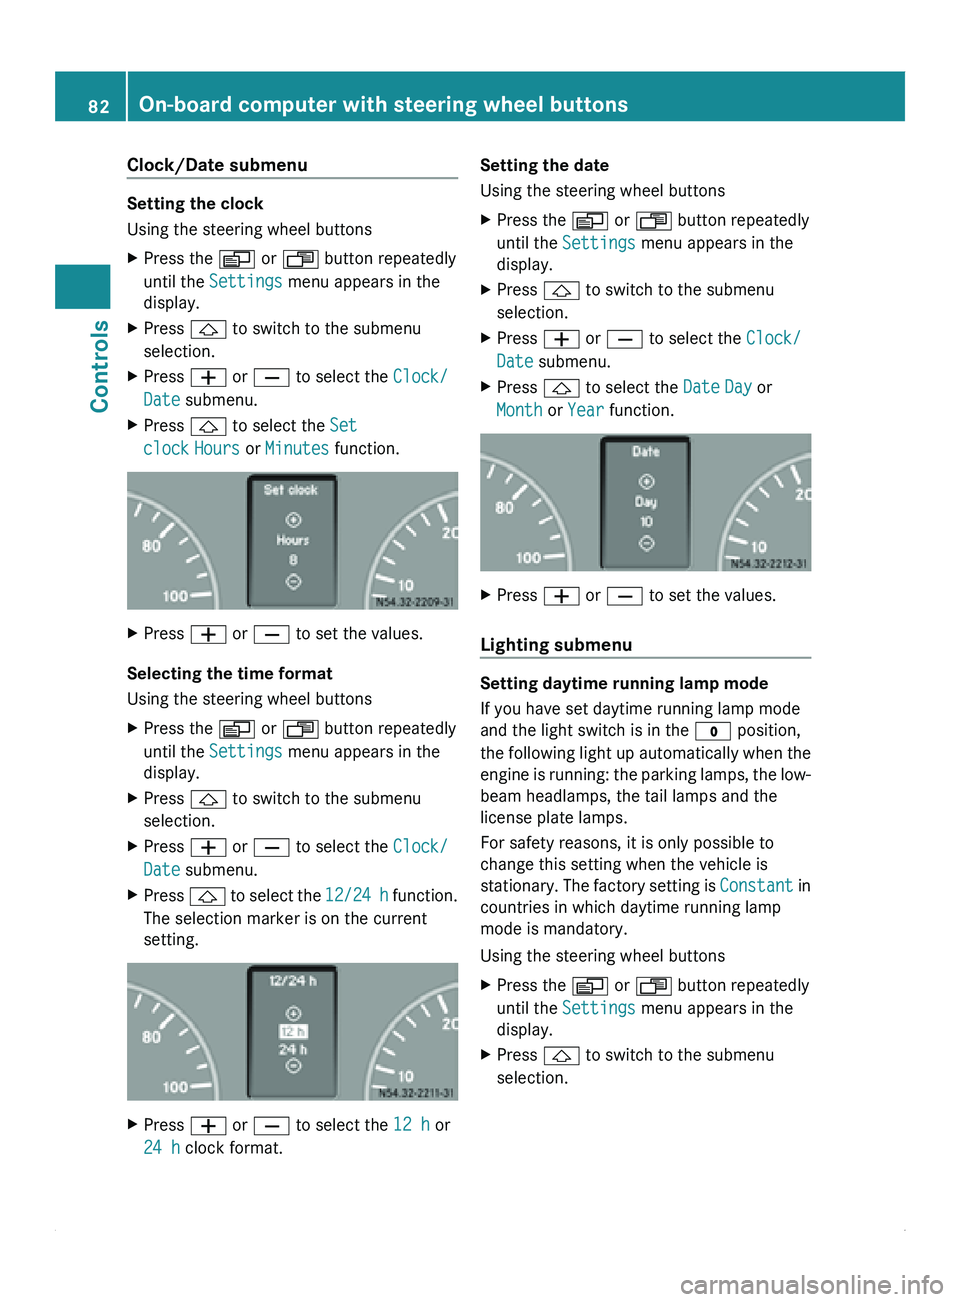
X Press 0029 to select the Set
clock Hours or Minutes function. X
Press 005A or 005B to set the values.
Selecting the time format
Using the steering wheel buttons
X Press the 0059 or 0058 button repeatedly
until the Settings menu appears in the
display.
X Press 0029 to switch to the submenu
selection.
X Press 005A or 005B to select the Clock/
Date submenu.
X Press 0029 to select the
12/24 h function.
The selection marker is on the current
setting. X
Press 005A or 005B to select the 12 h or
24 h clock format. Setting the date
Using the steering wheel buttons
X
Press the 0059 or 0058 button repeatedly
until the Settings menu appears in the
display.
X Press 0029 to switch to the submenu
selection.
X Press 005A or 005B to select the Clock/
Date submenu.
X Press 0029 to select the Date Day or
Month or Year function. X
Press 005A or 005B to set the values.
Lighting submenu Setting daytime running lamp mode
If you have set daytime running lamp mode
and the light switch is in the 0027 position,
the following
light
up automatically when the
engine is running: the parking lamps, the low-
beam headlamps, the tail lamps and the
license plate lamps.
For safety reasons, it is only possible to
change this setting when the vehicle is
stationary. The factory setting is Constant in
countries in which daytime running lamp
mode is mandatory.
Using the steering wheel buttons
X Press the 0059 or 0058 button repeatedly
until the Settings menu appears in the
display.
X Press 0029 to switch to the submenu
selection.82
On-board computer with steering wheel buttons
Controls
Page 85 of 292
X
Press 005A or 005B to select the
Lighting submenu.
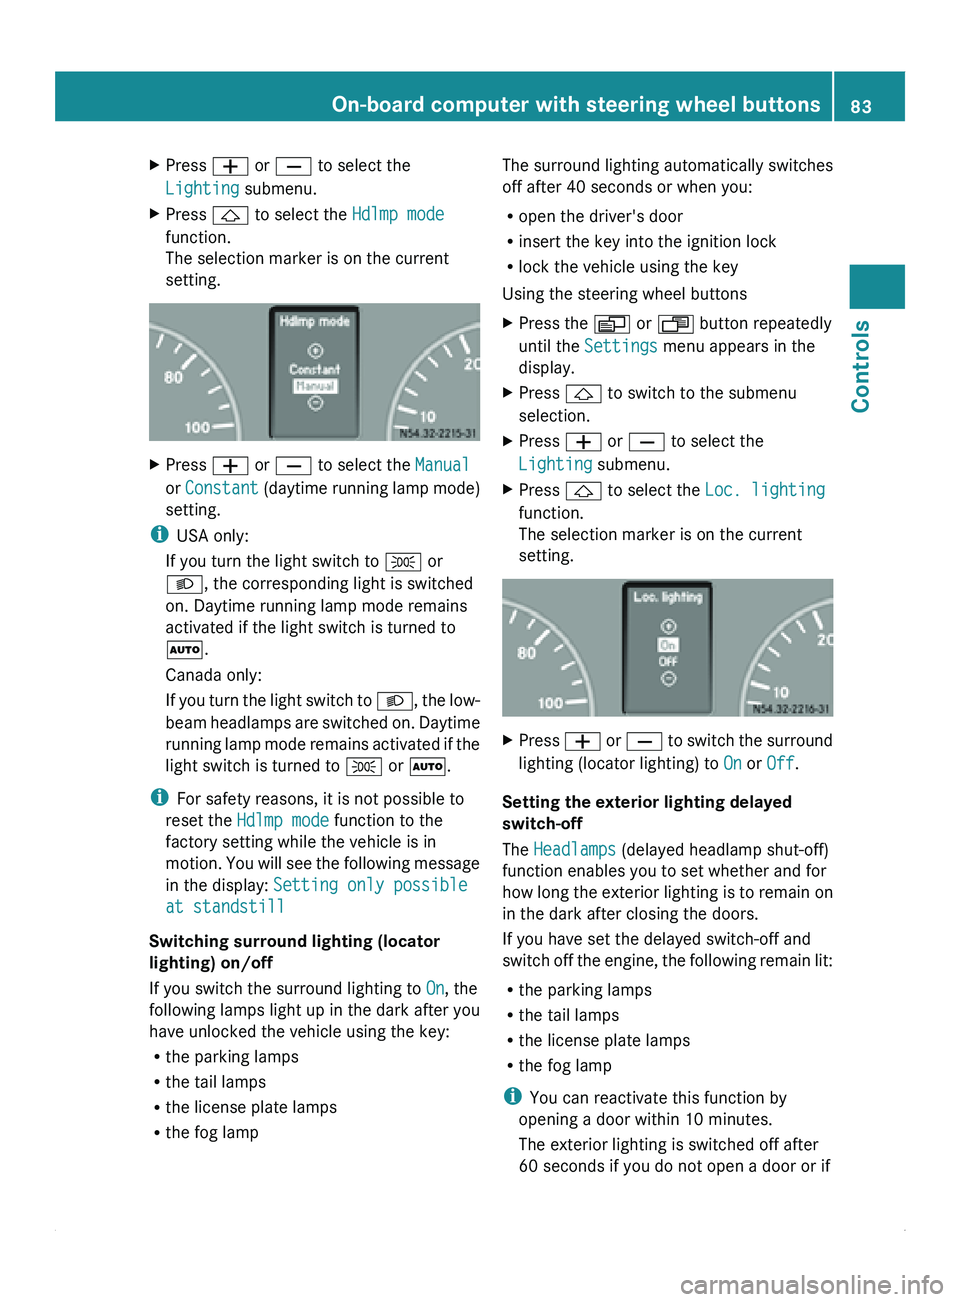
X Press 0029 to select the Hdlmp mode
function.
The selection marker is on the current
setting. X
Press 005A or 005B to select the Manual
or Constant (daytime running
lamp mode)
setting.
i USA only:
If you turn the light switch to 006C or
0064, the corresponding light is switched
on. Daytime running lamp mode remains
activated if the light switch is turned to
005A.
Canada only:
If you turn
the light switch to 0064, the low-
beam headlamps are switched on. Daytime
running lamp mode remains activated if the
light switch is turned to 006C or 005A.
i For safety reasons, it is not possible to
reset the Hdlmp mode function to the
factory setting while the vehicle is in
motion. You will see the following message
in the display: Setting only possible
at standstill
Switching surround lighting (locator
lighting) on/off
If you switch the surround lighting to On, the
following lamps light up in the dark after you
have unlocked the vehicle using the key:
R the parking lamps
R the tail lamps
R the license plate lamps
R the fog lamp The surround lighting automatically switches
off after 40 seconds or when you:
R
open the driver's door
R insert the key into the ignition lock
R lock the vehicle using the key
Using the steering wheel buttons
X Press the 0059 or 0058 button repeatedly
until the Settings menu appears in the
display.
X Press 0029 to switch to the submenu
selection.
X Press 005A or 005B to select the
Lighting submenu.
X Press 0029 to select the Loc. lighting
function.
The selection marker is on the current
setting. X
Press 005A
or 005B
to switch the surround
lighting (locator lighting) to On or Off.
Setting the exterior lighting delayed
switch-off
The Headlamps (delayed headlamp shut-off)
function enables you to set whether and for
how long
the
exterior lighting is to remain on
in the dark after closing the doors.
If you have set the delayed switch-off and
switch off the engine, the following remain lit:
R the parking lamps
R the tail lamps
R the license plate lamps
R the fog lamp
i You can reactivate this function by
opening a door within 10 minutes.
The exterior lighting is switched off after
60 seconds if you do not open a door or if On-board computer with steering wheel buttons
83
Controls Z
Page 86 of 292
you do not close an opened door after the
engine has been switched off.
Using the steering wheel buttons
X Press the 0059 or 0058 button repeatedly
until the Settings menu appears in the
display.
X Press 0029 to switch to the submenu
selection.
X Press 005A or 005B to select the
Lighting submenu.
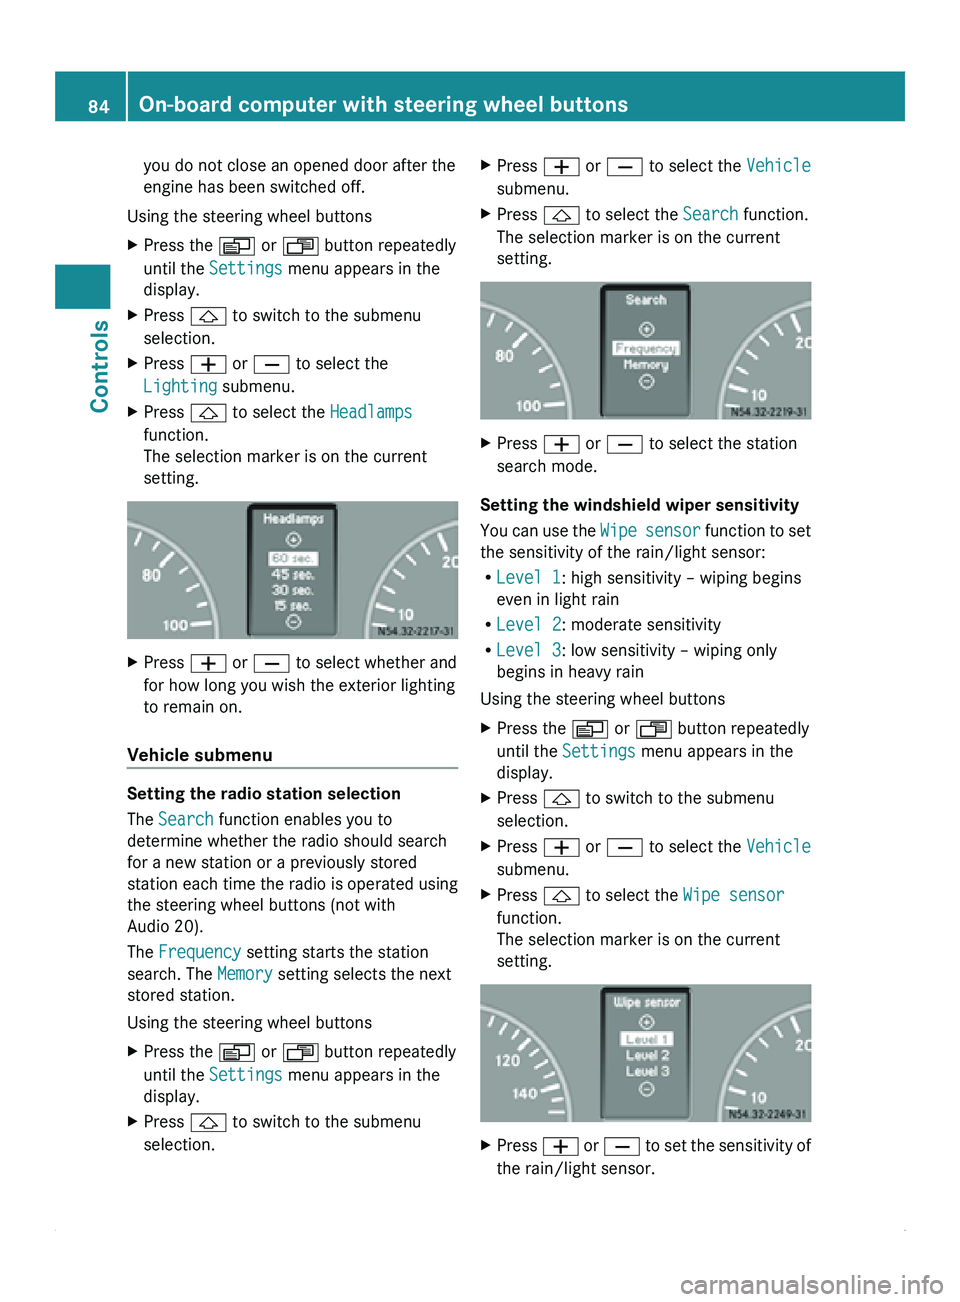
X Press 0029 to select the Headlamps
function.
The selection marker is on the current
setting. X
Press 005A or 005B to select whether and
for how long you wish the exterior lighting
to remain on.
Vehicle submenu Setting the radio station selection
The Search function enables you to
determine whether the radio should search
for a new station or a previously stored
station each
time
the radio is operated using
the steering wheel buttons (not with
Audio 20).
The Frequency setting starts the station
search. The Memory setting selects the next
stored station.
Using the steering wheel buttons
X Press the 0059 or 0058 button repeatedly
until the Settings menu appears in the
display.
X Press 0029 to switch to the submenu
selection. X
Press 005A or 005B to select the Vehicle
submenu.
X Press 0029 to select the Search function.
The selection marker is on the current
setting. X
Press 005A or 005B to select the station
search mode.
Setting the windshield wiper sensitivity
You can use
the Wipe sensor function to set
the sensitivity of the rain/light sensor:
R Level 1: high sensitivity – wiping begins
even in light rain
R Level 2: moderate sensitivity
R Level 3: low sensitivity – wiping only
begins in heavy rain
Using the steering wheel buttons
X Press the 0059 or 0058 button repeatedly
until the Settings menu appears in the
display.
X Press 0029 to switch to the submenu
selection.
X Press 005A or 005B to select the Vehicle
submenu.
X Press 0029 to select the Wipe sensor
function.
The selection marker is on the current
setting. X
Press 005A or 005B
to set the sensitivity of
the rain/light sensor. 84
On-board computer with steering wheel buttons
Controls
Page 87 of 292
Convenience submenu
Key-dependent settings
The
Key function allows
you to define whether
settings for the following submenus are
stored with a key dependence:
R Inst. cluster (instrument cluster)
R Lighting
R Vehicle
Using the steering wheel buttons
X Press the 0059 or 0058 button repeatedly
until the Settings menu appears in the
display.
X Press 005A or 005B to select the
Convenience submenu.
X Press the 0029 button to select the Key
function.
The selection marker is on the current
setting. X
Press 005A or 005B to activate or
deactivate key dependency.
i For safety
reasons,
it is not possible to set
the Key function while the vehicle is in
motion. You will see the following message
in the display: Setting only possible
at standstill Trip computer menu
You can call
up or reset statistical data for the
vehicle in the Trip computer menu.
Consumption statistics after start Using the steering wheel buttons
i
When you call
up the trip computer again,
it displays the last function called up. The units of the statistical information
displayed are set permanently for each
specific country, and are therefore
independent of the units selected in the
Settings menu.
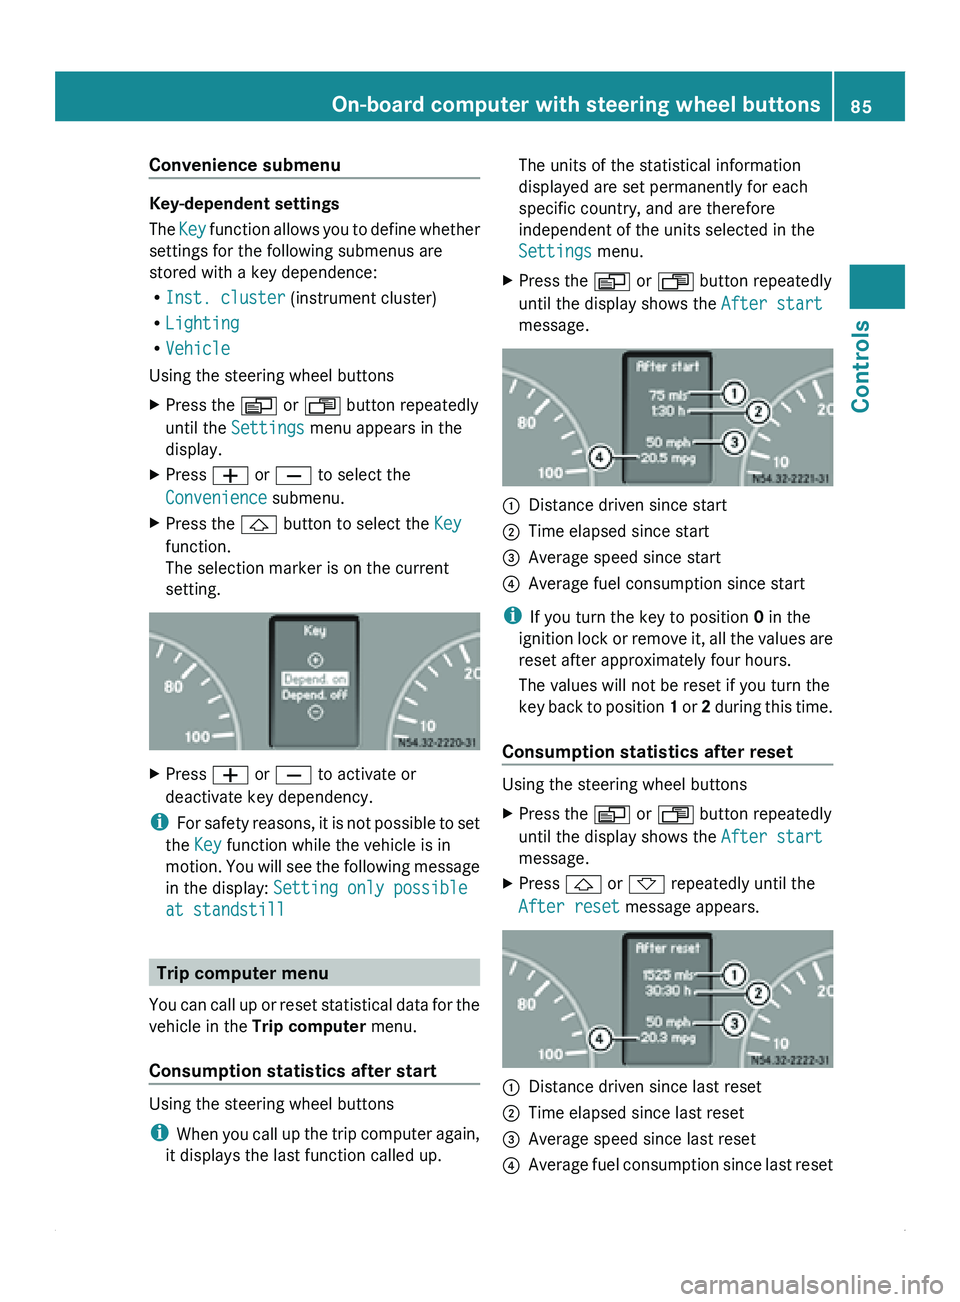
X Press the 0059 or 0058 button repeatedly
until the display shows the After start
message. 0046
Distance driven since start
0047 Time elapsed since start
008A Average speed since start
0088 Average fuel consumption since start
i If you turn the key to position 0 in the
ignition lock
or
remove it, all the values are
reset after approximately four hours.
The values will not be reset if you turn the
key back to position 1 or 2 during this time.
Consumption statistics after reset Using the steering wheel buttons
X
Press the 0059 or 0058 button repeatedly
until the display shows the After start
message.
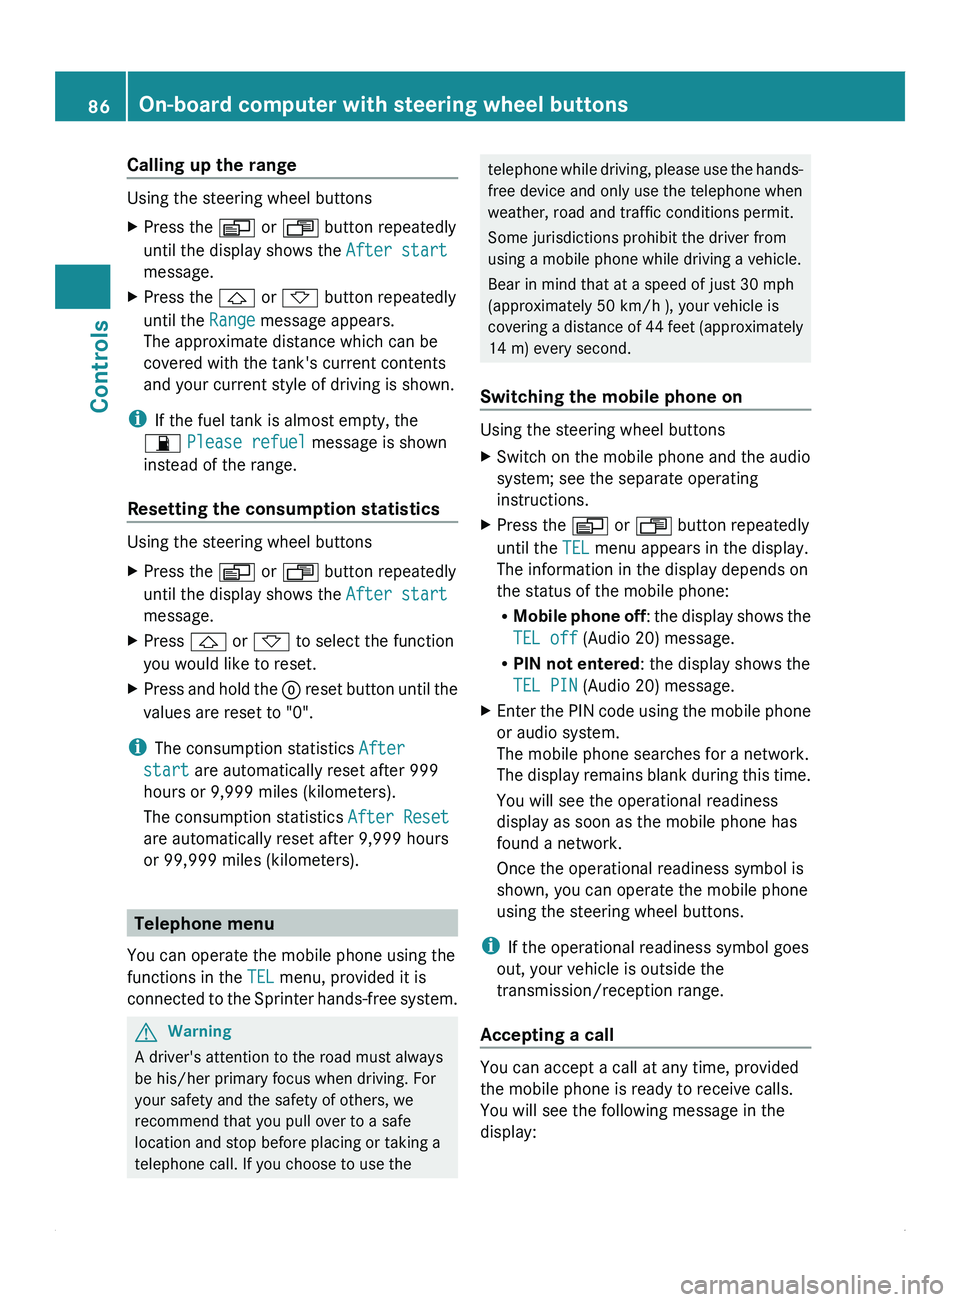
X Press 0029 or 002D repeatedly until the
After reset message appears. 0046
Distance driven since last reset
0047 Time elapsed since last reset
008A Average speed since last reset
0088 Average fuel consumption since last reset On-board computer with steering wheel buttons
85
Controls Z
Page 88 of 292
Calling up the range
Using the steering wheel buttons
X
Press the 0059 or 0058 button repeatedly
until the display shows the After start
message.
X Press the 0029 or 002D button repeatedly
until the Range message appears.
The approximate distance which can be
covered with the tank's current contents
and your current style of driving is shown.
i If the fuel tank is almost empty, the
00B7 Please refuel message is shown
instead of the range.
Resetting the consumption statistics Using the steering wheel buttons
X
Press the 0059 or 0058 button repeatedly
until the display shows the After start
message.
X Press 0029 or 002D to select the function
you would like to reset.
X Press and hold the 0048 reset
button until the
values are reset to "0".
i The consumption statistics After
start are automatically reset after 999
hours or 9,999 miles (kilometers).
The consumption statistics After Reset
are automatically reset after 9,999 hours
or 99,999 miles (kilometers). Telephone menu
You can operate the mobile phone using the
functions in the TEL menu, provided it is
connected to the
Sprinter hands-free system.G
Warning
A driver's attention to the road must always
be his/her primary focus when driving. For
your safety and the safety of others, we
recommend that you pull over to a safe
location and stop before placing or taking a
telephone call. If you choose to use the telephone while driving, please use the hands-
free device and only use the telephone when
weather, road and traffic conditions permit.
Some jurisdictions prohibit the driver from
using a mobile phone while driving a vehicle.
Bear in mind that at a speed of just 30 mph
(approximately 50 km/h
), your vehicle is
covering
a distance of 44 feet (approximately
14 m) every second.
Switching the mobile phone on Using the steering wheel buttons
X
Switch on the mobile phone and the audio
system; see the separate operating
instructions.
X Press the 0059 or 0058 button repeatedly
until the TEL menu appears in the display.
The information in the display depends on
the status of the mobile phone:
R
Mobile phone off:
the display shows the
TEL off (Audio 20) message.
R PIN not entered: the display shows the
TEL PIN (Audio 20) message.
X Enter the PIN code using the mobile phone
or audio system.
The mobile phone searches for a network.
The display
remains
blank during this time.
You will see the operational readiness
display as soon as the mobile phone has
found a network.
Once the operational readiness symbol is
shown, you can operate the mobile phone
using the steering wheel buttons.
i If the operational readiness symbol goes
out, your vehicle is outside the
transmission/reception range.
Accepting a call You can accept a call at any time, provided
the mobile phone is ready to receive calls.
You will see the following message in the
display:86
On-board computer with steering wheel buttons
Controls
Page 89 of 292
X
Press 006A.
The display shows the call duration.
Rejecting or ending a call X
Press 007F.
The caller then hears the engaged tone.
The display shows the operational
readiness symbol again.
Dialing a number from the phone book You may select and dial a number from the
phone book
at
any time, provided the mobile
phone is ready to receive calls.
i It is only possible to create new phone
number entries in the phone book using the
mobile phone itself. See the separate
operating instructions.
X Press the 0059 or 0058 button repeatedly
until the TEL menu appears in the display.
The operational readiness
display is shown.
X Press 0029 or 002D
to switch to the phone
book.
The on-board computer reads the phone
book stored on the SIM card or in the
mobile phone. This may take more than a
minute. The display shows the
Processing (Audio 20) message.
Reading is complete when the message
disappears.
X Press 0029 or 002D to select the desired
name.
The display shows the stored names in
alphabetical order.
i The display scrolls through the names
rapidly if
you
press 0029 or 002D for longer
than one second. Releasing the button
stops the rapid scroll.
If you do not wish to make a call, press the
007F button.
X Press 006A.
The on-board computer dials the
corresponding phone number. The display
shows the dialing (Audio 20) message. The on-board computer stores the phone
numbers in the redial memory.
When a connection is made, the display
shows the name of the other person and
the call duration.
Redialing The on-board computer stores the last phone
numbers dialed. This means that you do not
have to search through the entire phone
book.
X
Press the 0059 or 0058 button repeatedly
until the TEL menu appears in the display.
The operational readiness
display is shown.
X Press 006A.
The display
shows
the most recently dialed
numbers or names in the redial memory.
X Press the 0029 or 002D button repeatedly
until the number or name you are looking
for is displayed.
X Press 006A.
The on-board computer dials the
corresponding phone number.
If a connection is made, the display shows
the call duration and name of the person
you are calling,
if stored in the phone book,
or the number you are dialing continues to
be displayed. Power supply
Battery isolating switch
You can use the battery isolating switch to
disconnect the power supply to all your
vehicle's consumers. This will prevent
uncontrolled battery discharge
caused by off-
load current consumption. G
Warning
If the vehicle is equipped with an additional
battery in the engine compartment, it is
necessary to disconnect
both batteries when
working on the vehicle electrical circuit. Only Power supply
87
Controls
Z
Page 90 of 292
then is the electrical system fully
disconnected from the power supply.
i Only disconnect the vehicle electrical
system from the power supply using the
battery isolating switch if the vehicle is to
be parked up for a long period or if it is
absolutely necessary. After the power
supply has been activated, you must reset
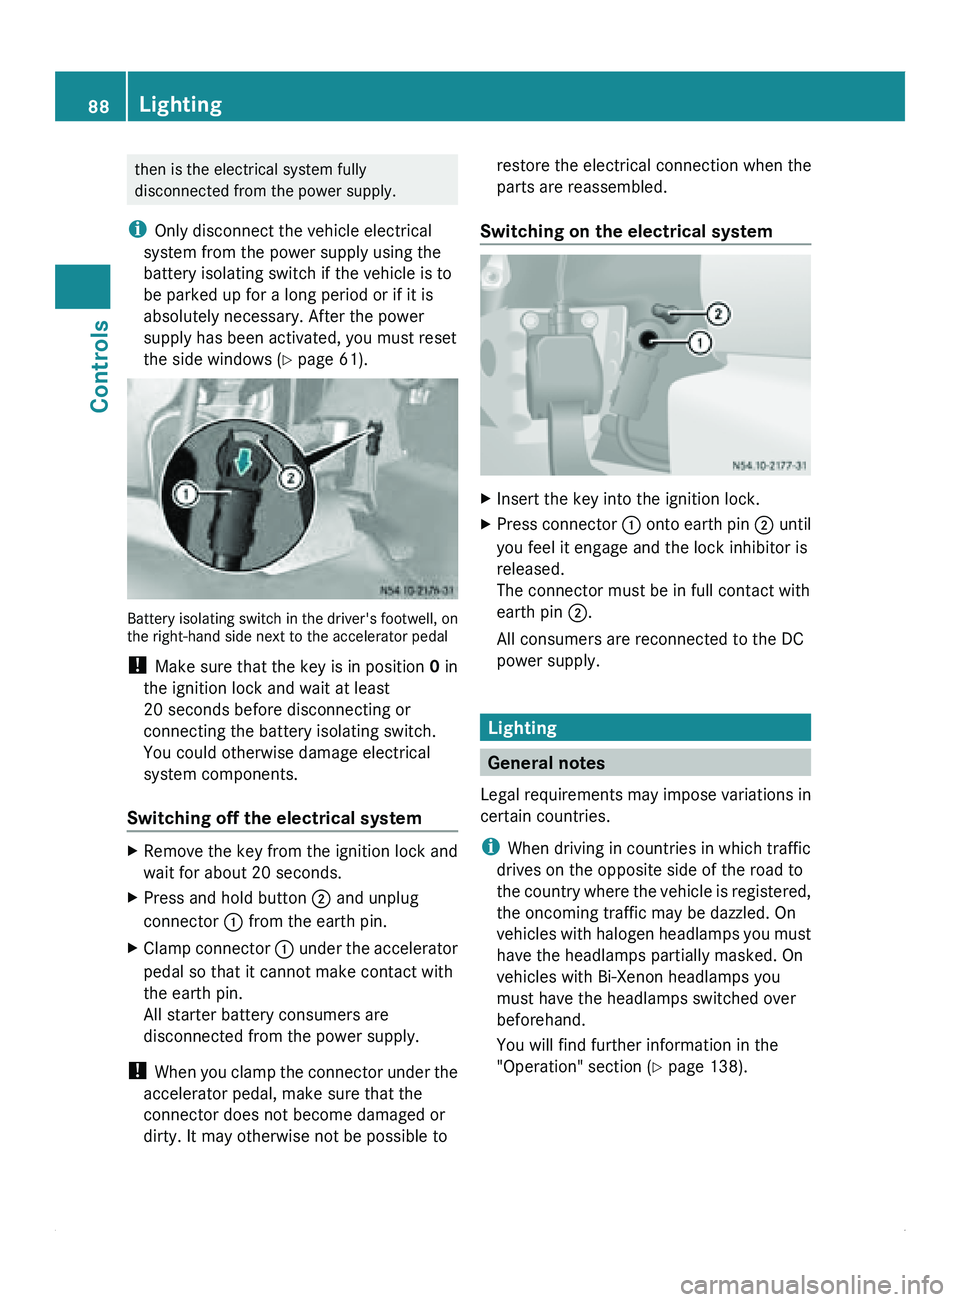
the side windows ( Y page 61). Battery isolating switch in the driver's footwell, on
the right-hand side next to the accelerator pedal
! Make sure that the key is in position 0 in
the ignition lock and wait at least
20 seconds before disconnecting or
connecting the battery isolating switch.
You could otherwise damage electrical
system components.
Switching off the electrical system X
Remove the key from the ignition lock and
wait for about 20 seconds.
X Press and hold button 0047 and unplug
connector 0046 from the earth pin.
X Clamp connector 0046 under
the
accelerator
pedal so that it cannot make contact with
the earth pin.
All starter battery consumers are
disconnected from the power supply.
! When you
clamp
the connector under the
accelerator pedal, make sure that the
connector does not become damaged or
dirty. It may otherwise not be possible to restore the electrical connection when the
parts are reassembled.
Switching on the electrical system X
Insert the key into the ignition lock.
X Press connector 0046
onto
earth
pin 0047 until
you feel it engage and the lock inhibitor is
released.
The connector must be in full contact with
earth pin 0047.
All consumers are reconnected to the DC
power supply. Lighting
General notes
Legal requirements may
impose variations in
certain countries.
i When driving in countries in which traffic
drives on the opposite side of the road to
the country where the vehicle is registered,
the oncoming traffic may be dazzled. On
vehicles with halogen headlamps you must
have the headlamps partially masked. On
vehicles with Bi-Xenon headlamps you
must have the headlamps switched over
beforehand.
You will find further information in the
"Operation" section ( Y page 138).88
Lighting
Controls