reset MERCEDES-BENZ V-CLASS MPV 2021 User Guide
[x] Cancel search | Manufacturer: MERCEDES-BENZ, Model Year: 2021, Model line: V-CLASS MPV, Model: MERCEDES-BENZ V-CLASS MPV 2021Pages: 337, PDF Size: 9.88 MB
Page 122 of 337
#
Switch on the po wer supp lyor the ignition. #
Brief lypress button 1.
Yo u will no lon ger be able tofold in the outside
mir rors once youre ach a speed greaterth an
47 km/h.
En gaging the outside mir rors
If an outside mir ror has been forc ibly disen gaged
fo rw ards or backwards, proceed as follo ws. #
Press and hold button 1until you hear a
click follo we dby the mir ror audibly engaging
in position.
The mir ror housing will now be engaged and
yo u will be able toadjust the outside mir rors
as normal.
Re setting the outside mir rors
% If
th e battery has been disconnected or com‐
ple tely discharged, the outside mir rors must
be reset. Only then will the automatic mir ror
fo lding function workproperly. #
Switch on the po wer supp lyor the ignition. #
Brief lypress button 1.
Heating the outside mir rors
Ve hicles without a rear window heater: at
te mp eratures below 15°C, the mir ror heater will
automatically switch on permanently once the
engine has been star ted.
Ve hicles with a rear window heater: attemp er‐
atures below 15°C, the mir ror heater will auto‐
matically switch on forte n minu tes once the
engine has been star ted. The mir ror heater can
also be switched on toget her with there ar win‐
dow heater. #
Swit chon the ignition. #
Press theto p or bottom section of the006C
rock er switch on the cont rol panel forth e air
conditioning.
The indicator lamp abo vethe006C rock er
switch will light up and the mir ror heater will
be switched on toget her with there ar wind ow
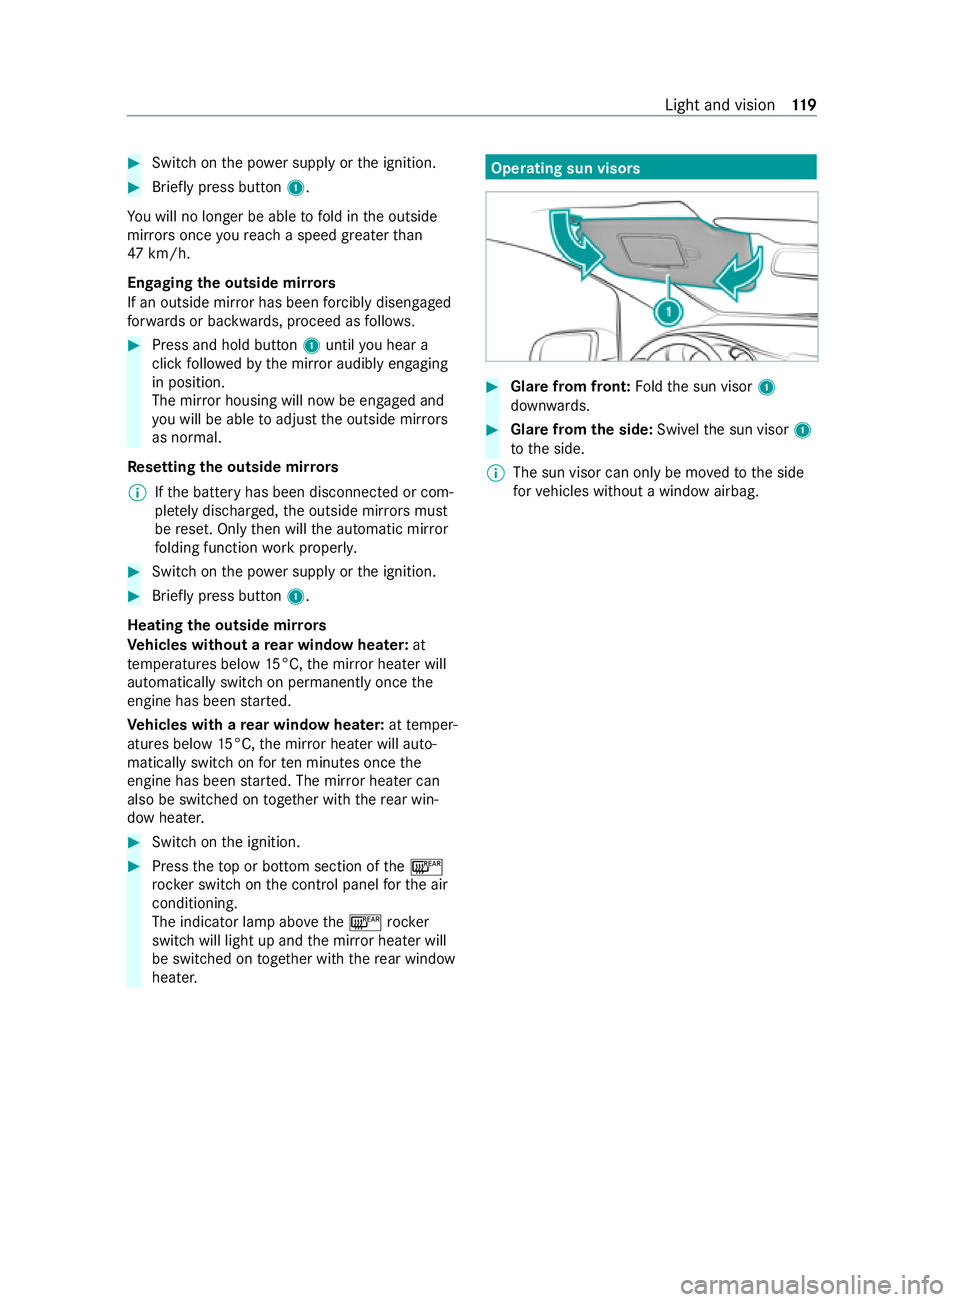
heater. Operating sun visors
#
Glare from front: Foldthe sun visor 1
down wards. #
Glar e from the side: Swivelthe sun visor 1
to the side.
% The sun visor can only be mo
vedto the side
fo rve hicles without a window airbag. Light and vision
11 9
Page 143 of 337

when driving at ele
vations higher than 2,500 m
abo vesea le vel. Obser vethe no tes on braking on
downhill gradients (/ page138).
The ma ximum permissible trailer loads are valid
fo r journe ysat ele vations up to1,000 m abo ve
sea le vel with gradients up to12% (/ page277). ECO
start/s top function Ope
ration of the ECO start/s top function &
WARNING Risk of accident and inju ry
due toautomatic engine starting
If th e engine was switched off automatically
and youth en get out, it star ted again auto‐
maticall y.The vehicle could pull away. #
Before leaving theve hicle,alw ays switch
off the ignition and secure theve hicle
against rolling away. Displ
aying the ECO start/ stop function in the
instrument clus ter:
R 00D6 : The ECO start/ stop function opera‐
tional.
R 00D5: Not all on vehicle conditions for an
automatic engine stop are met.
% Depending on the engine, the00D6 symbol
fi rs t appears du ring the automatic engine
st op or during the journe y.
If all theve hicle conditions for an automatic
engine stop are met, the engine will be automati‐
cally switched off:
R Vehicles with manual transmission: you
decelerate theve hicle toa lo wer speed, then
engage neutral 005Cand then release the
clutch pedal.
R Vehicles with automatic transmission: you
st op theve hicle in transmission position 005B
or 005C.
The engine restarts automatically in thefo llowing
cases:
R Vehicles with manual transmission: Yo u
depress the clutch pedal.
R Vehicles with automatic transmission: Yo u
re lease the brake pedal in transmission posi‐
tion 005Band with the HOLD function deactiva‐
te d.
R Vehicles with automatic transmission: Yo u
select transmission position 005Bor005E. R
You depress the accelera tor pedal.
R Ave hicle automatic engine start is required.
If th e engine was switched off bythe ECO start/
st op function and one of the doors is opened, the
engine will automatically start.
Swit ching the ECO start/s top function off/on #
Press the00D6 button on the cent reconsole.
When the indicator lamp in the00D6 button
lights up, the ECO start/ stop function is acti‐
va ted. Fu
nction of the ECO display The ECO display summarises
your driving charac‐
te rist ics from thest art of the journey toits com‐
pletion and assists you in achieving the most eco‐
nomical driving style. If you inter rupt your trip
and swit choff the ignition for longer than four
hours, the ECO display values will automatically
be reset.
Yo u can influence consum ption as follo ws:
R Anticipate road and traf fic conditions.
R Drive in drive program ;if it is available;
ot herwise, in drive program A
(/ page 145).
R Follow thege arshift recommendations. The inner segment lights up green and
the outer
segment fills up:
R 1Moderate acceleration
R 2Gentle deceleration and rolling
R 3Consis tent speed
The inner segment is gr eyand the outer segment
em pties:
R 1Sporty acceleration
R 2Heavy braking
R 3Speed fluctuations 14 0
Driving and pa rking
Page 187 of 337
R
Lane Keeping Assist (/ page175)
R Blind Sp otAssi st (/ page 174) #
Press the0064 or0063 button toswitch
between the assis tant displ ayand theev alua‐
tion of ATTENTION ASSIST (/ page172).
The evaluation of ATTENTION ASSIST sho ws
th e length of journey since the last break and
th e calculated attention le vel. Calling up displa
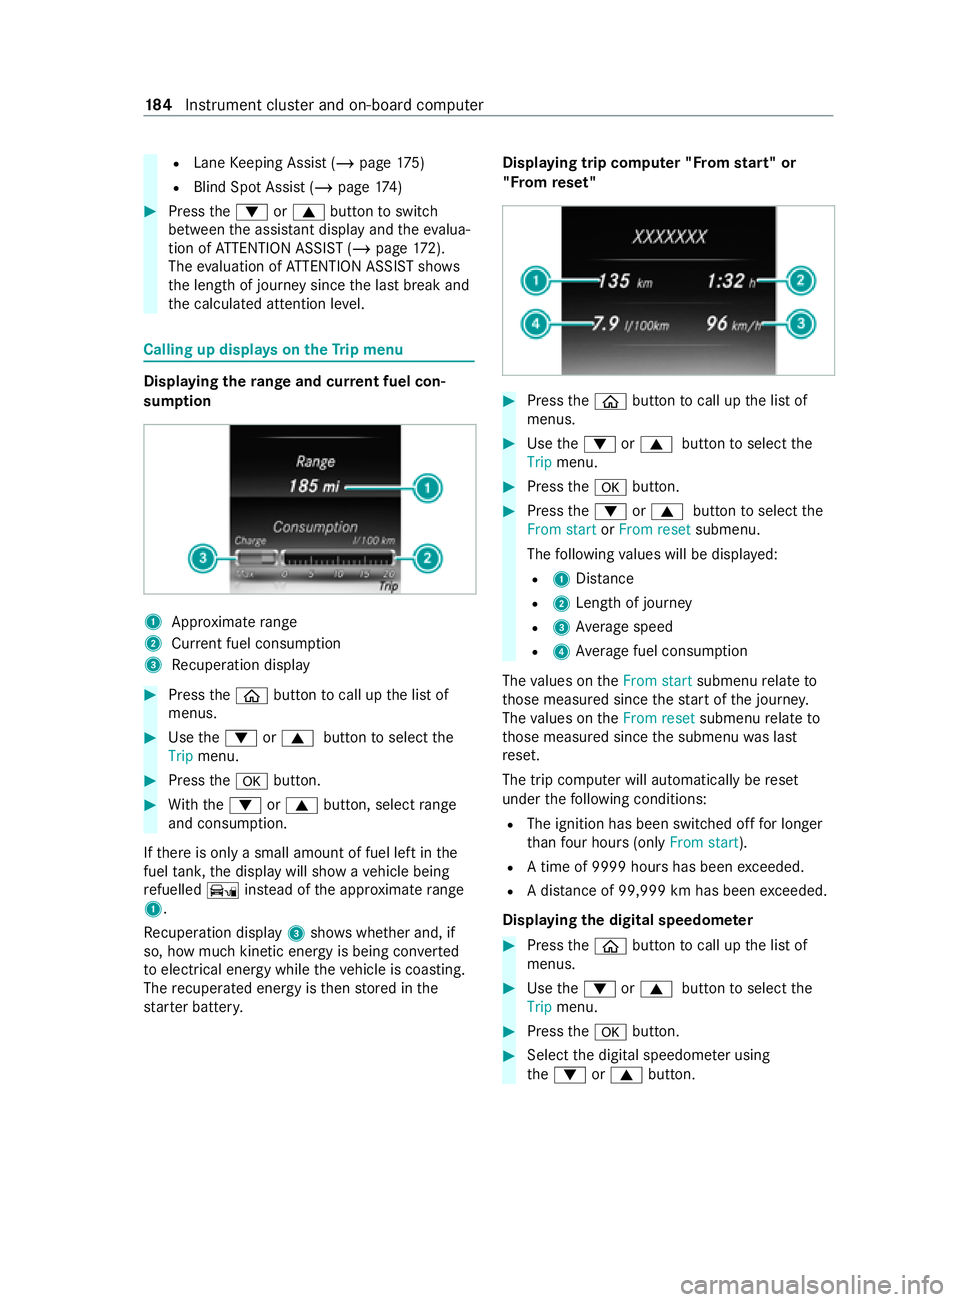
yson theTr ip menu Displaying
thera nge and cur rent fuel con‐
sum ption 1
Appr oximate range
2 Current fuel consum ption
3 Recuperation display #
Press the00E2 button tocall up the list of
menus. #
Use the0064 or0063 button toselect the
Trip menu. #
Press the0076 button. #
With th e0064 or0063 button, select range
and consu mption.
If th ere is only a small amount of fuel left in the
fuel tank, the display will show a vehicle being
re fuelled Ïinstead of the appr oximate range
1.
Re cuperation display 3showswhe ther and, if
so, how much kinetic energy is being con verted
to electrical energy while theve hicle is coasting.
The recuperated energy is then stored in the
st ar ter batter y. Displaying trip compu
ter "F rom start" or
"F rom reset" #
Press the00E2 button tocall up the list of
menus. #
Use the0064 or0063 button toselect the
Trip menu. #
Press the0076 button. #
Press the0064 or0063 button toselect the
From start orFrom reset submenu.
The following values will be displa yed:
R 1Distance
R 2Leng thof journey
R 3Average speed
R 4Average fuel consum ption
The values on theFrom start submenurelate to
th ose measured since thest art of the journe y.
The values on theFrom reset submenurelate to
th ose measured since the submenu was last
re set.
The trip computer will automatically be reset
under thefo llowing conditions:
R The ignition has been switched off for longer
th an four hours (on lyFrom start ).
R A time of 9999 hou rshas been exceeded.
R A dis tance of 99,999 km has been exceeded.
Displaying the digital speedome ter #
Press the00E2 button tocall up the list of
menus. #
Use the0064 or0063 button toselect the
Trip menu. #
Press the0076 button. #
Select the digital speedome ter using
th e0064 or0063 button. 184
Instrument clus ter and on-board computer
Page 188 of 337
Re
setting values
The values of thefo llowing functions can be
re se t:
R Trip dis tance
R "Fro m start" trip computer
R "Fro m reset" trip computer
R ECO display #
Press the00E2 button tocall up the list of
menus. #
Use the0064 or0063 button toselect the
Trip menu. #
Press the0076 button. #
Use the0064 button toselect Yesand con‐
fi rm with the0076 button.
If th e ECO display values are reset, theva lues in
th e "F rom start" trip computer will also be reset.
If th eva lues in the "F rom start" trip computer are
re set, the ECO display values will also be reset. Na
vigation menu In
theNavi menu, the display sho wsnavigation
instructions from the multimedia sy stem. #
Switch on the multimedia sy stem. #
Press the00E2 button tocall up the list of
menus. #
With th e0064 or0063 button, select the
Navi menu. #
Press the0076 button toconfirm.
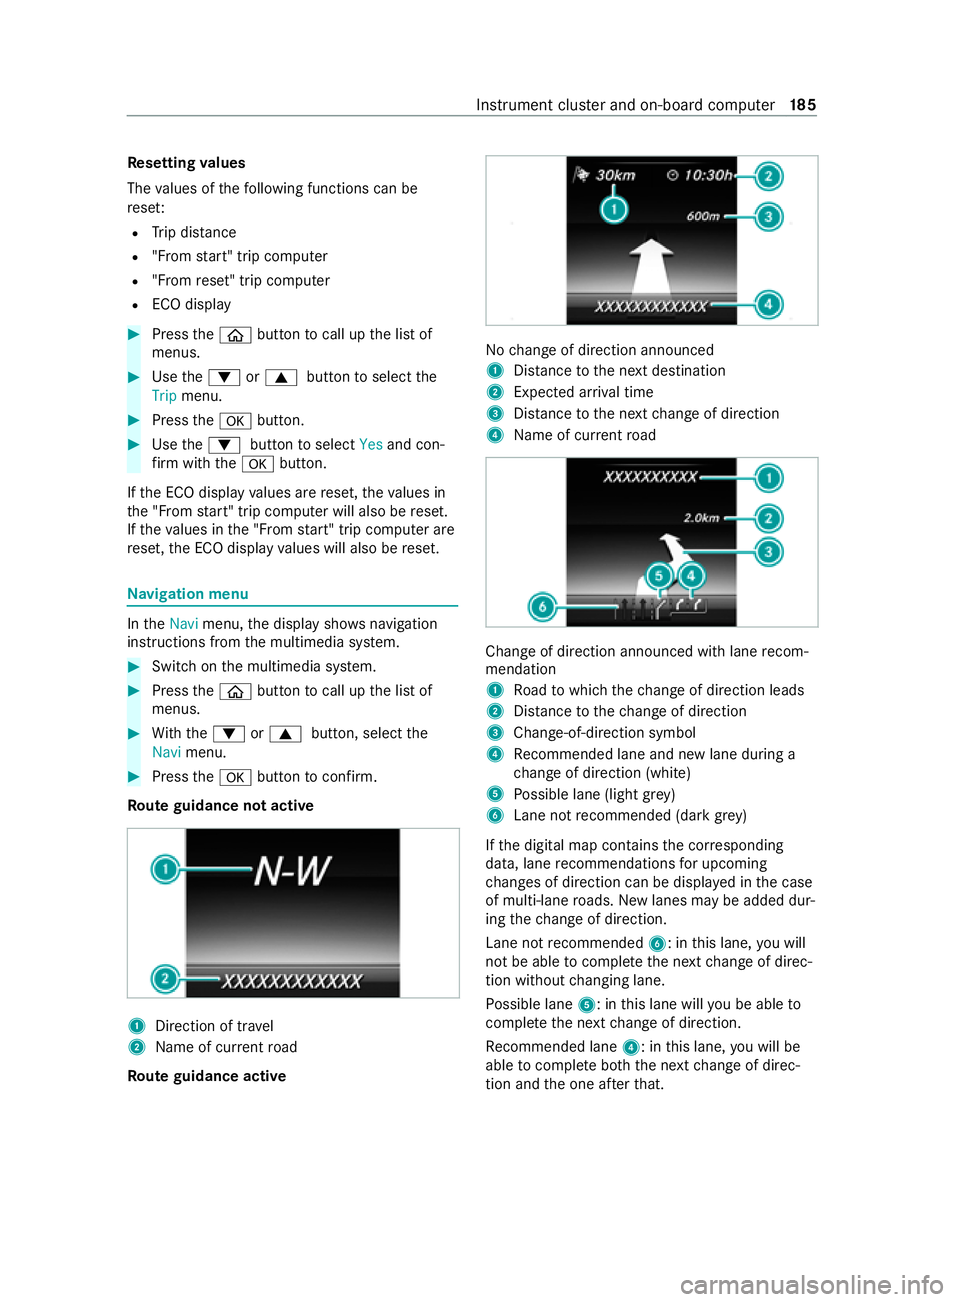
Ro ute guidance not active 1
Direction of tr avel
2 Name of cur rent road
Ro ute guidance active No
change of direction announced
1 Distance tothe next destination
2 Expected ar riva l time
3 Distance tothe next change of direction
4 Name of cur rent road Change of direction announced with lane
recom‐
mendation
1 Road towhich thech ange of direction leads
2 Distance tothech ange of direction
3 Change-of-direction symbol
4 Recommended lane and new lane du ring a
ch ange of direction (white)
5 Possible lane (light gr ey)
6 Lane not recommended (da rkgrey)
If th e digital map contains the cor responding
data, lane recommendations for upcoming
ch anges of direction can be displa yed in the case
of multi-lane roads. New lanes may be added dur‐
ing thech ange of direction.
Lane not recommended 6: inthis lane, you will
not be able tocomple tethe next change of direc‐
tion without changing lane.
Po ssible lane 5: inthis lane will you be able to
comple tethe next change of direction.
Re commended lane 4: inthis lane, you will be
able tocomple teboth th e next change of direc‐
tion and the one af terth at. In
stru ment clus ter and on-board computer 18 5
Page 189 of 337
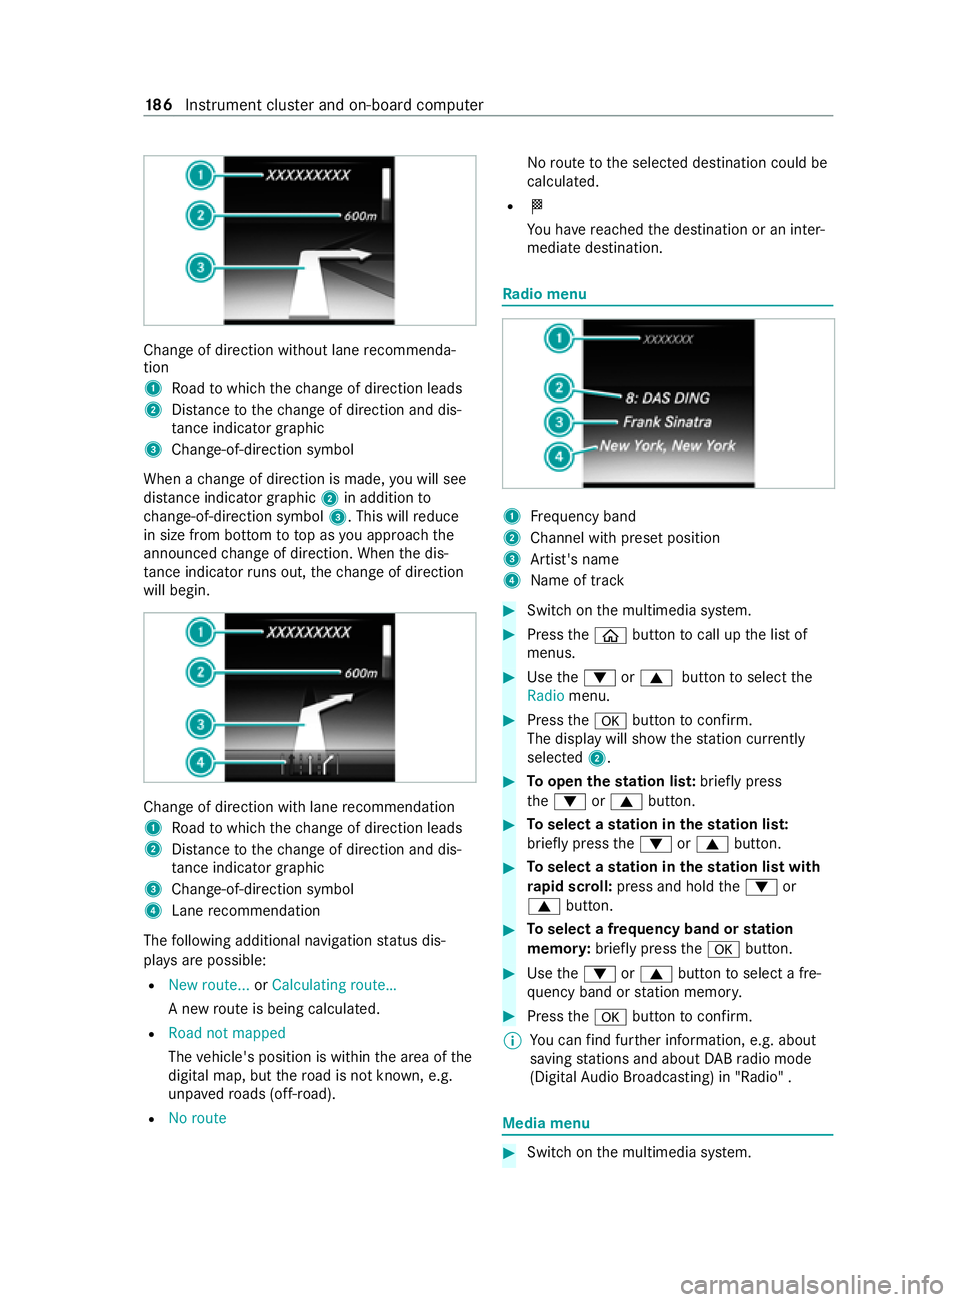
Chan
geof direction without lane recommenda‐
tion
1 Road towhich thech ange of direction leads
2 Distance tothech ange of direction and dis‐
ta nce indica tor graphic
3 Change-of-direction symbol
When a change of direction is made, you will see
dis tance indica tor graphic 2in addition to
ch ange-of-direction symbol 3. This willreduce
in size from bottom to top as you approach the
announced change of direction. When the dis‐
ta nce indica torru ns out, thech ange of direction
will begin. Change of direction with lane
recommendation
1 Road towhich thech ange of direction leads
2 Distance tothech ange of direction and dis‐
ta nce indica tor graphic
3 Change-of-direction symbol
4 Lane recommendation
The following additional navigation status dis‐
pla ysare possible:
R New route... orCalculating route…
A new route is being calculated.
R Road not mapped
The vehicle's position is within the area of the
digital map, but thero ad is not kn own, e.g.
unpa vedro ads (off- road).
R No route No
route tothe selected destination could be
calculated.
R 004B
You ha vereached the destination or an inter‐
mediate destination. Ra
dio menu 1
Frequency band
2 Channel with preset position
3 Artist's name
4 Name of track #
Switch on the multimedia sy stem. #
Press the00E2 button tocall up the list of
menus. #
Use the0064 or0063 button toselect the
Radio menu. #
Press the0076 button toconfirm.
The display will show thest ation cur rently
selected 2. #
Toopen thest ation lis t:briefly press
th e0064 or0063 button. #
Toselect a station in thest ation lis t:
brief lypress the0064 or0063 button. #
Toselect a station in thest ation list with
ra pid sc roll: press and hold the0064 or
0063 button. #
Toselect a frequency band or station
memor y:brief lypress the0076 button. #
Use the0064 or0063 button toselect a fre‐
qu ency band or station memor y. #
Press the0076 button toconfirm.
% Yo
u can find fur ther information, e.g. about
saving stations and about DABra dio mode
(Digital Audio Broadcasting) in "Radio" . Media menu
#
Switch on the multimedia sy stem. 18 6
Instrument clus ter and on-board computer
Page 192 of 337

Settings menu
#
Press the00E2 button tocall up the list of
menus. #
Use the0064 or0063 button toselect the
Settings menu. #
Press the0076 button toconfirm.
Yo u ha vethefo llowing options on theSettings
menu:
R Changing the settings forth e driver assis‐
tan ce sy stems on the Assis tance submenu
R Changing the settings forth eex terior lighting
on the Lights submenu
R Changing the display options on the Instru‐
ment clus ter submenu
R Setting the permanent limiter on theVe hicle
submenu
R Resetting the settings tofactory settings #
Select the desired submenu and confirm your
selection.
Assistance submenu #
Select a driving or driver assis tance sy stem
and configure a setting.
R Switching ESP ®
on/o ff (/ page 155).
R Switching Traf fic Sign Assi ston/off
(/ page 173).
R Switching Active Brake Assi ston/off
(/ page 157).
R Swit ching Blind Spot Assist on/off
(/ page 174).
R Adjusting ATTENTION ASSIST
(/ page 172).
R Adjusting Lane Keeping Assist
(/ page 175).
Lights submenu
The following settings are possible on the Lights
submenu:
R Switching the Intelligent Light Sy stem on/o ff
( / page 108)
R Switching between low beam forright- and
left-side traf fic (in vehicles with Intelligent
Light Sy stem only) #
Use the0064 or0063 button toselect the
Lights submenu. #
Press the0076 button toconfirm. #
Toswitch between low beam forri ght-
and left-side traf fic: use the0064 or0063
button toselect Dipped beams Setting for.
The display will show the selected setting. #
Change the selected setting with the0076
button.
When youch ange the setting, the switcho ver
will not take place until the next time the
ve hicle is stationar y.
When you swit chove rth e low beam forright- or
left-side traf fic, mo torw ay mode and the
enhanced fog light function may not be available.
This deactivation will take place only if the setting
fo r driving on theright or left is the opposite to
yo ur vehicle's national version.
Yo u can ha vethe low beam set forright- or left-
side traf fic at a qualified specialist workshop as
we ll.
Instrument clus ter submenu #
Use the0064 or0063 button toselect the
Instrument cluster submenu. #
Press the0076 button toconfirm. #
Toselect the unit of measurement for dis‐
tance: usethe0064 or0063 button toselect
th eDisplay unit Speed-/odometer function.
The display will show the selected setting km
or Miles. #
Change the selected setting with the0076
button. #
Toswitch the additional speedome ter on/
off: usethe0064 or0063 button toselect
Addit. speedo.
The cur rent selection will appear. #
Press the0076 button tochange the setting.
Ve hicle submenu #
Use the0064 or0063 button toselect the
Vehicle submenu. #
Press the0076 button toconfirm. #
Toset the permanent limiter: usethe0064
or 0063 button toselect Limit speed (winter
tyres).
The display will show the cur rent setting. #
Tochange the setting: pressthe0076 but‐
to n. #
Tosave the entr y:press the0076 button.
% Yo
u can find fur ther information in "Perma‐
nent limiter" (/ page160). In
stru ment clus ter and on-board computer 18 9
Page 193 of 337
#
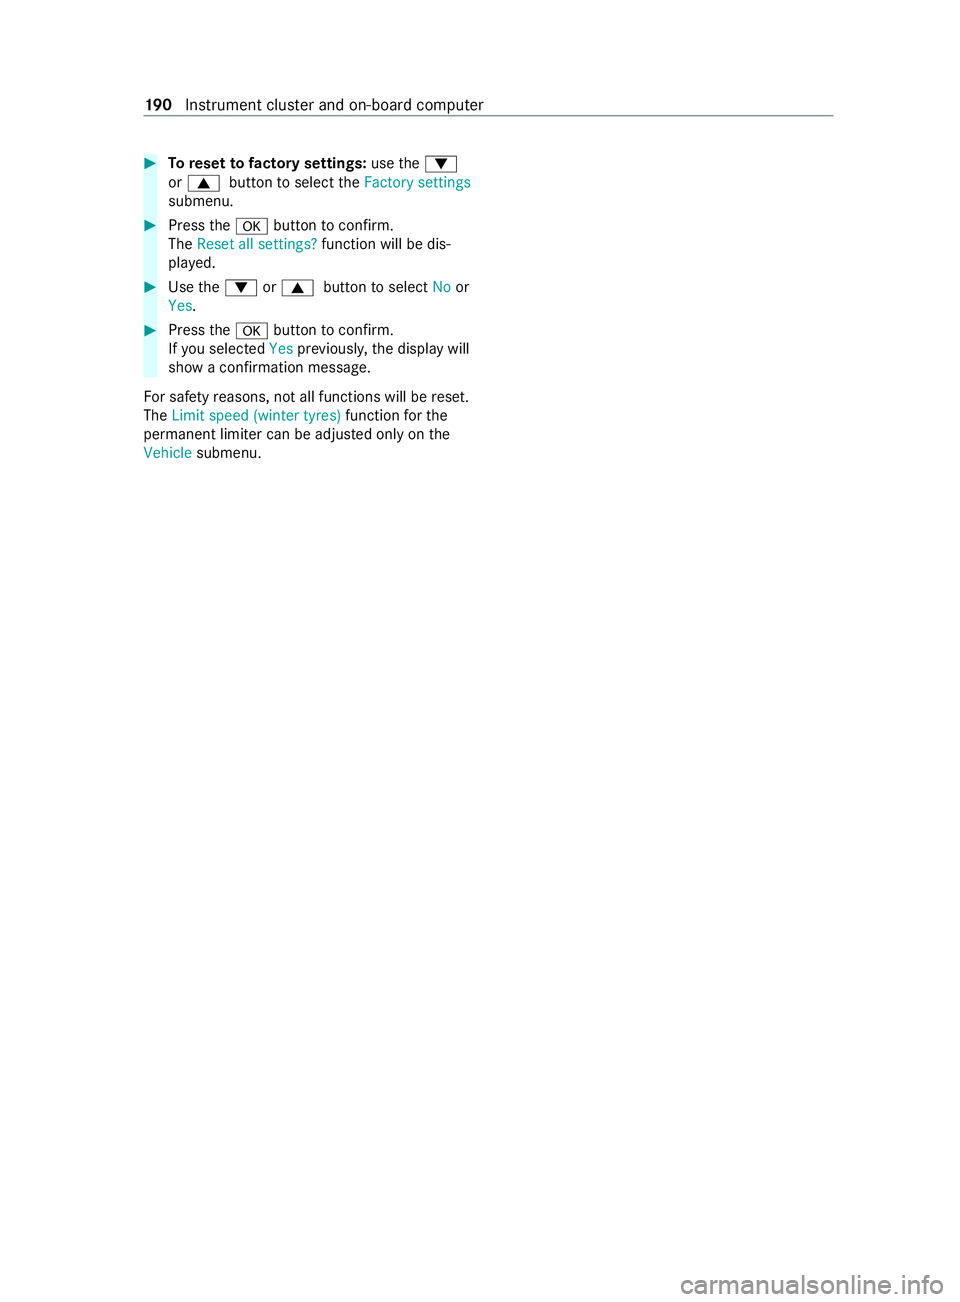
Toreset tofactory settings: usethe0064
or 0063 button toselect theFactory settings
submenu. #
Press the0076 button toconfirm.
The Reset all settings? function will be dis‐
pla yed. #
Use the0064 or0063 button toselect Noor
Yes. #
Press the0076 button toconfirm.
If yo u selec tedYes prev iousl y,the display will
show a confirmation message.
Fo r saf etyre asons, not all functions will be reset.
The Limit speed (winter tyres) functionforthe
permanent limiter can be adjus ted only on the
Vehicle submenu. 19 0
Instrument clus ter and on-board computer
Page 200 of 337

Information on profiles, suggestions and
fa
vo urites Using
the multimedia sy stem up toseven profiles
can be crea ted in theve hicle.
Profiles store your personal vehicle settings and
settings forth e multimedia sy stem.
If th eve hicle is used byseveral drivers, the driver
can select their profile before the journe y,with‐
out changing the settings of other drivers.
The following settings are sa ved in your profile,
fo rex ample:
R Radio (including station list)
R Last destinations
R Favo urites and suggestions
The vehicle can learn the habits of the driver. It
th en of fers suggestions forth e most likely naviga‐
tion destinations, media sources, radio stations
or con tacts. The requirements forth at are the
selection of a profile, your consent tothere cord‐
ing of data and sufficient collected data.
Favo urites are quick accesses tofrequently used
applications. Favourites can be selec ted from cat‐
egories or added directly in an application.Configuring profiles and suggestions
Multimedia sy
stem:
4 © 5
f Profiles
Creating a new profile #
Select 0081Create profile . #
Select an avatar. #
Enterth e name and confirm with 0076.#
Select Continue 0048. #
Select Current settings. #
Select Save. #
Activate Blu etoo th®
and select Connect
phone, toconnect a mobile phone wi th the
user profile. #
Select Finished .
Selecting profile options #
Select 0062for a profile.
The following functions are available:
R Resetting or deleting a profile
R Resetting favo urites
R Con figuring suggestions Configuring suggestions #
Select 0062for a profile. #
Select Suggestions settings. #
Switch Allow destination suggestions, Allow
music suggestions andAllow contact sugges-
tions on or off. #
Todeactivate the learn function for one
da y:activate Deact. learn. for 24h .
Fo r24 hours no new actions will be trained
and no data recorded forth e active profile.
Suggestions will continue tobe shown.
Example: if the option is switched on and a
ro ute toa new destination has been calcula‐
te d, this destination would not be take n into
account forth e learn function. Sy
stem settings Overview of
the sy stem settings menu In
the sy stem settings menu, you can make set‐
tings in thefo llowing menus and control ele‐
ments:
R Display
R Cont rol elements:
R LINGU ATRO NIC
R Sound:
- Enter tainment
- Navigation and traf fic announcements
- Telephone
- Voice amplification tothere ar
R Connectivity:
-
Transmission of theve hicle location
- Wi-Fi, Blu etoo th®
, NFC
R Time & date
R Langua ge
R Units for dis tance
R Software upda tes
R Data import/expo rt
R PIN pr otection
R System Reset Information on important sy
stem updates Impor
tant sy stem updates may be necessary for
th e security of your multimedia sy stem's data.
Ins tallth ese updates, or else the security of your
multimedia sy stem cann otbe ensured. MBUX multimedia sy
stem 197
Page 206 of 337
#
Enter the destination in 2.
The sear chresults are displa yed. #
Select the destination in list 3.
The de tailed view forth ero ute is displ ayed. Calculating a
route and using settings for
ro ute guidance Re
quirements:
R The destination has been entered.
R The destination address is shown.
R For the commuter route: you ha vecreate d a
profile (/ page197).
R The Allow destination suggestions option is
switched on .
R The multimedia sy stem has gathered suf fi‐
cient data in ordertoshow destination sug‐
ge stions.
R Routes ha vebeen learned forth ese destina‐
tion suggestions.
Multimedia sy stem:
4 © 5
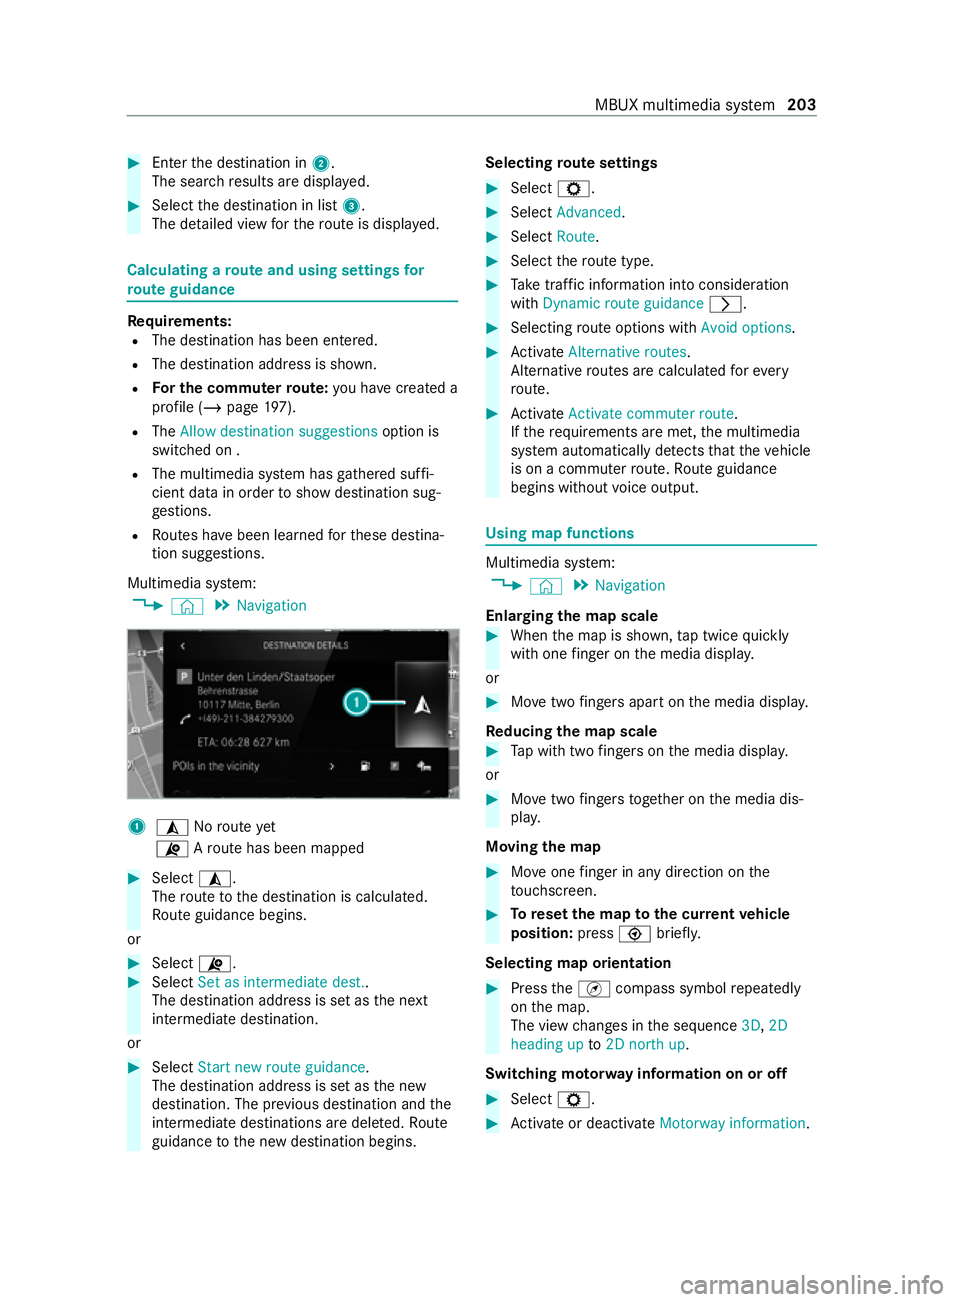
Navigation 1
¥ Noroute yet
¦ Aro ute has been mapped #
Select ¥.
The route tothe destination is calculated.
Ro ute guidance begins.
or #
Select ¦. #
Select Set as intermediate dest..
The destination address is set as the next
intermediate destination.
or #
Select Start new route guidance.
The destination address is set as the new
destination. The pr evious destination and the
intermediate destinations are dele ted. Ro ute
guidance tothe new destination begins. Selecting
route settings #
Select Z. #
Select Advanced. #
Select Route. #
Select thero ute type. #
Take traf fic information into consideration
wi th Dynamic route guidance 0048. #
Selecting route options with Avoid options. #
Activate Alternative routes.
Alternati veroutes are calculated forev ery
ro ute. #
Activate Activate commuter route .
If th ere qu irements are met, the multimedia
sy stem automatically de tects that theve hicle
is on a commuter route. Route guidance
begins without voice output. Using map functions
Multimedia sy
stem:
4 © 5
Navigation
Enlarging the map scale #
When the map is shown, tap twice quickly
with one finger on the media displa y.
or #
Movetwo fingers apart on the media displa y.
Re ducing the map scale #
Tap with two fingers on the media displa y.
or #
Movetwo fingers toge ther on the media dis‐
pla y.
Moving the map #
Moveone finger in any di rection on the
to uchsc reen. #
Toreset the map tothe cur rent vehicle
position: press\briefly.
Selecting map orientation #
Press theÄ compass symbol repeatedly
on the map.
The view changes in the sequence 3D,2D
heading up to2D north up .
Switching mo torw ay information on or off #
Select Z. #
Activate or deacti vate Motorway information. MBUX multimedia sy
stem 203
Page 210 of 337
Yo
u can inter change the mobile phone in
th efo re ground and bac kground.
Connecting a mobile phone
Re quirements:
R Blue tooth ®
is activated on the mobile phone
(see the manufacturer's operating instruc‐
tions).
R Blue tooth ®
is activated on the multimedia
sy stem.
Multimedia sy stem:
4 © 5
Phone
Sear ching for a mobile phone #
Select í. #
Select Connect new device.
Connecting a mobile phone
Auth orisation follo ws using secure simple pairing. #
Select a mobile phone.
A code is displ ayed in the multimedia sy stem
and on the mobile phone. #
If bo thcodes match, confirm the code on the
mobile phone.
Fu nctions in theTe lephony menu
The functions available in theTe lephony menu
include thefo llowing:
R Making calls, e.g.:
- R Accepting a call
- k End call
- i Create conferen. call
- Accepting or rejecting a waiting call
R Managing con tacts, e.g.:
- Downloading mobile phone contacts
- Editing thefo rm at of a con tact's name
- Saving contacts in theve hicle
R Receiving and sending messages, e.g.:
- Using there ad-aloud function
- Dictating a new messa ge Overview of Smartphone Integ
ration
Wi th Smartphone Integration, you can use cer tain
functions on your mobile phone via the multime‐
dia sy stem displa y.
Only one mobile phone at a time can be connec‐
te d via Smartphone Integration tothe multimedia
sy stem. Also for use with two phone mode with smartphone integration, only one additional
mobile phone can be connected using Blue
tooth®
with the multimedia sy stem.
The full range of functions for Smartphone Inte‐
gration is only possible with an Internet connec‐
tion. The appro priate application must be down‐
loaded on the mobile phone touse Smartphone
In te gration. The mobile phone must be switched
on and connected toa USB port with theç
symbol on the multimedia sy stem using a suita‐
ble cable.
Apps for Smartphone Integration
R Apple CarPlay ®
R Android Auto
Yo u can start Apple CarPlay ®
or Android Auto
using theApps menu.
Alternative: If an application is active via Smart‐
phone Integration (e.g. when music is being
pla yed or route guidance is active), you can call
up the active application using the| orz
or 002B application buttons
Yo u can end Smartphone In tegr ation bydiscon‐
necting the connecting cable between the mobile
phone and multimedia sy stem.
% Mercedes-Benz
recommends disconnecting
th e connecting cable only when theve hicle is
st ationar y.
When using Android Autoor Apple CarPlay ®
, cer‐
ta in vehicle data is transfer redto the mobile
phone. This enables youto getth e best out of
selected mobile phone services. Vehicle data is
not directly accessible.
The following sy stem information is transmit ted:
R Software release of the multimedia sy stem
R System ID (anonymised)
The transfer of this data is used tooptimise com‐
munication between theve hicle and the mobile
phone.
To do this, and toassign se veralve hicles tothe
mobile phone, a vehicle ID is randomly gener‐
ated.
This has no connection totheve hicle identifica‐
tion number (VIN) and is dele ted when the multi‐
media sy stem is reset (/ page 200). MBUX multimedia sy
stem 207