mirror Mercury Marauder 2003 Owner's Manuals
[x] Cancel search | Manufacturer: MERCURY, Model Year: 2003, Model line: Marauder, Model: Mercury Marauder 2003Pages: 232, PDF Size: 2.29 MB
Page 1 of 232
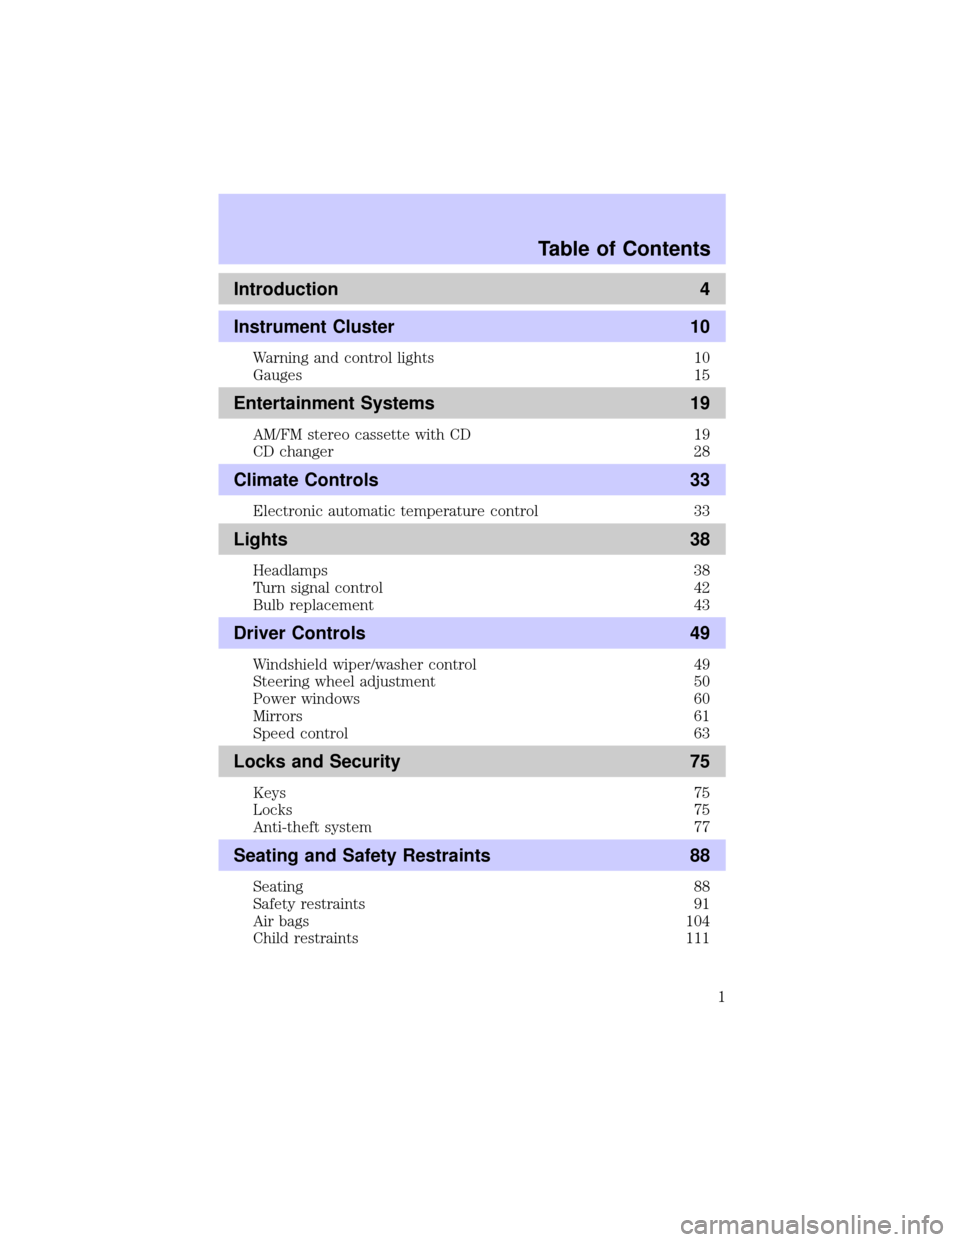
Introduction 4
Instrument Cluster 10
Warning and control lights 10
Gauges 15
Entertainment Systems 19
AM/FM stereo cassette with CD 19
CD changer 28
Climate Controls 33
Electronic automatic temperature control 33
Lights 38
Headlamps 38
Turn signal control 42
Bulb replacement 43
Driver Controls 49
Windshield wiper/washer control 49
Steering wheel adjustment 50
Power windows 60
Mirrors 61
Speed control 63
Locks and Security 75
Keys 75
Locks 75
Anti-theft system 77
Seating and Safety Restraints 88
Seating 88
Safety restraints 91
Air bags 104
Child restraints 111
Table of Contents
1
Page 37 of 232
To aid in side window defogging/demisting in cold weather conditions:
1. Select VENT
2. Set the temperature control to full heat
3. Set the fan speed to HI
4. Direct the outer panel vents towards to side windows
To increase airflow to the outer panel vents, close the central panel
vents.
Do not place objects on top of the instrument panel, as these
objects may become projectiles in a collision or sudden stop.
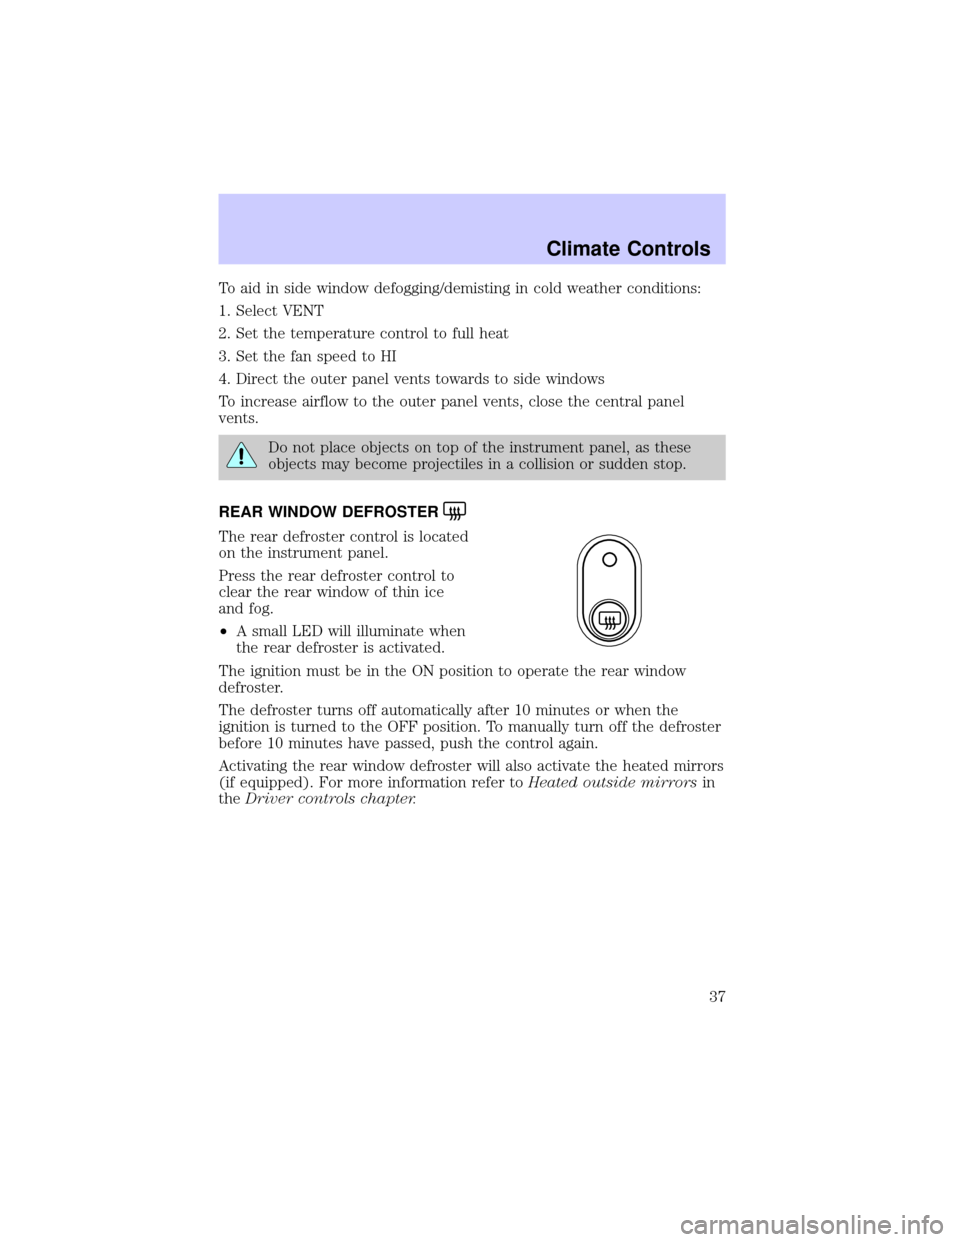
REAR WINDOW DEFROSTER
The rear defroster control is located
on the instrument panel.
Press the rear defroster control to
clear the rear window of thin ice
and fog.
²A small LED will illuminate when
the rear defroster is activated.
The ignition must be in the ON position to operate the rear window
defroster.
The defroster turns off automatically after 10 minutes or when the
ignition is turned to the OFF position. To manually turn off the defroster
before 10 minutes have passed, push the control again.
Activating the rear window defroster will also activate the heated mirrors
(if equipped). For more information refer toHeated outside mirrorsin
theDriver controls chapter.
Climate Controls
37
Page 43 of 232
BULBS
Replacing exterior bulbs
Check the operation of all the bulbs frequently.
Using the right bulbs
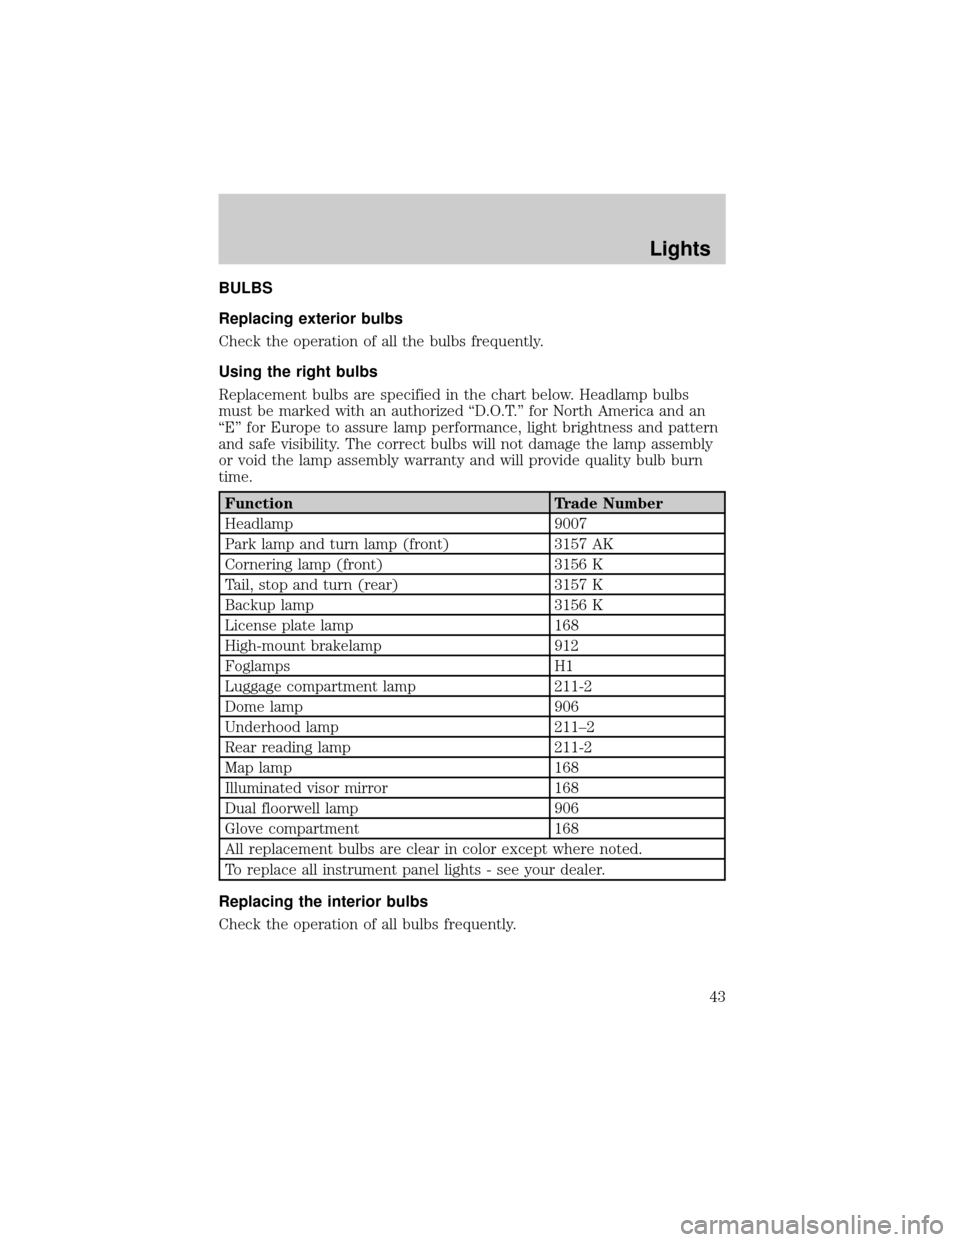
Replacement bulbs are specified in the chart below. Headlamp bulbs
must be marked with an authorized ªD.O.T.º for North America and an
ªEº for Europe to assure lamp performance, light brightness and pattern
and safe visibility. The correct bulbs will not damage the lamp assembly
or void the lamp assembly warranty and will provide quality bulb burn
time.
Function Trade Number
Headlamp 9007
Park lamp and turn lamp (front) 3157 AK
Cornering lamp (front) 3156 K
Tail, stop and turn (rear) 3157 K
Backup lamp 3156 K
License plate lamp 168
High-mount brakelamp 912
Foglamps H1
Luggage compartment lamp 211-2
Dome lamp 906
Underhood lamp 211±2
Rear reading lamp 211-2
Map lamp 168
Illuminated visor mirror 168
Dual floorwell lamp 906
Glove compartment 168
All replacement bulbs are clear in color except where noted.
To replace all instrument panel lights - see your dealer.
Replacing the interior bulbs
Check the operation of all bulbs frequently.
Lights
43
Page 51 of 232
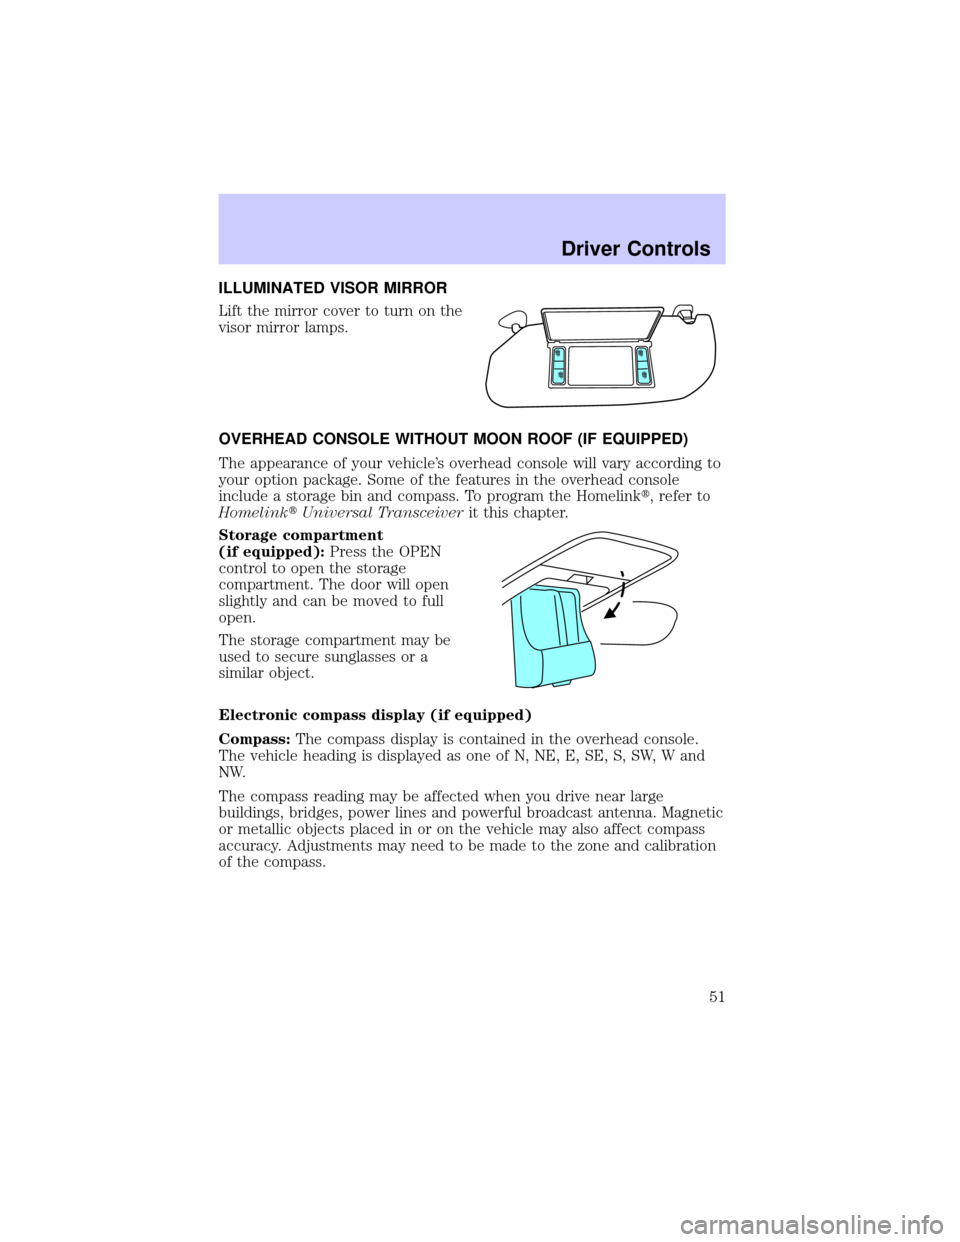
ILLUMINATED VISOR MIRROR
Lift the mirror cover to turn on the
visor mirror lamps.
OVERHEAD CONSOLE WITHOUT MOON ROOF (IF EQUIPPED)
The appearance of your vehicle's overhead console will vary according to
your option package. Some of the features in the overhead console
include a storage bin and compass. To program the Homelinkt, refer to
HomelinktUniversal Transceiverit this chapter.
Storage compartment
(if equipped):Press the OPEN
control to open the storage
compartment. The door will open
slightly and can be moved to full
open.
The storage compartment may be
used to secure sunglasses or a
similar object.
Electronic compass display (if equipped)
Compass:The compass display is contained in the overhead console.
The vehicle heading is displayed as one of N, NE, E, SE, S, SW, W and
NW.
The compass reading may be affected when you drive near large
buildings, bridges, power lines and powerful broadcast antenna. Magnetic
or metallic objects placed in or on the vehicle may also affect compass
accuracy. Adjustments may need to be made to the zone and calibration
of the compass.
Driver Controls
51
Page 61 of 232
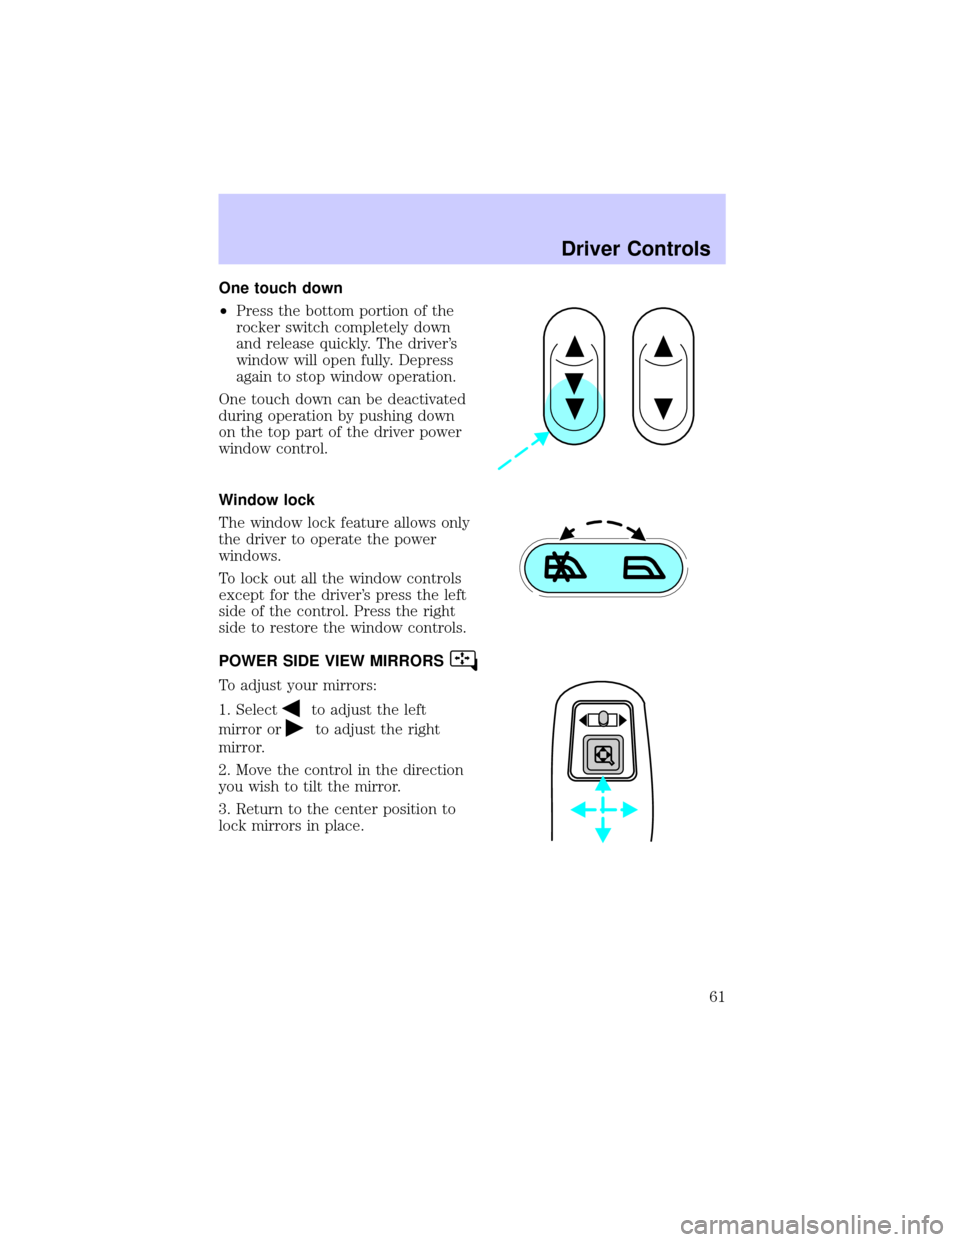
One touch down
²Press the bottom portion of the
rocker switch completely down
and release quickly. The driver's
window will open fully. Depress
again to stop window operation.
One touch down can be deactivated
during operation by pushing down
on the top part of the driver power
window control.
Window lock
The window lock feature allows only
the driver to operate the power
windows.
To lock out all the window controls
except for the driver's press the left
side of the control. Press the right
side to restore the window controls.
POWER SIDE VIEW MIRRORS
To adjust your mirrors:
1. Select
to adjust the left
mirror or
to adjust the right
mirror.
2. Move the control in the direction
you wish to tilt the mirror.
3. Return to the center position to
lock mirrors in place.
Driver Controls
61
Page 62 of 232
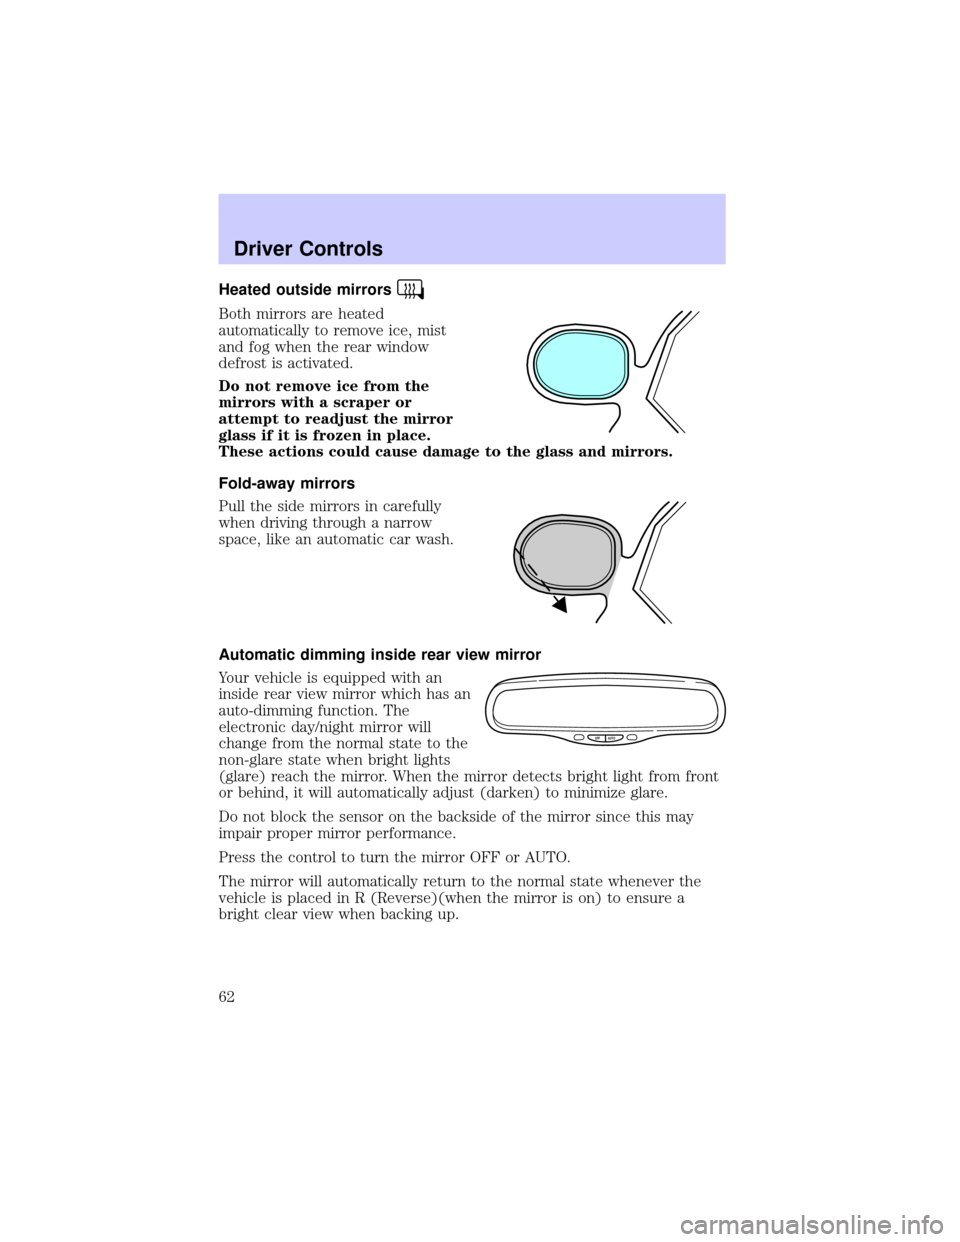
Heated outside mirrors
Both mirrors are heated
automatically to remove ice, mist
and fog when the rear window
defrost is activated.
Do not remove ice from the
mirrors with a scraper or
attempt to readjust the mirror
glass if it is frozen in place.
These actions could cause damage to the glass and mirrors.
Fold-away mirrors
Pull the side mirrors in carefully
when driving through a narrow
space, like an automatic car wash.
Automatic dimming inside rear view mirror
Your vehicle is equipped with an
inside rear view mirror which has an
auto-dimming function. The
electronic day/night mirror will
change from the normal state to the
non-glare state when bright lights
(glare) reach the mirror. When the mirror detects bright light from front
or behind, it will automatically adjust (darken) to minimize glare.
Do not block the sensor on the backside of the mirror since this may
impair proper mirror performance.
Press the control to turn the mirror OFF or AUTO.
The mirror will automatically return to the normal state whenever the
vehicle is placed in R (Reverse)(when the mirror is on) to ensure a
bright clear view when backing up.
OFF AUTO
Driver Controls
62
Page 146 of 232
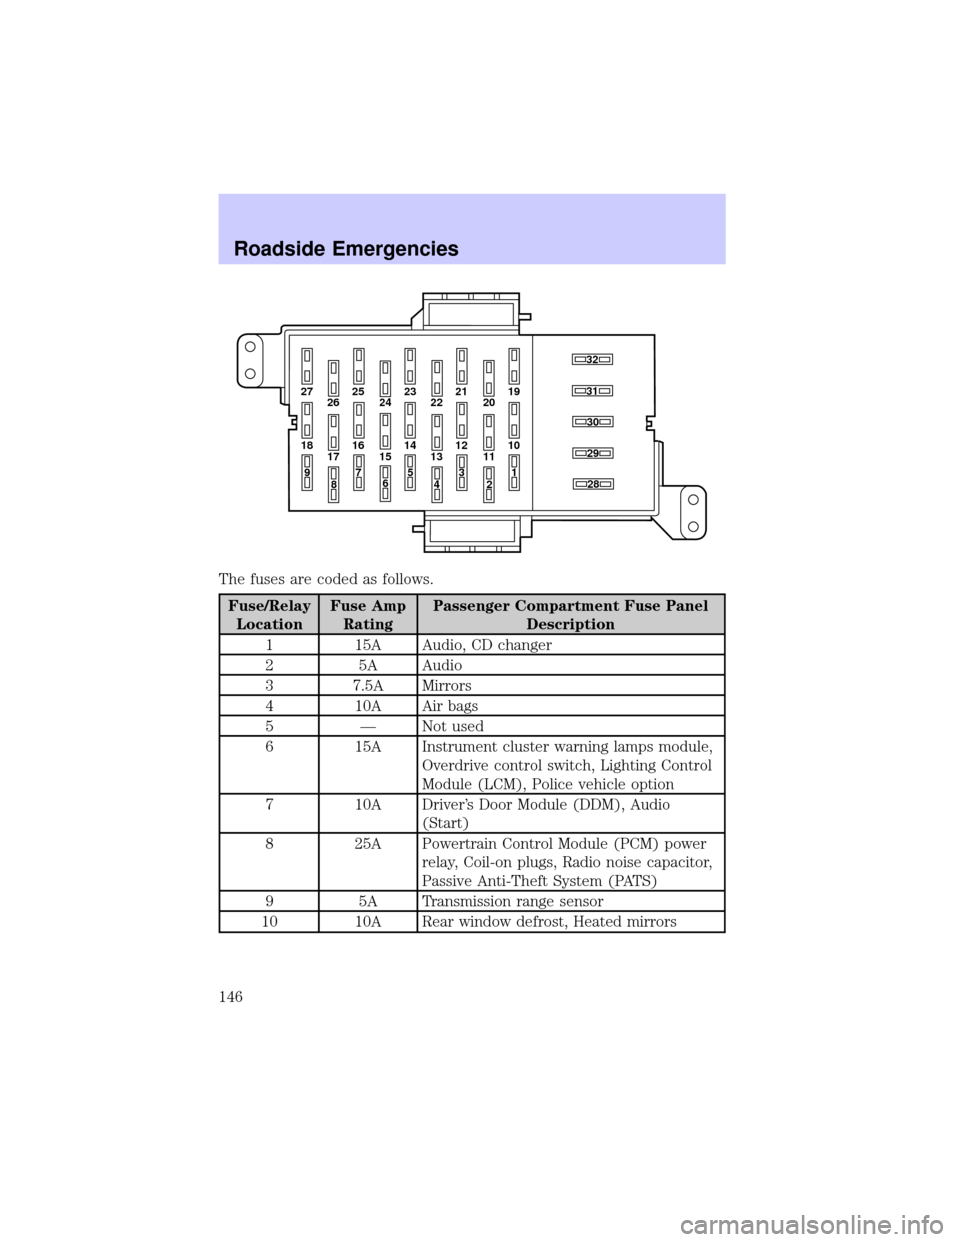
The fuses are coded as follows.
Fuse/Relay
LocationFuse Amp
RatingPassenger Compartment Fuse Panel
Description
1 15A Audio, CD changer
2 5A Audio
3 7.5A Mirrors
4 10A Air bags
5 Ð Not used
6 15A Instrument cluster warning lamps module,
Overdrive control switch, Lighting Control
Module (LCM), Police vehicle option
7 10A Driver's Door Module (DDM), Audio
(Start)
8 25A Powertrain Control Module (PCM) power
relay, Coil-on plugs, Radio noise capacitor,
Passive Anti-Theft System (PATS)
9 5A Transmission range sensor
10 10A Rear window defrost, Heated mirrors
27 25
26 2423 21
2219
20
18 16
17 1514 12
131030
32
31
28
29
11
97
8653
41
2
Roadside Emergencies
146
Page 147 of 232
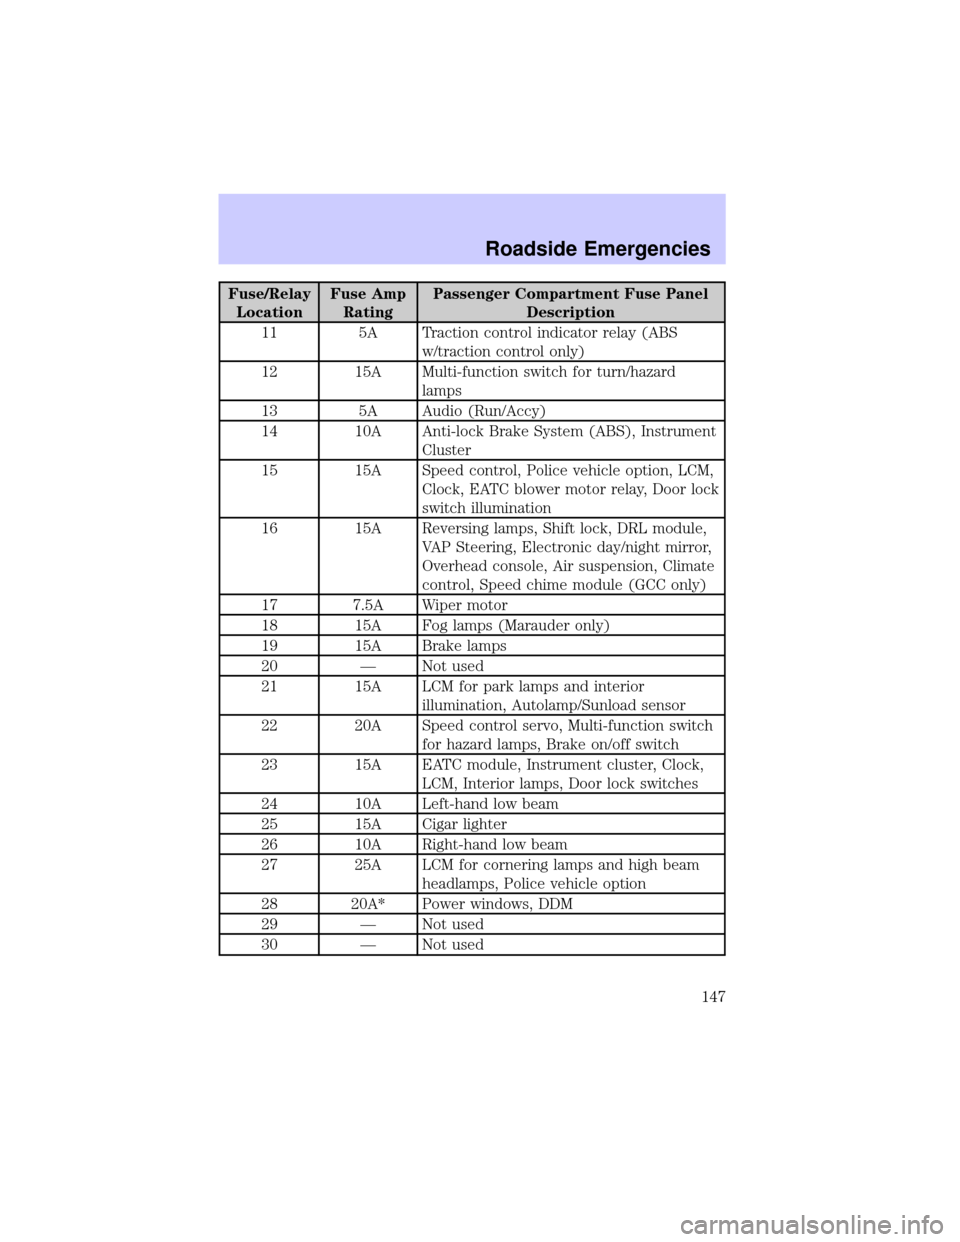
Fuse/Relay
LocationFuse Amp
RatingPassenger Compartment Fuse Panel
Description
11 5A Traction control indicator relay (ABS
w/traction control only)
12 15A Multi-function switch for turn/hazard
lamps
13 5A Audio (Run/Accy)
14 10A Anti-lock Brake System (ABS), Instrument
Cluster
15 15A Speed control, Police vehicle option, LCM,
Clock, EATC blower motor relay, Door lock
switch illumination
16 15A Reversing lamps, Shift lock, DRL module,
VAP Steering, Electronic day/night mirror,
Overhead console, Air suspension, Climate
control, Speed chime module (GCC only)
17 7.5A Wiper motor
18 15A Fog lamps (Marauder only)
19 15A Brake lamps
20 Ð Not used
21 15A LCM for park lamps and interior
illumination, Autolamp/Sunload sensor
22 20A Speed control servo, Multi-function switch
for hazard lamps, Brake on/off switch
23 15A EATC module, Instrument cluster, Clock,
LCM, Interior lamps, Door lock switches
24 10A Left-hand low beam
25 15A Cigar lighter
26 10A Right-hand low beam
27 25A LCM for cornering lamps and high beam
headlamps, Police vehicle option
28 20A* Power windows, DDM
29 Ð Not used
30 Ð Not used
Roadside Emergencies
147
Page 173 of 232

WASHING THE EXTERIOR
Wash your vehicle regularly with cool or lukewarm water and a neutral
Ph shampoo, such as Motorcraft Detail Wash (ZC-3±A), which is available
from your dealer.
²Never use strong household detergents or soap, such as dish washing
or laundry liquid. These products can discolor and spot painted
surfaces.
²Never wash a vehicle that is ªhot to the touchº or during exposure to
strong, direct sunlight.
²Always use a clean sponge or carwash mitt with plenty of water for
best results.
²Dry the vehicle with a chamois or soft terry cloth towel in order to
eliminate water spotting.
²It is especially important to wash the vehicle regularly during the
winter months, as dirt and road salt are difficult to remove and cause
damage to the vehicle.
²Immediately remove items such as gasoline, diesel fuel, bird droppings
and insect deposits because they can cause damage to the vehicle's
paintwork and trim over time.
²Remove any exterior accessories, such as antennas, before entering a
car wash.
²Suntan lotions and insect repellents can damage any painted
surface; if these substances come in contact with your vehicle,
wash off as soon as possible.
WAXING
Applying a polymer paint sealant to your vehicle every six months will
assist in reducing minor scratches and paint damage.
²Wash the vehicle first.
²Do not use waxes that contain abrasives.
²Do not allow paint sealant to come in contact with any non-body
(low-gloss black) colored trim, such as grained door handles, roof
racks, bumpers, side moldings, mirror housings or the windshield cowl
area. The paint sealant will ªgrayº or stain the parts over time.
Cleaning
173
Page 218 of 232

FORD ACCESSORIES FOR YOUR VEHICLE
A wide selection of genuine Ford accessories are available for your
vehicle through your local authorized Ford, Lincoln, Mercury or Ford of
Canada dealer. These quality accessories have been specifically
engineered to fulfill your automotive needs; they are custom designed to
complement the style and aerodynamic appearance of your vehicle. In
addition, each accessory is made from high quality materials and meets
or exceeds Ford's rigorous engineering and safety specifications. Ford
Motor Company will repair or replace any properly dealer-installed Ford
accessory found to be defective in factory-supplied materials or
workmanship during the warranty period, as well as any component
damaged by the defective accessory. The accessory will be warranted for
whichever provides you the greatest benefit:
²12 months or 20,000 km (12,000 miles) (whichever occurs first), or
²the remainder of your new vehicle limited warranty.
This means that genuine Ford accessories purchased along with your
new vehicle and installed by the dealer are covered for the full length of
your New Vehicle's Limited Warranty Ð 3 years or 60,000 km (36,000
miles) (whichever occurs first). Contact your dealer for details and a
copy of the warranty.
Not all accessories are available for all models.
Vehicle Security
Air bag anti-theft locks
Locking gas cap
Remote keyless entry
Styled wheel locks
Vehicle security systems
Comfort and convenience
Cargo organizer
Electrochromic compass mirror
Engine block heaters
Remote start system
Accessories
218