ignition Mercury Mountaineer 1999 s Owner's Guide
[x] Cancel search | Manufacturer: MERCURY, Model Year: 1999, Model line: Mountaineer, Model: Mercury Mountaineer 1999Pages: 248, PDF Size: 1.74 MB
Page 105 of 248

1. Remove the shade from the vehicle and extend it with the smooth
grain facing you.
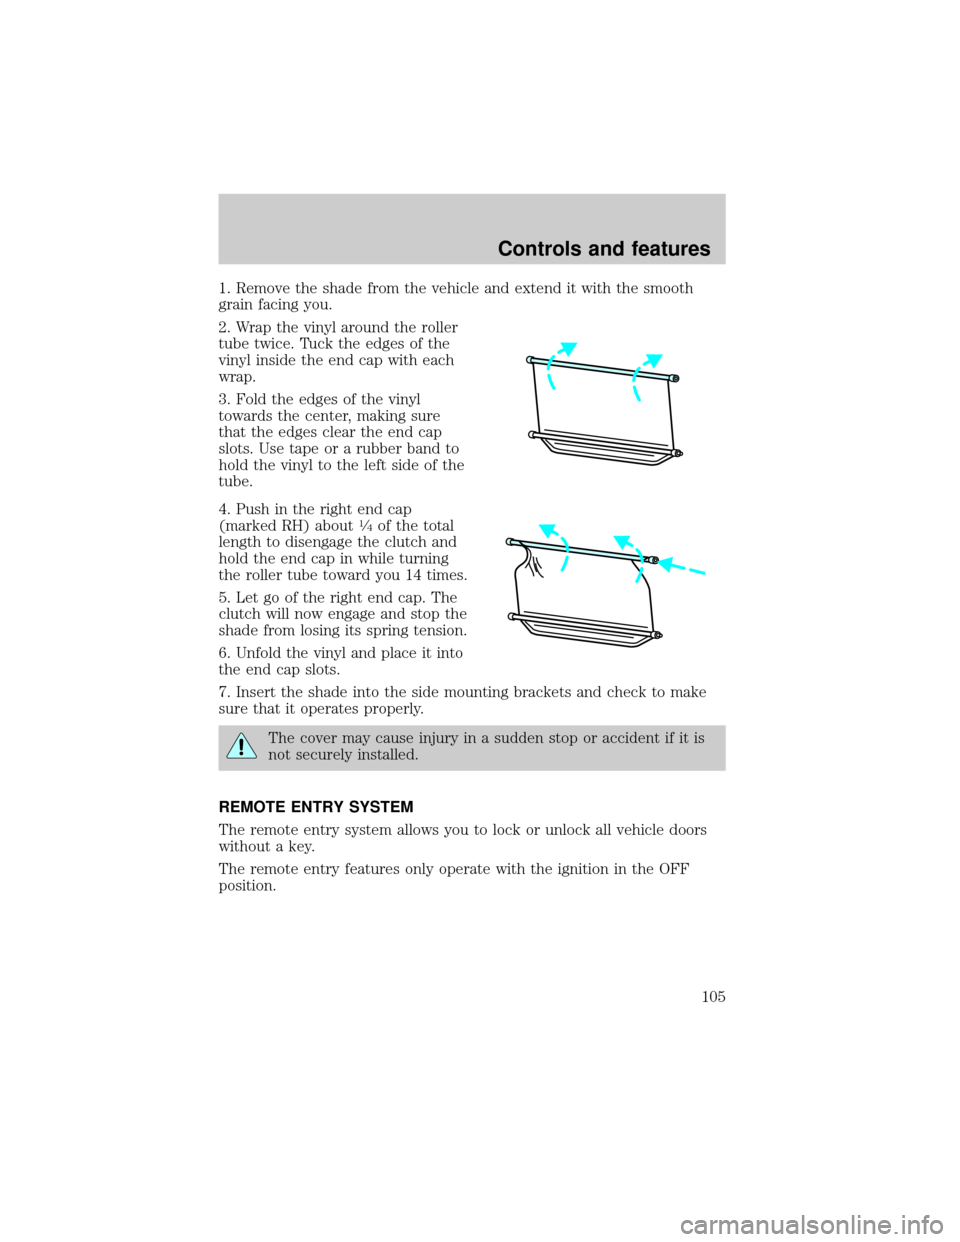
2. Wrap the vinyl around the roller
tube twice. Tuck the edges of the
vinyl inside the end cap with each
wrap.
3. Fold the edges of the vinyl
towards the center, making sure
that the edges clear the end cap
slots. Use tape or a rubber band to
hold the vinyl to the left side of the
tube.
4. Push in the right end cap
(marked RH) about
1¤4of the total
length to disengage the clutch and
hold the end cap in while turning
the roller tube toward you 14 times.
5. Let go of the right end cap. The
clutch will now engage and stop the
shade from losing its spring tension.
6. Unfold the vinyl and place it into
the end cap slots.
7. Insert the shade into the side mounting brackets and check to make
sure that it operates properly.
The cover may cause injury in a sudden stop or accident if it is
not securely installed.
REMOTE ENTRY SYSTEM
The remote entry system allows you to lock or unlock all vehicle doors
without a key.
The remote entry features only operate with the ignition in the OFF
position.
Controls and features
105
Page 106 of 248

Unlocking the doors
Press this control to unlock the
driver's door. The interior lamps will
illuminate.
Press the control a second time
within five seconds to unlock all
doors.
Locking the doors
Press this control to lock all doors.
To confirm all doors are closed and
locked, press the control a second
time within five seconds. The doors
will lock again, the horn will chirp
and the lamps will flash.
If any of the doors are ajar, the horn
will make two quick chirps,
reminding you to properly close all
doors.
Sounding a panic alarm
Press this control to activate the
alarm.
To deactivate the alarm, press the
control again or turn the ignition to
ACC or ON.
This device complies with part 15 of
the FCC rules and with RS-210 of
Industry Canada. Operation is
subject to the following two
conditions: (1) This device may not
cause harmful interference, and (2) This device must accept any
interference received, including interference that may cause undesired
operation.
Controls and features
106
Page 107 of 248

Changes or modifications not expressly approved by the party
responsible for compliance could void the user's authority to
operate the equipment.
Memory seat feature (if equipped)
The remote entry system can also
control the memory seat feature.
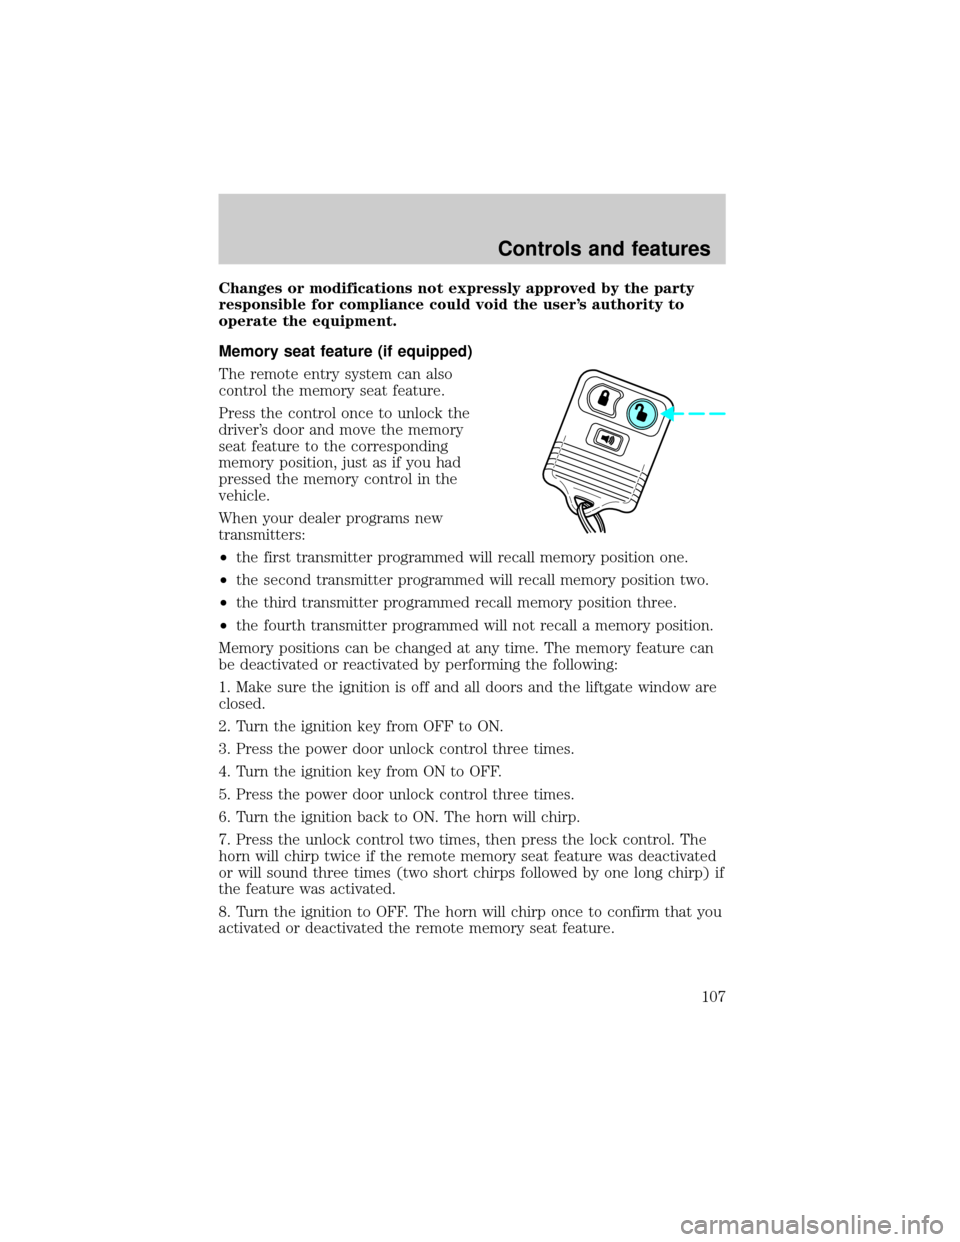
Press the control once to unlock the
driver's door and move the memory
seat feature to the corresponding
memory position, just as if you had
pressed the memory control in the
vehicle.
When your dealer programs new
transmitters:
²the first transmitter programmed will recall memory position one.
²the second transmitter programmed will recall memory position two.
²the third transmitter programmed recall memory position three.
²the fourth transmitter programmed will not recall a memory position.
Memory positions can be changed at any time. The memory feature can
be deactivated or reactivated by performing the following:
1. Make sure the ignition is off and all doors and the liftgate window are
closed.
2. Turn the ignition key from OFF to ON.
3. Press the power door unlock control three times.
4. Turn the ignition key from ON to OFF.
5. Press the power door unlock control three times.
6. Turn the ignition back to ON. The horn will chirp.
7. Press the unlock control two times, then press the lock control. The
horn will chirp twice if the remote memory seat feature was deactivated
or will sound three times (two short chirps followed by one long chirp) if
the feature was activated.
8. Turn the ignition to OFF. The horn will chirp once to confirm that you
activated or deactivated the remote memory seat feature.
Controls and features
107
Page 109 of 248

Replacing lost transmitters
Take all your vehicle's transmitters
to your dealer if service is required.
If you purchase additional
transmitters (up to four may be
programmed), perform the following
procedure:
To reprogram the transmitters
yourself, place the key in the
ignition and turn from OFF to ON
eight times in rapid succession
(within 10 seconds) ending in ON. After doors lock/unlock, press any
control on all transmitters (up to four). When completed, turn the
ignition to OFF. The doors will lock/unlock one last time to confirm
completion of program mode.
All transmitters must be programmed at the same time.
Illuminated entry
The interior lamps illuminate when the remote entry system is used to
unlock the door(s) or sound the personal alarm.
The system automatically turns off after 25 seconds or when the ignition
is turned to the RUN or ACC position. The dome lamp control (if
equipped) mustnotbe set to the OFF position for the illuminated entry
system to operate.
The inside lights will not turn off if:
²they have been turned on with the dimmer control or
²any door is open.
The battery saver will shut off the interior lamps 40 minutes after the
ignition has been turned to the OFF position.
Autolock
Autolock is a feature that will automatically lock all doors when:
²all vehicle doors, liftgate and liftgate window are fully closed
²the ignition key is in the ON position
²you shift into or through R (Reverse)
²the brake pedal is released
Controls and features
109
Page 110 of 248

The autolock feature repeats when:
²any door is opened and then closed
²the brake pedal is released
Deactivating autolock
Before following the activation or deactivation procedures, make sure
that the ignition is OFF and all vehicle doors and liftgate window are
closed.
1. Enter the 5 digit entry code.
2. Press and release the 3/4 control
while holding the 7/8 control.
3. Release the 7/8 control.
The horn will chirp once if autolock
was deactivated or twice (one short
and one long chirp) if autolock was
activated.
To reactivate autolock, repeat steps 1 through 3.
Autolock can also be activated or deactivated using the following
procedure:
You must complete steps 1 through 5 within 30 seconds or the procedure
will have to be repeated. If the procedure needs to be repeated, you
must wait 30 seconds.
1. Turn the ignition key from OFF to RUN/ACC.
2. Press the power door UNLOCK control three times.
3. Turn the ignition key from RUN/ACC to OFF.
4. Press the power door UNLOCK control three times.
5. Turn the ignition key from OFF to RUN/ACC. A horn chirp indicates
the enable/disable feature is entered.
6. Press the power door UNLOCK control one time.
7. Press the power door LOCK control to toggle the Autolock/Relock
state. You will receive a horn chirp followed by either a long honk,
autolock/relock is enabled, or no honk, autolock/relock is disabled.
8. Turn ignition to OFF.
123
45678
90
Controls and features
110
Page 113 of 248

SECURILOCKYPASSIVE ANTI-THEFT SYSTEM
The SecuriLockypassive anti-theft system provides an advanced level of
vehicle theft protection. Your vehicle's engine can only be started with
the two special SecuriLockyelectronically coded keys provided with
your vehicle. Each time you start your vehicle, the SecuriLockykey is
read by the SecuriLockypassive anti-theft system. If the SecuriLocky
key identification code matches the code stored in the SecuriLocky
anti-theft system, the vehicle's engine is allowed to start. If the
SecuriLockykey identification code does not match the code stored in
the system or if a SecuriLockykey is not detected (vehicle theft
situation), the vehicle's engine will not operate.
The SecuriLockypassive anti-theft system is not compatible with
aftermarket remote start systems. Use of these systems may result in
vehicle starting problems and a loss of security protection. Large metallic
objects or devices such as the Mobil Speedpassyon the same key ring
as your SecuriLockykey may cause vehicle starting problems. These
objects and devices cannot damage the SecuriLockykey, but can cause
a momentary problem if they are too close to the key when starting the
engine. If a problem occurs. turn ignition off and restart the engine with
all other objects on the key ring held away from the SecuriLocky
ignition key.
Spare SecuriLockykeys can be purchased from your dealership and
programmed to your SecuriLockypassive anti-theft system. Refer to
Programming spare SecuriLockykeysfor more information.
If one or both of your SecuriLockykeys are lost or stolen and you want
to ensure the lost or stolen key will not operate your vehicle, bring your
vehicle and all available SecuriLockykeys to your dealership for
reinitialization.
Controls and features
113
Page 114 of 248

Theft indicator
The theft indicator on the instrument cluster will operate as follows:
²When the ignition is OFF, the theft indicator will flash briefly every 2
seconds to indicate the SecuriLockysystem is protecting your
vehicle.
²When the ignition is turned to RUN or START, the theft indicator will
light for 3 seconds and then go out. If the theft indicator stays on for
an extended period of time or flashes rapidly, have the system
serviced by your dealership or a qualified technician.
Programming spare SecuriLockYkeys
Spare SecuriLockykeys can be purchased from your dealership and
programmed to your SecuriLockypassive anti-theft system (up to a
total of 8 keys). Your dealership can program your new SecuriLocky
key(s) to your vehicle or you can do it yourself using the following
simple procedure. To program a new SecuriLockykey yourself, you will
need two previously programmed SecuriLockykeys (keys that already
operate your vehicle's engine). If two previously programmed
SecuriLockykeys are not available (one or both of your original keys
were lost or stolen), you must bring your vehicle to your dealership to
have the spare SecuriLockykey(s) programmed.
Controls and features
114
Page 115 of 248

Procedure to program spare SecuriLockYkeys to your vehicle
New SecuriLockykeys must have the correct mechanical key cut for
your vehicle.
Conventional (non-SecuriLocky) keyscannotbe programmed to your
vehicle.
You will need to have two previously programmed SecuriLockykeys and
the new unprogrammed SecuriLockykey readily accessible for the
procedure. Please read and understand the entire procedure before you
begin.
1. Insert the first previously programmed SecuriLockykey into the
ignition and turn the ignition from OFF to RUN (maintain ignition in
RUN for at least one second).
2. Turn ignition to OFF and remove the first SecuriLockykey from the
ignition.
3. Within five seconds of turning the ignition to OFF, insert the second
previously programmed SecuriLockykey into the ignition and turn the
ignition from OFF to RUN (maintain ignition in RUN for at least one
second but no more than 5 seconds).
4. Turn the ignition to OFF and remove the second SecuriLockykey
from the ignition.
5. Within 10 seconds of turning the ignition to OFF, insert the
unprogrammed SecuriLockykey (new key) into the ignition and turn
the ignition from OFF to RUN (maintain ignition in RUN for at least one
second). This step will program your new SecuriLockykey.
6. To program additional SecuriLockykey(s), repeat this procedure from
step 1.
If the programming procedure was successful, the new SecuriLocky
key(s) will start the vehicle's engine. The theft indicator (located on the
instrument cluster) will light for three seconds and then go out.
If the programming procedure was not successful, the new SecuriLocky
key(s) will not operate the vehicle's engine. The theft indicator will flash
on and off. Wait at least one minute and then repeat the procedure from
step 1. If failure repeats, bring your vehicle to your dealership to have
the spare SecuriLockykey(s) programmed.
Controls and features
115
Page 124 of 248

Safety belt extension assembly
If the safety belt assembly is too short, even when fully extended, 20 cm
(8 inches) can be added to the safety belt assembly by adding a safety
belt extension assembly (part number 611C22). Safety belt extension
assemblies can be obtained from your dealer at no cost.
Use only extensions manufactured by the same supplier as the safety
belt. Manufacturer identification is located at the end of the webbing on
the label. Also, use the safety belt extension only if the safety belt is too
short for you when fully extended. Do not use extensions to change the
fit of the shoulder belt across the torso.
Safety belt warning light and indicator chime
The seat belt warning light illuminates in the instrument cluster and a
chime sounds to remind the occupants to fasten their safety belts.
Conditions of operation
If... Then...
The driver's safety belt is not
buckled before the ignition
switch is turned to the ON
position...The safety belt warning light
illuminates for one to two minutes and
the warning chime sounds for four to
eight seconds.
The driver's safety belt is
buckled while the indicator
light is illuminated and the
warning chime is sounding...The safety belt warning light and
warning chime turn off.
The driver's safety belt is
buckled before the ignition
switch is turned to the ON
position...The safety belt warning light and
indicator chime remain off.
Seating and safety restraints
124
Page 129 of 248

²and the electrical wiring which connects the components.
The diagnostic module monitors its own internal circuits and the
supplemental air bag electrical system warning (including the impact
sensors), the system wiring, the air bag system readiness light, the air
bag back up power and the air bag ignitors.
Determining if the system is operational
The SRS uses a readiness light in the instrument cluster or a tone to
indicate the condition of the system. Refer to theAir bag readiness
section in theInstrumentationchapter. Routine maintenance of the air
bag is not required.
A difficulty with the system is indicated by one or more of the following:
²The readiness light will either
flash or stay lit.
²The readiness light will not
illuminate immediately after
ignition is turned on.
²A series of five beeps will be heard. The tone pattern will repeat
periodically until the problem and light are repaired.
If any of these things happen, even intermittently, have the SRS serviced
at your dealership or by a qualified technician immediately. Unless
serviced, the system may not function properly in the event of a
collision.
Side air bag system (if equipped)
Do not use accessory seat covers. The use of accessory seat
covers may prevent the deployment of the side air bags and
increase the risk of injury in an accident.
Do not lean your head on the door, the side air bag could injure
you as it deploys from the side of the seatback.
Do not attempt to service, repair, or modify the air bag
Supplemental Restraint System, its fuses or the seat cover on a
seat containing an air bag. See your Ford or Lincoln Mercury dealer.
Seating and safety restraints
129