clock Mercury Mountaineer 2003 s User Guide
[x] Cancel search | Manufacturer: MERCURY, Model Year: 2003, Model line: Mountaineer, Model: Mercury Mountaineer 2003Pages: 264, PDF Size: 2.5 MB
Page 150 of 264

5. Return the cover plate (rotate
clockwise) to the closed position.
Start the vehicle.
If it is necessary to use the above procedure to move the gearshift lever,
it is possible that a fuse has blown or the vehicle’s brakelamps are not
operating properly. Refer toFuses and relaysin theRoadside
emergencieschapter.
Do not drive your vehicle until you verify that the brakelamps
are working.
Always set the parking brake fully and make sure the gearshift is
latched in P (Park). Turn the ignition to the LOCK position and
remove the key whenever you leave your vehicle.
If the parking brake is fully released, but the brake warning lamp
remains illuminated, the brakes may not be working properly.
See your dealer or a qualified service technician.
Driving with a 5–speed automatic transmission
Your transmission is equipped with an adaptive learning strategy found in
the vehicle computer. This feature is designed to increase durability, and
provide consistent shift feel over the life of the vehicle. A new vehicle or
transmission may have firm and/or soft shifts. This operation is
considered normal and will not affect function or durability of the
transmission. Over time, the adaptive learning process will fully update
transmission operation. Additionally, whenever the battery is
disconnected or a new battery installed, the strategy must be relearned.
Driving
150
Page 178 of 264

Removing the jack and tools
1. Open liftgate and remove the
carpeted floor lid and jack cover.
2. Turn jack screw eyelet
counterclockwise and remove the
jack from the bracket.
3. Remove the tools from the
provided bag.
Rotate the wrench socket out from
the handle.
Roadside Emergencies
178
Page 180 of 264

3. Turn the wrench
counterclockwise until the tire is
lowered to the ground and the cable
has slack. When turning the wrench,
make sure that it does not scuff the
kick plate.
4. Slide the tire rearward, lift one
side and remove the retainer from
the spare tire.
Changing the spare tire
To prevent the vehicle from moving when you change a tire, be
sure the parking brake is set, then block the wheel that is
diagonally opposite (other end of the vehicle) to the tire being
changed.
If the vehicle slips off the jack, you or someone else could be
seriously injured.
Do not attempt to change a tire on the side of the vehicle close
to moving traffic. Pull far enough off the road to avoid the
danger of being hit when operating the jack or changing the wheel.
1. Use the tip of the lug wrench to
remove the beauty cap by twisting
the tip under the cap. The carpeted
floor lid can be used as a kneeling
pad.
2. Loosen each wheel lug nut by half
a turn, but do not remove them
until the wheel is raised off the
ground.
Roadside Emergencies
180
Page 181 of 264

3. Assemble the jack handle
extension on the lug nut wrench by
sliding the square end of the jack
handle through the plastic grommet
on the lug nut wrench and into the
square hole on the other side.
If equipped with a two-piece
extension, assemble the two-piece
extension by sliding the two halves
together.
4. Position the jack according to the
illustrated guides and turn the jack
handle clockwise until the tire is a
maximum of 25 mm (1 inch) off the
ground.
Roadside Emergencies
181
Page 182 of 264

To lessen the risk of
personal injury, do not put
any part of your body under the
vehicle while changing a tire. Do
not start the engine when your
vehicle is on the jack. The jack is
only meant for changing the tire.
•Never use the front or rear
differential as a jacking point.
5. Remove the lug nuts with the lug wrench.
6. Replace the flat tire with the spare tire, making sure the valve stem is
facing outward. Reinstall the lug nuts, cone side in, until the wheel is
snug against the hub. Do not fully tighten the lug nuts until the wheel
has been lowered.
7. Lower the wheel by turning the jack handle counterclockwise.
8. Remove the jack and fully tighten
the lug nuts in the order shown.
Stowing the flat/spare tire
1. Lay the tire on the ground with the valve stem facing up, toward the
vehicle.
2. Slide the wheel partially under the vehicle and install the retainer
through the wheel center. Pull on the cable to align the components at
the end of the cable.
3. Turn the lug wrench clockwise until the tire is raised to its stowed
position underneath the vehicle. The effort to turn the jack handle
increases significantly and the spare tire carrier ratchets or slips when
the tire is raised to the maximum tightness. Tighten to the best of your
1
4 3
2 5
Roadside Emergencies
182
Page 215 of 264

Adding engine oil
1. Check the engine oil. For instructions, refer toChecking the engine
oilin this chapter.
2. If the engine oil level is not within the normal range, add only certified
engine oil of the recommended viscosity. Remove the engine oil filler cap
and use a funnel to pour the engine oil into the opening.
3. Recheck the engine oil level. Make sure the oil level is not above the
MAX hole on the engine oil level indicator (dipstick).
4. Install the indicator and ensure it is fully seated.
5. Fully install the engine oil filler cap by turning the filler cap clockwise
1/4 of a turn or until three clicks can be heard.
To avoid possible oil loss, DO NOT operate the vehicle with the
engine oil level indicator and/or the engine oil filler cap removed.
Engine Oil Recommendations
4.6L Engine
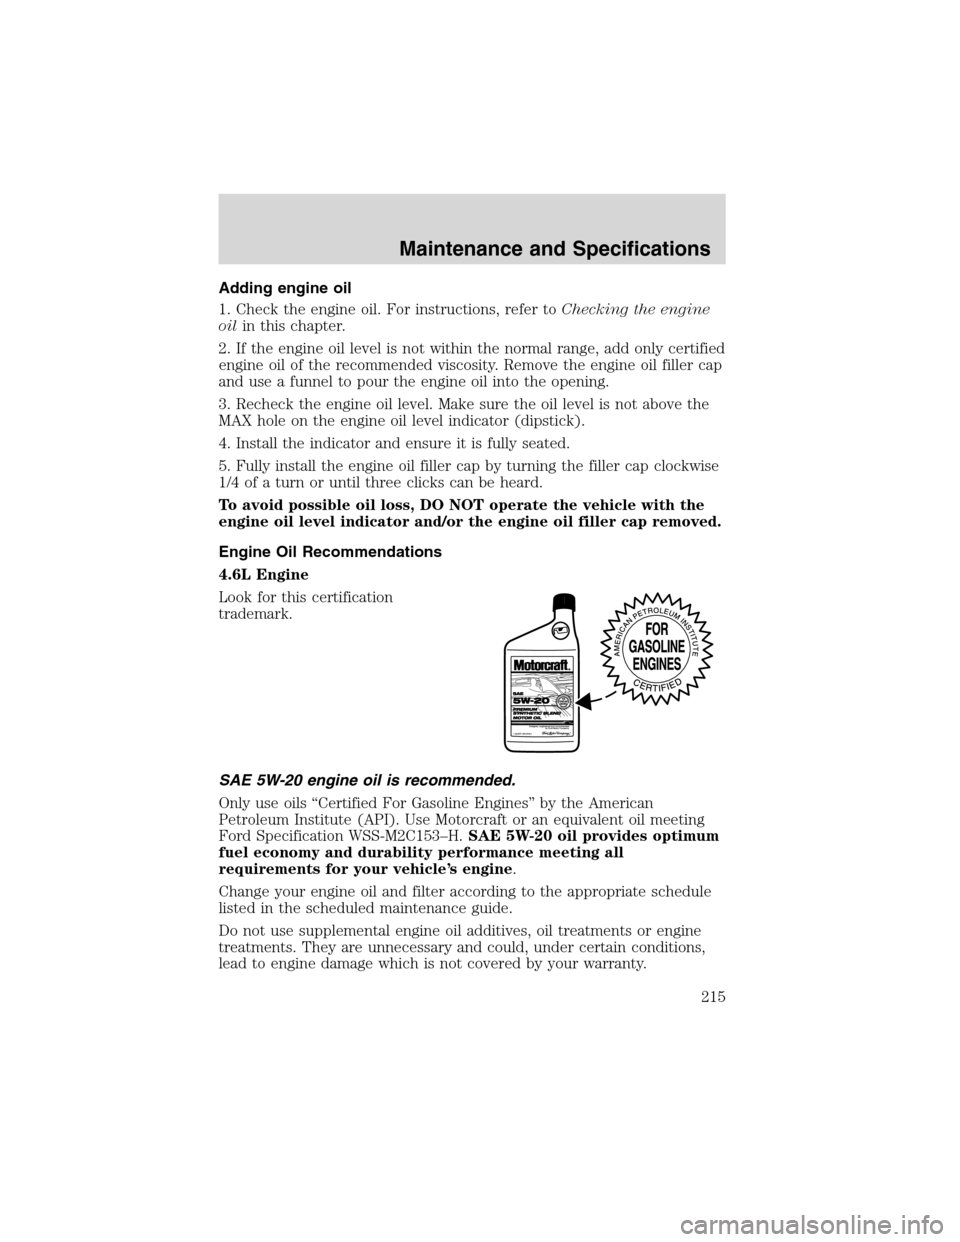
Look for this certification
trademark.
SAE 5W-20 engine oil is recommended.
Only use oils“Certified For Gasoline Engines”by the American
Petroleum Institute (API). Use Motorcraft or an equivalent oil meeting
Ford Specification WSS-M2C153–H.SAE 5W-20 oil provides optimum
fuel economy and durability performance meeting all
requirements for your vehicle’s engine.
Change your engine oil and filter according to the appropriate schedule
listed in the scheduled maintenance guide.
Do not use supplemental engine oil additives, oil treatments or engine
treatments. They are unnecessary and could, under certain conditions,
lead to engine damage which is not covered by your warranty.
Maintenance and Specifications
215
Page 219 of 264

If the battery has been disconnected or a new battery has been installed,
the clock and radio settings must be reset once the battery is
reconnected.
•Always dispose of automotive
batteries in a responsible manner.
Follow your local authorized
standards for disposal. Call your
local authorized recycling center
to find out more about recycling
automotive batteries.
ENGINE COOLANT
Checking engine coolant
The concentration and level of engine coolant should be checked at the
mileage intervals listed in the scheduled maintenance guide. The coolant
concentration should be maintained at 50/50 coolant and distilled water,
which equates to a freeze point of -36°C (-34°F). Coolant concentration
testing is possible with a hydrometer or antifreeze tester (such as the
Rotunda Battery and Antifreeze Tester, 014–R1060). The level of coolant
should be maintained at the“cold full”of“cold fill range”level in the
coolant reservoir. If the level falls below, add coolant per the instructions
in theAdding engine coolantsection.
Your vehicle was factory-filled with a 50/50 engine coolant and water
concentration. If the concentration of coolant falls below 40% or above
60%, the engine parts could become damaged or not work properly.A
50–50 mixture of coolant and water provides the following:
•Freeze protection down to -36°C (-34°F).
•Boiling protection up to 129°C (265°F).
•Protection against rust and other forms of corrosion.
•Enables calibrated gauges to work properly.
LEAD
RETURN
RECYCLE
Maintenance and Specifications
219
Page 222 of 264

To reduce the risk of personal injury, make sure the engine is
cool before unscrewing the coolant pressure relief cap. The
cooling system is under pressure; steam and hot liquid can come out
forcefully when the cap is loosened slightly.
1. Before you begin, turn the engine off and let it cool.
2. When the engine is cool, wrap a thick cloth around the coolant
pressure relief cap on the coolant reservoir (an opaque plastic bottle).
Slowly turn cap counterclockwise (left) until pressure begins to release.
3. Step back while the pressure releases.
4. When you are sure that all the pressure has been released, use the
cloth to turn it counterclockwise and remove the cap.
5. Fill the coolant reservoir slowly with the proper coolant mixture (see
above), to within the“cold fill range”or the“cold full”level on the
reservoir. If you removed the radiator cap in an overflow system, fill the
radiator until the coolant is visible and radiator is almost full.
6. Replace the cap. Turn until tightly installed. (Cap must be tightly
installed to prevent coolant loss.)
After any coolant has been added, check the coolant concentration, refer
toChecking Engine Coolantsection. If the concentration is not 50/50
(protection to–34°F/–36°C), drain some coolant and adjust the
concentration. It may take several drains and additions to obtain a 50/50
coolant concentration.
Whenever coolant has been added, the coolant level in the coolant
reservoir should be checked the next few times you drive the vehicle. If
necessary, add enough 50/50 concentration of engine coolant and
distilled water to bring the liquid level to the proper level.
If you have to add more than 1.0 liter (1.0 quart) of engine coolant per
month, have your dealer check the engine cooling system. Your cooling
system may have a leak. Operating an engine with a low level of coolant
can result in engine overheating and possible engine damage.
Recycled engine coolant
Ford Motor Company does NOT recommend the use of recycled engine
coolant in vehicles originally equipped with Motorcraft Premium Gold
Engine Coolant since a Ford-approved recycling process is not yet
available.
Used engine coolant should be disposed of in an appropriate
manner. Follow your community’s regulations and standards for recycling
and disposing of automotive fluids.
Maintenance and Specifications
222
Page 229 of 264

in the United States) because it may cause these problems to become
more pronounced. If the problems persist, see your dealer or a qualified
service technician.
FFV engine (if equipped)
Your FFV will operate well on ordinary“Regular”unleaded gasoline, but
only the highest quality fuel ethanol will provide the same level of
protection and performance. To identify if your vehicle is an FFV, check
your VIN or the label on the inside of your fuel filler door. When
checking the VIN, look for the engine type identifier (8th character). If
your vehicle is an FFV, then the character will be labeled as a“K.”
If you operate your vehicle 50% or more of the time on ethanol, you
should follow a different maintenance schedule. See theScheduled
Maintenance Guidefor more information.
If you are experiencing a rough or rolling idle after start-up with the
outside temperature above 27°C (80°F), the idle should improve within
10 to 30 seconds. If the problems persist below this temperature, see
your dealer or a qualified service technician.
Cleaner air
Ford endorses the use of reformulated“cleaner-burning”gasolines to
improve air quality.
Running out of fuel
Avoid running out of fuel because this situation may have an adverse
affect on powertrain components.
If you have run out of fuel:
•You may need to cycle the ignition from OFF to ON several times after
refueling, to allow the fuel system to pump the fuel from the tank to
the engine.
Fuel Filler Cap
Your fuel tank filler cap has an indexed design with a 1/8 turn on/off
feature.
When fueling your vehicle:
1. Turn the engine off.
2. Carefully turn the filler cap counterclockwise 1/8 of a turn until it
stops.
3. Pull to remove the cap from the fuel filler pipe.
Maintenance and Specifications
229
Page 230 of 264

4. To install the cap, align the tabs on the cap with the notches on the
filler pipe.
5. Turn the filler cap clockwise 1/8 of a turn until it stops.
If the“Check Fuel Cap”indicator comes on and stays on after you start
the engine, the fuel filler cap may not be properly installed. Turn off the
engine, remove the fuel filler cap, align the cap properly and reinstall it.
If you must replace the fuel filler cap, replace it with a fuel filler
cap that is designed for your vehicle. The customer warranty may
be void for any damage to the fuel tank or fuel system if the
correct genuine Ford or Motorcraft fuel filler cap is not used.
The fuel system may be under pressure. If the fuel filler cap is
venting vapor or if you hear a hissing sound, wait until it stops
before completely removing the fuel filler cap. Otherwise, fuel may
spray out and injure you or others.
If you do not use the proper fuel filler cap, excessive pressure or
vacuum in the fuel tank may damage the fuel system or cause
the fuel cap to disengage in a collision, which may result in possible
personal injury.
Fuel Filter
For fuel filter replacement, see your dealer or a qualified service
technician. Refer to the scheduled maintenance guide for the appropriate
intervals for changing the fuel filter.
Replace the fuel filter with an authorized Motorcraft part. The
customer warranty may be void for any damage to the fuel system
if an authorized Motorcraft fuel filter is not used.
ESSENTIALS OF GOOD FUEL ECONOMY
Measuring techniques
Your best source of information about actual fuel economy is you, the
driver. You must gather information as accurately and consistently as
possible. Fuel expense, frequency of fill-ups or fuel gauge readings are
NOT accurate as a measure of fuel economy. We do not recommend
taking fuel economy measurements during the first 1,600 km (1,000
miles) of driving (engine break-in period). You will get a more accurate
measurement after 3,000 km–5,000 km (2,000 miles-3,000 miles).
Maintenance and Specifications
230