MINI Hardtop 2 Door 2007 Manual Online
Manufacturer: MINI, Model Year: 2007, Model line: Hardtop 2 Door, Model: MINI Hardtop 2 Door 2007Pages: 148, PDF Size: 2.43 MB
Page 81 of 148
ReferenceAt a glance Controls Driving tips Mobility
79
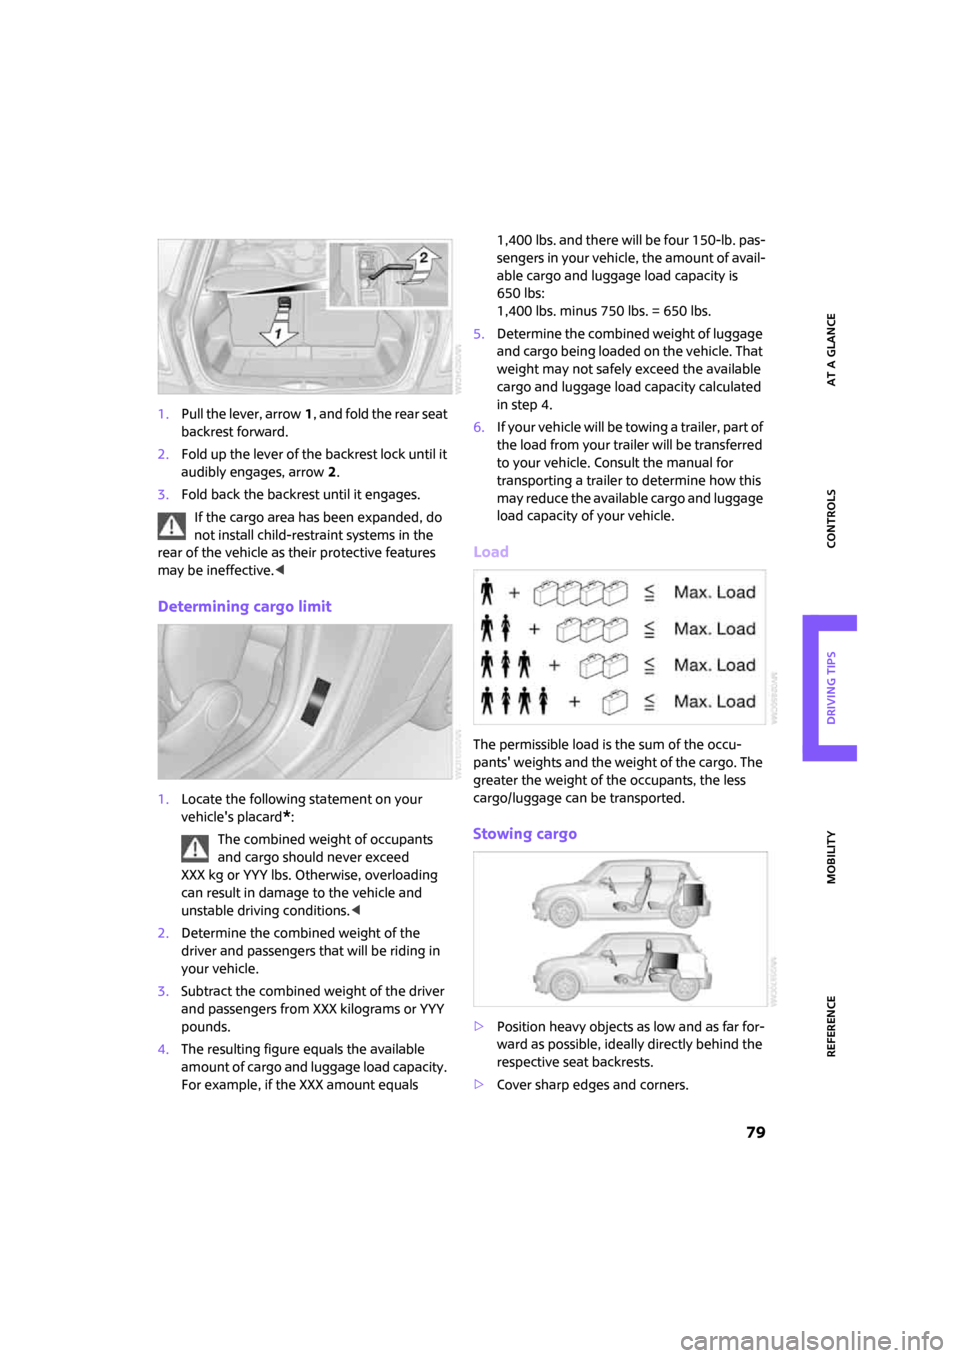
1.Pull the lever, arrow1, and fold the rear seat
backrest forward.
2.Fold up the lever of the backrest lock until it
audibly engages, arrow2.
3.Fold back the backrest until it engages.
If the cargo area has been expanded, do
not install child-restraint systems in the
rear of the vehicle as their protective features
may be ineffective.<
Determining cargo limit
1.Locate the following statement on your
vehicle's placard
*:
The combined weight of occupants
and cargo should never exceed
XXX kg or YYY lbs. Otherwise, overloading
can result in damage to the vehicle and
unstable driving conditions.<
2.Determine the combined weight of the
driver and passengers that will be riding in
your vehicle.
3.Subtract the combined weight of the driver
and passengers from XXX kilograms or YYY
pounds.
4.The resulting figure equals the available
amount of cargo and luggage load capacity.
For example, if the XXX amount equals 1,400 lbs. and there will be four 150-lb. pas-
sengers in your vehicle, the amount of avail-
able cargo and luggage load capacity is
650 lbs:
1,400 lbs. minus 750 lbs. = 650 lbs.
5.Determine the combined weight of luggage
and cargo being loaded on the vehicle. That
weight may not safely exceed the available
cargo and luggage load capacity calculated
in step 4.
6.I f yo u r v e h icl e w i ll be t o w in g a t r a il e r , p a r t o f
the load from your trailer will be transferred
to your vehicle. Consult the manual for
transporting a trailer to determine how this
may reduce the available cargo and luggage
load capacity of your vehicle.
Load
The permissible load is the sum of the occu-
pants' weights and the weight of the cargo. The
greater the weight of the occupants, the less
cargo/luggage can be transported.
Stowing cargo
>Position heavy objects as low and as far for-
ward as possible, ideally directly behind the
respective seat backrests.
>Cover sharp edges and corners.
Page 82 of 148
Things to remember when driving
80
>For very heavy cargo when the rear seat is
not occupied, secure each safety belt in the
respective opposite buckle.
Securing cargo
>Secure smaller and lighter items using
retaining or draw straps
*.
>Heavy-duty cargo straps
* for securing larger
and heavier objects are available at your
MINI Dealer. Four lashing eyes are provided
for attaching the cargo straps. Two of them
are located on the sidewalls of the cargo
area.
Comply with the information enclosed with
the load-securing devices.
Always position and secure the cargo as
described above, so that it cannot endan-
ger the car's occupants, for example if sudden
braking or swerves are necessary.
Do not exceed the approved gross weight and
axle loads, page132; otherwise the vehicle's
operating safety is no longer assured and it will
not be in compliance with the certification regu-
lations.
Heavy or hard objects should not be carried
loose inside the car, since they could be thrown
around, for example as a result of heavy braking,
sudden swerves, etc., and endanger the occu-
pants.<
Roof-mounted luggage
rack*
A special rack system is available as an option for
your MINI. Your MINI Dealer will be glad to
advise you. Comply with the installation instruc-
tions supplied with the rack system.
Mounting points
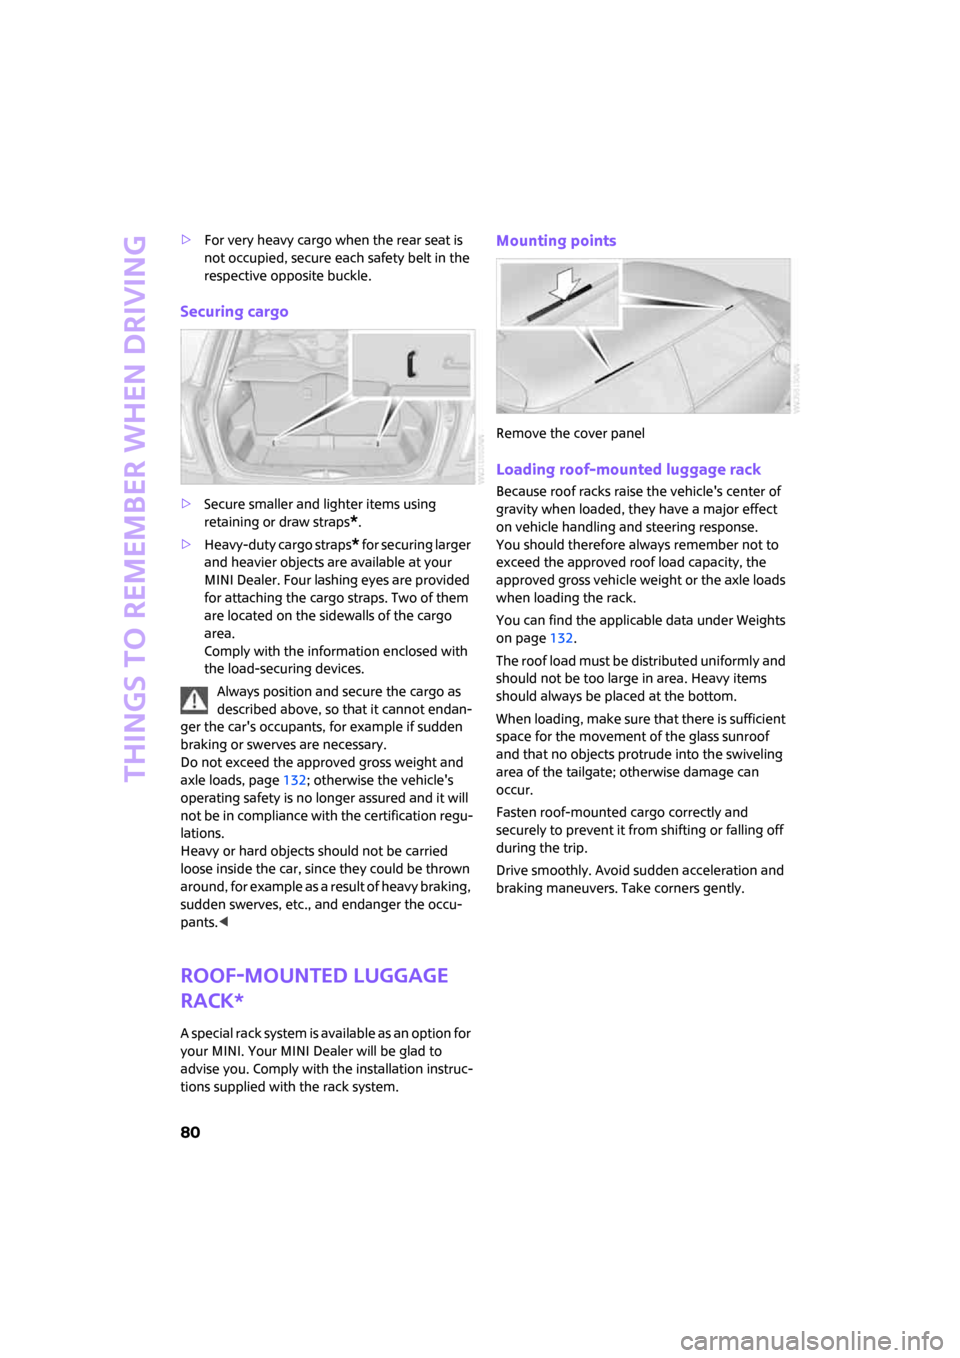
Remove the cover panel
Loading roof-mounted luggage rack
Because roof racks raise the vehicle's center of
gravity when loaded, they have a major effect
on vehicle handling and steering response.
You should therefore always remember not to
exceed the approved roof load capacity, the
approved gross vehicle weight or the axle loads
when loading the rack.
You can find the applicable data under Weights
on page132.
The roof load must be distributed uniformly and
should not be too large in area. Heavy items
should always be placed at the bottom.
When loading, make sure that there is sufficient
space for the movement of the glass sunroof
and that no objects protrude into the swiveling
area of the tailgate; otherwise damage can
occur.
Fasten roof-mounted cargo correctly and
securely to prevent it from shifting or falling off
during the trip.
Drive smoothly. Avoid sudden acceleration and
braking maneuvers. Take corners gently.
Page 83 of 148

ReferenceAt a glance Controls Driving tips Mobility
81
Page 84 of 148

Page 85 of 148

Mobility Controls
Driving tips At a glance
Reference
Mobility
Page 86 of 148
Refueling
84
Refueling
Switch off the engine before refueling,
otherwise fuel cannot be added to the
tank and a message will be displayed.<
Take all precautionary measures and
observe all applicable regulations when
handling fuel. Do not carry any spare fuel con-
tainers in your vehicle. They can develop a leak
and cause an explosion or cause a fire in the
event of an accident.<
Gas cap
Opening
1.Open fuel filler door.
2.Turn the gas cap counterclockwise.
3.Place the gas cap in the bracket attached to
the fuel filler door.
Closing
Fit the cap and turn it clockwise until you clearly
hear a click.
Do not jam the strap between the gas cap
and the vehicle. A message will be dis-
played if the gas cap is loose or missing.<
Manually releasing the fuel filler door
In the event of an electrical malfunction, you can
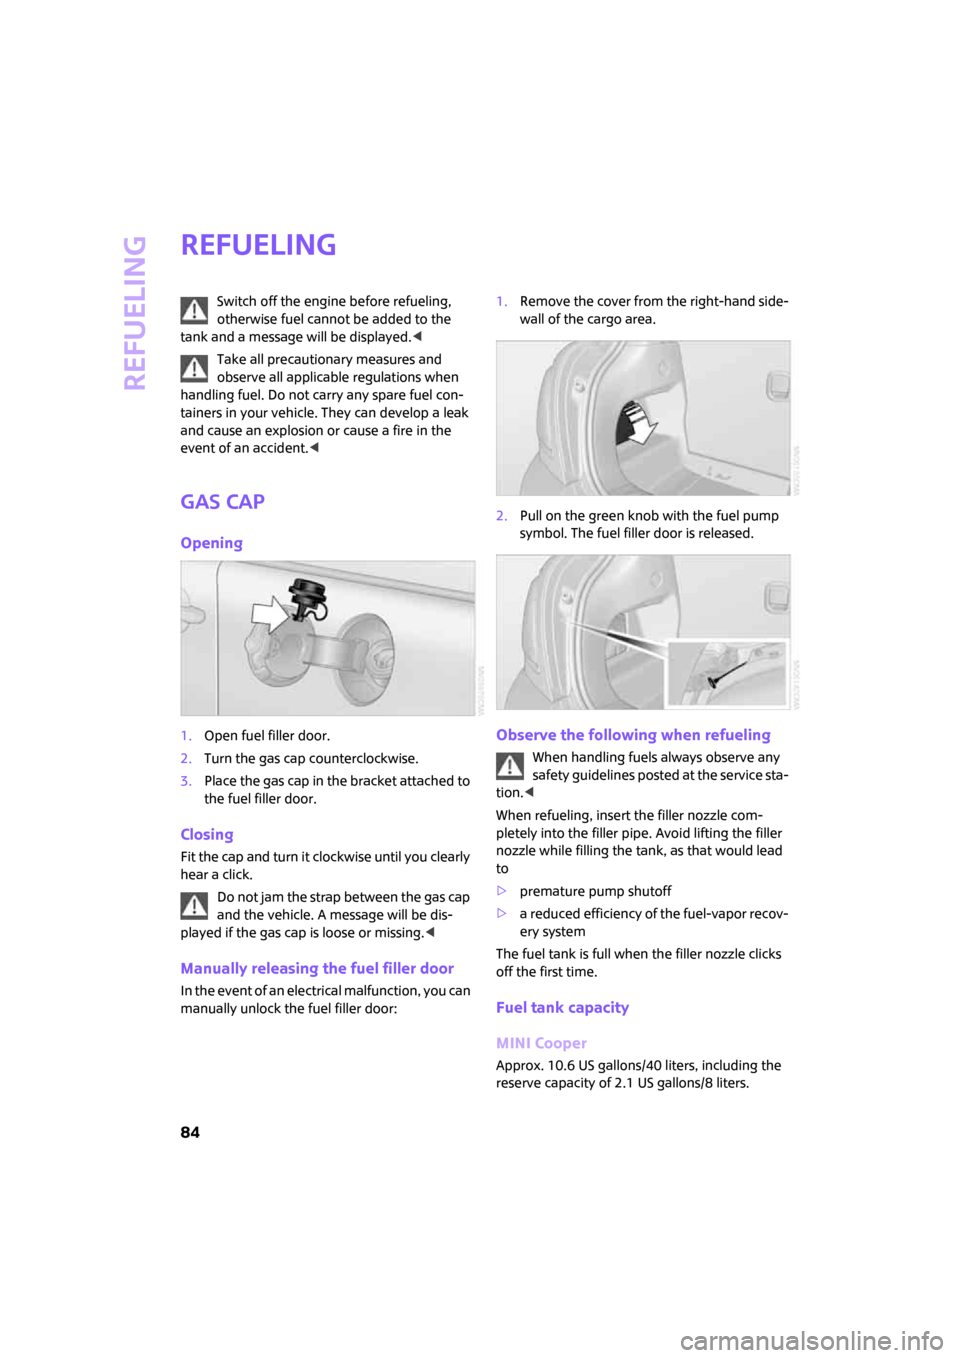
manually unlock the fuel filler door:1.Remove the cover from the right-hand side-
wall of the cargo area.
2.Pull on the green knob with the fuel pump
symbol. The fuel filler door is released.
Observe the following when refueling
When handling fuels always observe any
safety guidelines posted at the service sta-
tion.<
When refueling, insert the filler nozzle com-
pletely into the filler pipe. Avoid lifting the filler
nozzle while filling the tank, as that would lead
to
>premature pump shutoff
>a reduced efficiency of the fuel-vapor recov-
ery system
The fuel tank is full when the filler nozzle clicks
off the first time.
Fuel tank capacity
MINI Cooper
Approx. 10.6 US gallons/40 liters, including the
reserve capacity of 2.1 US gallons/8 liters.
Page 87 of 148
ReferenceAt a glance Controls Driving tips Mobility
85
MINI Cooper S
Approx. 13.2 US gallons/50 liters, including the
reserve capacity of 2.1 US gallons/8 liters.
Do not continue driving to the point where
the fuel tank is totally empty. Otherwise
engine performance is not guaranteed and
damage could occur.<
Fuel specifications
Do not fill the tank with leaded fuel, as this
would cause damage to the catalytic con-
verter.
Do not fill the tank with E85, i.e. fuel containing
85% ethanol, nor with FlexFuel. Otherwise the
engine and fuel supply system will be dam-
aged.<
Required fuel
Super Premium gasoline/AKI 91
This gasoline is highly recommended.
However, you may also use gasoline with less
AKI. The minimum AKI Rating is 87.
If you use gasoline with this minimum AKI Rat-
ing, the engine may produce knocking sounds
when starting at high outside temperatures. This
has no effect on the engine life.
Do not use any gasoline below the speci-
fied minimum fuel grade. Otherwise the
engine could be damaged.<
Use high-quality brands
Field experience has indicated significant differ-
ences in fuel quality: volatility, composition,
additives, etc., among gasolines offered for sale
in the United States and Canada. Fuels contain-
ing up to and including 10 % ethanol or other
oxygenates with up to 2.8 % oxygen by weight,
that is, 15 % MTBE or 3 % methanol plus an
equivalent amount of co-solvent, will not void
the applicable warranties with respect to defects
in materials or workmanship.
The use of poor-quality fuels may result in
drivability, starting and stalling problems
especially under certain environmental condi-tions such as high ambient temperature and
high altitude.
Should you encounter driveability problems
which you suspect could be related to the fuel
you are using, we recommend that you respond
by switching to a recognized high-quality brand
such as gasoline that is advertised as Top Tier
Detergent Gasoline.
Failure to comply with these recommendations
may also result in unscheduled maintenance.<
Page 88 of 148
Wheels and tires
86
Wheels and tires
Tire inflation pressures
Information for your safety
It is not merely the tires' service life, but also
driving comfort and, to a great extent, driving
safety that depend on the condition of the tires
and the maintenance of the specified tire pres-
sure.
Checking pressure
Check the tire inflation pressure regularly
and correct it, if necessary: at least twice a
month and before starting long trips. If you fail
to observe this precaution you may be driving
on tires with incorrect tire pressures, a condition
that can not only compromise your vehicle's
driving stability, but also lead to tire damage and
the risk of an accident. Do not drive with
deflated, i.e. flat tires, except when using Run-
Flat Tires. A flat tire will seriously impair your
vehicle's handling and braking response.
Attempts to drive on a flat tire can lead to loss of
control over the vehicle.<
Check the tire inflation pressures only on cold
tires. This means after a maximum of 1.25 miles/
2 km driving or when the vehicle has been
parked for at least 2 hours. When tires are warm,
the tire inflation pressure is higher.
Checking the inflation pressure on the
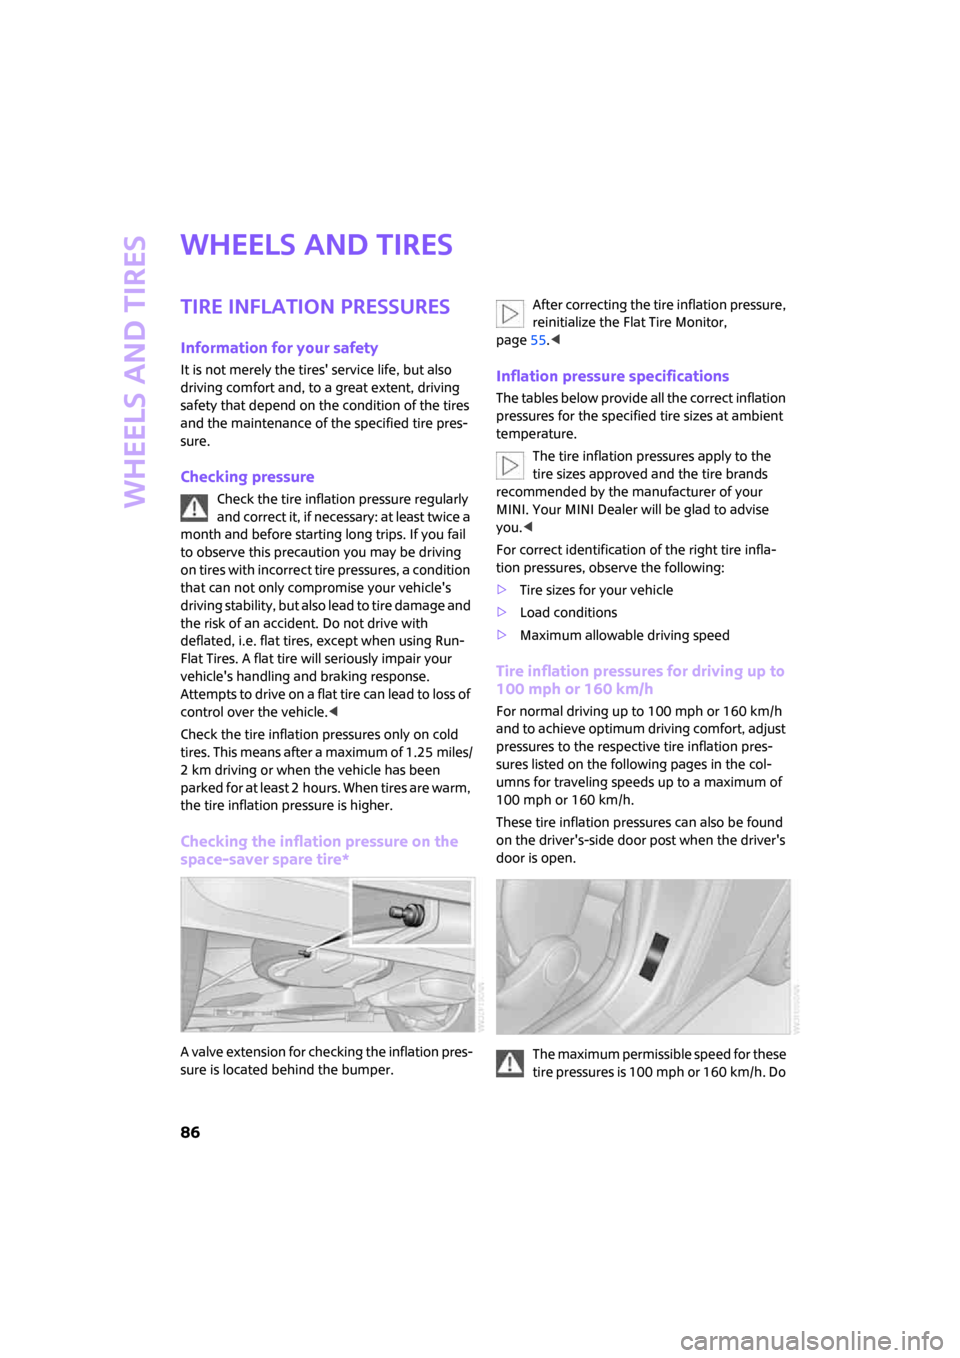
space-saver spare tire*
A valve extension for checking the inflation pres-
sure is located behind the bumper.After correcting the tire inflation pressure,
reinitialize the Flat Tire Monitor,
page55.<
Inflation pressure specifications
The tables below provide all the correct inflation
pressures for the specified tire sizes at ambient
temperature.
The tire inflation pressures apply to the
tire sizes approved and the tire brands
recommended by the manufacturer of your
MINI. Your MINI Dealer will be glad to advise
you.<
For correct identification of the right tire infla-
tion pressures, observe the following:
>Tire sizes for your vehicle
>Load conditions
>Maximum allowable driving speed
Tire inflation pressures for driving up to
100 mph or 160 km/h
For normal driving up to 100 mph or 160 km/h
and to achieve optimum driving comfort, adjust
pressures to the respective tire inflation pres-
sures listed on the following pages in the col-
umns for traveling speeds up to a maximum of
100 mph or 160 km/h.
These tire inflation pressures can also be found
on the driver's-side door post when the driver's
door is open.
The maximum permissible speed for these
tire pressures is 100 mph or 160 km/h. Do
Page 89 of 148
ReferenceAt a glance Controls Driving tips Mobility
87
not exceed this speed, otherwise tire damage
and accidents could occur.<
Tire inflation pressures for driving above
100 mph or 160 km/h
In order to drive at maximum speeds in
excess of 100 mph or 160 km/h, adjust
pressures to the respective tire inflation pres-
sures listed on the following pages in the col-
umns for traveling speeds including those
exceeding 100 mph or 160 km/h. Otherwise tire
damage and accidents could occur.<
Observe all national and local maximum speed
limits, otherwise violations of the laws could
occur.
Page 90 of 148
Wheels and tires
88
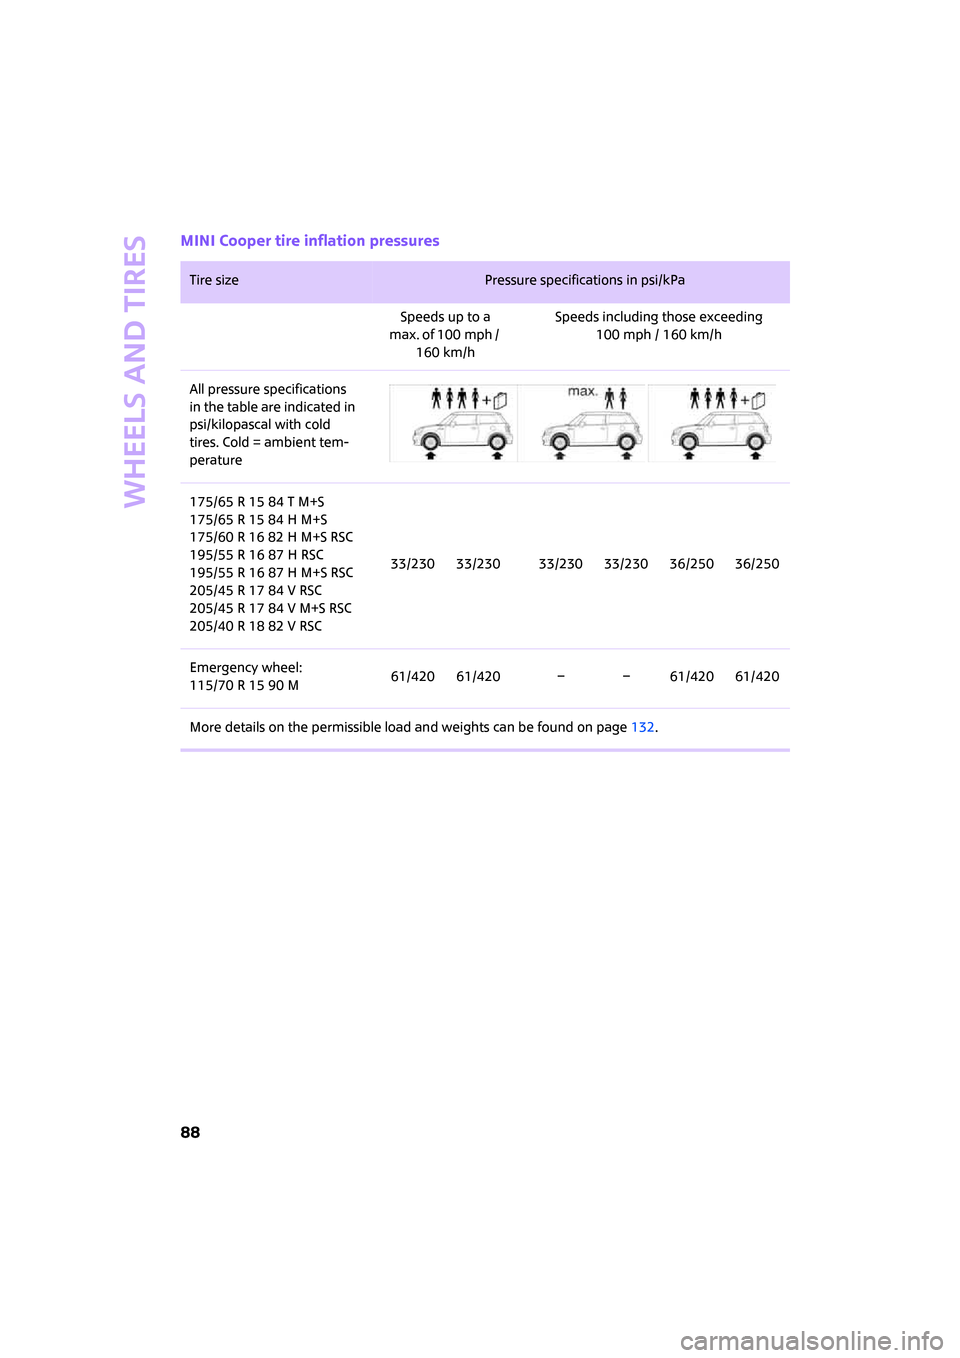
MINI Cooper tire inflation pressures
Tire size Pressure specifications in psi/kPa
Speeds up to a
max. of 100 mph /
160 km/hSpeeds including those exceeding
100 mph / 160 km/h
All pressure specifications
in the table are indicated in
psi/kilopascal with cold
tires. Cold = ambient tem-
perature
175/65 R 15 84 T M+S
175/65 R 15 84 H M+S
175/60 R 16 82 H M+S RSC
195/55 R 16 87 H RSC
195/55 R 16 87 H M+S RSC
205/45 R 17 84 V RSC
205/45 R 17 84 V M+S RSC
205/40 R 18 82 V RSC33/230 33/230 33/230 33/230 36/250 36/250
Emergency wheel:
115/70 R 15 90 M61/420 61/420 – – 61/420 61/420
More details on the permissible load and weights can be found on page132.