Phone MINI Paceman 2014 (Mini Connected) User Guide
[x] Cancel search | Manufacturer: MINI, Model Year: 2014, Model line: Paceman, Model: MINI Paceman 2014Pages: 282, PDF Size: 6.76 MB
Page 116 of 282

Installing1.Insert the center armrest into the rear re‐
cess of the base plate, arrow 1.2.Push it back and pivot it down at the front,
arrow 2.3.Push the center armrest forward in the base
plate.4.Tighten the handwheel by turning it clock‐
wise.
Ensure that the center armrest engages prop‐
erly when installed; otherwise, it could become
damaged during braking maneuvers, for exam‐
ple.
Center rail Various accessory parts can be mounted on the
center rail and moved to different positions.
Do not use accessory parts in the area of the
handbrake; otherwise, they may become dam‐
aged when the handbrake lever is activated.
Smartphone cradle The upper part of the smartphone cradle can
be rotated by 360°.
When installing it at the front of the rail, ensure
that it is surrounded by adequate clearance,
such as toward the seat; otherwise, damage
may result when it is rotated.
1.Pull up the lever 1 to unlock the holders.2.Insert the smartphone cradle into the cen‐
ter rail with the holders 2 first.3.To fix, push the lever 1 downward. Ensure
that the lever is properly engaged.
When connecting a smartphone to the USB au‐
dio interface, refer to page 170, pass the con‐
nection cable under the smartphone cradle.
In addition, the connection cable can be at‐
tached inside the rail.
1.Twist the rail segment, arrow 1, to remove
it.2.Insert the connection cable centrally into
the recess, arrow 2.3.Fix the rail segment in the rail.
Base plate
Various accessory parts such as cupholders,
eyeglass holders, and mobile phone cradles can
be mounted on the base plate.
Inserting the base plate
The lever 3 can be engaged in three positions.
Seite 116ControlsStorage compartments116
Online Edition for Part no. 01 40 2 911 544 - VI/13
Page 123 of 282
Closing the tailgateDrive with the tailgate closed
Only drive with the tailgate closed; other‐
wise, passengers and other road users may be
endangered or the vehicle may be damaged if
an accident occurs or during braking or swerv‐
ing. In addition, exhaust fumes may enter the
passenger compartment. ◀
If, despite this, the vehicle must be driven with
the tailgate open:▷Drive moderately.▷Close all windows and the glass sunroof.▷Switch off recirculated air mode and greatly
increase the blower speed.
Hot exhaust system
Hot exhaust system
High temperatures are generated in the
exhaust system.
Do not remove the heat shields installed and
never apply undercoating to them. Make sure
that flammable materials, e. g. hay, leaves,
grass, etc. do not come in contact with the hot
exhaust system during driving, while in idle po‐
sition mode, or when parked. Such contact
could lead to a fire, and with it the risk of seri‐
ous personal injury as well as property damage.
Do not touch hot exhaust pipes; otherwise,
there is the danger of getting burned. ◀
Mobile communication devices in the
vehicle
Mobile communication devices in the ve‐
hicle
It is not recommended to use mobile phones,
such as mobile phones without a direct con‐
nection to an external aerial in the vehicle's
passenger compartment. Otherwise, the vehi‐
cle electronics and mobile communication de‐
vices can interfere with each other. In addition,
there is no assurance that the radiation gener‐
ated during transmission will be discharged
from the vehicle interior. ◀
Hydroplaning On wet or slushy roads, a wedge of water can
form between the tires and road surface.
This phenomenon is referred to as hydroplan‐
ing. It is characterized by a partial or complete
loss of contact between the tires and the road
surface, ultimately undermining your ability to
steer and brake the vehicle.
Hydroplaning
When driving on wet or slushy roads, re‐
duce your speed to prevent hydroplaning. ◀
The risk of hydroplaning increases as the tire
tread depth decreases. Minimum tread depth,
refer to page 226.
Driving through water Drive though calm water only if it is not deeper
than 12 inches/30 cm and at this height, no
faster than walking speed, up to
6 mph/10 km/h.
Using the handbrake on inclines Using the handbrake
On inclines, do not hold the vehicle sta‐
tionary with a slipping clutch for extended pe‐
riod; use the handbrake instead. Otherwise, the
clutch will be subject to increased wear. ◀
Support from the hill drive-off assistant, refer to
page 95.
Braking safely The vehicle is equipped with ABS as a standard
feature.
Applying the brakes fully is the most effective
way of braking in situations when this is neces‐
sary.
The vehicle maintains steering responsiveness.
You can still avoid any obstacles with a mini‐
mum of steering effort.Seite 123Things to remember when drivingDriving tips123
Online Edition for Part no. 01 40 2 911 544 - VI/13
Page 138 of 282
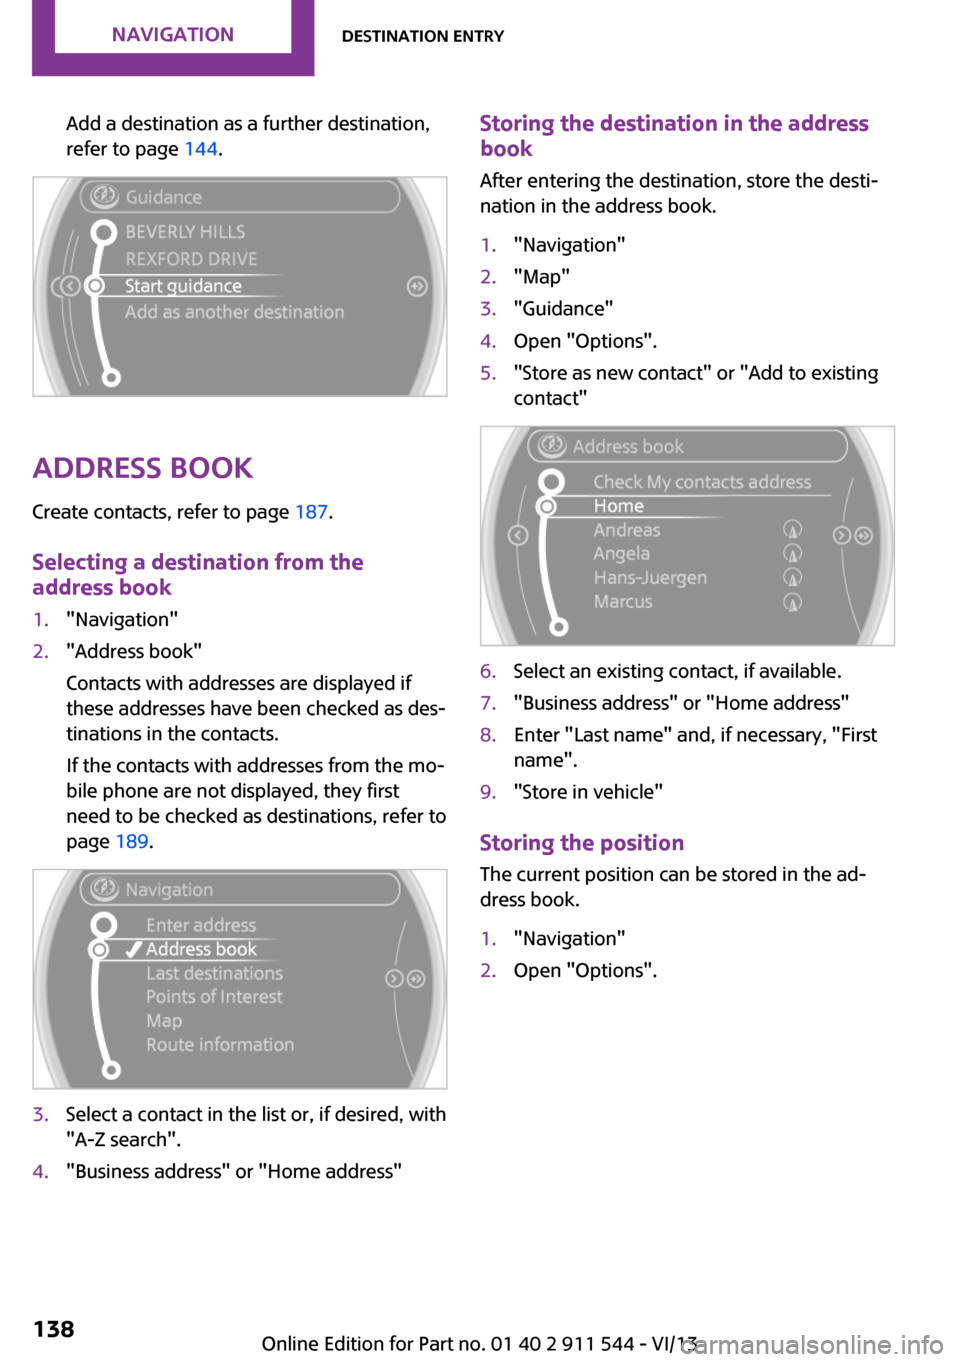
Add a destination as a further destination,
refer to page 144.
Address book
Create contacts, refer to page 187.
Selecting a destination from the
address book
1."Navigation"2."Address book"
Contacts with addresses are displayed if
these addresses have been checked as des‐
tinations in the contacts.
If the contacts with addresses from the mo‐
bile phone are not displayed, they first
need to be checked as destinations, refer to
page 189.3.Select a contact in the list or, if desired, with
"A-Z search".4."Business address" or "Home address"Storing the destination in the address
book
After entering the destination, store the desti‐
nation in the address book.1."Navigation"2."Map"3."Guidance"4.Open "Options".5."Store as new contact" or "Add to existing
contact"6.Select an existing contact, if available.7."Business address" or "Home address"8.Enter "Last name" and, if necessary, "First
name".9."Store in vehicle"
Storing the position
The current position can be stored in the ad‐
dress book.
1."Navigation"2.Open "Options".Seite 138NavigationDestination entry138
Online Edition for Part no. 01 40 2 911 544 - VI/13
Page 140 of 282
Editing the destination
Destinations can be edited, for example to
change the house number of an existing entry.1."Navigation"2."Last destinations"3.Highlight the destination.4.Open "Options".5."Edit destination"
Deleting the last destinations
1."Navigation"2."Last destinations"3.Highlight the destination.4.Open "Options".5."Delete entry" or "Delete all last
destinations"
Special destinations
General information
Even with the latest navigation data, informa‐
tion on individual special destinations may
have changed; for example, gas stations might
not be in operation.
Opening the search for specialdestinations
Selection of special destinations, such as hotels
or tourist attractions.
1."Navigation"2."Points of Interest"3.Select the search function.
A-Z search
1."A-Z search"2."Town/City"3.Select or enter the town/city.4."Category"5.Select the category.6."Category details"
For some special destinations, it may be
possible to select multiple category details.
Move the MINI joystick to the left to leave
the category details.7."Keyword"8.Enter the keyword.
A list of the special destinations is dis‐
played.9.Select a special destination.
Details are displayed.
If multiple details are stored, you can leaf
through the pages.
If a phone number is available, a connec‐
tion can be established if necessary.10. Select the symbol.11."Start guidance" or "Add as another
destination"
Add a destination as a further destination,
refer to page 144.
Category search
1."Category search"2."Search destination"3.Select or enter the town/city.4."Category"5.Select the category.6."Category details"
For some special destinations, it may be
possible to select multiple category details.
Move the MINI joystick to the left to leave
the category details.7."Start search"
A list of the special destinations is dis‐
played.8.Select a special destination.
Details are displayed.
If multiple details are stored, you can leaf
through the pages.Seite 140NavigationDestination entry140
Online Edition for Part no. 01 40 2 911 544 - VI/13
Page 141 of 282
If a phone number is available, a connec‐
tion can be established if necessary.9. Select the symbol.10."Start guidance" or "Add as another
destination"
Add a destination as a further destination,
refer to page 144.
Position of special destinations
When entering the search location, various op‐
tions can be selected.
▷"At current location"▷"At destination"▷"At different location"▷If destination guidance is active: "Along
route"
Starting the search for special
destinations
1."Start search"2.A list of the special destinations is dis‐
played.▷"At current location"
The special destinations are listed ac‐
cording to their distance and are dis‐
played with a directional arrow pointing
to the destination.▷"At destination", "At different location", "Along route"
Special destinations are listed according
to their distance from the location
where the search is being performed.▷Destinations of the selected category
are displayed in the map view as sym‐
bols. The display depends on the map
scale and the category.3.Highlight the special destination.4.Select a special destination.5. Select the symbol.6."Start guidance" or "Add as another
destination"
The direct distance to destination is dis‐
played.
Displaying special destinations in the
map
To display symbols of the special destinations in
the map view:
1."Navigation"2."Map"3.Open "Options".4."Display Points of Interest"5.Select the setting.
Destination entry by map
General information If only the location of the destination town/city
or street is known, the destination can be en‐
tered using the map.
Seite 141Destination entryNavigation141
Online Edition for Part no. 01 40 2 911 544 - VI/13
Page 148 of 282
This volume is independent of the volume of
the audio sources.
The setting is stored for the remote control cur‐
rently in use.
Map view
Selecting the map view
1."Navigation"2."Map"
At a glance
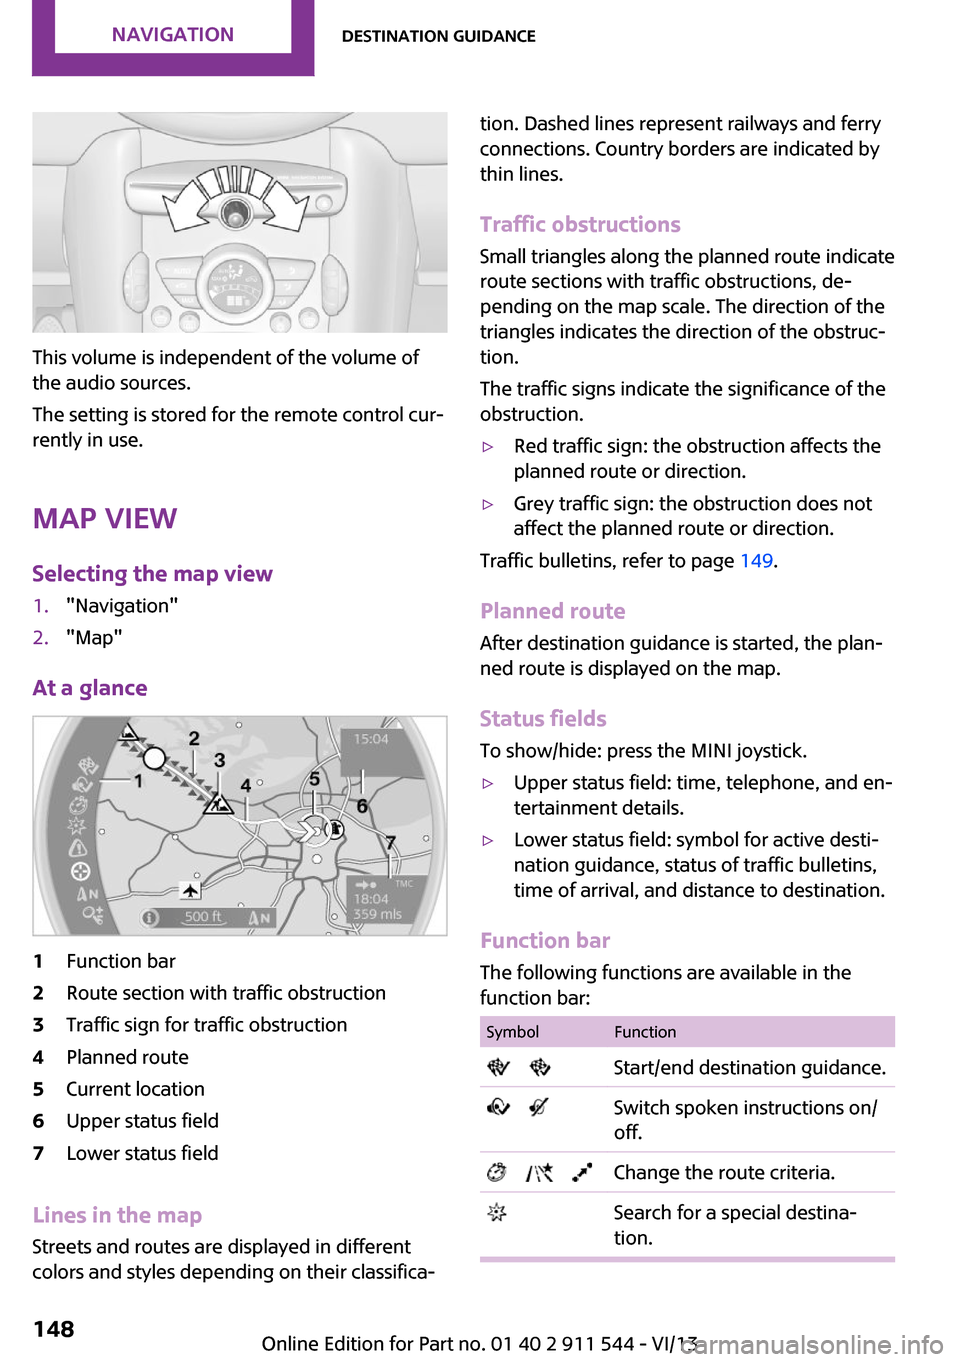
1Function bar2Route section with traffic obstruction3Traffic sign for traffic obstruction4Planned route5Current location6Upper status field7Lower status field
Lines in the map Streets and routes are displayed in different
colors and styles depending on their classifica‐
tion. Dashed lines represent railways and ferry
connections. Country borders are indicated by
thin lines.
Traffic obstructions
Small triangles along the planned route indicate
route sections with traffic obstructions, de‐
pending on the map scale. The direction of the
triangles indicates the direction of the obstruc‐
tion.
The traffic signs indicate the significance of the
obstruction.▷Red traffic sign: the obstruction affects the
planned route or direction.▷Grey traffic sign: the obstruction does not
affect the planned route or direction.
Traffic bulletins, refer to page 149.
Planned route After destination guidance is started, the plan‐
ned route is displayed on the map.
Status fields
To show/hide: press the MINI joystick.
▷Upper status field: time, telephone, and en‐
tertainment details.▷Lower status field: symbol for active desti‐
nation guidance, status of traffic bulletins,
time of arrival, and distance to destination.
Function bar
The following functions are available in the
function bar:
SymbolFunction Start/end destination guidance. Switch spoken instructions on/
off. Change the route criteria. Search for a special destina‐
tion.Seite 148NavigationDestination guidance148
Online Edition for Part no. 01 40 2 911 544 - VI/13
Page 156 of 282
ToneVehicle equipmentThis chapter describes all series equipment as
well as country-specific and special equipment
offered for this model series.Therefore, it also
describes equipment that may not be found in
your vehicle, for instance due to the selected
special equipment or the country version. This
also applies to safety-related functions and sys‐
tems.
General information The sound settings are stored for the remote
control currently in use.
Treble, bass, balance,
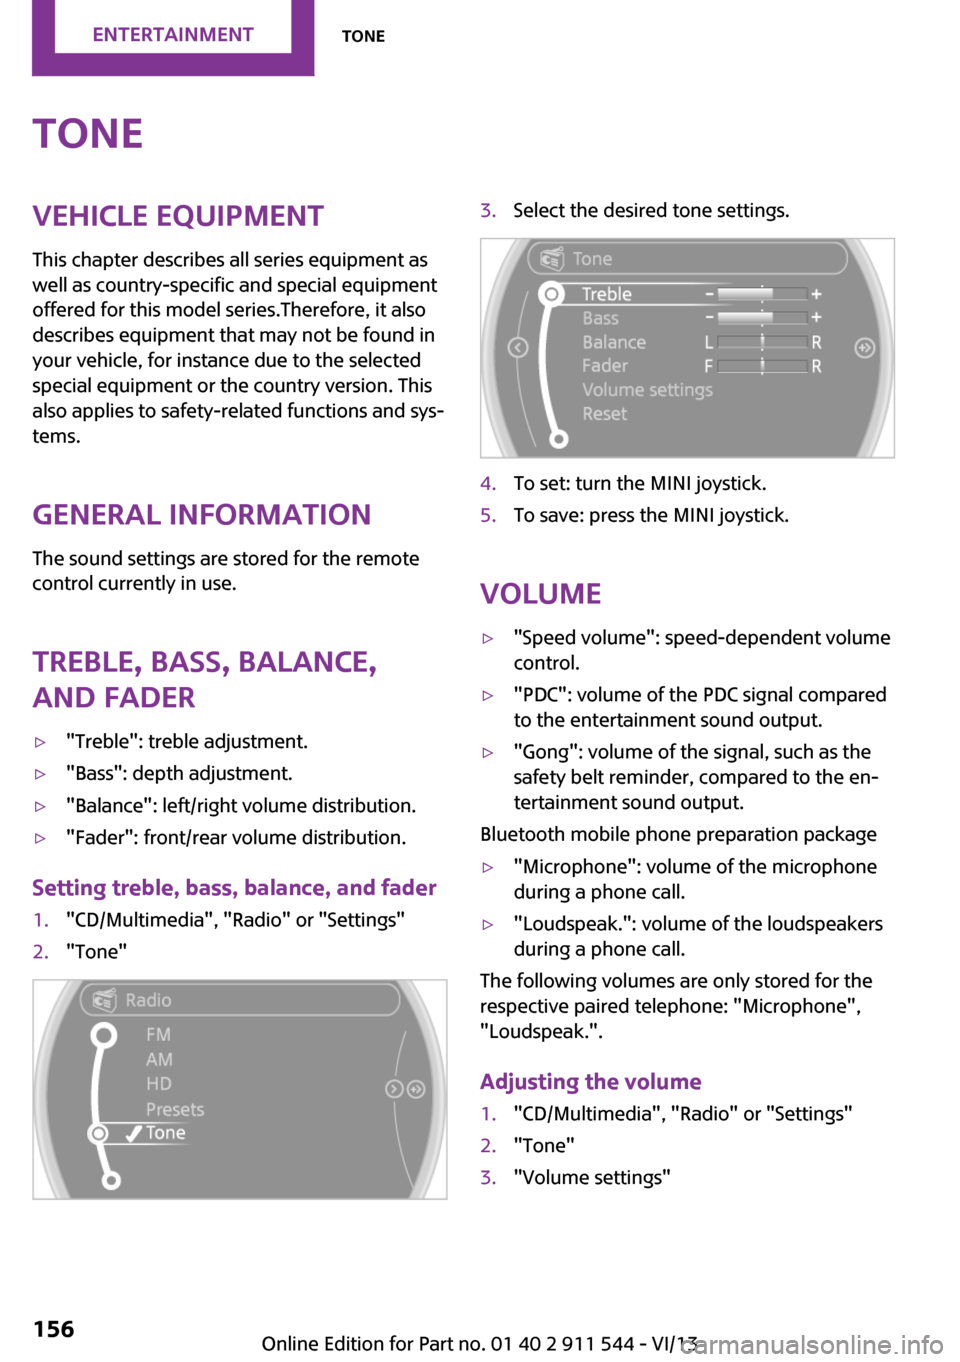
and fader▷"Treble": treble adjustment.▷"Bass": depth adjustment.▷"Balance": left/right volume distribution.▷"Fader": front/rear volume distribution.
Setting treble, bass, balance, and fader
1."CD/Multimedia", "Radio" or "Settings"2."Tone"3.Select the desired tone settings.4.To set: turn the MINI joystick.5.To save: press the MINI joystick.
Volume
▷"Speed volume": speed-dependent volume
control.▷"PDC": volume of the PDC signal compared
to the entertainment sound output.▷"Gong": volume of the signal, such as the
safety belt reminder, compared to the en‐
tertainment sound output.
Bluetooth mobile phone preparation package
▷"Microphone": volume of the microphone
during a phone call.▷"Loudspeak.": volume of the loudspeakers
during a phone call.
The following volumes are only stored for the
respective paired telephone: "Microphone",
"Loudspeak.".
Adjusting the volume
1."CD/Multimedia", "Radio" or "Settings"2."Tone"3."Volume settings"Seite 156EntertainmentTone156
Online Edition for Part no. 01 40 2 911 544 - VI/13
Page 160 of 282
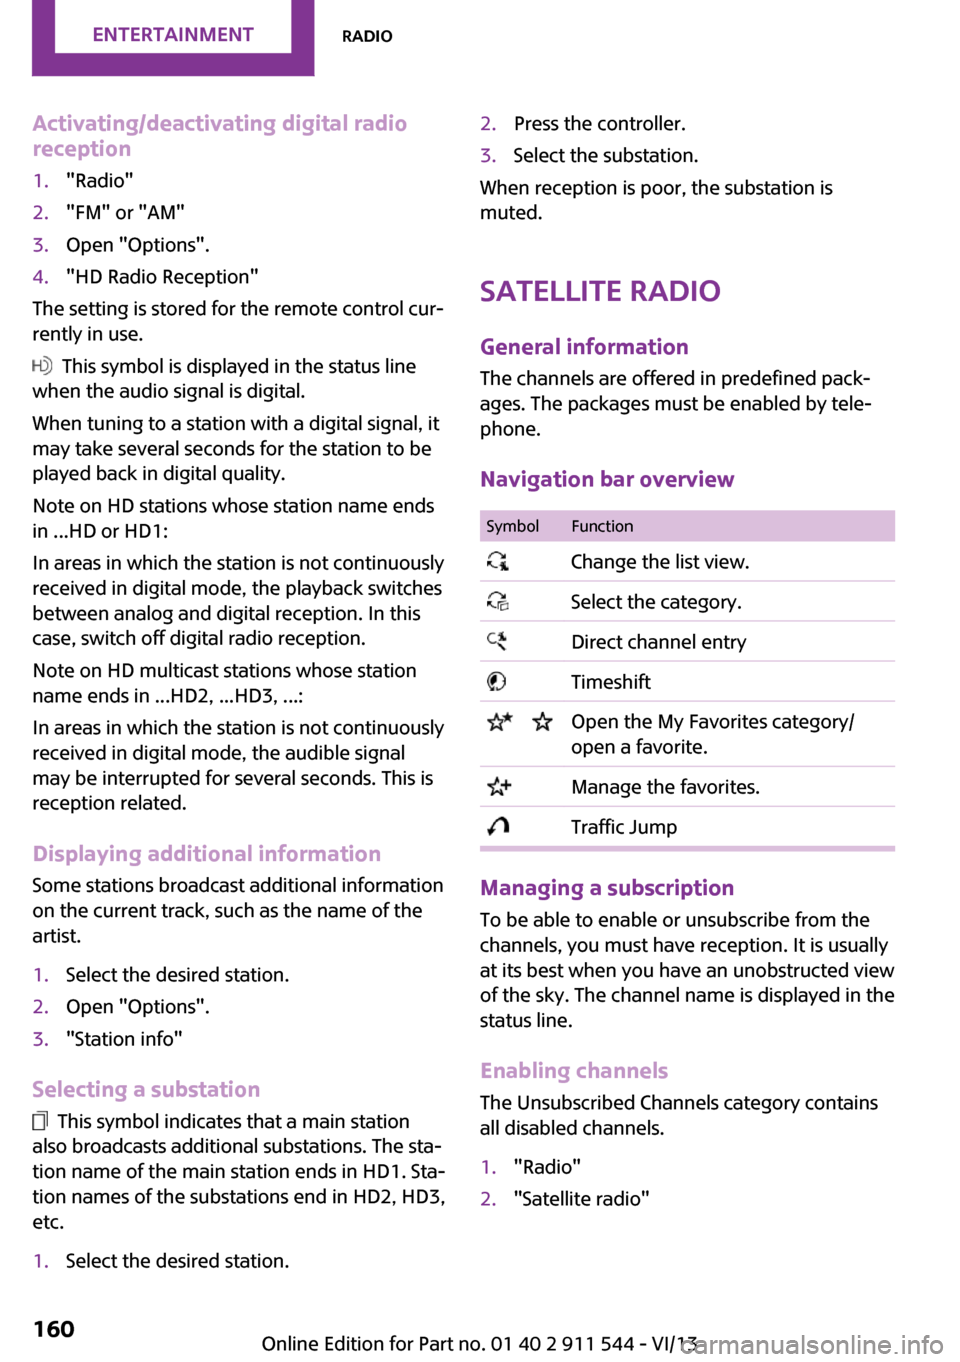
Activating/deactivating digital radio
reception1."Radio"2."FM" or "AM"3.Open "Options".4."HD Radio Reception"
The setting is stored for the remote control cur‐
rently in use.
This symbol is displayed in the status line
when the audio signal is digital.
When tuning to a station with a digital signal, it
may take several seconds for the station to be
played back in digital quality.
Note on HD stations whose station name ends
in ...HD or HD1:
In areas in which the station is not continuously
received in digital mode, the playback switches
between analog and digital reception. In this
case, switch off digital radio reception.
Note on HD multicast stations whose station
name ends in ...HD2, ...HD3, ...:
In areas in which the station is not continuously
received in digital mode, the audible signal
may be interrupted for several seconds. This is
reception related.
Displaying additional information
Some stations broadcast additional information
on the current track, such as the name of the
artist.
1.Select the desired station.2.Open "Options".3."Station info"
Selecting a substation
This symbol indicates that a main station
also broadcasts additional substations. The sta‐
tion name of the main station ends in HD1. Sta‐
tion names of the substations end in HD2, HD3,
etc.
1.Select the desired station.2.Press the controller.3.Select the substation.
When reception is poor, the substation is
muted.
Satellite radioGeneral information
The channels are offered in predefined pack‐
ages. The packages must be enabled by tele‐
phone.
Navigation bar overview
SymbolFunction Change the list view. Select the category. Direct channel entry Timeshift Open the My Favorites category/
open a favorite. Manage the favorites. Traffic Jump
Managing a subscription
To be able to enable or unsubscribe from the
channels, you must have reception. It is usually
at its best when you have an unobstructed view
of the sky. The channel name is displayed in the
status line.
Enabling channelsThe Unsubscribed Channels category contains
all disabled channels.
1."Radio"2."Satellite radio"Seite 160EntertainmentRadio160
Online Edition for Part no. 01 40 2 911 544 - VI/13
Page 161 of 282
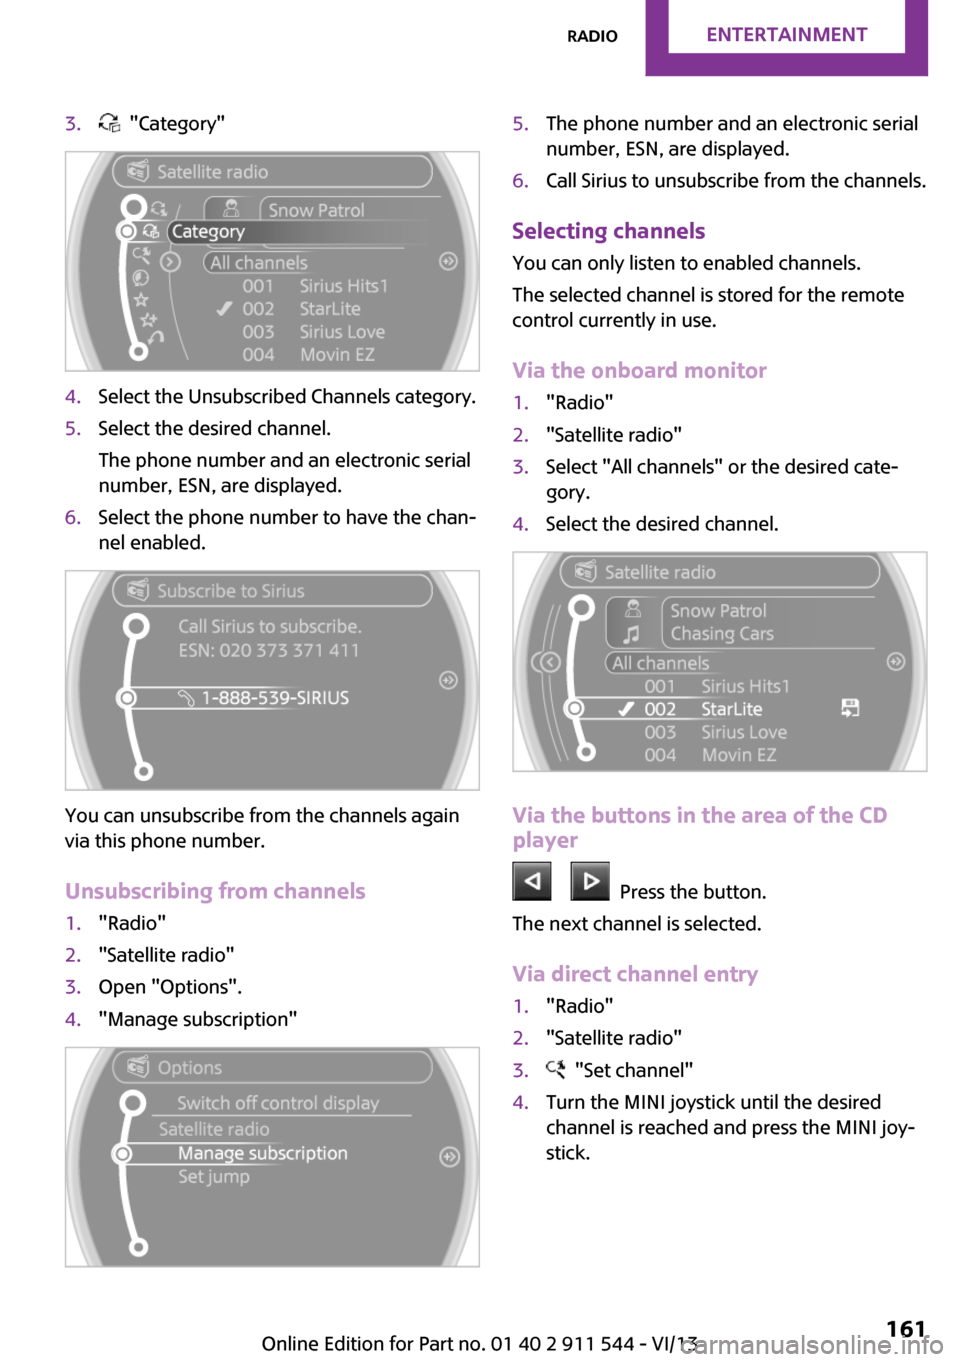
3. "Category"4.Select the Unsubscribed Channels category.5.Select the desired channel.
The phone number and an electronic serial
number, ESN, are displayed.6.Select the phone number to have the chan‐
nel enabled.
You can unsubscribe from the channels again
via this phone number.
Unsubscribing from channels
1."Radio"2."Satellite radio"3.Open "Options".4."Manage subscription"5.The phone number and an electronic serial
number, ESN, are displayed.6.Call Sirius to unsubscribe from the channels.
Selecting channels
You can only listen to enabled channels.
The selected channel is stored for the remote
control currently in use.
Via the onboard monitor
1."Radio"2."Satellite radio"3.Select "All channels" or the desired cate‐
gory.4.Select the desired channel.
Via the buttons in the area of the CD
player
Press the button.
The next channel is selected.
Via direct channel entry
1."Radio"2."Satellite radio"3. "Set channel"4.Turn the MINI joystick until the desired
channel is reached and press the MINI joy‐
stick.Seite 161RadioEntertainment161
Online Edition for Part no. 01 40 2 911 544 - VI/13
Page 163 of 282
SymbolFunction Reverse Automatic timeshift deactivated/
activated
Automatic timeshift
When the function is activated, audio playback
is stopped automatically in the event of:
▷Incoming and outgoing telephone calls.▷Activation of the voice activation system.▷Muting.
The audio playback then continues with a time
delay.
Activating
1."Radio"2."Satellite radio"3. "Replay - Time shift"4. "Automatic time shift"
Deactivating
"Automatic time shift"
Storing favorites Up to 30 favorites can be stored in the favorites
list. Available favorites are artist, track, game,
league, and team.
Storing the artist, track, or game
It is only possible to store favorites that are cur‐
rently being broadcast. The channel informa‐
tion must be available.
1."Radio"2."Satellite radio"3.If necessary, open "All channels" or the de‐
sired category.4.Select the desired channel.5.Press the MINI joystick again.6.Select the artist, track, or game.Storing the league or team
Leagues or teams can be added to the favorites
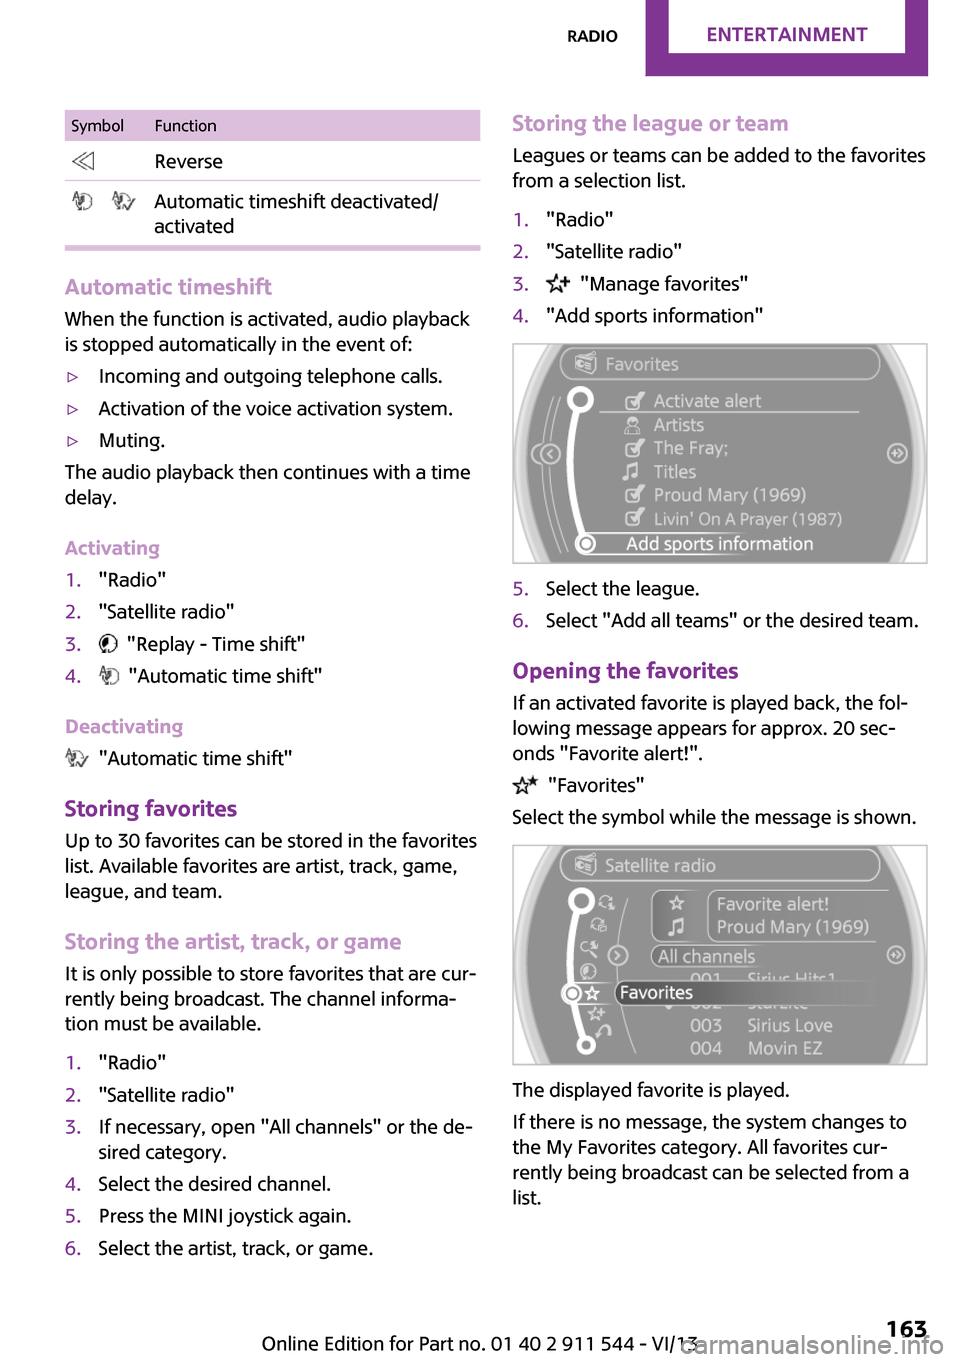
from a selection list.1."Radio"2."Satellite radio"3. "Manage favorites"4."Add sports information"5.Select the league.6.Select "Add all teams" or the desired team.
Opening the favorites
If an activated favorite is played back, the fol‐
lowing message appears for approx. 20 sec‐
onds "Favorite alert!".
"Favorites"
Select the symbol while the message is shown.
The displayed favorite is played.
If there is no message, the system changes to
the My Favorites category. All favorites cur‐
rently being broadcast can be selected from a
list.
Seite 163RadioEntertainment163
Online Edition for Part no. 01 40 2 911 544 - VI/13