ECO mode MITSUBISHI ASX 2015 Owner's Manual (in English)
[x] Cancel search | Manufacturer: MITSUBISHI, Model Year: 2015, Model line: ASX, Model: MITSUBISHI ASX 2015Pages: 452, PDF Size: 20.1 MB
Page 317 of 452
Map & room lamps (front)
E00717300638
Room lamp
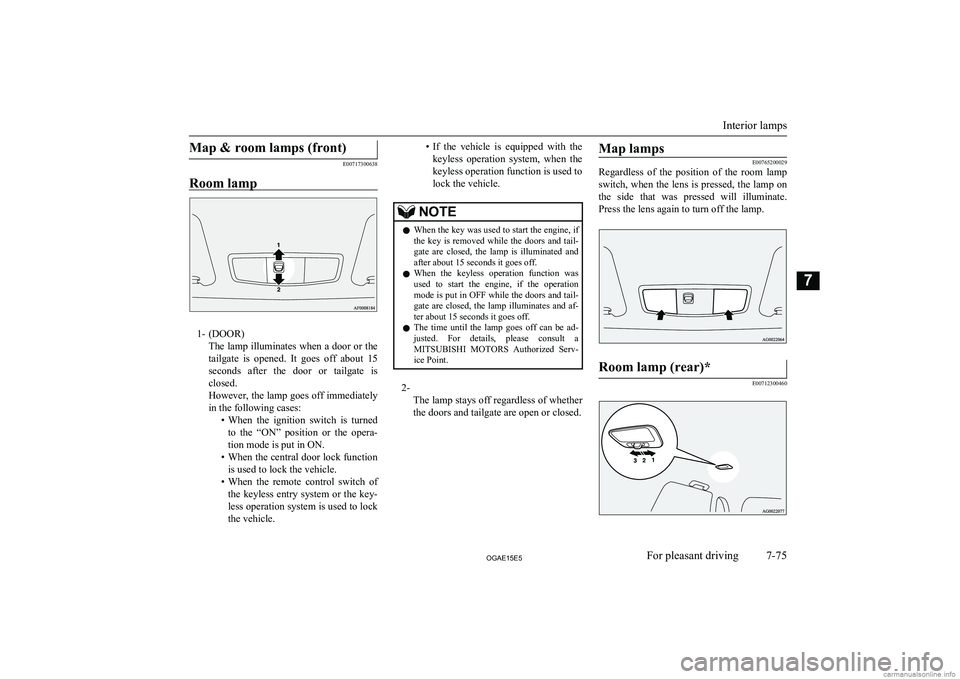
1- (DOOR) The lamp illuminates when a door or the
tailgate is opened. It goes off about 15
seconds after the door or tailgate is
closed.
However, the lamp goes off immediately in the following cases: •When the ignition switch is turned
to the “ON” position or the opera-
tion mode is put in ON.
• When the central door lock function
is used to lock the vehicle.
• When the remote control switch of
the keyless entry system or the key-
less operation system is used to lock
the vehicle.
• If the vehicle is equipped with the
keyless operation system, when the keyless operation function is used tolock the vehicle.NOTEl When the key was used to start the engine, if
the key is removed while the doors and tail- gate are closed, the lamp is illuminated and after about 15 seconds it goes off.
l When the keyless operation function was
used to start the engine, if the operation mode is put in OFF while the doors and tail-
gate are closed, the lamp illuminates and af- ter about 15 seconds it goes off.
l The time until the lamp goes off can be ad-
justed. For details, please consult a
MITSUBISHI MOTORS Authorized Serv-
ice Point.
2-
The lamp stays off regardless of whether
the doors and tailgate are open or closed.
Map lamps
E00765200029
Regardless of the position of the room lamp
switch, when the lens is pressed, the lamp on
the side that was pressed will illuminate. Press the lens again to turn off the lamp.
Room lamp (rear)*
E00712300460
Interior lamps
7-75OGAE15E5For pleasant driving7
Page 318 of 452
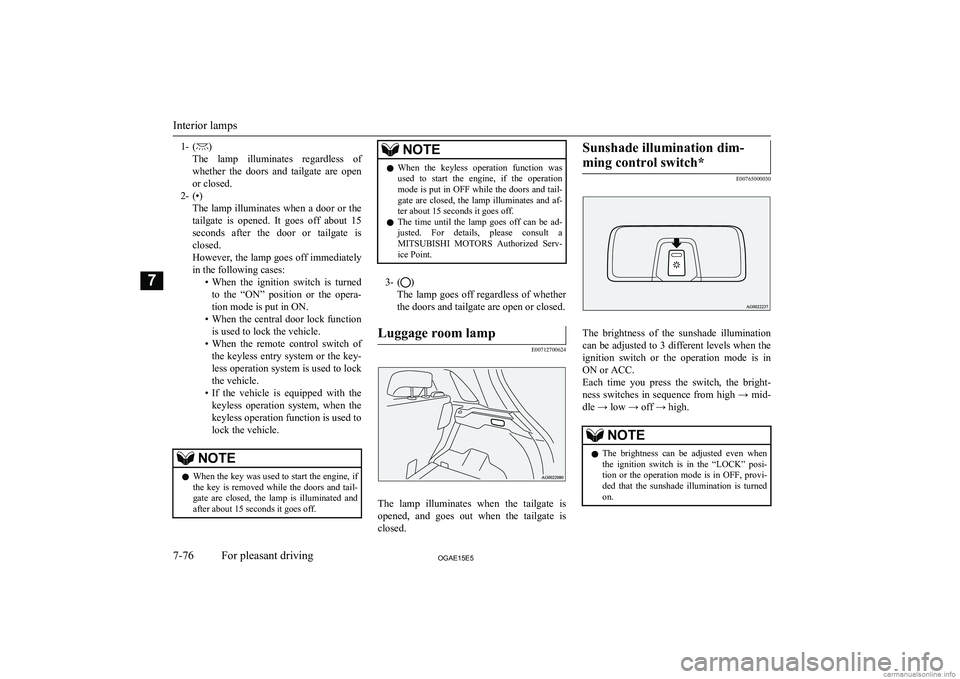
1- ()
The lamp illuminates regardless of whether the doors and tailgate are open
or closed.
2- (•) The lamp illuminates when a door or thetailgate is opened. It goes off about 15
seconds after the door or tailgate is
closed.
However, the lamp goes off immediately in the following cases: •When the ignition switch is turned
to the “ON” position or the opera-
tion mode is put in ON.
• When the central door lock function
is used to lock the vehicle.
• When the remote control switch of
the keyless entry system or the key- less operation system is used to lock
the vehicle.
• If the vehicle is equipped with the
keyless operation system, when the
keyless operation function is used to
lock the vehicle.NOTEl When the key was used to start the engine, if
the key is removed while the doors and tail- gate are closed, the lamp is illuminated and after about 15 seconds it goes off.NOTEl When the keyless operation function was
used to start the engine, if the operation
mode is put in OFF while the doors and tail- gate are closed, the lamp illuminates and af-ter about 15 seconds it goes off.
l The time until the lamp goes off can be ad-
justed. For details, please consult a MITSUBISHI MOTORS Authorized Serv-
ice Point.
3- ()
The lamp goes off regardless of whether
the doors and tailgate are open or closed.
Luggage room lamp
E00712700624
The lamp illuminates when the tailgate is opened, and goes out when the tailgate is
closed.
Sunshade illumination dim-
ming control switch*
E00765000030
The brightness of the sunshade illumination
can be adjusted to 3 different levels when the ignition switch or the operation mode is in
ON or ACC.
Each time you press the switch, the bright-
ness switches in sequence from high → mid-
dle → low → off → high.
NOTEl The brightness can be adjusted even when
the ignition switch is in the “LOCK” posi-
tion or the operation mode is in OFF, provi- ded that the sunshade illumination is turned
on.
Interior lamps
7-76OGAE15E5For pleasant driving7
Page 319 of 452
Sunshade illumination*
E00765100060
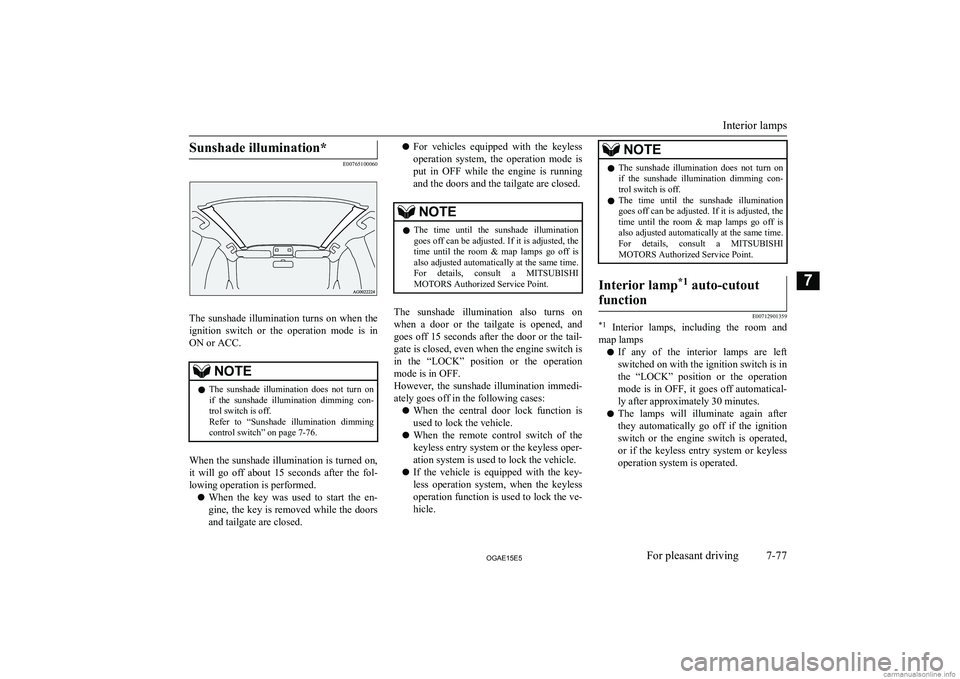
The sunshade illumination turns on when the
ignition switch or the operation mode is in
ON or ACC.
NOTEl The sunshade illumination does not turn on
if the sunshade illumination dimming con-
trol switch is off.
Refer to “Sunshade illumination dimming
control switch” on page 7-76.
When the sunshade illumination is turned on,
it will go off about 15 seconds after the fol-
lowing operation is performed.
l When the key was used to start the en-
gine, the key is removed while the doors
and tailgate are closed.
l For vehicles equipped with the keyless
operation system, the operation mode is
put in OFF while the engine is running and the doors and the tailgate are closed.NOTEl The time until the sunshade illumination
goes off can be adjusted. If it is adjusted, thetime until the room & map lamps go off is also adjusted automatically at the same time.
For details, consult a MITSUBISHI
MOTORS Authorized Service Point.
The sunshade illumination also turns on
when a door or the tailgate is opened, and
goes off 15 seconds after the door or the tail-
gate is closed, even when the engine switch is
in the “LOCK” position or the operation mode is in OFF.
However, the sunshade illumination immedi- ately goes off in the following cases:
l When the central door lock function is
used to lock the vehicle.
l When the remote control switch of the
keyless entry system or the keyless oper- ation system is used to lock the vehicle.
l If the vehicle is equipped with the key-
less operation system, when the keyless operation function is used to lock the ve-hicle.
NOTEl The sunshade illumination does not turn on
if the sunshade illumination dimming con-
trol switch is off.
l The time until the sunshade illumination
goes off can be adjusted. If it is adjusted, thetime until the room & map lamps go off is also adjusted automatically at the same time.
For details, consult a MITSUBISHI
MOTORS Authorized Service Point.Interior lamp *1
auto-cutout
function
E00712901359
*1 Interior lamps, including the room and
map lamps
l If any of the interior lamps are left
switched on with the ignition switch is in
the “LOCK” position or the operation
mode is in OFF, it goes off automatical- ly after approximately 30 minutes.
l The lamps will illuminate again after
they automatically go off if the ignition switch or the engine switch is operated, or if the keyless entry system or keylessoperation system is operated.
Interior lamps
7-77OGAE15E5For pleasant driving7
Page 328 of 452
If the vehicle breaks downE00800101108
If the vehicle breaks down on the road, move it to the shoulder and turn on the hazard
warning flashers and set up a warning trian- gle, flashing lamp, etc.
Refer to “Hazard warning flasher switch” on
page 5-55.
If the engine stops/fails
Vehicle operation and control are affected if
the engine stops.
Before moving the vehicle to a safe area, be
aware of the following:
l The brake booster becomes inoperative
and the pedal effort will increase. Press down the brake pedal harder than usual.
l Since the power steering system is no
longer operative, the steering wheel feels
heavy when turning it.
Emergency starting
E00800504161
If the engine cannot be started because thebattery is weak or dead, the battery from an-other vehicle can be used with jumper cables to start the engine.
WARNINGl To start the engine using jumper cables
connected to another vehicle, perform the
correct procedures according to the in- struction below. Incorrect procedures could result in a fire or explosion or dam-
age to the vehicles.CAUTIONl Do not attempt to start the engine by pulling
or pushing the vehicle.
It could damage your vehicle.
l Always wear protective eye goggles when
working near the battery.
l Keep the battery out of the reach of children.
1.
Get the vehicles close enough so the
jumper cables can reach, but be sure the vehicles aren’t touching each other.
CAUTIONl Check the other vehicle. It must have a 12-
volt battery.
If the other system isn’t 12-volt, shorting can
damage both vehicles.
2. Turn off all lamps, heater and other elec-
trical loads.
3. Set the parking brake firmly on each ve-
hicle. Put an A/T, CVT in “P” (PARK)
or a M/T in “N” (Neutral).
4. Turn the ignition switch to the “LOCK”
position or put the operation mode in OFF.WARNINGl Perform step 4 on both vehicles before-
hand.
Make sure that the cables or your clothes cannot be caught by the fan or drive belt.
Personal injury could result.
5. Make sure battery electrolyte is at the
proper level.
Refer to “Battery” on page 10-09.
WARNINGl If electrolyte fluid is not visible, or ap-
pears to be frozen, Do Not Attempt Jump
Starting!
A battery might rupture or explode if the temperature is below the freezing point orif it is not filled to the proper level.
6. Connect one end of one jumper cable to
the positive (+) terminal of the dis-charged battery (A), and the other end to
the positive (+) terminal of the booster
battery (B).
If the vehicle breaks down
8-02OGAE15E5For emergencies8
Page 332 of 452
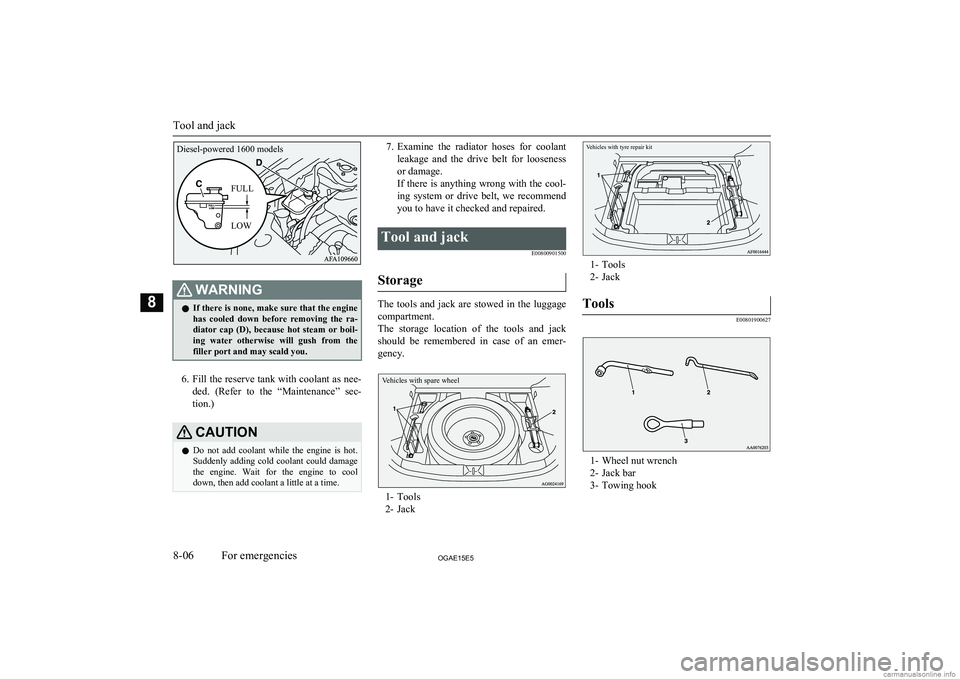
WARNINGlIf there is none, make sure that the engine
has cooled down before removing the ra-
diator cap (D), because hot steam or boil- ing water otherwise will gush from the filler port and may scald you.
6. Fill the reserve tank with coolant as nee-
ded. (Refer to the “Maintenance” sec- tion.)
CAUTIONl Do not add coolant while the engine is hot.
Suddenly adding cold coolant could damage
the engine. Wait for the engine to cool
down, then add coolant a little at a time.7. Examine the radiator hoses for coolant
leakage and the drive belt for looseness
or damage.
If there is anything wrong with the cool-
ing system or drive belt, we recommend
you to have it checked and repaired.Tool and jack
E00800901500
Storage
The tools and jack are stowed in the luggagecompartment.
The storage location of the tools and jack should be remembered in case of an emer-
gency.
Vehicles with spare wheel
1- Tools
2- Jack
1- Tools
2- Jack
Tools
E00801900627
1- Wheel nut wrench
2- Jack bar
3- Towing hook
Tool and jack
8-06OGAE15E5For emergencies8Diesel-powered 1600 modelsFULL
LOW Vehicles with tyre repair kit
Page 337 of 452
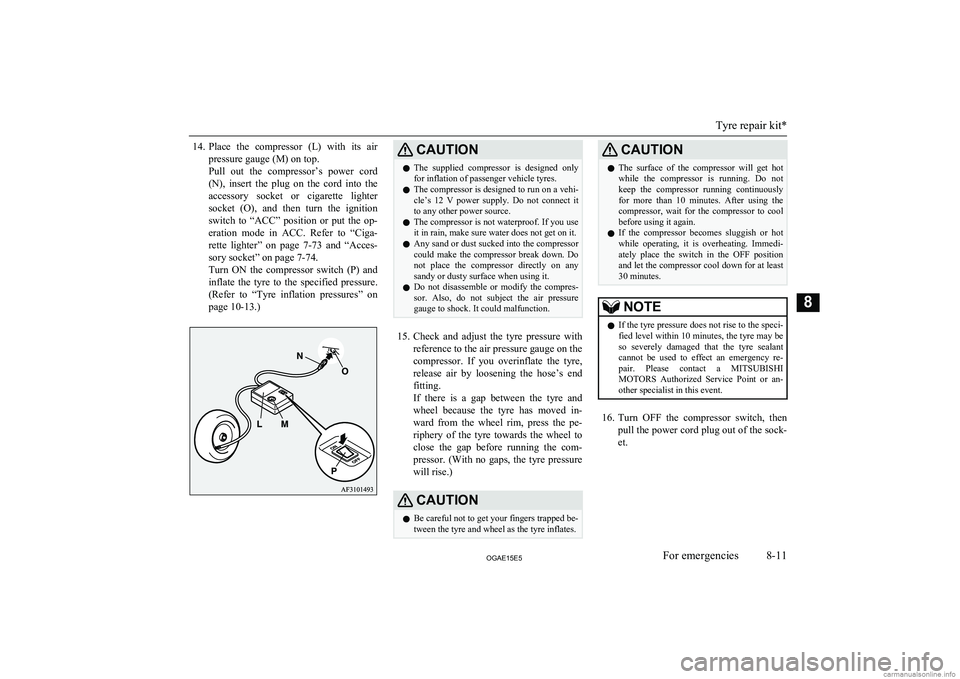
14.Place the compressor (L) with its air
pressure gauge (M) on top.
Pull out the compressor’s power cord
(N), insert the plug on the cord into the accessory socket or cigarette lighter
socket (O), and then turn the ignition switch to “ACC” position or put the op-
eration mode in ACC. Refer to “Ciga-
rette lighter” on page 7-73 and “Acces-
sory socket” on page 7-74.
Turn ON the compressor switch (P) and
inflate the tyre to the specified pressure. (Refer to “Tyre inflation pressures” on
page 10-13.)CAUTIONl The supplied compressor is designed only
for inflation of passenger vehicle tyres.
l The compressor is designed to run on a vehi-
cle’s 12 V power supply. Do not connect itto any other power source.
l The compressor is not waterproof. If you use
it in rain, make sure water does not get on it.
l Any sand or dust sucked into the compressor
could make the compressor break down. Do not place the compressor directly on anysandy or dusty surface when using it.
l Do not disassemble or modify the compres-
sor. Also, do not subject the air pressure
gauge to shock. It could malfunction.
15. Check and adjust the tyre pressure with
reference to the air pressure gauge on the
compressor. If you overinflate the tyre, release air by loosening the hose’s end
fitting.
If there is a gap between the tyre and
wheel because the tyre has moved in-
ward from the wheel rim, press the pe- riphery of the tyre towards the wheel to
close the gap before running the com- pressor. (With no gaps, the tyre pressure
will rise.)
CAUTIONl Be careful not to get your fingers trapped be-
tween the tyre and wheel as the tyre inflates.CAUTIONl The surface of the compressor will get hot
while the compressor is running. Do not
keep the compressor running continuously for more than 10 minutes. After using the compressor, wait for the compressor to cool
before using it again.
l If the compressor becomes sluggish or hot
while operating, it is overheating. Immedi- ately place the switch in the OFF positionand let the compressor cool down for at least30 minutes.NOTEl If the tyre pressure does not rise to the speci-
fied level within 10 minutes, the tyre may be
so severely damaged that the tyre sealant
cannot be used to effect an emergency re- pair. Please contact a MITSUBISHI
MOTORS Authorized Service Point or an-
other specialist in this event.
16. Turn OFF the compressor switch, then
pull the power cord plug out of the sock- et.
Tyre repair kit*
8-11OGAE15E5For emergencies8
Page 347 of 452
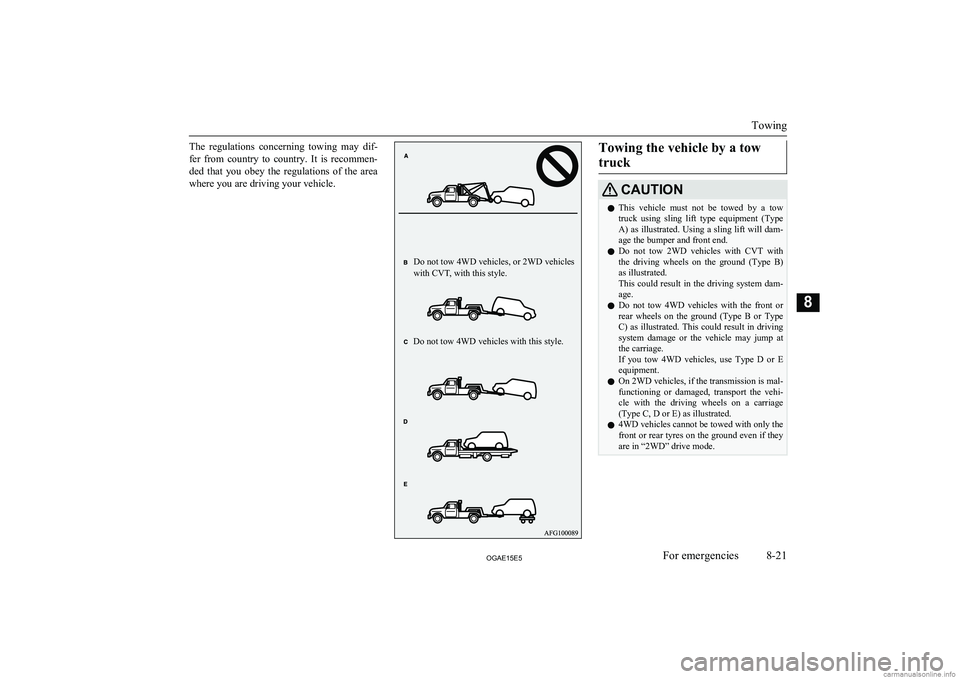
The regulations concerning towing may dif-
fer from country to country. It is recommen-
ded that you obey the regulations of the area where you are driving your vehicle.
Towing the vehicle by a tow
truckCAUTIONl This vehicle must not be towed by a tow
truck using sling lift type equipment (Type A) as illustrated. Using a sling lift will dam-age the bumper and front end.
l Do not tow 2WD vehicles with CVT with
the driving wheels on the ground (Type B) as illustrated.
This could result in the driving system dam- age.
l Do not tow 4WD vehicles with the front or
rear wheels on the ground (Type B or Type C) as illustrated. This could result in drivingsystem damage or the vehicle may jump at
the carriage.
If you tow 4WD vehicles, use Type D or E
equipment.
l On 2WD vehicles, if the transmission is mal-
functioning or damaged, transport the vehi- cle with the driving wheels on a carriage (Type C, D or E) as illustrated.
l 4WD vehicles cannot be towed with only the
front or rear tyres on the ground even if they
are in “2WD” drive mode.
Towing
8-21OGAE15E5For emergencies8Do not tow 4WD vehicles, or 2WD vehicles
with CVT, with this style.
Do not tow 4WD vehicles with this style.
Page 360 of 452
Service precautionsE01000102074
Adequate care of your vehicle at regular in- tervals serves to preserve the value and ap-
pearance as long as possible.
Maintenance items as described in this own- er’s manual can be performed by the owner.We recommend you to have the periodic in-
spection and maintenance performed by a MITSUBISHI MOTORS Authorized Service
Point or another specialist.In the event a malfunction or a problem is discovered, we recommend you to have it
checked and repaired. This section contains information on inspection maintenance pro- cedures that you can do yourself. Follow theinstructions and cautions for each of the vari-
ous procedures.
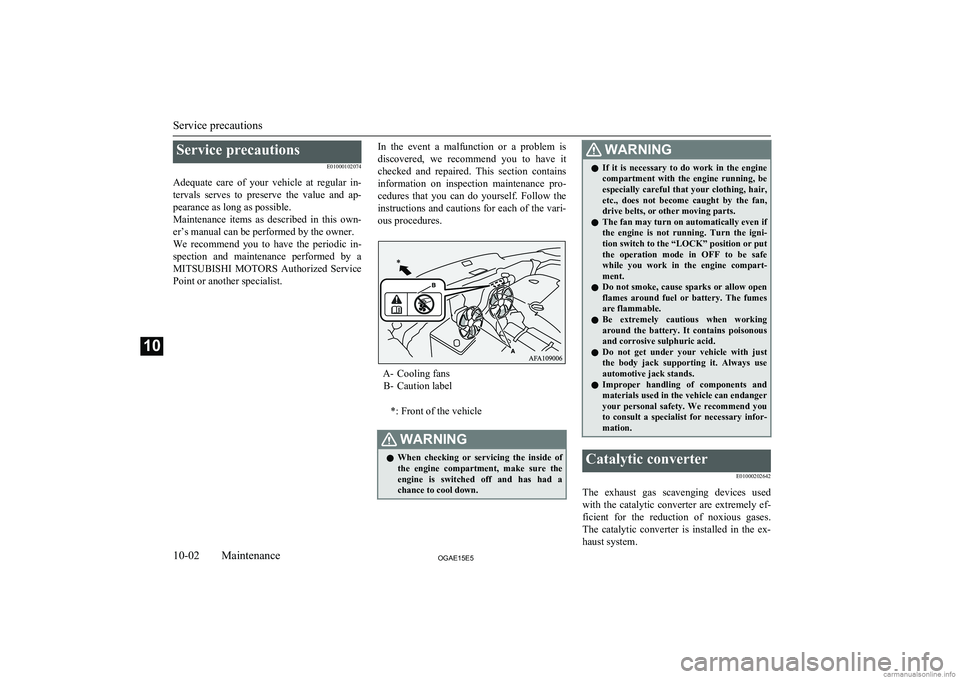
A- Cooling fans B- Caution label
*: Front of the vehicle
WARNINGl When checking or servicing the inside of
the engine compartment, make sure theengine is switched off and has had achance to cool down.WARNINGl If it is necessary to do work in the engine
compartment with the engine running, be
especially careful that your clothing, hair,
etc., does not become caught by the fan, drive belts, or other moving parts.
l The fan may turn on automatically even if
the engine is not running. Turn the igni-
tion switch to the “LOCK” position or put
the operation mode in OFF to be safe while you work in the engine compart-
ment.
l Do not smoke, cause sparks or allow open
flames around fuel or battery. The fumesare flammable.
l Be extremely cautious when working
around the battery. It contains poisonous
and corrosive sulphuric acid.
l Do not get under your vehicle with just
the body jack supporting it. Always use
automotive jack stands.
l Improper handling of components and
materials used in the vehicle can endangeryour personal safety. We recommend you to consult a specialist for necessary infor- mation.Catalytic converter
E01000202642
The exhaust gas scavenging devices usedwith the catalytic converter are extremely ef- ficient for the reduction of noxious gases.
The catalytic converter is installed in the ex- haust system.
Service precautions
10-02OGAE15E5Maintenance10
Page 363 of 452
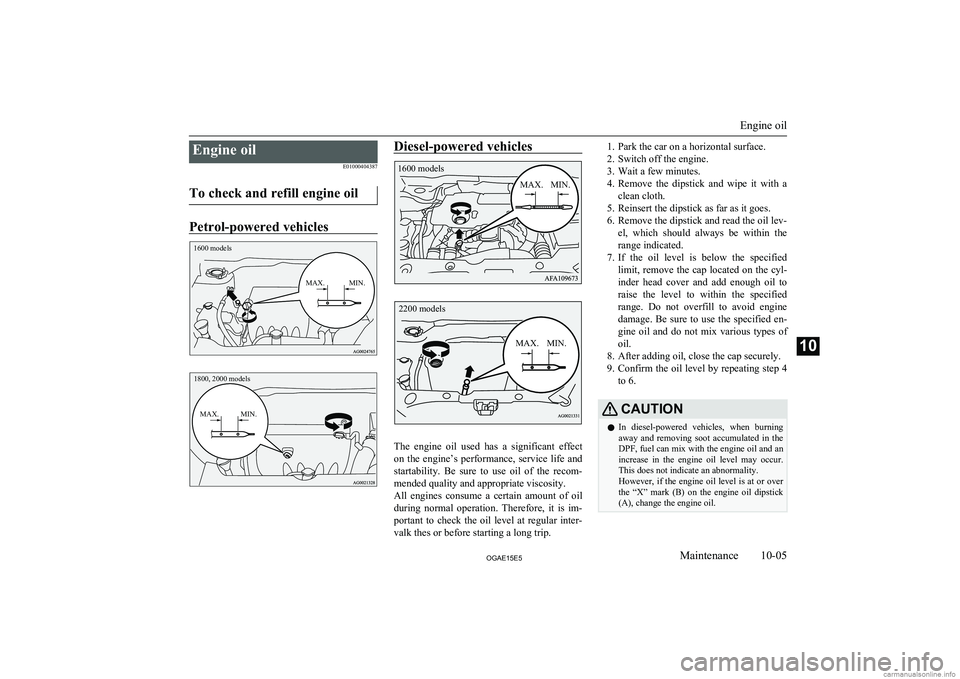
Engine oilE01000404387
To check and refill engine oil
Petrol-powered vehicles
1600 modelsMAX.MIN.1800, 2000 modelsMAX.MIN.Diesel-powered vehicles
The engine oil used has a significant effect on the engine’s performance, service life and
startability. Be sure to use oil of the recom- mended quality and appropriate viscosity.
All engines consume a certain amount of oil during normal operation. Therefore, it is im-portant to check the oil level at regular inter-
valk thes or before starting a long trip.
1. Park the car on a horizontal surface.
2. Switch off the engine.
3. Wait a few minutes.
4. Remove the dipstick and wipe it with a
clean cloth.
5. Reinsert the dipstick as far as it goes.
6. Remove the dipstick and read the oil lev- el, which should always be within therange indicated.
7. If the oil level is below the specified
limit, remove the cap located on the cyl- inder head cover and add enough oil to
raise the level to within the specified
range. Do not overfill to avoid engine damage. Be sure to use the specified en-
gine oil and do not mix various types of
oil.
8. After adding oil, close the cap securely.
9. Confirm the oil level by repeating step 4
to 6.CAUTIONl In diesel-powered vehicles, when burning
away and removing soot accumulated in the
DPF, fuel can mix with the engine oil and an increase in the engine oil level may occur. This does not indicate an abnormality.
However, if the engine oil level is at or over the “X” mark (B) on the engine oil dipstick
(A), change the engine oil.
Engine oil
10-05OGAE15E5Maintenance101600 models
MAX. MIN. 2200 models
MAX. MIN.
Page 364 of 452
NOTElThe engine oil will deteriorate rapidly if the
vehicle is subjected to severe conditions, re-
quiring earlier oil replacement.
Please refer to the maintenance schedule.
l For information on how to dispose of used
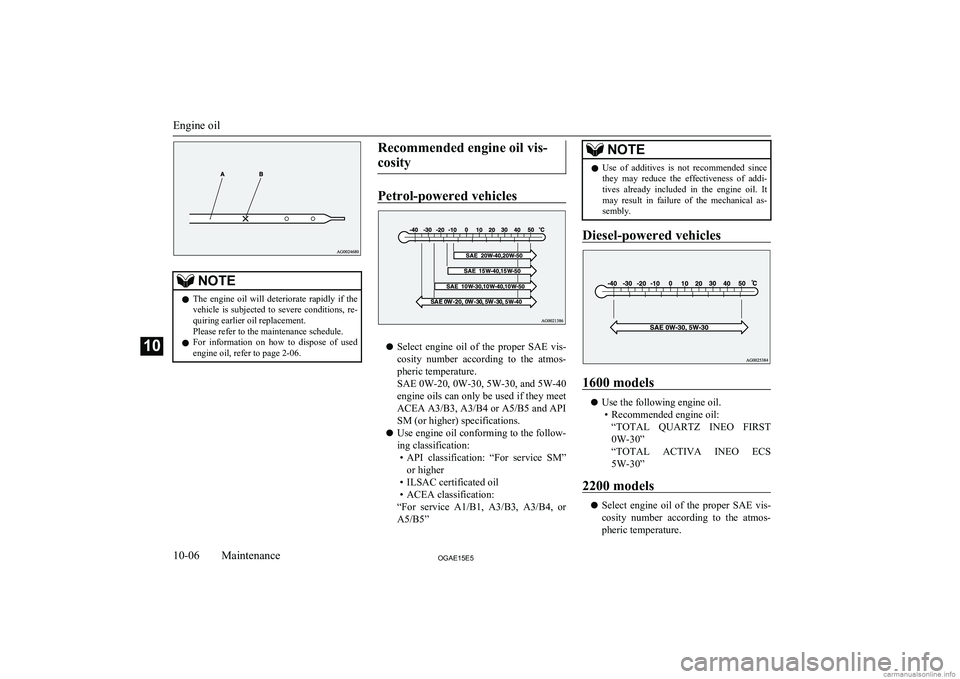
engine oil, refer to page 2-06.Recommended engine oil vis-
cosity
Petrol-powered vehicles
l Select engine oil of the proper SAE vis-
cosity number according to the atmos- pheric temperature.
SAE 0W-20, 0W-30, 5W-30, and 5W-40 engine oils can only be used if they meet
ACEA A3/B3, A3/B4 or A5/B5 and API SM (or higher) specifications.
l Use engine oil conforming to the follow-
ing classification: • API classification: “For service SM”
or higher
• ILSAC certificated oil
• ACEA classification:
“For service A1/B1, A3/B3, A3/B4, or A5/B5”
NOTEl Use of additives is not recommended since
they may reduce the effectiveness of addi-
tives already included in the engine oil. It may result in failure of the mechanical as-
sembly.
Diesel-powered vehicles
1600 models
l Use the following engine oil.
• Recommended engine oil: “TOTAL QUARTZ INEO FIRST
0W-30”
“TOTAL ACTIVA INEO ECS
5W-30”
2200 models
l Select engine oil of the proper SAE vis-
cosity number according to the atmos- pheric temperature.
Engine oil
10-06OGAE15E5Maintenance10