set clock MITSUBISHI COLT 2008 (in English) User Guide
[x] Cancel search | Manufacturer: MITSUBISHI, Model Year: 2008, Model line: COLT, Model: MITSUBISHI COLT 2008Pages: 450, PDF Size: 14.57 MB
Page 237 of 450

For pleasant driving5-21
5
For quick demisting
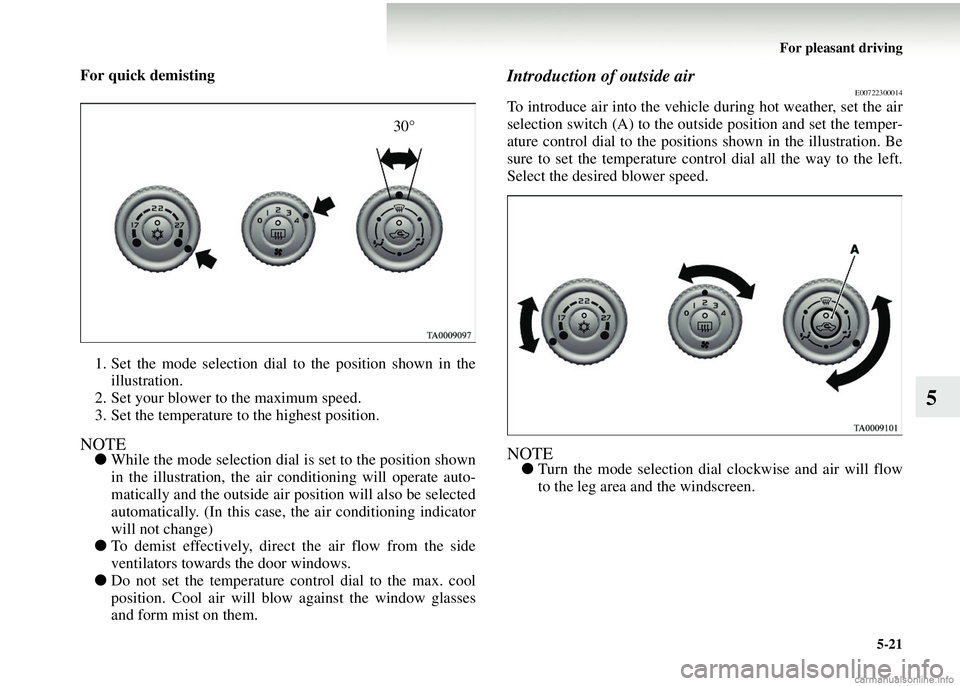
1. Set the mode selection dial to the position shown in the illustration.
2. Set your blower to the maximum speed.
3. Set the temperature to the highest position.
NOTE● While the mode selection dial is set to the position shown
in the illustration, the air conditioning will operate auto-
matically and the outside air pos ition will also be selected
automatically. (In this case, the air conditioning indicator
will not change)
● To demist effectively, direct the air flow from the side
ventilators towards the door windows.
● Do not set the temperature control dial to the max. cool
position. Cool air will blow against the window glasses
and form mist on them.
Introduction of outside airE00722300014
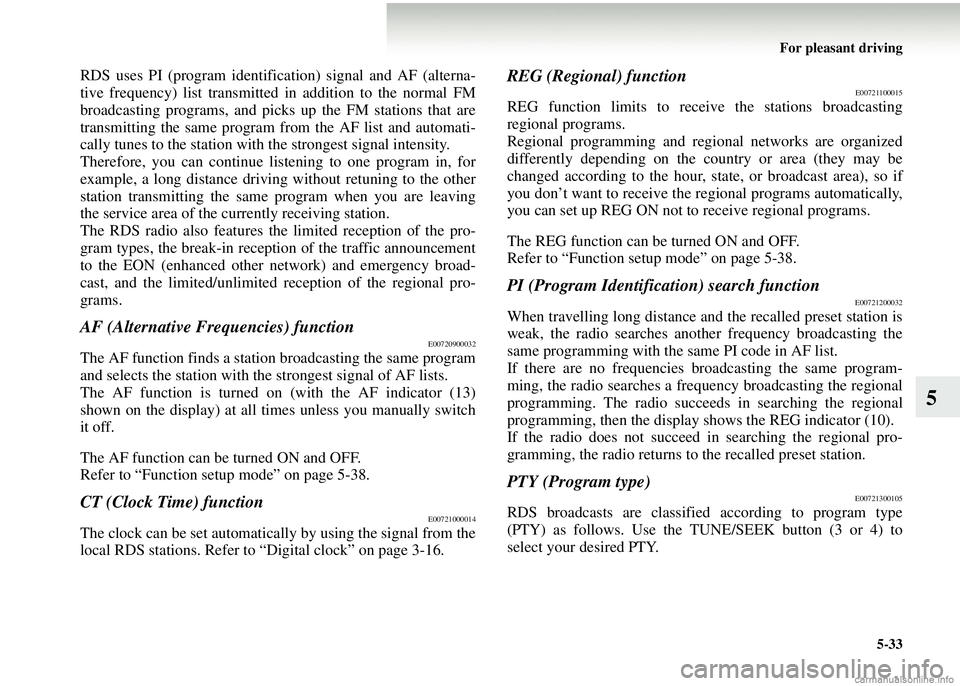
To introduce air into the vehicle during hot weather, set the air
selection switch (A) to the outside position and set the temper-
ature control dial to the positions shown in the illustration. Be
sure to set the temperature control dial all the way to the left.
Select the desired blower speed.
NOTE●Turn the mode selection dial clockwise and air will flow
to the leg area and the windscreen.
30°
Page 249 of 450

For pleasant driving5-33
5
RDS uses PI (program identifi cation) signal and AF (alterna-
tive frequency) list transmitted in addition to the normal FM
broadcasting programs, and picks up the FM stations that are
transmitting the same program from the AF list and automati-
cally tunes to the station with the strongest signal intensity.
Therefore, you can continue listening to one program in, for
example, a long distance driving without retuning to the other
station transmitting the same program when you are leaving
the service area of the currently receiving station.
The RDS radio also features th e limited reception of the pro-
gram types, the break-in receptio n of the traffic announcement
to the EON (enhanced other network) and emergency broad-
cast, and the limite d/unlimited reception of the regional pro-
grams.
AF (Alternative Frequencies) functionE00720900032
The AF function finds a statio n broadcasting the same program
and selects the station with the strongest signal of AF lists.
The AF function is turned on (with the AF indicator (13)
shown on the display) at all times unless you manually switch
it off.
The AF function can be turned ON and OFF.
Refer to “Function setup mode” on page 5-38.
CT (Clock Time) functionE00721000014
The clock can be set automatically by using the signal from the
local RDS stations. Refer to “Digital clock” on page 3-16.
REG (Regional) functionE00721100015
REG function limits to receive the stations broadcasting
regional programs.
Regional programming and regional networks are organized
differently depending on the country or area (they may be
changed according to the hour, state, or broadcast area), so if
you don’t want to receive the re gional programs automatically,
you can set up REG ON not to receive regional programs.
The REG function can be turned ON and OFF.
Refer to “Function setup mode” on page 5-38.
PI (Program Identification) search functionE00721200032
When travelling long distance an d the recalled preset station is
weak, the radio searches another frequency broadcasting the
same programming with the same PI code in AF list.
If there are no frequencies broadcasting the same program-
ming, the radio searches a frequency broadcasting the regional
programming. The radio succeeds in searching the regional
programming, then the display shows the REG indicator (10).
If the radio does not succeed in searching the regional pro-
gramming, the radio returns to the recalled preset station.
PTY (Program type)E00721300105
RDS broadcasts are classified according to program type
(PTY) as follows. Use the TUNE/SEEK button (3 or 4) to
select your desired PTY.
Page 318 of 450

6-28 For emergencies
6
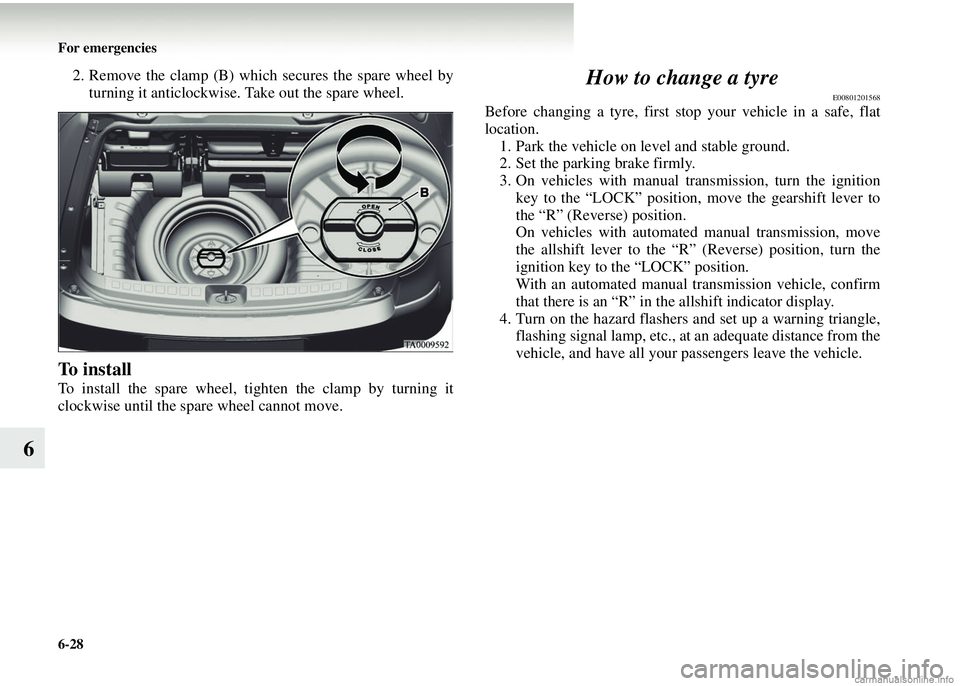
2. Remove the clamp (B) which secures the spare wheel byturning it anticlockwise. Take out the spare wheel.
To install
To install the spare wheel, ti ghten the clamp by turning it
clockwise until the sp are wheel cannot move.
How to change a tyre
E00801201568
Before changing a tyre, first stop your vehicle in a safe, flat
location.
1. Park the vehicle on level and stable ground.
2. Set the parking brake firmly.
3. On vehicles with manual transmission, turn the ignition key to the “LOCK” position, move the gearshift lever to
the “R” (Reverse) position.
On vehicles with automated manual transmission, move
the allshift lever to the “R” (Reverse) position, turn the
ignition key to the “LOCK” position.
With an automated manual tran smission vehicle, confirm
that there is an “R” in th e allshift indicator display.
4. Turn on the hazard flashers an d set up a warning triangle,
flashing signal lamp, etc., at an adequate distance from the
vehicle, and have all your passengers leave the vehicle.