key MITSUBISHI COLT 2008 (in English) Owner's Guide
[x] Cancel search | Manufacturer: MITSUBISHI, Model Year: 2008, Model line: COLT, Model: MITSUBISHI COLT 2008Pages: 450, PDF Size: 14.57 MB
Page 101 of 450
Seat and seat belts2-53
2
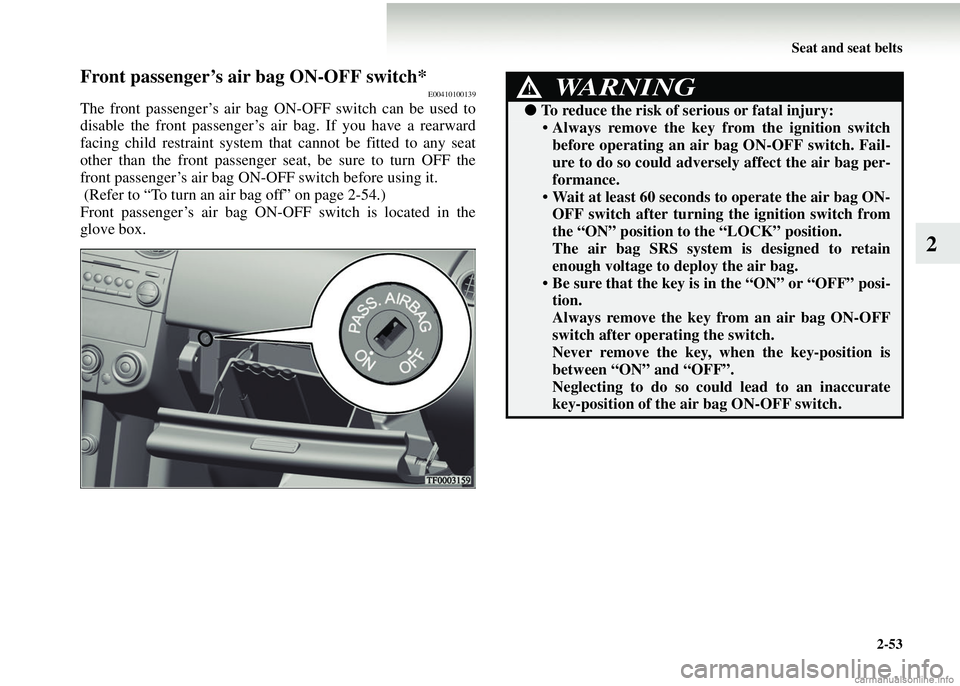
Front passenger’s air bag ON-OFF switch*E00410100139
The front passenger’s air bag ON-OFF switch can be used to
disable the front passenger’s air bag. If you have a rearward
facing child restraint system that cannot be fitted to any seat
other than the front passenger seat, be sure to turn OFF the
front passenger’s air bag ON-OFF switch before using it.
(Refer to “To turn an air bag off” on page 2-54.)
Front passenger’s air bag ON-OFF switch is located in the
glove box.
WARNING!
●To reduce the risk of serious or fatal injury:
• Always remove the key from the ignition switch
before operating an air bag ON-OFF switch. Fail-
ure to do so could adversely affect the air bag per-
formance.
• Wait at least 60 seconds to operate the air bag ON- OFF switch after turning the ignition switch from
the “ON” position to the “LOCK” position.
The air bag SRS system is designed to retain
enough voltage to deploy the air bag.
• Be sure that the key is in the “ON” or “OFF” posi- tion.
Always remove the key from an air bag ON-OFF
switch after operating the switch.
Never remove the key, when the key-position is
between “ON” and “OFF”.
Neglecting to do so coul d lead to an inaccurate
key-position of the air bag ON-OFF switch.
Page 102 of 450
2-54 Seat and seat belts
2
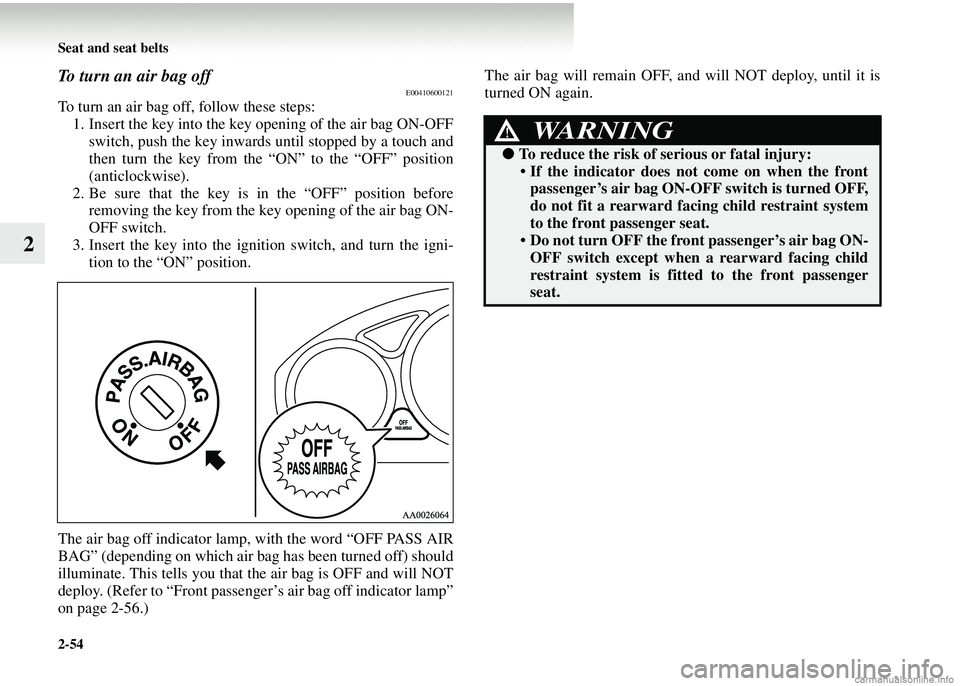
To turn an air bag offE00410600121
To turn an air bag off, follow these steps:1. Insert the key into the key opening of the air bag ON-OFF
switch, push the key inwards until stopped by a touch and
then turn the key from the “ON” to the “OFF” position
(anticlockwise).
2. Be sure that the key is in the “OFF” position before removing the key from the key opening of the air bag ON-
OFF switch.
3. Insert the key into the ignition switch, and turn the igni- tion to the “ON” position.
The air bag off indicator lamp, with the word “OFF PASS AIR
BAG” (depending on which air bag has been turned off) should
illuminate. This tells you that the air bag is OFF and will NOT
deploy. (Refer to “Front passenger’s air bag off indicator lamp”
on page 2-56.) The air bag will remain OFF, and will NOT deploy, until it is
turned ON again.
WARNING!
●
To reduce the risk of serious or fatal injury:
• If the indicator does not come on when the front
passenger’s air bag ON-OFF switch is turned OFF,
do not fit a rearward facing child restraint system
to the front passenger seat.
• Do not turn OFF the fron t passenger’s air bag ON-
OFF switch except when a rearward facing child
restraint system is fitt ed to the front passenger
seat.
Page 103 of 450
Seat and seat belts2-55
2
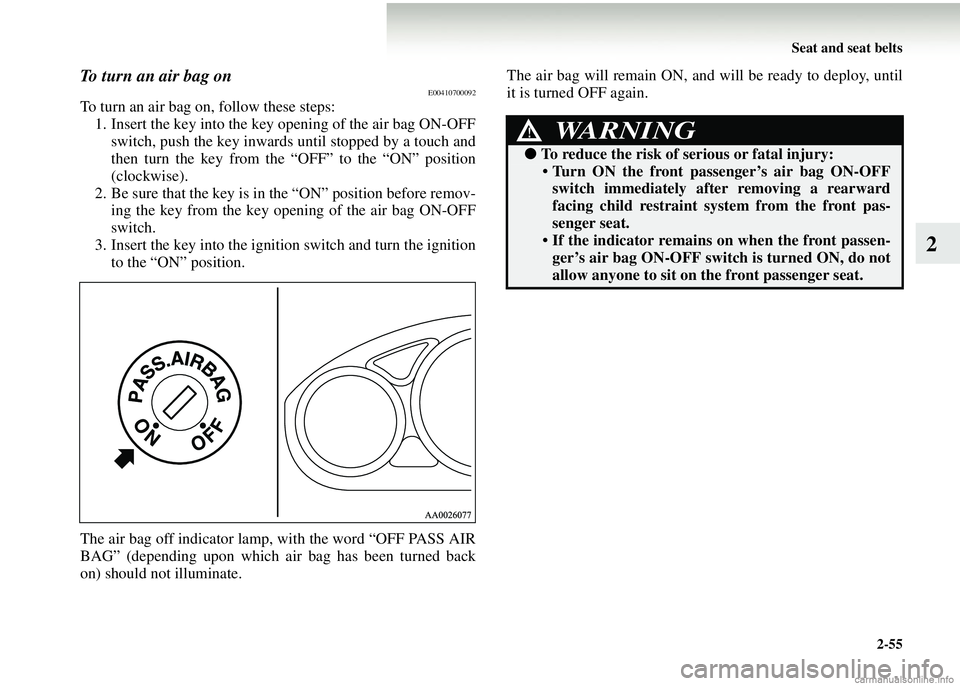
To turn an air bag onE00410700092
To turn an air bag on, follow these steps:1. Insert the key into the key opening of the air bag ON-OFF
switch, push the key inwards until stopped by a touch and
then turn the key from the “OFF” to the “ON” position
(clockwise).
2. Be sure that the key is in the “ON” position before remov- ing the key from the key opening of the air bag ON-OFF
switch.
3. Insert the key into the ignition switch and turn the ignition to the “ON” position.
The air bag off indicator lamp, with the word “OFF PASS AIR
BAG” (depending upon which air bag has been turned back
on) should not illuminate. The air bag will remain ON, and will be ready to deploy, until
it is turned OFF again.
WARNING!
●
To reduce the risk of serious or fatal injury:
• Turn ON the front passenger’s air bag ON-OFF
switch immediately after removing a rearward
facing child restraint sy stem from the front pas-
senger seat.
• If the indicator remains on when the front passen- ger’s air bag ON-OFF switch is turned ON, do not
allow anyone to sit on the front passenger seat.
Page 118 of 450
2-70 Seat and seat belts
2
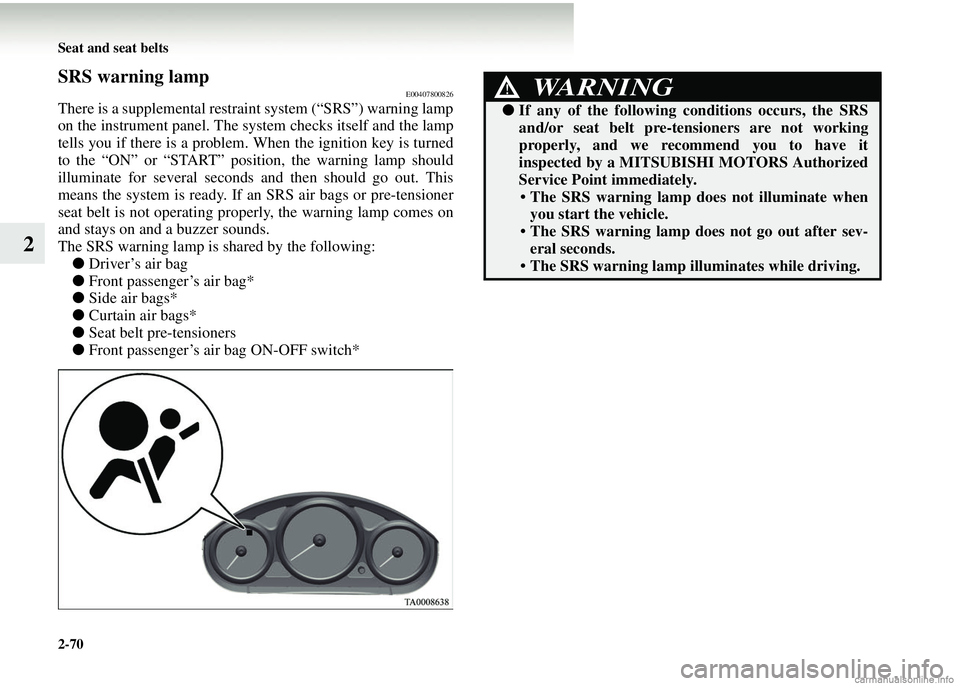
SRS warning lampE00407800826
There is a supplemental restraint system (“SRS”) warning lamp
on the instrument panel. The system checks itself and the lamp
tells you if there is a problem. When the ignition key is turned
to the “ON” or “START” position, the warning lamp should
illuminate for several seconds and then should go out. This
means the system is ready. If an SRS air bags or pre-tensioner
seat belt is not operating properly, the warning lamp comes on
and stays on and a buzzer sounds.
The SRS warning lamp is shared by the following: ● Driver’s air bag
● Front passenger’s air bag*
● Side air bags*
● Curtain air bags*
● Seat belt pre-tensioners
● Front passenger’s air bag ON-OFF switch*
WARNING!
●If any of the following conditions occurs, the SRS
and/or seat belt pre-tensioners are not working
properly, and we recommend you to have it
inspected by a MITSUBISHI MOTORS Authorized
Service Point immediately.
• The SRS warning lamp does not illuminate when
you start the vehicle.
• The SRS warning lamp does not go out after sev- eral seconds.
• The SRS warning lamp illuminates while driving.
Page 125 of 450
Instruments and controls3-5
3
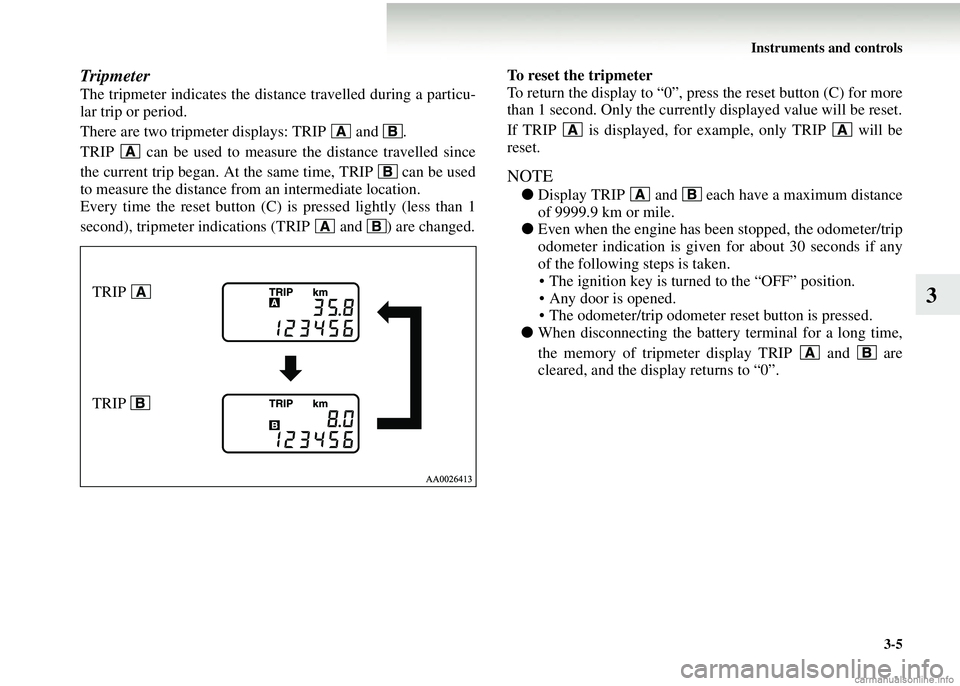
Tripmeter
The tripmeter indicates the dist ance travelled during a particu-
lar trip or period.
There are two tripmeter displays: TRIP and .
TRIP can be used to measur e the distance travelled since
the current trip began. At the same time, TRIP can be used
to measure the distance from an intermediate location.
Every time the reset button (C) is pressed lightly (less than 1
second), tripmeter indications (TRIP and ) are changed. To reset the tripmeter
To return the display to “0”, press the reset button (C) for more
than 1 second. Only the currently displayed value will be reset.
If TRIP is displayed, for example, only TRIP will be
reset.
NOTE
●
Display TRIP and each have a maximum distance
of 9999.9 km or mile.
● Even when the engine has been stopped, the odometer/trip
odometer indication is given for about 30 seconds if any
of the following steps is taken.
• The ignition key is turned to the “OFF” position.
• Any door is opened.
• The odometer/trip odometer reset button is pressed.
● When disconnecting the batter y terminal for a long time,
the memory of tripmeter display TRIP and are
cleared, and the display returns to “0”.
TRIP
TRIP
Page 153 of 450
Instruments and controls3-33
3
Lamp monitor buzzerE00506100067
If the driver’s door is opened when the ignition key is in the
“LOCK” or “ACC” position or removed from the ignition
switch while the lamps are on, a buzzer will sound to remind
the driver to turn off the lamps. Turn off the lamp switch to
stop the buzzer.
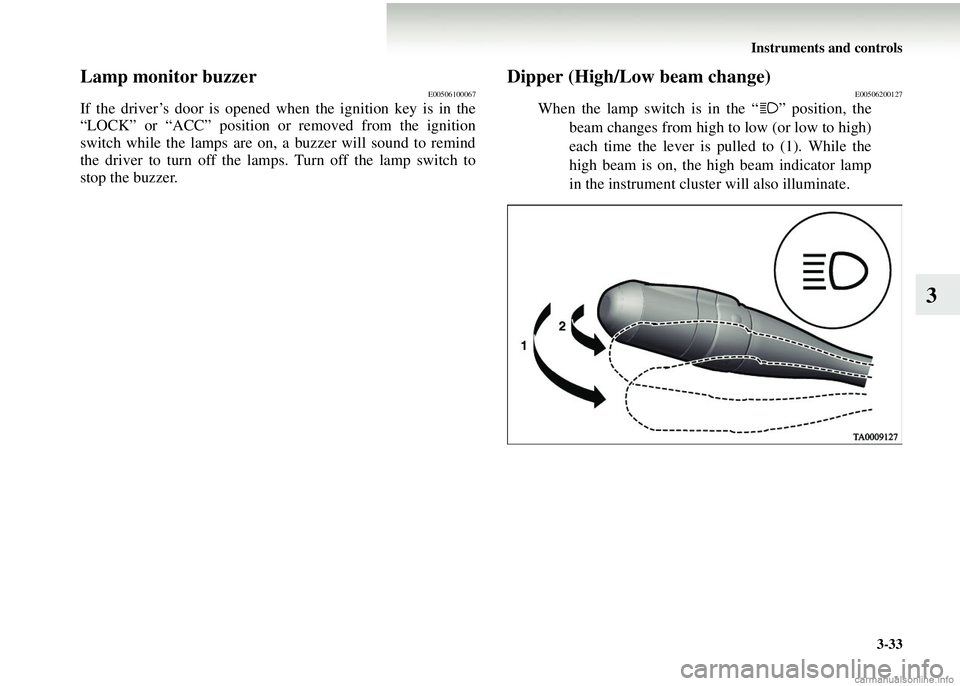
Dipper (High/Low beam change)E00506200127
When the lamp switch is in the “ ” position, thebeam changes from high to low (or low to high)
each time the lever is pul led to (1). While the
high beam is on, the high beam indicator lamp
in the instrument cluster will also illuminate.
Page 157 of 450
Instruments and controls3-37
3
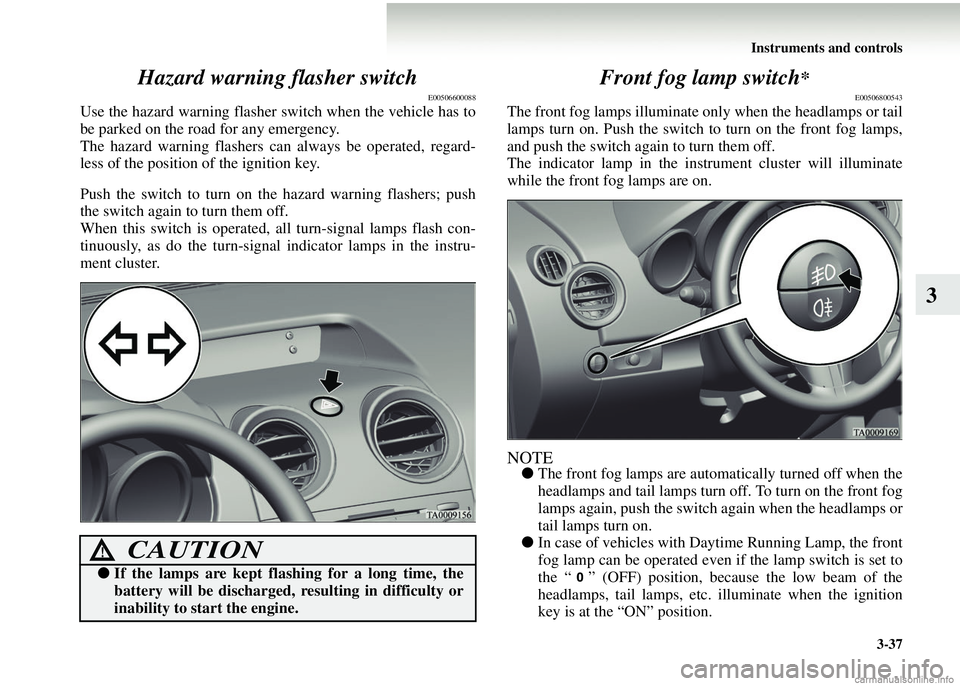
Hazard warning flasher switch
E00506600088
Use the hazard warning flasher switch when the vehicle has to
be parked on the road for any emergency.
The hazard warning flashers can always be operated, regard-
less of the position of the ignition key.
Push the switch to turn on the hazard warning flashers; push
the switch again to turn them off.
When this switch is operated, all turn-signal lamps flash con-
tinuously, as do the turn-signal indicator lamps in the instru-
ment cluster.
Front fog lamp switch*
E00506800543
The front fog lamps illuminate only when the headlamps or tail
lamps turn on. Push the switch to turn on the front fog lamps,
and push the switch again to turn them off.
The indicator lamp in the instrument cluster will illuminate
while the front fog lamps are on.
NOTE●
The front fog lamps are automa tically turned off when the
headlamps and tail lamps turn off. To turn on the front fog
lamps again, push the switch again when the headlamps or
tail lamps turn on.
● In case of vehicles with Daytime Running Lamp, the front
fog lamp can be operated even if the lamp switch is set to
the “ ” (OFF) position, becau se the low beam of the
headlamps, tail lamps, etc. illuminate when the ignition
key is at the “ON” position.
CAUTION!
● If the lamps are kept flashing for a long time, the
battery will be discharged, resulting in difficulty or
inability to start the engine.
Page 158 of 450
3-38 Instruments and controls
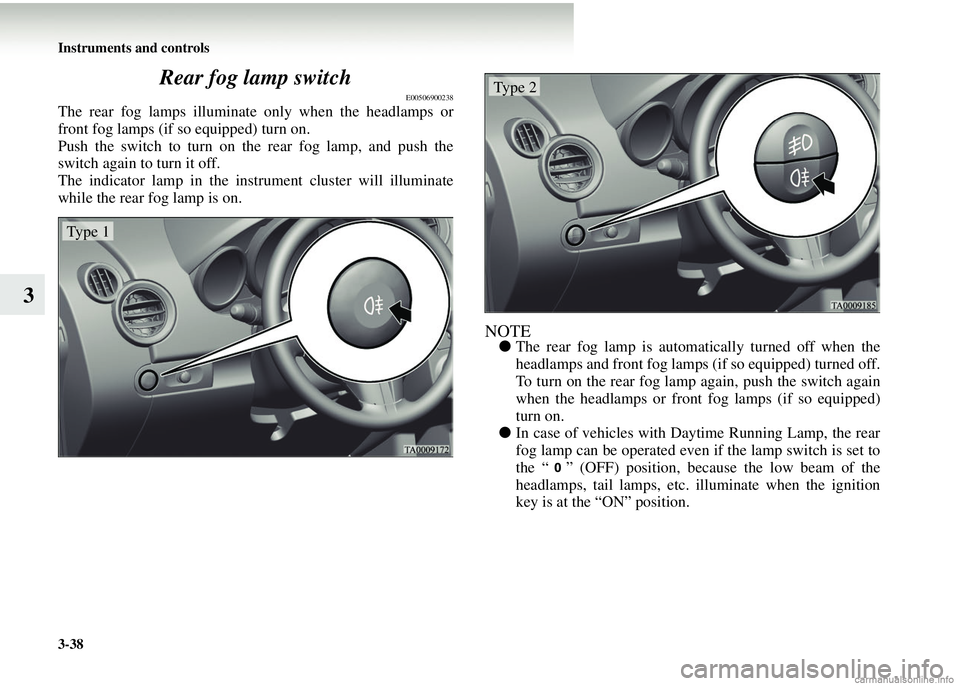
3Rear fog lamp switch
E00506900238
The rear fog lamps illuminate
only when the headlamps or
front fog lamps (if so equipped) turn on.
Push the switch to turn on the rear fog lamp, and push the
switch again to turn it off.
The indicator lamp in the instrument cluster will illuminate
while the rear fog lamp is on.
NOTE● The rear fog lamp is automa tically turned off when the
headlamps and front fog lamps (if so equipped) turned off.
To turn on the rear fog lamp again, push the switch again
when the headlamps or front fog lamps (if so equipped)
turn on.
● In case of vehicles with Daytime Running Lamp, the rear
fog lamp can be operated even if the lamp switch is set to
the “ ” (OFF) position, becau se the low beam of the
headlamps, tail lamps, etc. illuminate when the ignition
key is at the “ON” position.
Type 1
Type 2
Page 170 of 450
4-4 Starting and driving
4
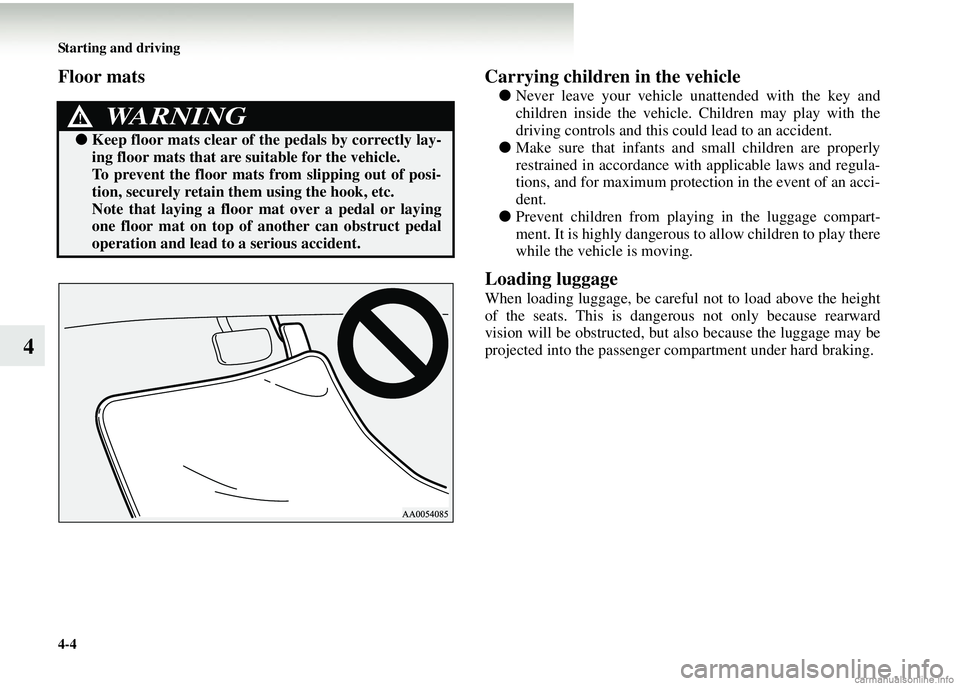
Floor matsCarrying children in the vehicle
●Never leave your vehicle un attended with the key and
children inside the vehicle. Children may play with the
driving controls and this could lead to an accident.
● Make sure that infants and small children are properly
restrained in accordance with applicable laws and regula-
tions, and for maximum protecti on in the event of an acci-
dent.
● Prevent children fr om playing in the luggage compart-
ment. It is highly dangerous to allow children to play there
while the vehicle is moving.
Loading luggage
When loading luggage, be careful not to load above the height
of the seats. This is dange rous not only because rearward
vision will be obstru cted, but also because the luggage may be
projected into the passenger compartment under hard braking.
WARNING!
● Keep floor mats clear of th e pedals by correctly lay-
ing floor mats that are suitable for the vehicle.
To prevent the floor mats from slipping out of posi-
tion, securely retain th em using the hook, etc.
Note that laying a floor mat over a pedal or laying
one floor mat on top of an other can obstruct pedal
operation and lead to a serious accident.
Page 174 of 450
4-8 Starting and driving
4Parking
E00600600869
Parking on a hill
To prevent the vehicle from rolling into the street, follow these
procedures:
Parking on a downhill
Turn the front wheels towards
the kerb and move the vehicle
forward until the kerb side wheel gently touches the kerb.
Set the parking brake and place the gearshift lever into the “R”
(Reverse) position (with manual transmission) or the allshift
lever into the “R” (Reverse) position (with automated manual
transmission).
If necessary, apply chocks to wheels.
Parking on an uphill
Turn the front wheels away from the kerb and move the vehicle
back until the kerb side wheel gently touches the kerb.
Set the parking brake and place th e gearshift lever into the 1st
position (with manual transmission) or the allshift lever into
the “S” (Stand by) position (with automated manual transmis-
sion).
If necessary, apply chocks to wheels.
NOTE● If your vehicle has an automated manual transmission,
place the allshift lever in the “S” (Stand by) position or
“R” (Reverse) position before stopping the engine.
If you move the allshift lever after stopping the engine, a
gearshift will not take place.
Parking with the engine running
Never leave the engine running while you take a short
sleep/rest. Also, never leave the engine running in a closed or
poorly ventilated place. Leaving the engine running risks
injury or death from accidental ly moving the gearshift lever
(manual transmission) or the allshift lever (automated manual
transmission) or the accumulation of toxic exhaust fumes in the
passenger compartment.
Where you park
Your front bumper can be damaged if you scrape it over kerbs
or parking stop blocks. Be careful when travelling up or down
steep slopes where your bumper can scrape the road.
When leaving the vehicle
Always remove the key from the ignition switch and lock all
doors and the tailgate when leaving the vehicle unattended.
Always try to park your vehicle in a well lit area.
WARNING!
● Do not park your vehicle in areas where combustible
materials such as dry grass or leaves can come in
contact with a hot exhaust, since a fire could occur.