key MITSUBISHI COLT 2011 (in English) Owner's Guide
[x] Cancel search | Manufacturer: MITSUBISHI, Model Year: 2011, Model line: COLT, Model: MITSUBISHI COLT 2011Pages: 274, PDF Size: 17.88 MB
Page 98 of 274
NOTEl While the hazard warning lamps are blinking
due to having manually pushed the switch,
the Emergency stop signal does not operate.
Refer to “Emergency stop signal system” on
page 4-26.Front fog lamp switch* E00506800820
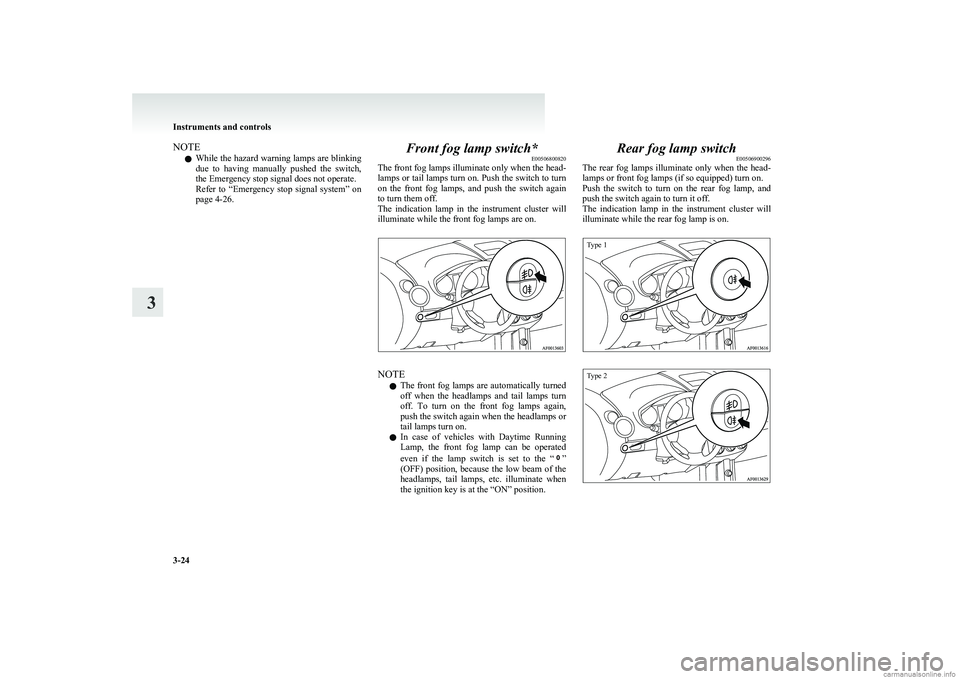
The front fog lamps illuminate only when the head-
lamps or tail lamps turn on. Push the switch to turn
on the front fog lamps, and push the switch again
to turn them off.
The indication lamp in the instrument cluster will
illuminate while the front fog lamps are on.
NOTE
l The front fog lamps are automatically turned
off when the headlamps and tail lamps turn
off. To turn on the front fog lamps again,
push the switch again when the headlamps or
tail lamps turn on.
l In case of vehicles with Daytime Running
Lamp, the front fog lamp can be operated
even if the lamp switch is set to the “
”
(OFF) position, because the low beam of the
headlamps, tail lamps, etc. illuminate when
the ignition key is at the “ON” position.
Rear fog lamp switch E00506900296
The rear fog lamps illuminate only when the head-
lamps or front fog lamps (if so equipped) turn on.
Push the switch to turn on the rear fog lamp, and
push the switch again to turn it off.
The indication lamp in the instrument cluster will
illuminate while the rear fog lamp is on.
Type 1Type 2
Instruments and controls
3-24
3
Page 99 of 274
NOTEl The rear fog lamp is automatically turned off
when the headlamps and front fog lamps (if
so equipped) turned off. To turn on the rear
fog lamp again, push the switch again when
the headlamps or front fog lamps (if so equip-
ped) turn on.
l In case of vehicles with Daytime Running
Lamp, the rear fog lamp can be operated
even if the lamp switch is set to the “
”
(OFF) position, because the low beam of the
headlamps, tail lamps, etc. illuminate when
the ignition key is at the “ON” position.
Wiper and washer switch E00507101191CAUTIONlIf the washer is used in cold weather, the
washer fluid sprayed against the glass
may freeze, which may hinder visibility.
Warm the glass with the defroster or rear
window demister switch before using the
washer.Windscreen wipers E00516900127Except for vehicle with rain sensorE00527000072
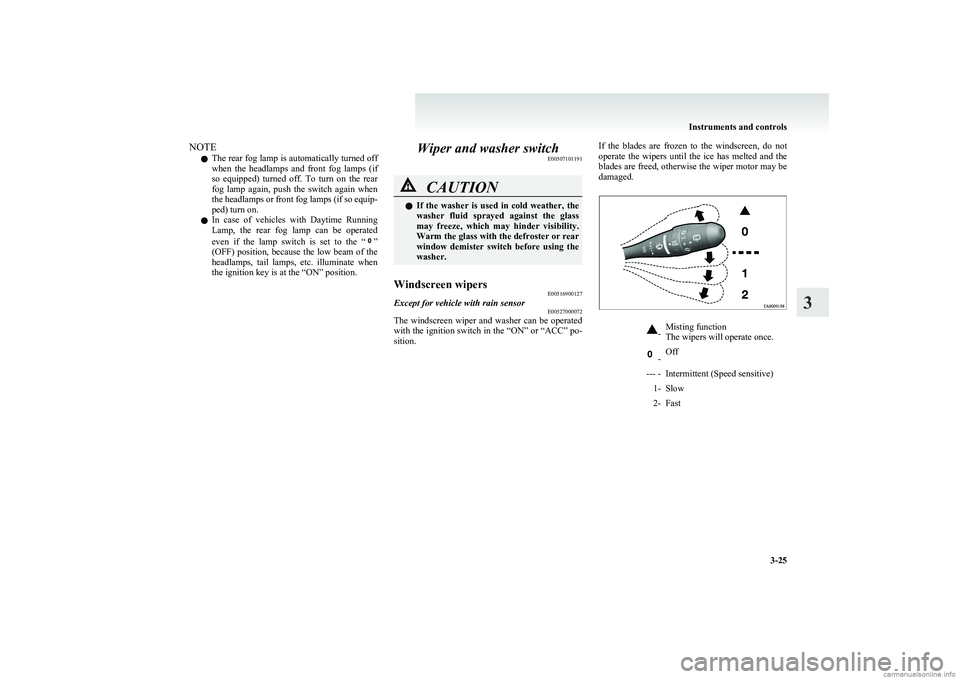
The windscreen wiper and washer can be operated
with the ignition switch in the “ON” or “ACC” po-
sition.
If the blades are frozen to the windscreen, do not
operate the wipers until the ice has melted and the
blades are freed, otherwise the wiper motor may be
damaged.-Misting function
The wipers will operate once. -Off--- -Intermittent (Speed sensitive)1-Slow2-Fast
Instruments and controls
3-25
3
Page 107 of 274
Safe driving techniquesE00600300390
Driving safety and protection against injury cannot
be fully ensured. However, we recommend that
you pay extra attention to the following:
Seat belts
Before starting the vehicle, make sure that you and
your passengers have fastened your seat belts.
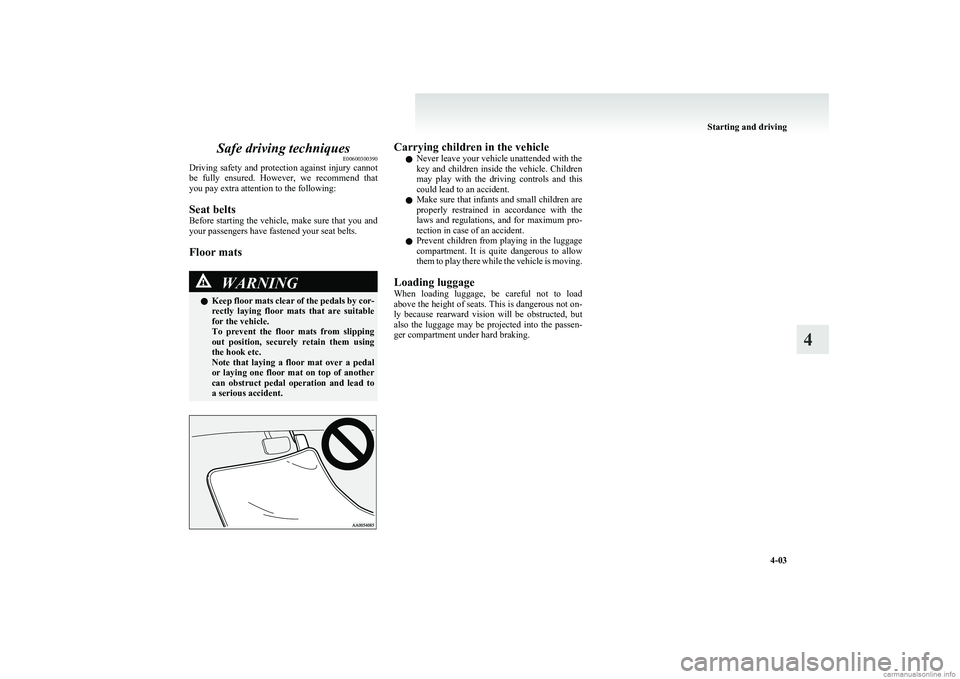
Floor matsWARNINGl Keep floor mats clear of the pedals by cor-
rectly laying floor mats that are suitable
for the vehicle.
To prevent the floor mats from slipping
out position, securely retain them using
the hook etc.
Note that laying a floor mat over a pedal
or laying one floor mat on top of another
can obstruct pedal operation and lead to
a serious accident.Carrying children in the vehicle
l Never leave your vehicle unattended with the
key and children inside the vehicle. Children
may play with the driving controls and this
could lead to an accident.
l Make sure that infants and small children are
properly restrained in accordance with the
laws and regulations, and for maximum pro-
tection in case of an accident.
l Prevent children from playing in the luggage
compartment. It is quite dangerous to allow
them to play there while the vehicle is moving.
Loading luggage
When loading luggage, be careful not to load
above the height of seats. This is dangerous not on-
ly because rearward vision will be obstructed, but
also the luggage may be projected into the passen-
ger compartment under hard braking.
Starting and driving
4-03
4
Page 111 of 274
ParkingE00600601521
Parking on a hill
To prevent the vehicle from rolling, follow these
procedures:
Parking on a downhill slope
Turn the front wheels towards the kerb and move
the vehicle forward until the kerb side wheel gently
touches the kerb.
Apply the parking brake and place the gearshift lev-
er into the “R” (Reverse) position (with manual
transmission) or the allshift lever into the “R” (Re-
verse) position (with automated manual transmis-
sion).
If necessary, apply chocks to wheels.
Parking on an uphill slope
Turn the front wheels away from the kerb and
move the vehicle back until the kerb side wheel gen-
tly touches the kerb.
Apply the parking brake and place the gearshift lev-
er into the 1 st
position (with manual transmission)
or the allshift lever into the “S” (Stand by) position
(with automated manual transmission).
If necessary, apply chocks to wheels.
NOTE l If your vehicle has an automated manual trans-
mission, place the allshift lever in the “S”
(Stand by) position or “R” (Reverse) position
before stopping the engine.
If you move the allshift lever after stopping
the engine, a gearshift will not take place.Parking with the engine running
Never leave the engine running while you take a
short sleep/rest. Also, never leave the engine run-
ning in a closed or poorly ventilated place.WARNINGl Leaving the engine running risks injury
or death from accidentally moving the
gearshift lever (manual transmission) or
the allshift lever (automated manual trans-
mission) or the accumulation of toxic ex-
haust fumes on the passenger compart-
ment.
Where you park
Your front bumper can be damaged if you scrape it
over kerbs or parking stop blocks. Be careful when
travelling up or down steep slopes where your bump-
er can scrape the road.
WARNINGl Do not park your vehicle in areas where
combustible materials such as dry grass
or leaves can come in contact with a hot
exhaust, since a fire could occur.
When leaving the vehicle
Always remove the key from the ignition switch
and lock all doors and the tailgate when leaving the
vehicle unattended.
Always try to park your vehicle in a well lit area.
Steering wheel height adjustment E00600700466
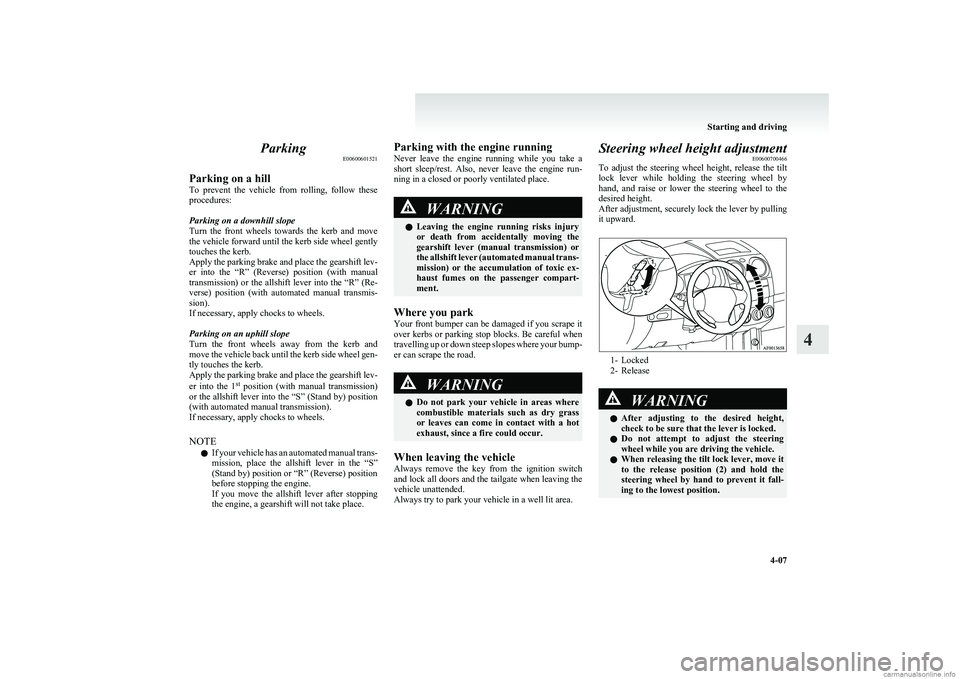
To adjust the steering wheel height, release the tilt
lock lever while holding the steering wheel by
hand, and raise or lower the steering wheel to the
desired height.
After adjustment, securely lock the lever by pulling
it upward.
1- Locked
2- Release
WARNINGl After adjusting to the desired height,
check to be sure that the lever is locked.
l Do not attempt to adjust the steering
wheel while you are driving the vehicle.
l When releasing the tilt lock lever, move it
to the release position (2) and hold the
steering wheel by hand to prevent it fall-
ing to the lowest position.
Starting and driving
4-07
4
Page 114 of 274
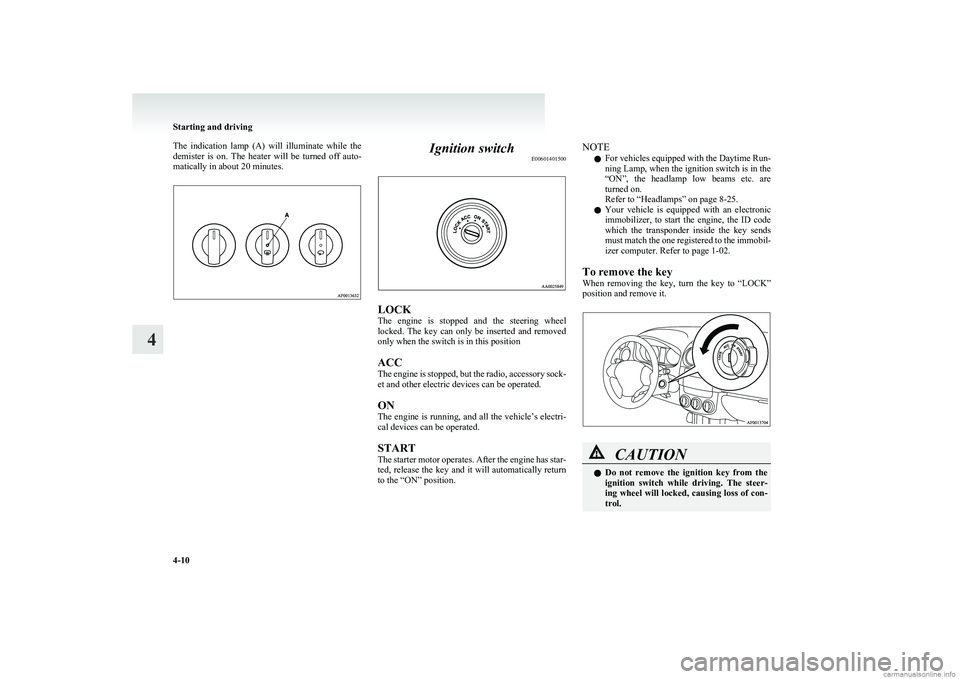
The indication lamp (A) will illuminate while the
demister is on. The heater will be turned off auto-
matically in about 20 minutes.Ignition switch E00601401500
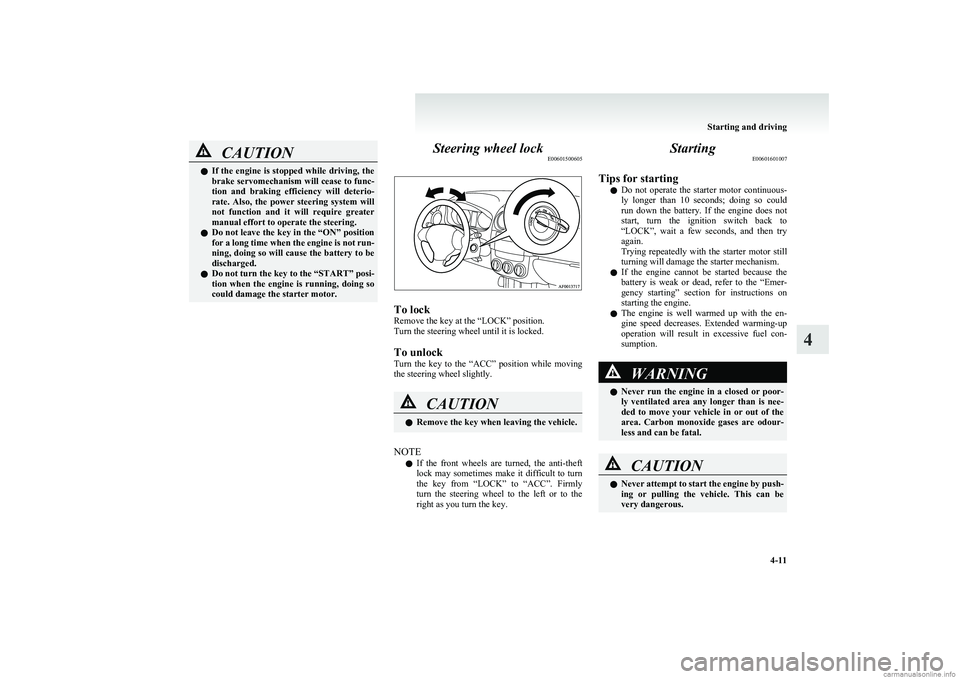
LOCK
The engine is stopped and the steering wheel
locked. The key can only be inserted and removed
only when the switch is in this position
ACC
The engine is stopped, but the radio, accessory sock-
et and other electric devices can be operated.
ON
The engine is running, and all the vehicle’s electri-
cal devices can be operated.
START
The starter motor operates. After the engine has star-
ted, release the key and it will automatically return
to the “ON” position.
NOTE
l For vehicles equipped with the Daytime Run-
ning Lamp, when the ignition switch is in the
“ON”, the headlamp low beams etc. are
turned on.
Refer to “Headlamps” on page 8-25.
l Your vehicle is equipped with an electronic
immobilizer, to start the engine, the ID code
which the transponder inside the key sends
must match the one registered to the immobil-
izer computer. Refer to page 1-02.
To remove the key
When removing the key, turn the key to “LOCK”
position and remove it.CAUTIONl Do not remove the ignition key from the
ignition switch while driving. The steer-
ing wheel will locked, causing loss of con-
trol.
Starting and driving
4-10
4
Page 115 of 274
CAUTIONlIf the engine is stopped while driving, the
brake servomechanism will cease to func-
tion and braking efficiency will deterio-
rate. Also, the power steering system will
not function and it will require greater
manual effort to operate the steering.
l Do not leave the key in the “ON” position
for a long time when the engine is not run-
ning, doing so will cause the battery to be
discharged.
l Do not turn the key to the “START” posi-
tion when the engine is running, doing so
could damage the starter motor.Steering wheel lock E00601500605
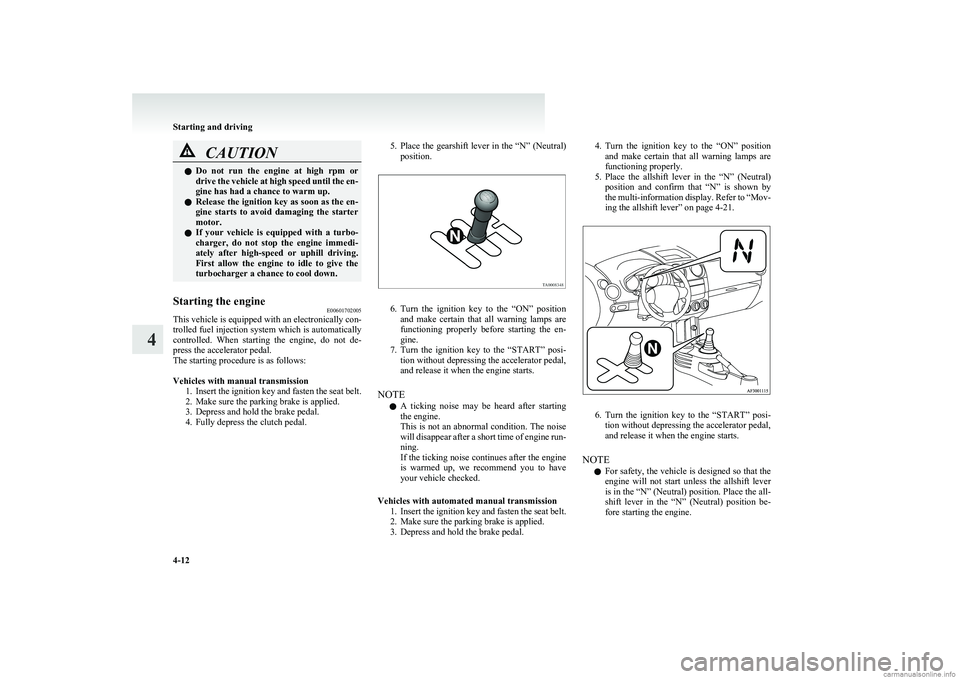
To lock
Remove the key at the “LOCK” position.
Turn the steering wheel until it is locked.
To unlock
Turn the key to the “ACC” position while moving
the steering wheel slightly.
CAUTIONl Remove the key when leaving the vehicle.
NOTE
l If the front wheels are turned, the anti-theft
lock may sometimes make it difficult to turn
the key from “LOCK” to “ACC”. Firmly
turn the steering wheel to the left or to the
right as you turn the key.
Starting E00601601007
Tips for starting l Do not operate the starter motor continuous-
ly longer than 10 seconds; doing so could
run down the battery. If the engine does not
start, turn the ignition switch back to
“LOCK”, wait a few seconds, and then try
again.
Trying repeatedly with the starter motor still
turning will damage the starter mechanism.
l If the engine cannot be started because the
battery is weak or dead, refer to the “Emer-
gency starting” section for instructions on
starting the engine.
l The engine is well warmed up with the en-
gine speed decreases. Extended warming-up
operation will result in excessive fuel con-
sumption.WARNINGl Never run the engine in a closed or poor-
ly ventilated area any longer than is nee-
ded to move your vehicle in or out of the
area. Carbon monoxide gases are odour-
less and can be fatal.CAUTIONl Never attempt to start the engine by push-
ing or pulling the vehicle. This can be
very dangerous.
Starting and driving
4-11
4
Page 116 of 274
CAUTIONlDo not run the engine at high rpm or
drive the vehicle at high speed until the en-
gine has had a chance to warm up.
l Release the ignition key as soon as the en-
gine starts to avoid damaging the starter
motor.
l If your vehicle is equipped with a turbo-
charger, do not stop the engine immedi-
ately after high-speed or uphill driving.
First allow the engine to idle to give the
turbocharger a chance to cool down.Starting the engine E00601702005
This vehicle is equipped with an electronically con-
trolled fuel injection system which is automatically
controlled. When starting the engine, do not de-
press the accelerator pedal.
The starting procedure is as follows:
Vehicles with manual transmission 1.Insert the ignition key and fasten the seat belt.
2. Make sure the parking brake is applied.
3. Depress and hold the brake pedal.
4. Fully depress the clutch pedal.
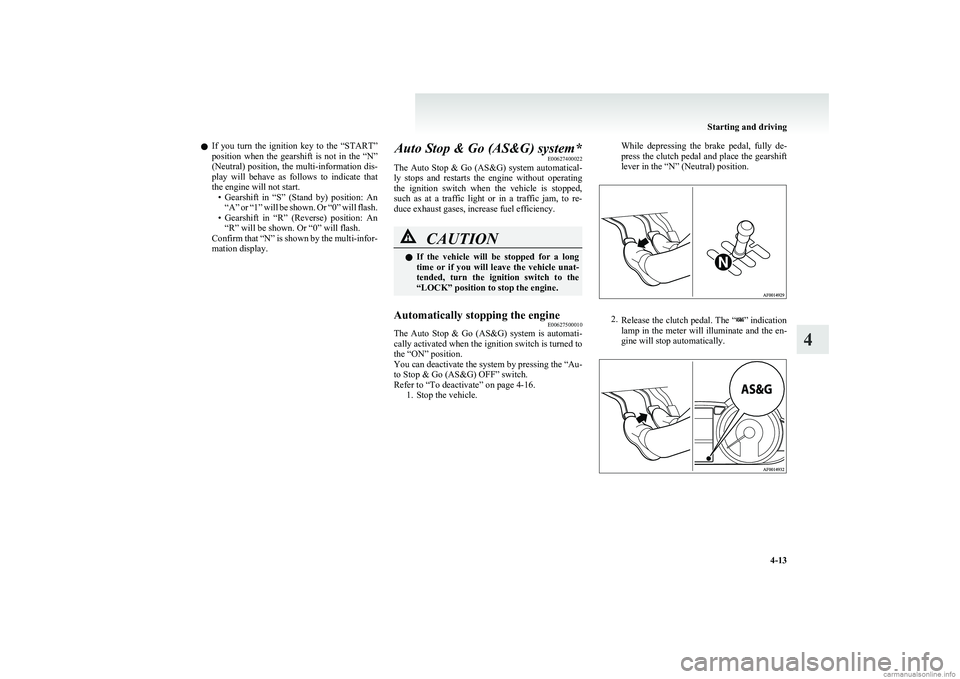
5. Place the gearshift lever in the “N” (Neutral)
position.
6. Turn the ignition key to the “ON” position
and make certain that all warning lamps are
functioning properly before starting the en-
gine.
7. Turn the ignition key to the “START” posi-
tion without depressing the accelerator pedal,
and release it when the engine starts.
NOTE l A ticking noise may be heard after starting
the engine.
This is not an abnormal condition. The noise
will disappear after a short time of engine run-
ning.
If the ticking noise continues after the engine
is warmed up, we recommend you to have
your vehicle checked.
Vehicles with automated manual transmission 1.Insert the ignition key and fasten the seat belt.
2. Make sure the parking brake is applied.
3. Depress and hold the brake pedal.
4. Turn the ignition key to the “ON” position
and make certain that all warning lamps are
functioning properly.
5. Place the allshift lever in the “N” (Neutral)
position and confirm that “N” is shown by
the multi-information display. Refer to “Mov-
ing the allshift lever” on page 4-21.
6. Turn the ignition key to the “START” posi-
tion without depressing the accelerator pedal,
and release it when the engine starts.
NOTE l For safety, the vehicle is designed so that the
engine will not start unless the allshift lever
is in the “N” (Neutral) position. Place the all-
shift lever in the “N” (Neutral) position be-
fore starting the engine.
Starting and driving
4-12
4
Page 117 of 274
lIf you turn the ignition key to the “START”
position when the gearshift is not in the “N”
(Neutral) position, the multi-information dis-
play will behave as follows to indicate that
the engine will not start. •Gearshift in “S” (Stand by) position: An
“A” or “1” will be shown. Or “0” will flash.
• Gearshift in “R” (Reverse) position: An
“R” will be shown. Or “0” will flash.
Confirm that “N” is shown by the multi-infor-
mation display.Auto Stop & Go (AS&G) system* E00627400022
The Auto Stop & Go (AS&G) system automatical-
ly stops and restarts the engine without operating
the ignition switch when the vehicle is stopped,
such as at a traffic light or in a traffic jam, to re-
duce exhaust gases, increase fuel efficiency.CAUTIONl If the vehicle will be stopped for a long
time or if you will leave the vehicle unat-
tended, turn the ignition switch to the
“LOCK” position to stop the engine.Automatically stopping the engine E00627500010
The Auto Stop & Go (AS&G) system is automati-
cally activated when the ignition switch is turned to
the “ON” position.
You can deactivate the system by pressing the “Au-
to Stop & Go (AS&G) OFF” switch.
Refer to “To deactivate” on page 4-16. 1. Stop the vehicle.
While depressing the brake pedal, fully de-
press the clutch pedal and place the gearshift
lever in the “N” (Neutral) position.
2. Release the clutch pedal. The “” indication
lamp in the meter will illuminate and the en-
gine will stop automatically.
Starting and driving
4-13
4
Page 129 of 274
CAUTIONlWhen leaving the vehicle, be sure to stop
the engine and remove the key from the
ignition switch. If you were to leave the en-
gine running with the allshift lever in the
“S” (Stand by) or “R” position, the trans-
mission’s creep effect could cause the ve-
hicle to move by itself. Also, the vehicle
could suddenly move if you accidentally
pressed the accelerator pedal when get-
ting back in the vehicle.
NOTE
l Sit in the correct position for driving even if
you plan to move just a short distance. Make
sure you are able to depress the brake pedal
and accelerator pedal properly.
l Reversing involves twisting to look rearward
in a position that makes operation of the ped-
als more difficult. Make sure you are able to
depress the brake pedal.
Braking E00607001801
All the parts of the brake system are critical to safe-
ty. We recommend you to have the vehicle
checked at regular intervals according to the serv-
ice booklet.CAUTIONl Avoid driving habits that cause heavy
braking and never “ride” the brakes by
resting your foot on the brake pedal
while driving.
It causes brake overheating and fade.
Brake system
The service brake is divided into two brake cir-
cuits. And your vehicle is equipped with power
brakes. If one brake circuit fails, the other is availa-
ble to stop the vehicle. If you should lose the pow-
er assist for some reason, the brakes will still work.
In these situations, even if the brake pedal moves
down to the very end of its possible stroke or re-
sists being depressed, keep depressing the brake ped-
al down harder and further than usual; stop driving
as soon as possible and have the brake system re-
paired.
WARNINGl Do not turn off the engine while your ve-
hicle is in motion. If you turn off the en-
gine while driving, the power assistance
for the braking system will stop working
and your brakes will not work effectively.WARNINGl If the power assist is lost or if either
brake hydraulic system stops working
properly, have your vehicle checked im-
mediately.
Warning lamp
The brake warning lamp illuminates to indicate a
fault in the braking system. Read “Brake warning
lamp” on page 3-17.
When brakes are wet
Check the brake system while driving at a low
speed immediately after starting, especially when
the brakes are wet, to confirm they work normally.
A film of water can be formed on the brake discs
or brake drums and prevent normal braking after
driving in heavy rain or through large puddles, or
after the vehicle is washed. If this occurs, dry the
brakes out by driving slowly while lightly depress-
ing the brake pedal.
When driving downhill
It is important to take advantage of the engine brak-
ing by shifting to a lower shift position while driv-
ing on steep downhill roads in order to prevent the
brakes from overheating.
Starting and driving
4-25
4
Page 154 of 274
It is recommended that the refrigerant be recovered
and recycled for further use.
During a long period of disuse
The air conditioning should be operated for at least
five minutes each week, even in cold weather. This
is to prevent poor lubrication of the compressor in-
ternal parts and to maintain the air conditioning in
the best operating condition.Air purifier E00708400024
An air filter has been incorporated into this air con-
ditioning so that dirt and dust are cleaned from the
air.
Replace the air filter periodically as its ability to
clean the air will be reduced as it collects pollen
and dirt. For the maintenance interval, refer to the
“SERVICE BOOKLET”.
NOTE l Operation in certain conditions such as driv-
ing on a dusty road and frequent use of the
air conditioning can lead to reduction of serv-
ice life of the filter. When the air flow rate
suddenly drops or when the windscreen or
windows start to fog up easily, the air filter
requires replacement.
We recommend you to have it checked.LW/MW/FM electronic tuning
radio with CD player* E00708502175
The audio system can be used when the ignition
switch is in the “ON” or “ACC” position.
NOTE l To listen to the audio system while the en-
gine is stopped, turn the ignition key to the
“ACC” position.
For Clear Tec models, the audio system will
continue to operate if the ignition switch is in
the “ON” position when the engine stops au-
tomatically. However, in some cases, the au-
dio system may stop producing sound or turn
off.
l If a cellular phone is used inside the vehicle,
it may create noise from the audio equip-
ment. This does not mean that anything is
wrong with your audio equipment. In such a
case, use the cellular phone at a place as far
away as possible from the audio equipment.
l If foreign objects or water get into the audio
equipment, or if smoke or a strange odour
comes from it, immediately turn off the au-
dio system. We recommend you to have it
checked. Never try to repair it by yourself.
Avoid continuous usage without inspection
by a qualified person.
For pleasant driving
5-12
5