tow MITSUBISHI COLT 2011 Owner's Manual (in English)
[x] Cancel search | Manufacturer: MITSUBISHI, Model Year: 2011, Model line: COLT, Model: MITSUBISHI COLT 2011Pages: 274, PDF Size: 17.88 MB
Page 14 of 274
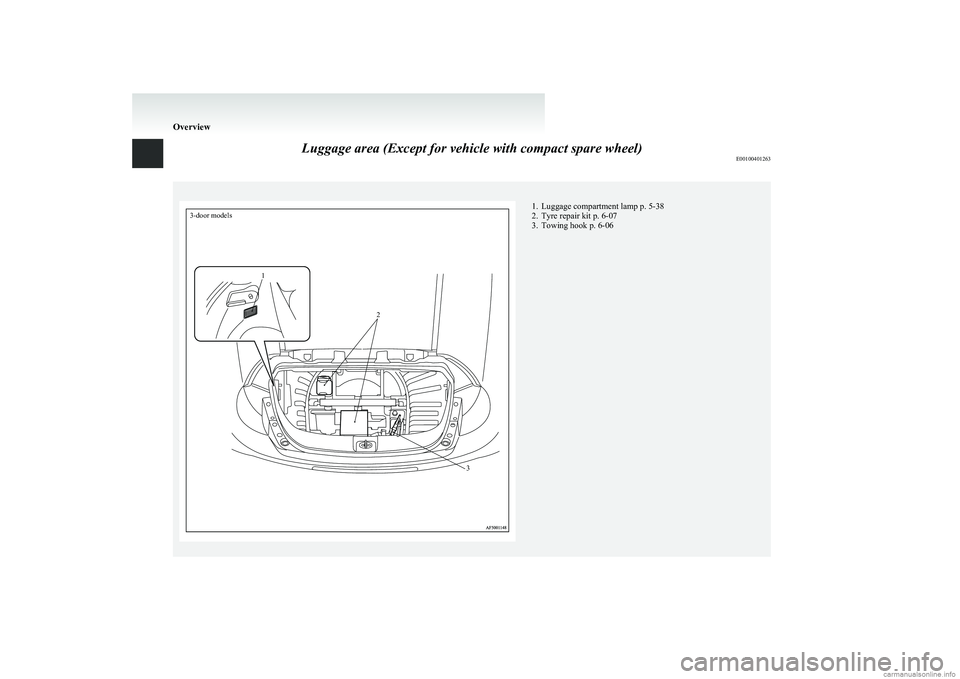
Luggage area (Except for vehicle with compact spare wheel)E00100401263
3-door models1231. Luggage compartment lamp p. 5-38
2. Tyre repair kit p. 6-07
3. Towing hook p. 6-06
Overview
Page 15 of 274
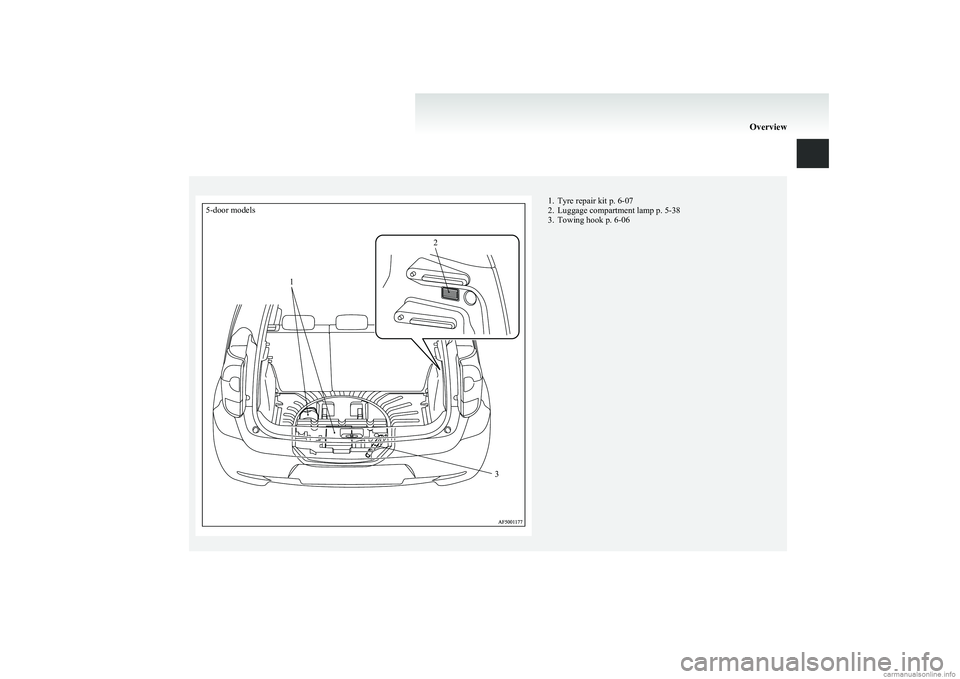
5-door models1231. Tyre repair kit p. 6-07
2. Luggage compartment lamp p. 5-38
3. Towing hook p. 6-06
Overview
Page 16 of 274
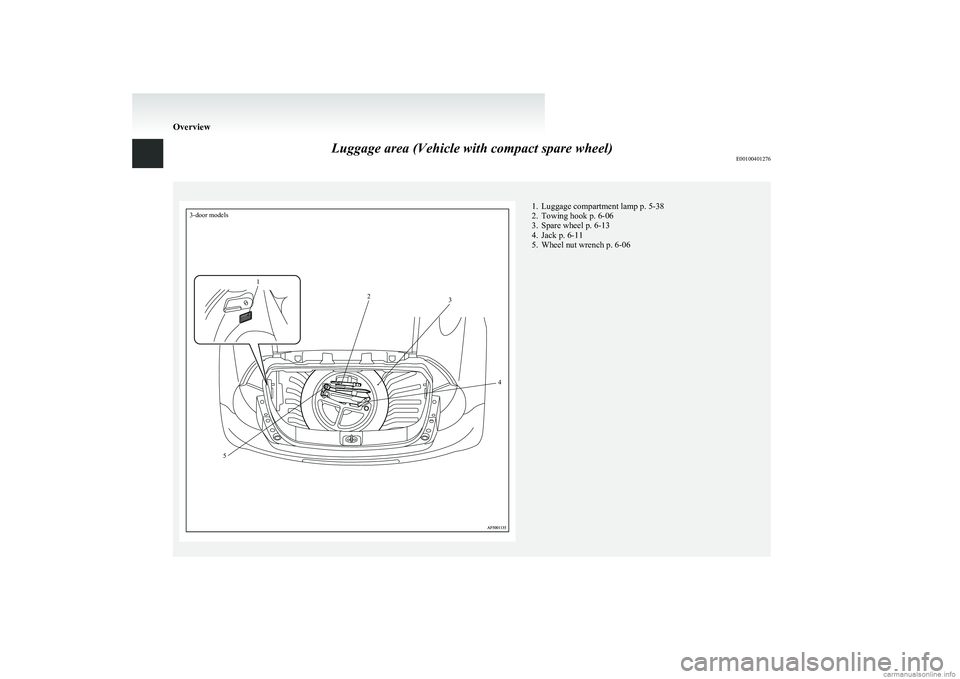
Luggage area (Vehicle with compact spare wheel)E00100401276
3-door models123451. Luggage compartment lamp p. 5-38
2. Towing hook p. 6-06
3. Spare wheel p. 6-13
4. Jack p. 6-11
5. Wheel nut wrench p. 6-06
Overview
Page 17 of 274
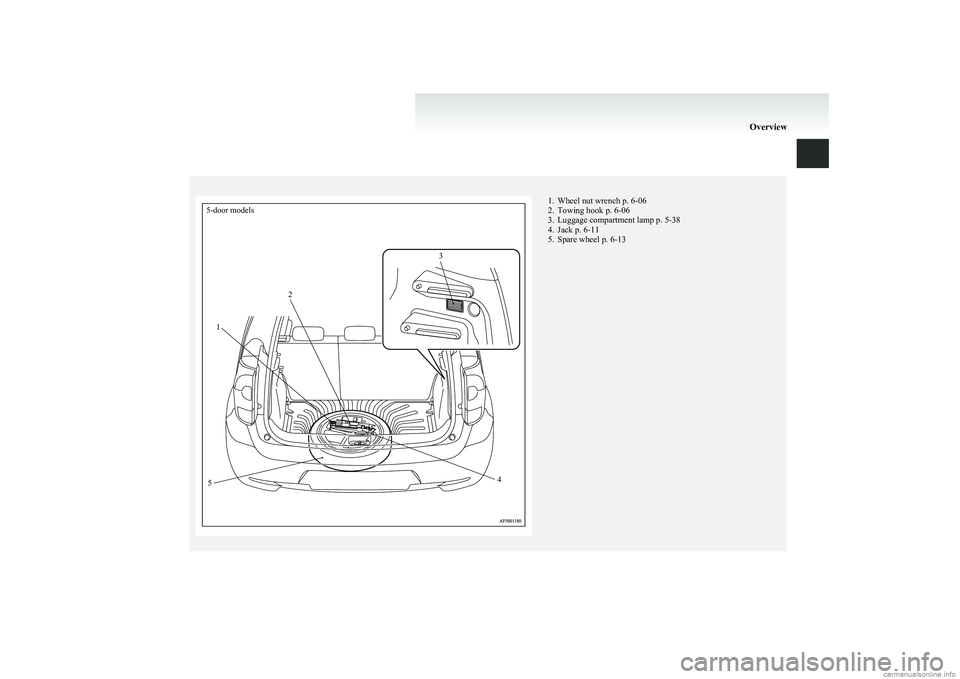
5-door models123451. Wheel nut wrench p. 6-06
2. Towing hook p. 6-06
3. Luggage compartment lamp p. 5-38
4. Jack p. 6-11
5. Spare wheel p. 6-13
Overview
Page 32 of 274
NOTEl If the UNLOCK switch (2) is pressed and
any of the doors or tailgate is not opened with-
in approximately 30 seconds: relocking will
automatically occur.
l It is possible to modify functions as follows:
For further information, contact your
MITSUBISHI MOTORS Authorized Service
Point. •The time from pressing the UNLOCK
switch (2) to the moment of automatic
locking can be changed.
• The confirmation function (flashing of
the turn-signal lamps) can be set to oper-
ate only when the doors and tailgate are
locked or only when the doors and tail-
gate are unlocked.
• The confirmation function (this indicates
locking or unlocking of the doors and tail-
gate with the flash of the turn-signal
lamps) can be deactivated.
• The number of times the turn-signal
lamps are flashed by the confirmation
function can be changed.
Operation of the Dead Lock System
With a vehicle that has a Dead Lock System, it is
possible to set the Dead Lock System using the re-
mote controller.
(Refer to “Dead Lock System” on page 1-07.)
NOTE l With a vehicle that has a Dead Lock System,
the keyless entry system does not work while
the key is in the ignition switch.l Pressing the LOCK switch (1) has no effect
(no locking takes place) while a door or the
tailgate is open.
l The remote control switch will operate with-
in about 4 m from the vehicle. However, the
operating range of the remote control switch
may change if the vehicle is located near a
TV transmitting tower, power station, or ra-
dio broadcasting station.
l If the turn-signal lamps flash nine times
when you press the remote control switch,
the battery may have run down. For further
information, please consult your
MITSUBISHI MOTORS Authorized Service
Point.
If you replace the battery yourself, refer to
“ Procedure for replacing the remote control
switch battery” on page 1-04.
l If your remote control switch is lost or dam-
aged, please contact your MITSUBISHI
MOTORS Authorized Service Point for a re-
placement remote control switch.
l If you wish to add a remote control switch,
we recommend you to contact your
MITSUBISHI MOTORS Authorized Service
Point.
A maximum of 8 remote control switches are
available for your vehicle.Procedure for replacing the remote
control switch battery E00309500031
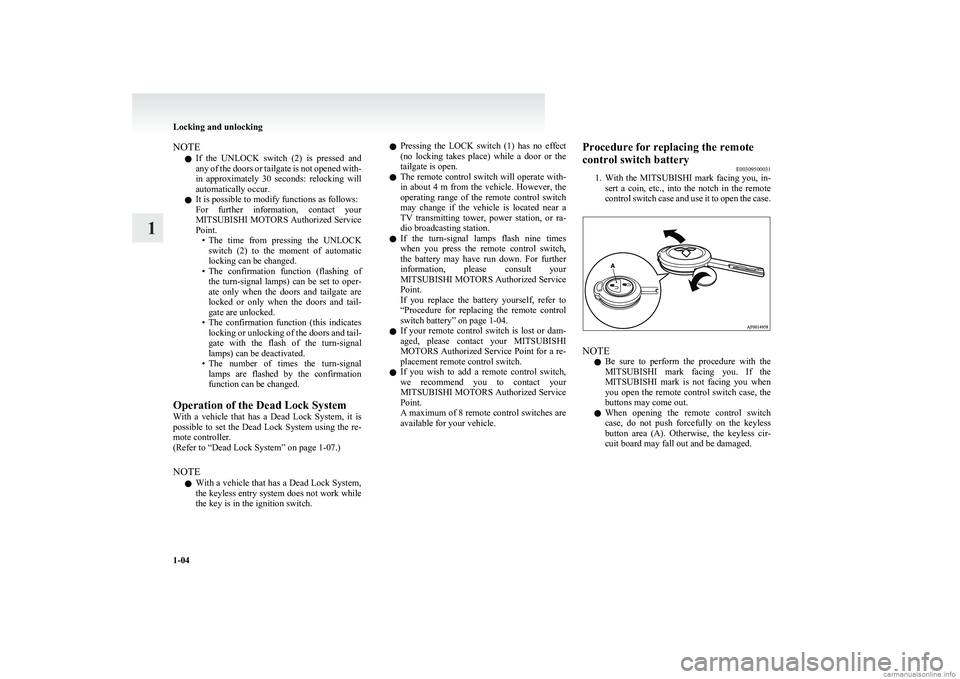
1. With the MITSUBISHI mark facing you, in-
sert a coin, etc., into the notch in the remote
control switch case and use it to open the case.
NOTE
l Be sure to perform the procedure with the
MITSUBISHI mark facing you. If the
MITSUBISHI mark is not facing you when
you open the remote control switch case, the
buttons may come out.
l When opening the remote control switch
case, do not push forcefully on the keyless
button area (A). Otherwise, the keyless cir-
cuit board may fall out and be damaged.
Locking and unlocking
1-04
1
Page 34 of 274
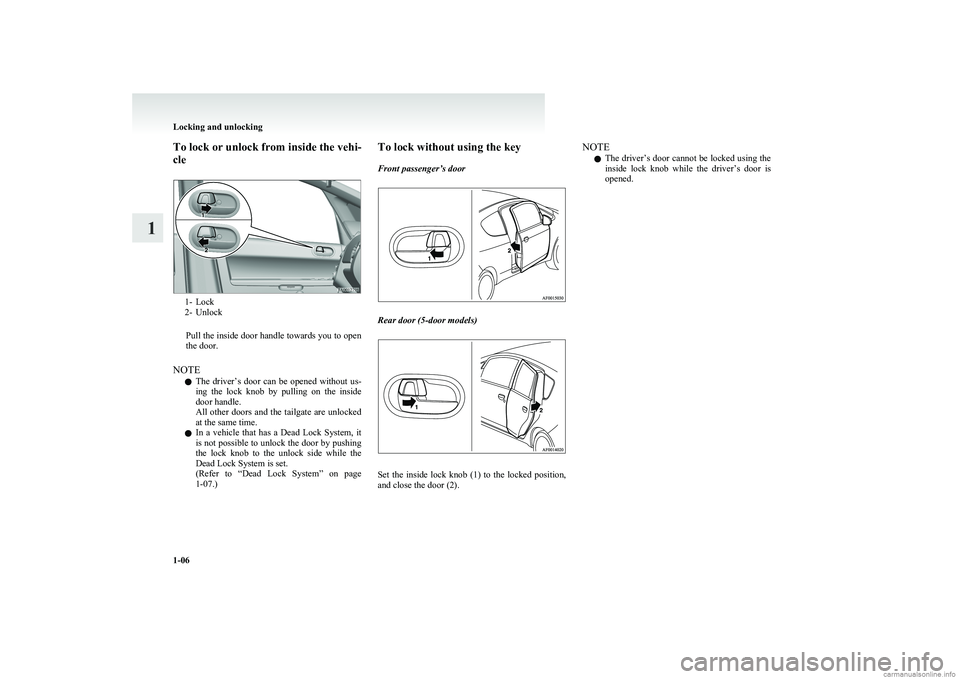
To lock or unlock from inside the vehi-
cle
1- Lock
2- Unlock
Pull the inside door handle towards you to open
the door.
NOTE l The driver’s door can be opened without us-
ing the lock knob by pulling on the inside
door handle.
All other doors and the tailgate are unlocked
at the same time.
l In a vehicle that has a Dead Lock System, it
is not possible to unlock the door by pushing
the lock knob to the unlock side while the
Dead Lock System is set.
( Refer to “Dead Lock System” on page
1-07.)
To lock without using the key
Front passenger’s door
Rear door (5-door models)
Set the inside lock knob (1) to the locked position,
and close the door (2).
NOTE
l The driver’s door cannot be locked using the
inside lock knob while the driver’s door is
opened.
Locking and unlocking
1-06
1
Page 35 of 274
Central door locksE00300801445
NOTE l Each of the doors can be locked or unlocked
independently by using the inside lock knob.
l Repeated continuous operation between lock
and unlock could activate the central door
locking systems built-in protection circuit
and prevent the system from operating.
If this occurs, wait about 1 minute before op-
erating the inside lock knob or the key.
All of the doors and the tailgate can be locked and
unlocked as described hereafter.
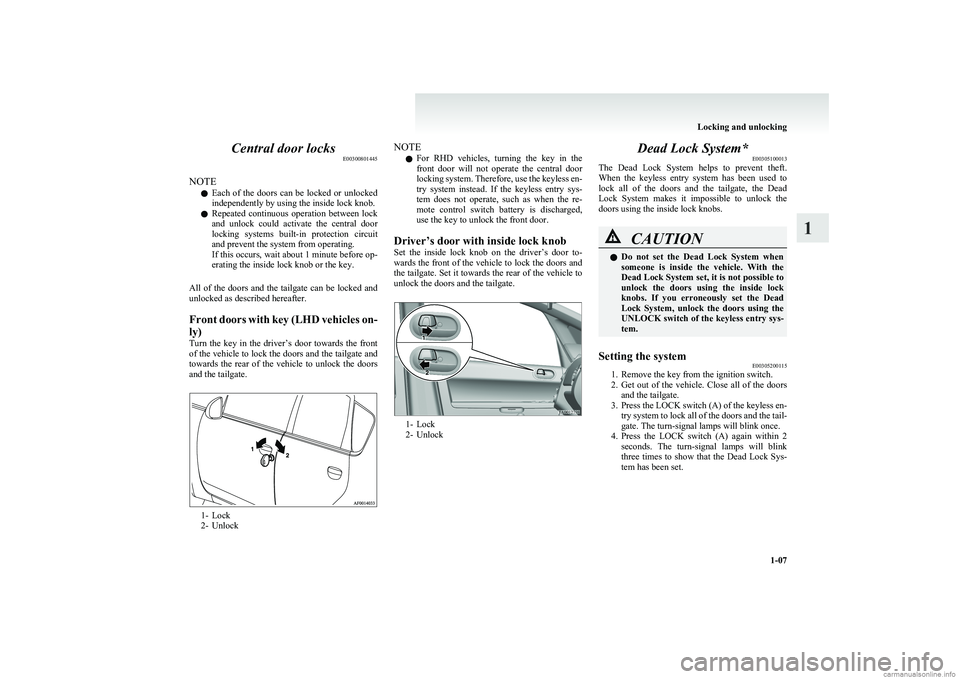
Front doors with key (LHD vehicles on-
ly)
Turn the key in the driver’s door towards the front
of the vehicle to lock the doors and the tailgate and
towards the rear of the vehicle to unlock the doors
and the tailgate.
1- Lock
2- Unlock
NOTE
l For RHD vehicles, turning the key in the
front door will not operate the central door
locking system. Therefore, use the keyless en-
try system instead. If the keyless entry sys-
tem does not operate, such as when the re-
mote control switch battery is discharged,
use the key to unlock the front door.
Driver’s door with inside lock knob
Set the inside lock knob on the driver’s door to-
wards the front of the vehicle to lock the doors and
the tailgate. Set it towards the rear of the vehicle to
unlock the doors and the tailgate.
1- Lock
2- Unlock
Dead Lock System* E00305100013
The Dead Lock System helps to prevent theft.
When the keyless entry system has been used to
lock all of the doors and the tailgate, the Dead
Lock System makes it impossible to unlock the
doors using the inside lock knobs.CAUTIONl Do not set the Dead Lock System when
someone is inside the vehicle. With the
Dead Lock System set, it is not possible to
unlock the doors using the inside lock
knobs. If you erroneously set the Dead
Lock System, unlock the doors using the
UNLOCK switch of the keyless entry sys-
tem.Setting the system E00305200115
1. Remove the key from the ignition switch.
2. Get out of the vehicle. Close all of the doors
and the tailgate.
3. Press the LOCK switch (A) of the keyless en-
try system to lock all of the doors and the tail-
gate. The turn-signal lamps will blink once.
4. Press the LOCK switch (A) again within 2
seconds. The turn-signal lamps will blink
three times to show that the Dead Lock Sys-
tem has been set.
Locking and unlocking
1-07
1
Page 43 of 274
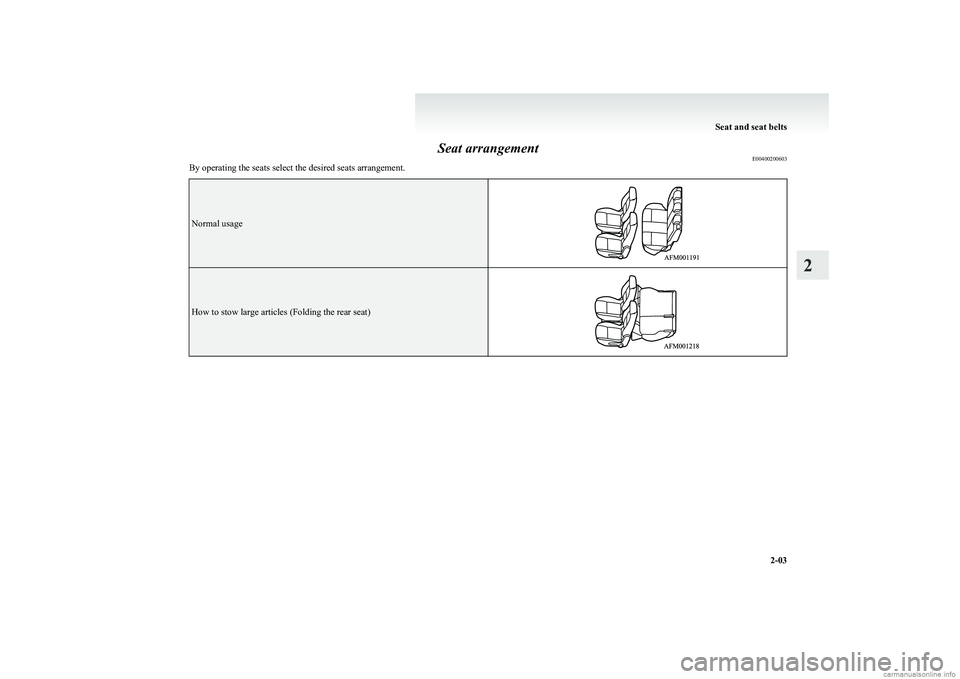
Seat arrangementE00400200603
By operating the seats select the desired seats arrangement.
Normal usageHow to stow large articles (Folding the rear seat)Seat and seat belts
2-03
2
Page 51 of 274
CAUTIONlThe seat belts must not be twisted when
worn.
3. Pull the belt slightly to adjust slackness as de-
sired.
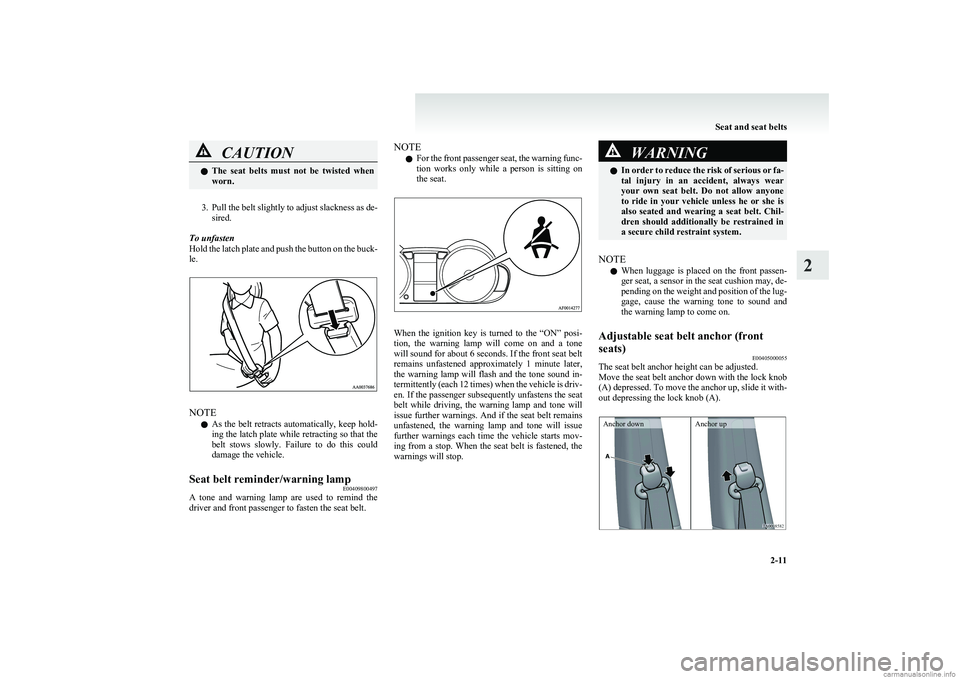
To unfasten
Hold the latch plate and push the button on the buck-
le.
NOTE
l As the belt retracts automatically, keep hold-
ing the latch plate while retracting so that the
belt stows slowly. Failure to do this could
damage the vehicle.
Seat belt reminder/warning lamp E00409800497
A tone and warning lamp are used to remind the
driver and front passenger to fasten the seat belt.
NOTE
l For the front passenger seat, the warning func-
tion works only while a person is sitting on
the seat.
When the ignition key is turned to the “ON” posi-
tion, the warning lamp will come on and a tone
will sound for about 6 seconds. If the front seat belt
remains unfastened approximately 1 minute later,
the warning lamp will flash and the tone sound in-
termittently (each 12 times) when the vehicle is driv-
en. If the passenger subsequently unfastens the seat
belt while driving, the warning lamp and tone will
issue further warnings. And if the seat belt remains
unfastened, the warning lamp and tone will issue
further warnings each time the vehicle starts mov-
ing from a stop. When the seat belt is fastened, the
warnings will stop.
WARNINGl In order to reduce the risk of serious or fa-
tal injury in an accident, always wear
your own seat belt. Do not allow anyone
to ride in your vehicle unless he or she is
also seated and wearing a seat belt. Chil-
dren should additionally be restrained in
a secure child restraint system.
NOTE
l When luggage is placed on the front passen-
ger seat, a sensor in the seat cushion may, de-
pending on the weight and position of the lug-
gage, cause the warning tone to sound and
the warning lamp to come on.
Adjustable seat belt anchor (front
seats) E00405000055
The seat belt anchor height can be adjusted.
Move the seat belt anchor down with the lock knob
(A) depressed. To move the anchor up, slide it with-
out depressing the lock knob (A).
Anchor downAnchor up
Seat and seat belts
2-11
2
Page 92 of 274
CAUTIONFurthermore, the vehicle
should be brought immediately
to a stop in a safe location and
we recommend you to have it
checked. •The brake warning lamp
does not illuminate when
the parking brake is applied
or does not turn off when
the parking brake is re-
leased.
• The ABS warning lamp and
brake warning lamp illumi-
nate at the same time.
For details, refer to “ABS
warning lamp” on page
4-28.
• The brake warning lamp re-
mains illuminated during
driving.
l The vehicle should be brought
to a halt in the following man-
ner when brake performance
has deteriorated. •Depress the brake pedal
harder than usual.
Even if the brake pedal
moves down to the very end
of its possible stroke, keep it
pressed down hard.CAUTION• Should the brakes fail, use
engine braking to reduce
your speed and pull the park-
ing brake lever.
Depress the brake pedal to
operate the stop lamp to
alert the vehicles behind you.Check engine warning lamp E00502601683
This lamp is a part of an onboard diag-
nostic system which monitors the emis-
sions, engine or automated manual trans-
mission control system/AS&G control
system.
If a problem is detected in one of these
systems, this lamp illuminates and a buz-
zer sounds.
Although your vehicle will usually be
drivable and not need towing, we recom-
mend you to have the system checked as
soon as possible.
This lamp will also illuminate for a few
seconds when the ignition switch is
turned to the “ON” position. If it does
not go off after a few seconds, we recom-
mend you to have the vehicle checked.CAUTIONl Prolonged driving with this
lamp on may cause further dam-
age to the emission control sys-
tem. It could also affect fuel
economy and drivability.
l If the lamp does not illuminate
when the ignition switch is
turned to the “ON” position,
we recommend you to have the
system checked.
l If the lamp illuminates while
the engine is running, avoid
driving at high speeds and we
recommend you to have the sys-
tem checked.
During vehicle operation with
the lamp illuminated, the vehi-
cle may not accelerate when
you depress the accelerator ped-
al.
NOTE
l The engine electronic control mod-
ule accommodating the onboard di-
agnostic system has various fault
data (especially about the exhaust
emission) stored.
This data will be erased if a bat-
tery cable is disconnected which
will make a rapid diagnosis diffi-
cult. Do not disconnect a battery
cable when the check engine warn-
ing lamp is ON.
Instruments and controls
3-18
3