ECO mode MITSUBISHI ECLIPSE CROSS 2018 (in English) Workshop Manual
[x] Cancel search | Manufacturer: MITSUBISHI, Model Year: 2018, Model line: ECLIPSE CROSS, Model: MITSUBISHI ECLIPSE CROSS 2018Pages: 417, PDF Size: 74.06 MB
Page 185 of 417
Forward Collision Mitigation sy
stem (FCM) (if so equipped)
5-106 Features and controls
5
N00595200025
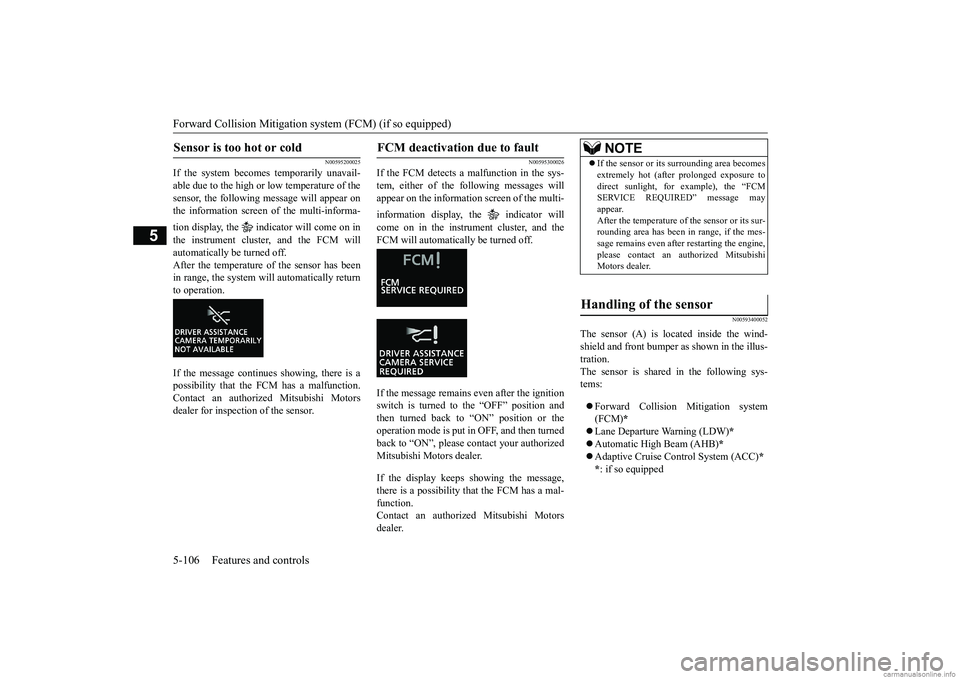
If the system becomes temporarily unavail- able due to the high or
low temperature of the
sensor, the following message will appear on the information screen of the multi-informa- tion display, the indicator will come on in the instrument cluster, and the FCM will automatically be turned off. After the temperature of the sensor has been in range, the system will automatically returnto operation. If the message continues showing, there is a possibility that the FCM has a malfunction. Contact an authorized Mitsubishi Motorsdealer for inspection of the sensor.
N00595300026
If the FCM detects a malfunction in the sys-tem, either of the following messages willappear on the information screen of the multi- information display, the indicator will come on in the instrument cluster, and the FCM will automatically be turned off. If the message remains even after the ignition switch is turned to the “OFF” position and then turned back to “ON” position or the operation mode is put in OFF, and then turnedback to “ON”, please contact your authorized Mitsubishi Motors dealer. If the display keeps showing the message, there is a possibility that the FCM has a mal-function. Contact an authorized Mitsubishi Motors dealer.
N00593400052
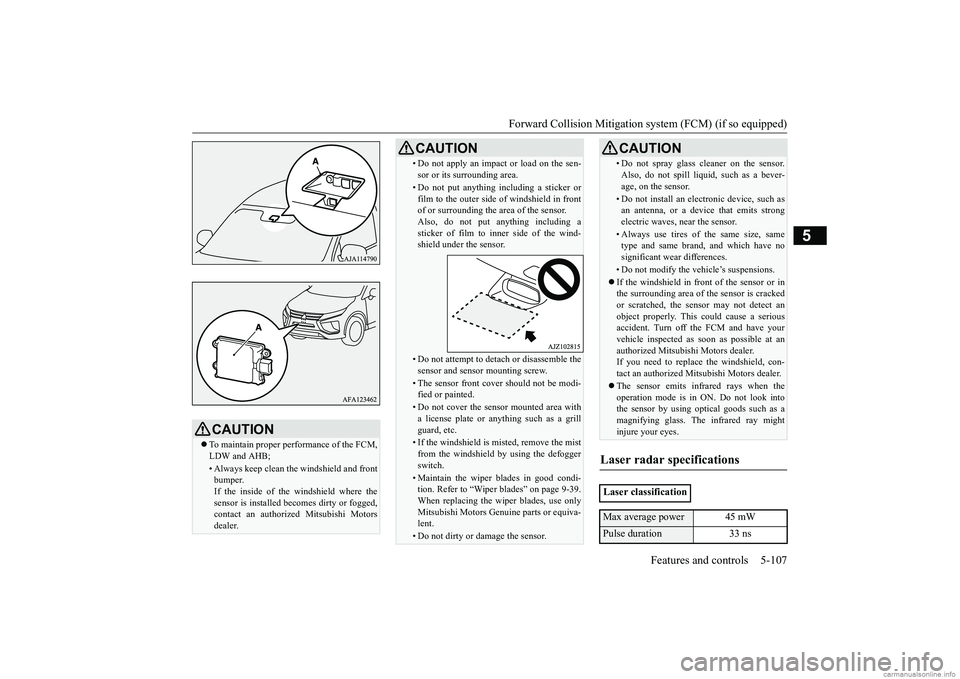
The sensor (A) is located inside the wind- shield and front bumper
as shown in the illus-
tration.The sensor is shared in the following sys- tems: Forward Collision Mitigation system (FCM)
*
Lane Departure Warning (LDW)
*
Automatic High Beam (AHB)
*
Adaptive Cruise Control System (ACC)
*
* : if so equipped
Sensor is too hot or cold
FCM deactivation due to fault
NOTE
If the sensor or its surrounding area becomes extremely hot (after prolonged exposure to direct sunlight, for example), the “FCM SERVICE REQUIRED” message may appear.After the temperature of the sensor or its sur- rounding area has been in range, if the mes- sage remains even after restarting the engine,please contact an authorized Mitsubishi Motors dealer.
Handling of the sensor
BK0252700US.book
106 ページ 2017年10月4日 水曜日 午後4時54分
Page 186 of 417
Forward Collision Mitigation sy
stem (FCM) (if so equipped) Features and controls 5-107
5
CAUTION To maintain proper performance of the FCM, LDW and AHB;• Always keep clean the windshield and frontbumper.If the inside of the windshield where the sensor is installed becomes dirty or fogged, contact an authorized Mitsubishi Motorsdealer.
• Do not apply an impact or load on the sen- sor or its surrounding area.• Do not put anything including a sticker or film to the outer side of windshield in frontof or surrounding the area of the sensor. Also, do not put anything including a sticker of film to inner side of the wind-shield under the sensor.• Do not attempt to detach or disassemble thesensor and sensor mounting screw.• The sensor front cover should not be modi-fied or painted.• Do not cover the sensor mounted area witha license plate or anything such as a grill guard, etc.• If the windshield is misted, remove the mistfrom the windshield by using the defogger switch.• Maintain the wiper blades in good condi-tion. Refer to “Wiper blades” on page 9-39. When replacing the wiper blades, use only Mitsubishi Motors Genuine parts or equiva-lent.• Do not dirty or damage the sensor.CAUTION
• Do not spray glass cleaner on the sensor. Also, do not spill liquid, such as a bever- age, on the sensor.• Do not install an electronic device, such asan antenna, or a device that emits strong electric waves, near the sensor.• Always use tires of the same size, sametype and same brand, and which have no significant wear differences.• Do not modify the vehicle’s suspensions. If the windshield in front of the sensor or in the surrounding area of the sensor is cracked or scratched, the sensor may not detect anobject properly. This could cause a serious accident. Turn off the FCM and have your vehicle inspected as soon as possible at anauthorized Mitsubishi Motors dealer. If you need to replace the windshield, con- tact an authorized Mitsubishi Motors dealer. The sensor emits infrared rays when the operation mode is in ON. Do not look intothe sensor by using opt
ical goods such as a
magnifying glass. The infrared ray might injure your eyes.
Laser radar specifications
Laser classificationMax average power 45 mWPulse duration 33 ns
CAUTION
BK0252700US.book
107 ページ 2017年10月4日 水曜日 午後4時54分
Page 188 of 417
Blind Spot Warning (BSW) (with Lane
Change Assist) (if so equipped) Features and controls 5-109
5
N00593500053
When the ignition switch is turned to the “ON” position or the operation mode is put in
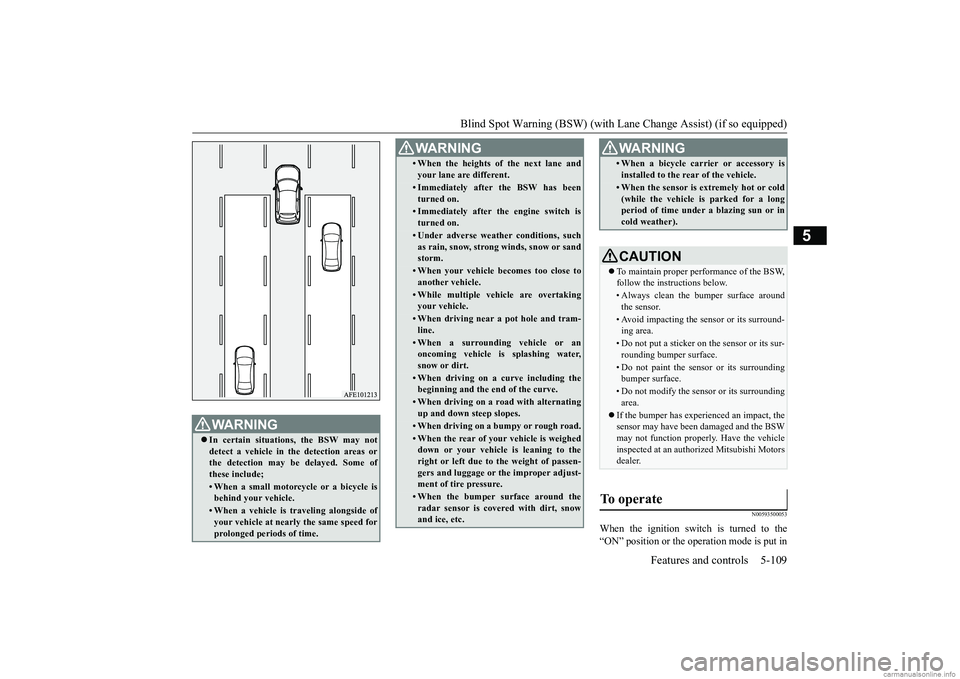
WA R N I N G In certain situations, the BSW may not detect a vehicle in the detection areas orthe detection may be delayed. Some of these include;• When a small motorcycle or a bicycle isbehind your vehicle.• When a vehicle is traveling alongside ofyour vehicle at nearly the same speed for prolonged periods of time.
• When the heights of the next lane and your lane are different.• Immediately after the BSW has been turned on.• Immediately after the engine switch isturned on.• Under adverse weather conditions, suchas rain, snow, strong winds, snow or sandstorm.• When your vehicle becomes too close toanother vehicle.• While multiple vehicle are overtakingyour vehicle.• When driving near a pot hole and tram-line.• When a surrounding vehicle or anoncoming vehicle is splashing water, snow or dirt.• When driving on a curve including thebeginning and the end of the curve.• When driving on a road with alternatingup and down steep slopes.• When driving on a bumpy or rough road.• When the rear of your vehicle is weighed down or your vehicle is leaning to the right or left due to the weight of passen- gers and luggage or the improper adjust- ment of tire pressure. • When the bumper surface around theradar sensor is covered with dirt, snow and ice, etc.WA R N I N G
• When a bicycle carrier or accessory is installed to the rear of the vehicle.• When the sensor is extremely hot or cold (while the vehicle is parked for a longperiod of time under a blazing sun or in cold weather).CAUTION To maintain proper performance of the BSW, follow the instructions below.• Always clean the bumper surface aroundthe sensor.• Avoid impacting the sensor or its surround-ing area.• Do not put a sticker on the sensor or its sur-rounding bumper surface.• Do not paint the sensor or its surroundingbumper surface.• Do not modify the sensor or its surroundingarea.
If the bumper has experienced an impact, the sensor may have been damaged and the BSWmay not function properly. Have the vehicle inspected at an authorized Mitsubishi Motors dealer.
To operate
WA R N I N G
BK0252700US.book
109 ページ 2017年10月4日 水曜日 午後4時54分
Page 193 of 417
Rear Cross Traffic Alert (RCTA) (if so equipped)
5-114 Features and controls
5
1. Press the BSW switch while the operationmode is put in ON.
(Refer to “Blind Spot Warning (BSW): To
operate” on page 5-109.)
2. When the selector lever is moved to the
“R” (REVERSE) position, the RCTA will
operate.
If the system detects a problem, a warning is
displayed on the information screen in the
multi-information display.
Refer to “Blind Spot Warning (BSW): Sys-
tem problem warning” on page 5-111.
N00594000055
For vehicles sold in U.S.A.
FCC ID: OAYSRR3A
This device complies with Part 15 of FCC
Rules.
Operation is subject to the following two con-
ditions:
For vehicles sold in Canada
Applicable law: Canada 310
This device complies with Industry Canada
licence-exempt RSS standard(s).
Operation is subject to the following two con-
ditions:
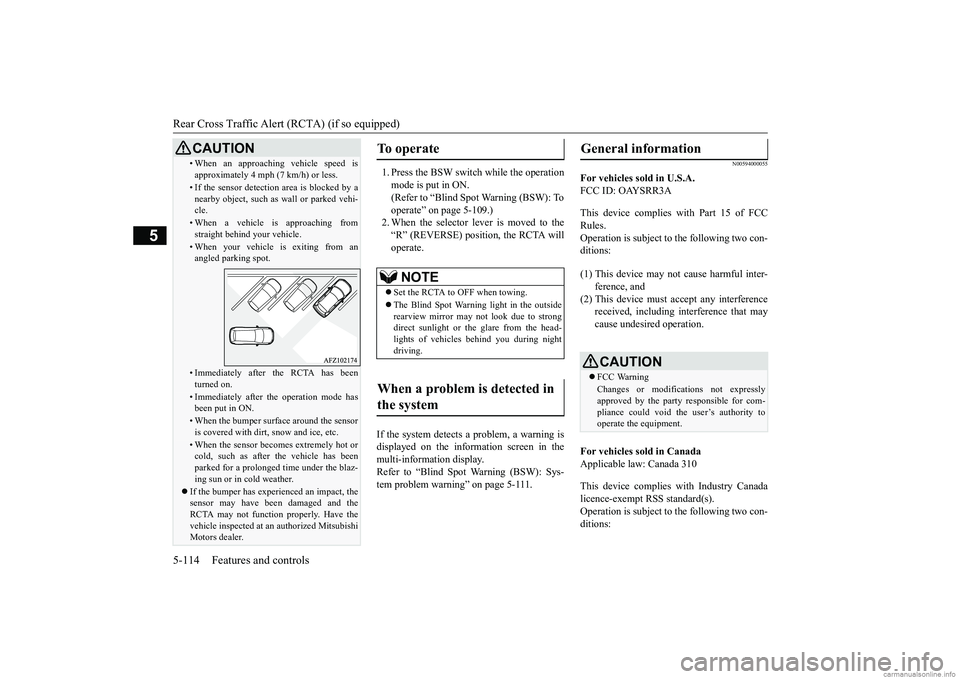
• When an approaching vehicle speed is approximately 4 mph (7 km/h) or less.• If the sensor detection area is blocked by anearby object, such as wall or parked vehi-
cle.• When a vehicle is approaching fromstraight behind your vehicle.• When your vehicle is exiting from anangled parking spot.• Immediately after the RCTA has beenturned on.• Immediately after the operation mode hasbeen put in ON.• When the bumper surface around the sensoris covered with dirt, snow and ice, etc.• When the sensor becomes extremely hot orcold, such as after the vehicle has been
parked for a prolonged time under the blaz-
ing sun or in cold weather. If the bumper has experienced an impact, the
sensor may have been damaged and the
RCTA may not function properly. Have the
vehicle inspected at an authorized Mitsubishi
Motors dealer.CAUTION
To operate
NOTE
Set the RCTA to OFF when towing.
The Blind Spot Warning light in the outside
rearview mirror may not look due to strong
direct sunlight or the glare from the head-
lights of vehicles behind you during night
driving.When a problem is detected in
the system
General information
(1) This device may not cause harmful inter-
ference, and
(2) This device must accept any interference received, including interference that may
cause undesired operation.
CAUTIONFCC WarningChanges or modifications not expressly
approved by the party responsible for com-
pliance could void the user’s authority to
operate the equipment.
BK0252700US.book 114 ページ 2017年10月12日 木曜日 午後1時2分
Page 198 of 417
Tire pressure monitoring system (TPMS)
Features and controls 5-119
5
N00532701389
When the ignition switch is turned to the “ON” position or the operation mode is put inON, the tire pressure monitoring system
warning light normally illuminates and goes off a few seconds later. If one or more of the vehicle tires (except for the spare tire) is significantly under-inflated, the warning light will remain illuminatedwhile the ignition switch is in the “ON” posi- tion or the operation mode is put in ON. Refer to “If the warning light / display illumi-nates while driving” on page 5-120 and take the necessary measures.
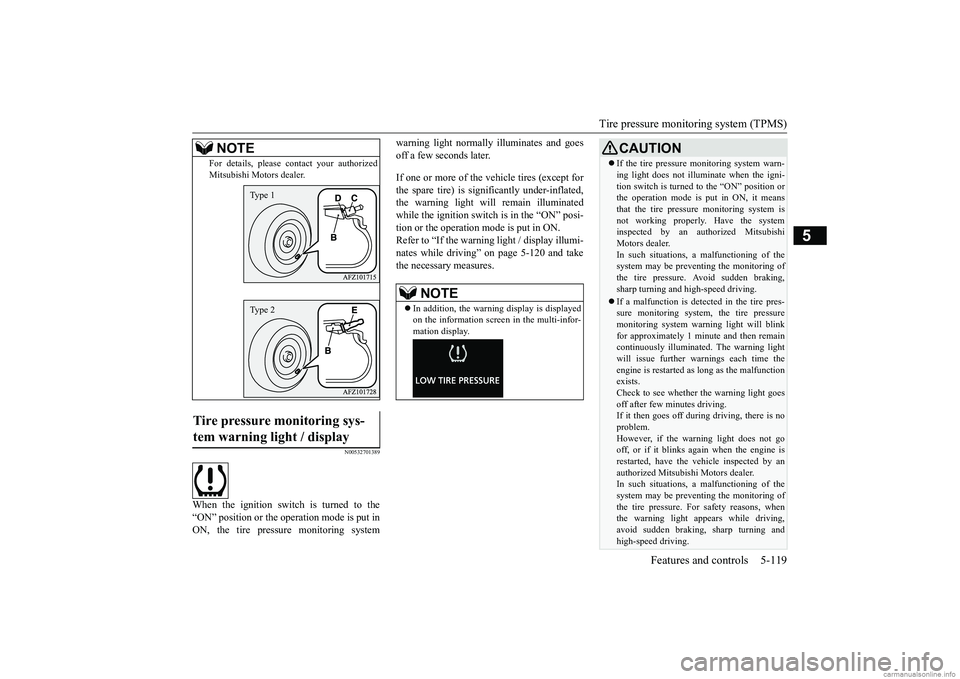
For details, please contact your authorized Mitsubishi Motors dealer.
Tire pressure monitoring sys- tem warning light / display
NOTE
Type 1Type 2
NOTE
In addition, the warning display is displayed on the information screen in the multi-infor- mation display.
CAUTION If the tire pressure monitoring system warn- ing light does not illuminate when the igni- tion switch is turned to the “ON” position or the operation mode is put in ON, it means that the tire pressure monitoring system isnot working properly. Have the system inspected by an authorized Mitsubishi Motors dealer.In such situations,
a malfunctioning of the
system may be preventing the monitoring of the tire pressure. Avoid sudden braking,sharp turning and high-speed driving. If a malfunction is detected in the tire pres- sure monitoring system, the tire pressure monitoring system warning light will blink for approximately 1 minute and then remaincontinuously illuminated. The warning light will issue further warn
ings each time the
engine is restarted as long as the malfunctionexists. Check to see whether the warning light goes off after few minutes driving.If it then goes off during driving, there is no problem. However, if the warning light does not gooff, or if it blinks again when the engine is restarted, have the vehicle inspected by an authorized Mitsubishi Motors dealer. In such situations,
a malfunctioning of the
system may be preventing the monitoring ofthe tire pressure. For safety reasons, when the warning light appears while driving, avoid sudden braking, sharp turning andhigh-speed driving.
BK0252700US.book
119 ページ 2017年10月4日 水曜日 午後4時54分
Page 205 of 417
Parking sensors (Front/Rear) (if so equipped) 5-126 Features and controls
5
Front and corner sensor Back sensor (When the “normal mode” is selected)
Back sensor (When the “Towing hitch mode” is selected)
N00590100045
If your vehicle is equipped with a towinghitch and part of the towing hitch is close tothe center sensors (e. g. European type towing hitch), the center sensor may detect the tow- ing hitch and alarm beeps may sound thoughthere is no obstacle behind the vehicle. To avoid this detection, the parking sensors can be switched to the towing hitch mode. To switch to the towing hitch mode; While the selector lever is in the “R”(REVERSE) position, turn off the parking sensors by pressing the “SONAR” switch, then press and hold the “SONAR” switchapproximately 3 seconds or more and release it. A buzzer will sound twice to indicate the detection mode is switched to the towinghitch mode. To turn on the parking sensors, press the “SONAR” switch again. To return to the normal mode; While the selector lever is in the “R”(REVERSE) position, turn off the parking sensors by pressing the “SONAR” switch, then press and hold the “SONAR” switchapproximately 3 seconds or more and release it. A buzzer will sound once to indicate the detection mode is returned to the normalmode. To turn on the parking sensors, press the “SONAR” switch again.
Distance to an
obstacle
War n i n g d i s -play/sound cycle
Approximately 24 to 16 inches (60 to 40
cm)
Intermittent
Approximately 16 to 12 inches (40 to 30
cm)
Fast intermittent
Within approxi- mately 12 inches
(30 cm)
Continuous
Distance to an
obstacle
War n i n g d i s -play/sound cycle
Approximately 49 to 32 inches (125 to
80 cm)
Intermittent
Approximately 32 to 16 inches (80 to 40
cm)
Fast intermittent
Within approxi- mately 16 inches
(40 cm)
Continuous
Distance to an
obstacle
War n i n g d i s -play/sound cycle
Approximately 49 to 40 inches (125 to
100 cm)
Intermittent
Approximately 40 to 24 inches (100 to
60 cm)
Fast intermittent
Within approxi- mately 24 inches
(60 cm)
Continuous
CAUTION The distances are for reference only. The actual distance may vary due to various fac-tors, such as the temperature, humidity or the shape of the object being detected.NOTE
When more than one object is detected, all indicators corresponding to the sensors detecting the objects will be blinking in the multi-information display and a buzzer willsound according to the closest object.
Changing the detection mode
BK0252700US.book
126 ページ 2017年10月4日 水曜日 午後4時54分
Page 206 of 417
Rear-view camera
Features and controls 5-127
5
N00590200046
If the system detects a problem with a sensor, a warning is displayed in the multi-informa- tion display and a buzzer will sound forapproximately five seconds.
Also, the indicator light (A) on the “SONAR” switch will continue blinking until the sensor resumes functioning. Have the vehicle inspected at an authorizedMitsubishi Motors dealer or a repair facility of your choice.
N00546201330
When the selector lever is in the “R” (REVERSE) position with the ignition switch in the “ON” position, or the operation mode is put in ON, the rear-view image will be dis-played on the screen of the Smartphone Link Display Audio. When the selector lever is shifted out of the“R” (REVERSE) position, the rear-view image will go off.
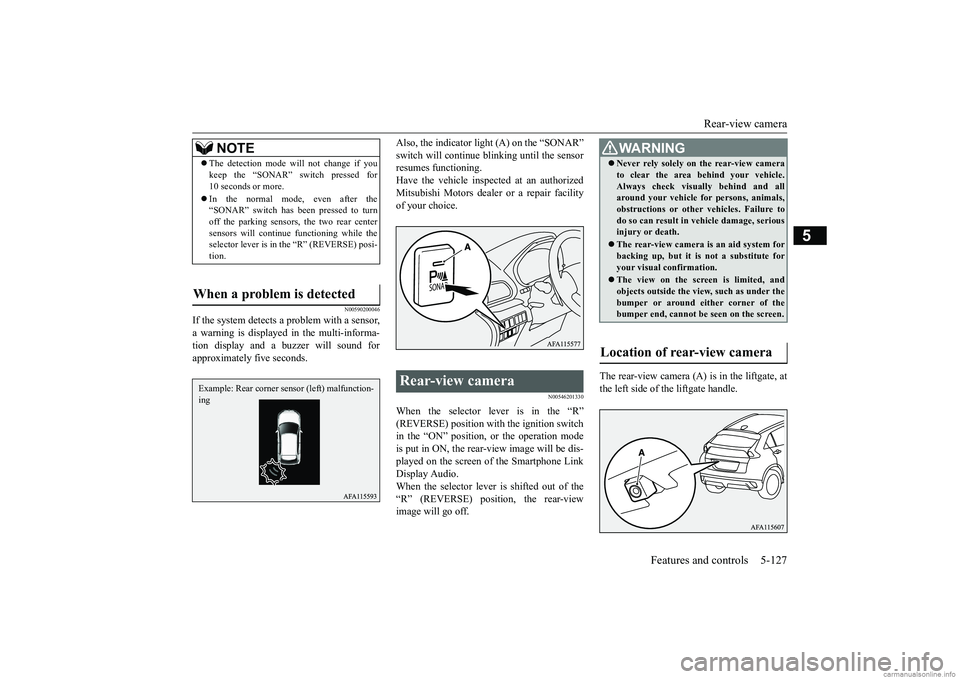
The rear-view camera (A) is in the liftgate, at the left side of the liftgate handle.
NOTE
The detection mode will not change if you keep the “SONAR” switch pressed for 10 seconds or more. In the normal mode, even after the “SONAR” switch has been pressed to turn off the parking sensors, the two rear center sensors will continue functioning while theselector lever is in the “R” (REVERSE) posi- tion.
When a problem is detected
Example: Rear corner sensor (left) malfunction- ing
Rear-view camera
WA R N I N G Never rely solely on the rear-view camera to clear the area behind your vehicle. Always check visually behind and all around your vehicle for persons, animals, obstructions or other vehicles. Failure todo so can result in vehicle damage, serious injury or death. The rear-view camera is an aid system for backing up, but it is not a substitute for your visual confirmation. The view on the screen is limited, and objects outside the view, such as under thebumper or around either corner of the bumper end, cannot be seen on the screen.
Location of rear-view camera
BK0252700US.book
127 ページ 2017年10月4日 水曜日 午後4時54分
Page 212 of 417
Multi Around Monitor (if so equipped)
Features and controls 5-133
5
N00587500058
The Multi Around Monitor can only be used when the operation mode is put in ON. When you move the selector lever to the “R” (REVERSE) position, the wide-rear-view isdisplayed on the Smartphone Link Display Audio. When you move the selector lever to any other position, the display disappears.
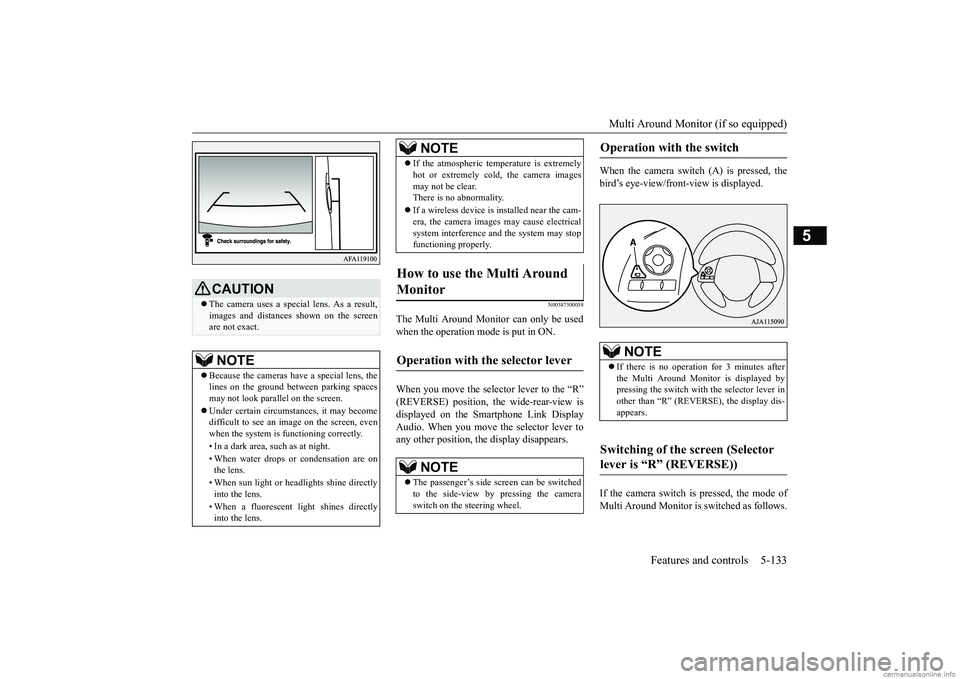
When the camera switch (A) is pressed, the bird’s eye-view/front-view is displayed. If the camera switch is pressed, the mode of Multi Around Monitor is switched as follows.
CAUTION The camera uses a special lens. As a result, images and distances shown on the screen are not exact.NOTE
Because the cameras have a special lens, the lines on the ground between parking spacesmay not look parallel on the screen. Under certain circumstances, it may become difficult to see an image on the screen, even when the system is functioning correctly. • In a dark area, such as at night. • When water drops or condensation are on the lens. • When sun light or headlights shine directly into the lens. • When a fluorescent light shines directly into the lens.
If the atmospheric temperature is extremely hot or extremely cold, the camera images may not be clear. There is no abnormality. If a wireless device is installed near the cam- era, the camera images may cause electrical system interference and the system may stopfunctioning properly.
How to use the Multi Around Monitor
Operation with the selector lever
NOTE
The passenger’s side screen can be switched to the side-view by pressing the cameraswitch on the steering wheel.NOTE
Operation with the switch
NOTE
If there is no operation for 3 minutes after the Multi Around Monitor is displayed bypressing the switch with the selector lever in other than “R” (REVERSE), the display dis- appears.
Switching of the screen (Selector lever is “R” (REVERSE))
BK0252700US.book
133 ページ 2017年10月4日 水曜日 午後4時54分
Page 218 of 417
Instrument cluster
Features and controls 5-139
5
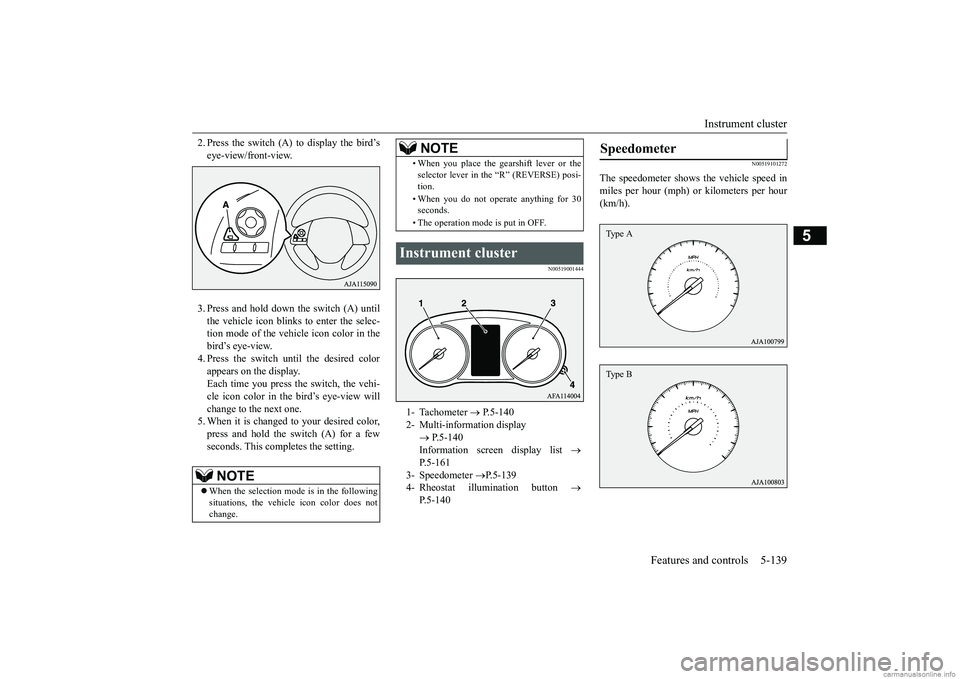
2. Press the switch (A) to display the bird’s eye-view/front-view. 3. Press and hold down the switch (A) until the vehicle icon blinks to enter the selec- tion mode of the vehicle icon color in the bird’s eye-view.4. Press the switch until the desired color appears on the display. Each time you press the switch, the vehi-cle icon color in the bird’s eye-view willchange to the next one. 5. When it is changed to your desired color, press and hold the switch (A) for a fewseconds. This completes the setting.
N00519001444
N00519101272
The speedometer shows the vehicle speed in miles per hour (mph) or kilometers per hour(km/h).
NOTE
When the selection mode is in the following situations, the vehicle icon color does not change.
• When you place the gearshift lever or theselector lever in the “R” (REVERSE) posi- tion. • When you do not operate anything for 30 seconds. • The operation mode is put in OFF.
Instrument cluster 1- Tachometer
P.5-140
2- Multi-information display
P.5-140 Information screen display list
P.5-161
3- Speedometer
P.5-139
4- Rheostat illumination button
P.5-140NOTE
Speedometer Type AType B
BK0252700US.book
139 ページ 2017年10月4日 水曜日 午後4時54分
Page 219 of 417
Multi-information display 5-140 Features and controls
5
N00519201303
The tachometer shows engine revolutions per minute. This allows the driver to determinethe most efficient selector position and engine speed combinations. This gauge also assist
s in evaluating engine
performance.
N00554901293
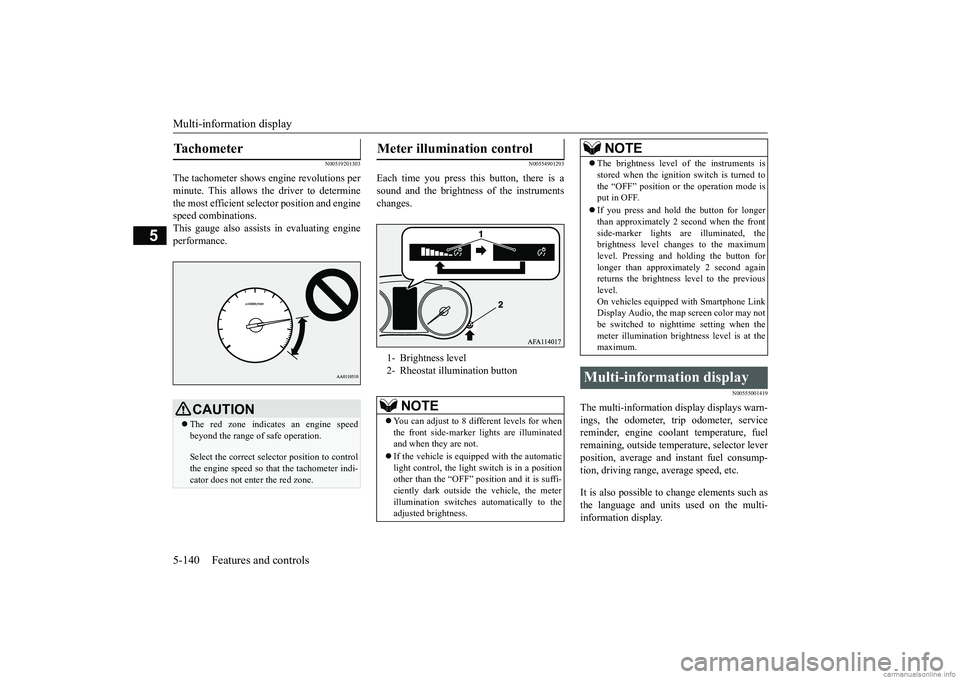
Each time you press this button, there is asound and the brightness of the instrumentschanges.
N00555001419
The multi-information display displays warn- ings, the odometer, trip odometer, service reminder, engine coolant temperature, fuelremaining, outside temperature, selector lever position, average and instant fuel consump- tion, driving range, average speed, etc. It is also possible to change elements such as the language and units used on the multi- information display.
Tachometer
CAUTION The red zone indicates an engine speed beyond the range of safe operation. Select the correct selector position to control the engine speed so that the tachometer indi- cator does not enter the red zone.
Meter illumination control 1- Brightness level 2- Rheostat illumination button
NOTE
You can adjust to 8 different levels for when the front side-marker lights are illuminatedand when they are not. If the vehicle is equipped with the automatic light control, the light switch is in a position other than the “OFF” position and it is suffi- ciently dark outside the vehicle, the meterillumination switches automatically to the adjusted brightness.
The brightness level of the instruments is stored when the ignition switch is turned to the “OFF” position or the operation mode is put in OFF. If you press and hold the button for longer than approximately 2 second when the front side-marker lights are illuminated, thebrightness level changes to the maximum level. Pressing and holding the button for longer than approximately 2 second againreturns the brightness level to the previous level. On vehicles equipped with Smartphone LinkDisplay Audio, the map screen color may not be switched to nighttime setting when the meter illumination brightness level is at themaximum.
Multi-information display
NOTE
BK0252700US.book
140 ページ 2017年10月4日 水曜日 午後4時54分