ACC MITSUBISHI ECLIPSE CROSS 2020 Owner's Manual (in English)
[x] Cancel search | Manufacturer: MITSUBISHI, Model Year: 2020, Model line: ECLIPSE CROSS, Model: MITSUBISHI ECLIPSE CROSS 2020Pages: 427, PDF Size: 78.05 MB
Page 273 of 427

Combination headlights and dimmer switch 5-192 Features and controls
5
Rotate the switch to operate the lights. The combinations of switch operations and illuminated lights differ in accordance with the following conditions. [When the engine is started, and the parking brake is released]
[When the engine is not running, or when the engine is running but the parking brake is not released] The engine starts when the lights are off.
Ty p e 2 OFF
The daytime running lights illumi- nated
AUTO
The daytime running lights illumi- nated (when it is light outside the vehicle) Headlights and other lights turn on and off automatically in accor- dance with outside light level.
The daytime running lights illumi-nated Tail, front and rear side-marker lights, license plate and instrument panel lights on Headlights and other lights on
NOTE
Once the daytime running light come on, they do not go out until the ignition switch is turned to the “OFF” or “ACC” position or the operation mode is changed to OFF orACC.OFF All lights off AUTO
Headlights and other lights turn on and off automatically in accor- dance with outside light level. Parking, tail, front and rear side- marker lights, license plate and instrument panel lights on Headlights and other lights on
NOTE
The sensitivity of the automatic on/off con- trol can be adjusted. For further information, please contact your authorized Mitsubishi Motors dealer or a repair facility of your choice.As your vehicle is equipped with Smart- phone Link Display Audio, screen operations can be used to make the adjustment.Refer to the separate owner’s manual for details. Do not cover the sensor (A) for the automatic on/off control by affixing a sticker or label to the windshield. If the lights do not turn on or off with the switch in the “AUTO” position, manually operate the switch. Have the system checkedby an authorized Mitsubishi Motors dealer or a repair facility of your choice.
BK0277700US.book
192 ページ 2019年3月8日 金曜日 午前9時23分
Page 274 of 427
Combination headlights and dimmer switch
Features and controls 5-193
5
N00532601652
If the following operation is performed with the combination headlights and dim- mer switch in the “ ” or “ ” position, the lights automatically turn off. [Except for vehicles equipped with the F. A . S . T. - k e y ] The ignition switch is
turned to the “OFF”
or “ACC” position or the key is removed from the ignition switch and the driver’s door is opened. [For vehicles equipped with the F.A.S.T.- key] The operation mode is changed to OFF or ACC and the driver’s door is opened. If the following operation is performed with the combination headlights and dim- mer switch in the “ ” or “ ” position, the lights automatically turn off after approximately 3 minutes. [Except for vehicles equipped with the F. A . S . T. - k e y ] The ignition switch is
turned to the “OFF”
or “ACC” position or the key is removedfrom the ignition switch and the driver’sdoor is not opened.
[For vehicles equipped with the F.A.S.T.- key] The operation mode is changed to OFF or ACC and the driver’s door is not opened.
If the combination headlights and dimmer switch is turned to the “ ” or “ ” posi- tion again after the engine is turned off, theapproximately 3-minute auto-cutout function described above will not work. The lights (the parking lights, tail lights and license platelights) will stay on and will not turn off auto- matically.
N00584500044
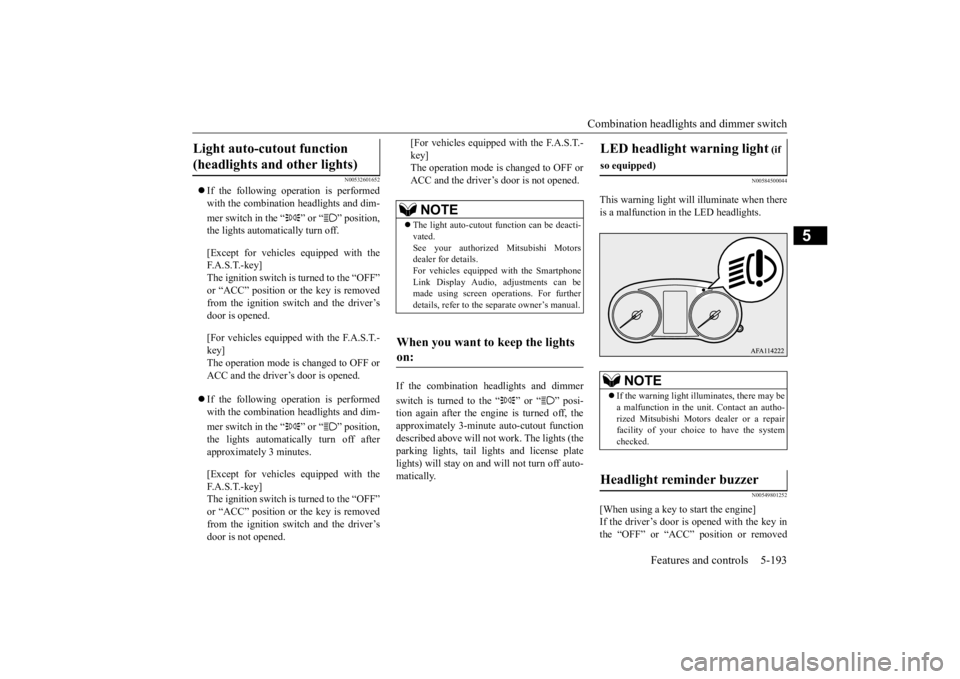
This warning light will
illuminate when there
is a malfunction in the LED headlights.
N00549801252
[When using a key to start the engine]If the driver’s door is opened with the key in the “OFF” or “ACC” position or removed
Light auto-cutout function (headlights and other lights)
NOTE
The light auto-cutout function can be deacti- vated.See your authorized Mitsubishi Motors dealer for details. For vehicles equipped with the SmartphoneLink Display Audio, adjustments can be made using screen operations. For further details, refer to the separate owner’s manual.
When you want to keep the lights on:
LED headlight warning light
(if
so equipped)
NOTE
If the warning light illuminates, there may be a malfunction in the unit. Contact an autho- rized Mitsubishi Motors dealer or a repairfacility of your choice to have the system checked.
Headlight reminder buzzer
BK0277700US.book
193 ページ 2019年3月8日 金曜日 午前9時23分
Page 275 of 427
Combination headlights and dimmer switch 5-194 Features and controls
5
from the ignition switch while the lights are on, the tone will sound to remind you to turn off the lights. [When using the F.A.S.T.-key to start the engine]If the driver’s door is opened with the opera- tion mode is put in OFF or ACC, or if the operation mode is changed to OFF while thelights are on, the tone will sound to remind you to turn off the lights. In either case, the lights will turn off automat- ically and so will the tone. Or you can turn the light switch to the
“OFF” position to stop
the tone.
N00549901178
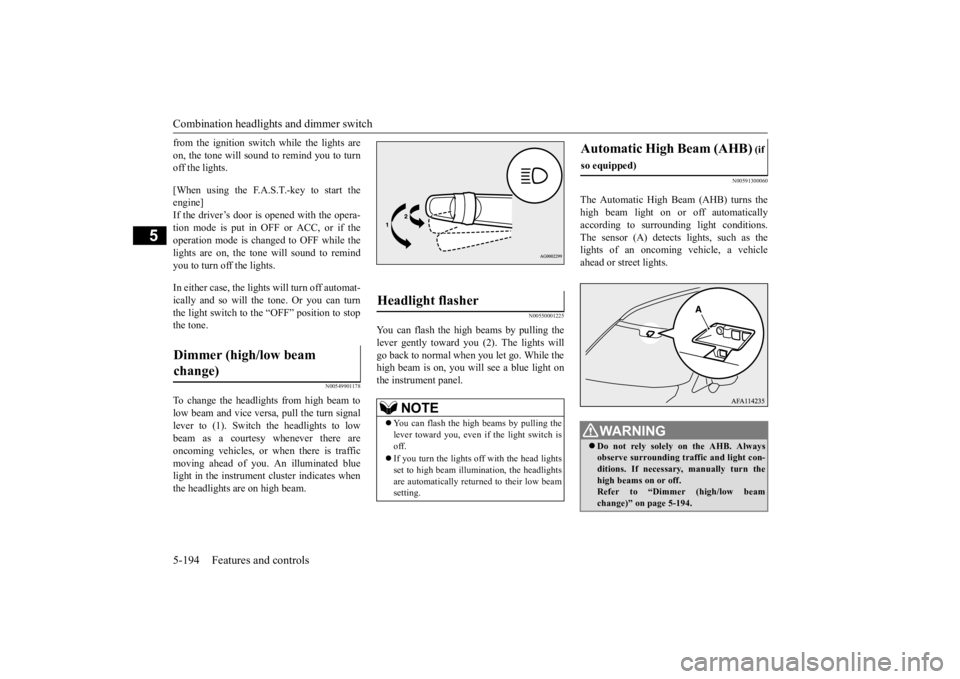
To change the headlights from high beam to low beam and vice versa, pull the turn signal lever to (1). Switch the headlights to lowbeam as a courtesy whenever there are oncoming vehicles, or when there is traffic moving ahead of you. An illuminated bluelight in the instrument cluster indicates when the headlights are on high beam.
N00550001225
You can flash the high beams by pulling the lever gently toward you (2). The lights willgo back to normal when you let go. While the high beam is on, you will see a blue light on the instrument panel.
N00591300060
The Automatic High Beam (AHB) turns the high beam light on or off automatically according to surrounding light conditions.The sensor (A) detects lights, such as the lights of an oncoming vehicle, a vehicle ahead or street lights.
Dimmer (high/low beam change)
Headlight flasher
NOTE
You can flash the high beams by pulling the lever toward you, even if the light switch isoff. If you turn the lights off with the head lights set to high beam illumin
ation, the headlights
are automatically returned to their low beam setting.
Automatic High Beam (AHB)
(if
so equipped)
WA R N I N G Do not rely solely on the AHB. Always observe surrounding traffic and light con- ditions. If necessary, manually turn the high beams on or off.Refer to “Dimmer (high/low beam change)” on page 5-194.
BK0277700US.book
194 ページ 2019年3月8日 金曜日 午前9時23分
Page 280 of 427
Headlight leveling switch (if so equipped)
Features and controls 5-199
5
4. The headlights will come on in the low beam setting for approximately 30 sec- onds. After the headlights go off, the headlights can be turned on again in thelow beam setting for approximately 30 seconds by pulling the turn signal lever toward you within 60 seconds of turningthe ignition switch to the “OFF” position or putting the operation mode in OFF. To turn on the headlights again after 60 sec-onds of turning the ignition switch to the“OFF” position or putting the operation mode in OFF, repeat the process from step 1.
N00537101131
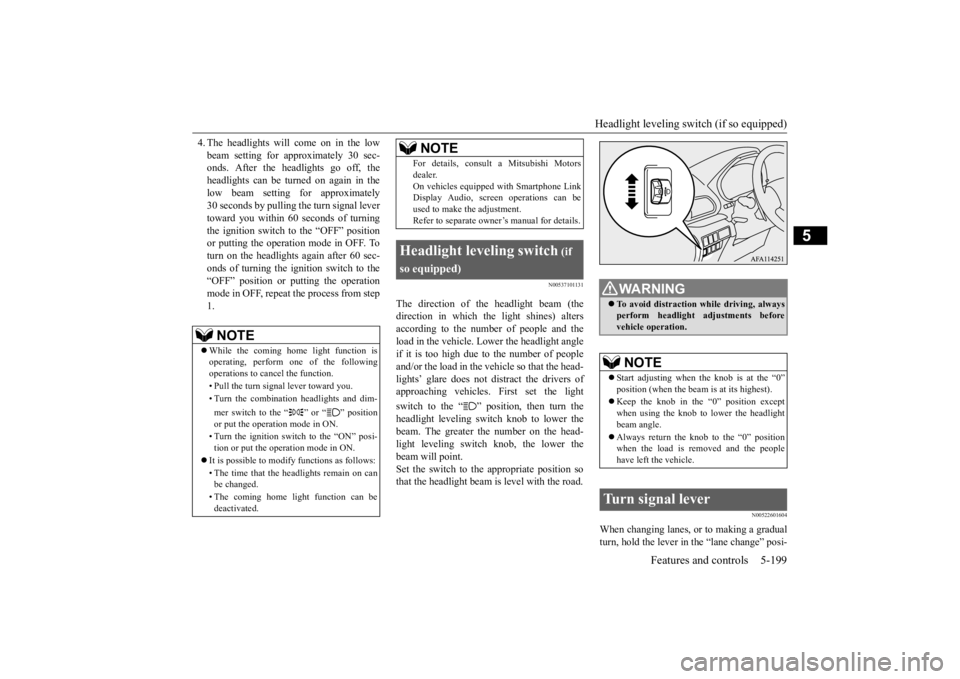
The direction of the headlight beam (thedirection in which the light shines) altersaccording to the number of people and the load in the vehicle. Lower the headlight angle if it is too high due to the number of peopleand/or the load in the vehicle so that the head- lights’ glare does not distract the drivers of approaching vehicles. First set the light switch to the “ ” position, then turn the headlight leveling switch knob to lower the beam. The greater the number on the head- light leveling switch knob, the lower thebeam will point. Set the switch to the appropriate position so that the headlight beam is level with the road.
N00522601604
When changing lanes, or to making a gradualturn, hold the lever in
the “lane change” posi-
NOTE
While the coming home light function is operating, perform one of the following operations to cancel the function. • Pull the turn signal lever toward you. • Turn the combination headlights and dim- mer switch to the “ ” or “ ” position or put the operation mode in ON. • Turn the ignition switch to the “ON” posi- tion or put the operation mode in ON.
It is possible to modify functions as follows: • The time that the headlights remain on can be changed. • The coming home light function can be deactivated.
For details, consult a Mitsubishi Motors dealer. On vehicles equipped with Smartphone Link Display Audio, screen operations can be used to make the adjustment.Refer to separate owner’s manual for details.
Headlight leveling switch
(if
so equipped)
NOTE
WA R N I N G To avoid distraction while driving, always perform headlight adjustments before vehicle operation.NOTE
Start adjusting when
the knob is at the “0”
position (when the beam is at its highest). Keep the knob in the “0” position except when using the knob to lower the headlight beam angle. Always return the knob to the “0” position when the load is removed and the people have left the vehicle.
Turn signal lever
BK0277700US.book
199 ページ 2019年3月8日 金曜日 午前9時23分
Page 283 of 427
Wiper and washer switch 5-202 Features and controls
5
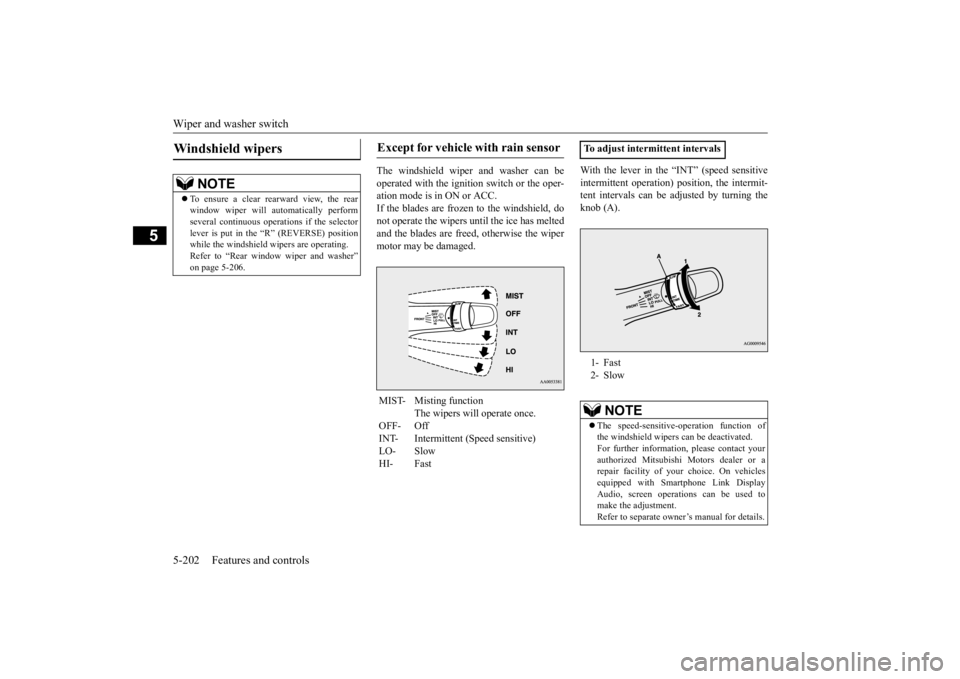
The windshield wiper and washer can be operated with the ignition switch or the oper- ation mode is in ON or ACC.If the blades are frozen to the windshield, do not operate the wipers until the ice has melted and the blades are freed, otherwise the wipermotor may be damaged.
With the lever in the “INT” (speed sensitive intermittent operation) position, the intermit- tent intervals can be adjusted by turning the knob (A).
Windshield wipers
NOTE
To ensure a clear rearward view, the rear window wiper will automatically perform several continuous operations if the selector lever is put in the “R” (REVERSE) positionwhile the windshield wipers are operating. Refer to “Rear window wiper and washer” on page 5-206.
Except for vehicle with rain sensor MIST- Misting function
The wipers will operate once.
OFF- Off INT- Intermittent (Speed sensitive) LO- SlowHI- Fast
To adjust intermittent intervals 1- Fast 2- Slow
NOTE
The speed-sensitive-operation function of the windshield wipers can be deactivated. For further information, please contact yourauthorized Mitsubishi Motors dealer or a repair facility of your choice. On vehicles equipped with Smartphone Link DisplayAudio, screen operations can be used to make the adjustment. Refer to separate owner’s manual for details.
BK0277700US.book
202 ページ 2019年3月8日 金曜日 午前9時23分
Page 284 of 427
Wiper and washer switch
Features and controls 5-203
5
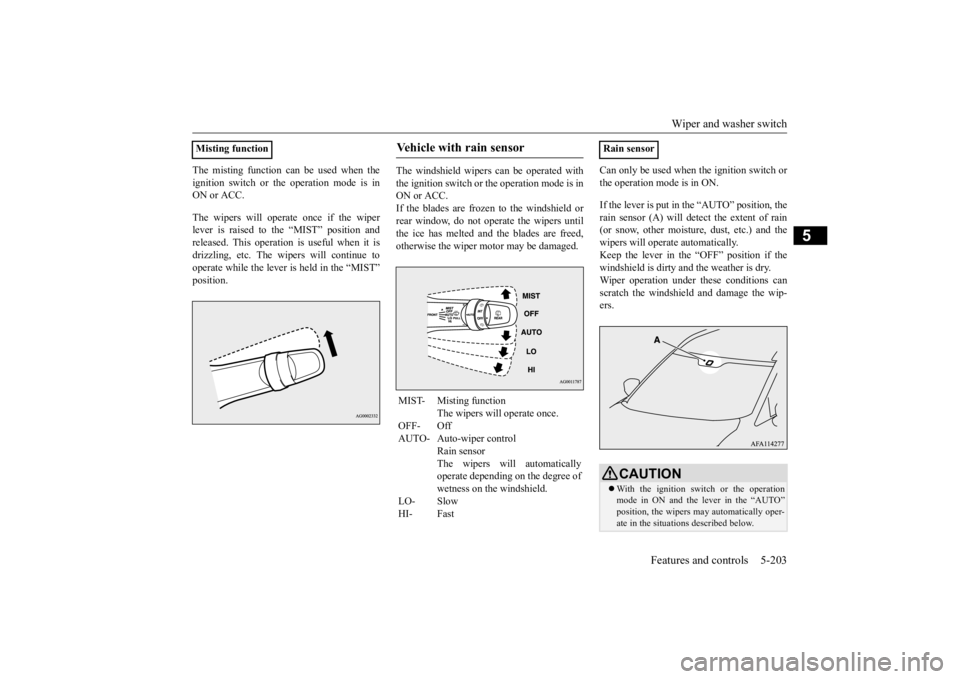
The misting function can be used when the ignition switch or the operation mode is in ON or ACC. The wipers will operate once if the wiper lever is raised to the “MIST” position andreleased. This operation is useful when it is drizzling, etc. The wipers will continue to operate while the lever is held in the “MIST”position.
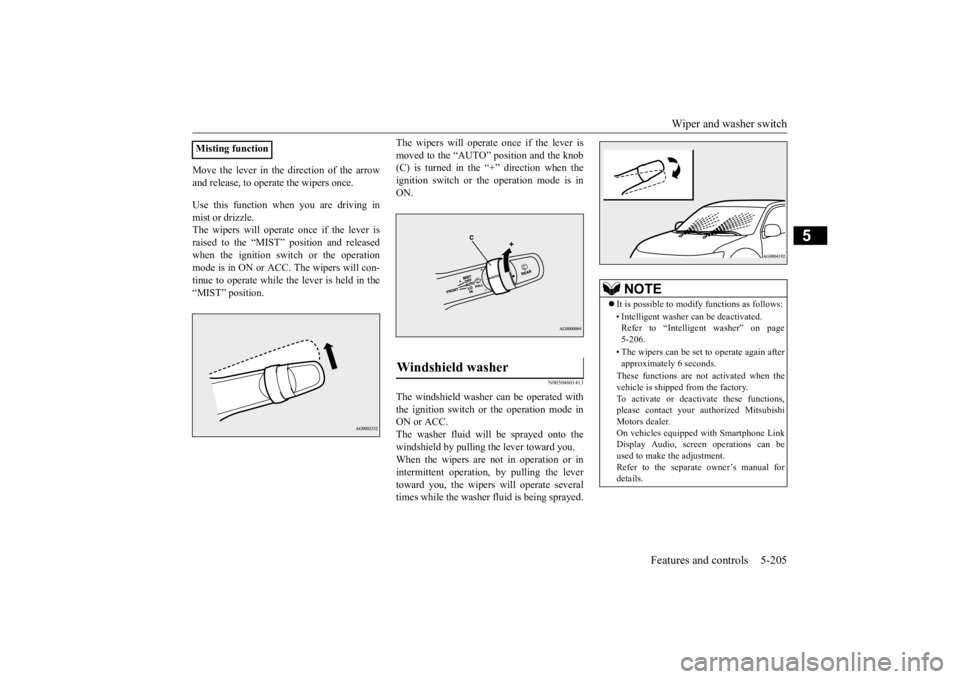
The windshield wipers can be operated with the ignition switch or the operation mode is in ON or ACC.If the blades are frozen to the windshield or rear window, do not operate the wipers until the ice has melted and the blades are freed,otherwise the wiper motor may be damaged.
Can only be used when the ignition switch or the operation mode is in ON. If the lever is put in the “AUTO” position, the rain sensor (A) will detect the extent of rain (or snow, other moisture, dust, etc.) and thewipers will operate automatically. Keep the lever in the “OFF” position if the windshield is dirty and the weather is dry.Wiper operation under these conditions canscratch the windshield and damage the wip- ers.
Misting function
Vehicle with rain sensor MIST- Misting function
The wipers will operate once.
OFF- Off AUTO- Auto-wiper control
Rain sensorThe wipers will automatically operate depending on the degree of wetness on the windshield.
LO- Slow HI- Fast
Rain sensor
CAUTION With the ignition switch or the operation mode in ON and the lever in the “AUTO” position, the wipers may automatically oper- ate in the situations described below.
BK0277700US.book
203 ページ 2019年3月8日 金曜日 午前9時23分
Page 286 of 427
Wiper and washer switch
Features and controls 5-205
5
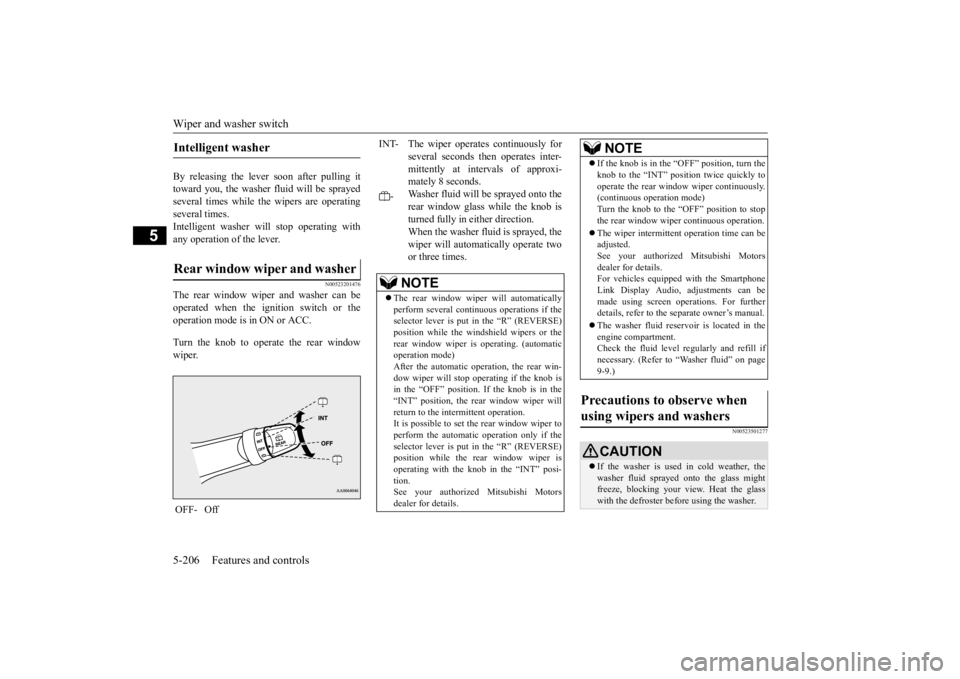
Move the lever in the direction of the arrow and release, to operate the wipers once. Use this function when you are driving in mist or drizzle. The wipers will operate once if the lever israised to the “MIST” position and released when the ignition switch or the operation mode is in ON or ACC. The wipers will con-tinue to operate while the lever is held in the“MIST” position.
The wipers will operate once if the lever is moved to the “AUTO” position and the knob (C) is turned in the “+” direction when the ignition switch or the operation mode is inON.
N00504601413
The windshield washer can be operated with the ignition switch or the operation mode in ON or ACC.The washer fluid will be sprayed onto the windshield by pulling the lever toward you. When the wipers are not in operation or inintermittent operation, by pulling the lever toward you, the wipers will operate several times while the washer fluid is being sprayed.
Misting function
Windshield washer
NOTE
It is possible to modify functions as follows: • Intelligent washer can be deactivated. Refer to “Intelligent washer” on page 5-206. • The wipers can be set to operate again after approximately 6 seconds. These functions are not activated when the vehicle is shipped from the factory. To activate or deactivate these functions,please contact your authorized Mitsubishi Motors dealer. On vehicles equipped with Smartphone LinkDisplay Audio, screen operations can be used to make the adjustment. Refer to the separate owner’s manual fordetails.
BK0277700US.book
205 ページ 2019年3月8日 金曜日 午前9時23分
Page 287 of 427
Wiper and washer switch 5-206 Features and controls
5
By releasing the lever soon after pulling it toward you, the washer fluid will be sprayedseveral times while the wipers are operating several times. Intelligent washer will stop operating withany operation of the lever.
N00523201476
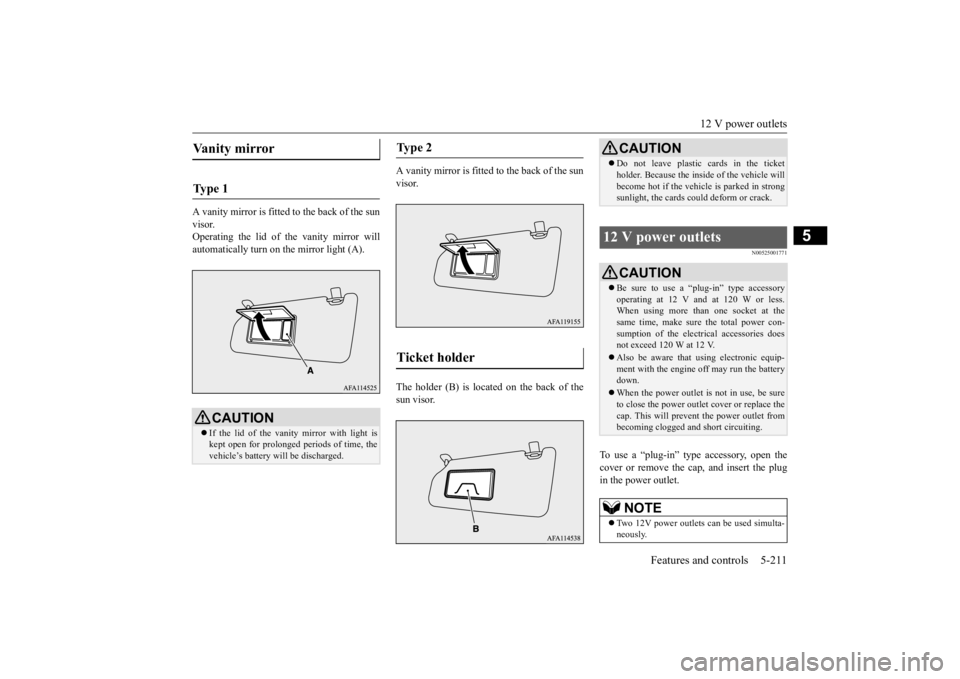
The rear window wiper and washer can beoperated when the ignition switch or theoperation mode is in ON or ACC. Turn the knob to operate the rear window wiper.
N00523501277
Intelligent washer Rear window wiper and washer OFF- Off
INT- The wiper operates continuously for
several seconds then operates inter-mittently at intervals of approxi- mately 8 seconds.
-
Washer fluid will be sprayed onto the rear window glass while the knob is turned fully in either direction. When the washer fluid is sprayed, thewiper will automatically operate two or three times.NOTE
The rear window wiper will automatically perform several continuous operations if the selector lever is put in the “R” (REVERSE) position while the windshield wipers or therear window wiper is operating. (automatic operation mode) After the automatic operation, the rear win-dow wiper will stop operating if the knob is in the “OFF” position. If the knob is in the “INT” position, the rear window wiper willreturn to the intermittent operation. It is possible to set the rear window wiper to perform the automatic operation only if theselector lever is put in the “R” (REVERSE) position while the rear window wiper is operating with the knob in the “INT” posi- tion. See your authorized Mitsubishi Motorsdealer for details.
If the knob is in the “OFF” position, turn the knob to the “INT” position twice quickly to operate the rear window wiper continuously. (continuous operation mode) Turn the knob to the “OFF” position to stopthe rear window wiper continuous operation. The wiper intermittent operation time can be adjusted. See your authorized Mitsubishi Motors dealer for details.For vehicles equipped with the Smartphone Link Display Audio, adjustments can be made using screen operations. For furtherdetails, refer to the separate owner’s manual. The washer fluid reservoir is located in the engine compartment. Check the fluid level regularly and refill if necessary. (Refer to “Washer fluid” on page9-9.)
Precautions to observe when using wipers and washers
CAUTION If the washer is used in cold weather, the washer fluid sprayed onto the glass might freeze, blocking your view. Heat the glass with the defroster before using the washer.NOTE
BK0277700US.book
206 ページ 2019年3月8日 金曜日 午前9時23分
Page 292 of 427
12 V power outlets
Features and controls 5-211
5
A vanity mirror is fitted to the back of the sun visor. Operating the lid of the vanity mirror willautomatically turn on the mirror light (A).
A vanity mirror is fitted to the back of the sun visor. The holder (B) is located on the back of the sun visor.
N00525001771
To use a “plug-in” type accessory, open thecover or remove the cap, and insert the plug in the power outlet.
Vanity mirror Ty p e 1
CAUTION If the lid of the vanity mirror with light is kept open for prolonged periods of time, thevehicle’s battery will be discharged.
Ty p e 2 Ticket holder
CAUTION Do not leave plastic cards in the ticket holder. Because the inside of the vehicle will become hot if the vehicle is parked in strong sunlight, the cards could deform or crack.
12 V power outlets
CAUTION Be sure to use a “plug-in” type accessory operating at 12 V and at 120 W or less. When using more than one socket at the same time, make sure the total power con-sumption of the electrical accessories does not exceed 120 W at 12 V. Also be aware that using electronic equip- ment with the engine off may run the battery down. When the power outlet is
not in use, be sure
to close the power outlet cover or replace thecap. This will prevent the power outlet from becoming clogged and short circuiting.NOTE
Two 12V power outlets can be used simulta- neously.
BK0277700US.book
211 ページ 2019年3月8日 金曜日 午前9時23分
Page 293 of 427
HomeLink® Wireless Control System (if so equipped) 5-212 Features and controls
5
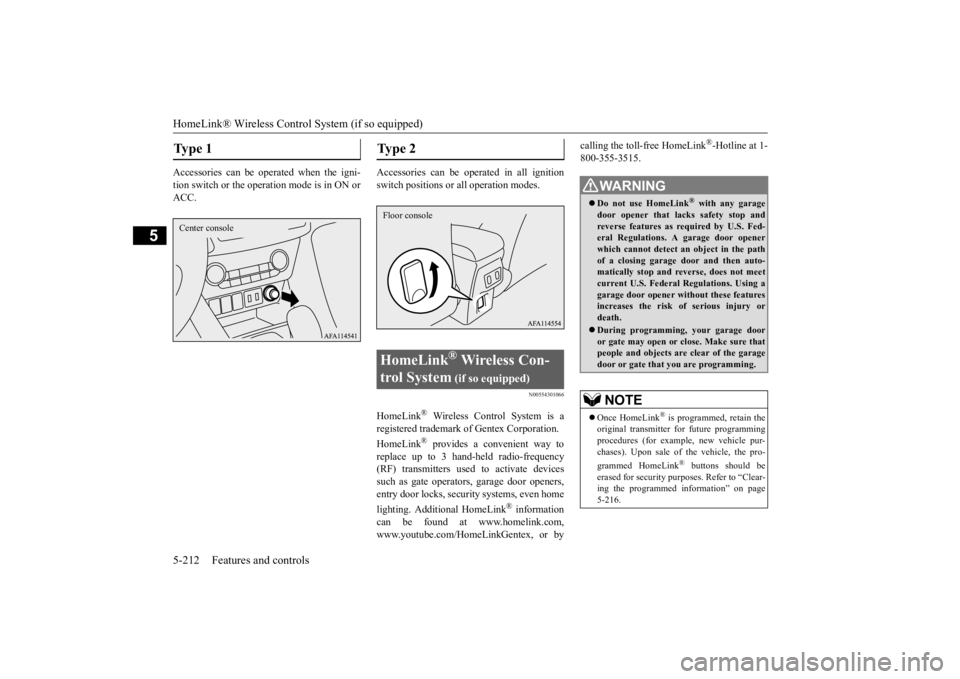
Accessories can be operated when the igni- tion switch or the operation mode is in ON or ACC.
Accessories can be operated in all ignition switch positions or all operation modes.
N00554301066
HomeLink
® Wireless Control System is a
registered trademark of Gentex Corporation. HomeLink
® provides a convenient way to
replace up to 3 hand-held radio-frequency (RF) transmitters used
to activate devices
such as gate operators, garage door openers,entry door locks, security systems, even home lighting. Additional HomeLink
® information
can be found at www.homelink.com,www.youtube.com/HomeLinkGentex, or by
calling the toll-free HomeLink
®-Hotline at 1-
800-355-3515.
Type 1 Center console
Type 2 HomeLink
® Wireless Con-
trol System
(if so equipped)
Floor console
WA R N I N G Do not use HomeLink
® with any garage
door opener that lacks safety stop and reverse features as required by U.S. Fed-eral Regulations. A garage door opener which cannot detect an object in the path of a closing garage door and then auto-matically stop and reverse, does not meet current U.S. Federal Regulations. Using a garage door opener without these featuresincreases the risk of serious injury or death. During programming, your garage door or gate may open or close. Make sure that people and objects are clear of the garagedoor or gate that you are programming.NOTE
Once HomeLink
® is programmed, retain the
original transmitter for future programming procedures (for example, new vehicle pur- chases). Upon sale of
the vehicle, the pro-
grammed HomeLink
® buttons should be
erased for security purposes. Refer to “Clear-ing the programmed information” on page 5-216.
BK0277700US.book
212 ページ 2019年3月8日 金曜日 午前9時23分