MITSUBISHI ECLIPSE CROSS 2020 Owner's Manual (in English)
Manufacturer: MITSUBISHI, Model Year: 2020, Model line: ECLIPSE CROSS, Model: MITSUBISHI ECLIPSE CROSS 2020Pages: 427, PDF Size: 78.05 MB
Page 291 of 427
Sun visors 5-210 Features and controls
5
4. To remove the USB connector cable, turn the ignition switch to the “OFF” position or put the operation mode in OFF first and perform the installation steps in reverse.
N00566901274
1. Park your vehicle in a safe place and turnthe ignition switch to the “OFF” position or put the operation mode in OFF. 2. Connect the connector cable to the iPod. 3. Connect the connector cable to the USB input terminal. 4. To remove the connector cable, turn the ignition switch to the “OFF” position orput the operation mode in OFF first and perform the installation steps in reverse.
N00567001126
For details, please refer to the separatedowner’s manual for “Smartphone Link Dis- play Audio” or the “DISPLAY AUDIO”.
N00524601419
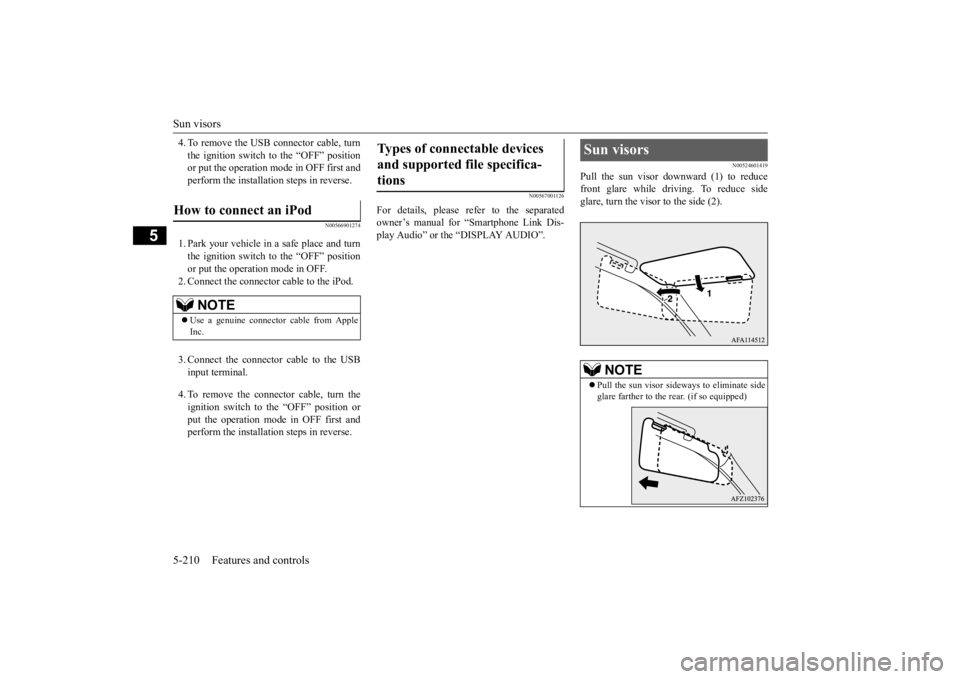
Pull the sun visor downward (1) to reducefront glare while driving. To reduce sideglare, turn the visor to the side (2).
How to connect an iPod
NOTE
Use a genuine connector cable from Apple Inc.
Types of connectable devices and supported file specifica- tions
Sun visors
NOTE
Pull the sun visor sideways to eliminate side glare farther to the rear. (if so equipped)
BK0277700US.book
210 ページ 2019年3月8日 金曜日 午前9時23分
Page 292 of 427
12 V power outlets
Features and controls 5-211
5
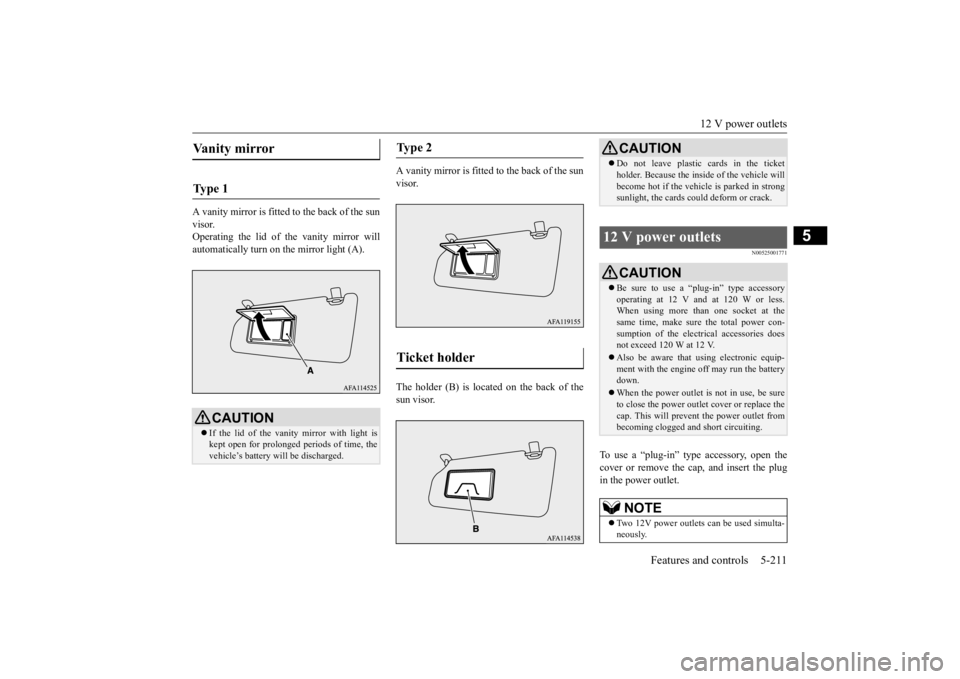
A vanity mirror is fitted to the back of the sun visor. Operating the lid of the vanity mirror willautomatically turn on the mirror light (A).
A vanity mirror is fitted to the back of the sun visor. The holder (B) is located on the back of the sun visor.
N00525001771
To use a “plug-in” type accessory, open thecover or remove the cap, and insert the plug in the power outlet.
Vanity mirror Ty p e 1
CAUTION If the lid of the vanity mirror with light is kept open for prolonged periods of time, thevehicle’s battery will be discharged.
Ty p e 2 Ticket holder
CAUTION Do not leave plastic cards in the ticket holder. Because the inside of the vehicle will become hot if the vehicle is parked in strong sunlight, the cards could deform or crack.
12 V power outlets
CAUTION Be sure to use a “plug-in” type accessory operating at 12 V and at 120 W or less. When using more than one socket at the same time, make sure the total power con-sumption of the electrical accessories does not exceed 120 W at 12 V. Also be aware that using electronic equip- ment with the engine off may run the battery down. When the power outlet is
not in use, be sure
to close the power outlet cover or replace thecap. This will prevent the power outlet from becoming clogged and short circuiting.NOTE
Two 12V power outlets can be used simulta- neously.
BK0277700US.book
211 ページ 2019年3月8日 金曜日 午前9時23分
Page 293 of 427
HomeLink® Wireless Control System (if so equipped) 5-212 Features and controls
5
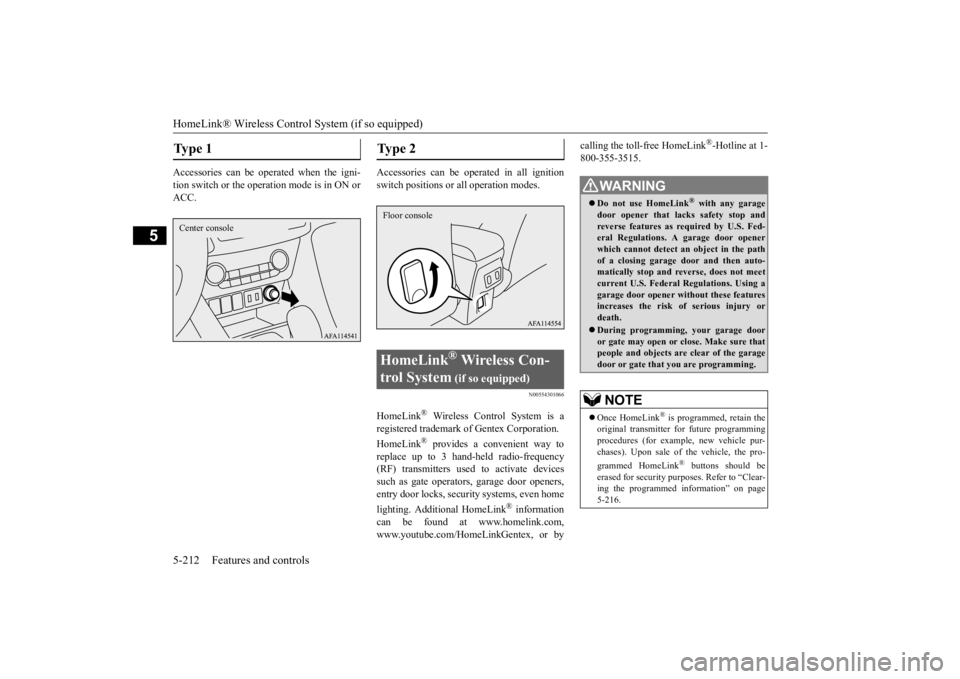
Accessories can be operated when the igni- tion switch or the operation mode is in ON or ACC.
Accessories can be operated in all ignition switch positions or all operation modes.
N00554301066
HomeLink
® Wireless Control System is a
registered trademark of Gentex Corporation. HomeLink
® provides a convenient way to
replace up to 3 hand-held radio-frequency (RF) transmitters used
to activate devices
such as gate operators, garage door openers,entry door locks, security systems, even home lighting. Additional HomeLink
® information
can be found at www.homelink.com,www.youtube.com/HomeLinkGentex, or by
calling the toll-free HomeLink
®-Hotline at 1-
800-355-3515.
Type 1 Center console
Type 2 HomeLink
® Wireless Con-
trol System
(if so equipped)
Floor console
WA R N I N G Do not use HomeLink
® with any garage
door opener that lacks safety stop and reverse features as required by U.S. Fed-eral Regulations. A garage door opener which cannot detect an object in the path of a closing garage door and then auto-matically stop and reverse, does not meet current U.S. Federal Regulations. Using a garage door opener without these featuresincreases the risk of serious injury or death. During programming, your garage door or gate may open or close. Make sure that people and objects are clear of the garagedoor or gate that you are programming.NOTE
Once HomeLink
® is programmed, retain the
original transmitter for future programming procedures (for example, new vehicle pur- chases). Upon sale of
the vehicle, the pro-
grammed HomeLink
® buttons should be
erased for security purposes. Refer to “Clear-ing the programmed information” on page 5-216.
BK0277700US.book
212 ページ 2019年3月8日 金曜日 午前9時23分
Page 294 of 427
HomeLink® Wireless Control System (if so equipped)
Features and controls 5-213
5
N00584600029
Some garage door openers manufactured after 1995 have “rolling code protection”. To program a garage door opener equipped with “rolling code protection”;you will need to access the garage door opener motor to press the motor’s “Learn” or “Smart” buttons. For convenience, usea ladder and another person to assist you. It is recommended that a new battery be placed in the hand-held transmitter of the device being programmed to HomeLink
®
for quicker training and accurate trans- mission of the radio-frequency signal.
N00584700046
To program HomeLink
® to operate a garage
door, gate, entry door opener, home or officelighting, you need to be at the same location as the device. 1. Press the HomeLink
® button that you
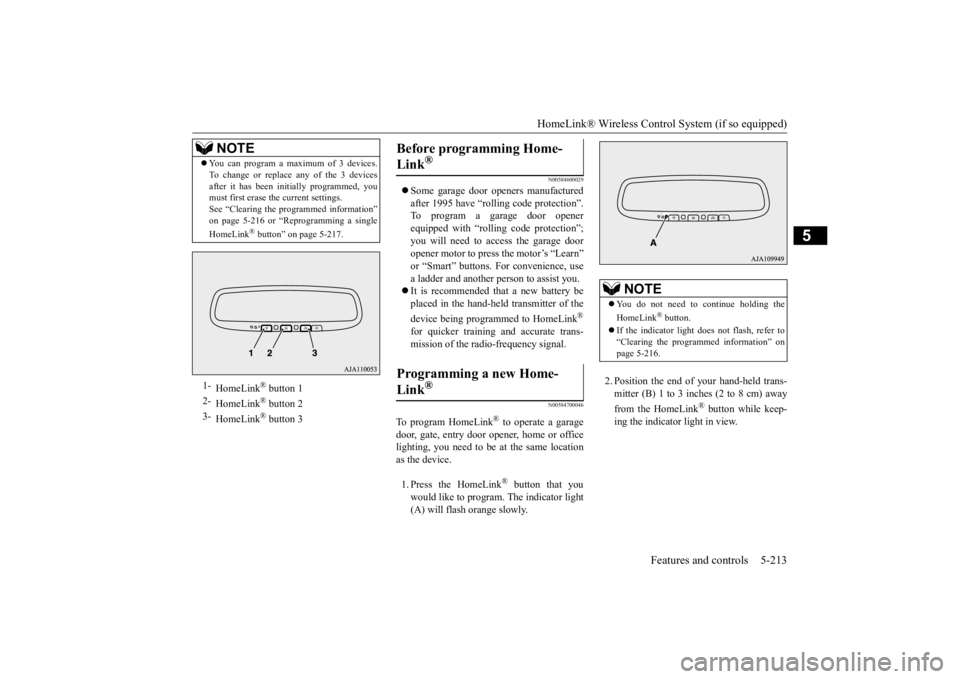
would like to program. The indicator light(A) will flash orange slowly.
2. Position the end of your hand-held trans- mitter (B) 1 to 3 inches (2 to 8 cm) away from the HomeLink
® button while keep-
ing the indicator light in view.
You can program a maximum of 3 devices. To change or replace any of the 3 devices after it has been initially programmed, you must first erase the current settings. See “Clearing the programmed information”on page 5-216 or “Reprogramming a single HomeLink
® button” on page 5-217.
1-
HomeLink
® button 1
2-
HomeLink
® button 2
3-
HomeLink
® button 3
NOTE
Before programming Home- Link
®
Programming a new Home-Link
®
NOTE
You do not need to continue holding the HomeLink
® button.
If the indicator light
does not flash, refer to
“Clearing the programmed information” on page 5-216.
BK0277700US.book
213 ページ 2019年3月8日 金曜日 午前9時23分
Page 295 of 427
HomeLink® Wireless Control System (if so equipped) 5-214 Features and controls
5
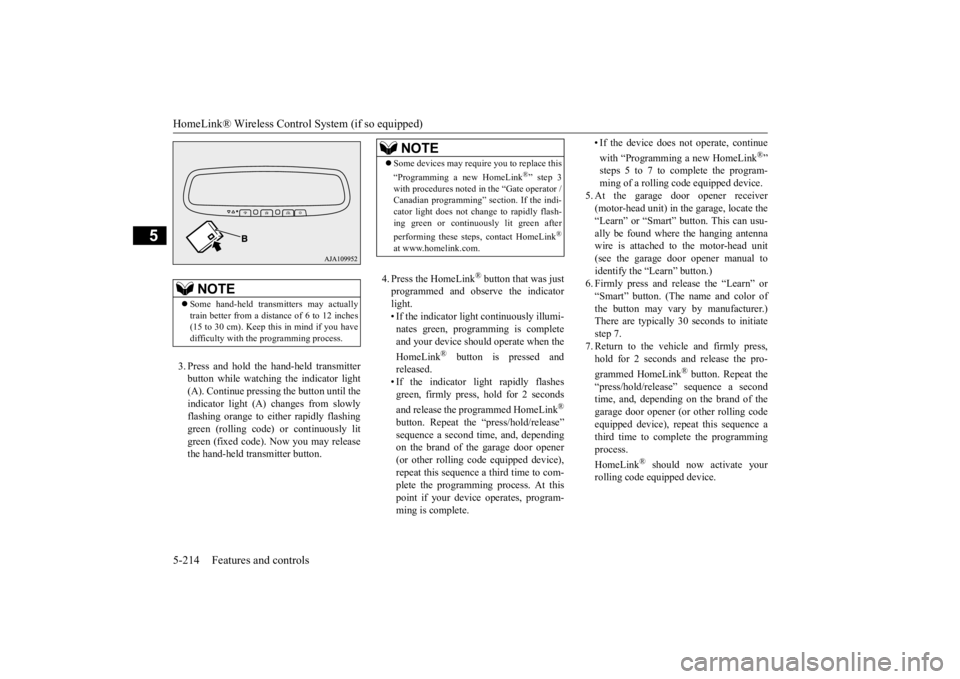
3. Press and hold the hand-held transmitter button while watching the indicator light(A). Continue pressing the button until theindicator light (A) changes from slowly flashing orange to either rapidly flashing green (rolling code) or continuously litgreen (fixed code). Now you may release the hand-held transmitter button.
4. Press the HomeLink
® button that was just
programmed and observe the indicatorlight. • If the indicator light continuously illumi- nates green, programming is completeand your device should
operate when the
HomeLink
® button is pressed and
released.• If the indicator light rapidly flashesgreen, firmly press, hold for 2 seconds and release the programmed HomeLink
®
button. Repeat the “press/hold/release” sequence a second time, and, depending on the brand of the garage door opener (or other rolling code equipped device),repeat this sequence a third time to com- plete the programming process. At this point if your device operates, program-ming is complete.
• If the device does not operate, continue with “Programming a new HomeLink
®”
steps 5 to 7 to complete the program- ming of a rolling code equipped device.
5. At the garage door opener receiver (motor-head unit) in the garage, locate the “Learn” or “Smart” button. This can usu-ally be found where the hanging antenna wire is attached to the motor-head unit (see the garage door opener manual toidentify the “Learn” button.)6. Firmly press and release the “Learn” or “Smart” button. (The name and color of the button may vary by manufacturer.)There are typically 30 seconds to initiate step 7. 7. Return to the vehicle and firmly press,hold for 2 seconds and release the pro- grammed HomeLink
® button. Repeat the
“press/hold/release” sequence a secondtime, and, depending on the brand of the garage door opener (or other rolling code equipped device), repeat this sequence athird time to complete the programming process. HomeLink
® should now activate your
rolling code equipped device.
NOTE
Some hand-held transmitters may actually train better from a distance of 6 to 12 inches (15 to 30 cm). Keep this in mind if you havedifficulty with the programming process.
NOTE
Some devices may require you to replace this “Programming a new HomeLink
®” step 3
with procedures noted in the “Gate operator / Canadian programming” section. If the indi- cator light does not change to rapidly flash-ing green or continuously lit green after performing these steps, contact HomeLink
®
at www.homelink.com.
BK0277700US.book
214 ページ 2019年3月8日 金曜日 午前9時23分
Page 296 of 427
HomeLink® Wireless Control System (if so equipped)
Features and controls 5-215
5
N00584800021
Canadian radio-frequency laws require trans- mitter signals to “time-out” (or quit) after several seconds of transmission - which may not be long enough for HomeLink
® to pick
up the signal during programming. Similar tothis Canadian law, some U.S. gate operators are designed to “time-out” in the same man- ner.The indicator LED on the hand-held transmit- ter will go off when the device times out indi- cating that it has finished transmitting.If you live in Canada
or you are having diffi-
culties programming a gate operator or garage door opener by using the “Program-ming” procedures, replace “Programming a new HomeLink
®” step 3 with the following:
3. Press and release - every 2 seconds (“cycle”) your hand-held transmitter until the HomeLink
® indicator light changes from
slowly flashing orange to either rapidly flash-ing green (rolling code) or continuously lit green (fixed code). Now you may release the hand-held transmitter button.Proceed with “Programming a new Home- Link
®” step 4 to complete.
N00584900022
The HomeLink
® has the capability of receiv-
ing garage door status from compatible garage door opener systems. Check your garage door opener manual for the available feature and HomeLink
® compatibility. Also
for a listing of compatible systems contact HomeLink
® at: www.homelink.com
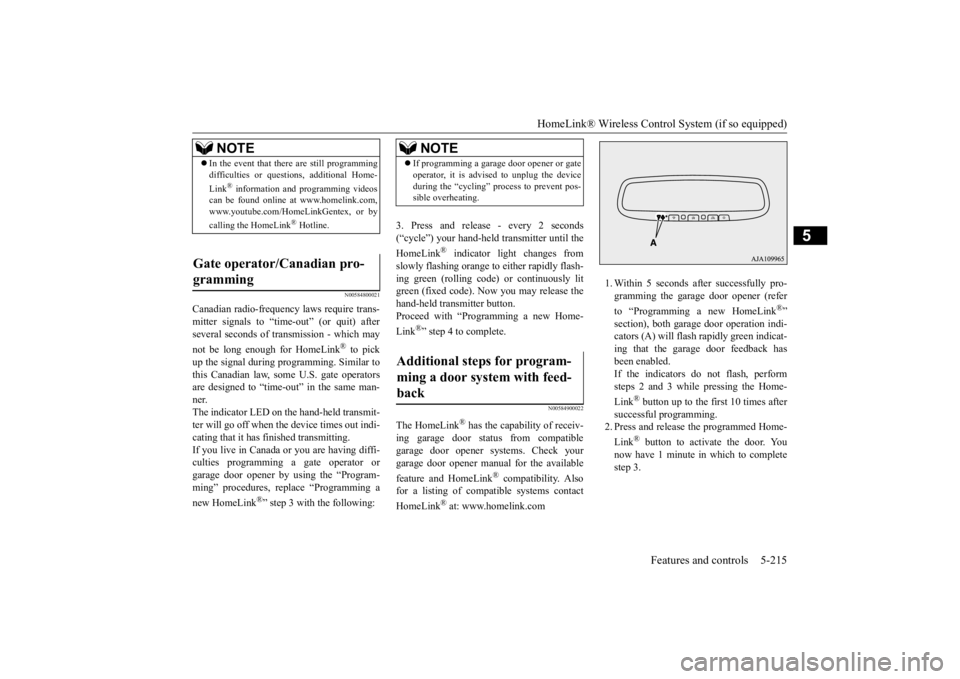
1. Within 5 seconds after successfully pro- gramming the garage door opener (refer to “Programming a new HomeLink
®”
section), both garage door operation indi- cators (A) will flash rapidly green indicat- ing that the garage door feedback hasbeen enabled. If the indicators do not flash, perform steps 2 and 3 while pressing the Home- Link
® button up to the first 10 times after
successful programming. 2. Press and release the programmed Home- Link
® button to activate the door. You
now have 1 minute in which to complete step 3.
NOTE
In the event that there are still programming difficulties or questions, additional Home- Link
® information and programming videos
can be found online at www.homelink.com, www.youtube.com/HomeLinkGentex, or by calling the HomeLink
® Hotline.
Gate operator/Canadian pro- gramming
NOTE
If programming a garage door opener or gate operator, it is advised to unplug the device during the “cycling” process to prevent pos- sible overheating.
Additional steps for program- ming a door system with feed-back
BK0277700US.book
215 ページ 2019年3月8日 金曜日 午前9時23分
Page 297 of 427
HomeLink® Wireless Control System (if so equipped) 5-216 Features and controls
5
3. Once the door has stopped, press and release the “Learn” or “Smart” button on the garage door opener (refer to your garage door opener owner’s manual forthe location of the “Learn” button). Both the HomeLink
® garage door operation
indicators will flash rapidly green uponsuccessful synchronization with the door opener (within 5 seconds).
N00585000020
To operate, simply press and release the pro- grammed HomeLink
® button. Activation will
now occur for the trained device (i.e. garage door opener, gate operator, security system,entry door lock, home/office lighting, etc.). For convenience, the hand-held transmitter of the device may also be used at any time.
N00585200022
The HomeLink
® has the capability of receiv-
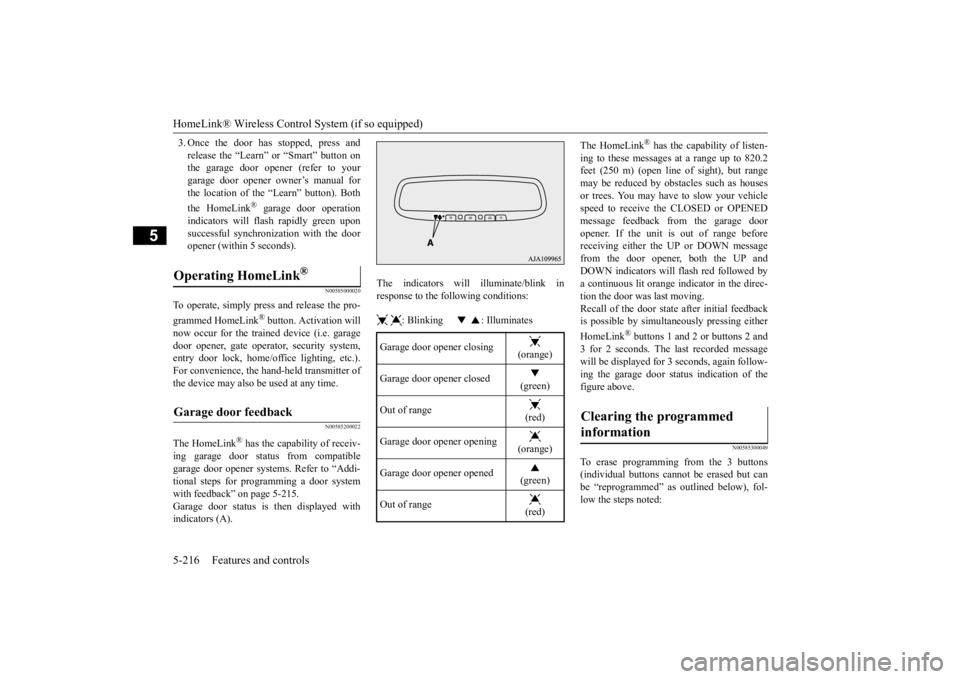
ing garage door status from compatiblegarage door opener systems. Refer to “Addi- tional steps for programming a door system with feedback” on page 5-215.Garage door status is then displayed with indicators (A).
The indicators will illuminate/blink in response to the following conditions: : Blinking : Illuminates
The HomeLink
® has the capability of listen-
ing to these messages at a range up to 820.2 feet (250 m) (open line of sight), but range may be reduced by obstacles such as housesor trees. You may have to slow your vehicle speed to receive the CLOSED or OPENED message feedback from the garage dooropener. If the unit is out of range before receiving either the UP or DOWN message from the door opener, both the UP andDOWN indicators will flash red followed bya continuous lit orange indicator in the direc- tion the door was last moving. Recall of the door state after initial feedbackis possible by simultaneously pressing either HomeLink
® buttons 1 and 2 or buttons 2 and
3 for 2 seconds. The last recorded messagewill be displayed for 3 seconds, again follow- ing the garage door status indication of the figure above.
N00585300049
To erase programming from the 3 buttons(individual buttons can
not be erased but can
be “reprogrammed” as outlined below), fol- low the steps noted:
Operating HomeLink
®
Garage door feedback
Garage door opener closing
(orange)
Garage door opener closed
(green)
Out of range
(red)
Garage door opener opening
(orange)
Garage door opener opened
(green)
Out of range
(red)
Clearing the programmed information
BK0277700US.book
216 ページ 2019年3月8日 金曜日 午前9時23分
Page 298 of 427
HomeLink® Wireless Control System (if so equipped)
Features and controls 5-217
5
1. Press and hold the 2 outer HomeLink
®
buttons for at least
10 seconds. The indi-
cator will change from continuous yellow to rapidly flashing green.2. Release both buttons. 3. HomeLink
® is now in the training (or
learning) mode and can be programmed at any time beginning with “Programming a new HomeLink
®” step 1.
N00585400024
To reprogram a HomeLink
® button, complete
the following. 1. Press and hold the desired HomeLink
®
button. Do not release the button. 2. The indicator light will begin to slowlyflash orange after 20 seconds. The Home- Link
® button can be released at this point.
Proceed with “Programming a new HomeLink
®” step 2.
N00585600042
Your HomeLink
® system operates on a radio
frequency subject to Federal Communica- tions Commission (FCC) Rules (For vehiclessold in U.S.A.) and Industry Canada Rules (For vehicles sold in Canada). This device complies with Part 15 of the FCC Rules andRSS-210 of the Industry Canada Rules. Oper- ation is subject to the following two condi- tions. This device may not cause harmful inter- ference. This device must accept any interference that may be received, including interfer-ence that may cause undesired operation.
This equipment complies with FCC radiation exposure limits set forth for an uncontrolledenvironment. End Users must follow the spe-cific operating instructions for satisfying RF exposure compliance. This transmitter must be at least 8 inches (20 cm) from the user andmust not be co-located or operating in con- junction with any other antenna or transmit- ter.The term “IC:” before the certification/regis- tration number only signifies that Industry Canada technical specifications were met.
NOTE
Do not hold for longer than 20 seconds.
Reprogramming a single HomeLink
® button
NOTE
If you do not complete the programming of a new device to the button,
it will revert to the
previously stored programming. For questions or comments, visit www.homelink.com,www.youtube.com/HomeLinkGentex, or by calling the HomeLink
® Hotline.
General information
CAUTION The transmitter has been tested and complies with FCC and IC rules. Changes or modifications not expressly approved by the party responsible for com- pliance could void the user’s authority tooperate the device.
BK0277700US.book
217 ページ 2019年3月8日 金曜日 午前9時23分
Page 299 of 427
Interior lights 5-218 Features and controls
5
N00525301745
N00525401586
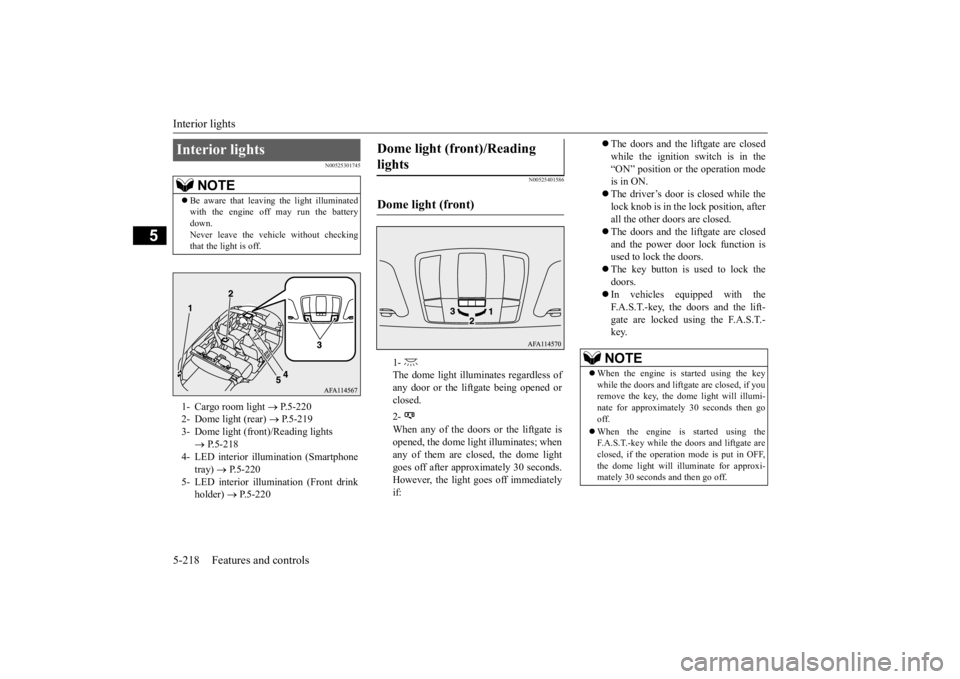
Interior lights
NOTE
Be aware that leaving the light illuminated with the engine off may run the battery down. Never leave the vehicle without checkingthat the light is off.1- Cargo room light
P.5-220
2- Dome light (rear)
P.5-219
3- Dome light (front)/Reading lights
P.5-218
4- LED interior illumination (Smartphone
tray)
P.5-220
5- LED interior illumination (Front drink
holder)
P.5-220
Dome light (front)/Reading lights Dome light (front)
1- The dome light illuminates regardless of any door or the liftgate being opened or closed. 2- When any of the doors or the liftgate is opened, the dome light illuminates; whenany of them are closed, the dome light goes off after approximately 30 seconds. However, the light goes off immediatelyif:
The doors and the liftgate are closed while the ignition switch is in the“ON” position or the operation mode is in ON. The driver’s door is closed while the lock knob is in the lock position, after all the other doors are closed. The doors and the liftgate are closed and the power door lock function is used to lock the doors. The key button is used to lock the doors. In vehicles equipped with the F.A.S.T.-key, the doors and the lift- gate are locked using the F.A.S.T.-key.NOTE
When the engine is started using the key while the doors and liftgate are closed, if you remove the key, the dome light will illumi- nate for approximately 30 seconds then gooff. When the engine is started using the F.A.S.T.-key while the doors and liftgate are closed, if the operation
mode is put in OFF,
the dome light will illuminate for approxi- mately 30 seconds and then go off.
BK0277700US.book
218 ページ 2019年3月8日 金曜日 午前9時23分
Page 300 of 427
Interior lights
Features and controls 5-219
5
3- The dome light stays off regardless of any door or the liftgate being opened or closed.
N00537601194
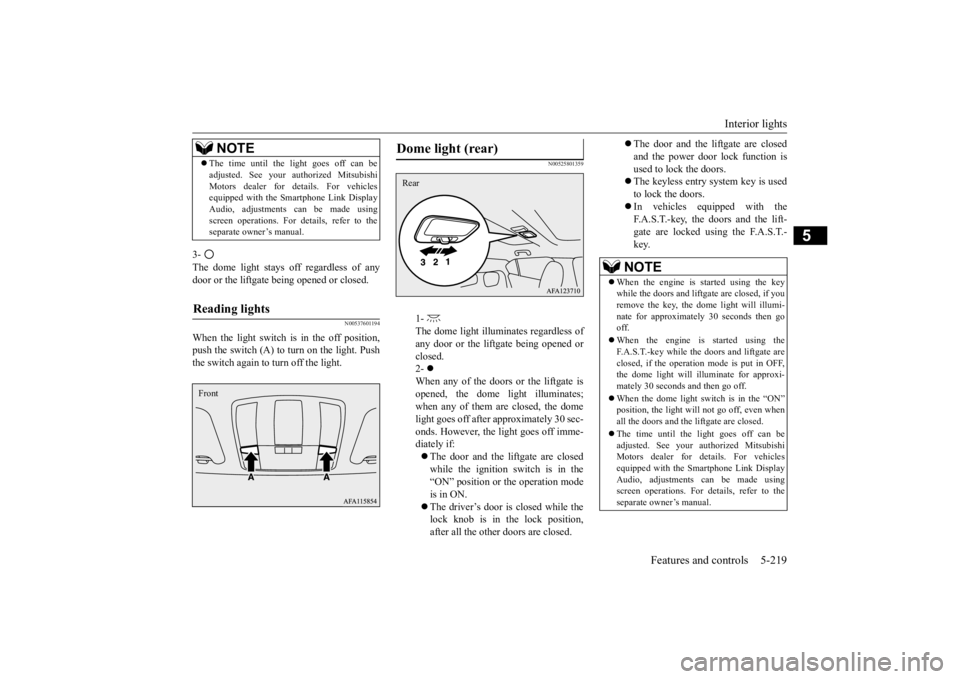
When the light switch is in the off position,push the switch (A) to turn on the light. Push the switch again to turn off the light.
N00525801359
The time until the light goes off can be adjusted. See your authorized Mitsubishi Motors dealer for details. For vehicles equipped with the Smartphone Link Display Audio, adjustments can be made usingscreen operations. For details, refer to the separate owner’s manual.
Reading lights
NOTE
Front
Dome light (rear)
1- The dome light illuminates regardless ofany door or the liftgate being opened orclosed. 2- When any of the doors or the liftgate isopened, the dome light illuminates; when any of them are closed, the dome light goes off after approximately 30 sec-onds. However, the light goes off imme- diately if: The door and the liftgate are closed while the ignition switch is in the “ON” position or the operation mode is in ON. The driver’s door is closed while the lock knob is in the lock position, after all the other doors are closed.
Rear
The door and the liftgate are closed and the power door lock function isused to lock the doors. The keyless entry system key is used to lock the doors. In vehicles equipped with the F.A.S.T.-key, the doors and the lift- gate are locked using the F.A.S.T.-key.NOTE
When the engine is started using the key while the doors and liftgate are closed, if you remove the key, the dome light will illumi-nate for approximately 30 seconds then go off. When the engine is started using the F.A.S.T.-key while the doors and liftgate are closed, if the operation mode is put in OFF,the dome light will illuminate for approxi- mately 30 seconds and then go off. When the dome light switch is in the “ON” position, the light will not go off, even when all the doors and the liftgate are closed. The time until the light goes off can be adjusted. See your authorized MitsubishiMotors dealer for details. For vehicles equipped with the Smartphone Link Display Audio, adjustments can be made using screen operations. For details, refer to the separate owner’s manual.
BK0277700US.book
219 ページ 2019年3月8日 金曜日 午前9時23分