ESP MITSUBISHI ENDEAVOR 2004 Service Repair Manual
[x] Cancel search | Manufacturer: MITSUBISHI, Model Year: 2004, Model line: ENDEAVOR, Model: MITSUBISHI ENDEAVOR 2004Pages: 3870, PDF Size: 98.47 MB
Page 268 of 3870
with a new one if a problem is found.
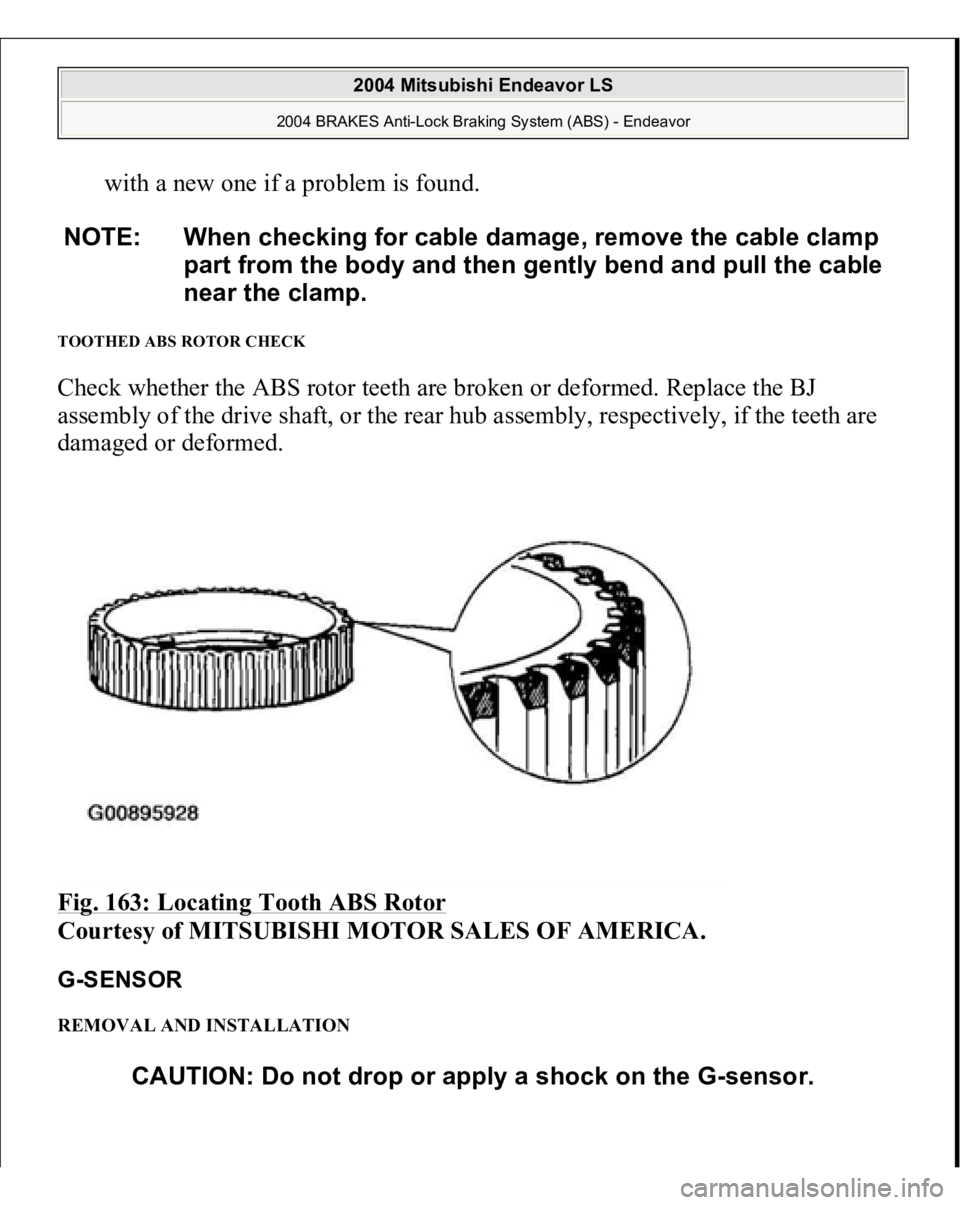
TOOTHED ABS ROTOR CHECK Check whether the ABS rotor teeth are broken or deformed. Replace the BJ
assembly of the drive shaft, or the rear hub assembly, respectively, if the teeth are
damaged or deformed.
Fig. 163: Locating Tooth ABS Rotor
Courtesy of MITSUBISHI MOTOR SALES OF AMERICA.
G-SENSOR REMOVAL AND INSTALLATION NOTE: When checking for cable damage, remove the cable clamp
part from the body and then gently bend and pull the cable
near the clamp.
CAUTION: Do not drop or apply a shock on the G-sensor.
2004 Mitsubishi Endeavor LS
2004 BRAKES Anti-Lock Braking System (ABS) - Endeavor
Page 525 of 3870
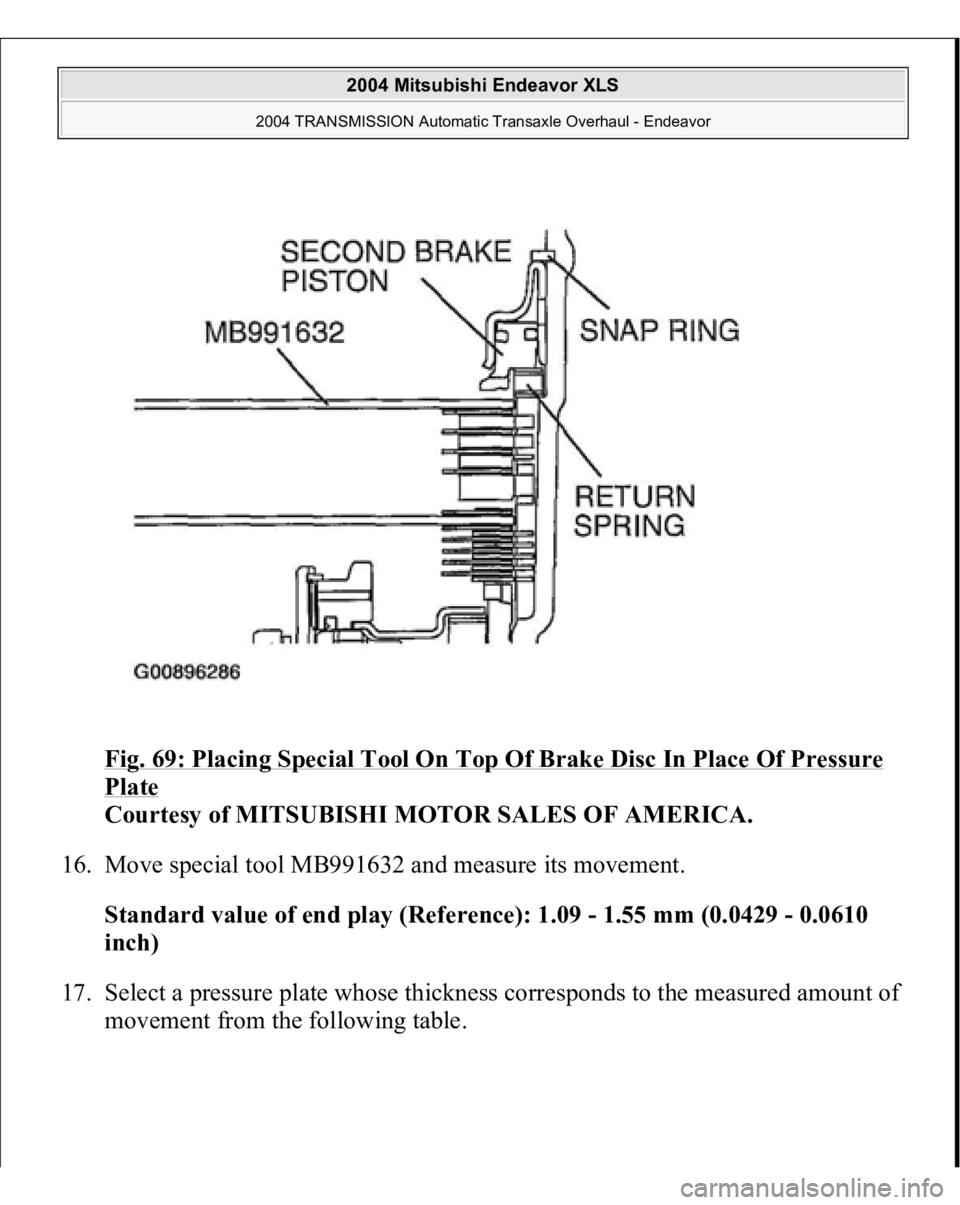
Fig. 69: Placing Special Tool On Top Of Brake Disc In Place Of Pressure Plate
Courtesy of MITSUBISHI MOTOR SALES OF AMERICA.
16. Move special tool MB991632 and measure its movement.
Standard value of end play (Reference): 1.09 - 1.55 mm (0.0429 - 0.0610
inch)
17. Select a pressure plate whose thickness corresponds to the measured amount of
movement from the followin
g table.
2004 Mitsubishi Endeavor XLS
2004 TRANSMISSION Automatic Transaxle Overhaul - Endeavor
Page 529 of 3870
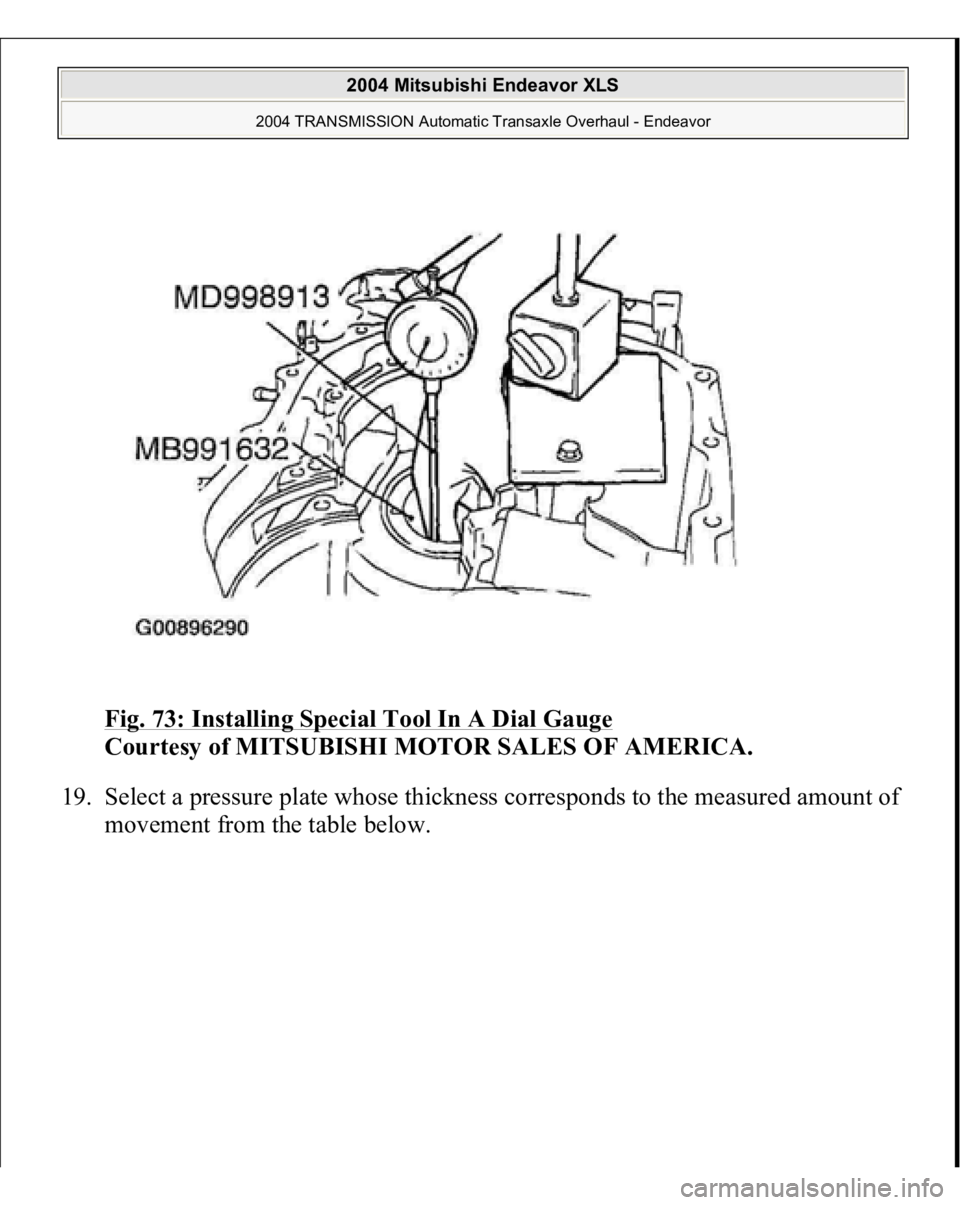
Fig. 73: Installing Special Tool In A Dial Gauge
Courtesy of MITSUBISHI MOTOR SALES OF AMERICA.
19. Select a pressure plate whose thickness corresponds to the measured amount of
movement from the table below.
2004 Mitsubishi Endeavor XLS
2004 TRANSMISSION Automatic Transaxle Overhaul - Endeavor
Page 558 of 3870
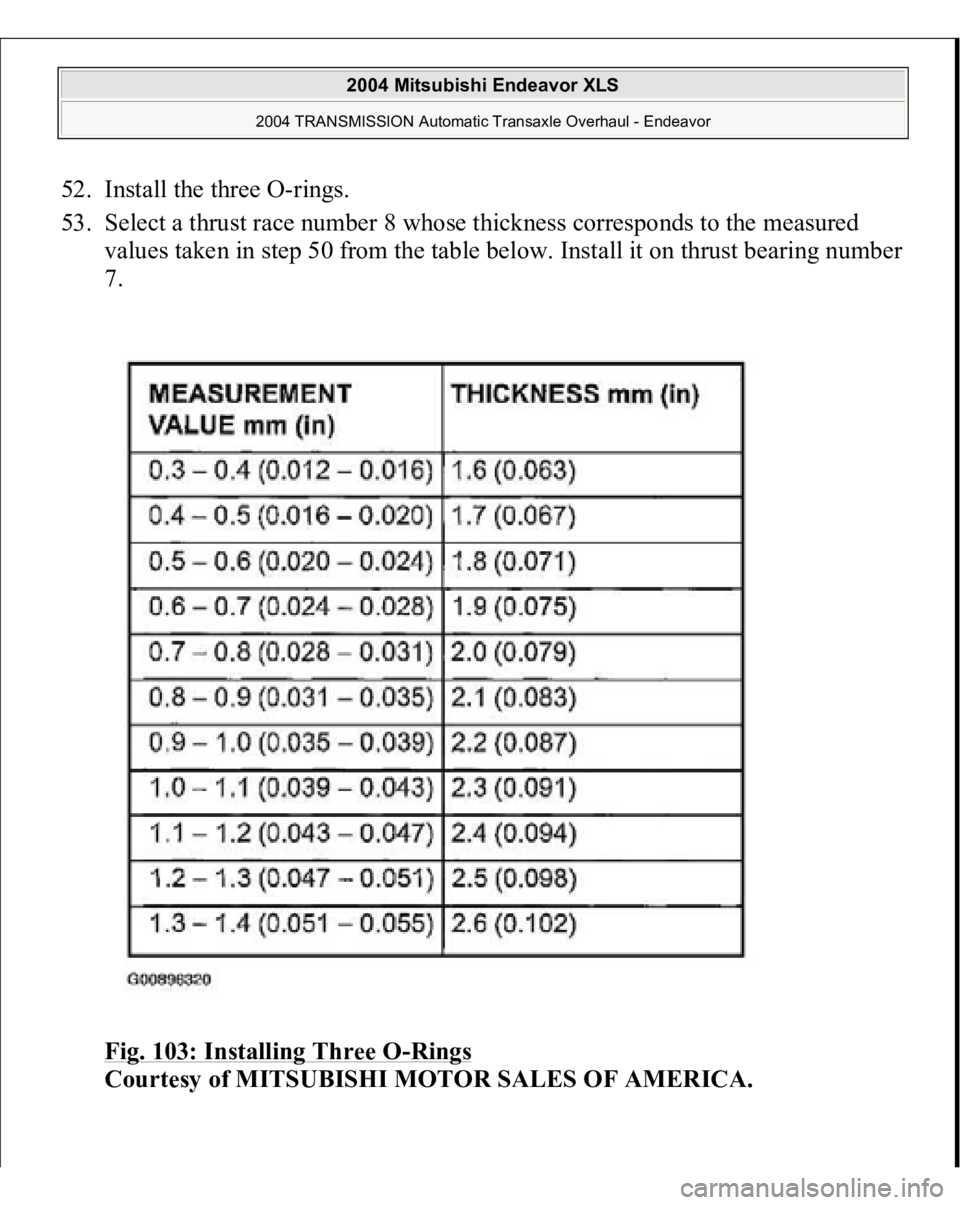
52. Install the three O-rings.
53. Select a thrust race number 8 whose thickness corresponds to the measured
values taken in step 50 from the table below. Install it on thrust bearing number
7.
Fig. 103: Installing Three O
-Rings
Courtesy of MITSUBISHI MOTOR SALES OF AMERICA.
2004 Mitsubishi Endeavor XLS
2004 TRANSMISSION Automatic Transaxle Overhaul - Endeavor
Page 567 of 3870
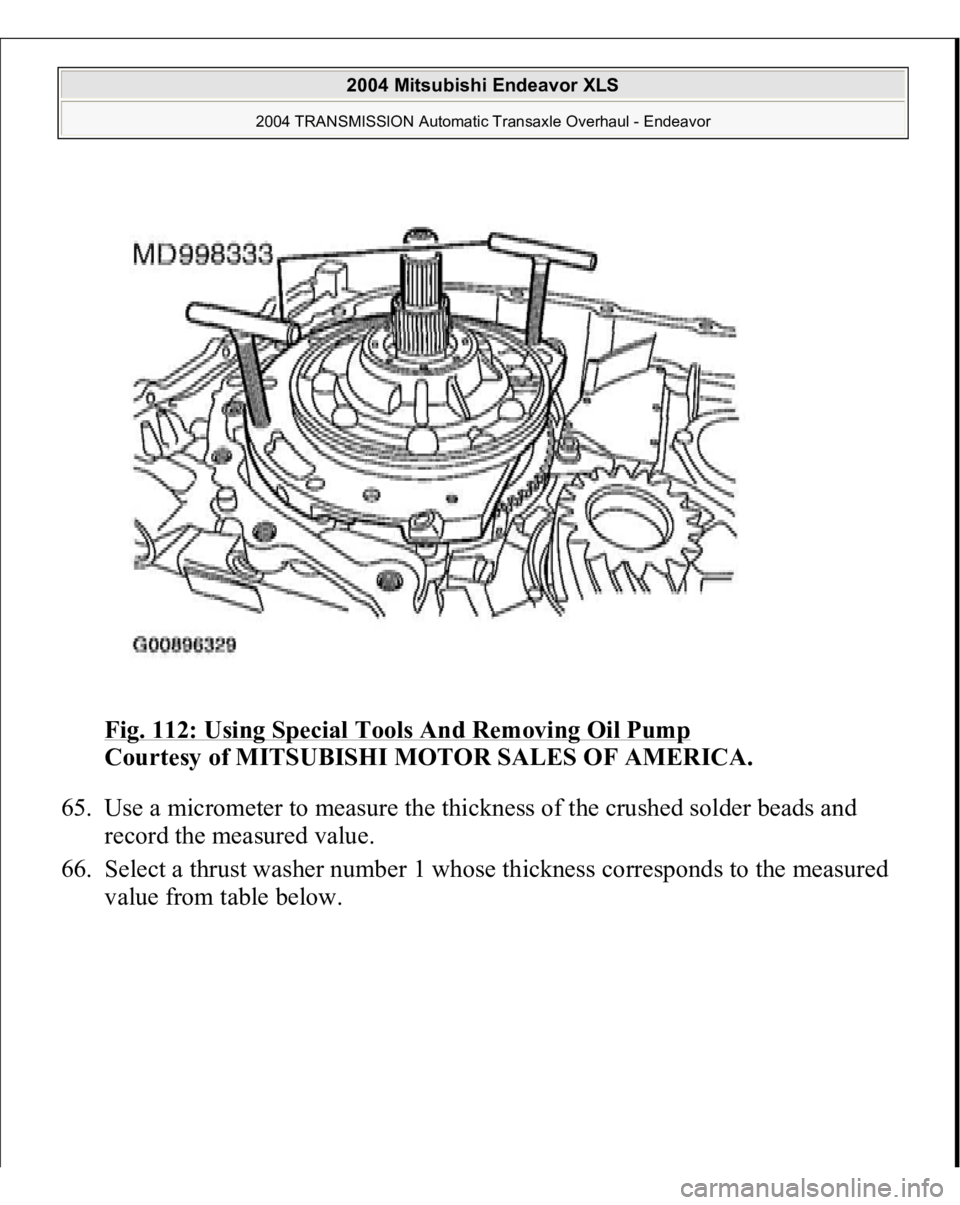
Fig. 112: Using Special Tools And Removing Oil Pump
Courtesy of MITSUBISHI MOTOR SALES OF AMERICA.
65. Use a micrometer to measure the thickness of the crushed solder beads and
record the measured value.
66. Select a thrust washer number 1 whose thickness corresponds to the measured
value from table below.
2004 Mitsubishi Endeavor XLS
2004 TRANSMISSION Automatic Transaxle Overhaul - Endeavor
Page 578 of 3870
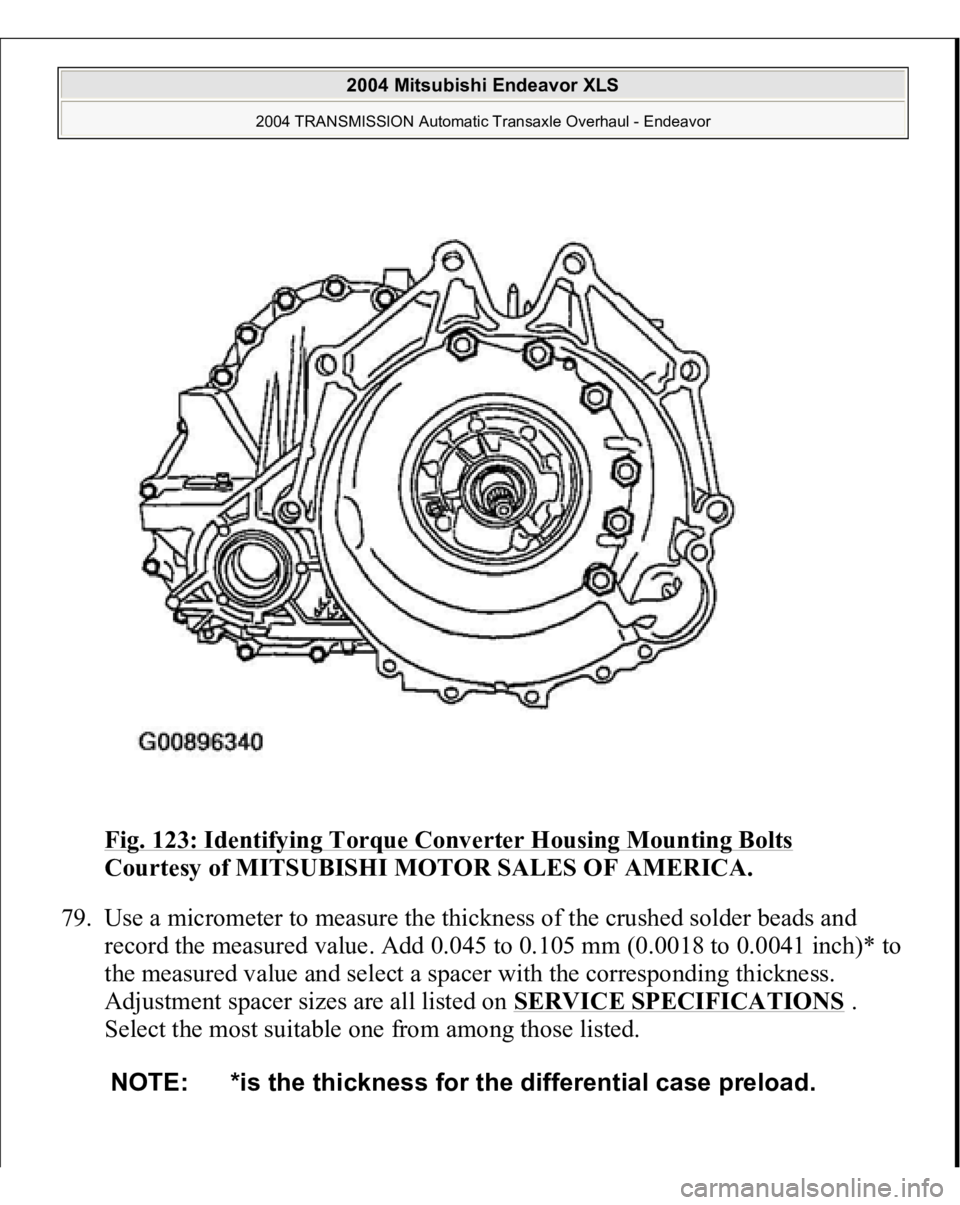
Fig. 123: Identifying Torque Converter Housing Mounting Bolts
Courtesy of MITSUBISHI MOTOR SALES OF AMERICA.
79. Use a micrometer to measure the thickness of the crushed solder beads and
record the measured value. Add 0.045 to 0.105 mm (0.0018 to 0.0041 inch)* to
the measured value and select a spacer with the corresponding thickness.
Adjustment spacer sizes are all listed on SERVICE SPECIFICATIONS
.
Select the most suitable one from among those listed.
NOTE: *is the thickness for the differential case preload.
2004 Mitsubishi Endeavor XLS
2004 TRANSMISSION Automatic Transaxle Overhaul - Endeavor
Page 692 of 3870
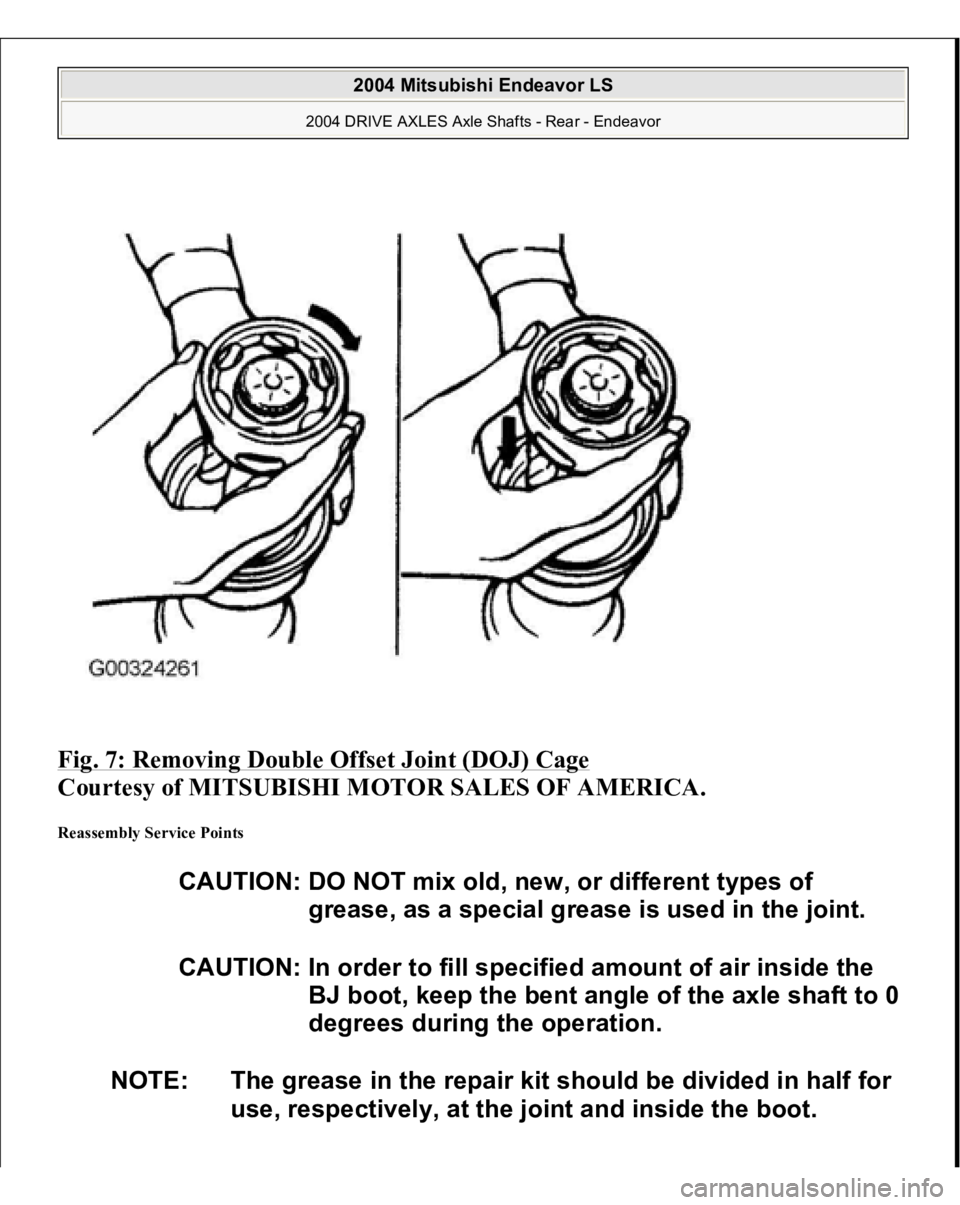
Fig. 7: Removing Double Offset Joint (DOJ) Cage
Courtesy of MITSUBISHI MOTOR SALES OF AMERICA.
Reassembly Service Points
CAUTION: DO NOT mix old, new, or different types of
grease, as a special grease is used in the joint.
CAUTION: In order to fill specified amount of air inside the
BJ boot, keep the bent angle of the axle shaft to 0
degrees during the operation.
NOTE: The grease in the repair kit should be divided in half for
use, respectively, at the joint and inside the boot.
2004 Mitsubishi Endeavor LS
2004 DRIVE AXLES Axle Shafts - Rear - Endeavor
Page 697 of 3870
2. Remove the battery from the vehicle.
3. Inspect battery carrier for damage caused by loss of acid from the battery. If
acid damage is present, it is necessary to clean area with a solution of clean
warm water and baking soda. Scrub area with a stiff bristle brush. Wipe clean
with a cloth moistened with ammonia or baking soda in water.
4. Clean the battery, especially the top with same solutions as described in step 3.
5. Inspect the battery case and cover for cracks. If cracks are present, battery must
be replaced.
6. Clean the battery post with a suitable battery post cleaning tool.
7. Clean the inside surfaces of the terminal clamps with a suitable battery
terminal cleaning tool. Replace damaged or frayed cables and broken terminal
clamps.
8. Install the battery in the vehicle.
9. Connect the positive and negative cables to the battery in the order of mention.
10. Tighten the clamp nut securely. BATTERY CHARGING Battery electrolyte temperature may temporarily be allowed to rise to 55°C (131°F).
Increase of electrolyte temperature above 55°C (131°F) is harmful to the battery,
causing deformation of battery cell, decrease in life of battery, etc.
case is cracked or leaking to protect hands from
the electrolyte. A suitable pair of rubber gloves
(not the household type) should be worn when
removing battery by hand.
WARNING:When batteries are being charged, an explosive gas
forms beneath the cover of each cell. Do not smoke
near batteries on charge or which have recently
been charged. Do not break live circuits at the
terminals of the batteries on charge. A spark will
occur where the live circuit is broken. Keep all open
flames away from the battery.
2004 Mitsubishi Endeavor Limited 2004 ELECTRICAL Battery - Endeavor
Page 983 of 3870

pressed. If the values measured at the time correspond to those in the table below, the resistance values are correct.
2004 Mitsubishi Endeavor LS
2004 BODY & ACCESSORIES Auto, Cruise Control System - Endeavor
Page 1068 of 3870
2 .
3. Turn the ignition switch to the ON position and select BELT TENSION
MEASUREMENT from the menu screen on Scan Tool (MB991958).
4. Hold Microphone (part of Belt Drive Meter Set) (MB991668) near the center
of the drive belt between the pulleys away from the rear surface of the belt and
perpendicular to the belt (no more then 15 degrees in either direction). See Fi
g.
3 and Fig. 4
.
5. Gently tap the middle of the belt between the pulleys with your finger, and
check that the vibration frequency of the belt is within specification. See Fig. 3
and Fig. 4
. See DRIVE BELT ADJUSTMENT SPECIFICATIONS
table.
CAUTION: Temperature of the surface of the belt should be
as close possible to underhood temperature.
CAUTION: DO NOT let contaminants such as water or oil get
onto the microphone. If strong gusts of wind
blow against the microphone or if there are any
loud sources of noise nearby, the values
measured by the microphone may not
correspond to actual values. DO NOT take
measurement while engine is running.
2004 Mitsubishi Endeavor Limited
2004 ENGINE COOLING Specifications & Drive Belt Routing - Endeavor