MITSUBISHI ENDEAVOR 2004 Service Repair Manual
ENDEAVOR 2004
MITSUBISHI
MITSUBISHI
https://www.carmanualsonline.info/img/19/57105/w960_57105-0.png
MITSUBISHI ENDEAVOR 2004 Service Repair Manual
Page 456 of 3870
2004 TRANSMISSION
Automatic Transaxle Overhaul - Endeavor
GENERAL INFORMATION This automatic transaxle is made up of the following main parts.
The gear train is made up of 3 multi-plate clutches, 2 multi-plate brakes and 2
planetary gears made up of a sun gear, carrier, pinion gear and annulus gear.
The torque converter employs a 3 element, 1 step, 2 phase lock-up clutch.
The cases consist of a converter housing, transaxle case, rear cover and a valve
body cover.
Parts related to oil pressure regulation are the oil pump, which pressurizes the oil;
the regulator, which controls the pressure setting; the solenoid valves, which
changes the oil pressure with electrical signals; the pressure control valve, which
controls the oil pressure coming from the solenoid valve that effects each clutch and
brake; each kind of valve, which carry out the retention of the oil pressure through
the lines; and finally the valve body, which houses all the valves. SECTIONAL VIEW < F4A5A >
2004 Mitsubishi Endeavor XLS
2004 TRANSMISSION Automatic Transaxle Overhaul - Endeavor
2004 Mitsubishi Endeavor XLS
2004 TRANSMISSION Automatic Transaxle Overhaul - Endeavor
Page 469 of 3870
Required Special Tools:
MB990607: Torque Wrench Socket MB990930: Installer Adapter MB990931: Installer Adapter MB990936: Installer Adapter MB990938: Handle MB991625: Special Socket (41) MB991632: Clearance Dummy Plate MD998323: Bearing Installer MD998333: Oil Pump Remover MD998338: Oil Pump Remover MD998412: Guide MD998913: Dial Gauge Extension MD998924: Spring Compressor Retainer
DISASSEMBLY
CAUTION:
Because the automatic transaxle is manufactured
from high-precision parts, care must be taken not
to scratch or damage these parts during
disassembly and assembly. The working area should be covered with a
rubber mat to keep it clean at all times. Do not wear any cloth gloves and do not use any
shop towels during disassembly. Use only nylon
cloth, paper towels or any other lint-free material. Parts which have been disassembled should all
be cleaned. Metal parts can be cleaned with
normal detergent, but they should be dried
completely using compressed air. Clutch discs, plastic thrust plates and rubber
parts should be cleaned with automatic
2004 Mitsubishi Endeavor XLS
2004 TRANSMISSION Automatic Transaxle Overhaul - Endeavor
Page 490 of 3870
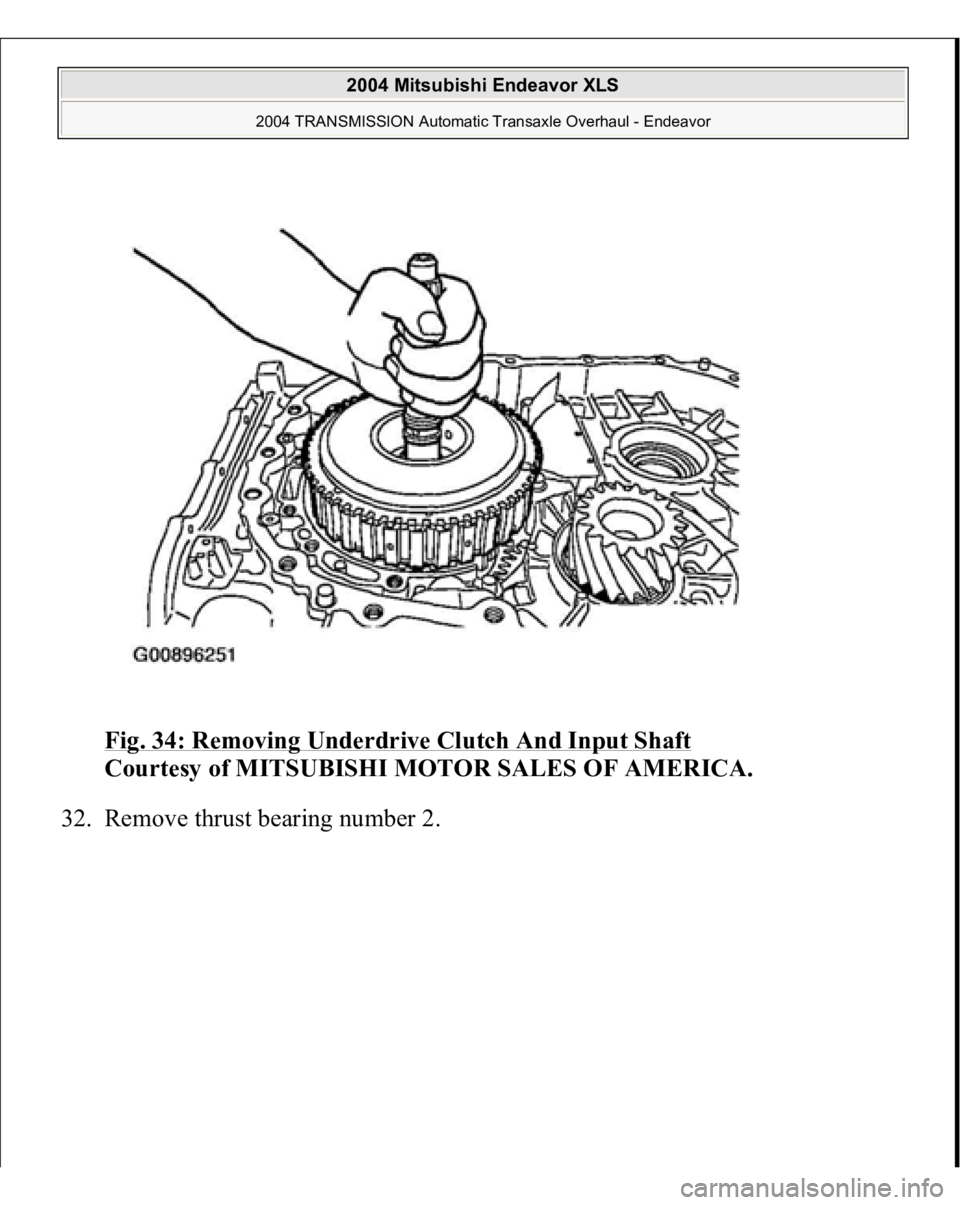
Fig. 34: Removing Underdrive Clutch And Input Shaft
Courtesy of MITSUBISHI MOTOR SALES OF AMERICA.
32. Remove thrust bearing number 2.
2004 Mitsubishi Endeavor XLS
2004 TRANSMISSION Automatic Transaxle Overhaul - Endeavor
Page 491 of 3870
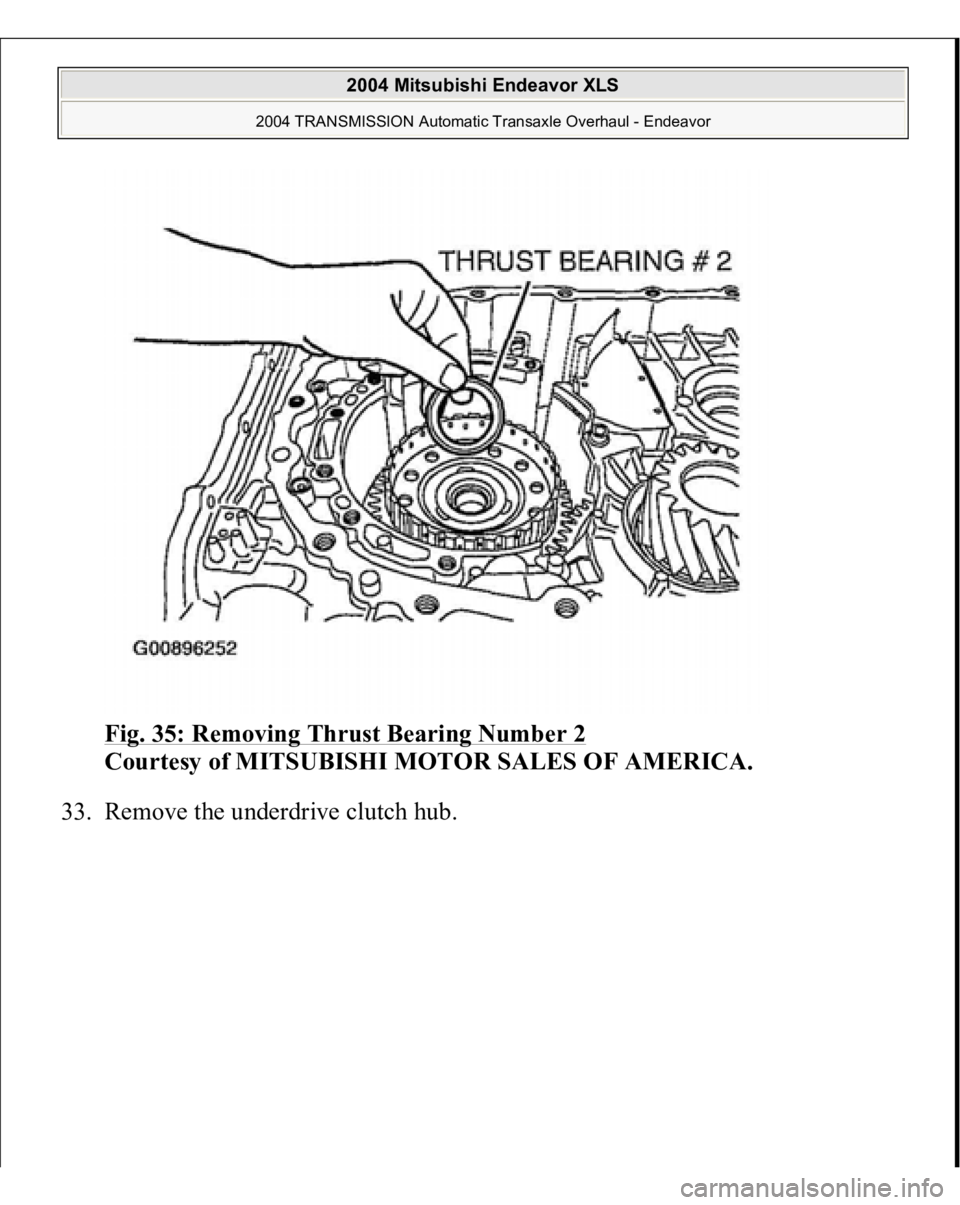
Fig. 35: Removing Thrust Bearing Number 2
Courtesy of MITSUBISHI MOTOR SALES OF AMERICA.
33. Remove the underdrive clutch hub.
2004 Mitsubishi Endeavor XLS
2004 TRANSMISSION Automatic Transaxle Overhaul - Endeavor
Page 492 of 3870
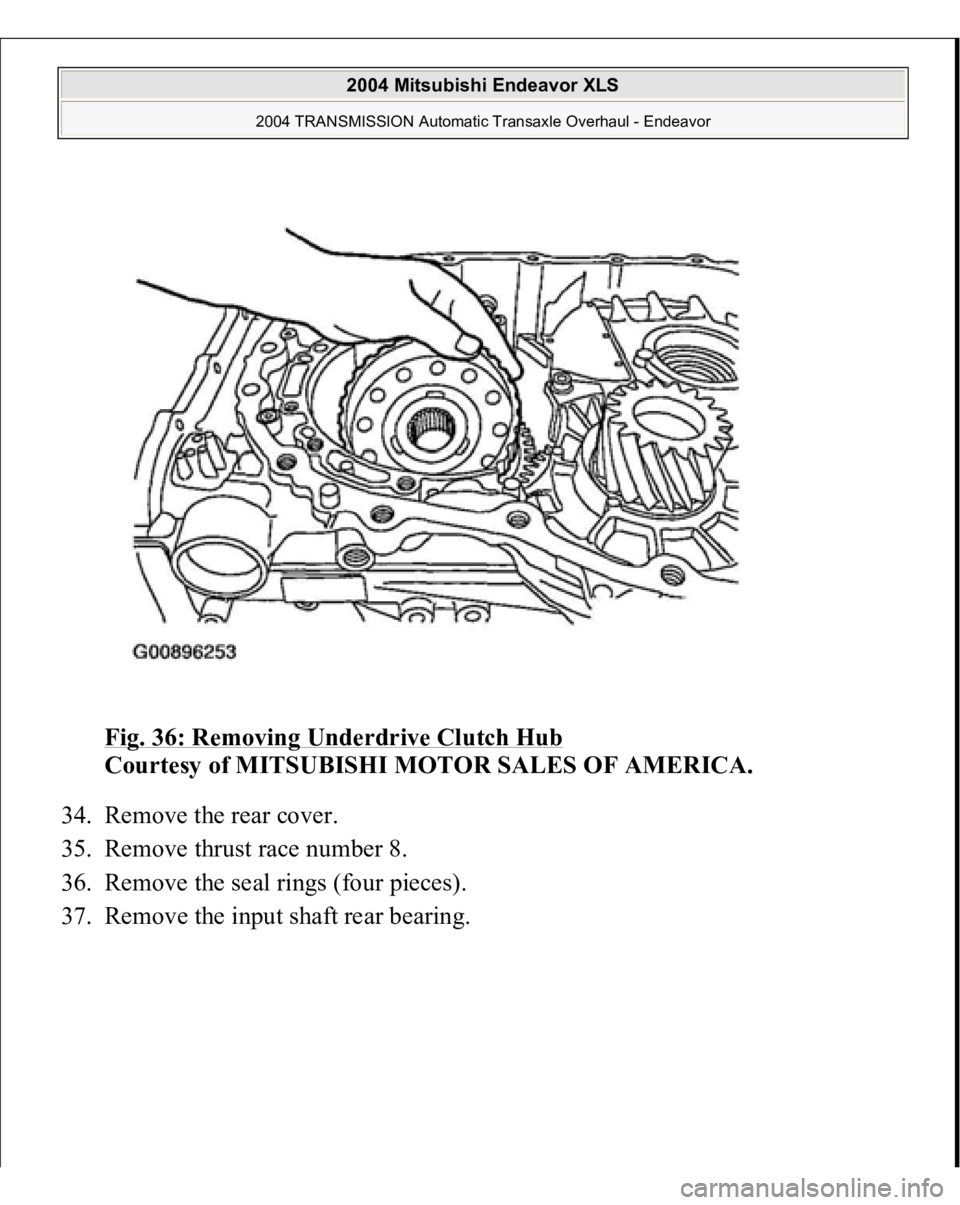
Fig. 36: Removing Underdrive Clutch Hub
Courtesy of MITSUBISHI MOTOR SALES OF AMERICA.
34. Remove the rear cover.
35. Remove thrust race number 8.
36. Remove the seal rings (four pieces).
37. Remove the in
put shaft rear bearin
g.
2004 Mitsubishi Endeavor XLS
2004 TRANSMISSION Automatic Transaxle Overhaul - Endeavor
Page 494 of 3870
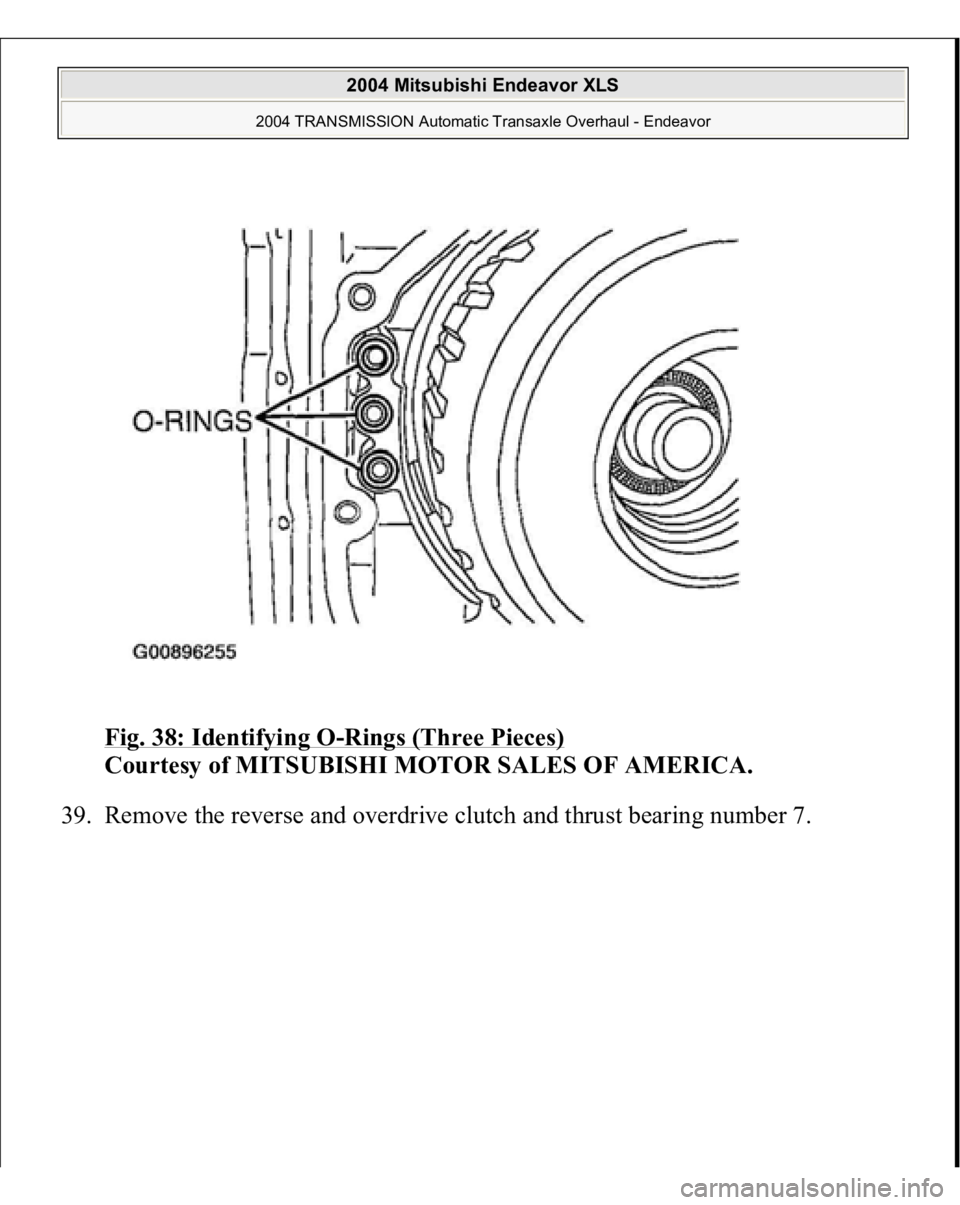
Fig. 38: Identifying O
-Rings (Three Pieces)
Courtesy of MITSUBISHI MOTOR SALES OF AMERICA.
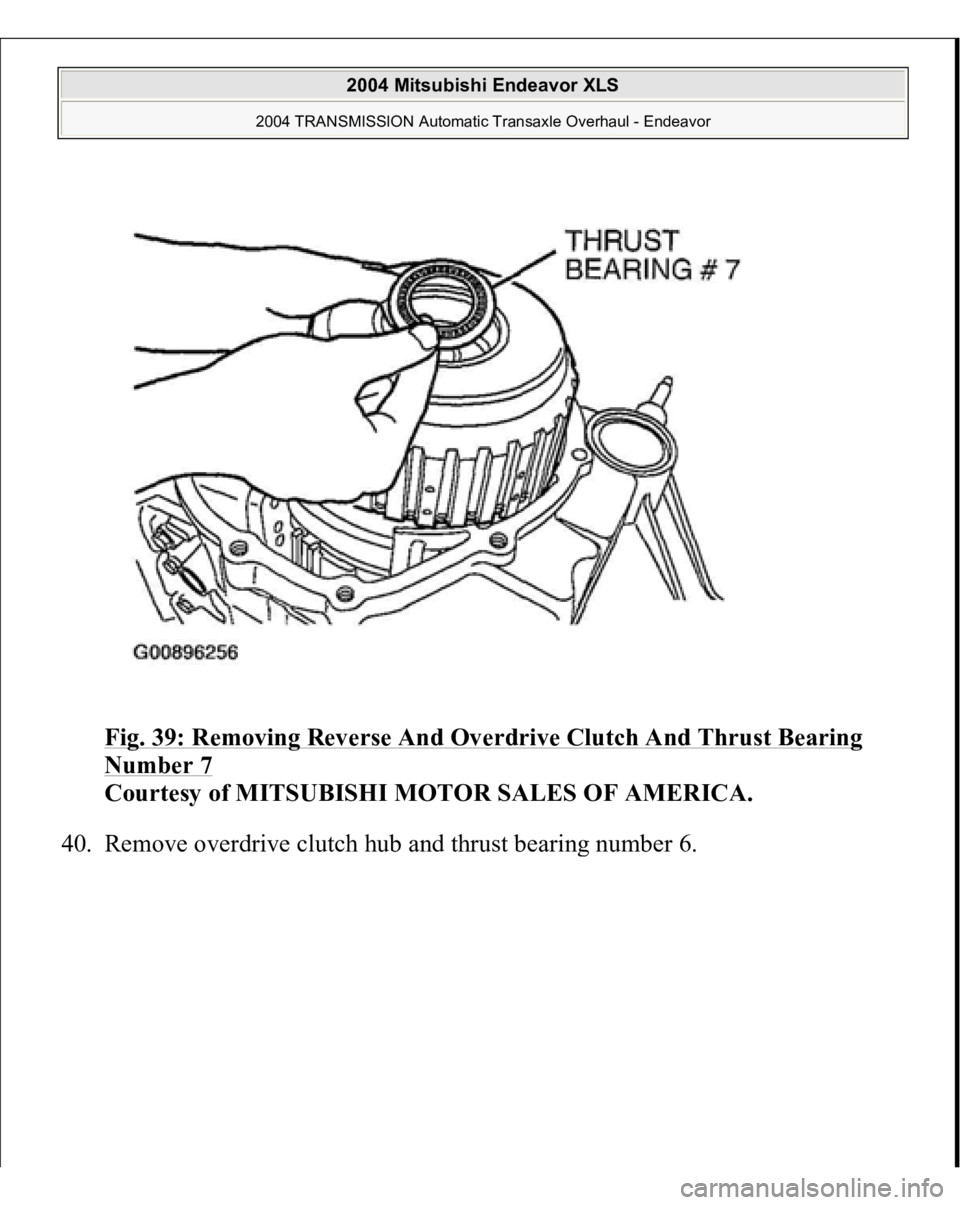
39. Remove the reverse and overdrive clutch and thrust
bearin
g number 7.
2004 Mitsubishi Endeavor XLS
2004 TRANSMISSION Automatic Transaxle Overhaul - Endeavor
Page 495 of 3870
Fig. 39: Removing Reverse And Overdrive Clutch And Thrust Bearing Number 7
Courtesy of MITSUBISHI MOTOR SALES OF AMERICA.
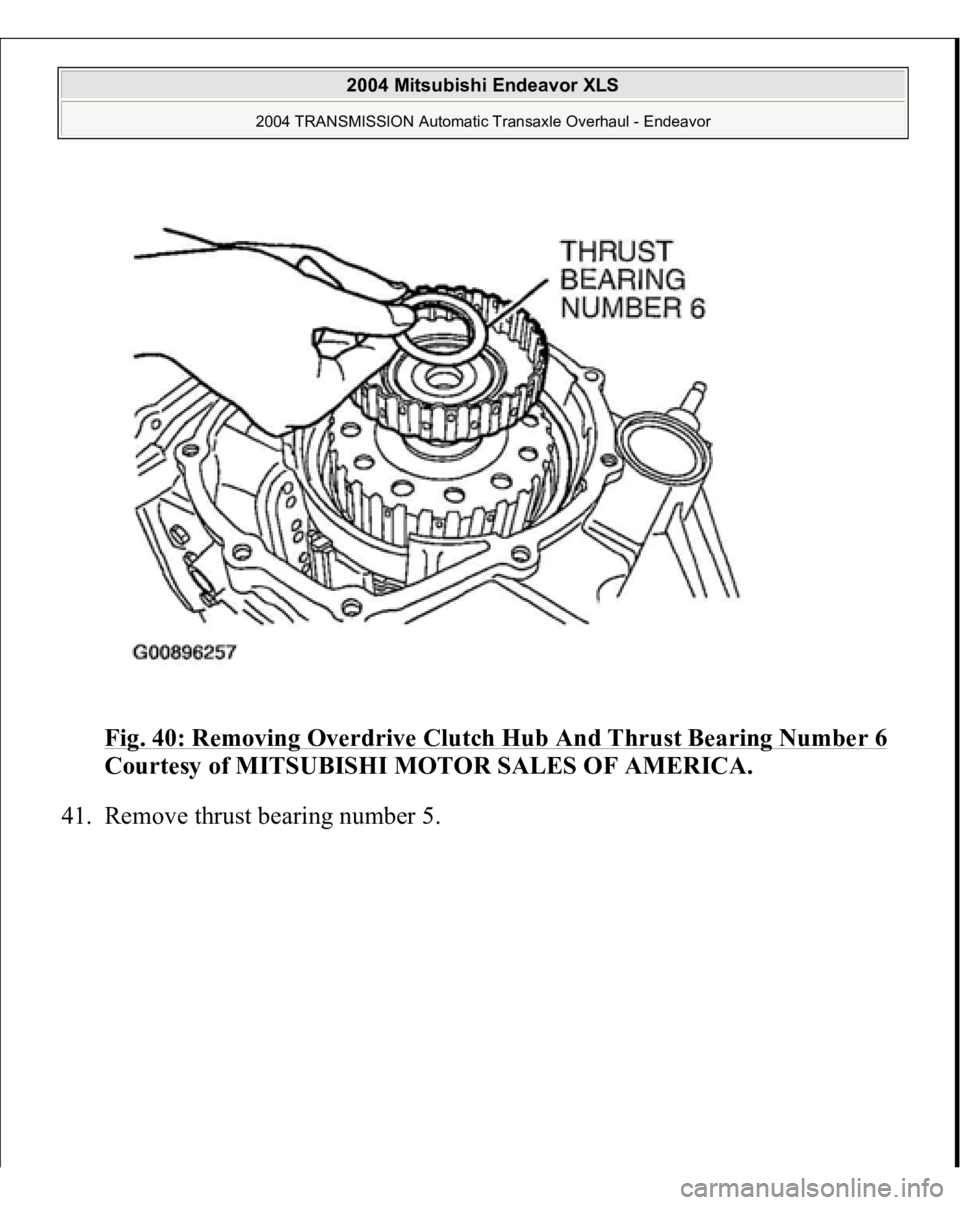
40. Remove overdrive clutch hub and thrust bearin
g number 6.
2004 Mitsubishi Endeavor XLS
2004 TRANSMISSION Automatic Transaxle Overhaul - Endeavor
Page 496 of 3870
Fig. 40: Removing Overdrive Clutch Hub And Thrust Bearing Number 6
Courtesy of MITSUBISHI MOTOR SALES OF AMERICA.
41. Remove thrust bearin
g number 5.
2004 Mitsubishi Endeavor XLS
2004 TRANSMISSION Automatic Transaxle Overhaul - Endeavor
Page 509 of 3870
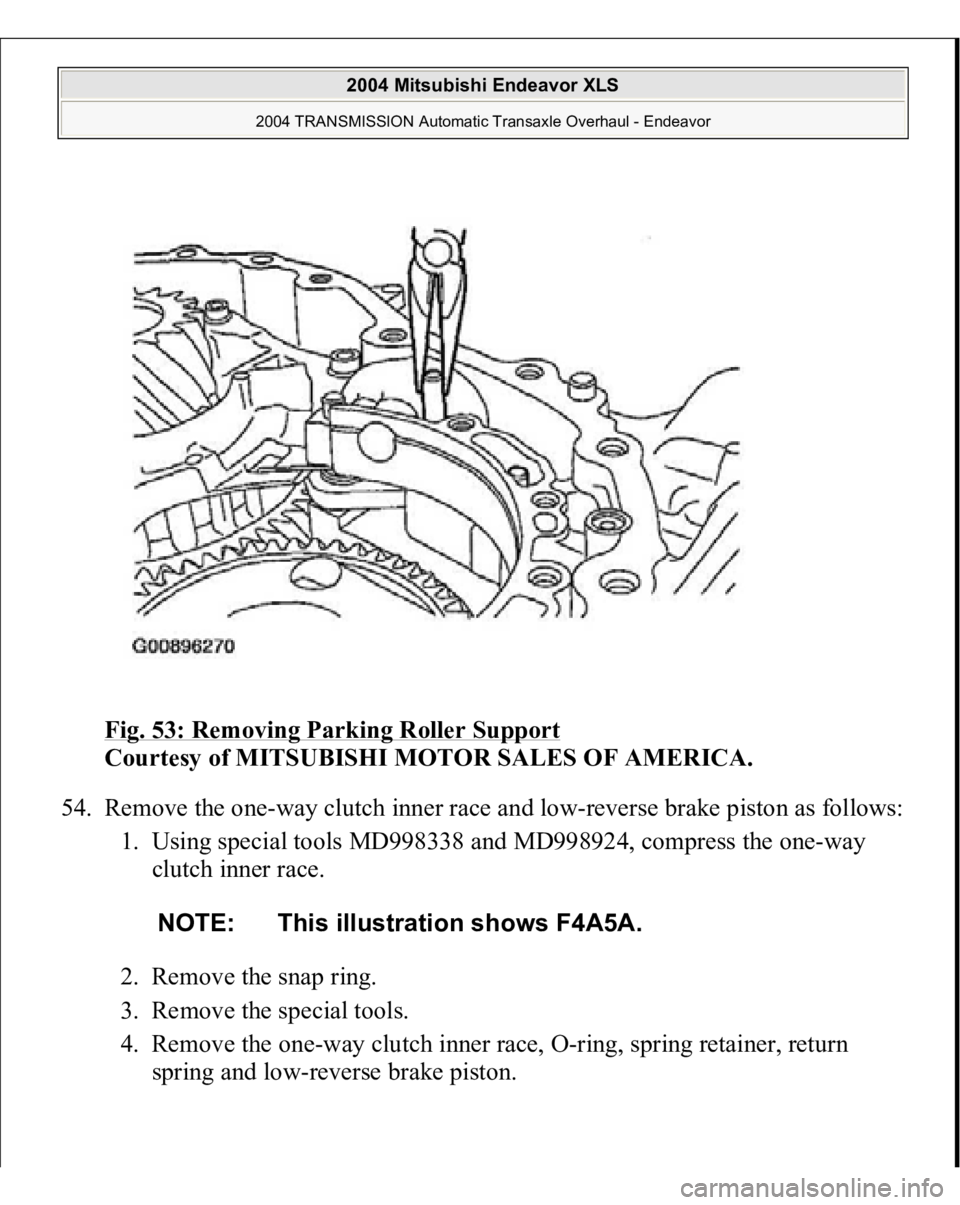
Fig. 53: Removing Parking Roller Support
Courtesy of MITSUBISHI MOTOR SALES OF AMERICA.
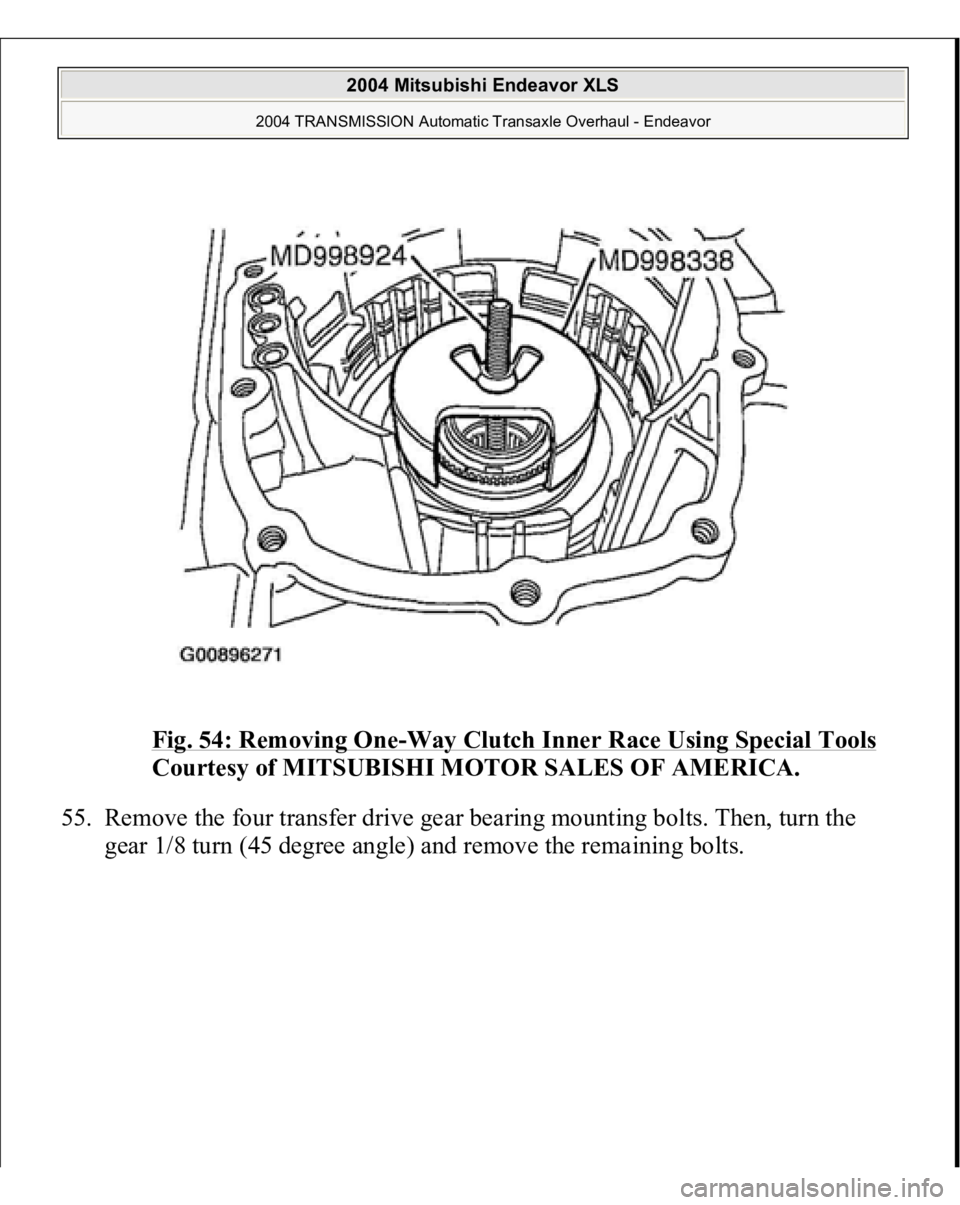
54. Remove the one-way clutch inner race and low-reverse brake piston as follows:
1. Using special tools MD998338 and MD998924, compress the one-way
clutch inner race.
2. Remove the snap ring.
3. Remove the special tools.
4. Remove the one-way clutch inner race, O-ring, spring retainer, return
s
prin
g and low-reverse brake
piston.
NOTE: This illustration shows F4A5A.
2004 Mitsubishi Endeavor XLS
2004 TRANSMISSION Automatic Transaxle Overhaul - Endeavor
Page 510 of 3870
Fig. 54: Removing One
-Way Clutch Inner Race Using Special Tools
Courtesy of MITSUBISHI MOTOR SALES OF AMERICA.
55. Remove the four transfer drive gear bearing mounting bolts. Then, turn the
gear 1/8 turn
(45 de
gree an
gle) and remove the remainin
g bolts.
2004 Mitsubishi Endeavor XLS
2004 TRANSMISSION Automatic Transaxle Overhaul - Endeavor


