roof MITSUBISHI ENDEAVOR 2004 Service Repair Manual
[x] Cancel search | Manufacturer: MITSUBISHI, Model Year: 2004, Model line: ENDEAVOR, Model: MITSUBISHI ENDEAVOR 2004Pages: 3870, PDF Size: 98.47 MB
Page 993 of 3870
CENTRAL DOOR LOCKING SYSTEM DIAGNOSIS The central door locking system is controlled by the simplified wiring system
(SWS). Refer to SYMPTOM CHART
.
POWER WINDOW DIAGNOSIS The power window is controlled by the simplified wiring system (SWS). Refer to
SYMPTOM CHART
.
DOOR DIAGNOSIS INTRODUCTION TO GLASS AND DOOR DIAGNOSIS Glass and door faults include water leaks and improper opening and closing. Causes
for these faults can include faults in the glass, weatherstrip, drain hole, waterproof
film or door installation. GLASS AND DOOR DIAGNOSTIC TROUBLESHOOTING STRATEGY Use these steps to plan your diagnostic strategy. If you follow them carefully, you
will be sure that you have exhausted most of the possible ways to find a glass and
door fault.
1. Gather information from the customer.
2. Verify that the condition described by the customer exists.
3. Find the malfunction by following the Symptom Chart.
4. Verify malfunction is eliminated. SYMPTOM CHART SYMPTOM REFERENCE SYMPTOM
INSPECTION
PROCEDURE
REFERENCE PAGE
Water leak through door
window glass
1
INSPECTION
PROCEDURE 1: Water
Leak Throu
gh Door
Window Glass
2004 Mitsubishi Endeavor LS
2004 BODY & ACCESSORIES Door - Endeavor
Page 1012 of 3870
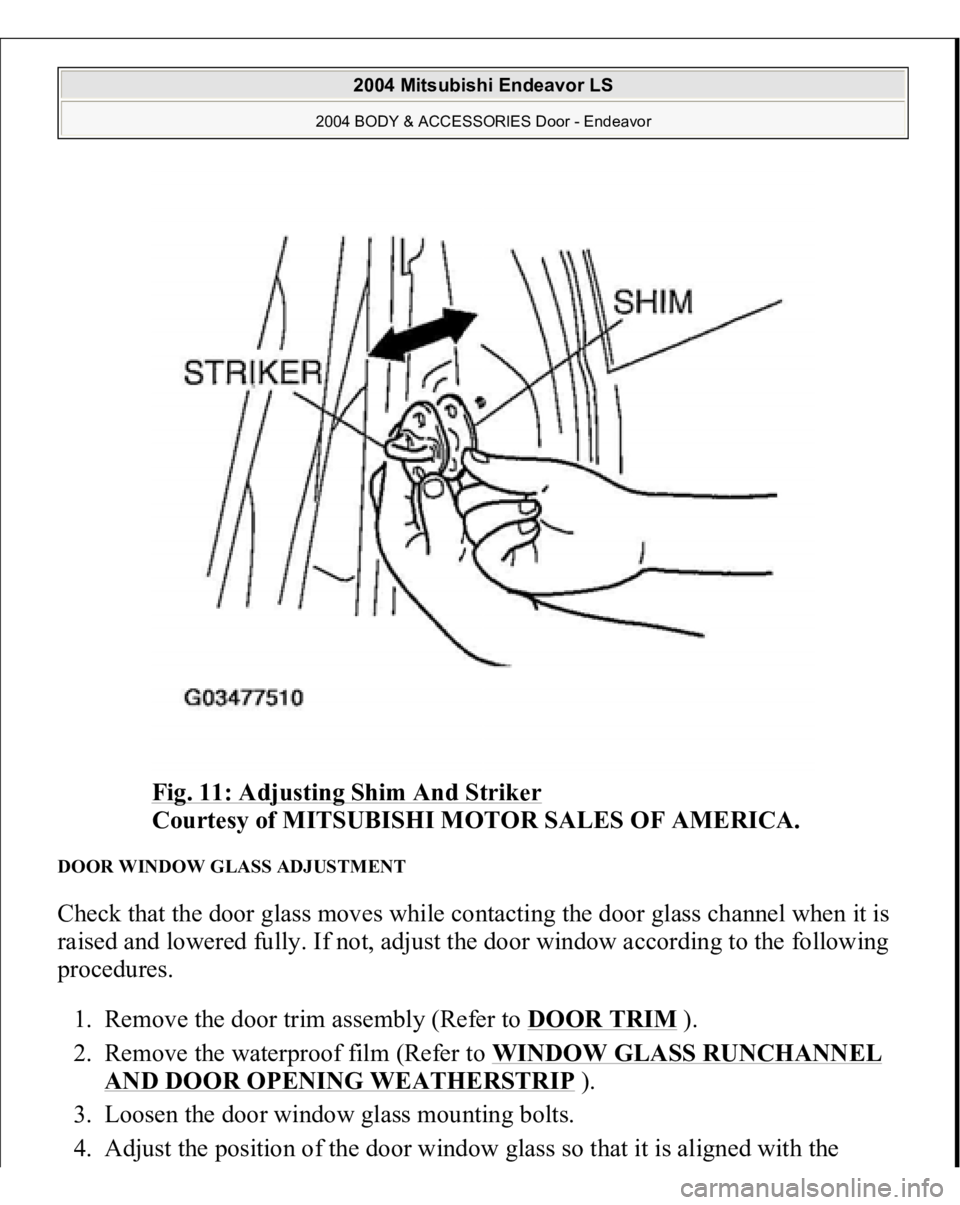
Fig. 11: Adjusting Shim And Striker
Courtesy of MITSUBISHI MOTOR SALES OF AMERICA.
DOOR WINDOW GLASS ADJUSTMENT Check that the door glass moves while contacting the door glass channel when it is
raised and lowered fully. If not, adjust the door window according to the following
procedures.
1. Remove the door trim assembly (Refer to DOOR TRIM
).
2. Remove the waterproof film (Refer to WINDOW GLASS RUNCHANNEL
AND DOOR OPENING WEATHERSTRIP
).
3. Loosen the door window glass mounting bolts.
4. Ad
just the
position of the door window
glass so that it is ali
gned with the
2004 Mitsubishi Endeavor LS
2004 BODY & ACCESSORIES Door - Endeavor
Page 1015 of 3870
Fig. 12: Adjusting Door Window Glas
s
Courtesy of MITSUBISHI MOTOR SALES OF AMERICA.
GLASS SLIDING MECHANISM CHECK AND ADJUSTMENT If the window glass automatically starts moving downwards at the wrong time
while it is being raised, carry out the following adjustment or replacement
procedures.
1. Remove the door trim assembly (Refer to DOOR TRIM
).
2. Remove the waterproof film (Refer to WINDOW GLASS RUNCHANNEL
AND DOOR OPENING WEATHERSTRIP
).
3. Remove the window regulator assembly from the door window glass, and then
raise and lower the door window glass by hand to check the operation force.
4. If the door window glass does not move up and down smoothly, check or
repair the following points:
Check the installation condition of the runchannel. Repair any twisting in the door sash. Check the installation condition of the lower sash.
CAUTION: Insert a cushion or similar object to prevent
damage to the glass if it should fall.
NOTE: To align the lower sash, loosen the lower sash
mounting bolts, and move the lower sash along the
oblong mounting holes.
2004 Mitsubishi Endeavor LS
2004 BODY & ACCESSORIES Door - Endeavor
Page 1059 of 3870
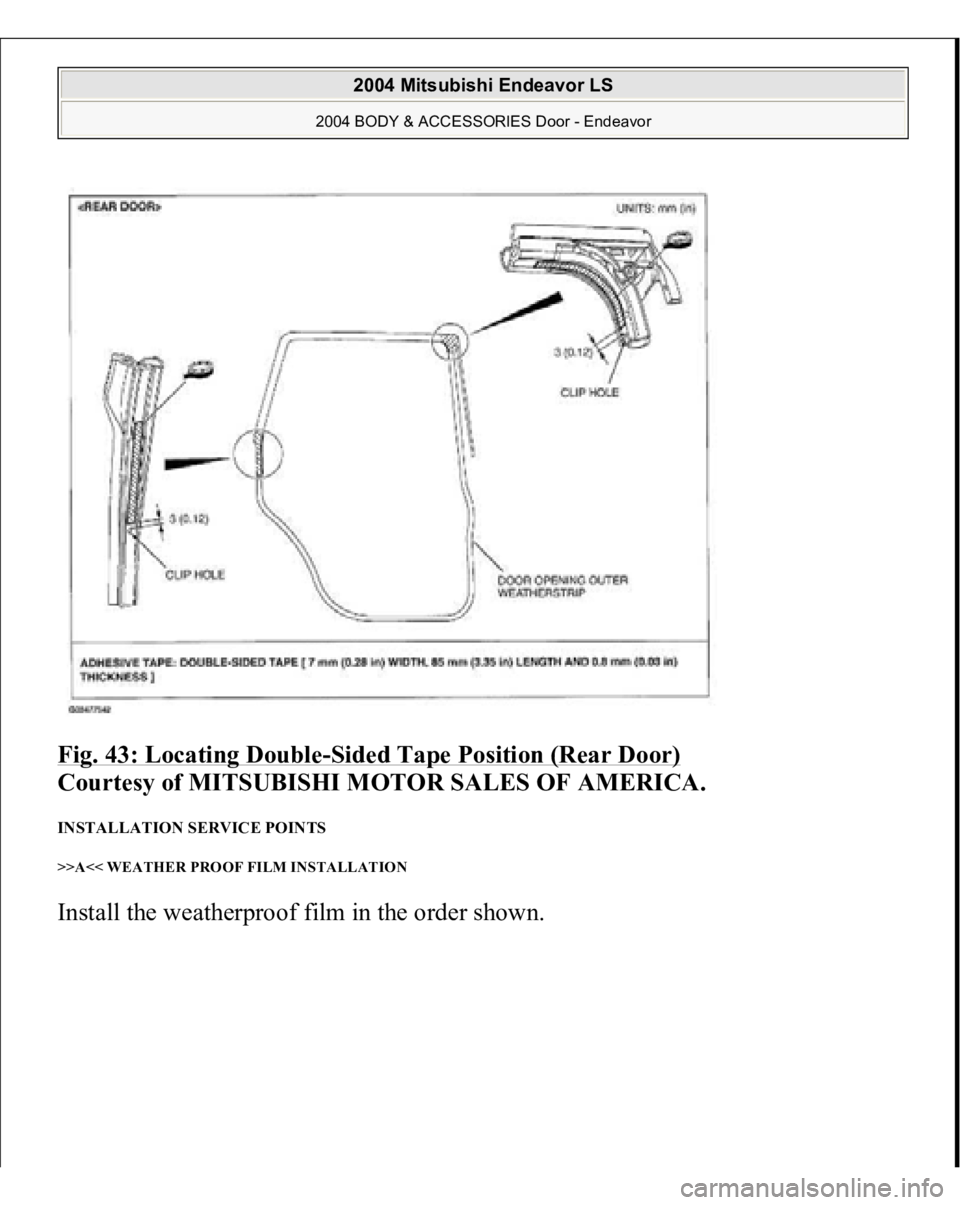
Fig. 43: Locating Double
-Sided Tape Position (Rear Door)
Courtesy of MITSUBISHI MOTOR SALES OF AMERICA.
INSTALLATION SERVICE POINTS >>A<< WEATHER PROOF FILM INSTALLATION Install the weather
proof film in the order shown.
2004 Mitsubishi Endeavor LS
2004 BODY & ACCESSORIES Door - Endeavor
Page 1060 of 3870
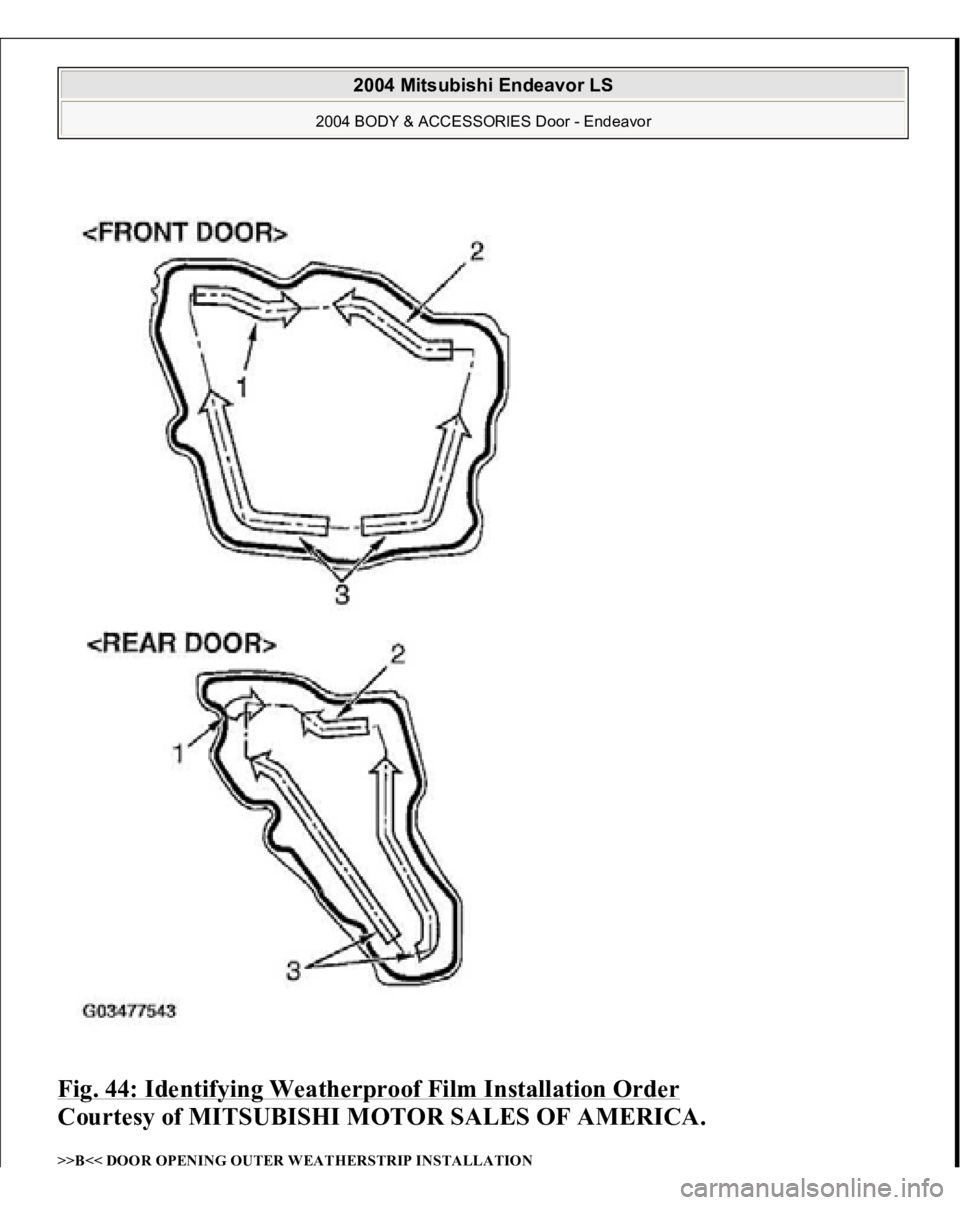
Fig. 44: Identifying Weatherproof Film Installation Order
Courtesy of MITSUBISHI MOTOR SALES OF AMERICA.
>>B<< DOOR OPENING OUTER WEATHERSTRIP INSTALLATION
2004 Mitsubishi Endeavor LS
2004 BODY & ACCESSORIES Door - Endeavor
Page 1095 of 3870

MOTORS MOTORS LOCATION SENDING UNITS & SENSORS SENDING UNITS & SENSORS LOCATION
4 .
Power Window Main Switch CPU
Integral to power window main switch.
See Fig. 15
.
SRS ECU
Under front of center console.Fig. 14
.
Sunroof ECU
At front of sunroof opening.Fig. 13
.
Component
Location
Door Lock Actuator (Left Front) (E-
20)
Rear of left front door.Fig. 77
.
Door Lock Actuator (Left Rear) (E-13)
Rear of left rear door.Fig. 77
.
Door Lock Actuator (Right Front) (E-
03)
Rear of right front door.Fig. 77
.
Door Lock Actuator (Right Rear) (E-
07)
Rear of right rear door.Fig. 77
.
Fuel Pump Module
In top of fuel tank.Fig. 64
.
Liftgate Actuator (F-11)
Lower center of liftgate. See Fig. 88
.
Power Steering Oil Pump
Lower right side of engine
compartment. See Fig. 36
.
Rear Blower Motor (C-20)
Rear of center console.Fig. 76
.
Rear Washer Motor (A-26)
In washer tank assembly.Fig. 79
.
Sunroof Motor Assembly
Right front of roof. See Fig. 62
.
Windshield Washer Motor (A-27)
In washer tank assembly.Fig. 79
.
Windshield Wiper Motor (A-03)
On left side of firewall.Fig. 79
.
Component
Location
ABS G Sensor Or G & Yaw Rate
Sensor
Under center console. See Fig. 67
.
Acceleration Pedal Position
Above accelerator pedal.Fig. 59
.
2004 Mitsubishi Endeavor LS
2004 MITSUBISHI Endeavor
Page 1100 of 3870
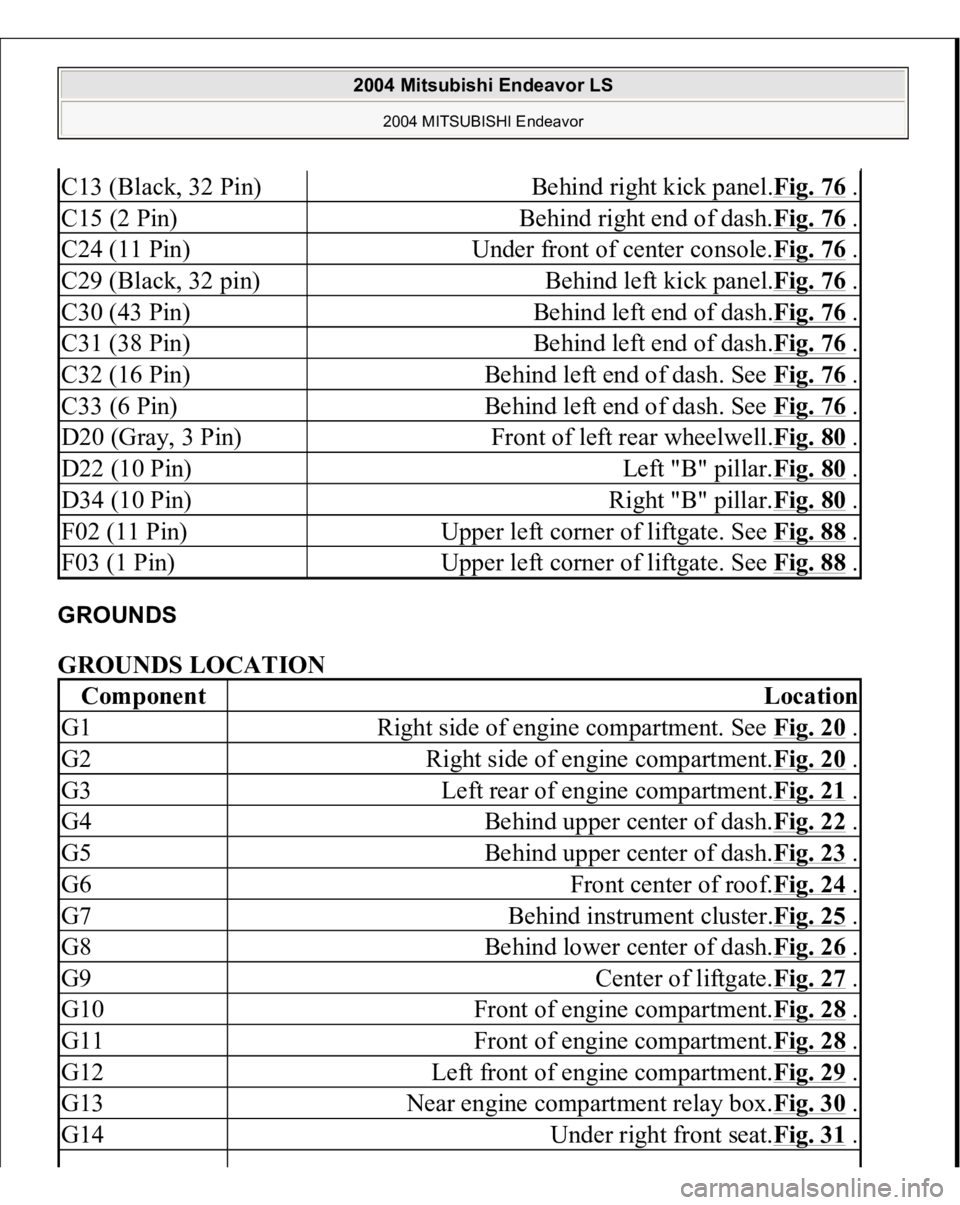
GROUNDS GROUNDS LOCATION C13 (Black, 32 Pin)
Behind right kick panel.Fig. 76
.
C15 (2 Pin)
Behind right end of dash.Fig. 76
.
C24 (11 Pin)
Under front of center console.Fig. 76
.
C29 (Black, 32 pin)
Behind left kick panel.Fig. 76
.
C30 (43 Pin)
Behind left end of dash.Fig. 76
.
C31 (38 Pin)
Behind left end of dash.Fig. 76
.
C32 (16 Pin)
Behind left end of dash. See Fig. 76
.
C33 (6 Pin)
Behind left end of dash. See Fig. 76
.
D20 (Gray, 3 Pin)
Front of left rear wheelwell.Fig. 80
.
D22 (10 Pin)
Left "B" pillar.Fig. 80
.
D34 (10 Pin)
Right "B" pillar.Fig. 80
.
F02 (11 Pin)
Upper left corner of liftgate. See Fig. 88
.
F03 (1 Pin)
Upper left corner of liftgate. See Fig. 88
.
Component
Location
G1
Right side of engine compartment. See Fig. 20
.
G2
Right side of engine compartment.Fig. 20
.
G3
Left rear of engine compartment.Fig. 21
.
G4
Behind upper center of dash.Fig. 22
.
G5
Behind upper center of dash.Fig. 23
.
G6
Front center of roof.Fig. 24
.
G7
Behind instrument cluster.Fig. 25
.
G8
Behind lower center of dash.Fig. 26
.
G9
Center of liftgate.Fig. 27
.
G10
Front of engine compartment.Fig. 28
.
G11
Front of engine compartment.Fig. 28
.
G12
Left front of engine compartment.Fig. 29
.
G13
Near engine compartment relay box.Fig. 30
.
G14
Under right front seat.Fig. 31
.
2004 Mitsubishi Endeavor LS
2004 MITSUBISHI Endeavor
Page 1109 of 3870
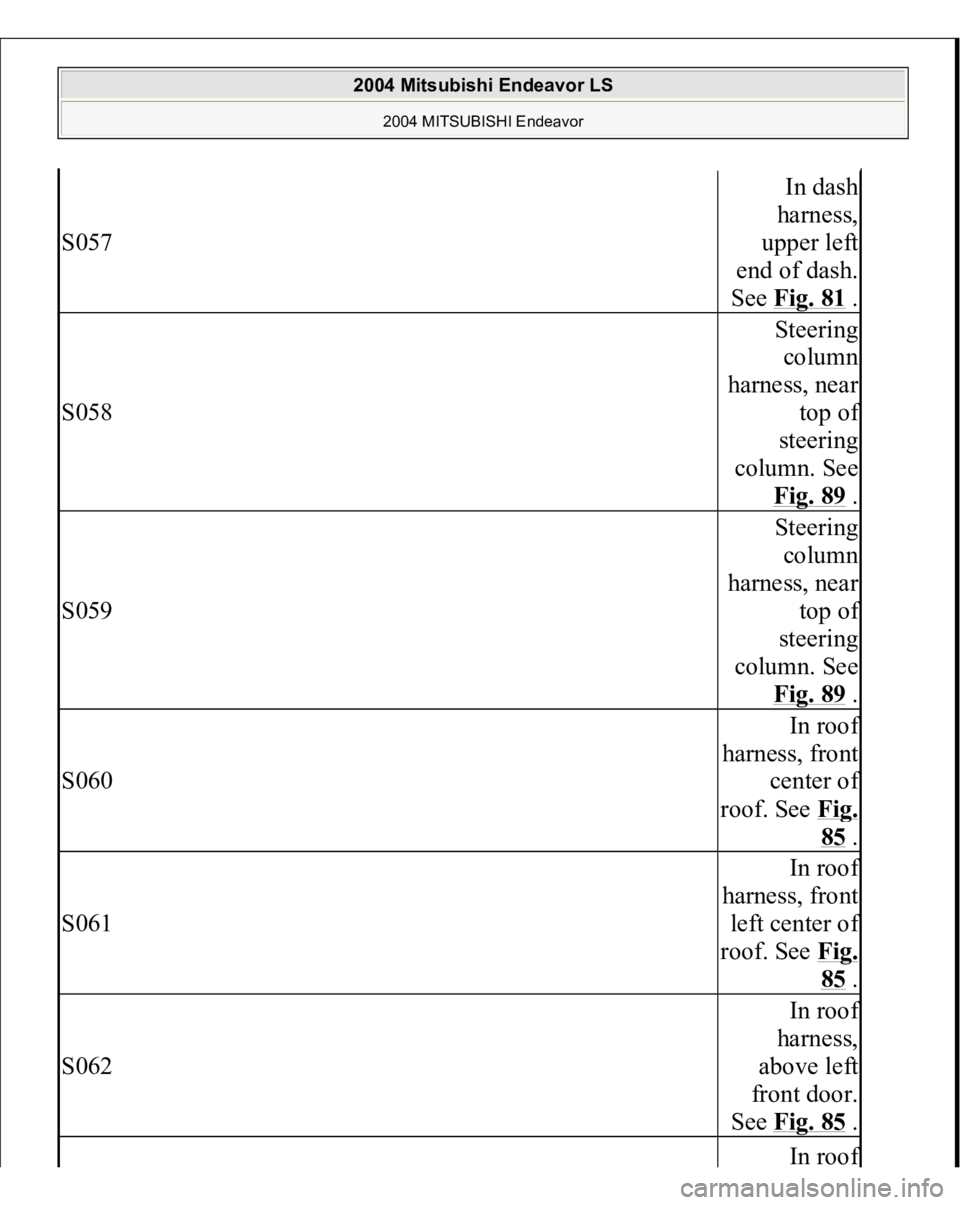
S057
In dash
harness,
upper left
end of dash.
See Fig. 81
.
S058
Steering
column
harness, near
top o
f
steering
column. See
Fig. 89 .
S059
Steering
column
harness, near
top o
f
steering
column. See
Fig. 89 .
S060
In roo
f
harness, front
center of
roof. See Fig.
85 .
S061
In roo
f
harness, front
left center of
roof. See Fig.
85 .
S062
In roo
f
harness,
above left
front door.
See Fig. 85 .
In roo
f
2004 Mitsubishi Endeavor LS
2004 MITSUBISHI Endeavor
Page 1174 of 3870
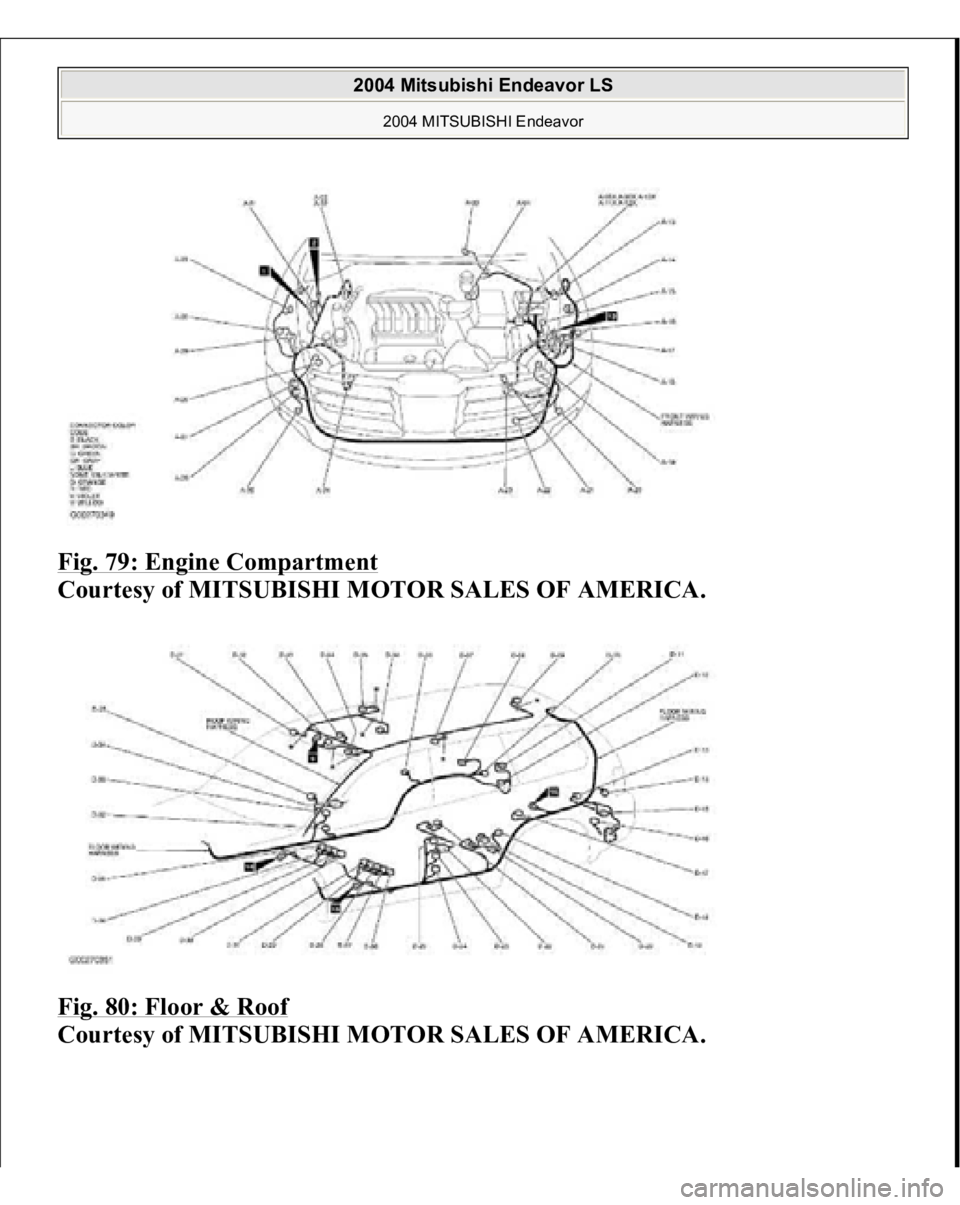
Fig. 79: Engine Compartment
Courtesy of MITSUBISHI MOTOR SALES OF AMERICA.
Fig. 80: Floor & Roof
Courtes
y of MITSUBISHI MOTOR SALES OF AMERICA
.
2004 Mitsubishi Endeavor LS
2004 MITSUBISHI Endeavor
Page 1179 of 3870
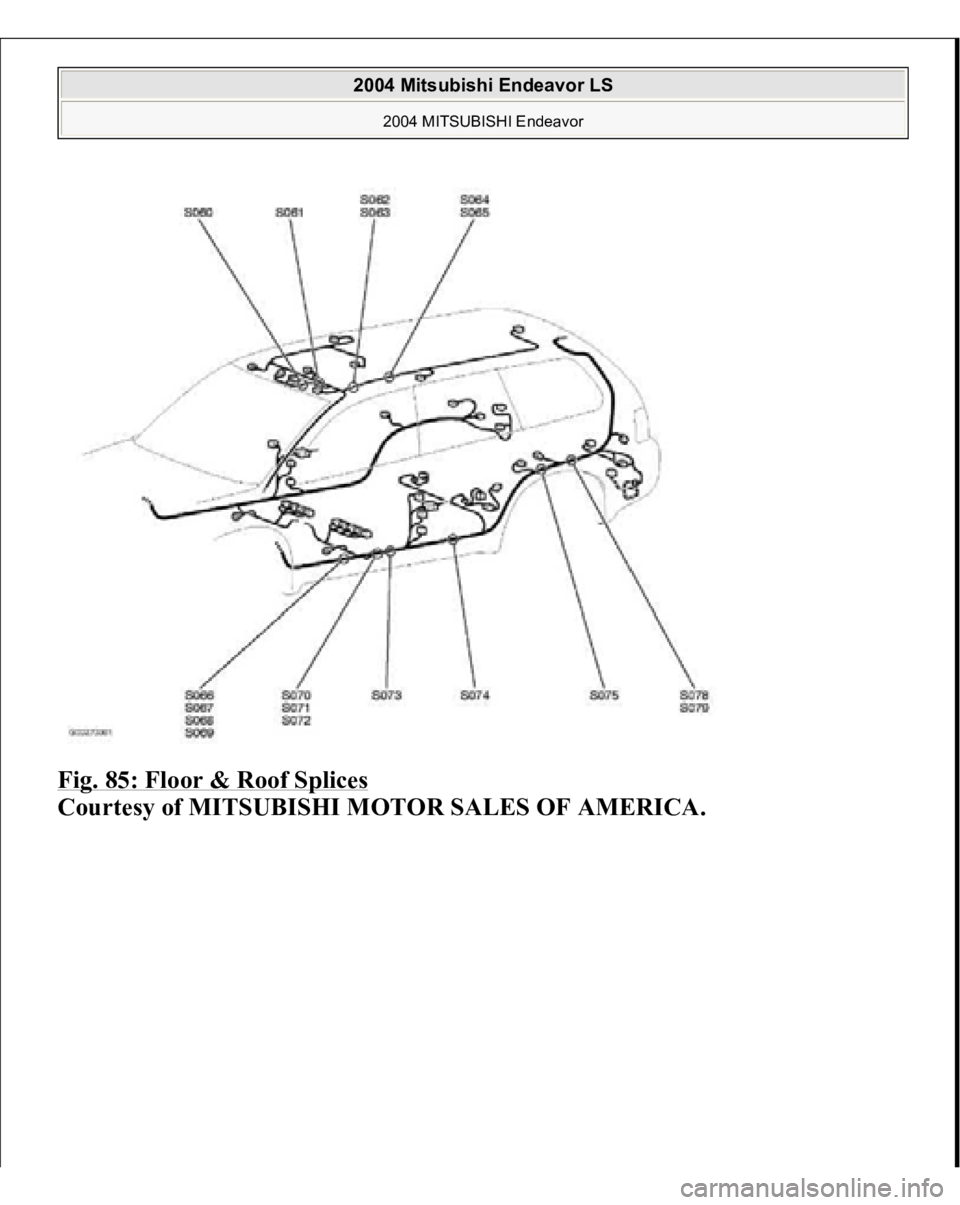
Fig. 85: Floor & Roof Splices
Courtesy of MITSUBISHI MOTOR SALES OF AMERICA.
2004 Mitsubishi Endeavor LS
2004 MITSUBISHI Endeavor