MITSUBISHI iMiEV 2013 Owner's Manual (in English)
Manufacturer: MITSUBISHI, Model Year: 2013, Model line: iMiEV, Model: MITSUBISHI iMiEV 2013Pages: 258, PDF Size: 13 MB
Page 121 of 258
Economical driving.......................................................................5-02
Driving, alcohol and drugs
........................................................... 5-02
Safe driving techniques ................................................................ 5-03
Parking brake................................................................................ 5-03
Parking.......................................................................................... 5-04
Inside rear-view mirror ................................................................. 5-05
Outside rear-view mirrors ............................................................. 5-05
Electric motor switch .................................................................... 5-07
Steering wheel lock ...................................................................... 5-08
Starting the electric motor unit ..................................................... 5-08
Transmission................................................................................. 5-09
Driving the vehicle ....................................................................... 5-11
Inspection
and maintenance following rough road oper-
ation.......................................................................................... 5-12
Acoustic Vehicle Alerting System (AVAS) .................................5-12
Braking......................................................................................... 5-14
Brake assist system....................................................................... 5-15
Anti-lock brake system (ABS) ..................................................... 5-15
Electric power steering system (EPS) ..........................................5-17
Active stability control (ASC) ...................................................... 5-18
Cargo loads................................................................................... 5-20
Trailer towing ............................................................................... 5-21Starting and driving
5
OHAE13E1
Page 122 of 258
Economical driving
E00600101092
For
economical driving, there are some technical re-
quirements that have to be met. In order to achieve
longer life of the vehicle and the most economical
operation, we recommend you to have the vehicle
checked at regular intervals in accordance with the
service standards.
Starting and acceleration
Avoid driving with the accelerator pedal is pushed
way down, such as for unnecessarily sudden starts,
acceleration and deceleration. Smoothly depress
the accelerator pedal.
Observe the speed limit and keep the speed as con-
stant as possible while driving.
Idling
Parking for a long period with the ready indicator
illuminated will shorten the cruising range.
Speed
At higher vehicle speed, more traction battery is con-
sumed. Avoid driving at full speed. Even a slight re-
lease of the accelerator pedal will save a significant
amount of traction battery.
Tyre inflation pressure
Check the tyre inflation pressures at regular inter-
vals. Low tyre inflation pressure increases road re-
sistance. In addition, low tyre pressures adversely
affect tyre wear and driving stability.
Cargo loads
Do not drive with unnecessary articles in the lug-
gage compartment. Air conditioning
Too
much cooling/heating can affect the cruising
range, so maintain an appropriate temperature to ex-
tend the cruising range. Driving, alcohol and drugs
E00600200070
Driving
after drinking alcohol is one of the most fre-
quent causes of accidents.
Your driving ability can be seriously impaired even
with blood alcohol levels far below the legal mini-
mum. If you have been drinking, don’t drive. Ride
with a designated non-drinking driver, call a cab or
a friend, or use public transportation. Drinking cof-
fee or taking a cold shower will not make you sober.
Similarly, prescription and nonprescription drugs af-
fect your alertness, perception and reaction time.
Consult with your doctor or pharmacist before driv-
ing while under the influence of any of these medi-
cations. WARNING
l NEVER DRINK AND DRIVE.
Your
perceptions are less accurate, your
reflexes are slower and your judgment is
impaired. Starting and driving
5-02
5
OHAE13E1
Page 123 of 258
Safe driving techniques
E00600300635
Driving
safety and protection against injury cannot
be fully ensured. However, we recommend that
you pay extra attention to the following:
Seat belts
Before starting the vehicle, make sure that you and
your passengers have fastened your seat belts.
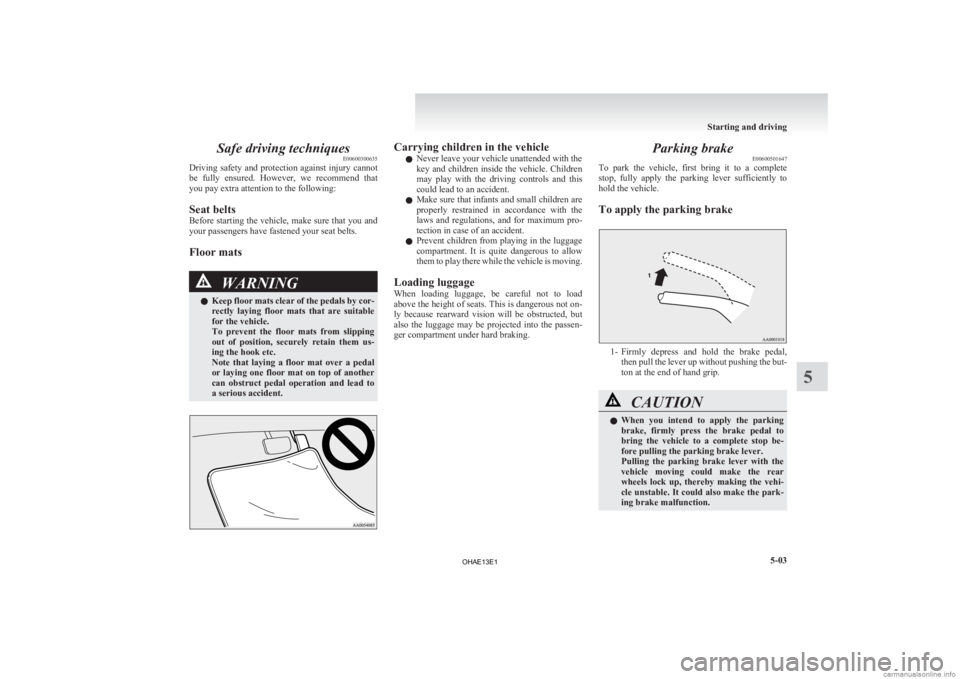
Floor mats WARNING
l Keep
floor mats clear of the pedals by cor-
rectly laying floor mats that are suitable
for the vehicle.
To prevent the floor mats from slipping
out of position, securely retain them us-
ing the hook etc.
Note that laying a floor mat over a pedal
or laying one floor mat on top of another
can obstruct pedal operation and lead to
a serious accident. Carrying children in the vehicle
l Never leave your vehicle unattended with the
key
and children inside the vehicle. Children
may play with the driving controls and this
could lead to an accident.
l Make sure that infants and small children are
properly restrained in accordance with the
laws and regulations, and for maximum pro-
tection in case of an accident.
l Prevent children from playing in the luggage
compartment. It is quite dangerous to allow
them to play there while the vehicle is moving.
Loading luggage
When loading luggage, be careful not to load
above the height of seats. This is dangerous not on-
ly because rearward vision will be obstructed, but
also the luggage may be projected into the passen-
ger compartment under hard braking. Parking brake
E00600501647
To
park the vehicle, first bring it to a complete
stop, fully apply the parking lever sufficiently to
hold the vehicle.
To apply the parking brake 1- Firmly
depress and hold the brake pedal,
then pull the lever up without pushing the but-
ton at the end of hand grip. CAUTION
l
When
you intend to apply the parking
brake, firmly press the brake pedal to
bring the vehicle to a complete stop be-
fore pulling the parking brake lever.
Pulling the parking brake lever with the
vehicle moving could make the rear
wheels lock up, thereby making the vehi-
cle unstable. It could also make the park-
ing brake malfunction. Starting and driving
5-03 5
OHAE13E1
Page 124 of 258
NOTE
l Apply
sufficient force to the parking brake
lever to hold the vehicle stationary after the
foot brake is released.
l If the parking brake does not hold the vehicle
stationary after the foot brake is released,
have your vehicle checked immediately.
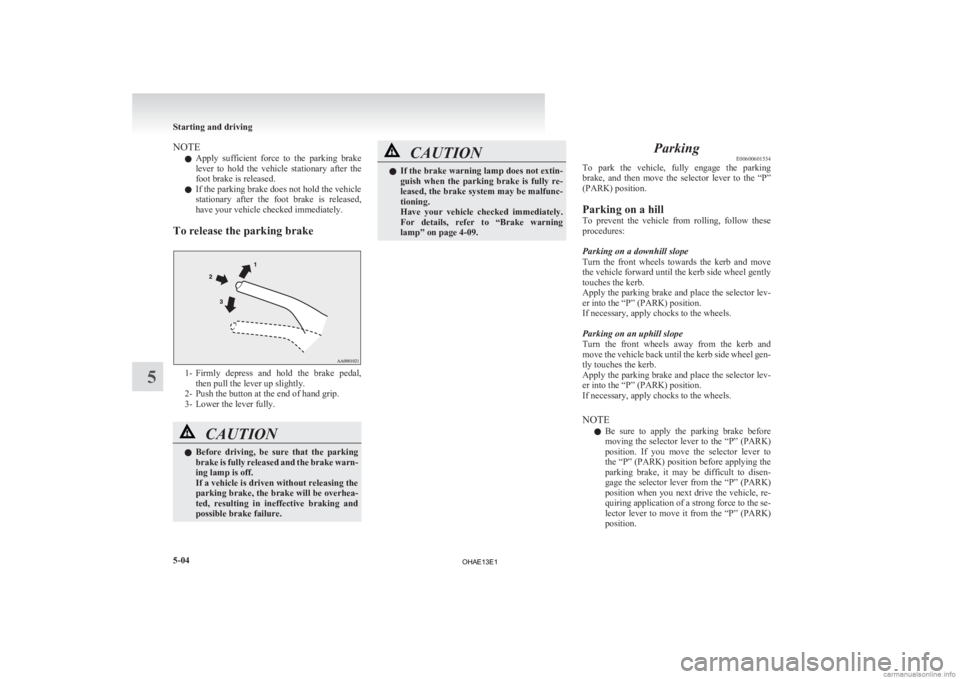
To release the parking brake 1- Firmly
depress and hold the brake pedal,
then pull the lever up slightly.
2- Push the button at the end of hand grip.
3- Lower the lever fully. CAUTION
l
Before
driving, be sure that the parking
brake is fully released and the brake warn-
ing lamp is off.
If a vehicle is driven without releasing the
parking brake, the brake will be overhea-
ted, resulting in ineffective braking and
possible brake failure. CAUTION
l
If
the brake warning lamp does not extin-
guish when the parking brake is fully re-
leased, the brake system may be malfunc-
tioning.
Have your vehicle checked immediately.
For details, refer to “Brake warning
lamp” on page 4-09. Parking
E00600601534
To
park the vehicle, fully engage the parking
brake, and then move the selector lever to the “P”
(PARK) position.
Parking on a hill
To prevent the vehicle from rolling, follow these
procedures:
Parking on a downhill slope
Turn the front wheels towards the kerb and move
the vehicle forward until the kerb side wheel gently
touches the kerb.
Apply the parking brake and place the selector lev-
er into the “P” (PARK) position.
If necessary, apply chocks to the wheels.
Parking on an uphill slope
Turn the front wheels away from the kerb and
move the vehicle back until the kerb side wheel gen-
tly touches the kerb.
Apply the parking brake and place the selector lev-
er into the “P” (PARK) position.
If necessary, apply chocks to the wheels.
NOTE
l Be sure to apply the parking brake before
moving the selector lever to the “P” (PARK)
position. If you move the selector lever to
the “P” (PARK) position before applying the
parking brake, it may be difficult to disen-
gage the selector lever from the “P” (PARK)
position when you next drive the vehicle, re-
quiring application of a strong force to the se-
lector lever to move it from the “P” (PARK)
position. Starting and driving
5-04
5
OHAE13E1
Page 125 of 258
Parking with the electric motor unit
running
Never
leave the electric motor unit running while
you take a short sleep/rest. WARNING
l Leaving
the electric motor unit running
risks injury or death from accidentally
moving the selector lever.
Do not keep the steering wheel fully
turned for a long time
More
effort could be required to turn the steering
wheel. Refer to “Electric power steering system
(EPS)” on page 5-17.
When leaving the vehicle
Always carry the key and lock all doors and the tail-
gate when leaving the vehicle unattended.
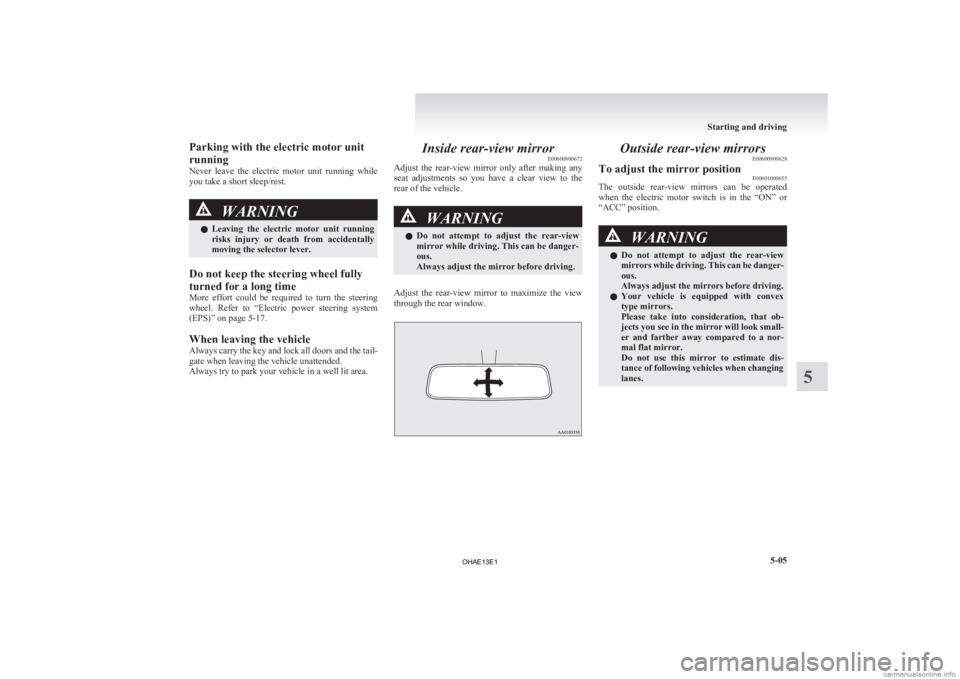
Always try to park your vehicle in a well lit area. Inside rear-view mirror
E00600800672
Adjust
the rear-view mirror only after making any
seat adjustments so you have a clear view to the
rear of the vehicle. WARNING
l Do
not attempt to adjust the rear-view
mirror while driving. This can be danger-
ous.
Always adjust the mirror before driving.
Adjust the rear-view mirror to maximize the view
through the rear window. Outside rear-view mirrors
E00600900628
To adjust the mirror position E00601000655
The outside rear-view mirrors can be operated
when
the electric motor switch is in the “ON” or
“ACC” position. WARNING
l Do
not attempt to adjust the rear-view
mirrors while driving. This can be danger-
ous.
Always adjust the mirrors before driving.
l Your vehicle is equipped with convex
type mirrors.
Please take into consideration, that ob-
jects you see in the mirror will look small-
er and farther away compared to a nor-
mal flat mirror.
Do not use this mirror to estimate dis-
tance of following vehicles when changing
lanes. Starting and driving
5-05 5
OHAE13E1
Page 126 of 258
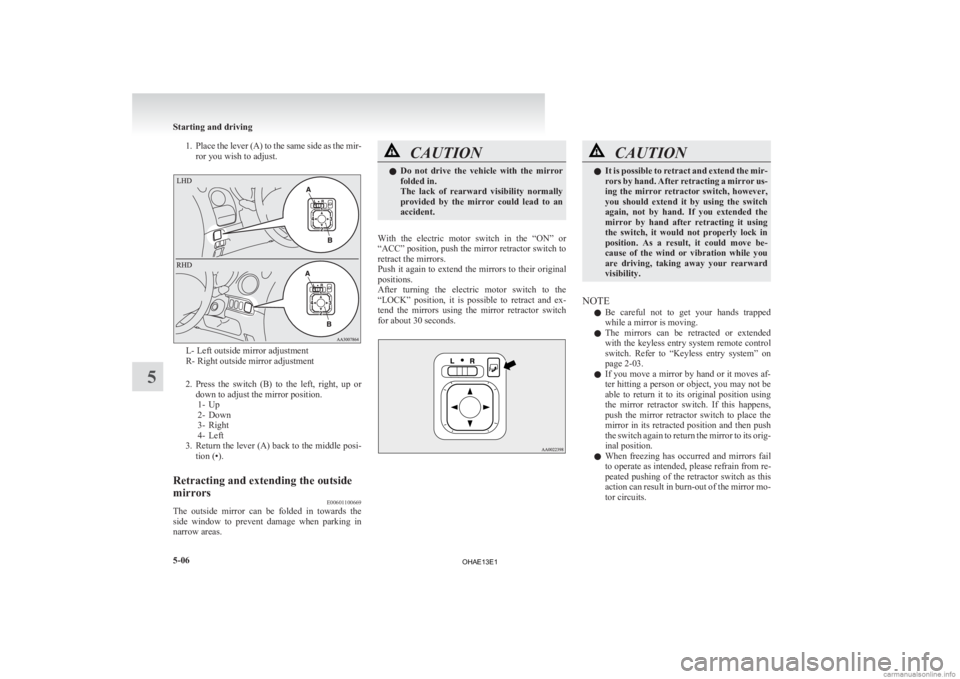
1. Place the lever (A) to the same side as the mir-
ror you wish to adjust. L- Left outside mirror adjustment
R- Right outside mirror adjustment
2. Press
the switch (B) to the left, right, up or
down to adjust the mirror position. 1- Up
2- Down
3- Right
4- Left
3. Return the lever (A) back to the middle posi- tion (•).
Retracting and extending the outside
mirrors E00601100669
The outside mirror can be folded in towards the
side
window to prevent damage when parking in
narrow areas. CAUTION
l
Do
not drive the vehicle with the mirror
folded in.
The lack of rearward visibility normally
provided by the mirror could lead to an
accident.
With the electric motor switch in the “ON” or
“ACC”
position, push the mirror retractor switch to
retract the mirrors.
Push it again to extend the mirrors to their original
positions.
After turning the electric motor switch to the
“LOCK” position, it is possible to retract and ex-
tend the mirrors using the mirror retractor switch
for about 30 seconds. CAUTION
l
It
is possible to retract and extend the mir-
rors by hand. After retracting a mirror us-
ing the mirror retractor switch, however,
you should extend it by using the switch
again, not by hand. If you extended the
mirror by hand after retracting it using
the switch, it would not properly lock in
position. As a result, it could move be-
cause of the wind or vibration while you
are driving, taking away your rearward
visibility.
NOTE l Be
careful not to get your hands trapped
while a mirror is moving.
l The mirrors can be retracted or extended
with the keyless entry system remote control
switch. Refer to “Keyless entry system” on
page 2-03.
l If you move a mirror by hand or it moves af-
ter hitting a person or object, you may not be
able to return it to its original position using
the mirror retractor switch. If this happens,
push the mirror retractor switch to place the
mirror in its retracted position and then push
the switch again to return the mirror to its orig-
inal position.
l When freezing has occurred and mirrors fail
to operate as intended, please refrain from re-
peated pushing of the retractor switch as this
action can result in burn-out of the mirror mo-
tor circuits. Starting and driving
5-06
5
OHAE13E1
Page 127 of 258
Heated mirror*
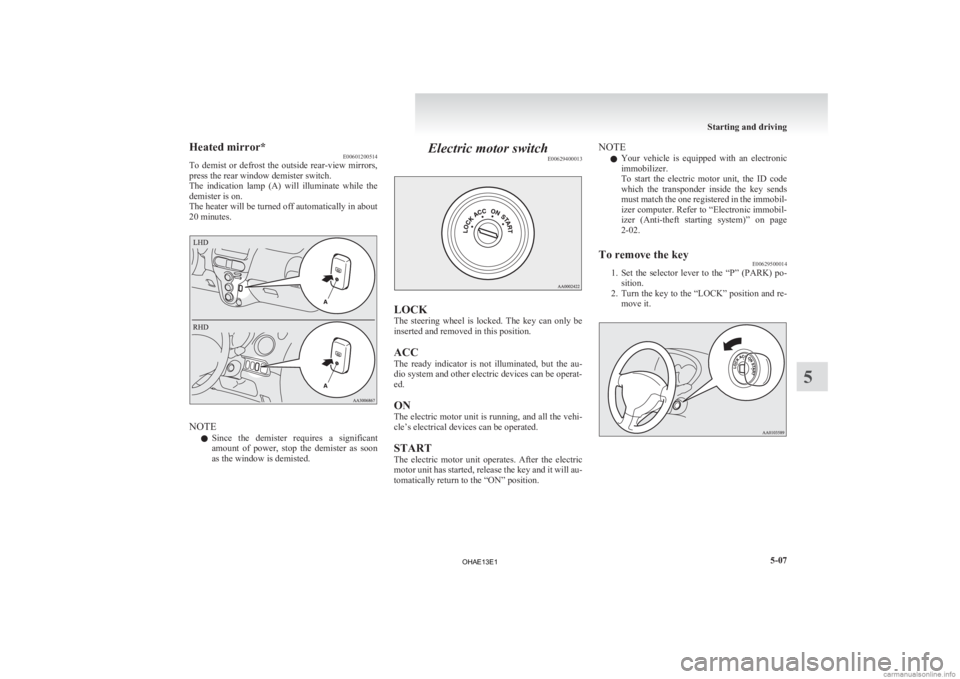
E00601200514
To
demist or defrost the outside rear-view mirrors,
press the rear window demister switch.
The indication lamp (A) will illuminate while the
demister is on.
The heater will be turned off automatically in about
20 minutes. NOTE
l Since
the demister requires a significant
amount of power, stop the demister as soon
as the window is demisted. Electric motor switch
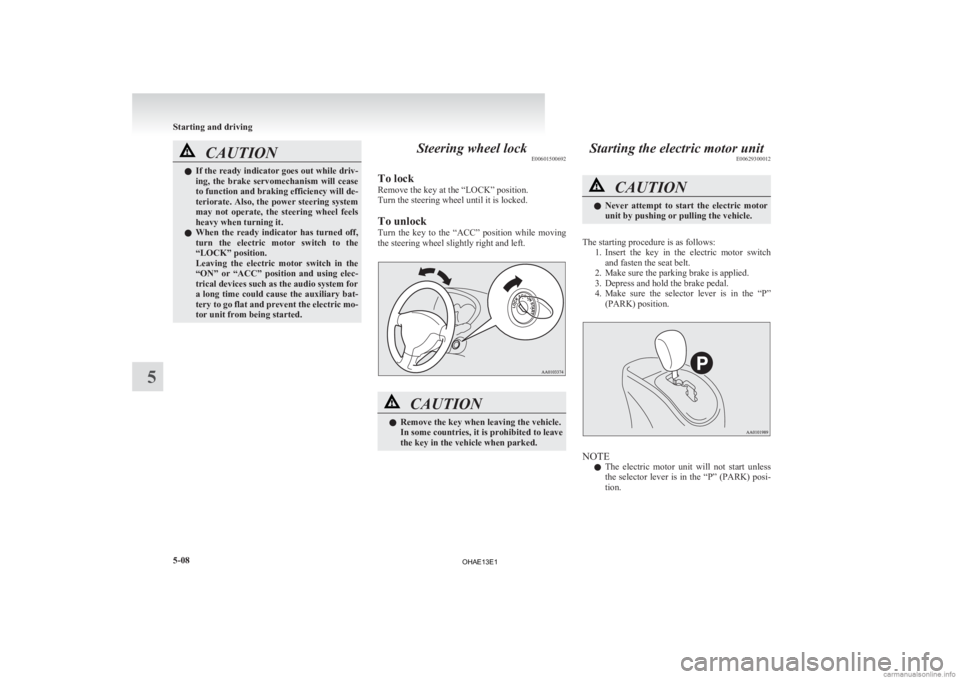
E00629400013 LOCK
The
steering wheel is locked. The key can only be
inserted and removed in this position.
ACC
The ready indicator is not illuminated, but the au-
dio system and other electric devices can be operat-
ed.
ON
The electric motor unit is running, and all the vehi-
cle’s electrical devices can be operated.
START
The electric motor unit operates. After the electric
motor unit has started, release the key and it will au-
tomatically return to the “ON” position. NOTE
l Your
vehicle is equipped with an electronic
immobilizer.
To start the electric motor unit, the ID code
which the transponder inside the key sends
must match the one registered in the immobil-
izer computer. Refer to “Electronic immobil-
izer (Anti-theft starting system)” on page
2-02.
To remove the key E00629500014
1. Set
the selector lever to the “P” (PARK) po-
sition.
2. Turn the key to the “LOCK” position and re- move it. Starting and driving
5-07 5
OHAE13E1
Page 128 of 258
CAUTION
l
If the ready indicator goes out while driv-
ing, the brake servomechanism will cease
to function and braking efficiency will de-
teriorate. Also, the power steering system
may not operate, the steering wheel feels
heavy when turning it.
l When the ready indicator has turned off,
turn the electric motor switch to the
“LOCK” position.
Leaving the electric motor switch in the
“ON” or “ACC” position and using elec-
trical devices such as the audio system for
a long time could cause the auxiliary bat-
tery to go flat and prevent the electric mo-
tor unit from being started. Steering wheel lock
E00601500692
To lock
Remove the key at the “LOCK” position.
Turn the steering wheel until it is locked.
To unlock
Turn
the key to the “ACC” position while moving
the steering wheel slightly right and left. CAUTION
l
Remove the key when leaving the vehicle.
In some countries, it is prohibited to leave
the key in the vehicle when parked. Starting the electric motor unit
E00629300012 CAUTION
l
Never
attempt to start the electric motor
unit by pushing or pulling the vehicle.
The starting procedure is as follows: 1. Insert
the key in the electric motor switch
and fasten the seat belt.
2. Make sure the parking brake is applied.
3. Depress and hold the brake pedal.
4. Make sure the selector lever is in the “P” (PARK) position. NOTE
l The
electric motor unit will not start unless
the selector lever is in the “P” (PARK) posi-
tion. Starting and driving
5-08
5
OHAE13E1
Page 129 of 258
5. Press the brake pedal with your right foot.
Turn the electric motor switch fully, keep it
in the “START” position for one to two sec-
onds, and slowly return it to its original posi-
tion. When you hear the startup sound and
the ready indicator comes on, startup of the
electric motor unit is complete.
NOTE l If the ready indicator does not illuminate, re-
turn the electric motor switch to the “LOCK”
position once. After a while, turn it to the
“START” position to start the electric motor
unit.
l To prevent a careless start, your vehicle is
equipped with electric motor reminder. Refer
to “Electric motor reminder” on page 5-09.
Electric motor reminder E00630700029
If the driver’s door is opened while the key is in
the
“ON” position, the electric motor reminder buz-
zer sounds intermittently to remind the key is in the
electric motor switch.
Selector lever reminder E00630800017
If the driver’s door is opened while the selector lev-
er
is placed into the other positions from the “P”
(PARK) position while the electric motor switch is
on, the selector lever reminder buzzer sounds in the
interval shorter than electric motor reminder buzzer. Transmission
E00603200677
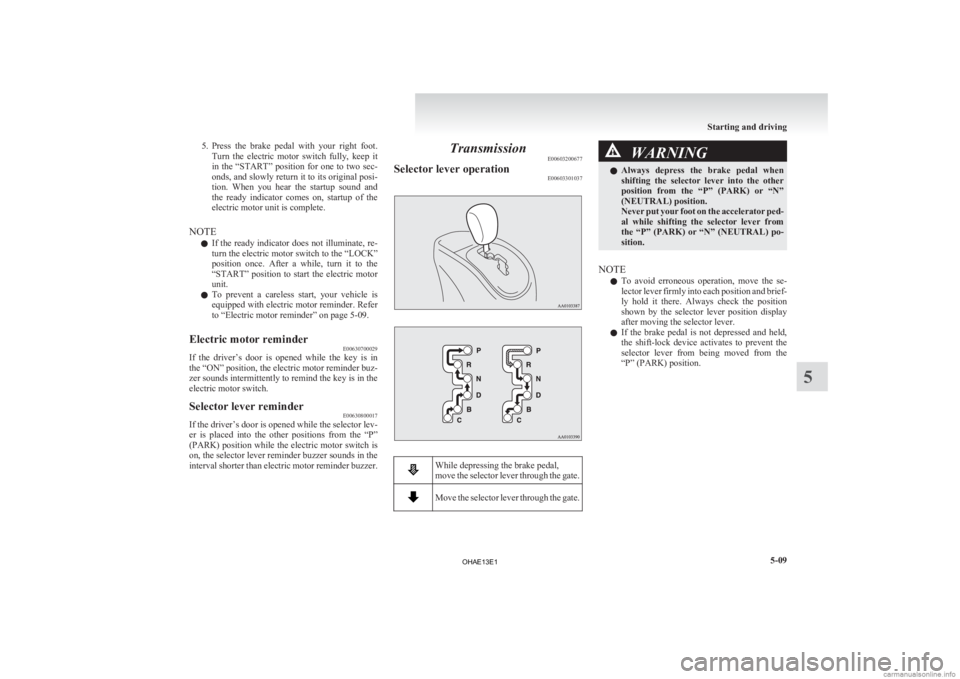
Selector lever operation E00603301037 While depressing the brake pedal,
move
the selector lever through the gate. Move the selector lever through the gate. WARNING
l Always
depress the brake pedal when
shifting the selector lever into the other
position from the “P” (PARK) or “N”
(NEUTRAL) position.
Never put your foot on the accelerator ped-
al while shifting the selector lever from
the “P” (PARK) or “N” (NEUTRAL) po-
sition.
NOTE l To
avoid erroneous operation, move the se-
lector lever firmly into each position and brief-
ly hold it there. Always check the position
shown by the selector lever position display
after moving the selector lever.
l If the brake pedal is not depressed and held,
the shift-lock device activates to prevent the
selector lever from being moved from the
“P” (PARK) position. Starting and driving
5-09 5
OHAE13E1
Page 130 of 258
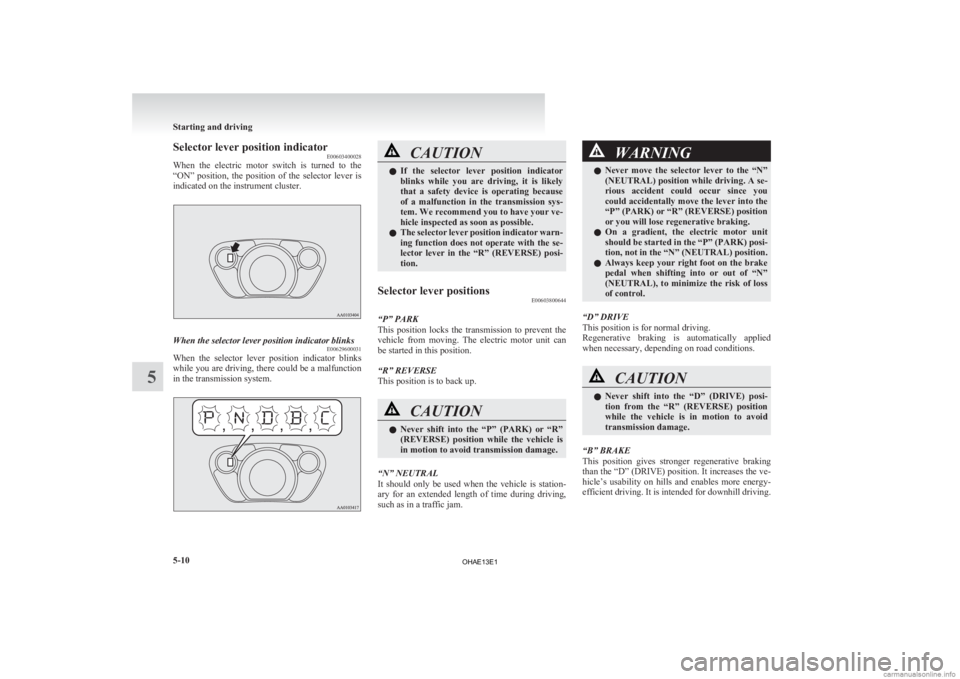
Selector lever position indicator
E00603400028
When
the electric motor switch is turned to the
“ON” position, the position of the selector lever is
indicated on the instrument cluster. When the selector lever position indicator blinks
E00629600031
When the selector lever position indicator blinks
while
you are driving, there could be a malfunction
in the transmission system. CAUTION
l
If
the selector lever position indicator
blinks while you are driving, it is likely
that a safety device is operating because
of a malfunction in the transmission sys-
tem. We recommend you to have your ve-
hicle inspected as soon as possible.
l The selector lever position indicator warn-
ing function does not operate with the se-
lector lever in the “R” (REVERSE) posi-
tion.
Selector lever positions E00603800644
“P” PARK
This
position locks the transmission to prevent the
vehicle from moving. The electric motor unit can
be started in this position.
“R” REVERSE
This position is to back up. CAUTION
l
Never
shift into the “P” (PARK) or “R”
(REVERSE) position while the vehicle is
in motion to avoid transmission damage.
“N” NEUTRAL
It
should only be used when the vehicle is station-
ary for an extended length of time during driving,
such as in a traffic jam. WARNING
l Never
move the selector lever to the “N”
(NEUTRAL) position while driving. A se-
rious accident could occur since you
could accidentally move the lever into the
“P” (PARK) or “R” (REVERSE) position
or you will lose regenerative braking.
l On a gradient, the electric motor unit
should be started in the “P” (PARK) posi-
tion, not in the “N” (NEUTRAL) position.
l Always keep your right foot on the brake
pedal when shifting into or out of “N”
(NEUTRAL), to minimize the risk of loss
of control.
“D” DRIVE
This position is for normal driving.
Regenerative
braking is automatically applied
when necessary, depending on road conditions. CAUTION
l
Never
shift into the “D” (DRIVE) posi-
tion from the “R” (REVERSE) position
while the vehicle is in motion to avoid
transmission damage.
“B” BRAKE
This
position gives stronger regenerative braking
than the “D” (DRIVE) position. It increases the ve-
hicle’s usability on hills and enables more energy-
efficient driving. It is intended for downhill driving. Starting and driving
5-10
5
OHAE13E1