MITSUBISHI iMiEV 2016 1.G Owners Manual
Manufacturer: MITSUBISHI, Model Year: 2016, Model line: iMiEV, Model: MITSUBISHI iMiEV 2016 1.GPages: 296, PDF Size: 7.79 MB
Page 111 of 296
Electronic immobilizer (Ant
i-theft starting system)
Features and controls 5-3
5
Only keys that have been programmed to the vehicle electronics can be used to start the vehicle. If you lose a key, you can order a key from a certified i-MiEV dealer by referring to the key number. To prevent vehicle theft, the ID code for thevehicle keys must be changed. Take your vehicle and al
l remaining keys to a
certified i-MiEV dealer
to have your ID code
changed. To add a key, you need to register the ID code to the vehicle. Registering the ID code can be done by a cer- tified i-MiEV dealer.
Or it can be done by
yourself (except for vehi
cles sold in Canada).
To register the ID code yourself, follow the “Customer key programming” procedurebelow.
NOTE
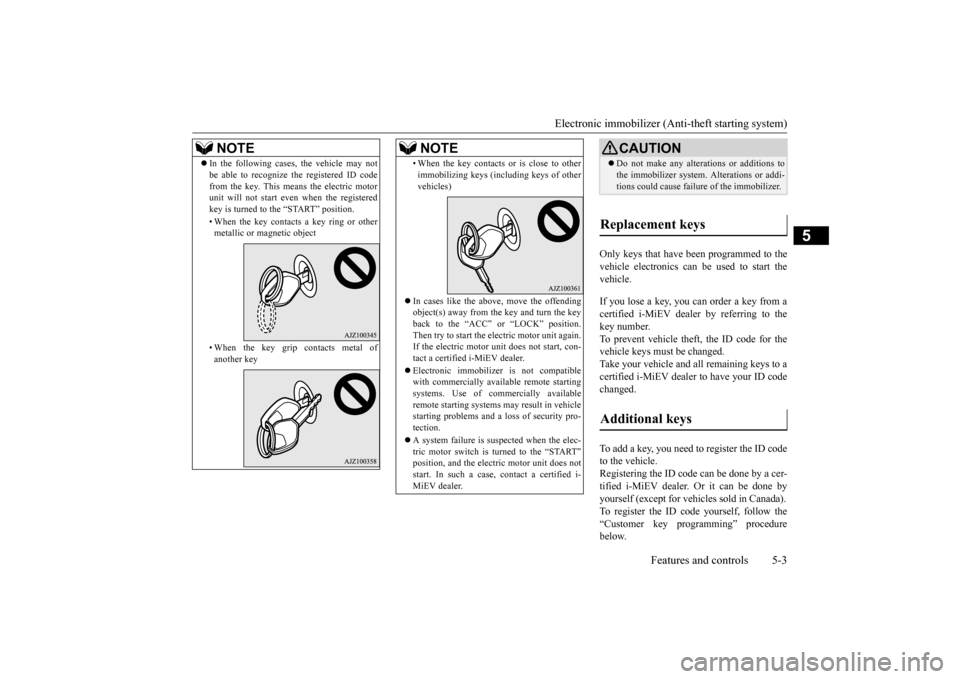
In the following cases, the vehicle may not be able to recognize
the registered ID code
from the key. This means the electric motorunit will not start even when the registered key is turned to the “START” position. • When the key contacts
a key ring or other
metallic or magnetic object • When the key grip
contacts metal of
another key
• When the key contacts
or is close to other
immobilizing keys (inc
luding keys of other
vehicles)
In cases like the above, move the offending object(s) away from the key and turn the key back to the “ACC” or “LOCK” position.Then try to start the electric motor unit again. If the electric motor unit does not start, con- tact a certified i-MiEV dealer. Electronic immobilize
r is not compatible
with commercially available remote startingsystems. Use of commercially available remote starting systems may result in vehicle starting problems
and a loss of security pro-
tection. A system failure is suspected when the elec- tric motor switch is turned to the “START”
tric motor unit does not
start. In such a case, contact a certified i-MiEV dealer.NOTE
CAUTION Do not make any altera
tions or additions to
the immobilizer system.
Alterations or addi-
tions could cause failur
e of the immobilizer.
Replacement keys Additional keys
BK0220401US.book 3 ページ 2015年6月3日 水曜日 午前7時42分
Page 112 of 296
Electronic immobilizer (Anti-theft starting system)
5
If you choose to have a certified i-MiEV dealer register the ID
code, take your vehicle
and any remaining keys
to a certified i-MiEV
dealer.
N00562200113
You can program new keys to the system ifyou have two valid (alr
eady registered) keys
and blank (not regist
ered) immobilizer key
(specially cut for your ve
hicle at a certified i-
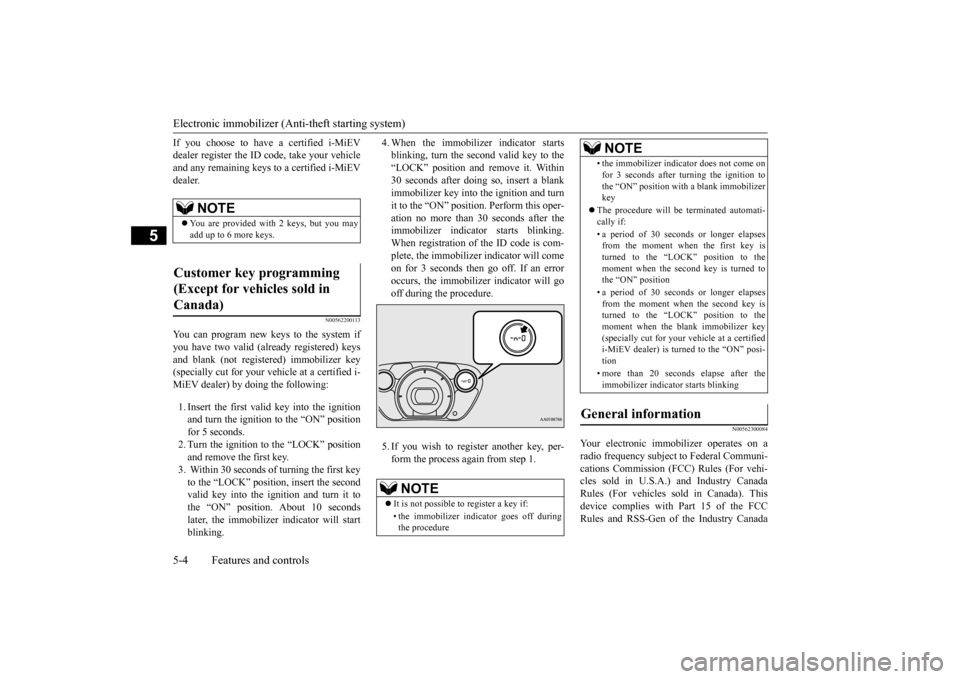
MiEV dealer) by doing the following: 1. Insert the first valid key into the ignition and turn the ignition to the “ON” positionfor 5 seconds. 2. Turn the ignition to the “LOCK” position and remove the first key.3. Within 30 seconds of turning the first key to the “LOCK” position, insert the second valid key into the ignition and turn it tothe “ON” position. About 10 seconds later, the immobilizer indicator will start blinking.
4. When the immobilizer indicator starts blinking, turn the second valid key to the“LOCK” position and remove it. Within 30 seconds after doing so, insert a blank immobilizer key into the ignition and turnit to the “ON” position. Perform this oper- ation no more than 30 seconds after the immobilizer indicato
r starts blinking.
When registration of the ID code is com- plete, the immobilizer indicator will come on for 3 seconds then go off. If an error occurs, the immobilizer indicator will go off during the procedure. 5. If you wish to register another key, per- form the process again from step 1.
N00562300084
Your electronic imm
obilizer operates on a
radio frequency subject
to Federal Communi-
cations Commission (FCC) Rules (For vehi- cles sold in U.S.A.) and Industry CanadaRules (For vehicles so
ld in Canada). This
device complies with
Part 15 of the FCC
Rules and RSS-Gen of the Industry Canada
NOTE
You are provided with
2 keys, but you may
add up to 6 more keys.
Customer key programming (Except for vehicles sold in Canada)
NOTE
It is not possible to register a key if: • the immobilizer indi
cator goes off during
the procedure
• the immobilizer indica
tor does not come on
for 3 seconds after turning the ignition tothe “ON” position with
a blank immobilizer
key
The procedure will be terminated automati- cally if: • a period of 30 seconds or longer elapses from the moment when the first key is turned to the “LOCK” position to the moment when the second key is turned tothe “ON” position • a period of 30 seconds or longer elapses from the moment when the second key is turned to the “LOCK” position to the moment when the blank immobilizer key(specially cut for your
vehicle at a certified
i-MiEV dealer) is turned to the
Page 113 of 296
Keyless entry system
Features and controls 5-5
5
Rules. Operation is subject to the following two conditions. This device may not
cause harmful inter-
ference. This device must ac
cept any interference
received, including interference that maycause undesired operation.
This digital apparatu
s does not exceed the
Class A limits for radi
o noise emissions from
digital apparatus set out in the Radio Interfer- ence Regulations of th
e Canadian Department
of Communications.
N00509000910
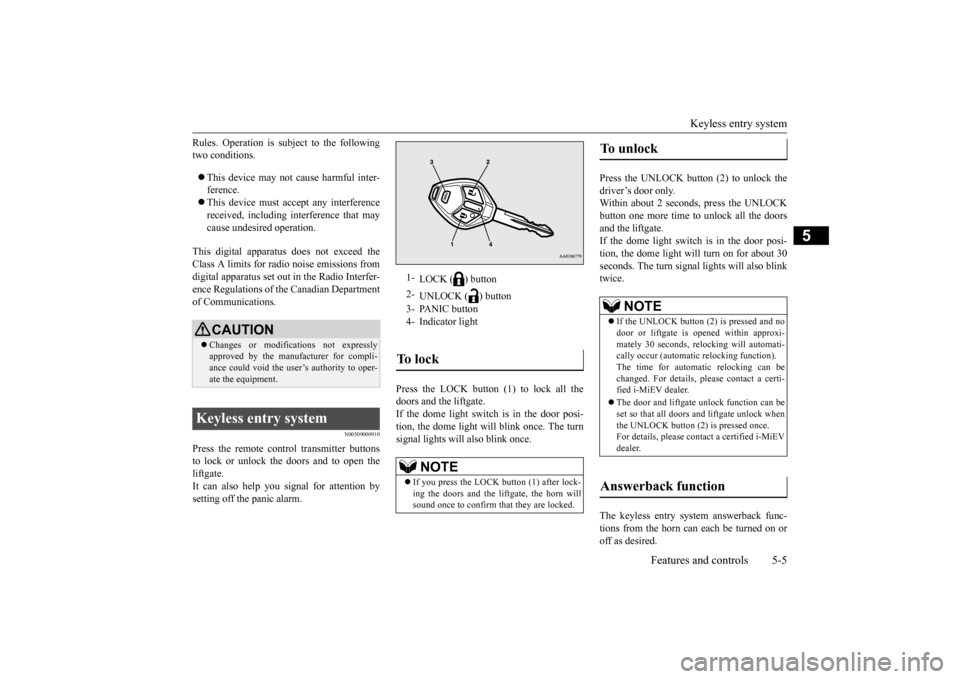
Press the remote control transmitter buttonsto lock or unlock the doors and to open the liftgate. It can also help you
signal for attention by
setting off the panic alarm.
Press the LOCK button (1) to lock all the doors and the liftgate. If the dome light switch is in the door posi- tion, the dome light w
ill blink once. The turn
signal lights will also blink once.
Press the UNLOCK button (2) to unlock the driver’s door only. Within about 2 seconds, press the UNLOCKbutton one more time to unlock all the doors and the liftgate. If the dome light switch is in the door posi-tion, the dome light will turn on for about 30 seconds. The turn signal
lights will also blink
twice. The keyless entry system answerback func- tions from the horn can each be turned on or off as desired.
CAUTION Changes or modifica
tions not expressly
approved by the manufacturer for compli- ance could void the user’s authority to oper-ate the equipment.
Keyless entry system
1-
LOCK ( ) button
2-
UNLOCK ( ) button
3- PANIC button 4- Indicator lightTo l o c k
NOTE
If you press the LOCK button (1) after lock- ing the doors and the liftgate, the horn will sound once to confirm that they are locked.
To unlock
NOTE
If the UNLOCK button (2) is pressed and no door or liftgate is opened within approxi- mately 30 seconds, relocking will automati- cally occur (automatic
relocking function).
The time for automatic relocking can be changed. For details,
please contact a certi-
fied i-MiEV dealer. The door and liftgate unlock function can be set so that all doors and liftgate unlock whenthe UNLOCK button (2) is pressed once. For details, please c
ontact a certified i-MiEV
dealer.
Answerback function
BK0220401US.book 5 ページ 2015年6月3日 水曜日 午前7時42分
Page 114 of 296

Keyless entry system 5-6 Features and controls
5
The horn answerback function can be set to the following three conditions. Each time the horn answerback function isset, a chime will sound to tell you the condi- tion of the answerback function. 1. Remove the key from the electric motor switch.2. Open the driver’s door and turn the com- bination headlights and dimmer switch to the “OFF” position.3. Press the LOCK button (1) for 4 to 10 sec- onds and press the UNLOCK button (2) during this time.4. Release in sequence the UNLOCK and LOCK buttons within 10 seconds of pressing the UNLOCK button in step 3.
The turn signal lights answerback function can be changed. If you want to change the answerback func- tion, please contact a
certified i-MiEV dealer
for details.
N00543600105
The door and liftgate unlock function can be set so that all doors and liftgate unlock when the UNLOCK button (2) is pressed once.For details, please contact a certified i-MiEV dealer.
N00543700050
If you are near your vehicle and feel threat-ened, you may activate th
e alarm to call atten-
tion as follows: 1. Press the PANIC button (3) for more than 1 second. 2. The headlights will blink on and off and the horn will sound intermittently forabout 3 minutes. 3. To turn off the alarm, press any button on the remote control transmitter.
N00543800077
Only remote control transmitters pro-grammed with the vehicle’s electronics canlock or unlock all doors. If you lose the remote control transmitter, you can order a remote cont
rol transmitter from a
certified i-MiEV deal
er by referring to the
key number. To prevent vehicle theft, the ID codes for allthe remote control transmitters except the one for the lost key must be programmed again. Take your vehicle and all the remainingremote control transmitters to a certified i- MiEV dealer to have your ID codes pro- grammed again.
N00543900065
To add a remote control transmitter, you mustalready have one registered remote control transmitter. Registering the ID code can be done by your-self or by a certified i-MiEV dealer. For you to register the ID code yourself, follow the “Customer remote control transmitter pro-gramming” procedure below.
Horn deactivation/reactivation Number of chimes
Condition
One chime The horn will not sound. Two chimes The horn will sound. Three chimes
The horn will sound if the auto light switch is ON (if so equipped).
Four chimes
The horn will sound if the LOCK button is pressed twice quickly.
Changing the setting of the turn signal lights answerback function Setting of door unlock function Using the panic alarm
Replacement remote control transmitters Additional remote control transmitters
BK0220401US.book 6 ページ 2015年6月3日 水曜日 午前7時42分
Page 115 of 296
Keyless entry system
Features and controls 5-7
5
If you choose to have a certified i-MiEV dealer register the ID
code, take your vehicle
and all remaining keys to a certified i-MiEV dealer.
N00546100101
Your keyless entry system operates on a radiofrequency subject to
Federal Communica-
tions Commission (FCC)
Rules (For vehicles
sold in U.S.A.) and Industry Canada Rules (For vehicles sold in Canada). This device complies with Part 15 of the FCC Rules andRSS-Gen of the Industry Canada Rules. Operation is subject to the following two con- ditions. This device may not
cause harmful inter-
ference. This device must ac
cept any interference
received, including interference that maycause undesired operation.
N00544101133
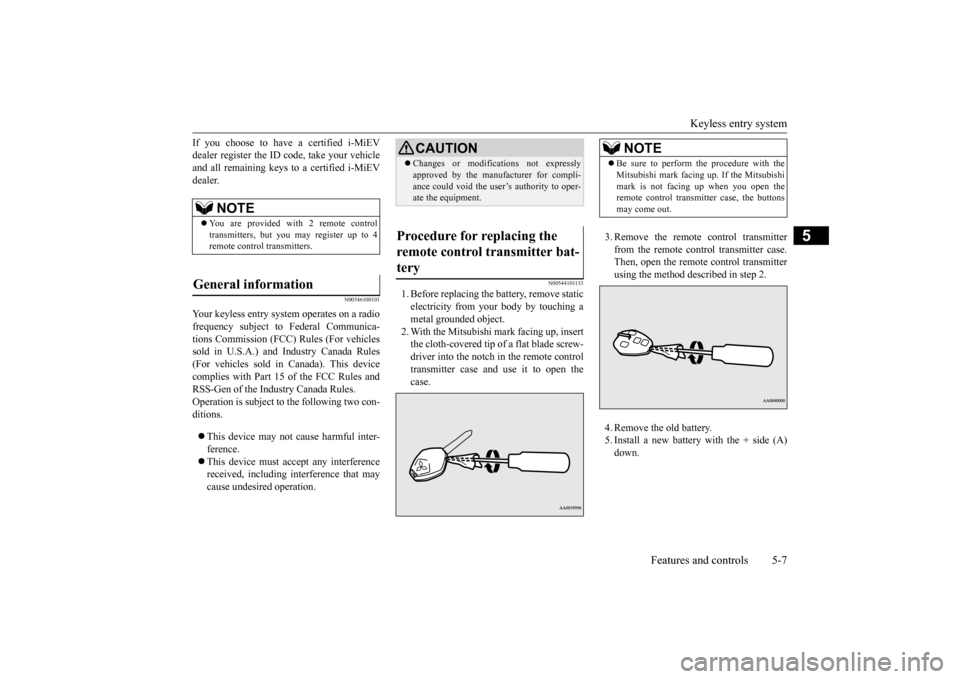
1. Before replacing the
battery, remove static
electricity from your body by touching ametal grounded object. 2. With the Mitsubishi mark facing up, insert the cloth-covered tip of
a flat blade screw-
driver into the notch in the remote control transmitter case and
use it to open the
case.
3. Remove the remote control transmitter from the remote control transmitter case. Then, open the remote control transmitterusing the method described in step 2. 4. Remove the old battery. 5. Install a new battery with the + side (A)down.
NOTE
You are provided with 2 remote control transmitters, but you may register up to 4 remote control transmitters.
General information
CAUTION Changes or modifica
tions not expressly
approved by the manufacturer for compli-ance could void the user’s authority to oper-ate the equipment.
Procedure for replacing the remote control transmitter bat- tery
NOTE
Be sure to perform the procedure with the Mitsubishi mark facing up. If the Mitsubishimark is not facing up when you open theremote control transmitter case, the buttons may come out.
BK0220401US.book 7 ページ 2015年6月3日 水曜日 午前7時42分
Page 116 of 296
Door locks 5-8 Features and controls
5
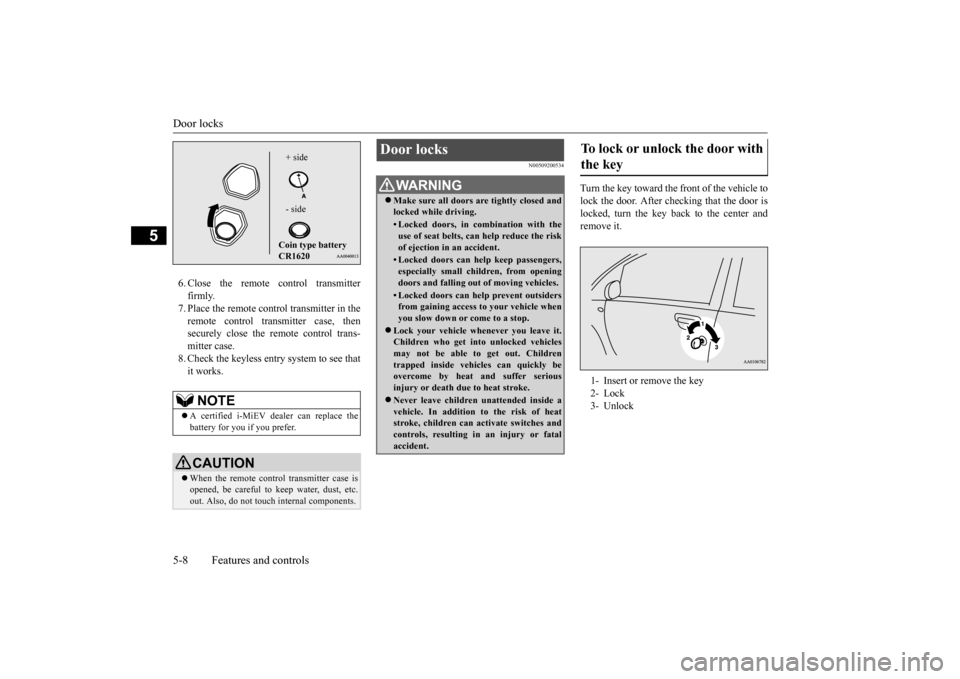
6. Close the remote control transmitter firmly.7. Place the remote control transmitter in the remote control transmitter case, then securely close the remote control trans-mitter case. 8. Check the keyless entry system to see that it works.
N00509200534
Turn the key toward the front of the vehicle to lock the door. After checking that the door is locked, turn the key back to the center andremove it.
NOTE
A certified i-MiEV dealer can replace the battery for you if you prefer. CAUTION When the remote control transmitter case is opened, be careful to
keep water, dust, etc.
out. Also, do not touch
internal components.+ side - side Coin type battery CR1620
Door locks
WA R N I N GMake sure all doors are tightly closed and locked while driving.• Locked doors, in co
mbination with the
use of seat belts, can help reduce the riskof ejection in
an accident.
• Locked doors can help keep passengers, especially small children, from opening doors and falling out
of moving vehicles.
• Locked doors can help
prevent outsiders
from gaining access to your vehicle when you slow down or come to a stop.
Lock your vehicle when
ever you leave it.
Children who get into
unlocked vehicles
may not be able to get out. Children trapped inside vehicles can quickly be overcome by heat
and suffer serious
injury or death due to heat stroke. Never leave children unattended inside a vehicle. In addition
to the risk of heat
stroke, children can activate switches and controls, resulting in an injury or fatalaccident.
To lock or unlock the door with the key 1- Insert or remove the key 2- Lock 3- Unlock
BK0220401US.book 8 ページ 2015年6月3日 水曜日 午前7時42分
Page 117 of 296
Power door locks
Features and controls 5-9
5
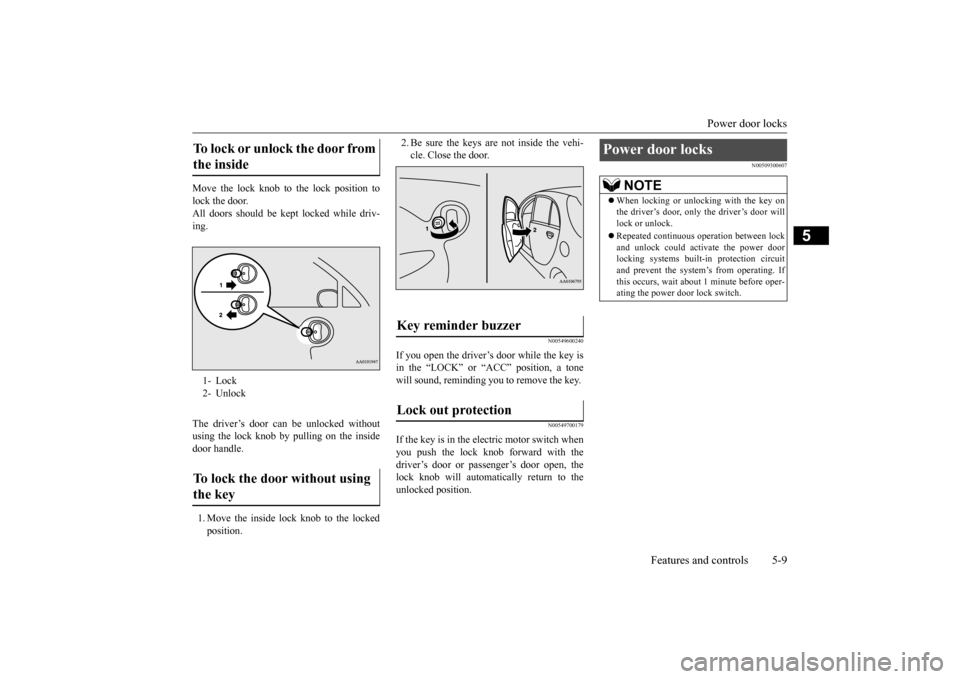
Move the lock knob to the lock position to lock the door. All doors should be kept locked while driv-ing. The driver’s door can be unlocked without using the lock knob by pulling on the insidedoor handle. 1. Move the inside lock knob to the locked position.
2. Be sure the keys are not inside the vehi- cle. Close the door.
N00549600240
If you open the driver’s door while the key isin the “LOCK” or “ACC” position, a tonewill sound, reminding you
to remove the key.
N00549700179
If the key is in the electric motor switch when you push the lock knob forward with the driver’s door or passenger’s door open, the lock knob will automatically return to theunlocked position.
N00509300607
To lock or unlock the door from the inside 1- Lock 2- Unlock To lock the door without using the key
Key reminder buzzer Lock out protection
Power door locks
NOTE
When locking or unlocking with the key on the driver’s door, only the driver’s door willlock or unlock. Repeated continuous
operation between lock
and unlock could acti
vate the power door
locking systems built-i
n protection circuit
and prevent the system’s from operating. Ifthis occurs, wait about
1 minute before oper-
ating the power door lock switch.
BK0220401US.book 9 ページ 2015年6月3日 水曜日 午前7時42分
Page 118 of 296
Child safety locks for rear door 5-10 Features and controls
5
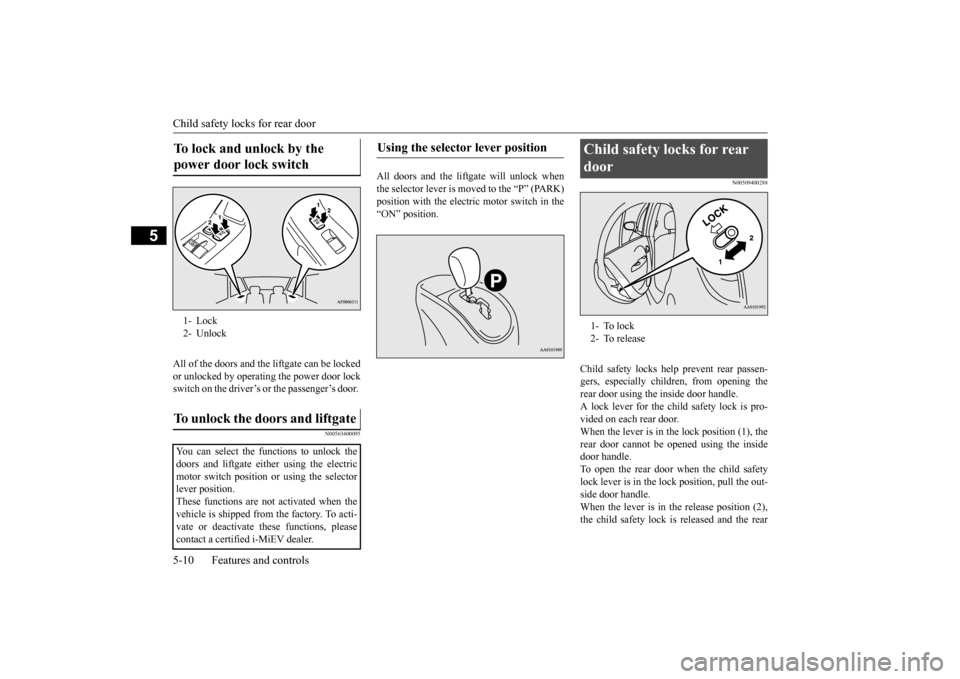
All of the doors and the liftgate can be locked or unlocked by operating the power door lock switch on the driver’s or the passenger’s door.
N00563400095
All doors and the liftgate will unlock when the selector lever is moved to the “P” (PARK) position with the electric motor switch in the“ON” position.
N00509400288
Child safety locks help prevent rear passen-gers, especially child
ren, from opening the
rear door using the inside door handle. A lock lever for the child safety lock is pro- vided on each rear door.When the lever is in the lock position (1), the rear door cannot be opened using the inside door handle.To open the rear door when the child safety lock lever is in the lock position, pull the out- side door handle.When the lever is in the release position (2), the child safety lock is released and the rear
To lock and unlock by the power door lock switch 1- Lock 2- Unlock To unlock the doors and liftgate You can select the functions to unlock the doors and liftgate either using the electric motor switch position or using the selector lever position.These functions are not
activated when the
vehicle is shipped from the factory. To acti- vate or deactivate
these functions, please
contact a certified i-MiEV dealer.
Using the selector lever position
Child safety locks for rear door 1- To lock 2- To release
BK0220401US.book 10 ページ 2015年6月3日 水曜日 午前7時42分
Page 119 of 296
Liftgate
Features and controls 5-11
5
door can be opened using the inside door han- dle.
N00510101266
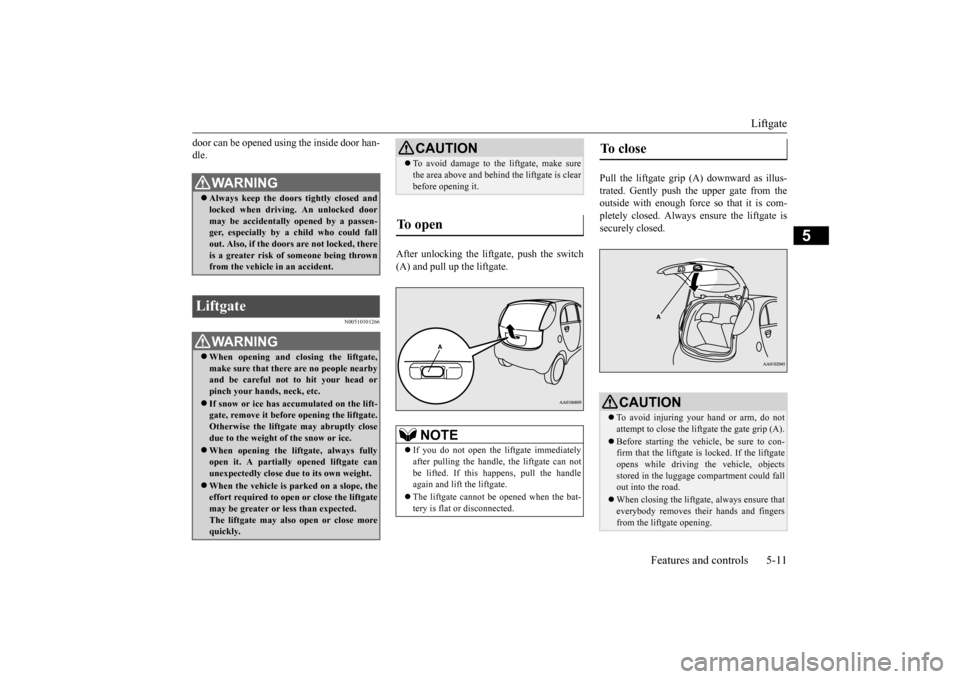
After unlocking the lift
gate, push the switch
(A) and pull up the liftgate.
Pull the liftgate grip (A) downward as illus- trated. Gently push the upper gate from the outside with enough force so that it is com-pletely closed. Always ensure the liftgate is securely closed.
WA R N I N G Always keep the door
s tightly closed and
locked when driving. An unlocked door may be accidentally
opened by a passen-
ger, especially by
a child who could fall
out. Also, if the doors are not locked, there is a greater risk of
someone being thrown
from the vehicle
in an accident.
Liftgate
WA R N I N GWhen opening and closing the liftgate, make sure that there are no people nearby and be careful not to hit your head or pinch your hands, neck, etc. If snow or ice has ac
cumulated on the lift-
gate, remove it before
opening the liftgate.
Otherwise the liftgate
may abruptly close
due to the weight of the snow or ice. When opening the lift
gate, always fully
open it. A partially opened liftgate can unexpectedly close due to its own weight. When the vehicle is parked on a slope, the effort required to open or close the liftgate may be greater or less than expected.The liftgate may also open or close more quickly.
CAUTION To avoid damage to th
e liftgate, make sure
the area above and behind
the liftgate is clear
before opening it.
To open
NOTE
If you do not open the li
ftgate immediately
after pulling the handle,
the liftgate can not
be lifted. If this happens, pull the handle again and lift
the liftgate.
The liftgate cannot be opened when the bat- tery is flat or disconnected.
To close
CAUTION To avoid injuring your hand or arm, do not attempt to close the liftgate the gate grip (A). Before starting the vehi
cle, be sure to con-
firm that the liftgate is locked. If the liftgate opens while driving the vehicle, objectsstored in the luggage compartment could fall out into the road. When closing the liftga
te, always ensure that
everybody removes their hands and fingers from the liftgate opening.
BK0220401US.book 11 ページ 2015年6月3日 水曜日 午前7時42分
Page 120 of 296
Theft-alarm system 5-12 Features and controls
5
N00510200244
The theft-alarm system is designed to provide protection from unauthorized entry into the vehicle. This system
is operated in three
stages: the first is the “armed” stage, the sec-
ond is the “alarm” stage, and third is the “dis- armed” stage. If triggered, the systemprovides both audible a
nd visual alarm sig-
nals. Park the vehicle and stop the electric motor unit. Arm the system
as described below.
1. Remove the key from the electric motor switch.2. Lock all doors and the liftgate by using the keyless entry system.
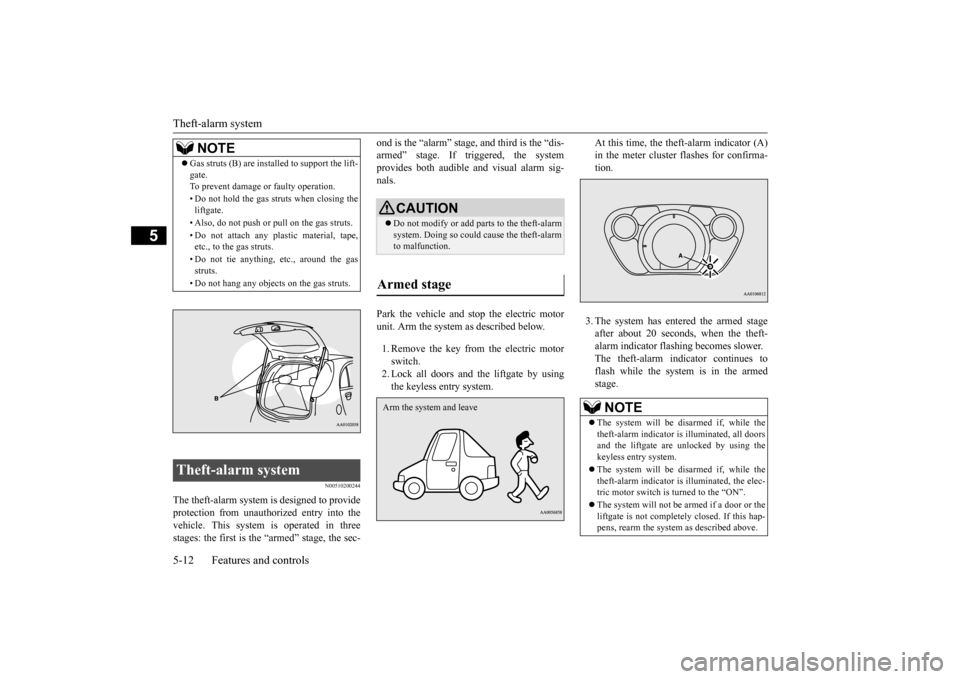
At this time, the theft-alarm indicator (A)
flashes for confirma-
tion. 3. The system has entered the armed stage after about 20 seconds, when the theft-alarm indicator flashing becomes slower. The theft-alarm indicator continues to flash while the system is in the armedstage.
NOTE
Gas struts (B) are installed to support the lift- gate.To prevent damage
or faulty operation.
• Do not hold the gas struts when closing the liftgate. • Also, do not push or pull on the gas struts. • Do not attach any pl
astic material, tape,
etc., to the gas struts. • Do not tie anything, etc., around the gas struts. • Do not hang any objects on the gas struts.
Theft-alarm system
CAUTION Do not modify or add parts to the theft-alarm system. Doing so could
cause the theft-alarm
to malfunction.
Armed stage Arm the system and leave
NOTE
The system will be disarmed if, while the theft-alarm indicator is
illuminated, all doors
and the liftgate are unlocked by using thekeyless entry system. The system will be disarmed if, while the theft-alarm indicator is illuminated, the elec- tric motor switch is turned to the “ON”. The system will not be
armed if a door or the
liftgate is not completely closed. If this hap- pens, rearm the system
as described above.
BK0220401US.book 12 ページ 2015年6月3日 水曜日 午前7時42分