page 9 MITSUBISHI LANCER RALLIART 2014 8.G Owners Manual
[x] Cancel search | Manufacturer: MITSUBISHI, Model Year: 2014, Model line: LANCER RALLIART, Model: MITSUBISHI LANCER RALLIART 2014 8.GPages: 434, PDF Size: 57.5 MB
Page 325 of 434

Listen to Audio Files on a USB Device 7-50 Comfort controls
7
Press the MEDIA key to set USB as the source. The selected source is indicated on the dis- play.
Press the key or key to select the track. This enables selection of the next or previous track. Hold down the 3 key or the 4 key. Fast forward/rewind is possible. Repeat playback, random playback, and scan playback are possible. Press the 1RPT key. Repeat playback of th
e track currently being
played.
NOTE
Regarding details such as types of USB devices that can be connected, and USB input ports, refer to “Device types” on page 5-185. Regarding details of types of files that can be played back in equipment by type (vehicles with a Bluetooth
® 2.0 interface), refer to
“File specifications” on page 5-186. Regarding how to connect USB devices, refer to “How to connect a USB memory device” on page 5-184. When connecting a USB device, use a con- nection cable. Failure to use a connection cable when connecting may place undue loadon, or damage the USB connector. Set up the device in order that no unsafe actions, such as plugging in the connection cable are taken while driving. When inserting and removing the USB device, for safety’s sake first stop the vehi-cle. Do not insert other than audio devices into the USB port. Damage to the device or equipment may result. Depending on the status of the USB device, it may take some time until the device is rec- ognized, or playback starts. Depending on USB devices, buttons on the product will not operate while the USBdevice is connected. USB device specifications and settings may mean that connection is not possible, or result in differences in operation or display.
Depending on audio data in the USB device, track information may not be displayed cor- rectly. Depending on the status of the vehicle and device, the iPod/iPhone may not play back after starting the engine. Data containing copyright information may not play back. This product can play back MP3, WMA, and AAC format audio files. Depending on the type of USB device, usage may not be possible, or functions that can be used may be restricted. The recommended file system for USB memory is FAT32. The maximum supported capacity for USB memory is 32GB. Operate the USB device containing recorded audio files while connected to this product.
Play Back of Audio Files on a USB Device
NOTE
Select the Track (File) Fast Forward or Rewind Switch Playback Mode Repeat Playback (RPT)
NOTE
Pressing again will cancel.
Page 327 of 434
Listen to Bluetooth Audio (if so equipped) 7-52 Comfort controls
7
4. Press the /SEL key. This plays the selected file (track).
N00717500020
This product can play back tracks on com- mercially-available Bluetooth-capable audiodevices.
Regarding how to connect your Bluetooth device, refer to “Connecting the Bluetooth
®
2.0 interface and Bluetooth device” on page 5-169. Operation methods below describe situationsonce connection has been completed. 1. Press the MEDIA key to set Bluetooth Audio as the source. The selected source is indicated on the display.
NOTE
While the folder is selected, press the 6 key to cancel track search mode. If there is no operation for 10 seconds after selecting the folder, then track search modewill be cancelled. Select the folder, and hold down the /SEL key to start playback from the first track inthat folder. While the file is selected, press the 6 key to return to the previous operation. While the file is selected, hold down the 6 key to cancel track search mode. If there is no operation for five seconds after selecting the file, that file is played back. Operations such as selecting a track will can- cel track search mode.
Listen to Bluetooth Audio
(if
so equipped)
CAUTION Never hold these devices in your hand to operate while driving, as this is dangerous. Do not leave the Bluetooth audio device unattended in the vehicle. Depending on how the devices are handled, audio files being damaged or lost, thereforeit is recommended that data be backed up.NOTE
Depending on the type of Bluetooth-capable audio devices, usage may not be possible, orfunctions that can be used may be restricted. Confirm together with the user manuals for the commercially-available Bluetooth-capa- ble audio devices. Depending on the type of Bluetooth-capable audio devices, volume levels may differ. There is the danger of loud volumes, so priorto use, it is recommended that you turn the volume down. “Adjust Volume” (P.7-39)
Depending on the status of the Bluetooth audio device, it may take some time until thedevice is recognized, or playback starts. Bluetooth audio device specifications and settings may mean that connection is not possible, or result in differences in operationor display. Depending on audio data in the Bluetooth audio device, track information may not be displayed correctly.
Depending on the status of the vehicle and device, the iPod/iPhone may not play back after starting the engine.
Connect a Bluetooth-capable Audio Device
NOTE
If the iPod/iPhone is connected via Bluetooth as a Bluetooth-capable audio device, then do not connect the iPod/iPhone using an iPod cable. Connection using both methods willresult in erroneous operation.
Play Bluetooth Audio
NOTE
Page 330 of 434
Display Indicator
Comfort controls 7-55
7
N00717700022
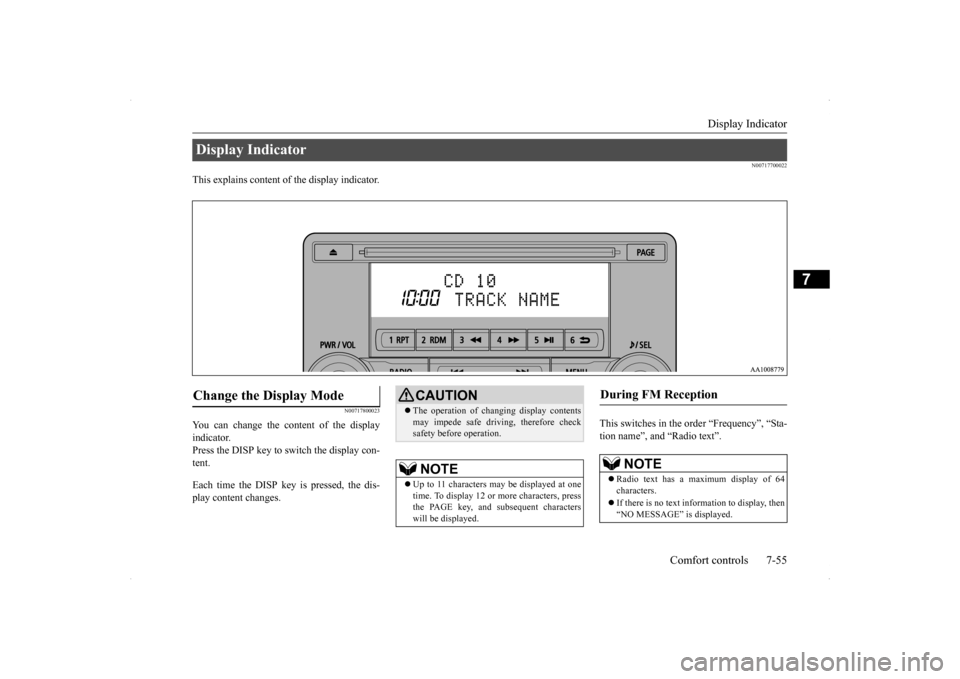
This explains content of the display indicator.
N00717800023
You can change the content of the display indicator. Press the DISP key to switch the display con- tent. Each time the DISP key is pressed, the dis- play content changes.
This switches in the order “Frequency”, “Sta- tion name”, and “Radio text”.
Display Indicator Change the Display Mode
CAUTION The operation of changing display contents may impede safe driving, therefore check safety before operation.NOTE
Up to 11 characters may be displayed at one time. To display 12 or more characters, press the PAGE key, and subsequent characterswill be displayed.
During FM Reception
NOTE
Radio text has a maximum display of 64 characters. If there is no text information to display, then “NO MESSAGE” is displayed.
Page 344 of 434
Jump-starting the engine For emergencies 8-3
8
4. Make sure your battery electrolyte is at the proper level. (Refer to “Checking bat- tery electrolyte level” on page 9-15.) 5. For vehicles equipped with turbocharger, remove the air duct and then the battery upper cover.(Refer to “Removing and installing the battery upper cover” on page 9-14.)
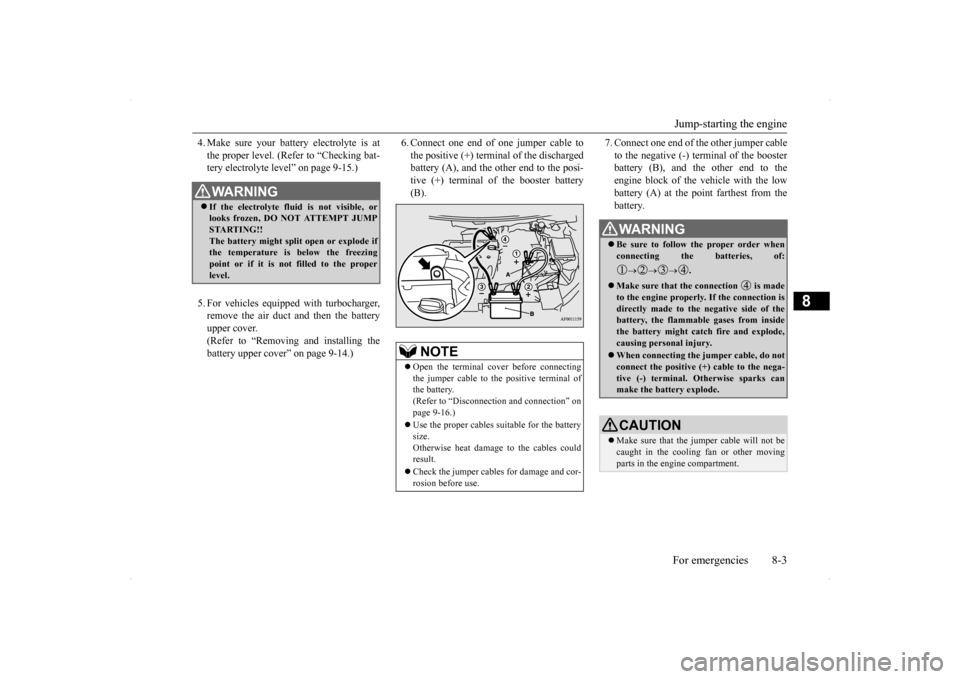
6. Connect one end of one jumper cable to the positive (+) terminal of the discharged battery (A), and the other end to the posi- tive (+) terminal of the booster battery(B).
7. Connect one end of the other jumper cable to the negative (-) terminal of the booster battery (B), and the other end to the engine block of the vehicle with the lowbattery (A) at the point farthest from the battery.
WA R N I N G If the electrolyte fluid is not visible, or looks frozen, DO NOT ATTEMPT JUMP STARTING!! The battery might split open or explode if the temperature is below the freezing point or if it is not filled to the properlevel.
NOTE
Open the terminal cover before connecting the jumper cable to the positive terminal of the battery. (Refer to “Disconnection and connection” on page 9-16.) Use the proper cables suitable for the battery size. Otherwise heat damage to the cables couldresult. Check the jumper cables for damage and cor- rosion before use.
WA R N I N G Be sure to follow the proper order when connecting the batteries, of:
.
Make sure that the connection is made to the engine properly. If the connection isdirectly made to the negative side of the battery, the flammable gases from inside the battery might catch fire and explode, causing personal injury. When connecting the jumper cable, do not connect the positive (+) cable to the nega- tive (-) terminal. Otherwise sparks canmake the battery explode.CAUTION Make sure that the jumper cable will not be caught in the cooling fan or other movingparts in the engine compartment.
Page 345 of 434
Engine overheating 8-4 For emergencies
8
8. Start the engine in the vehicle providing the boost. Let the engine idle a few min- utes, then start the engine in the vehicle with the low battery. 9. After the engine is started, disconnect the cables in the reverse order from the wayyou connected them.
10. For vehicles equipped with turbocharger,
install the battery upper cover and thenthe air duct. (Refer to “Removing and installing the battery upper cover” on page 9-14.)
If you drive your vehicle with a low battery charge, after the engine has been started by using jumper cables, the engine may misfire. This can cause the anti-lock braking systemwarning light to blink on and off. This is only due to the low battery voltage. It is not a problem with the brake system. If this hap-pens, fully charge the battery and ensure the charging system is operating properly.
N00836500323
When the engine has overheated, the infor- mation screen in the multi-information dis-play will be interrupted and the engine coolant temperature warning display will appear. The screen will then change to theengine coolant temperature display screen and “ ” will flash. If this happens: 1. Stop the vehicle in a safe place. Turn on the hazard warning flashers. 2. With the engine still running, carefullyraise the engine hood to vent the engine compartment. 3. Check that the cooling fan is running. Ifthe fan is not turning, stop the engine immediately and contact an authorized Mitsubishi Motors dealer or a repair facil-ity of your choice for assistance. 4. If you see steam or spray coming from under the hood, turn off the engine.
NOTE
If the engine is started with the air duct removed, the noise produced as air is drawn into the engine will be greater than when the duct is installed.WA R N I N G Charging your battery while it is still in your vehicle might cause the battery tocatch fire and explode. If you have to charge it while in the vehicle, disconnect the negative terminal. Keep sparks, cigarettes and flames away from the battery because the battery may explode. Keep your work area well vented when charging or using the battery in an enclosed space.
Remove all the caps before charging the battery. Electrolyte (battery acid) is corrosive diluted sulphuric acid. If electrolyte comesin contact with your hands, eyes, clothes, or the painted surface of your vehicle, thoroughly flush with water. If electrolytegets in your eyes, flush them immediately and thoroughly with water, and get prompt medical attention. Always wear protective clothing and gog- gles when working near the battery. Keep the battery out of the reach of chil- dren.
As your vehicle has anti-lock brakes
WA R N I N G
Engine overheating
WA R N I N G To avoid personal injury, keep hands, hair, jewelry and clothes away from the cooling fan. The cooling fan can start at any time.
Page 348 of 434
How to change a tire
For emergencies 8-7
8
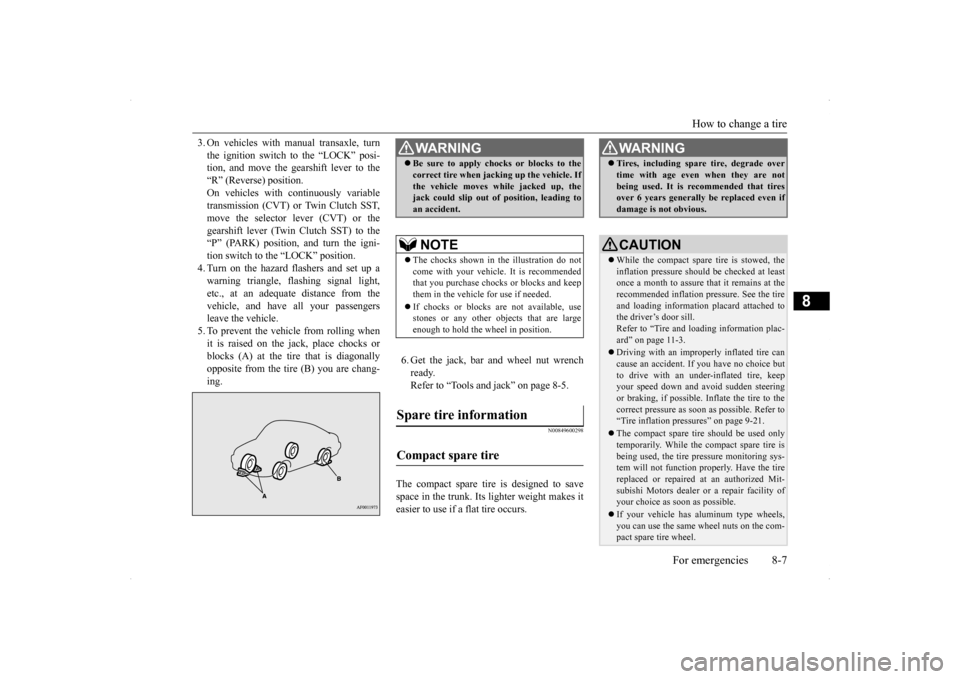
3. On vehicles with manual transaxle, turn the ignition switch to the “LOCK” posi- tion, and move the gearshift lever to the “R” (Reverse) position.On vehicles with continuously variable transmission (CVT) or Twin Clutch SST, move the selector lever (CVT) or thegearshift lever (Twin Clutch SST) to the “P” (PARK) position, and turn the igni- tion switch to the “LOCK” position.4. Turn on the hazard flashers and set up awarning triangle, flashing signal light, etc., at an adequate distance from the vehicle, and have all your passengersleave the vehicle. 5. To prevent the vehicle from rolling when it is raised on the jack, place chocks orblocks (A) at the tire that is diagonally opposite from the tire (B) you are chang- ing.
6. Get the jack, bar and wheel nut wrench ready.Refer to “Tools and jack” on page 8-5.
N00849600298
The compact spare tire is designed to savespace in the trunk. Its lighter weight makes it easier to use if a flat tire occurs.
WA R N I N G Be sure to apply chocks or blocks to the correct tire when jacking up the vehicle. If the vehicle moves while jacked up, the jack could slip out of position, leading to an accident.NOTE
The chocks shown in the illustration do not come with your vehicle. It is recommended that you purchase chocks or blocks and keepthem in the vehicle for use if needed. If chocks or blocks are not available, use stones or any other objects that are large enough to hold the wheel in position.
Spare tire information Compact spare tire
WA R N I N G Tires, including spare tire, degrade over time with age even when they are not being used. It is recommended that tires over 6 years generally be replaced even if damage is not obvious.CAUTION While the compact spare tire is stowed, the inflation pressure should be checked at least once a month to assure that it remains at therecommended inflation pressure. See the tire and loading information placard attached to the driver’s door sill.Refer to “Tire and loading information plac- ard” on page 11-3. Driving with an improperly inflated tire can cause an accident. If you have no choice but to drive with an under-inflated tire, keepyour speed down and avoid sudden steering or braking, if possible. Inflate the tire to the correct pressure as soon as possible. Refer to“Tire inflation pressures” on page 9-21. The compact spare tire should be used only temporarily. While the compact spare tire is being used, the tire pressure monitoring sys- tem will not function properly. Have the tire replaced or repaired at an authorized Mit- subishi Motors dealer or a repair facility ofyour choice as soon as possible. If your vehicle has aluminum type wheels, you can use the same wheel nuts on the com- pact spare tire wheel.
Page 350 of 434
How to change a tire
For emergencies 8-9
8
N00849800388
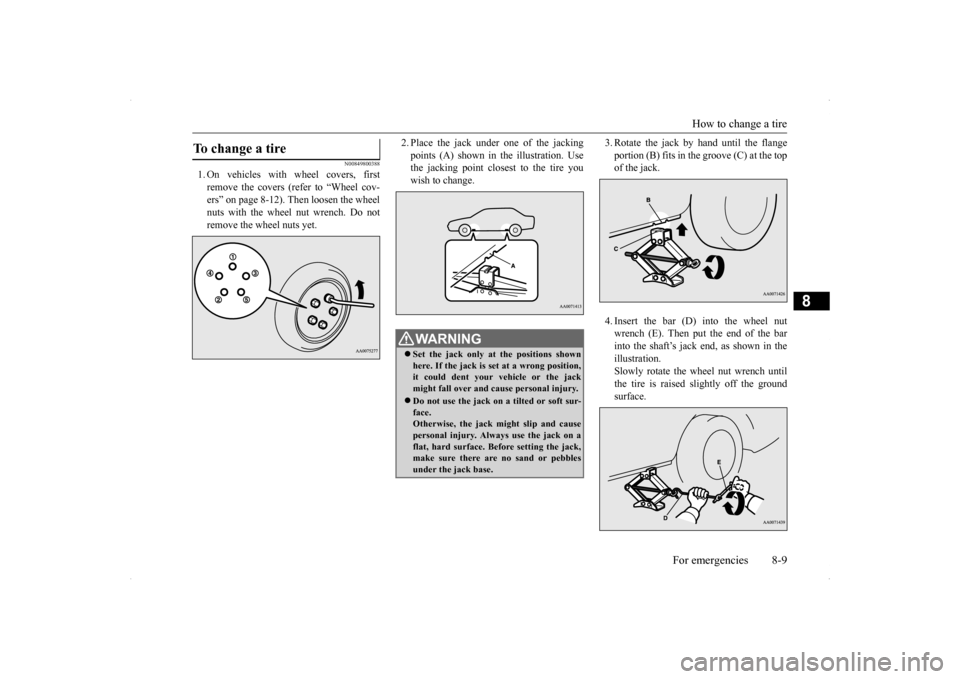
1. On vehicles with wheel covers, first remove the covers (refer to “Wheel cov-ers” on page 8-12). Then loosen the wheel nuts with the wheel nut wrench. Do not remove the wheel nuts yet.
2. Place the jack under
one of the jacking
points (A) shown in the illustration. Use the jacking point closest to the tire you wish to change.
3. Rotate the jack by hand until the flange portion (B) fits in the groove (C) at the top of the jack. 4. Insert the bar (D) into the wheel nut wrench (E). Then put the end of the barinto the shaft’s jack end, as shown in the illustration. Slowly rotate the wheel nut wrench untilthe tire is raised slightly off the groundsurface.
To change a tire
WA R N I N G Set the jack only at the positions shown here. If the jack is set at a wrong position,it could dent your vehicle or the jack might fall over and cause personal injury. Do not use the jack on a tilted or soft sur- face. Otherwise, the jack might slip and causepersonal injury. Always use the jack on a flat, hard surface. Before setting the jack, make sure there are no sand or pebblesunder the jack base.
Page 353 of 434
How to change a tire 8-12 For emergencies
8
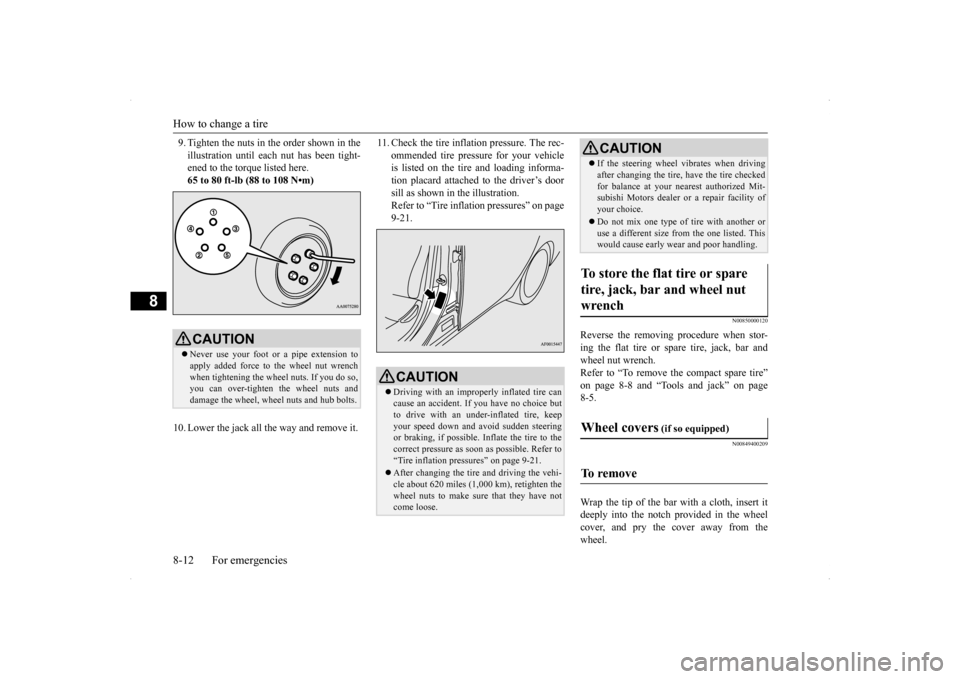
9. Tighten the nuts in the order shown in the illustration until each nut has been tight- ened to the torque listed here. 65 to 80 ft-lb (88 to 108 N•m)
10. Lower the jack all the way and remove it.
11. Check the tire inflation pressure. The rec-
ommended tire pressure for your vehicle is listed on the tire and loading informa- tion placard attached to the driver’s doorsill as shown in the illustration. Refer to “Tire inflation pressures” on page 9-21.
N00850000120
Reverse the removing procedure when stor-ing the flat tire or spare tire, jack, bar and wheel nut wrench. Refer to “To remove the compact spare tire”on page 8-8 and “Tools and jack” on page 8-5.
N00849400209
Wrap the tip of the bar with a cloth, insert it deeply into the notch provided in the wheelcover, and pry the cover away from the wheel.
CAUTION Never use your foot or a pipe extension to apply added force to the wheel nut wrench when tightening the wheel nuts. If you do so, you can over-tighten the wheel nuts anddamage the wheel, wheel nuts and hub bolts.
CAUTION Driving with an improperly inflated tire can cause an accident. If
you have no choice but
to drive with an under-inflated tire, keep your speed down and avoid sudden steering or braking, if possible. Inflate the tire to thecorrect pressure as soon as possible. Refer to “Tire inflation pressures” on page 9-21. After changing the tire and driving the vehi- cle about 620 miles (1,000 km), retighten the wheel nuts to make sure that they have notcome loose.
If the steering wheel vibrates when driving after changing the tire, have the tire checked for balance at your nearest authorized Mit- subishi Motors dealer or a repair facility of your choice. Do not mix one type of tire with another or use a different size from the one listed. Thiswould cause early wear and poor handling.
To store the flat tire or spare tire, jack, bar and wheel nut wrench Wheel covers
(if so equipped)
To remove
CAUTION
Page 357 of 434
Operation under adverse driving conditions 8-16 For emergencies
8
the engine idle for a few minutes to cool the transaxle before trying again. If your vehicle is still stuck after several rock- ing attempts, call for a commercial tow truckservice.
When driving on a road covered with snow or ice, use snow tires. Tire chains cannot be used on your vehicle. There may be state or local regulations aboutusing snow tires. Always check the regu- lations in your local area before using them. Refer to the section entitled “Snowtires” on page 9-24 and “Tire chains” on page 9-24. Drive slowly. Do not make sudden starts or stops, sharp turns, or slam on the brakes. Allow extra distance between your vehi- cle and the vehicle in front of you, and avoid sudden braking. If a skid occurs when the accelerator pedal is depressed, take your foot off the pedal. Steer gently in the direction of the skid.
Your vehicle is equipped with an anti-lock braking system (ABS), hold the brake pedal down firmly and keep it depressed. Do not pump the brake pedal which willresult in reduced braking performance. After parking on snowy or icy road, it may be difficult to move your vehicle dueto freeze-up of the brake. Depress the accelerator pedal little by little to move the vehicle after confirming safety of thevehicle. Drive as slow as possible when driving on bumpy or rutted roads or over potholes etc.
WA R N I N G When trying to rock your vehicle out of a stuck position, make sure that there are no people nearby. The rocking motion canmake your vehicle suddenly lurch forward or backward, and injure any bystanders.
On wet roads
CAUTION Avoid flooded roads. Water is often deeper than it looks, and you could be seriously hurt by driving into flood water. When driving in rain, on water-covered roads, or through a car wash, water could get into the brake discs and make them fail tem-porarily. In such cases, lightly press the brake pedal to see if they are working prop- erly. If they are not, press the pedal lightly several times while driving to dry the brake pads or linings, then check them again.
When driving in rain, a layer of water may form between the tires and the road surface (aquaplaning). This loosens your tires’ grip on the road, making it difficult to steer or brake properly. When driving on a wet road:• Drive your vehicle at a safe speed.• Do not drive on worn tires.• Always keep the tires at the correct infla-tion pressures.
On snowy or icy roads
CAUTION
CAUTION Do not depress the accelerator pedal rapidly. The vehicle could start moving when it breaks free from the ice, possibly resulting inan accident.
On a bumpy or rutted road
CAUTION Driving on bumpy, rutted roads or over pot- holes can damage the tires and wheels.Wheels with low-profiles tires or under- inflated tires are especially at risk for dam- age.
Page 375 of 434
Battery 9-16 Vehicle care and maintenance
9
N00901600015
The battery is weaker in cold temperatures. This has to do with its chemical and physical properties and is why a very cold battery,especially one with a low charge, will have a hard time starting your vehicle. It is recommended that you have your batteryand charging system checked by an autho- rized Mitsubishi Motors
dealer or a repair
facility of your choice before the start of coldweather. If necessary, have it charged. This will guarantee more reliable starting, and lon- ger battery life.
N00901701084
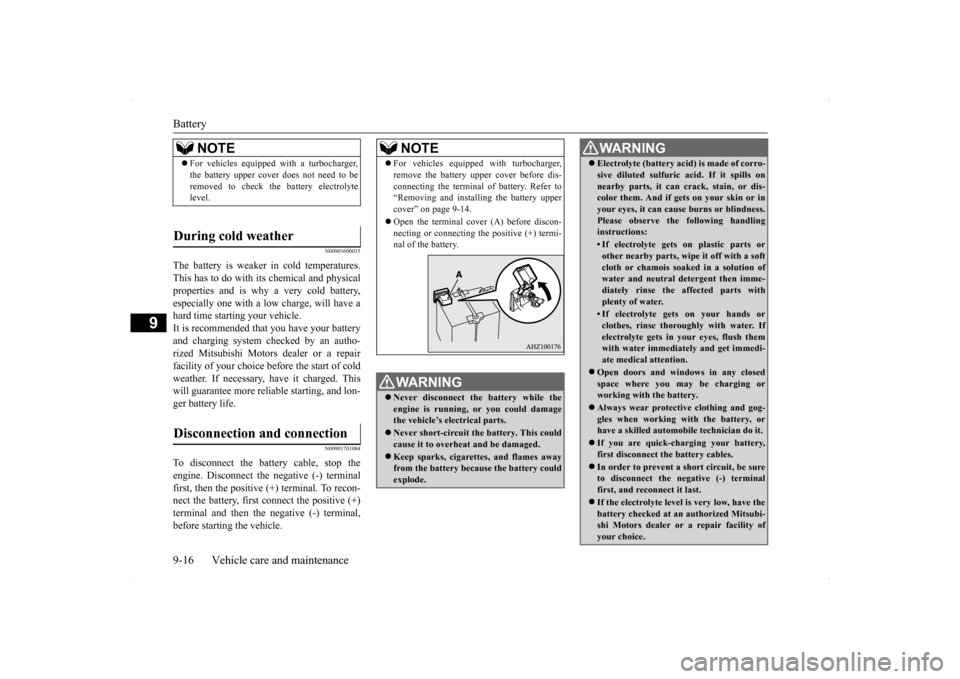
To disconnect the battery cable, stop theengine. Disconnect the negative (-) terminalfirst, then the positive (+) terminal. To recon- nect the battery, first connect the positive (+) terminal and then the negative (-) terminal,before starting the vehicle.
NOTE
For vehicles equipped with a turbocharger, the battery upper cover does not need to be removed to check the battery electrolyte level.
During cold weather Disconnection and connection
NOTE
For vehicles equipped with turbocharger, remove the battery upper cover before dis- connecting the terminal of battery. Refer to “Removing and installing the battery upper cover” on page 9-14. Open the terminal cover (A) before discon- necting or connecting the positive (+) termi-nal of the battery.WA R N I N G Never disconnect the battery while the engine is running, or you could damagethe vehicle’s electrical parts. Never short-circuit the battery. This could cause it to overheat and be damaged. Keep sparks, cigarettes, and flames away from the battery because the battery could explode.
Electrolyte (battery acid) is made of corro- sive diluted sulfuric acid. If it spills on nearby parts, it can crack, stain, or dis- color them. And if gets on your skin or in your eyes, it can cause burns or blindness.Please observe the following handling instructions:• If electrolyte gets on plastic parts orother nearby parts, wipe it off with a soft cloth or chamois soaked in a solution ofwater and neutral detergent then imme- diately rinse the affected parts with plenty of water.• If electrolyte gets on your hands orclothes, rinse thoroughly with water. Ifelectrolyte gets in your eyes, flush them with water immediately and get immedi- ate medical attention.
Open doors and windows in any closed space where you may be charging orworking with the battery. Always wear protective clothing and gog- gles when working with the battery, or have a skilled automobile technician do it. If you are quick-charging your battery, first disconnect the
battery cables.
In order to prevent a short circuit, be sure to disconnect the negative (-) terminal first, and reconnect it last. If the electrolyte level is very low, have the battery checked at an authorized Mitsubi- shi Motors dealer or a repair facility of your choice.WA R N I N G