page 9 MITSUBISHI LANCER RALLIART 2014 8.G Repair Manual
[x] Cancel search | Manufacturer: MITSUBISHI, Model Year: 2014, Model line: LANCER RALLIART, Model: MITSUBISHI LANCER RALLIART 2014 8.GPages: 434, PDF Size: 57.5 MB
Page 169 of 434
Cruise control (if so equipped) 5-102 Features and controls
5
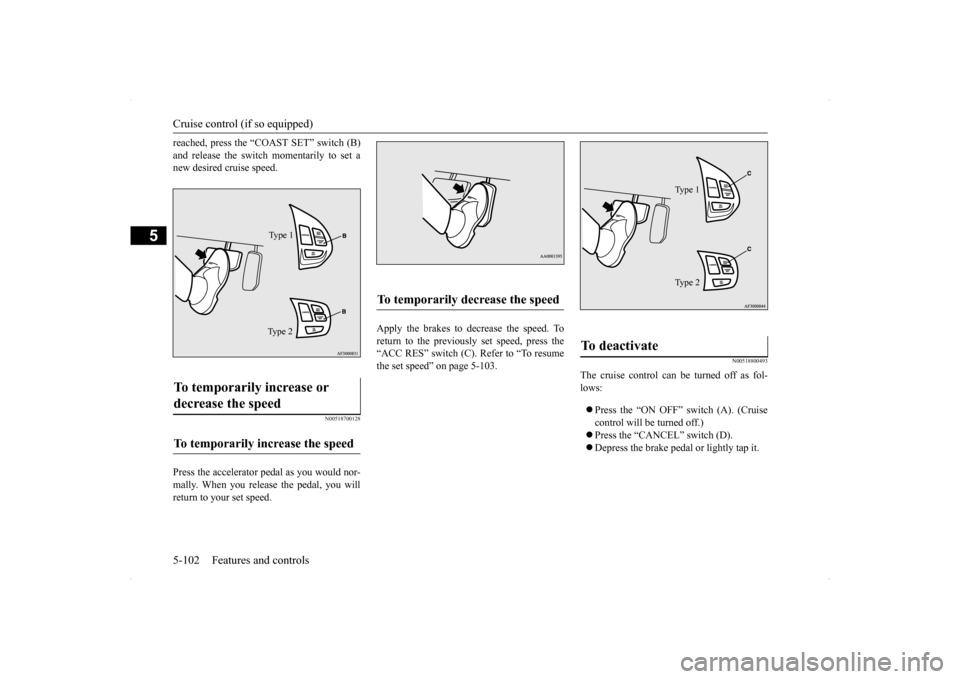
reached, press the “COAST SET” switch (B) and release the switch momentarily to set a new desired cruise speed.
N00518700128
Press the accelerator pedal as you would nor- mally. When you release the pedal, you willreturn to your set speed.
Apply the brakes to decrease the speed. To return to the previously set speed, press the“ACC RES” switch (C). Refer to “To resume the set speed” on page 5-103.
N00518800493
The cruise control can be turned off as fol- lows: Press the “ON OFF” switch (A). (Cruise control will be turned off.) Press the “CANCEL” switch (D). Depress the brake pedal or lightly tap it.
To temporarily increase or decrease the speed
To temporarily increase the speed
Type 1 Ty p e 2
To temporarily decrease the speed
To deactivate
Ty p e 1 Ty p e 2
Page 170 of 434
Cruise control (if so equipped) Features and controls 5-103
5
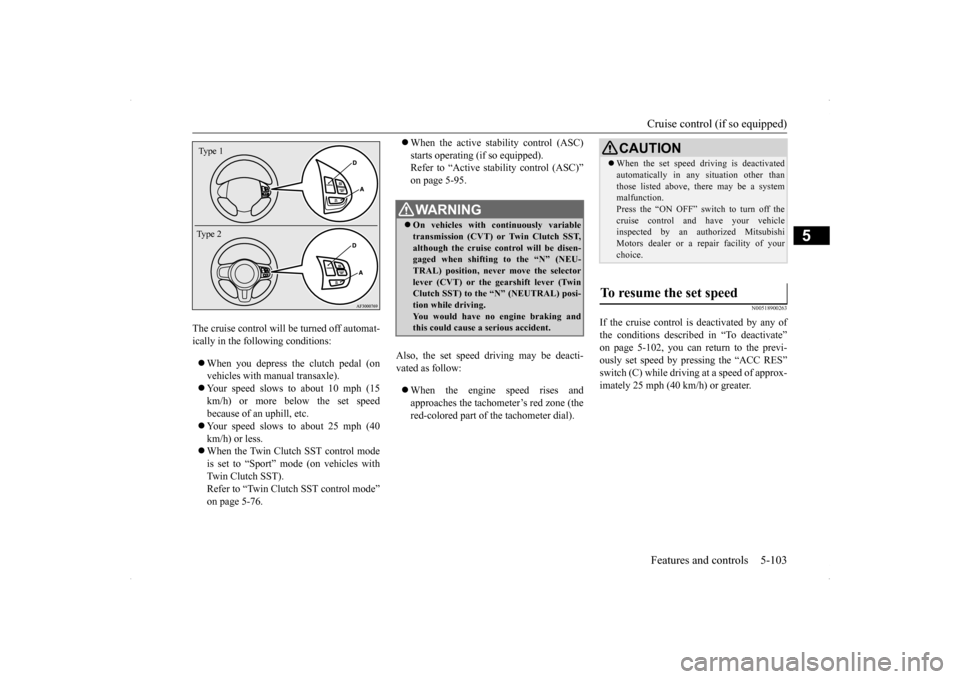
The cruise control will be turned off automat- ically in the following conditions: When you depress the clutch pedal (on vehicles with manual transaxle). Your speed slows to about 10 mph (15 km/h) or more below the set speedbecause of an uphill, etc. Your speed slows to about 25 mph (40 km/h) or less. When the Twin Clutch SST control mode is set to “Sport” mode (on vehicles with Twin Clutch SST).Refer to “Twin Clutch SST control mode” on page 5-76.
When the active stability control (ASC) starts operating (if so equipped). Refer to “Active stability control (ASC)” on page 5-95.
Also, the set speed driving may be deacti- vated as follow: When the engine speed rises and approaches the tachometer’s red zone (the red-colored part of the tachometer dial).
N00518900263
If the cruise control is deactivated by any ofthe conditions described in “To deactivate”on page 5-102, you can return to the previ- ously set speed by pressing the “ACC RES” switch (C) while driving at a speed of approx-imately 25 mph (40 km/h) or greater.
Type 1 Type 2
WA R N I N G On vehicles with continuously variable transmission (CVT) or Twin Clutch SST,although the cruise control will be disen- gaged when shifting to the “N” (NEU- TRAL) position, never move the selectorlever (CVT) or the gearshift lever (Twin Clutch SST) to the “N” (NEUTRAL) posi- tion while driving.You would have no engine braking and this could cause a serious accident.
CAUTION When the set speed driving is deactivated automatically in any situation other than those listed above, there may be a system malfunction. Press the “ON OFF” switch to turn off thecruise control and have your vehicle inspected by an authorized Mitsubishi Motors dealer or a repair facility of yourchoice.
To resume the set speed
Page 171 of 434
Tire pressure monitoring system 5-104 Features and controls
5
However, you must repeat the speed setting procedure under either of the following con-ditions: The ignition switch is turned to the “OFF” position. The cruise control is turned OFF. “CRUISE” indicator light is turned off.
N00530201494
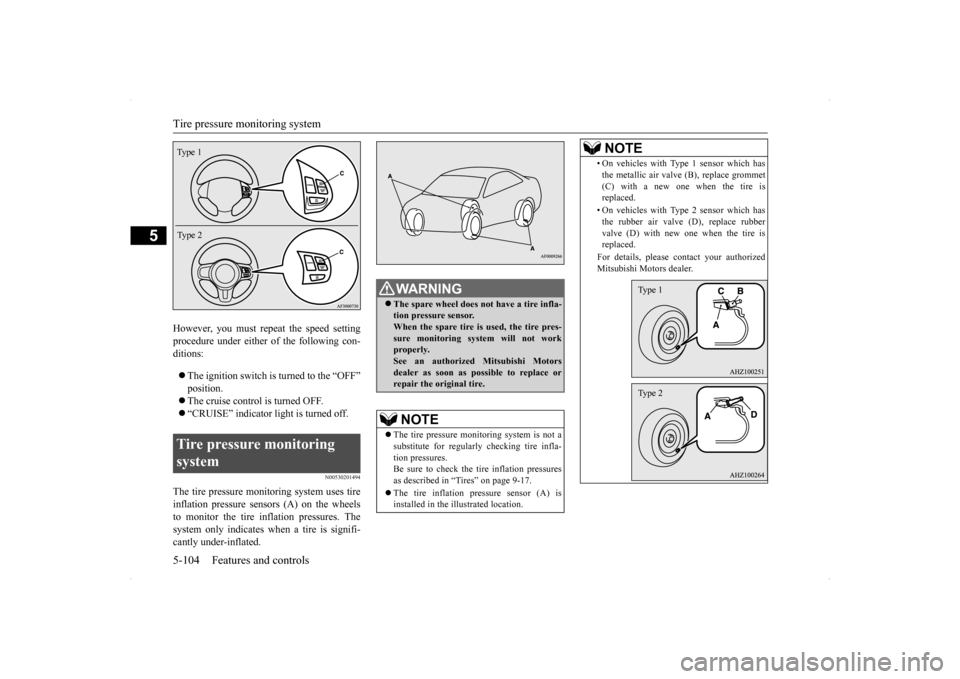
The tire pressure monitoring system uses tire inflation pressure sensors (A) on the wheels to monitor the tire inflation pressures. The system only indicates when a tire is signifi-cantly under-inflated.Tire pressure monitoring system Type 1 Type 2
WA R N I N G The spare wheel does not have a tire infla- tion pressure sensor. When the spare tire is used, the tire pres- sure monitoring system will not workproperly. See an authorized Mitsubishi Motors dealer as soon as possible to replace orrepair the original tire.NOTE
The tire pressure monitoring system is not a substitute for regularly checking tire infla-tion pressures. Be sure to check the tire inflation pressures as described in “Tires” on page 9-17. The tire inflation pressure sensor (A) is installed in the illustrated location.
• On vehicles with Type 1 sensor which has the metallic air valve (B), replace grommet (C) with a new one when the tire is replaced. • On vehicles with Type 2 sensor which has the rubber air valve (D), replace rubber valve (D) with new one when the tire isreplaced. For details, please contact your authorized Mitsubishi Motors dealer.NOTE
Type 1Type 2
Page 172 of 434
Tire pressure monitoring system
Features and controls 5-105
5
N00532700122
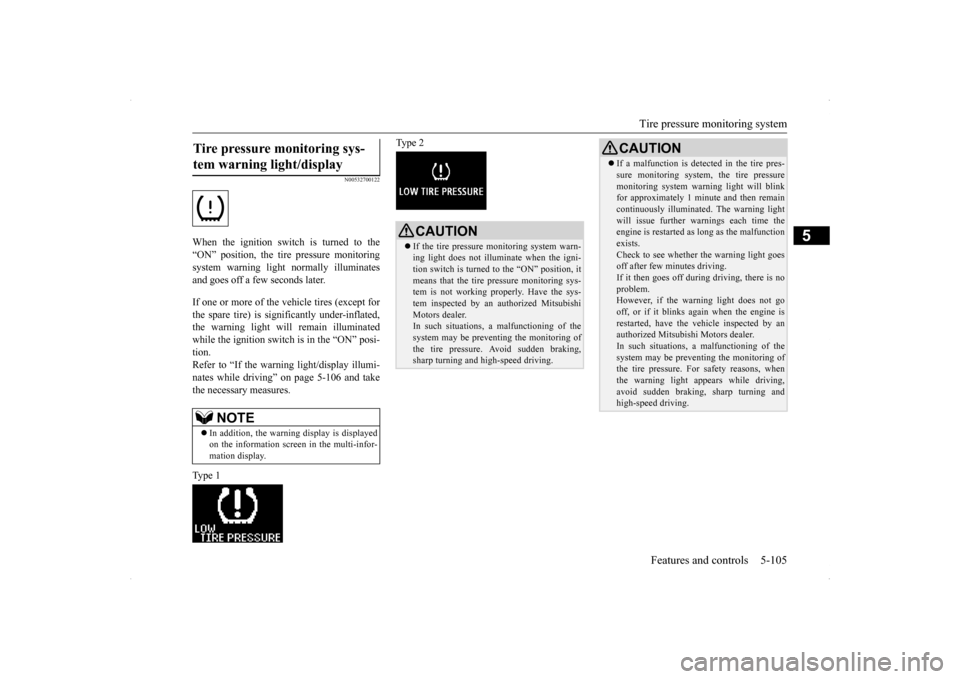
When the ignition switch is turned to the “ON” position, the tire pressure monitoringsystem warning light normally illuminatesand goes off a few seconds later. If one or more of the vehicle tires (except for the spare tire) is significantly under-inflated, the warning light will remain illuminatedwhile the ignition switch is in the “ON” posi- tion. Refer to “If the warning light/display illumi-nates while driving” on page 5-106 and take the necessary measures. Type 1
Type 2
Tire pressure monitoring sys- tem warning light/display
NOTE
In addition, the warning display is displayed on the information screen in the multi-infor- mation display.
CAUTION If the tire pressure monitoring system warn- ing light does not illuminate when the igni- tion switch is turned to the “ON” position, it means that the tire pressure monitoring sys-tem is not working properly. Have the sys- tem inspected by an authorized Mitsubishi Motors dealer.In such situations,
a malfunctioning of the
system may be preventing the monitoring of the tire pressure. Avoid sudden braking, sharp turning and high-speed driving.
If a malfunction is detected in the tire pres- sure monitoring system, the tire pressure monitoring system warning light will blink for approximately 1 minute and then remain continuously illuminated. The warning lightwill issue further warn
ings each time the
engine is restarted as long as the malfunction exists.Check to see whether the warning light goes off after few minutes driving. If it then goes off during driving, there is noproblem. However, if the warning light does not go off, or if it blinks again when the engine isrestarted, have the vehicle inspected by an authorized Mitsubishi Motors dealer. In such situations,
a malfunctioning of the
system may be preventing the monitoring of the tire pressure. For safety reasons, when the warning light appears while driving,avoid sudden braking, sharp turning and high-speed driving.CAUTION
Page 173 of 434
Tire pressure monitoring system 5-106 Features and controls
5
Each tire, including the spare (if provided), should be checked monthly when cold andinflated to the inflation pressure recom-mended by the vehicle manufacturer on the vehicle placard or tire inflation pressure label. (If your vehicle has tires of a different sizethan the size indicated on the vehicle placard or tire inflation pressure label, you should determine the proper tire inflation pressurefor those tires.) As an added safety feature, your vehicle has been equipped with a tire pressure monitoringsystem (TPMS) that illuminates a low tire
pressure telltale when one or more of your tires is significantly under-inflated. Accordingly, when the low tire pressure tell- tale illuminates, you should stop and checkyour tires as soon as possible, and inflate them to the proper pressure. Driving on a sig- nificantly under-inflated tire causes the tire tooverheat and can lead to tire failure. Under-inflation also reduces fuel efficiency and tire tread life, and may affect the vehi-cle’s handling and stopping ability. Pleasenote that the TPMS is not a substitute for proper tire maintenance, and it is the driver’s responsibility to maintain correct tire pres-sure, even if under-inflation has not reached the level to trigger illumination of the TPMS low tire pressure telltale.Your vehicle has also been equipped with a TPMS malfunction indicator to indicate when the system is not operating properly. TheTPMS malfunction indicator is combined with the low tire pressure telltale. When the system detects a malfunction, thetelltale will flash for approximately one min- ute and then remain continuously illuminated. This sequence will continue upon subsequent
vehicle start-ups as long as the malfunction exists. When the malfunction indicator is illumi- nated, the system may not be able to detect orsignal low tire pressure as intended. TPMS malfunctions may occur for a variety of reasons, including the installation ofreplacement or alternate tires or wheels on the vehicle that prevent the TPMS from function- ing properly. Always check the TPMS mal-function telltale after replacing one or moretires or wheels on your vehicle to ensure that the replacement or alternate tires and wheels allow the TPMS to continue to function prop-erly.
N00532800439
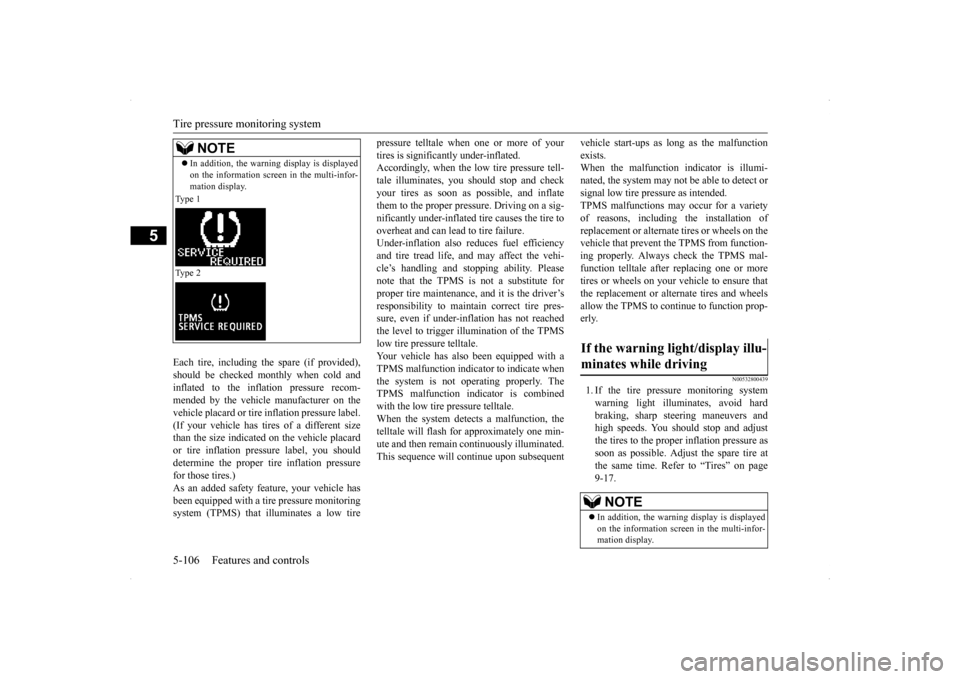
1. If the tire pressure monitoring system warning light illuminates, avoid hard braking, sharp steering maneuvers andhigh speeds. You should stop and adjust the tires to the proper inflation pressure as soon as possible. Adjust the spare tire atthe same time. Refer to “Tires” on page 9-17.
NOTE
In addition, the warning display is displayed on the information screen in the multi-infor- mation display.
Type 1 Type 2
If the warning light/display illu- minates while driving
NOTE
In addition, the warning display is displayed on the information screen in the multi-infor- mation display.
Page 180 of 434
Multi-information display
Features and controls 5-113
5
N00555100136
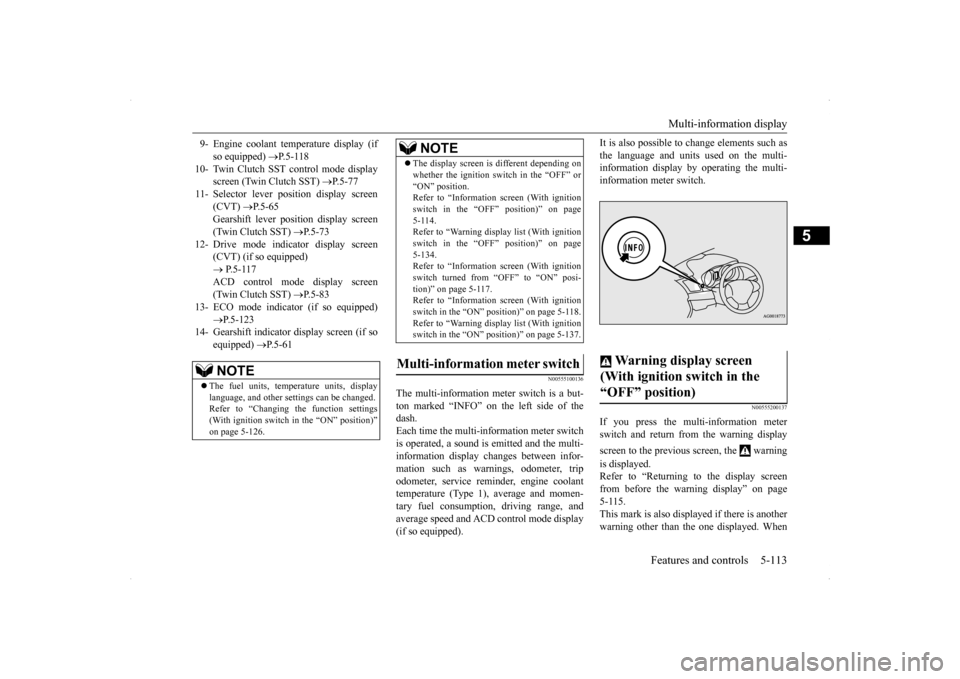
The multi-information meter switch is a but- ton marked “INFO” on the left side of the dash. Each time the multi-information meter switchis operated, a sound is emitted and the multi- information display changes between infor- mation such as warnings, odometer, tripodometer, service reminder, engine coolant temperature (Type 1), average and momen- tary fuel consumption, driving range, andaverage speed and ACD control mode display (if so equipped).
It is also possible to change elements such as the language and units used on the multi- information display by operating the multi- information meter switch.
N00555200137
If you press the multi-information meterswitch and return from the warning display screen to the previous screen, the warning is displayed. Refer to “Returning to the display screen from before the warning display” on page 5-115.This mark is also displayed if there is anotherwarning other than the one displayed. When
9- Engine coolant temperature display (if
so equipped)
P.5-118
10- Twin Clutch SST control mode display
screen (Twin Clutch SST)
P.5-77
11- Selector lever position display screen
(CVT)
P.5-65
Gearshift lever position display screen (Twin Clutch SST)
P.5-73
12- Drive mode indicator display screen
(CVT) (if so equipped) P.5-117 ACD control mode display screen(Twin Clutch SST)
P.5-83
13- ECO mode indicator (if so equipped)
P.5-123
14- Gearshift indicator display screen (if so
equipped)
P.5-61
NOTE
The fuel units, temperature units, display language, and other settings can be changed.Refer to “Changing the function settings (With ignition switch in the “ON” position)” on page 5-126.
The display screen is different depending on whether the ignition switch in the “OFF” or “ON” position. Refer to “Information screen (With ignition switch in the “OFF” position)” on page5-114. Refer to “Warning displa
y list (With ignition
switch in the “OFF” position)” on page5-134. Refer to “Information screen (With ignition switch turned from “OFF” to “ON” posi-tion)” on page 5-117. Refer to “Information screen (With ignition switch in the “ON” position)” on page 5-118.Refer to “Warning displa
y list (With ignition
switch in the “ON” position)” on page 5-137.
Multi-information meter switch
NOTE
Warning display screen (With ignition switch in the “OFF” position)
Page 181 of 434
Multi-information display 5-114 Features and controls
5
the cause of the warning display is elimi- nated, the warning goes out automatically.
N00555300112
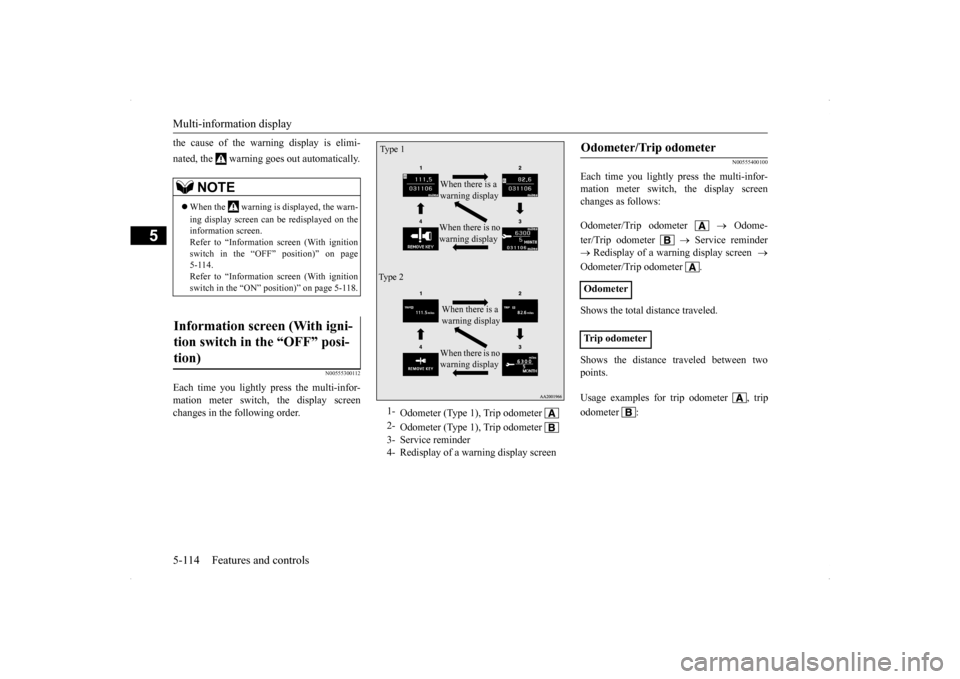
Each time you lightly press the multi-infor- mation meter switch, the display screen changes in the following order.
N00555400100
Each time you lightly press the multi-infor-mation meter switch, the display screenchanges as follows: Odometer/Trip odometer
Odome-
ter/Trip odometer
Service reminder
Redisplay of a warning display screen
Odometer/Trip odometer . Shows the total distance traveled. Shows the distance traveled between two points.
NOTE
When the warning is displayed, the warn- ing display screen can be redisplayed on the information screen. Refer to “Information screen (With ignitionswitch in the “OFF” position)” on page 5-114. Refer to “Information screen (With ignitionswitch in the “ON” position)” on page 5-118.
Information screen (With igni- tion switch in the “OFF” posi- tion)
1-
Odometer (Type 1), Trip odometer
2-
Odometer (Type 1), Trip odometer
3- Service reminder4- Redisplay of a warning display screenType 1
When there is no warning display When there is a warning display
Ty p e 2
When there is no warning display When there is a warning display
Odometer/Trip odometer Odometer Trip odometer Usage examples for
trip odometer , trip
odometer :
Page 182 of 434
Multi-information display
Features and controls 5-115
5
N00555500039
Shows the distance and number of months until the next periodic inspection. Refer to “Service reminder” on page 5-123.
N00559600155
When there is information to be announced,such as a key reminder, the buzzer sounds and switches to the warning display screen. Refer to the appropriate page and take the necessarymeasures. When the cause of the warning display is eliminated, the warning display goes outautomatically.
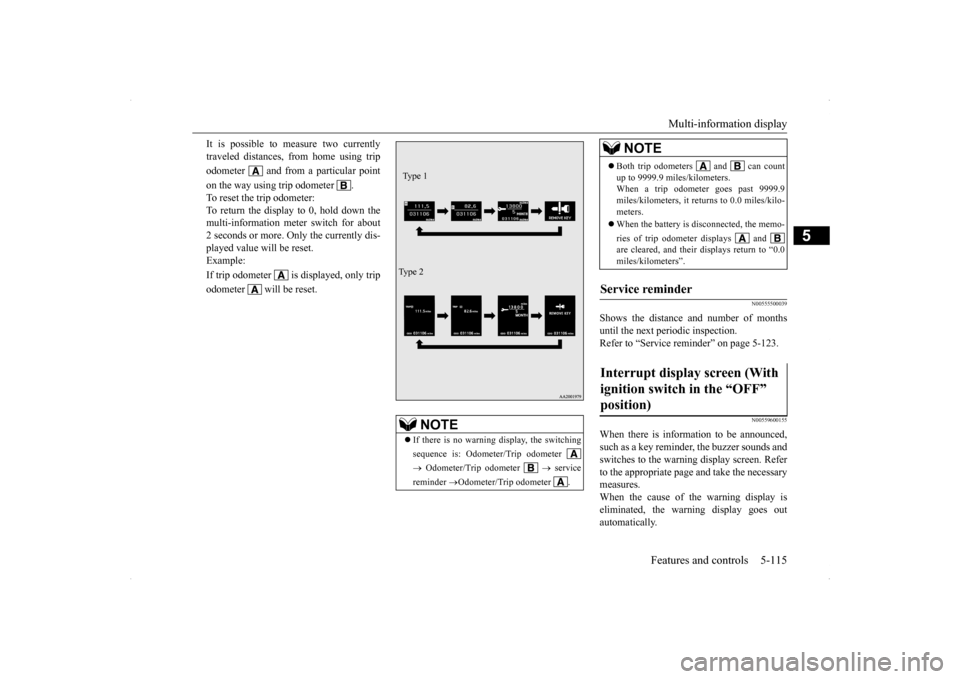
It is possible to measure two currently traveled distances, from home using trip odometer and from a particular pointon the way using trip odometer . To reset the trip odometer: To return the display to 0, hold down the multi-information meter switch for about2 seconds or more. Only the currently dis- played value will be reset. Example: If trip odometer is displayed, only tripodometer will be reset.
NOTE
If there is no warning display, the switching sequence is: Odometer/Trip odometer Odometer/Trip odometer
service
reminder
Odometer/Trip odometer .
Ty p e 1 Ty p e 2
Both trip odometers and can count up to 9999.9 miles/kilometers. When a trip odometer goes past 9999.9 miles/kilometers, it returns to 0.0 miles/kilo-meters. When the battery is disconnected, the memo- ries of trip odometer displays and are cleared, and their displays return to “0.0 miles/kilometers”.
Service reminder Interrupt display screen (With ignition switch in the “OFF” position)
NOTE
Page 183 of 434
Multi-information display 5-116 Features and controls
5
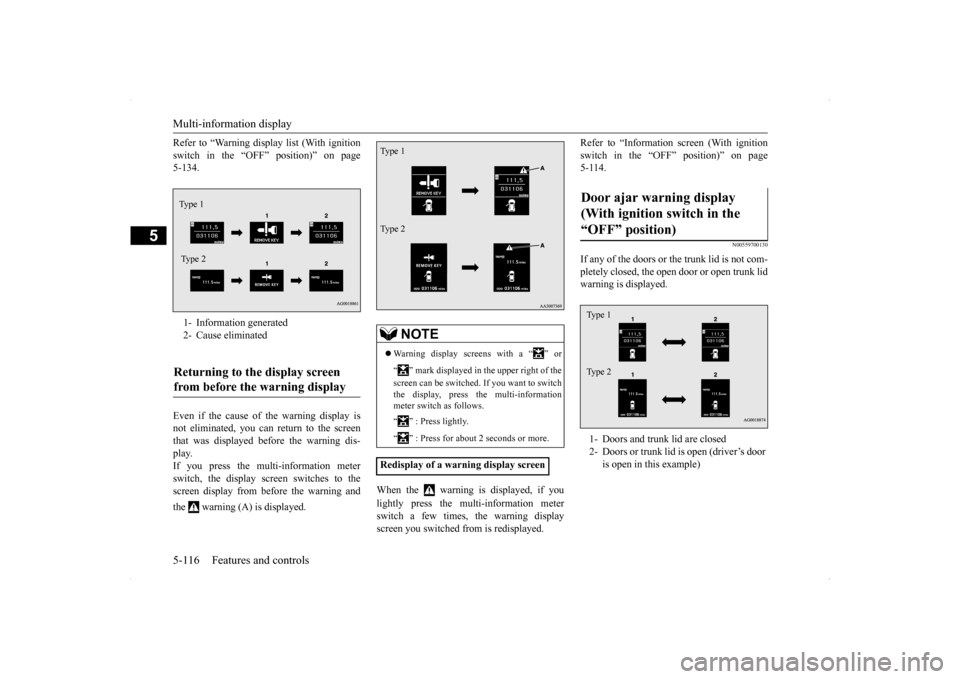
Refer to “Warning display list (With ignition switch in the “OFF” position)” on page 5-134. Even if the cause of the warning display is not eliminated, you can return to the screen that was displayed before the warning dis-play. If you press the multi-information meter switch, the display screen switches to thescreen display from before the warning and the warning (A) is displayed.
When the warning is displayed, if you lightly press the multi-information meter switch a few times, the warning displayscreen you switched from is redisplayed.
Refer to “Information screen (With ignition switch in the “OFF” position)” on page 5-114.
N00559700130
If any of the doors or the trunk lid is not com- pletely closed, the open door or open trunk lidwarning is displayed.
1- Information generated 2- Cause eliminatedReturning to the display screen from before the warning display Type 1 Ty p e 2
NOTE
Warning display screens with a “ ” or “ ” mark displayed in the upper right of the screen can be switched. If you want to switch the display, press the multi-information meter switch as follows. “ ” : Press lightly. “ ” : Press for about 2 seconds or more.
Redisplay of a warning display screenType 1 Type 2
Door ajar warning display (With ignition switch in the “OFF” position) 1- Doors and trunk lid are closed 2- Doors or trunk lid is open (driver’s door
is open in this example)
Type 1 Type 2
Page 184 of 434
Multi-information display
Features and controls 5-117
5
N00555800133
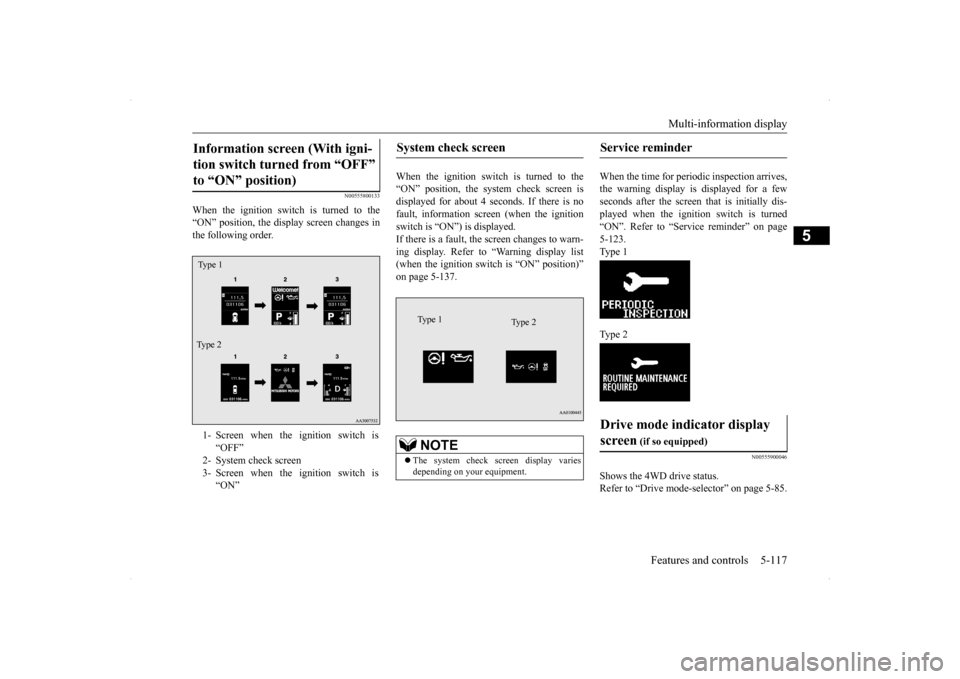
When the ignition switch is turned to the “ON” position, the display screen changes in the following order.
When the ignition switch is turned to the “ON” position, the system check screen isdisplayed for about 4 seconds. If there is no fault, information screen (when the ignition switch is “ON”) is displayed.If there is a fault, the screen changes to warn- ing display. Refer to “Warning display list (when the ignition switch is “ON” position)”on page 5-137.
When the time for periodic inspection arrives, the warning display is displayed for a fewseconds after the screen that is initially dis- played when the ignition switch is turned “ON”. Refer to “Service reminder” on page5-123. Type 1 Type 2
N00555900046
Shows the 4WD drive status. Refer to “Drive mode-s
elector” on page 5-85.
Information screen (With igni- tion switch turned from “OFF” to “ON” position) 1- Screen when the ignition switch is
“OFF”
2- System check screen 3- Screen when the ignition switch is
“ON”
Ty p e 1 Type 2
System check screen
NOTE
The system check screen display varies depending on your equipment.Type 1
Type 2
Service reminder Drive mode indicator display screen
(if so equipped)