MITSUBISHI OUTLANDER PHEV 2018 Owner's Manual (in English)
Manufacturer: MITSUBISHI, Model Year: 2018, Model line: OUTLANDER PHEV, Model: MITSUBISHI OUTLANDER PHEV 2018Pages: 538, PDF Size: 25.01 MB
Page 221 of 538
WARNINGlLeaving the engine running risks injury
or death from accidentally moving the se-
lector lever or the accumulation of toxic
exhaust fumes on the passenger compart- ment.
Where you park
WARNINGl Do not park your vehicle in areas where
combustible materials such as dry grass
or leaves can come in contact with a hot exhaust, since a fire could occur.
When leaving the vehicle
Always carry the key and lock all doors and
the tailgate when leaving the vehicle unatten-
ded.
Always try to park your vehicle in a well lit
area.
CAUTIONl When you leave the vehicle, be sure that you
have stopped the Plug-in Hybrid EV System.
The engine may start suddenly by a remain-
ing amount decline of the drive battery.Steering wheel height and
reach adjustment E00600701652
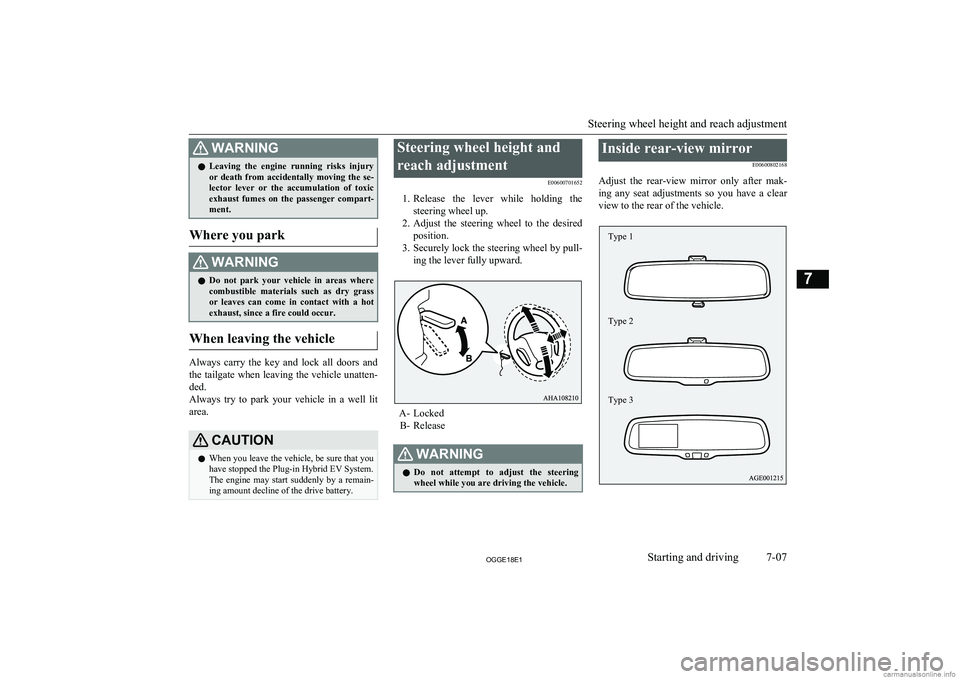
1. Release the lever while holding the
steering wheel up.
2. Adjust the steering wheel to the desired
position.
3. Securely lock the steering wheel by pull-
ing the lever fully upward.
A- Locked B- Release
WARNINGl Do not attempt to adjust the steering
wheel while you are driving the vehicle.Inside rear-view mirror
E00600802168
Adjust the rear-view mirror only after mak-
ing any seat adjustments so you have a clear
view to the rear of the vehicle.
Steering wheel height and reach adjustment
7-07OGGE18E1Starting and driving7 Type 1
Type 2
Type 3
Page 222 of 538
WARNINGlDo not attempt to adjust the rear-view
mirror while driving. This can be danger-
ous.
Always adjust the mirror before driving.
Adjust the rear-view mirror to maximize the
view through the rear window.
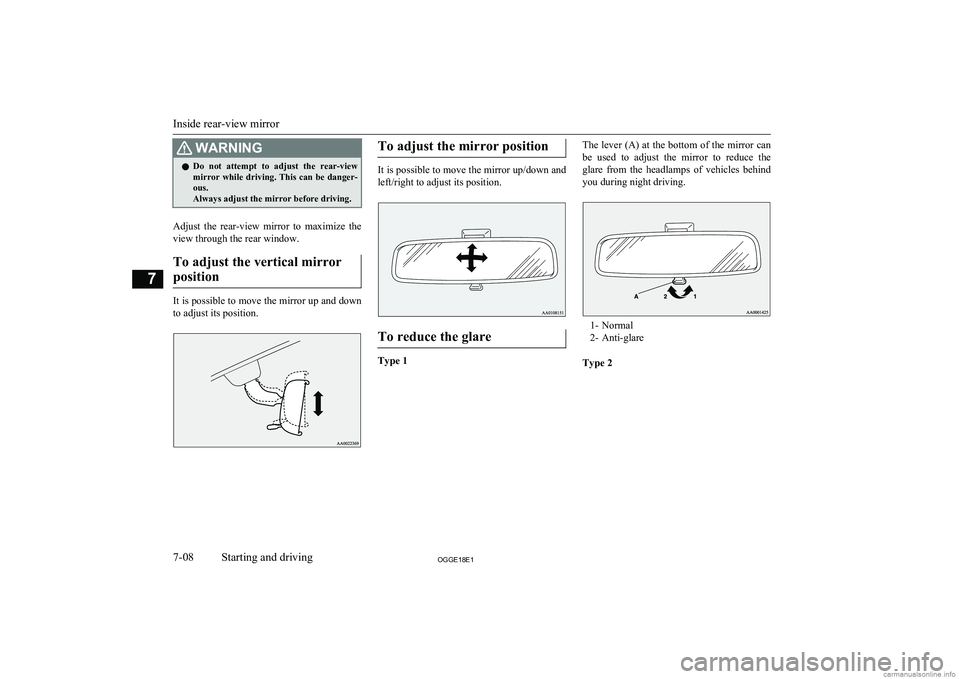
To adjust the vertical mirror position
It is possible to move the mirror up and down
to adjust its position.
To adjust the mirror position
It is possible to move the mirror up/down and
left/right to adjust its position.
To reduce the glare
Type 1
The lever (A) at the bottom of the mirror can be used to adjust the mirror to reduce the
glare from the headlamps of vehicles behind
you during night driving.
1- Normal
2- Anti-glare
Type 2
Inside rear-view mirror
7-08OGGE18E1Starting and driving7
Page 223 of 538
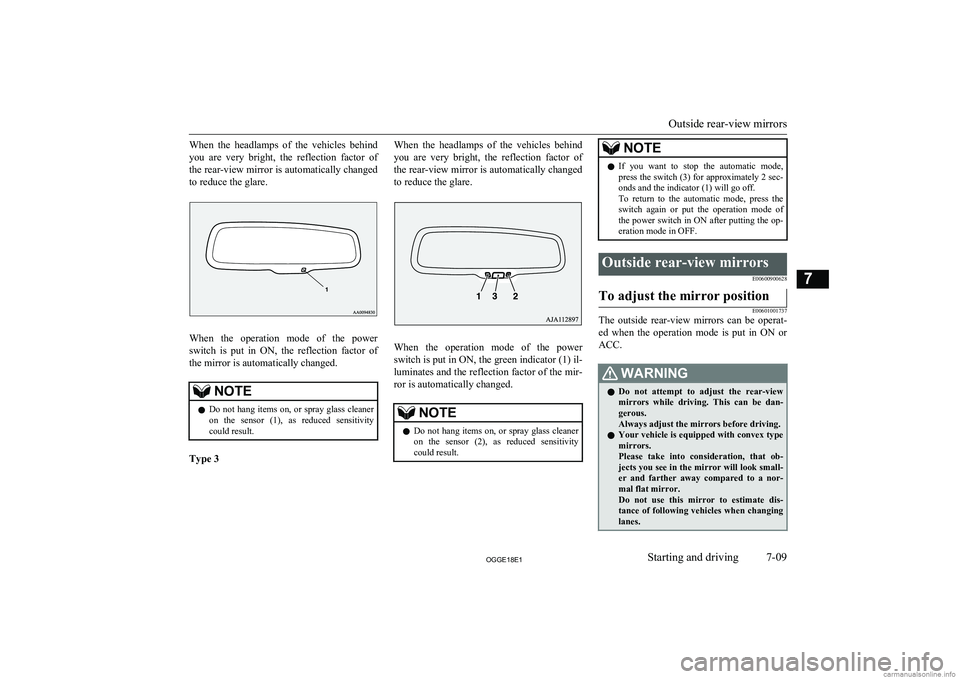
When the headlamps of the vehicles behindyou are very bright, the reflection factor ofthe rear-view mirror is automatically changed
to reduce the glare.
When the operation mode of the power
switch is put in ON, the reflection factor of the mirror is automatically changed.
NOTEl Do not hang items on, or spray glass cleaner
on the sensor (1), as reduced sensitivitycould result.
Type 3
When the headlamps of the vehicles behind
you are very bright, the reflection factor ofthe rear-view mirror is automatically changed
to reduce the glare.
When the operation mode of the power
switch is put in ON, the green indicator (1) il- luminates and the reflection factor of the mir-ror is automatically changed.
NOTEl Do not hang items on, or spray glass cleaner
on the sensor (2), as reduced sensitivitycould result.NOTEl If you want to stop the automatic mode,
press the switch (3) for approximately 2 sec- onds and the indicator (1) will go off.
To return to the automatic mode, press the
switch again or put the operation mode of the power switch in ON after putting the op- eration mode in OFF.Outside rear-view mirrors
E00600900628To adjust the mirror position
E00601001737
The outside rear-view mirrors can be operat-
ed when the operation mode is put in ON or ACC.
WARNINGl Do not attempt to adjust the rear-view
mirrors while driving. This can be dan-
gerous.
Always adjust the mirrors before driving.
l Your vehicle is equipped with convex type
mirrors.
Please take into consideration, that ob- jects you see in the mirror will look small-er and farther away compared to a nor-
mal flat mirror.
Do not use this mirror to estimate dis- tance of following vehicles when changing lanes.
Outside rear-view mirrors
7-09OGGE18E1Starting and driving7
Page 224 of 538
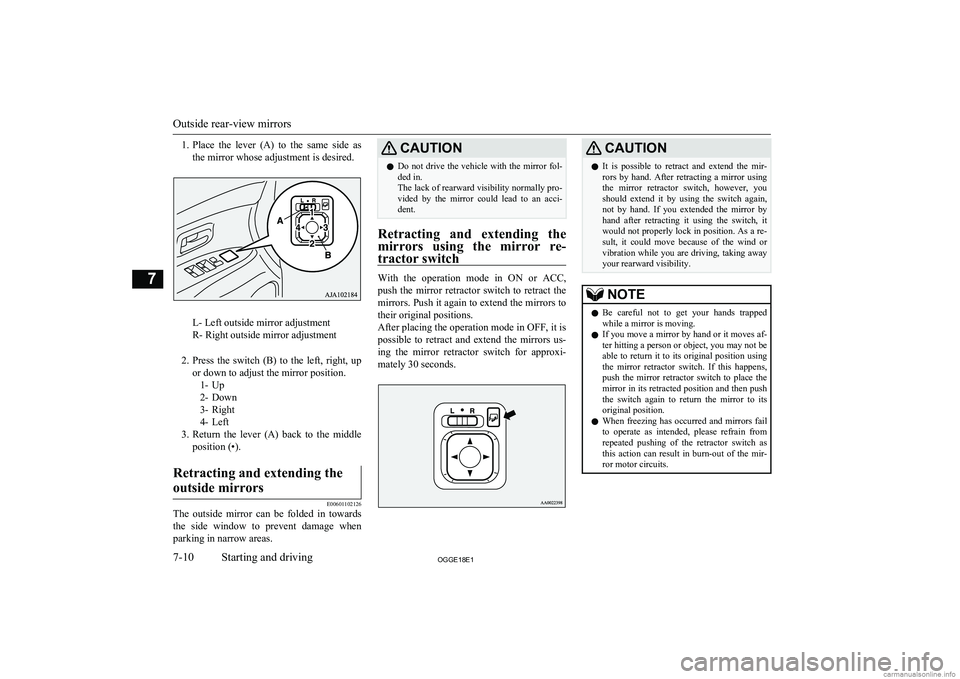
1.Place the lever (A) to the same side as
the mirror whose adjustment is desired.
L- Left outside mirror adjustment
R- Right outside mirror adjustment
2. Press the switch (B) to the left, right, up
or down to adjust the mirror position. 1- Up
2- Down
3- Right
4- Left
3. Return the lever (A) back to the middle
position (•).
Retracting and extending the
outside mirrors
E00601102126
The outside mirror can be folded in towards the side window to prevent damage when
parking in narrow areas.
CAUTIONl Do not drive the vehicle with the mirror fol-
ded in.
The lack of rearward visibility normally pro-
vided by the mirror could lead to an acci- dent.
Retracting and extending the
mirrors using the mirror re- tractor switch
With the operation mode in ON or ACC,push the mirror retractor switch to retract the
mirrors. Push it again to extend the mirrors to their original positions.
After placing the operation mode in OFF, it is possible to retract and extend the mirrors us-
ing the mirror retractor switch for approxi-
mately 30 seconds.
CAUTIONl It is possible to retract and extend the mir-
rors by hand. After retracting a mirror using
the mirror retractor switch, however, you should extend it by using the switch again,
not by hand. If you extended the mirror by
hand after retracting it using the switch, it would not properly lock in position. As a re-
sult, it could move because of the wind or
vibration while you are driving, taking away your rearward visibility.NOTEl Be careful not to get your hands trapped
while a mirror is moving.
l If you move a mirror by hand or it moves af-
ter hitting a person or object, you may not be
able to return it to its original position using the mirror retractor switch. If this happens,
push the mirror retractor switch to place the mirror in its retracted position and then push
the switch again to return the mirror to its original position.
l When freezing has occurred and mirrors fail
to operate as intended, please refrain from repeated pushing of the retractor switch as
this action can result in burn-out of the mir- ror motor circuits.
Outside rear-view mirrors
7-10OGGE18E1Starting and driving7
Page 225 of 538
Retracting and extending the
mirrors without using the mir- ror retractor switch
The mirrors automatically retract or extendwhen the doors are locked or unlocked using
the remote control switches or the keyless op-eration function of the keyless operation sys-
tem.
Refer to “Keyless operation system: To oper-
ate using the key-less operation function, Keyless entry system” on pages 4-09 and
4-03.
NOTEl Functions can be modified as stated below.
Please consult a MITSUBISHI MOTORS
Authorized Service Point.
On vehicles equipped with the Smartphone
Link Display Audio or the MITSUBISHI
Multi-Communication System (MMCS), screen operations can be used to make theadjustment. Refer to the separate owner’s
manual for details.
• Automatically extend when the operation
mode is put in ON, and automatically re- tract when the driver’s door is opened af- ter the operation mode is put in OFF.
• Automatically extend when the vehicle
speed reaches 30 km/h (19 mph).
• Deactivate the automatic extension func-
tion.NOTEl The outside rear-view mirrors can be retrac-
ted or extended by the following operations,even if changing to any of the above.
After pressing the LOCK button on the key to lock the doors and tailgate, if the LOCK button is pressed again twice in a row within
approximately 30 seconds, the outside rear- view mirrors will retract.
After pressing the UNLOCK button on the key to unlock the doors and tailgate, if the
UNLOCK button is pressed again twice in a row within approximately 30 seconds, the
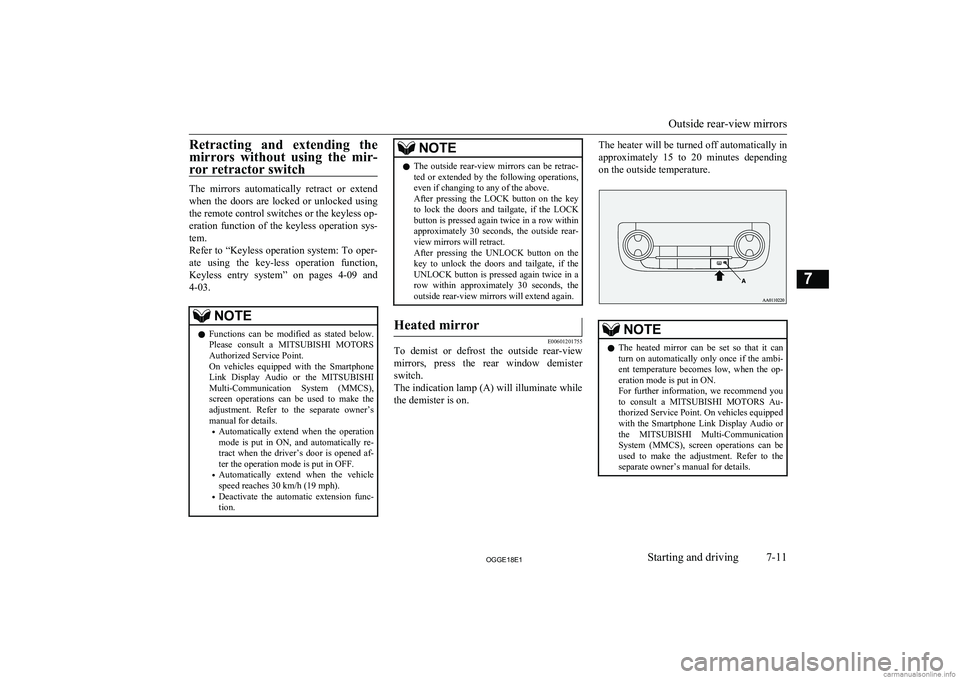
outside rear-view mirrors will extend again.Heated mirror
E00601201755
To demist or defrost the outside rear-view
mirrors, press the rear window demister
switch.
The indication lamp (A) will illuminate while the demister is on.
The heater will be turned off automatically in
approximately 15 to 20 minutes depending
on the outside temperature.NOTEl The heated mirror can be set so that it can
turn on automatically only once if the ambi-
ent temperature becomes low, when the op- eration mode is put in ON.
For further information, we recommend you to consult a MITSUBISHI MOTORS Au-
thorized Service Point. On vehicles equipped
with the Smartphone Link Display Audio or the MITSUBISHI Multi-Communication
System (MMCS), screen operations can be
used to make the adjustment. Refer to the
separate owner’s manual for details.
Outside rear-view mirrors
7-11OGGE18E1Starting and driving7
Page 226 of 538
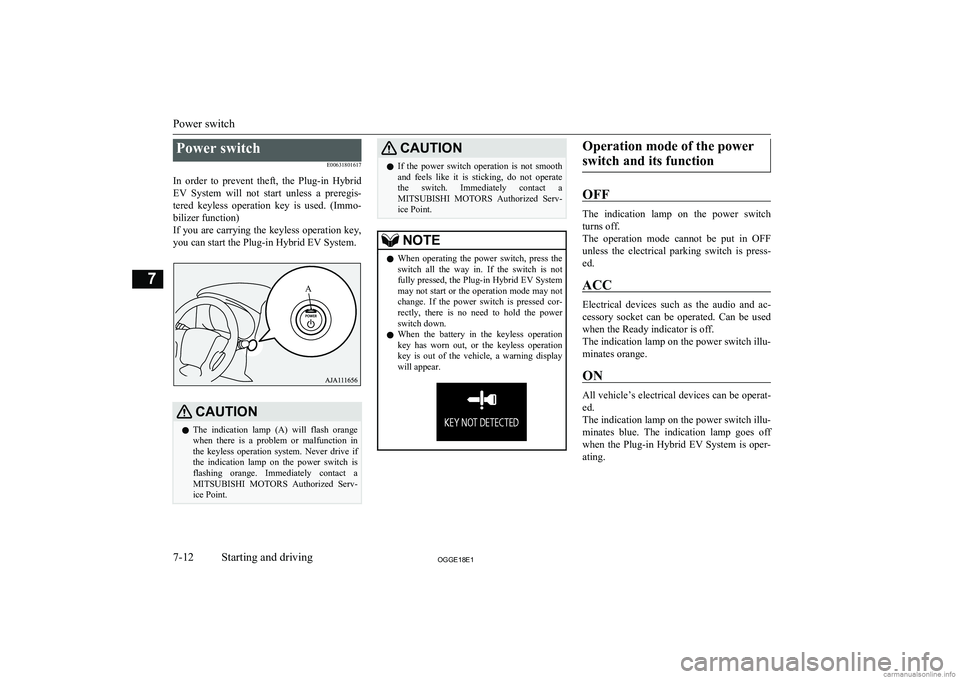
Power switchE00631801617
In order to prevent theft, the Plug-in Hybrid EV System will not start unless a preregis-tered keyless operation key is used. (Immo-
bilizer function)
If you are carrying the keyless operation key, you can start the Plug-in Hybrid EV System.CAUTIONl The indication lamp (A) will flash orange
when there is a problem or malfunction inthe keyless operation system. Never drive if
the indication lamp on the power switch is flashing orange. Immediately contact a
MITSUBISHI MOTORS Authorized Serv-
ice Point.CAUTIONl If the power switch operation is not smooth
and feels like it is sticking, do not operate
the switch. Immediately contact a MITSUBISHI MOTORS Authorized Serv-
ice Point.NOTEl When operating the power switch, press the
switch all the way in. If the switch is not
fully pressed, the Plug-in Hybrid EV System
may not start or the operation mode may not change. If the power switch is pressed cor-
rectly, there is no need to hold the power switch down.
l When the battery in the keyless operation
key has worn out, or the keyless operationkey is out of the vehicle, a warning display
will appear.Operation mode of the power
switch and its function
OFF
The indication lamp on the power switch
turns off.
The operation mode cannot be put in OFF unless the electrical parking switch is press-
ed.
ACC
Electrical devices such as the audio and ac-
cessory socket can be operated. Can be used
when the Ready indicator is off.
The indication lamp on the power switch illu- minates orange.
ON
All vehicle’s electrical devices can be operat- ed.
The indication lamp on the power switch illu-
minates blue. The indication lamp goes off
when the Plug-in Hybrid EV System is oper-
ating.
Power switch
7-12OGGE18E1Starting and driving7A
Page 227 of 538
NOTElYour vehicle is equipped with an electronic
immobilizer.
To start the Plug-in Hybrid EV System, the ID code which the transponder inside the
key sends, must match the one registered in the immobilizer computer. Refer to “Elec-
tronic immobilizer (Anti-theft starting sys-
tem)” on page 4-03.Changing the operation mode
E00631901269
If you press the power switch without de-
pressing the brake pedal, you can change the
operation mode in the order of OFF, ACC,
ON, OFF.
CAUTIONl When the Plug-in Hybrid EV System is not
operating, put the operation mode in OFF.
Leaving the operation mode in ON or ACC for a long time when the Plug-in Hybrid EV
System is not operating may cause the auxil- iary battery to discharge, making it impossi-
ble to start the Plug-in Hybrid EV System.
l When the auxiliary battery is disconnected,
the current operation mode is memorized. After reconnecting the auxiliary battery, thememorized mode is selected automatically.
Before disconnecting the auxiliary battery
for repair or replacement, make sure to put the operation mode in OFF.
Be careful if you are not sure which opera-
tion mode the vehicle is in when the auxili-
ary battery is run down.
l The operation mode cannot be changed from
OFF to ACC or ON if the keyless operation key is not detected to be in the vehicle. Refer
to “Keyless operation system: Operating
range for starting the Plug-in Hybrid EV System and changing the operation mode”on page 4-09.ACC power auto-cutout func-
tion
E00632801265
After approximately 30 minutes have elapsed with the operation mode in ACC, the func-
tion automatically cuts out the power for the audio system and other electric devices that
can be operated with that position.
When the power switch operates again, the
power is supplied again.NOTEl It is possible to modify functions as follows:
• The time until the power cuts out can be
changed to approximately 60 minutes.
• The ACC power auto-cutout function can
be deactivated.
For details, we recommend you to consult
a MITSUBISHI MOTORS Authorized
Service Point.
On vehicles equipped with the Smart-
phone Link Display Audio or the
MITSUBISHI Multi-Communication Sys- tem (MMCS), screen operations can be used to make the adjustment.
Refer to the separate owner’s manual for
details.Operation mode OFF reminder
system
E00632201171Power switch
7-13OGGE18E1Starting and driving7
Page 228 of 538
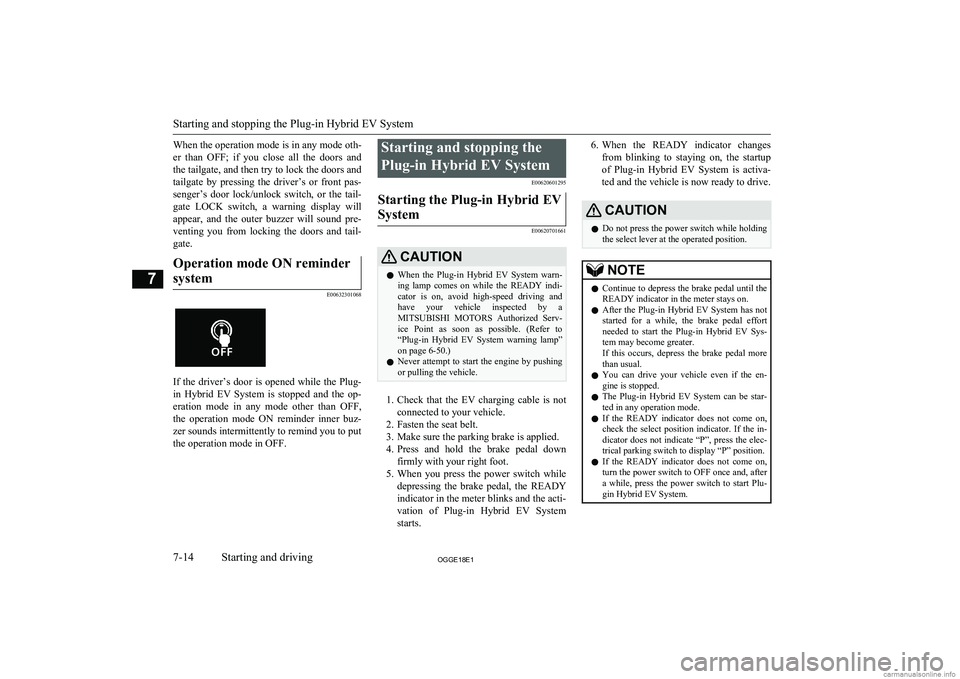
When the operation mode is in any mode oth-er than OFF; if you close all the doors and the tailgate, and then try to lock the doors and
tailgate by pressing the driver’s or front pas- senger’s door lock/unlock switch, or the tail-
gate LOCK switch, a warning display will appear, and the outer buzzer will sound pre-
venting you from locking the doors and tail- gate.Operation mode ON reminder
system
E00632301068
If the driver’s door is opened while the Plug- in Hybrid EV System is stopped and the op-
eration mode in any mode other than OFF, the operation mode ON reminder inner buz-
zer sounds intermittently to remind you to put
the operation mode in OFF.
Starting and stopping the
Plug-in Hybrid EV System E00620601295Starting the Plug-in Hybrid EV
System
E00620701661
CAUTIONl When the Plug-in Hybrid EV System warn-
ing lamp comes on while the READY indi- cator is on, avoid high-speed driving and
have your vehicle inspected by a
MITSUBISHI MOTORS Authorized Serv-
ice Point as soon as possible. (Refer to “Plug-in Hybrid EV System warning lamp” on page 6-50.)
l Never attempt to start the engine by pushing
or pulling the vehicle.
1. Check that the EV charging cable is not
connected to your vehicle.
2. Fasten the seat belt.
3. Make sure the parking brake is applied.
4. Press and hold the brake pedal down
firmly with your right foot.
5. When you press the power switch while
depressing the brake pedal, the READY indicator in the meter blinks and the acti-
vation of Plug-in Hybrid EV System
starts.
6. When the READY indicator changes
from blinking to staying on, the startup of Plug-in Hybrid EV System is activa-ted and the vehicle is now ready to drive.CAUTIONl Do not press the power switch while holding
the select lever at the operated position.NOTEl Continue to depress the brake pedal until the
READY indicator in the meter stays on.
l After the Plug-in Hybrid EV System has not
started for a while, the brake pedal effort needed to start the Plug-in Hybrid EV Sys-tem may become greater.
If this occurs, depress the brake pedal more
than usual.
l You can drive your vehicle even if the en-
gine is stopped.
l The Plug-in Hybrid EV System can be star-
ted in any operation mode.
l If the READY indicator does not come on,
check the select position indicator. If the in-
dicator does not indicate “P”, press the elec-
trical parking switch to display “P” position.
l If the READY indicator does not come on,
turn the power switch to OFF once and, after a while, press the power switch to start Plu- gin Hybrid EV System.
Starting and stopping the Plug-in Hybrid EV System
7-14OGGE18E1Starting and driving7
Page 229 of 538
Stopping the Plug-in HybridEV System
E00620801457
1. Stop your vehicle completely.
2. Apply the parking brake firmly while
depressing the brake pedal.
3. After pressing the electrical parking
switch, press the power switch to stop the Plug-in Hybrid EV System. (Refer to“Electrical Parking switch” on page
7-18.)
WARNINGl Never stop the Plug-in Hybrid EV System
during running except in an emergency. The effectiveness of the brake becomes
very poor and the steering wheel becomes very heavy, which can easily lead to an ac-
cident.NOTEl Do not operate the power switch during run-
ning except in an emergency. If you have to stop the Plug-in Hybrid EV System becauseof an emergency during operation, continue to press the power switch for three seconds
or longer or press the power switch three times or more quickly. The Plug-in Hybrid
EV System stops, the operation mode turns to ACC, and the selector lever position shifts
to the “P” position at very slow speed.NOTEl If you press the power switch when the se-
lector lever position is other than the “P” po-
sition while your vehicle is stopped, the se- lector lever position automatically shifts to
the “P” position, Plug-in Hybrid EV System stops, and the power mode turns to “OFF”.
l If the parking lock mechanism is faulty, a
warning is displayed on the information
screen in the multi-information display. When this warning is displayed, the Plug-in
Hybrid EV System cannot be stopped unless
you apply the parking brake and then press the power switch. Park on a flat place with
the parking brake securely applied. Have your vehicle inspected by a MITSUBISHI
MOTORS Authorized Service Point.If the keyless operation key is
not operating properly
E00632901237
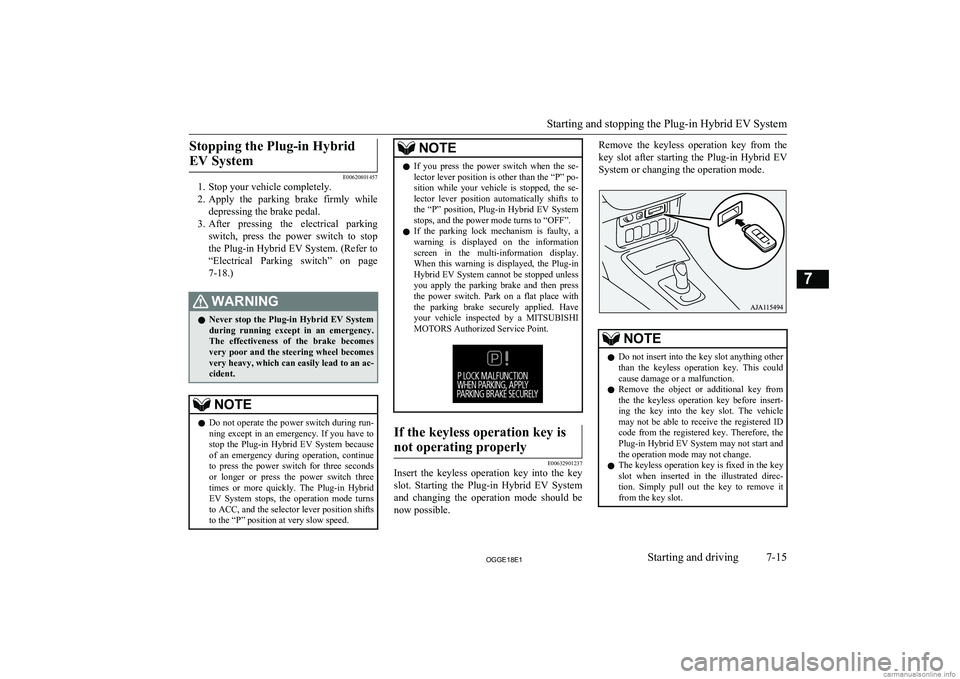
Insert the keyless operation key into the key
slot. Starting the Plug-in Hybrid EV System and changing the operation mode should be now possible.
Remove the keyless operation key from the
key slot after starting the Plug-in Hybrid EV
System or changing the operation mode.NOTEl Do not insert into the key slot anything other
than the keyless operation key. This couldcause damage or a malfunction.
l Remove the object or additional key from
the the keyless operation key before insert-ing the key into the key slot. The vehicle
may not be able to receive the registered ID
code from the registered key. Therefore, the Plug-in Hybrid EV System may not start and
the operation mode may not change.
l The keyless operation key is fixed in the key
slot when inserted in the illustrated direc- tion. Simply pull out the key to remove it
from the key slot.
Starting and stopping the Plug-in Hybrid EV System
7-15OGGE18E1Starting and driving7
Page 230 of 538

Keyless operation key remind-er
E00633001046
If the operation mode is in OFF and the driv- er’s door is opened with the keyless operationkey in the key slot, the outer buzzer sounds
for approximately 3 seconds and the inner buzzer sounds for approximately 1 minute or
a warning display will appear to remind you
to remove the key.
Selector lever (Joystick
type) E00636100096Selector lever operation
E00636200097
The selector lever always returns to its home
( ● ) position when it is released.
The position you select with the selector lev- er will be illuminated on the shift position
panel shown in the illustration below.
Move the selector lever slowly and securely
in the following method.
l To select “D” (DRIVE) or “R” (RE-
VERSE):
Move the selector lever in the direction of the arrow.
l To select “N” (NEUTRAL):
Move the selector lever in the direction
of the arrow and hold it for a while.
l To select “B” (REGENERATIVE
BRAKE):
Move the selector lever in the direction
of the arrow.
The “B” (REGENERATIVE BRAKE) posi-
tion can only be selected while the select po- sition is in the “D” (DRIVE) position. Whenthe selector lever is moved to the “B” posi-
tion, the regenerative brake force will be- come stronger.
When the selector lever is again moved to the
“B” position, the maximum regenerative brake force will be used.
To return to the “D” position, use the selector
lever to select the “D” position.NOTEl If you operate the selector lever to “B” twice
too quickly, the regenerative brake force
may not become the maximum.WARNINGl Do not replace the selector lever knob
with anything other than a MITSUBISHI
MOTORS genuine part. In addition, do
not hang an object on the selector lever as it may be the cause of an accident.
l When you shift the selector lever to “D”
or “R” position, always depress the brake
pedal with your right foot for your safety. Never shift the lever while depressing the
accelerator pedal. Doing so will start your vehicle abruptly, which may lead to a seri-ous accident. It may also be a cause of
failure of the vehicle.
Selector lever (Joystick type)
7-16OGGE18E1Starting and driving7 Home
position