buttons MITSUBISHI PAJERO IV 2011 Owners Manual
[x] Cancel search | Manufacturer: MITSUBISHI, Model Year: 2011, Model line: PAJERO IV, Model: MITSUBISHI PAJERO IV 2011Pages: 377, PDF Size: 29.43 MB
Page 93 of 377
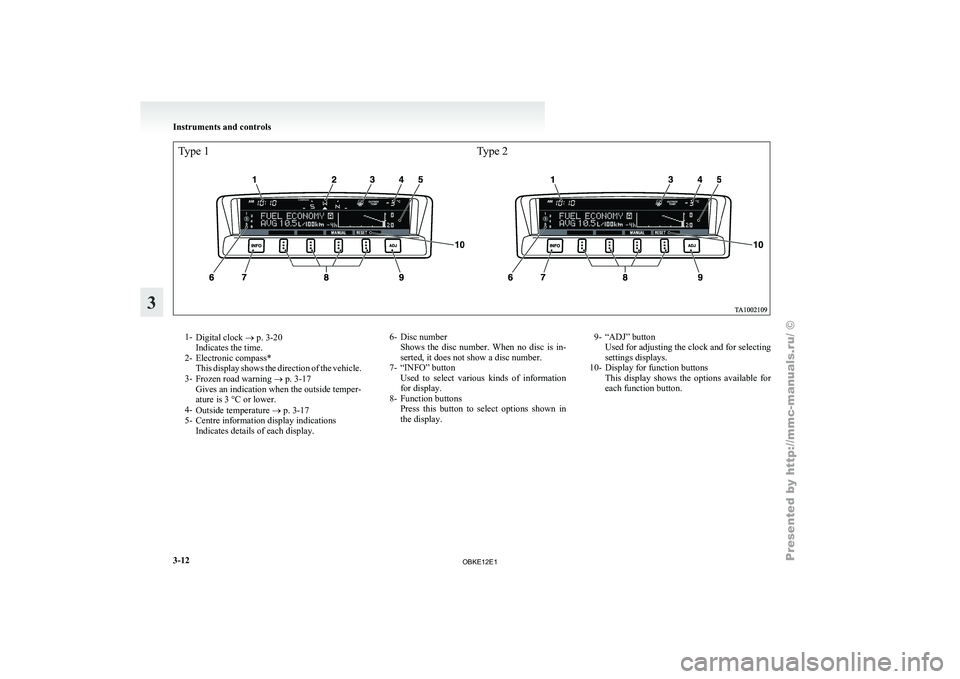
Type 1Type 21-
Digital clock ®
p. 3-20
Indicates the time.
2- Electronic compass* This display shows the direction of the vehicle.
3- Frozen road warning ® p. 3-17
Gives an indication when the outside temper-
ature is 3 °C or lower.
4- Outside temperature ® p. 3-17
5- Centre information display indications Indicates details of each display. 6- Disc number
Shows the disc
number. When no disc is in-
serted, it does not show a disc number.
7- “INFO” button Used to select various kinds of information
for display.
8- Function buttons Press this button to select options shown in
the display. 9- “ADJ” button
Used for adjusting the clock and for selecting
settings displays.
10- Display for function buttons This display
shows the options available for
each function button. Instruments and controls
3-12
3
OBKE12E1
Page 99 of 377
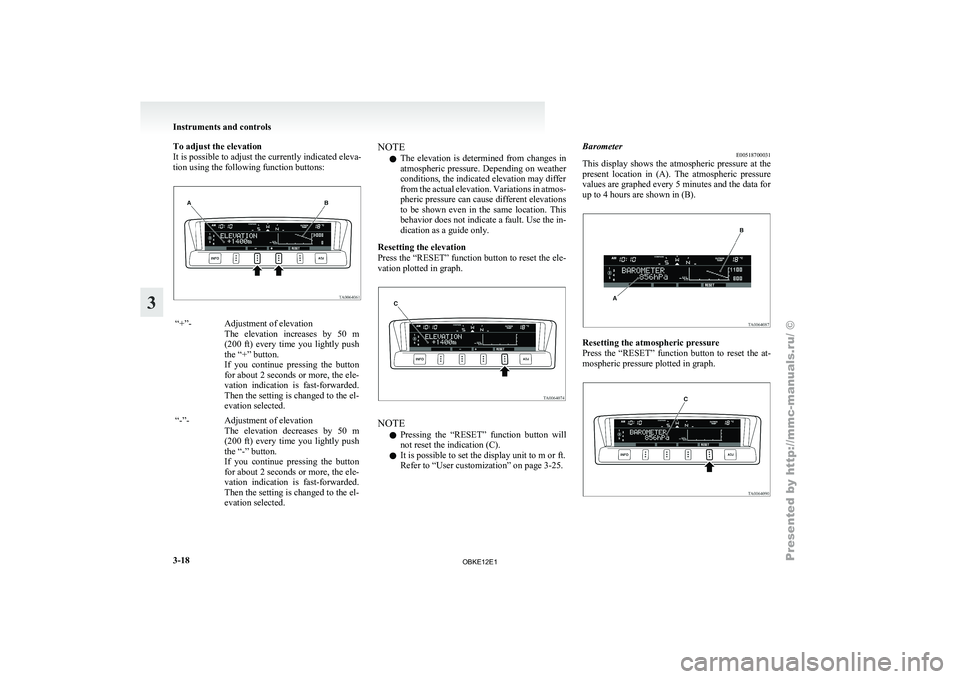
To adjust the elevation
It is possible to adjust the currently indicated eleva-
tion using the following function buttons:
“+”- Adjustment of elevation
The elevation increases
by 50 m
(200 ft) every time you lightly push
the “+” button.
If you continue pressing the button
for about 2 seconds or more, the ele-
vation indication is fast-forwarded.
Then the setting is changed to the el-
evation selected.
“-”- Adjustment of elevation The elevation decreases
by 50 m
(200 ft) every time you lightly push
the “-” button.
If you continue pressing the button
for about 2 seconds or more, the ele-
vation indication is fast-forwarded.
Then the setting is changed to the el-
evation selected. NOTE
l The
elevation is
determined from changes in
atmospheric pressure. Depending on weather
conditions, the indicated elevation may differ
from the actual elevation. Variations in atmos-
pheric pressure can cause different elevations
to be shown even in the same location. This
behavior does not indicate a fault. Use the in-
dication as a guide only.
Resetting the elevation
Press the “RESET” function button to reset the ele-
vation plotted in graph. NOTE
l Pressing
the “RESET”
function button will
not reset the indication (C).
l It is possible to set the display unit to m or ft.
Refer to “User customization” on page 3-25. Barometer
E00518700031
This display shows
the atmospheric pressure at the
present location in (A). The atmospheric pressure
values are graphed every 5 minutes and the data for
up to 4 hours are shown in (B). Resetting the atmospheric pressure
Press the
“RESET”
function button to reset the at-
mospheric pressure plotted in graph. Instruments and controls
3-18
3
OBKE12E1
Page 100 of 377
NOTE
l Pressing
the “RESET”
function button will
not reset the indication (C).
l It is possible to set the display unit to hPa,
mb, kPa, or inHg.
Refer to “User customization” on page 3-25.
Calendar E00518800029
The date is shown. The calendar pattern can be
changed to your desired setting.
Refer to
“Changing
the calendar setting” on page
3-24. Clock-only
E00518900017
Only the clock
is shown. The time notation can be
changed to your desired setting. (12 hour/24 hour)
Refer to “User customization” on page 3-25. Blank
E00519000015
The whole display can be turned into blank. In this
case, buttons remain illuminated. NOTE
l If
you operate
the audio system, the audio dis-
play pops up.
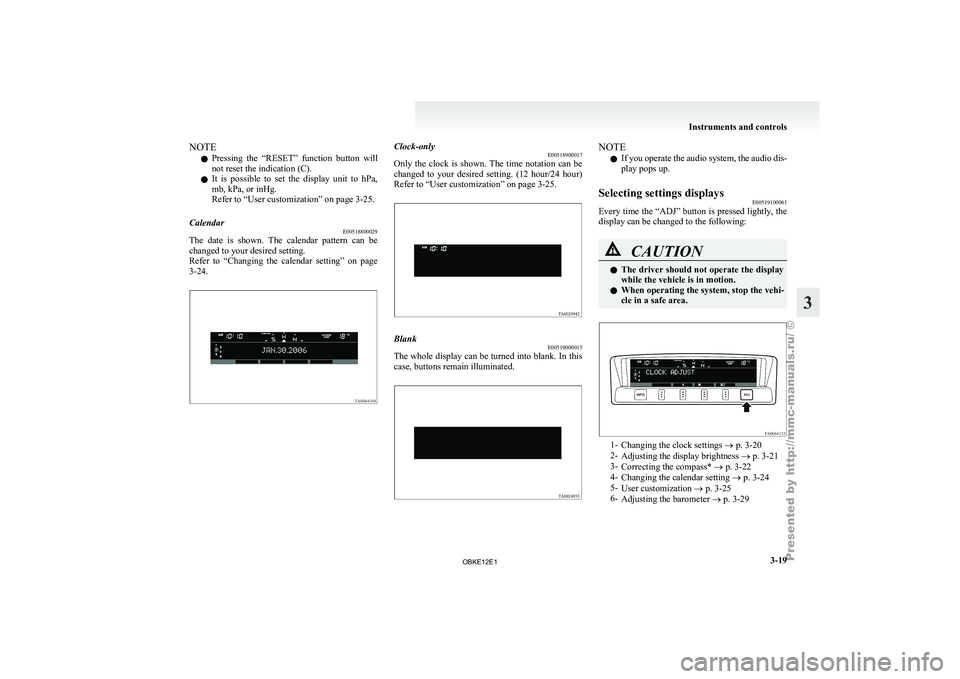
Selecting settings displays E00519100061
Every time the “ADJ” button is pressed lightly, the
display can be changed to the following: CAUTION
l
The driver
should
not operate the display
while the vehicle is in motion.
l When operating the system, stop the vehi-
cle in a safe area. 1-
Changing the clock settings ®
p. 3-20
2- Adjusting the display brightness ® p. 3-21
3- Correcting the compass* ® p. 3-22
4- Changing the calendar setting ® p. 3-24
5- User customization ® p. 3-25
6- Adjusting the barometer ® p. 3-29 Instruments and controls
3-19 3
OBKE12E1
Page 101 of 377
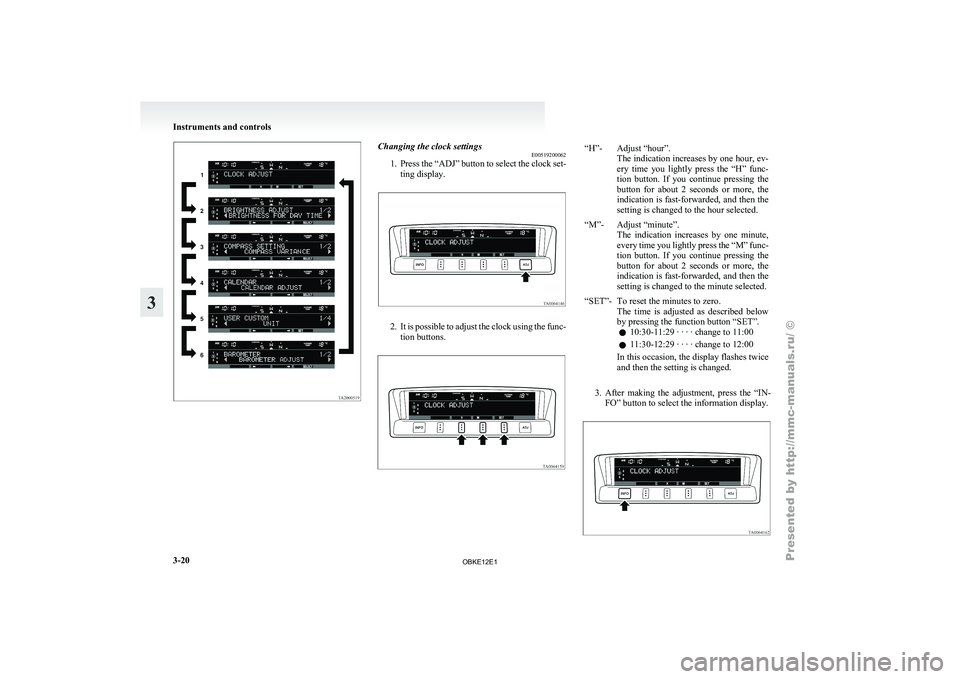
Changing the clock settings
E00519200062
1. Press the “ADJ”
button to select the clock set-
ting display. 2. It is possible to adjust the clock using the func-
tion buttons. “H”- Adjust “hour”.
The indication increases by one hour, ev-
ery time you lightly press the “H” func-
tion button. If you continue pressing the
button for about 2 seconds or more, the
indication is fast-forwarded, and then the
setting is changed to the hour selected.
“M”- Adjust “minute”. The indication increases
by one minute,
every time you lightly press the “M” func-
tion button. If you continue pressing the
button for about 2 seconds or more, the
indication is fast-forwarded, and then the
setting is changed to the minute selected.
“SET”- To reset the minutes to zero. The time is
adjusted as described below
by pressing the function button “SET”.
l 10:30-11:29 · · · · change to 11:00
l 11:30-12:29 · · · · change to 12:00
In this occasion, the display flashes twice
and then the setting is changed.
3. After making the adjustment, press the “IN- FO” button to select the information display. Instruments and controls
3-20
3
OBKE12E1
Page 102 of 377
NOTE
l Vehicles
equipped with
the MITSUBISHI
Multi Communication System (MMCS) also
have a clock indication, but the time shown
by the MMCS may differ from that shown
by the centre information display because dif-
ferent sources of data are used for automatic
adjustment.
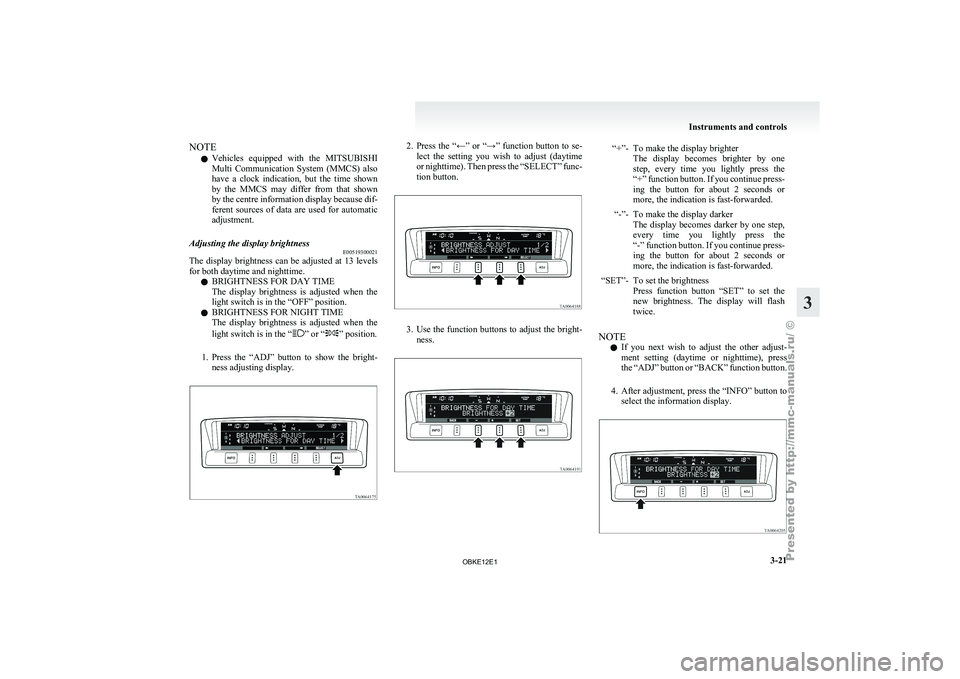
Adjusting the display brightness E00519300021
The display brightness can be adjusted at 13 levels
for both daytime and nighttime.
l BRIGHTNESS FOR DAY TIME
The
display
brightness
is adjusted when the
light switch is in the “OFF” position.
l BRIGHTNESS FOR NIGHT TIME
The display brightness is adjusted when the
light switch is in the “ ” or “ ” position.
1. Press the “ADJ”
button to show the bright-
ness adjusting display. 2. Press the “←” or “→” function button to se-
lect the
setting you wish to adjust (daytime
or nighttime). Then press the “SELECT” func-
tion button. 3. Use the function buttons to adjust the bright-
ness. “+”- To make the display brighter
The display becomes brighter by one
step, every time you lightly press the
“+” function button. If you continue press-
ing the button for about 2 seconds or
more, the indication is fast-forwarded.
“-”- To make the display darker The display becomes
darker by one step,
every time you lightly press the
“-” function button. If you continue press-
ing the button for about 2 seconds or
more, the indication is fast-forwarded.
“SET”- To set the brightness Press function button
“SET” to set the
new brightness. The display will flash
twice.
NOTE l If
you next
wish to adjust the other adjust-
ment setting (daytime or nighttime), press
the “ADJ” button or “BACK” function button.
4. After adjustment, press the “INFO” button to select the information display. Instruments and controls
3-21 3
OBKE12E1
Page 105 of 377
NOTE
l The
“Completed the
calibration”. message
may be displayed even if you terminate the
turn before it is complete and return to the ve-
hicle’s original direction. The compass may
not be properly calibrated in this case, so you
must turn the vehicle through at least
360 degrees.
4. The compass setting will finish automatical- ly and the words “COMPASS CALIBRA-
TION COMPLETE” will appear on the
screen. NOTE
l If your vehicle has a sunroof, do not open the
sunroof
when checking
the indicated direc-
tion after completing the turn. Opening the
sunroof could cause the azimuth bar shown
on the centre information display to freeze be-
cause of electromagnetic interference. Be
sure to check the indicated direction with the
sunroof closed. If the azimuth bar freezes, per-
form the compass calibration procedure again. Changing the calendar setting
E00519500023
The date and
the calendar indication patterns can
be changed.
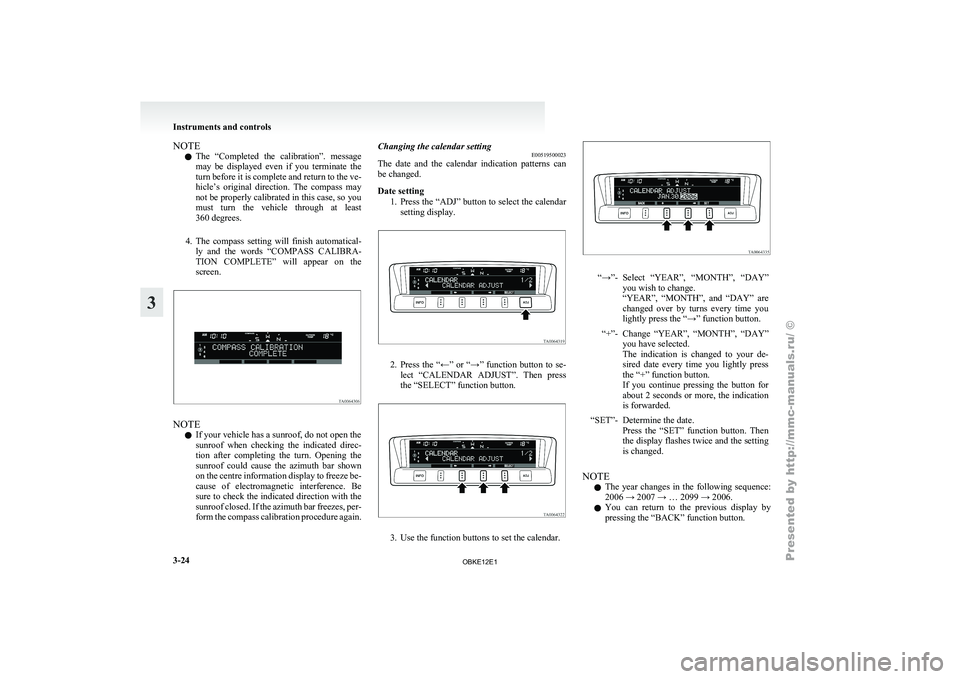
Date setting
1. Press the “ADJ” button to select the calendarsetting display. 2. Press
the “←” or “→” function button to se-
lect “CALENDAR
ADJUST”. Then press
the “SELECT” function button. 3. Use the function buttons to set the calendar. “→”- Select “YEAR”, “MONTH”, “DAY”
you wish to change.
“YEAR”, “MONTH”, and
“DAY” are
changed over by turns every time you
lightly press the “→” function button.
“+”- Change “YEAR”, “MONTH”, “DAY” you have selected.
The indication is
changed to your de-
sired date every time you lightly press
the “+” function button.
If you continue pressing the button for
about 2 seconds or more, the indication
is forwarded.
“SET”- Determine the date. Press the “SET”
function button. Then
the display flashes twice and the setting
is changed.
NOTE l The
year changes
in the following sequence:
2006 → 2007 → … 2099 → 2006.
l You can return to the previous display by
pressing the “BACK” function button. Instruments and controls
3-24
3
OBKE12E1
Page 110 of 377
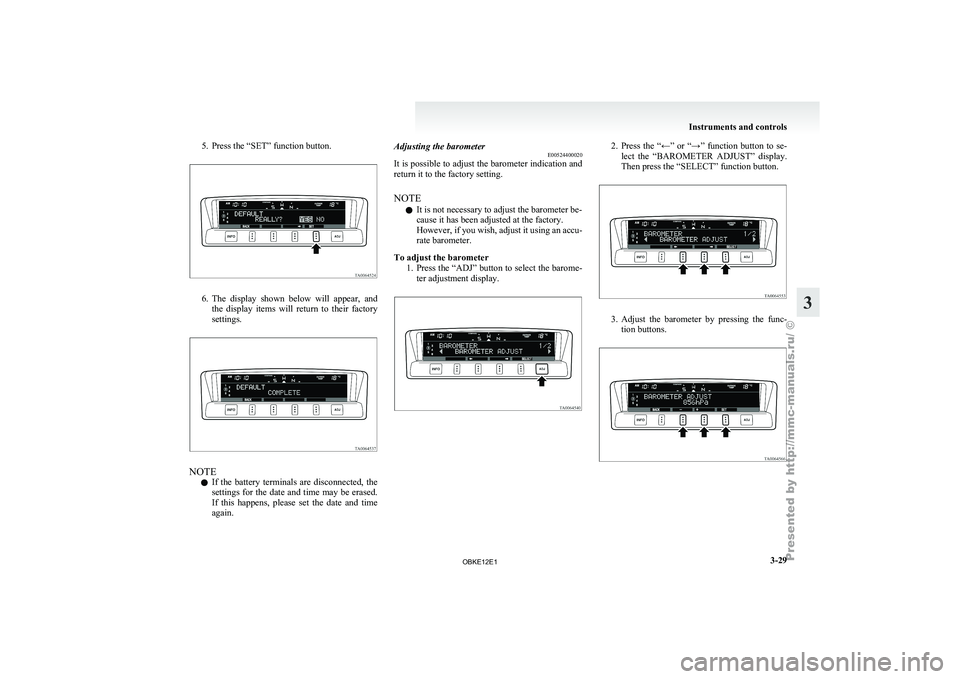
5. Press the “SET” function button.
6. The display shown below will appear, and
the display
items will return to their factory
settings. NOTE
l If
the battery
terminals are disconnected, the
settings for the date and time may be erased.
If this happens, please set the date and time
again. Adjusting the barometer
E00524400020
It is
possible
to adjust the barometer indication and
return it to the factory setting.
NOTE
l It is not necessary to adjust the barometer be-
cause it has been adjusted at the factory.
However, if you wish, adjust it using an accu-
rate barometer.
To adjust the barometer 1. Press the “ADJ” button to select the barome-ter adjustment display. 2. Press the “←” or “→” function button to se-
lect the “BAROMETER ADJUST” display.
Then press the “SELECT” function button. 3. Adjust the barometer by pressing the func-
tion buttons. Instruments and controls
3-29 3
OBKE12E1
Page 178 of 377
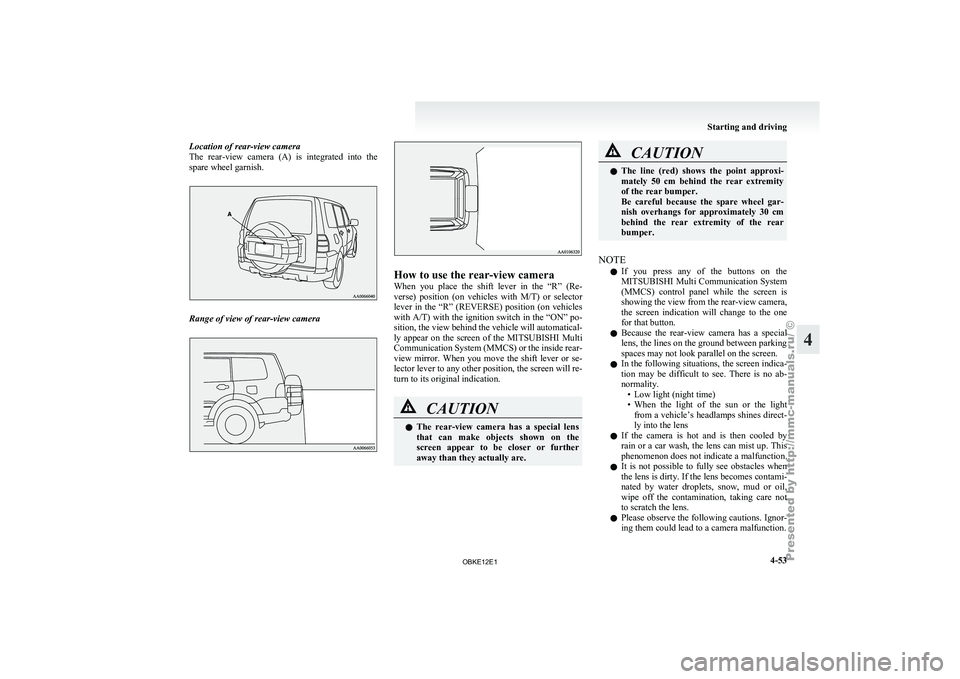
Location of rear-view camera
The rear-view camera
(A) is integrated into the
spare wheel garnish. Range of view of rear-view camera How to use the rear-view camera
When you
place
the shift lever in the “R” (Re-
verse) position (on vehicles with M/T) or selector
lever in the “R” (REVERSE) position (on vehicles
with A/T) with the ignition switch in the “ON” po-
sition, the view behind the vehicle will automatical-
ly appear on the screen of the MITSUBISHI Multi
Communication System (MMCS) or the inside rear-
view mirror. When you move the shift lever or se-
lector lever to any other position, the screen will re-
turn to its original indication. CAUTION
l
The rear-view
camera
has a special lens
that can make objects shown on the
screen appear to be closer or further
away than they actually are. CAUTION
l
The line (red)
shows the point approxi-
mately 50 cm behind the rear extremity
of the rear bumper.
Be careful because the spare wheel gar-
nish overhangs for approximately 30 cm
behind the rear extremity of the rear
bumper.
NOTE l If
you press
any of the buttons on the
MITSUBISHI Multi Communication System
(MMCS) control panel while the screen is
showing the view from the rear-view camera,
the screen indication will change to the one
for that button.
l Because the rear-view camera has a special
lens, the lines on the ground between parking
spaces may not look parallel on the screen.
l In the following situations, the screen indica-
tion may be difficult to see. There is no ab-
normality.
• Low light (night time)
• When the light of the sun or the lightfrom a vehicle’s headlamps shines direct-
ly into the lens
l If the camera is hot and is then cooled by
rain or a car wash, the lens can mist up. This
phenomenon does not indicate a malfunction.
l It is not possible to fully see obstacles when
the lens is dirty. If the lens becomes contami-
nated by water droplets, snow, mud or oil,
wipe off the contamination, taking care not
to scratch the lens.
l Please observe the following cautions. Ignor-
ing them could lead to a camera malfunction. Starting and driving
4-53 4
OBKE12E1
Page 196 of 377
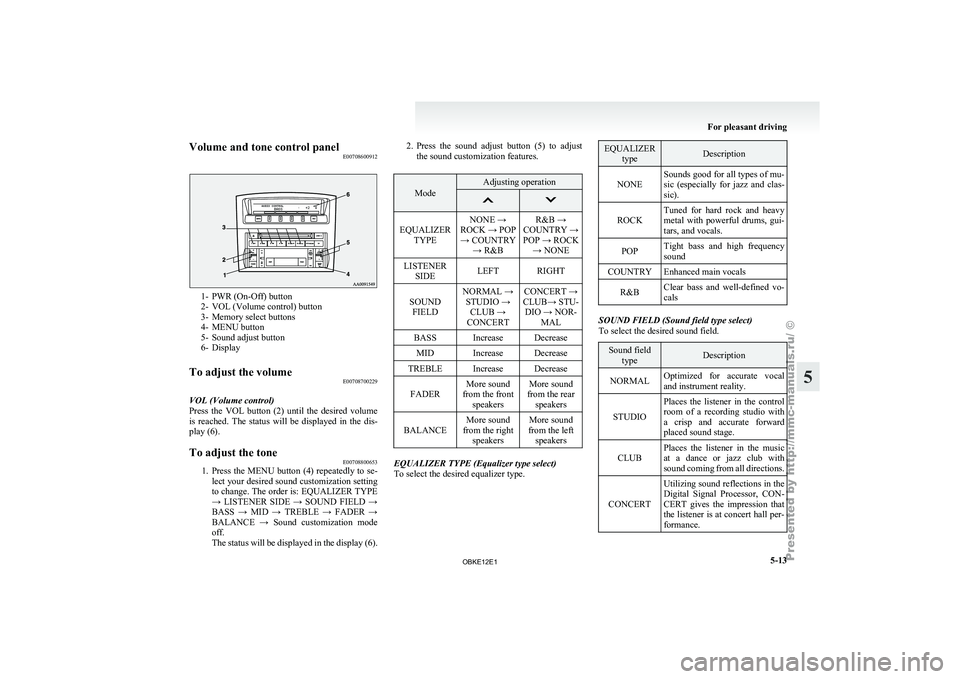
Volume and tone control panel
E007086009121- PWR (On-Off) button
2- VOL (Volume control) button
3-
Memory select buttons
4-
MENU button
5- Sound adjust button
6- Display
To adjust the volume E00708700229
VOL (Volume control)
Press the VOL
button (2) until the desired volume
is reached. The status will be displayed in the dis-
play (6).
To adjust the tone E00708800653
1. Press the MENU button (4) repeatedly to se-
lect your
desired sound customization setting
to change. The order is: EQUALIZER TYPE
→ LISTENER SIDE → SOUND FIELD →
BASS → MID → TREBLE → FADER →
BALANCE → Sound customization mode
off.
The status will be displayed in the display (6). 2. Press
the sound adjust button (5) to adjust
the sound customization features. Mode Adjusting operation
EQUALIZER
TYPE NONE →
ROCK → POP → COUNTRY → R&B R&B →
COUNTRY →
POP → ROCK → NONE
LISTENER SIDE LEFT RIGHT
SOUND FIELD NORMAL →
STUDIO → CLUB →
CONCERT CONCERT →
CLUB→ STU- DIO → NOR- MAL
BASS Increase Decrease MID Increase Decrease
TREBLE Increase Decrease
FADER More sound
from the front speakers More sound
from the rear speakers
BALANCE More sound
from the right speakers More sound
from the left speakers EQUALIZER TYPE (Equalizer type select)
To select the desired equalizer type. EQUALIZER
type Description
NONE Sounds good for all types of mu-
sic (especially for
jazz and clas-
sic).
ROCK Tuned for hard rock and heavy
metal with powerful
drums, gui-
tars, and vocals.
POP Tight bass and high frequency
sound
COUNTRY Enhanced main vocals
R&B Clear bass and well-defined vo-
cals SOUND FIELD (Sound field type select)
To select the desired sound field.
Sound field
type Description
NORMAL Optimized for accurate vocal
and instrument reality.
STUDIO Places the listener in the control
room of
a
recording studio with
a crisp and accurate forward
placed sound stage.
CLUB Places the listener in the music
at a dance
or jazz club with
sound coming from all directions.
CONCERT Utilizing sound reflections in the
Digital Signal Processor,
CON-
CERT gives the impression that
the listener is at concert hall per-
formance. For pleasant driving
5-13 5
OBKE12E1
Page 198 of 377
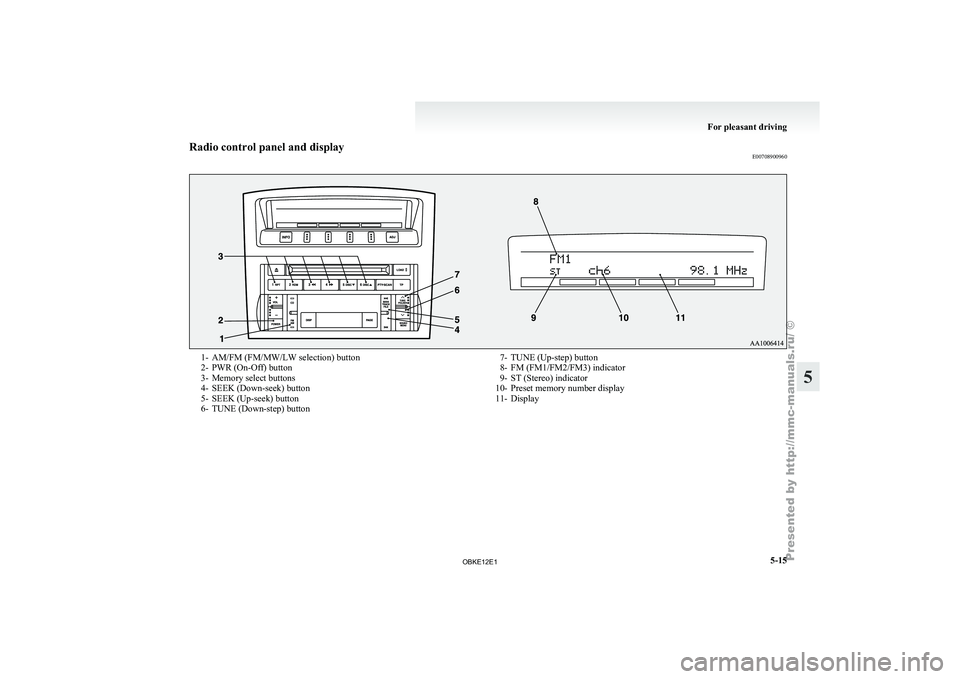
Radio control panel and display
E007089009601- AM/FM (FM/MW/LW selection) button
2- PWR (On-Off) button
3-
Memory select buttons
4-
SEEK (Down-seek) button
5- SEEK (Up-seek) button
6- TUNE (Down-step) button 7- TUNE (Up-step) button
8- FM (FM1/FM2/FM3) indicator
9- ST (Stereo) indicator
10-
Preset memory number display
11- Display For pleasant driving
5-15 5
OBKE12E1