window MITSUBISHI SHOGUN 2003 (in English) User Guide
[x] Cancel search | Manufacturer: MITSUBISHI, Model Year: 2003, Model line: SHOGUN, Model: MITSUBISHI SHOGUN 2003Pages: 392, PDF Size: 14.34 MB
Page 27 of 392
F17A183A
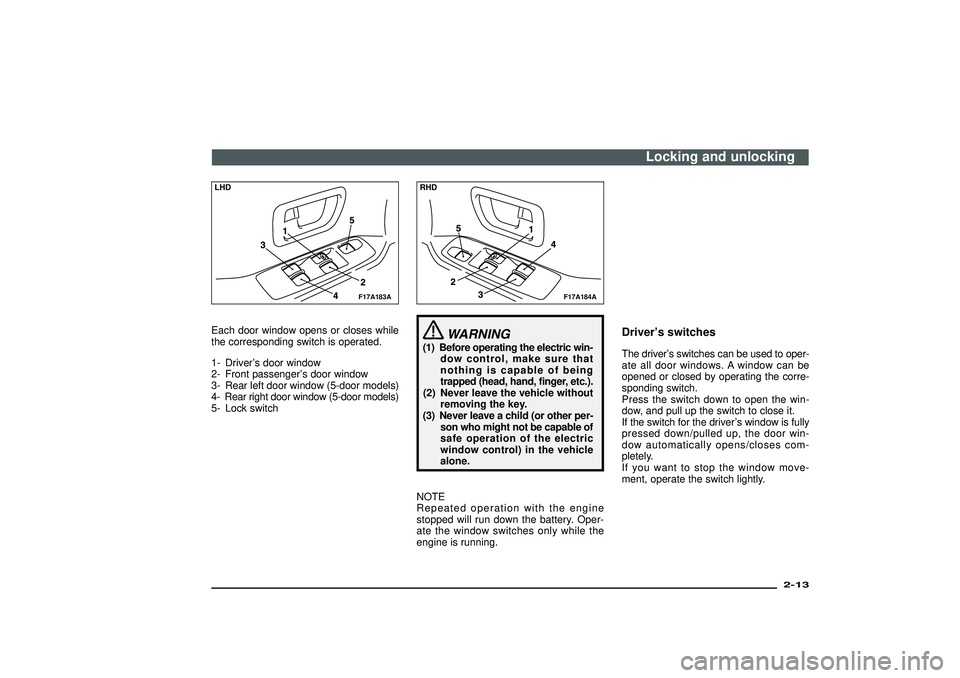
LHDEach door window opens or closes while
the corresponding switch is operated.
1- Driver’s door window
2- Front passenger’s door window
3- Rear left door window (5-door models)
4- Rear right door window (5-door models)
5- Lock switch
F17A184A
RHD
WARNING
(1) Before operating the electric win-
dow control, make sure that
nothing is capable of being
trapped (head, hand, finger, etc.).
(2) Never leave the vehicle without
removing the key.
(3) Never leave a child (or other per-
son who might not be capable of
safe operation of the electric
window control) in the vehicle
alone.
NOTE
Repeated operation with the engine
stopped will run down the battery. Oper-
ate the window switches only while the
engine is running.
Driver’s switchesThe driver’s switches can be used to oper-
ate all door windows. A window can be
opened or closed by operating the corre-
sponding switch.
Press the switch down to open the win-
dow, and pull up the switch to close it.
If the switch for the driver’s window is fully
pressed down/pulled up, the door win-
dow automatically opens/closes com-
pletely.
If you want to stop the window move-
ment, operate the switch lightly.
Locking and unlocking
2-13
Div:
Out put date:
Page 28 of 392
F17A022A
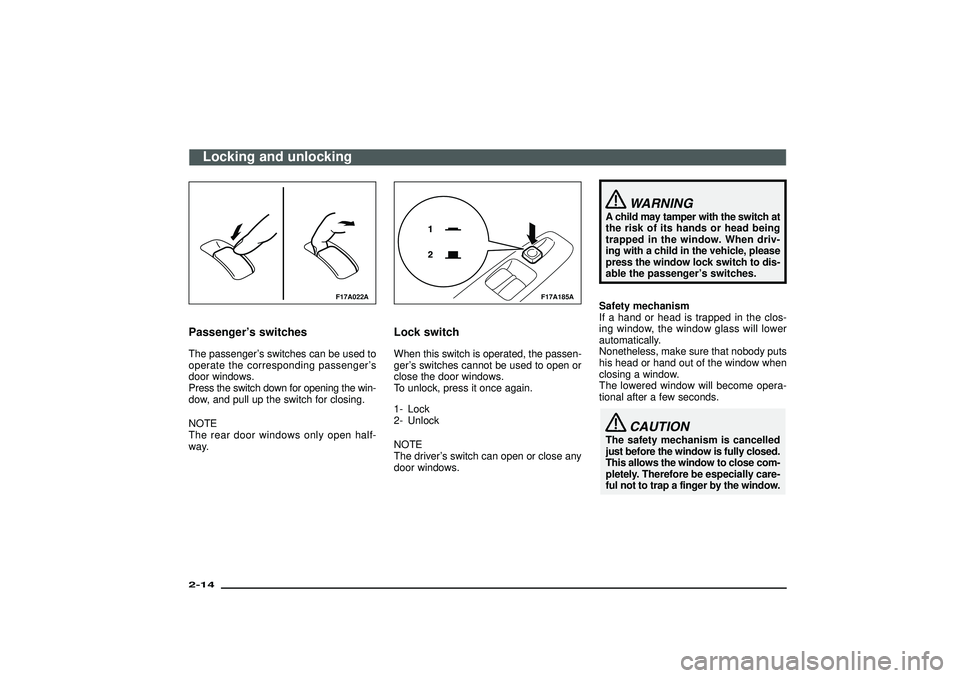
Passenger’s switchesThe passenger’s switches can be used to
operate the corresponding passenger’s
door windows.
Press the switch down for opening the win-
dow, and pull up the switch for closing.
NOTE
The rear door windows only open half-
way.
F17A185A
Lock switchWhen this switch is operated, the passen-
ger’s switches cannot be used to open or
close the door windows.
To unlock, press it once again.
1- Lock
2- Unlock
NOTE
The driver’s switch can open or close any
door windows.
WARNING
A child may tamper with the switch at
the risk of its hands or head being
trapped in the window. When driv-
ing with a child in the vehicle, please
press the window lock switch to dis-
able the passenger’s switches.
Safety mechanism
If a hand or head is trapped in the clos-
ing window, the window glass will lower
automatically.
Nonetheless, make sure that nobody puts
his head or hand out of the window when
closing a window.
The lowered window will become opera-
tional after a few seconds.
CAUTION
The safety mechanism is cancelled
just before the window is fully closed.
This allows the window to close com-
pletely. Therefore be especially care-
ful not to trap a finger by the window.
Locking and unlocking
2-14Div:
Out put date:
Page 29 of 392
F18C014A
Rear side/quarter window
EF18B-F
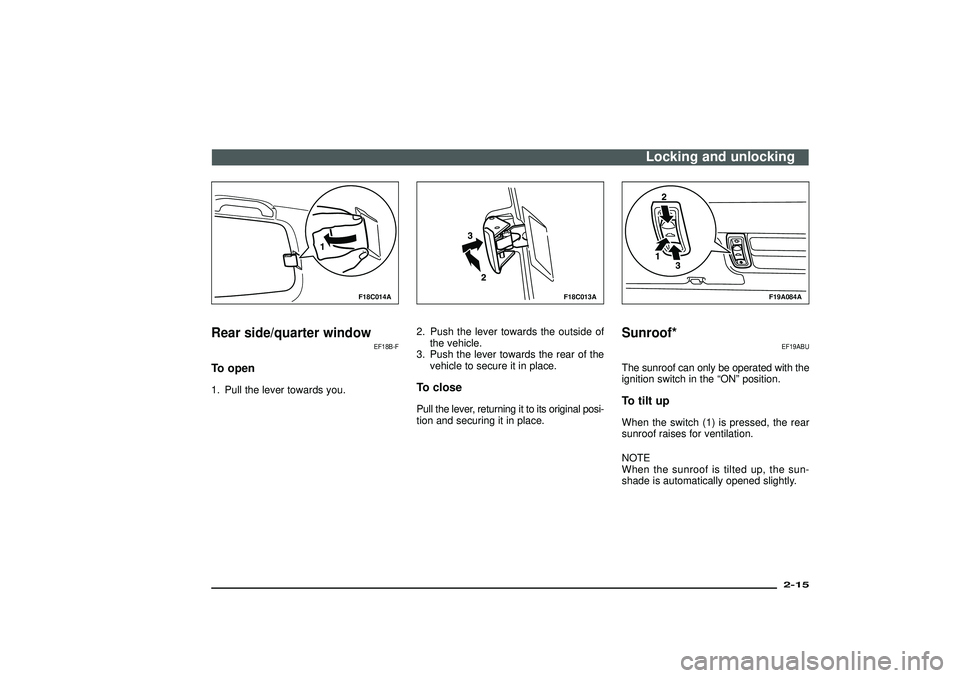
To open1. Pull the lever towards you.
F18C013A
2. Push the lever towards the outside of
the vehicle.
3. Push the lever towards the rear of the
vehicle to secure it in place.To closePull the lever, returning it to its original posi-
tion and securing it in place.
F19A084A
Sunroof*
EF19ABU
The sunroof can only be operated with the
ignition switch in the“ON”position.To tilt upWhen the switch (1) is pressed, the rear
sunroof raises for ventilation.
NOTE
When the sunroof is tilted up, the sun-
shade is automatically opened slightly.
Locking and unlocking
2-15
Div:
Out put date:
Page 75 of 392

WARNING
IT IS VERY IMPORTANT TO BE
PROPERLY SEATED.
A driver or front passenger too close
to the steering wheel or instrument
panel during air bag deployment can
be killed or seriously injured.
Air bags inflate very fast, and with
great force.
If the driver and front passenger are
not properly seated and restrained
the air bags may not protect you
properly, and could cause serious or
fatal injuries when it inflates.
(1) Before driving, adjust the driv-
er’s seat as far back as pos-
sible while still maintaining
complete control of the vehicle.
(2) Before driving, adjust the front
passenger seat as far back as
possible.
(3) Make sure all vehicle occupants
are always properly restrained
using the available seat belts.
(4) With seat belts properly fas-
tened the driver and front pas-
senger should sit well back and
upright without leaning against
the window or door.
G28G157A
WARNING
(5) Do not sit on the edge of the
seat, or lean head or chest close
to the steering wheel or instru-
ment panel. Do not put feet or
legs on or against the instru-
ment panel.
(6) Place all infants and small chil-
dren in the rear seat and prop-
erly restrained using an
appropriate child restraint sys-
tem.
The rear seat is the safest for
infants and children.
G28G176A
WARNING
(7) Infants and small children should
never be unrestrained, stand up
against the instrument panel or
held in your arms or on your lap.
They could be seriously injured
or killed in a collision, includ-
ing when the air bag inflates.
They should be properly seated
in the rear seat in an appropri-
ate child restraint system. See
the“Child restraint”section of
this owner’s manual.
Seat and seat belts
3-43
Div:
Out put date:
Page 78 of 392
When the impact sensors detect an impact
of sufficient frontal or side force, an auto-
mated circuit ignites materials in the infla-
tor to generate gas and inflate the air bags.
The air bags deployment produces a sud-
den, loud noise, and releases some smoke
and powder, but these conditions are not
injurious, and do not indicate a fire in the
vehicle. People with respiratory problems
may feel some temporary irritation from
chemicals used to produce the deployment;
open the windows after air bag deploy-
ment, if safe to do so.
The air bags deflate very rapidly after
deployment, so there is little danger of
obscured vision.
The time required from the sensors detect-
ing an impact to deflation of the air bags
after deployment is shorter than a blink of
an eye.
CAUTION
Air bags are inflated at an extremely
rapid speed. In certain situations,
contact with inflating air bags can
result in light cuts, bruises, and the
like.
G28G242A
Driver’s and passenger’s front air
bag system
EG29C-D
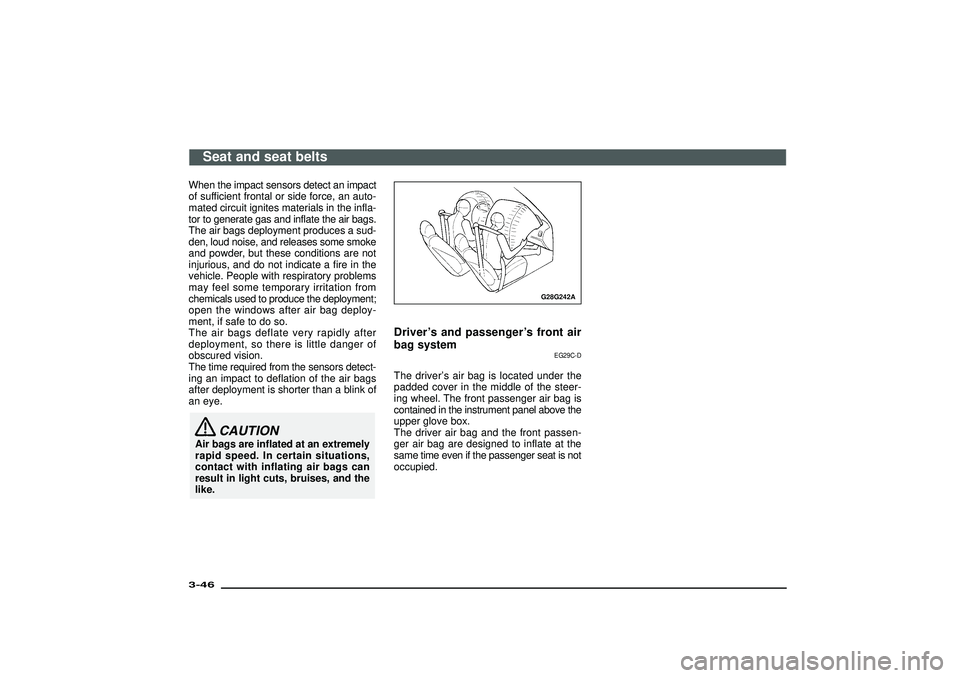
The driver’s air bag is located under the
padded cover in the middle of the steer-
ing wheel. The front passenger air bag is
contained in the instrument panel above the
upper glove box.
The driver air bag and the front passen-
ger air bag are designed to inflate at the
same time even if the passenger seat is not
occupied.
Seat and seat belts
3-46Div:
Out put date:
Page 87 of 392
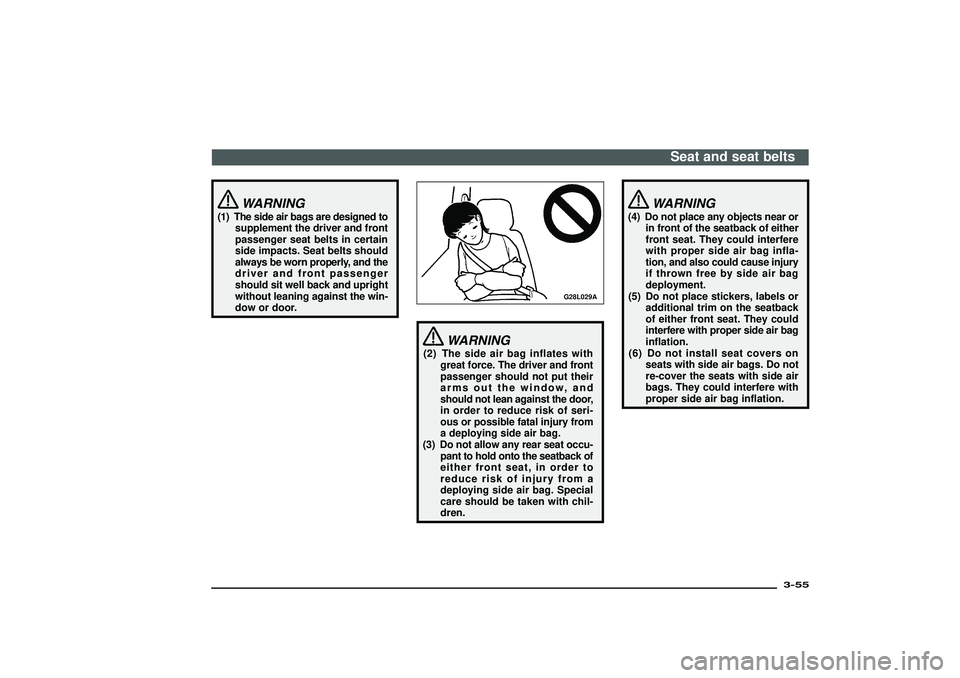
WARNING
(1) The side air bags are designed to
supplement the driver and front
passenger seat belts in certain
side impacts. Seat belts should
always be worn properly, and the
driver and front passenger
should sit well back and upright
without leaning against the win-
dow or door.
G28L029A
WARNING
(2) The side air bag inflates with
great force. The driver and front
passenger should not put their
arms out the window, and
should not lean against the door,
in order to reduce risk of seri-
ous or possible fatal injury from
a deploying side air bag.
(3) Do not allow any rear seat occu-
pant to hold onto the seatback of
either front seat, in order to
reduce risk of injury from a
deploying side air bag. Special
care should be taken with chil-
dren.
WARNING
(4) Do not place any objects near or
in front of the seatback of either
front seat. They could interfere
with proper side air bag infla-
tion, and also could cause injury
if thrown free by side air bag
deployment.
(5) Do not place stickers, labels or
additional trim on the seatback
of either front seat. They could
interfere with proper side air bag
inflation.
(6) Do not install seat covers on
seats with side air bags. Do not
re-cover the seats with side air
bags. They could interfere with
proper side air bag inflation.
Seat and seat belts
3-55
Div:
Out put date:
Page 93 of 392
Instruments and controls
Instruments ............................................................ 4- 2
Speedometer ......................................................... 4- 2
Tachometer ............................................................. 4- 3
Odometer/Tripmeter............................................... 4- 3
Fuel gauge .............................................................. 4- 4
Water temperature gauge...................................... 4- 5
Indication and warning lamps .............................. 4- 6
Combination headlamps,
dipper and turn signal switch ........................... 4-14
Headlamp levelling switch ................................... 4-16
Windscreen wiper and washer switch ................. 4-17
Rear window wiper and washer switch ............... 4-19
Headlamp washer switch ...................................... 4-19
Hazard warning flasher switch ............................. 4-20
Rear window demister switch .............................. 4-21
Front fog lamp switch ........................................... 4-22
Rear fog lamp switch............................................. 4-22
Rheostat (meter illumination control) .................. 4-23
Wiper deicer switch ............................................... 4-24
Horn switch ............................................................ 4-24
Room lamps ........................................................... 4-24
Rear personal lamp................................................ 4-25
Luggage compartment lamp ................................. 4-26
Multi centre display ............................................... 4-27
RV meter ................................................................. 4-40
Div:
Out put date:
Page 106 of 392
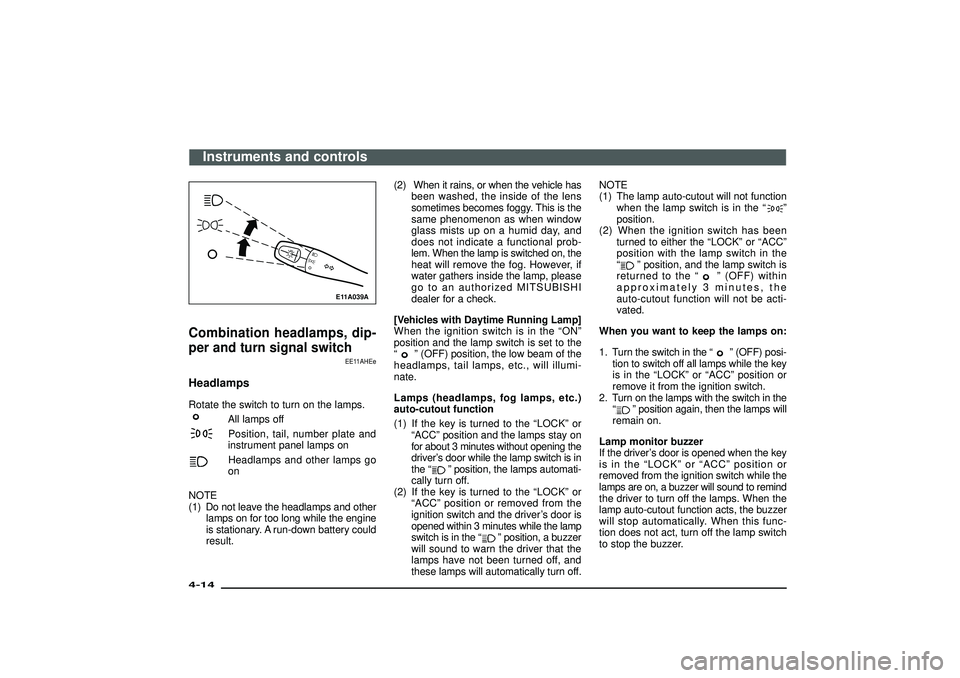
E11A039A
Combination headlamps, dip-
per and turn signal switch
EE11AHEe
HeadlampsRotate the switch to turn on the lamps.
All lamps offPosition, tail, number plate and
instrument panel lamps onHeadlamps and other lamps go
on
NOTE
(1) Do not leave the headlamps and other
lamps on for too long while the engine
is stationary. A run-down battery could
result.(2) When it rains, or when the vehicle has
been washed, the inside of the lens
sometimes becomes foggy. This is the
same phenomenon as when window
glass mists up on a humid day, and
does not indicate a functional prob-
lem. When the lamp is switched on, the
heat will remove the fog. However, if
water gathers inside the lamp, please
go to an authorized MITSUBISHI
dealer for a check.
[Vehicles with Daytime Running Lamp]
When the ignition switch is in the“ON”
position and the lamp switch is set to the
“
”(OFF) position, the low beam of the
headlamps, tail lamps, etc., will illumi-
nate.
Lamps (headlamps, fog lamps, etc.)
auto-cutout function
(1) If the key is turned to the“LOCK”or
“ACC”position and the lamps stay on
for about 3 minutes without opening the
driver’s door while the lamp switch is in
the“
”position, the lamps automati-
cally turn off.
(2) If the key is turned to the“LOCK”or
“ACC”position or removed from the
ignition switch and the driver’s door is
opened within 3 minutes while the lamp
switch is in the“
”position, a buzzer
will sound to warn the driver that the
lamps have not been turned off, and
these lamps will automatically turn off.NOTE
(1) The lamp auto-cutout will not function
when the lamp switch is in the“
”
position.
(2) When the ignition switch has been
turned to either the“LOCK”or“ACC”
position with the lamp switch in the
“
”position, and the lamp switch is
returned to the“
”(OFF) within
approximately 3 minutes, the
auto-cutout function will not be acti-
vated.
When you want to keep the lamps on:
1. Turn the switch in the“
”(OFF) posi-
tion to switch off all lamps while the key
is in the“LOCK”or“ACC”position or
remove it from the ignition switch.
2. Turn on the lamps with the switch in the
“
”position again, then the lamps will
remain on.
Lamp monitor buzzer
If the driver’s door is opened when the key
is in the“LOCK”or“ACC”position or
removed from the ignition switch while the
lamps are on, a buzzer will sound to remind
the driver to turn off the lamps. When the
lamp auto-cutout function acts, the buzzer
will stop automatically. When this func-
tion does not act, turn off the lamp switch
to stop the buzzer.
Instruments and controls
4-14Div:
Out put date:
Page 111 of 392
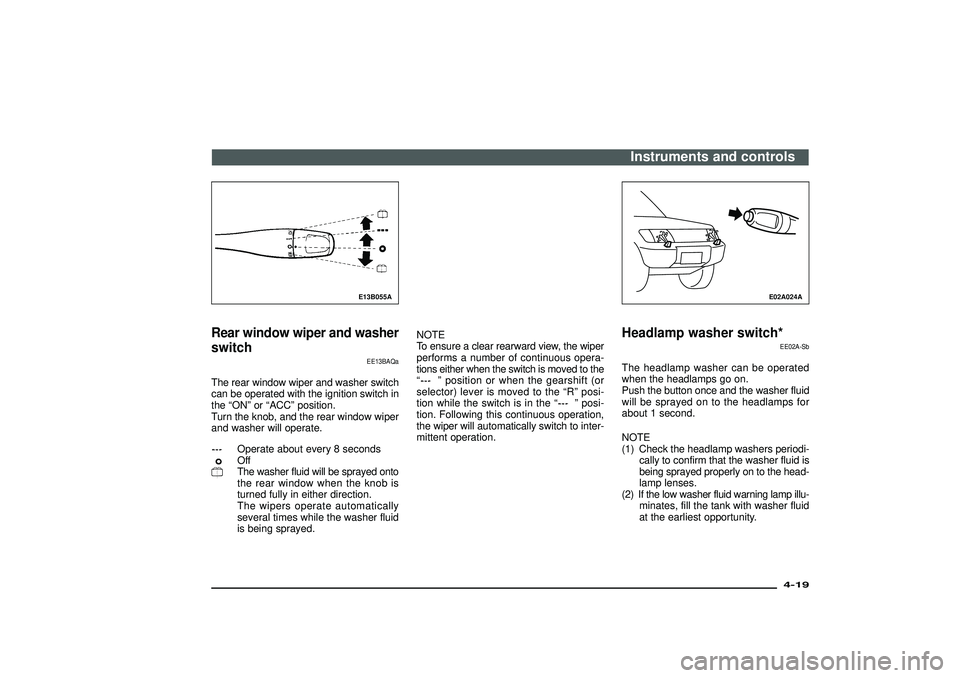
E13B055A
Rear window wiper and washer
switch
EE13BAQa
The rear window wiper and washer switch
can be operated with the ignition switch in
the“ON”or“ACC”position.
Turn the knob, and the rear window wiper
and washer will operate.
Operate about every 8 secondsOffThe washer fluid will be sprayed onto
the rear window when the knob is
turned fully in either direction.
The wipers operate automatically
several times while the washer fluid
is being sprayed.NOTE
To ensure a clear rearward view, the wiper
performs a number of continuous opera-
tions either when the switch is moved to the
“
”position or when the gearshift (or
selector) lever is moved to the“R”posi-
tion while the switch is in the“
”posi-
tion. Following this continuous operation,
the wiper will automatically switch to inter-
mittent operation.
E02A024A
Headlamp washer switch*
EE02A-Sb
The headlamp washer can be operated
when the headlamps go on.
Push the button once and the washer fluid
will be sprayed on to the headlamps for
about 1 second.
NOTE
(1) Check the headlamp washers periodi-
cally to confirm that the washer fluid is
being sprayed properly on to the head-
lamp lenses.
(2) If the low washer fluid warning lamp illu-
minates, fill the tank with washer fluid
at the earliest opportunity.Instruments and controls
4-19
Div:
Out put date:
Page 113 of 392
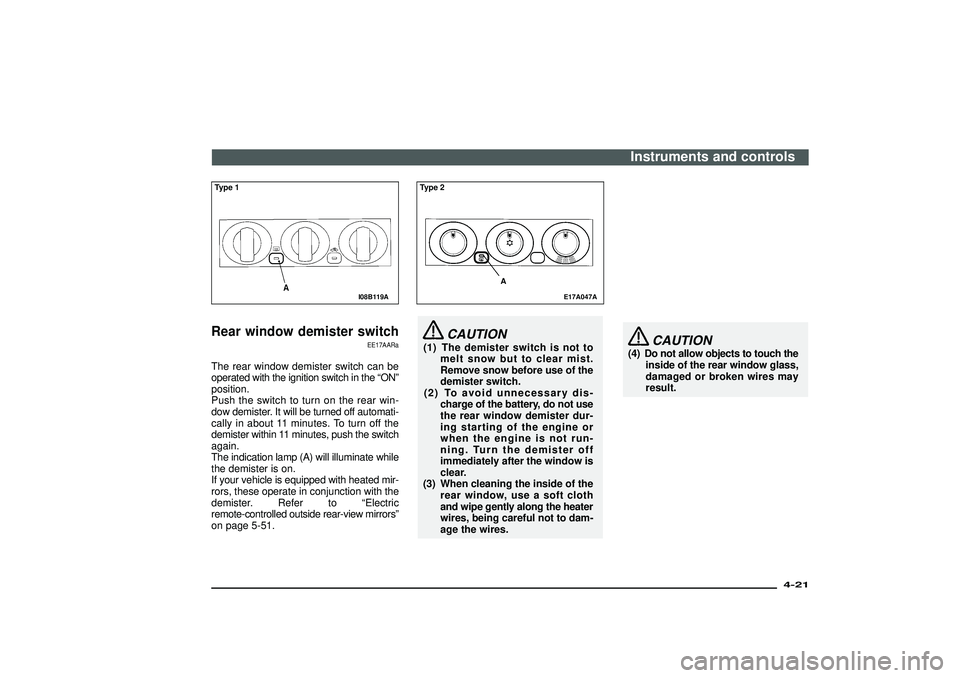
I08B119A
Type 1Rear window demister switch
EE17AARa
The rear window demister switch can be
operated with the ignition switch in the“ON”
position.
Push the switch to turn on the rear win-
dow demister. It will be turned off automati-
cally in about 11 minutes. To turn off the
demister within 11 minutes, push the switch
again.
The indication lamp (A) will illuminate while
the demister is on.
If your vehicle is equipped with heated mir-
rors, these operate in conjunction with the
demister. Refer to“Electric
remote-controlled outside rear-view mirrors”
on page 5-51.
E17A047A
Type 2
A
CAUTION
(1) The demister switch is not to
melt snow but to clear mist.
Remove snow before use of the
demister switch.
(2) To avoid unnecessary dis-
charge of the battery, do not use
the rear window demister dur-
ing starting of the engine or
when the engine is not run-
ning. Turn the demister off
immediately after the window is
clear.
(3) When cleaning the inside of the
rear window, use a soft cloth
and wipe gently along the heater
wires, being careful not to dam-
age the wires.
CAUTION
(4) Do not allow objects to touch the
inside of the rear window glass,
damaged or broken wires may
result.Instruments and controls
4-21
Div:
Out put date: