side light MITSUBISHI SHOGUN 2003 Owner's Manual (in English)
[x] Cancel search | Manufacturer: MITSUBISHI, Model Year: 2003, Model line: SHOGUN, Model: MITSUBISHI SHOGUN 2003Pages: 392, PDF Size: 14.34 MB
Page 24 of 392
F13A257A
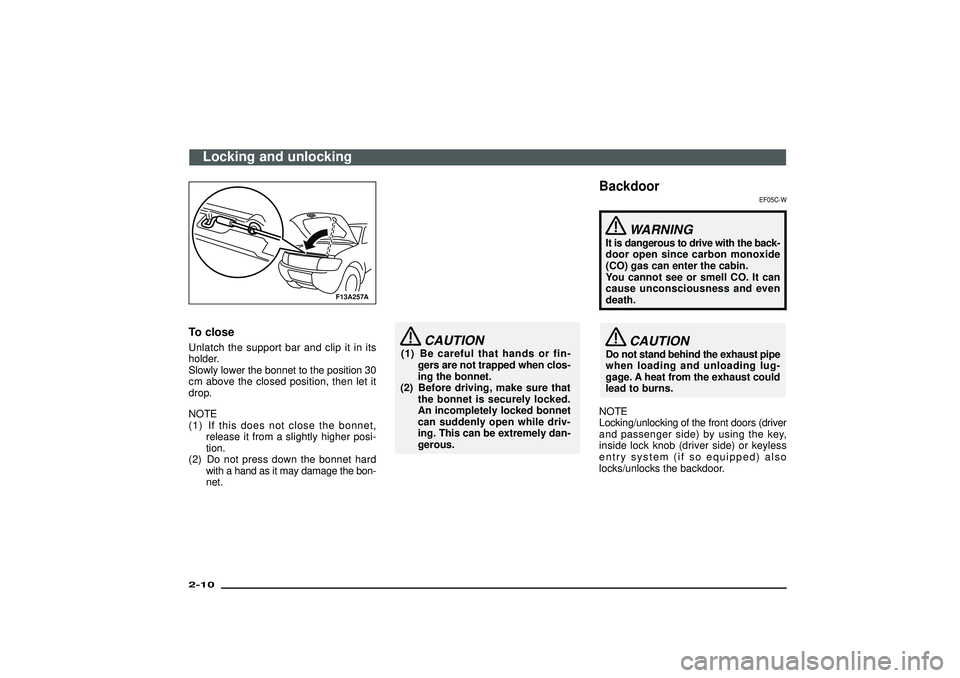
To closeUnlatch the support bar and clip it in its
holder.
Slowly lower the bonnet to the position 30
cm above the closed position, then let it
drop.
NOTE
(1) If this does not close the bonnet,
release it from a slightly higher posi-
tion.
(2) Do not press down the bonnet hard
with a hand as it may damage the bon-
net.
CAUTION
(1) Be careful that hands or fin-
gers are not trapped when clos-
ing the bonnet.
(2) Before driving, make sure that
the bonnet is securely locked.
An incompletely locked bonnet
can suddenly open while driv-
ing. This can be extremely dan-
gerous.
Backdoor
EF05C-W
WARNING
It is dangerous to drive with the back-
door open since carbon monoxide
(CO) gas can enter the cabin.
You cannot see or smell CO. It can
cause unconsciousness and even
death.
CAUTION
Do not stand behind the exhaust pipe
when loading and unloading lug-
gage. A heat from the exhaust could
lead to burns.
NOTE
Locking/unlocking of the front doors (driver
and passenger side) by using the key,
inside lock knob (driver side) or keyless
entry system (if so equipped) also
locks/unlocks the backdoor.
Locking and unlocking
2-10Div:
Out put date:
Page 29 of 392
F18C014A
Rear side/quarter window
EF18B-F
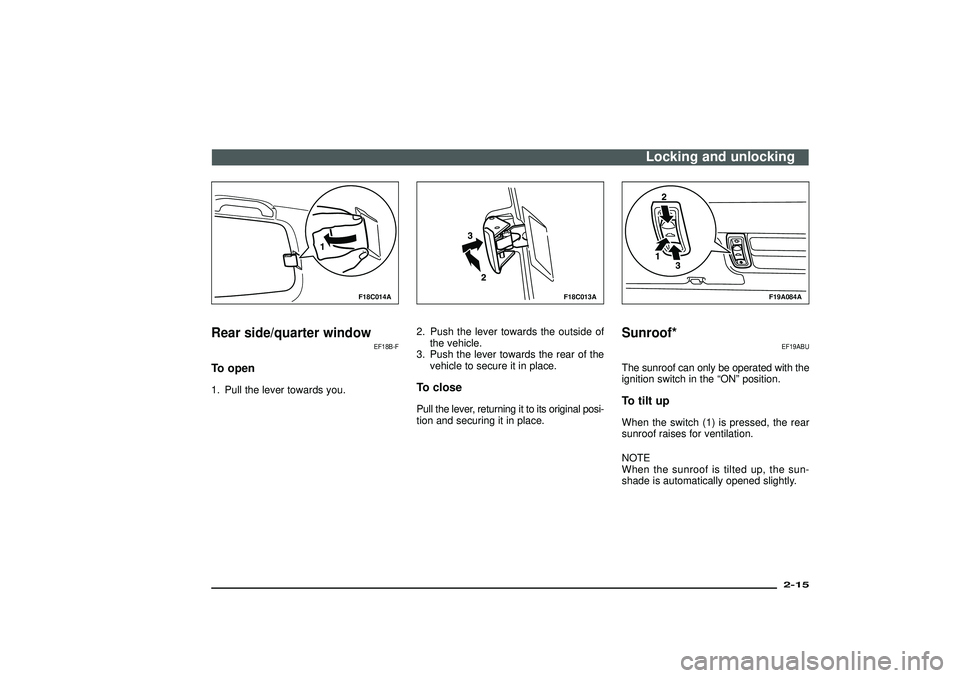
To open1. Pull the lever towards you.
F18C013A
2. Push the lever towards the outside of
the vehicle.
3. Push the lever towards the rear of the
vehicle to secure it in place.To closePull the lever, returning it to its original posi-
tion and securing it in place.
F19A084A
Sunroof*
EF19ABU
The sunroof can only be operated with the
ignition switch in the“ON”position.To tilt upWhen the switch (1) is pressed, the rear
sunroof raises for ventilation.
NOTE
When the sunroof is tilted up, the sun-
shade is automatically opened slightly.
Locking and unlocking
2-15
Div:
Out put date:
Page 44 of 392
G21C076A
3-door modelsRear seat (3-door models)*/
Second seat (5-door models)*
EG21COI
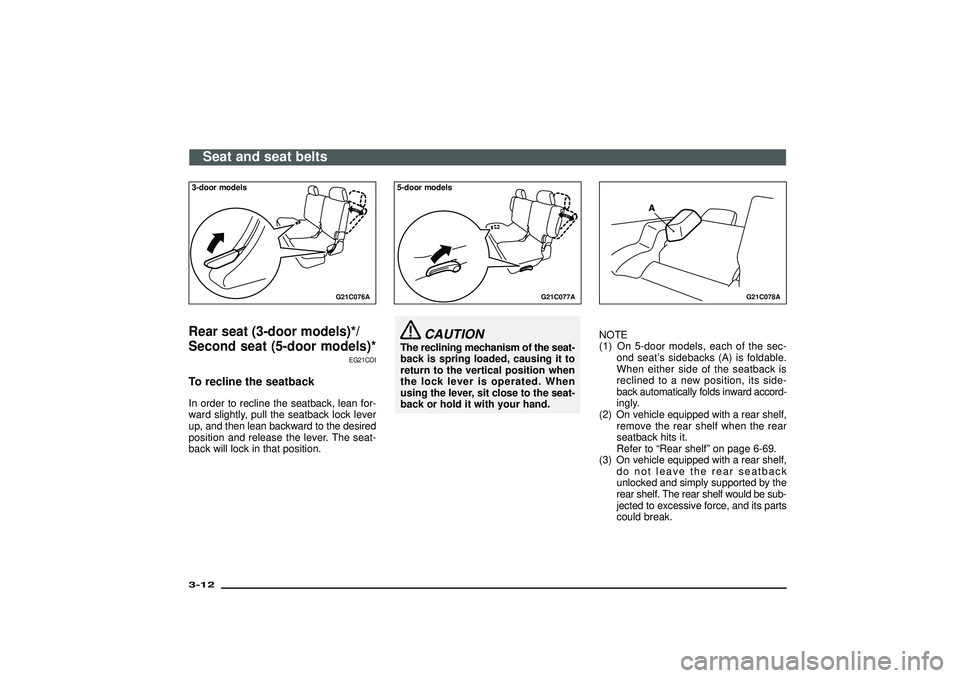
To recline the seatbackIn order to recline the seatback, lean for-
ward slightly, pull the seatback lock lever
up, and then lean backward to the desired
position and release the lever. The seat-
back will lock in that position.
G21C077A
5-door models
CAUTION
The reclining mechanism of the seat-
back is spring loaded, causing it to
return to the vertical position when
the lock lever is operated. When
using the lever, sit close to the seat-
back or hold it with your hand.
G21C078A
NOTE
(1) On 5-door models, each of the sec-
ond seat’s sidebacks (A) is foldable.
When either side of the seatback is
reclined to a new position, its side-
back automatically folds inward accord-
ingly.
(2) On vehicle equipped with a rear shelf,
remove the rear shelf when the rear
seatback hits it.
Refer to“Rear shelf”on page 6-69.
(3) On vehicle equipped with a rear shelf,
do not leave the rear seatback
unlocked and simply supported by the
rear shelf. The rear shelf would be sub-
jected to excessive force, and its parts
could break.
Seat and seat belts
3-12Div:
Out put date:
Page 48 of 392
G23F071A
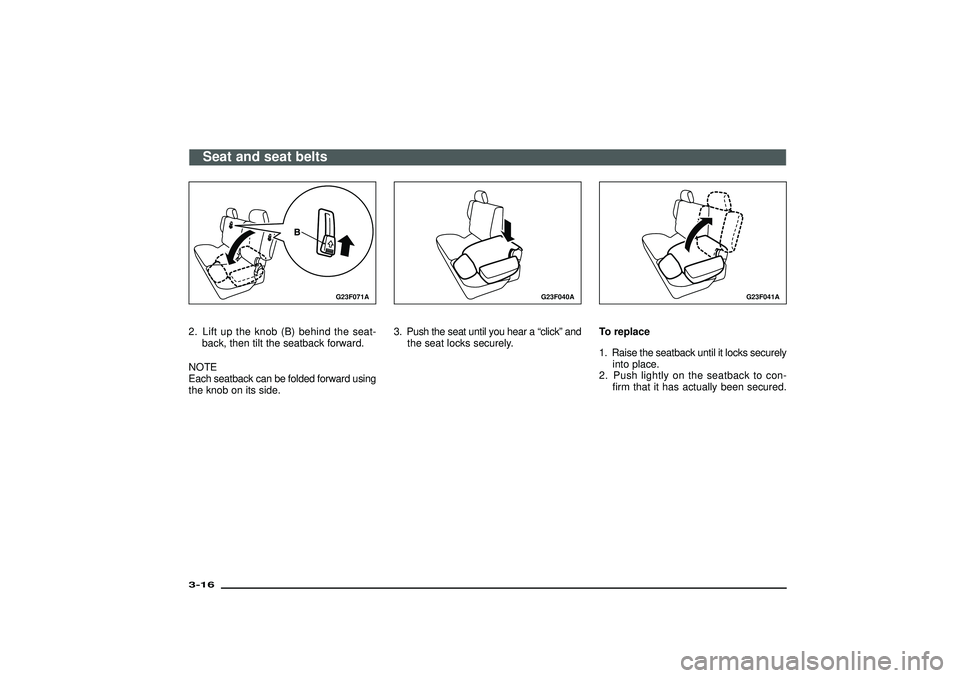
2. Lift up the knob (B) behind the seat-
back, then tilt the seatback forward.
NOTE
Each seatback can be folded forward using
the knob on its side.
G23F040A
3. Push the seat until you hear a“click”and
the seat locks securely.
G23F041A
To replace
1. Raise the seatback until it locks securely
into place.
2. Push lightly on the seatback to con-
firm that it has actually been secured.
Seat and seat belts
3-16Div:
Out put date:
Page 54 of 392
G24E034A
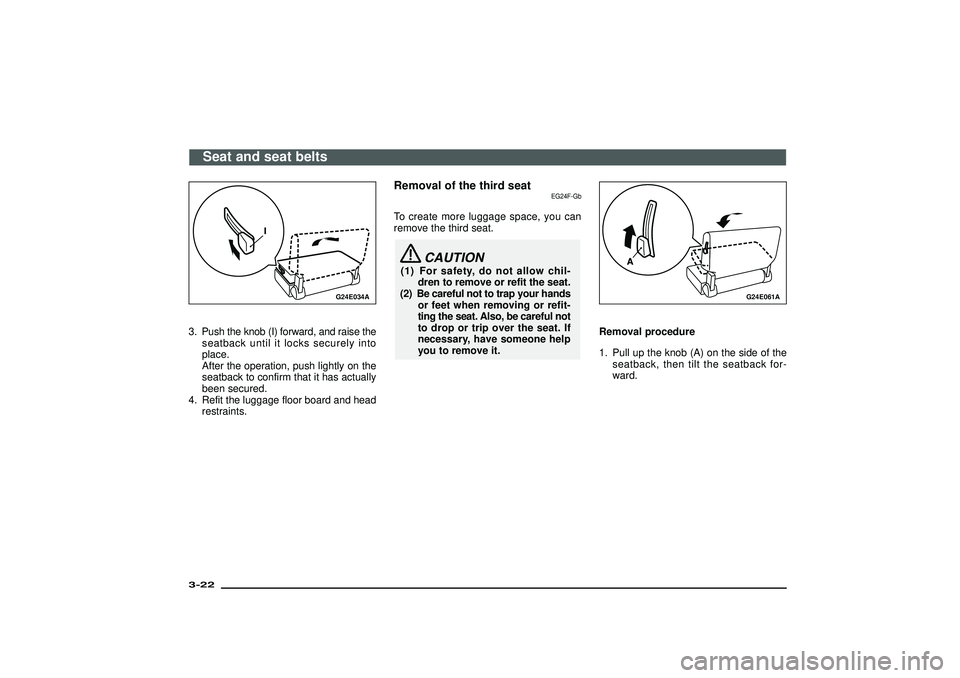
3. Push the knob (I) forward, and raise the
seatback until it locks securely into
place.
After the operation, push lightly on the
seatback to confirm that it has actually
been secured.
4. Refit the luggage floor board and head
restraints.
Removal of the third seat
EG24F-Gb
To create more luggage space, you can
remove the third seat.
CAUTION
(1) For safety, do not allow chil-
dren to remove or refit the seat.
(2) Be careful not to trap your hands
or feet when removing or refit-
ting the seat. Also, be careful not
to drop or trip over the seat. If
necessary, have someone help
you to remove it.
G24E061A
Removal procedure
1. Pull up the knob (A) on the side of the
seatback, then tilt the seatback for-
ward.
Seat and seat belts
3-22Div:
Out put date:
Page 78 of 392
When the impact sensors detect an impact
of sufficient frontal or side force, an auto-
mated circuit ignites materials in the infla-
tor to generate gas and inflate the air bags.
The air bags deployment produces a sud-
den, loud noise, and releases some smoke
and powder, but these conditions are not
injurious, and do not indicate a fire in the
vehicle. People with respiratory problems
may feel some temporary irritation from
chemicals used to produce the deployment;
open the windows after air bag deploy-
ment, if safe to do so.
The air bags deflate very rapidly after
deployment, so there is little danger of
obscured vision.
The time required from the sensors detect-
ing an impact to deflation of the air bags
after deployment is shorter than a blink of
an eye.
CAUTION
Air bags are inflated at an extremely
rapid speed. In certain situations,
contact with inflating air bags can
result in light cuts, bruises, and the
like.
G28G242A
Driver’s and passenger’s front air
bag system
EG29C-D
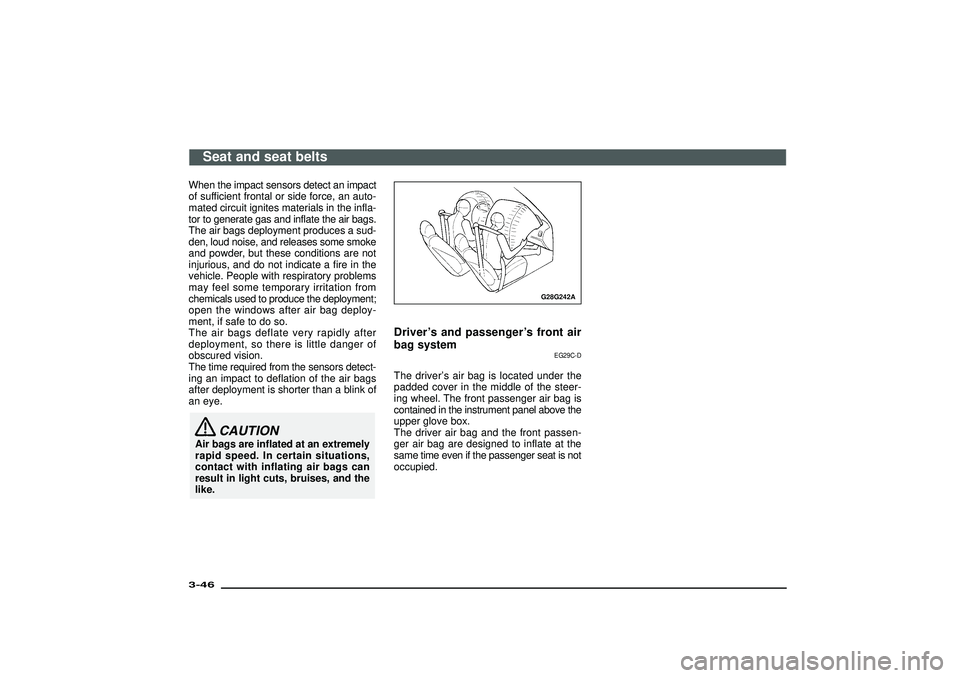
The driver’s air bag is located under the
padded cover in the middle of the steer-
ing wheel. The front passenger air bag is
contained in the instrument panel above the
upper glove box.
The driver air bag and the front passen-
ger air bag are designed to inflate at the
same time even if the passenger seat is not
occupied.
Seat and seat belts
3-46Div:
Out put date:
Page 104 of 392
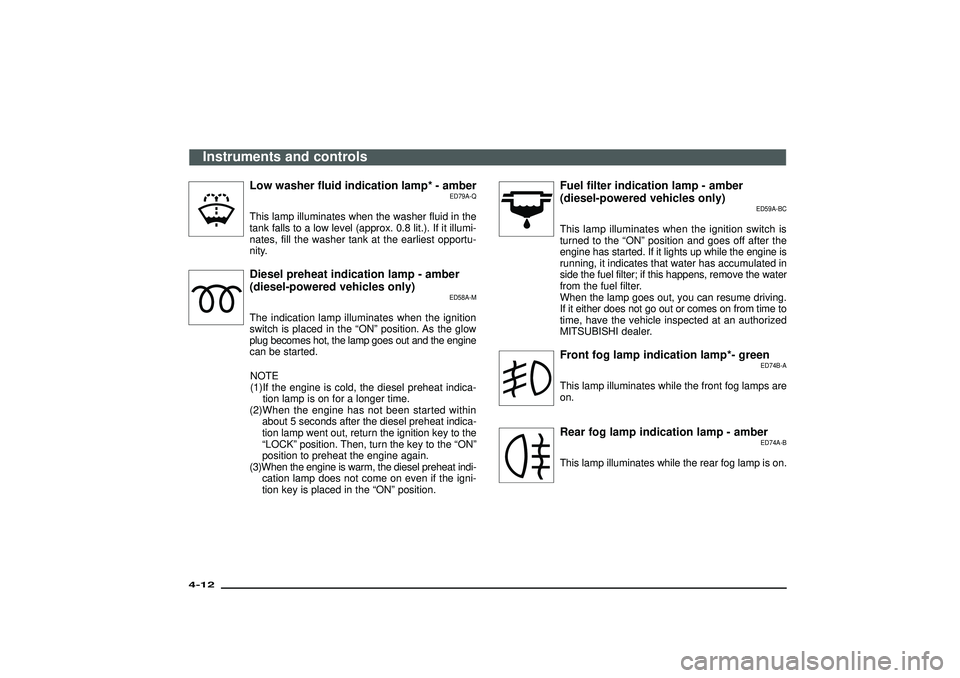
Low washer fluid indication lamp* - amber
ED79A-Q
This lamp illuminates when the washer fluid in the
tank falls to a low level (approx. 0.8 lit.). If it illumi-
nates, fill the washer tank at the earliest opportu-
nity.Diesel preheat indication lamp - amber
(diesel-powered vehicles only)
ED58A-M
The indication lamp illuminates when the ignition
switch is placed in the“ON ”position. As the glow
plug becomes hot, the lamp goes out and the engine
can be started.
NOTE
(1)If the engine is cold, the diesel preheat indica- tion lamp is on for a longer time.
(2)When the engine has not been started within about 5 seconds after the diesel preheat indica-
tion lamp went out, return the ignition key to the
“LOCK” position. Then, turn the key to the “ON”
position to preheat the engine again.
(3)When the engine is warm, the diesel preheat indi- cation lamp does not come on even if the igni-
tion key is placed in the “ON” position.
Fuel filter indication lamp - amber
(diesel-powered vehicles only)
ED59A-BC
This lamp illuminates when the ignition switch is
turned to the “ON ”position and goes off after the
engine has started. If it lights up while the engine is
running, it indicates that water has accumulated in
side the fuel filter; if this happens, remove the water
from the fuel filter.
When the lamp goes out, you can resume driving.
If it either does not go out or comes on from time to
time, have the vehicle inspected at an authorized
MITSUBISHI dealer.Front fog lamp indication lamp*- green
ED74B-A
This lamp illuminates while the front fog lamps are
on.Rear fog lamp indication lamp - amber
ED74A-B
This lamp illuminates while the rear fog lamp is on.
Instruments and controls
4-12Div:
Out put date:
Page 123 of 392
Display mode
ED92G-I
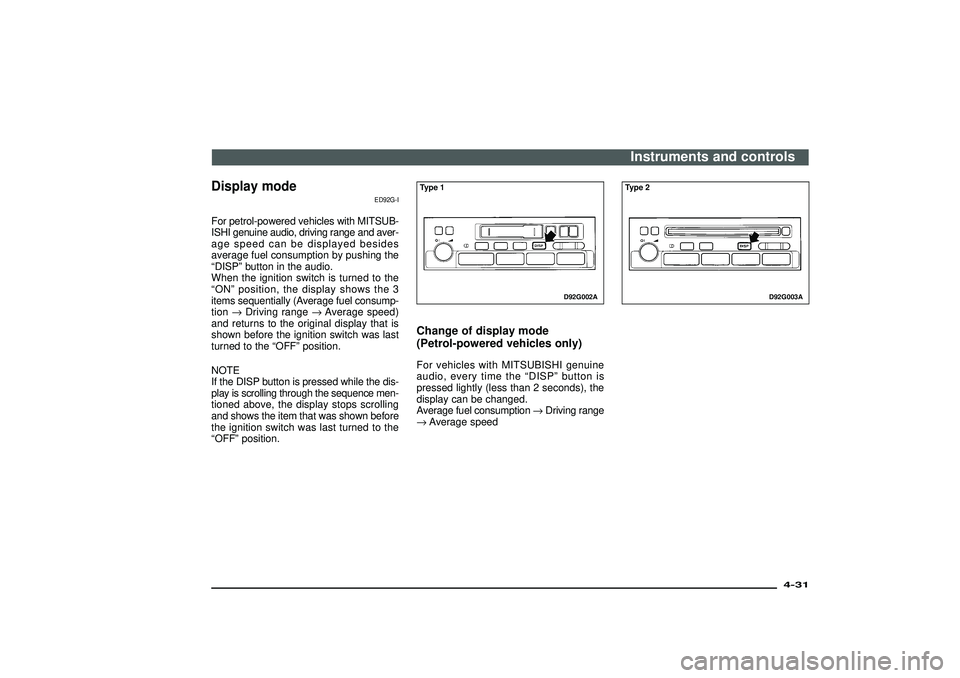
For petrol-powered vehicles with MITSUB-
ISHI genuine audio, driving range and aver-
age speed can be displayed besides
average fuel consumption by pushing the
“DISP”button in the audio.
When the ignition switch is turned to the
“ON”position, the display shows the 3
items sequentially (Average fuel consump-
tion→Driving range→Average speed)
and returns to the original display that is
shown before the ignition switch was last
turned to the“OFF”position.
NOTE
If the DISP button is pressed while the dis-
play is scrolling through the sequence men-
tioned above, the display stops scrolling
and shows the item that was shown before
the ignition switch was last turned to the
“OFF”position.
D92G002A
Type 1Change of display mode
(Petrol-powered vehicles only)For vehicles with MITSUBISHI genuine
audio, every time the“DISP”button is
pressed lightly (less than 2 seconds), the
display can be changed.
Average fuel consumption→Driving range
→Average speed
D92G003A
Type 2Instruments and controls
4-31
Div:
Out put date:
Page 170 of 392
(3) For vehicles equipped with the Day-
time Running Lamp, when the igni-
tion switch is“ON”, the headlamp low
beams etc. are turned on.
Refer to“Headlamps”.
(4) As your vehicle is equipped with an
electronic immobilizer, to start the
engine, the ID code which the tran-
sponder inside the key sends must
match the one registered to the immo-
bilizer computer. (Refer to page 2-2).
CAUTION
(1) Do not remove the ignition key
from the ignition switch while
driving. The steering wheel will
be locked, causing loss of con-
trol.
(2) If the engine is stopped while
driving, the brake servomecha-
nism will cease to function and
braking efficiency will deterio-
rate. Also, power steering sys-
tem will not function and it will
require greater manual effort to
operate the steering.
(3) Do not leave the key in the“ON”
position for a long time when the
engine is not running; doing so
will cause the battery to be dis-
charged.
(4) Do not turn the key to the
“START”position when the
engine is running; doing so
could damage the starter motor.
I01B016A
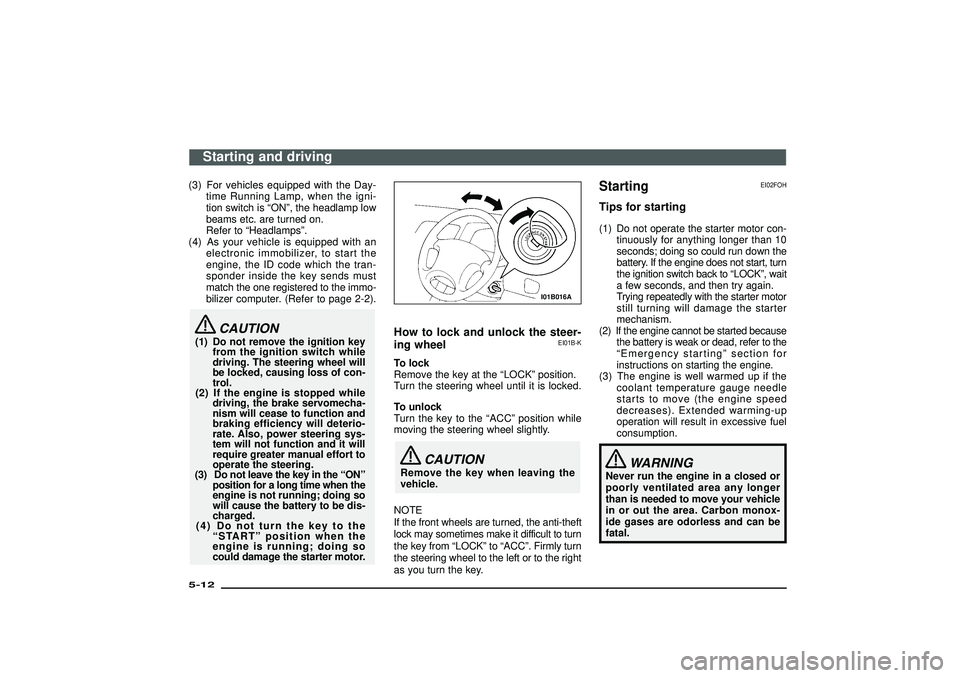
How to lock and unlock the steer-
ing wheel
EI01B-K
To lock
Remove the key at the“LOCK”position.
Turn the steering wheel until it is locked.
To unlock
Turn the key to the“ACC”position while
moving the steering wheel slightly.
CAUTION
Remove the key when leaving the
vehicle.
NOTE
If the front wheels are turned, the anti-theft
lock may sometimes make it difficult to turn
the key from“LOCK”to“ACC”. Firmly turn
the steering wheel to the left or to the right
as you turn the key.
Starting
EI02FOH
Tips for starting(1) Do not operate the starter motor con-
tinuously for anything longer than 10
seconds; doing so could run down the
battery. If the engine does not start, turn
the ignition switch back to“LOCK”, wait
a few seconds, and then try again.
Trying repeatedly with the starter motor
still turning will damage the starter
mechanism.
(2) If the engine cannot be started because
the battery is weak or dead, refer to the
“Emergency starting”section for
instructions on starting the engine.
(3) The engine is well warmed up if the
coolant temperature gauge needle
starts to move (the engine speed
decreases). Extended warming-up
operation will result in excessive fuel
consumption.
WARNING
Never run the engine in a closed or
poorly ventilated area any longer
than is needed to move your vehicle
in or out the area. Carbon monox-
ide gases are odorless and can be
fatal.
Starting and driving
5-12Div:
Out put date:
Page 199 of 392
Crossing a stream4-wheel drive vehicles are not necessar-
ily waterproof. If the electrical circuits
become wet, further operation of the
vehicle will be impossible; therefore, avoid
crossing streams unless absolutely nec-
essary. If crossing a stream is unavoid-
able, use the following procedure:
(1) Check depths of the stream and geo-
graphical features before attempting to
cross a stream and ford the stream
where the water is as shallow as prac-
ticable.
(2) Cross at a place where the water is less
than 6 cm deep.
(3) Set the transfer shift lever to“4L”(part
time 4WD) or“4LLc”(super select 4WD
II).
(4) Drive slowly at a speed of approxi-
mately 5 km/h (3 mph) to avoid splash-
ing too much water.
CAUTION
Do not attempt to cross a stream at
a place where the water is more than
60 cm deep.
Frequent crossing of streams can
adversely affect the life span of the
vehicle; consult an authorized
MITSUBISHI dealer and take the nec-
essary measures to prepare, inspect,
and repair the vehicle.
After crossing a stream, apply the brakes
to be sure they are functioning properly. If
the brakes are wet and not functioning
properly, dry them out by driving slowly
while lightly depressing the brake pedal.
Inspect each part of the vehicle carefully.
Inspection and maintenance follow-
ing rough road operationAfter operating the vehicle in rough road
conditions, be sure to perform the follow-
ing inspection and maintenance proce-
dures :
(1) Check that the vehicle has not been
damaged by rocks, gravel, etc.
(2) Carefully wash the vehicle with water.
Drive the vehicle slowly while lightly
depressing the brake pedal in order to
dry out the brakes. If the brakes still do
not function properly, contact an autho-
rized MITSUBISHI dealer as soon as
possible to have the brakes checked.
(3) Remove insects, dried grass, etc. clog-
ging the radiator core.
(4) If a stream has been crossed, check
the engine, transmission, and differen-
tial oil. If the oil or grease is milky or
cloudy because of water contamina-
tion, it must be replaced with new oil.
(5) Check the inside of the vehicle. If
ingress of water is found, dry the car-
pet etc.
(6) Inspect the headlamps. If the head-
lamp bulb is flooded with water, have
the bulb drained off at an authorized
MITSUBISHI dealer.
(7) Have an authorized MITSUBISHI
dealer replace grease in the wheel
bearings.
Starting and driving
5-41
Div:
Out put date: