light MITSUBISHI SHOGUN 2008 (in English) Owner's Guide
[x] Cancel search | Manufacturer: MITSUBISHI, Model Year: 2008, Model line: SHOGUN, Model: MITSUBISHI SHOGUN 2008Pages: 538, PDF Size: 25.09 MB
Page 156 of 538
3-32 Instruments and controls
3
Selecting settings displays
E00519100045
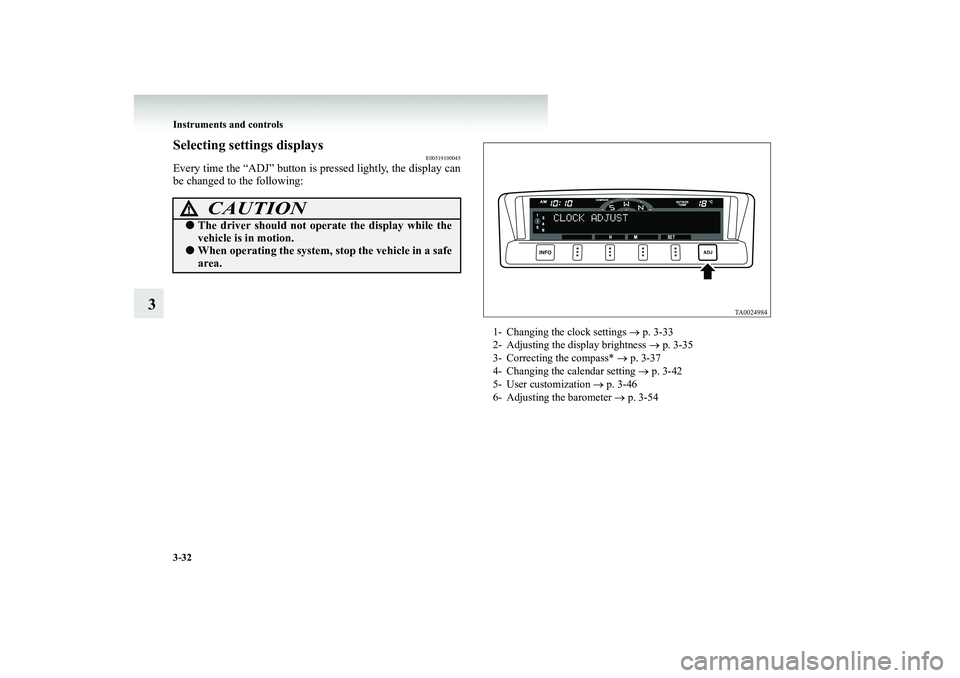
Every time the “ADJ” button is pressed lightly, the display can be changed to the following:
CAUTION
!●
The driver should not opera
te the display while the
vehicle is in motion.
●
When operating the system,
stop the vehicle in a safe
area.
1- Changing the clock settings
→ p. 3-33
2- Adjusting the display brightness
→ p. 3-35
3- Correcting the compass*
→ p. 3-37
4- Changing the calendar setting
→ p. 3-42
5- User customization
→ p. 3-46
6- Adjusting the barometer
→ p. 3-54
BK-BK2008E1ENUK.en-uk-Section6.fm Page
32 Wednesday, January 9, 2008 4:32 PM
Page 158 of 538

3-34 Instruments and controls
3
2. It is possible to adjust the clock using the function buttons
3. After making the adjustment, press the “INFO” button to
select the information display.
NOTE●
Vehicles equipped with the Mitsubishi Multi Communica- tion System (MMCS) also have a clock indication, but the time shown by the MMCS may differ from that shown by the centre information disp
lay because different sources
of data are used for automatic adjustment.
“H”- Adjust “hour”.
The indication increases by one hour, every time youlightly press the “H” function button. If you continuepressing the button for about 2 seconds or more, theindication is fast-forwarded, and then the setting ischanged to the hour selected.
“M”- Adjust “minute”.
The indication increases by one minute, every time youlightly press the “M” function button. If you continuepressing the button for about 2 seconds or more, theindication is fast-forwarded, and then the setting ischanged to the minute selected.
“SET”- To reset the minutes to zero.
The time is adjusted as described below by pressing thefunction button “SET”.●
10:30-11:29 · · · · Change to 11:00
●
11:30-12:29 · · · · Change to 12:00
In this occasion, the display flashes twice before the set-ting is changed.
BK-BK2008E1ENUK.en-uk-Section6.fm Page
34 Wednesday, January 9, 2008 4:32 PM
Page 159 of 538
Instruments and controls
3-35
3
Adjusting the display brightness
E00519300018
The display brightness can be adjusted at 13 levels for both daytime and nighttime. ●
BRIGHTNESS FOR DAYTIME The display brightness is adjusted when the light switch is in the “OFF” position.
●
BRIGHTNESS FOR NIGHTTIME The display brightness is adjusted when the light switch is in the “ ” or “ ” position.
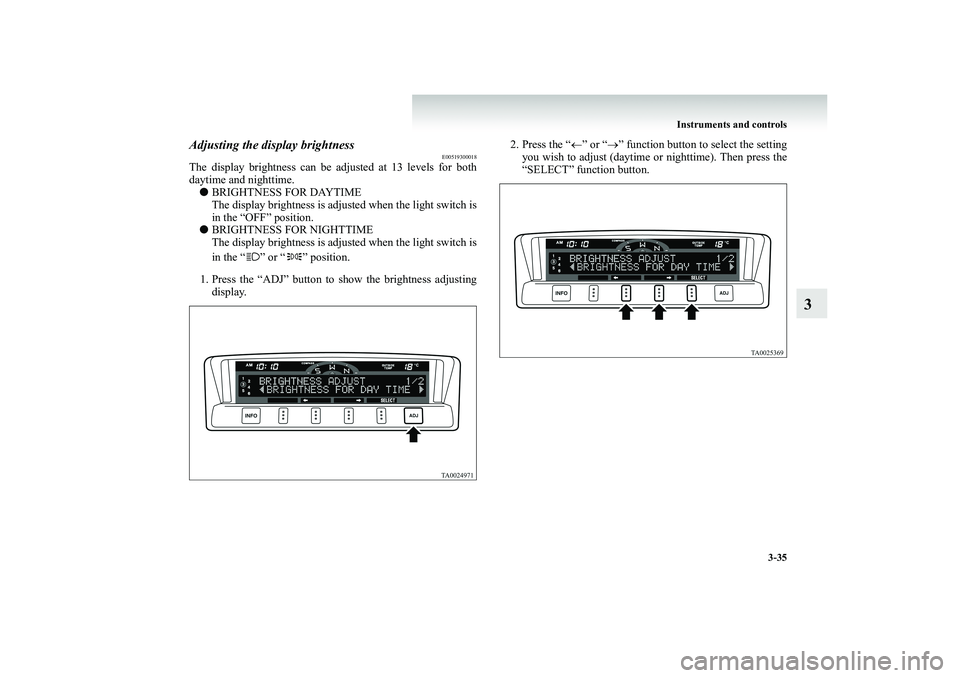
1. Press the “ADJ” button to sh
ow the brightness adjusting
display.
2. Press the “
←” or “
→” function button to select the setting
you wish to adjust (daytime or nighttime). Then press the “SELECT” function button.
BK-BK2008E1ENUK.en-uk-Section6.fm Page
35 Wednesday, January 9, 2008 4:32 PM
Page 160 of 538
3-36 Instruments and controls
3
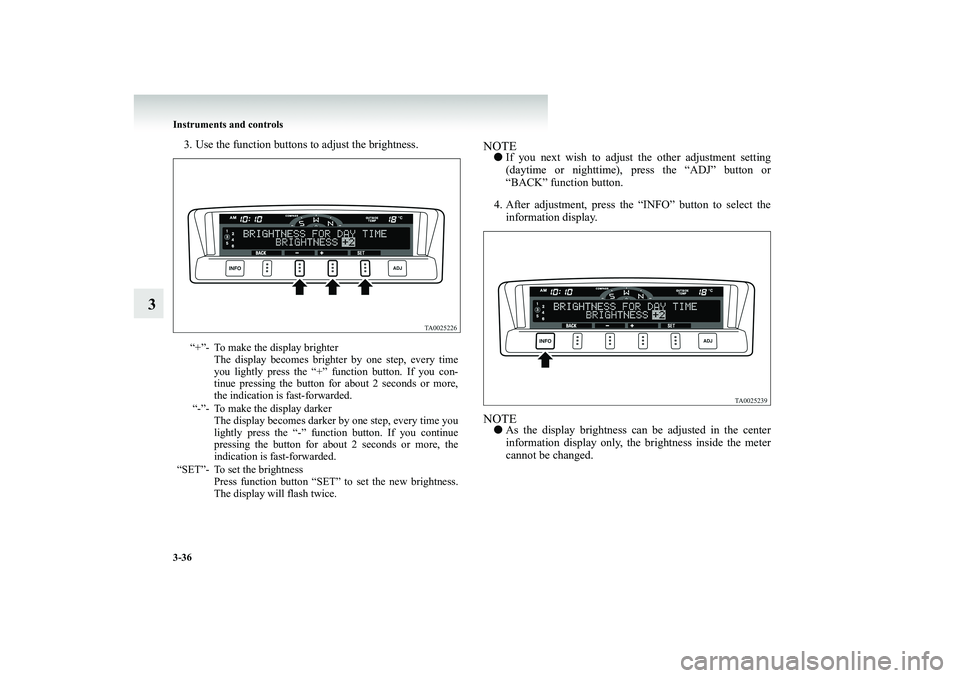
3. Use the function buttons to adjust the brightness.
NOTE●
If you next wish to adjust the other adjustment setting (daytime or nighttime), press the “ADJ” button or “BACK” function button.
4. After adjustment, press the
“INFO” button to select the
information display.
NOTE●
As the display brightness can
be adjusted in the center
information display only, the brightness inside the meter cannot be changed.
“+”- To make the display brighter
The display becomes brighter by one step, every timeyou lightly press the “+” function button. If you con-tinue pressing the button for about 2 seconds or more,the indication is fast-forwarded.
“-”- To make the display darker
The display becomes darker by one step, every time youlightly press the “-” function button. If you continuepressing the button for about 2 seconds or more, theindication is fast-forwarded.
“SET”- To set the brightness
Press function button “SET” to set the new brightness.The display will flash twice.
BK-BK2008E1ENUK.en-uk-Section6.fm Page
36 Wednesday, January 9, 2008 4:32 PM
Page 167 of 538
Instruments and controls
3-43
3
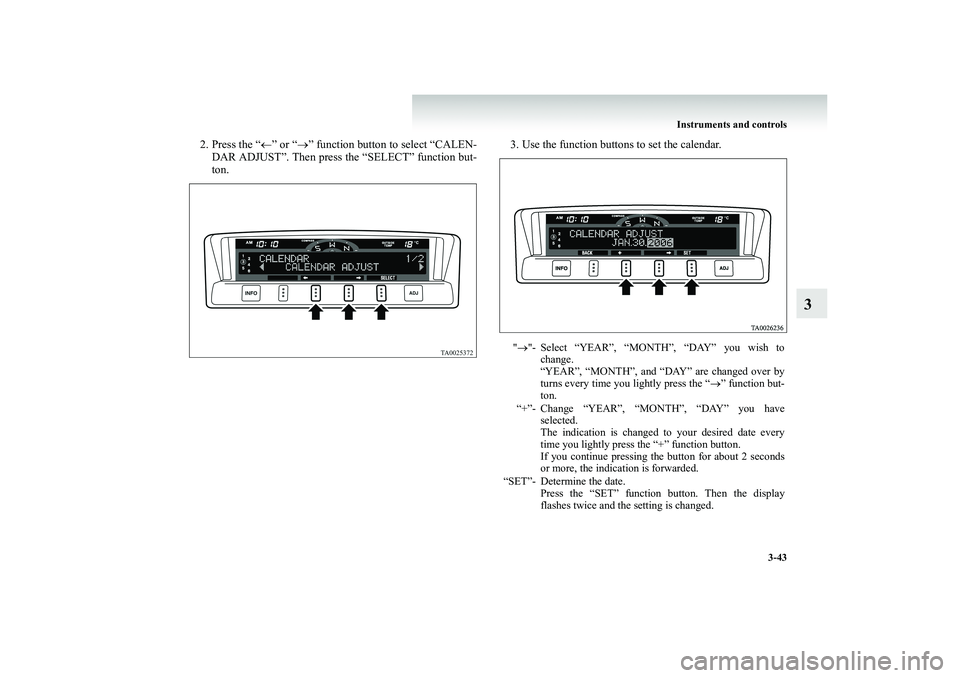
2. Press the “
←” or “
→” function button to select “CALEN-
DAR ADJUST”. Then press the “SELECT” function but- ton.
3. Use the function buttons to set the calendar." →"- Select “YEAR”, “MONTH”, “DAY” you wish to
change.“YEAR”, “MONTH”, and “DAY” are changed over byturns every time you lightly press the “
→” function but-
ton.
“+”- Change “YEAR”, “MONTH”, “DAY” you have
selected.The indication is changed to your desired date everytime you lightly press the “+” function button.If you continue pressing the button for about 2 secondsor more, the indication is forwarded.
“SET”- Determine the date.
Press the “SET” function button. Then the displayflashes twice and the setting is changed.
BK-BK2008E1ENUK.en-uk-Section6.fm Page
43 Wednesday, January 9, 2008 4:32 PM
Page 182 of 538
3-58 Instruments and controls
3
Combination headlamps
and dipper switch
E00506001353
HeadlampsNOTE●
Do not leave the lights on for a long time while the engine is stationary (not running). A run-down battery could result.
●
When it rains, or when the
vehicle has been washed, the
inside of the lens sometimes becomes foggy, but this does not indicate a functional pr
oblem. When the lamp is
switched on, the heat will
remove the fog. However, if
water gathers inside the lamp, we recommend you to have it checked.
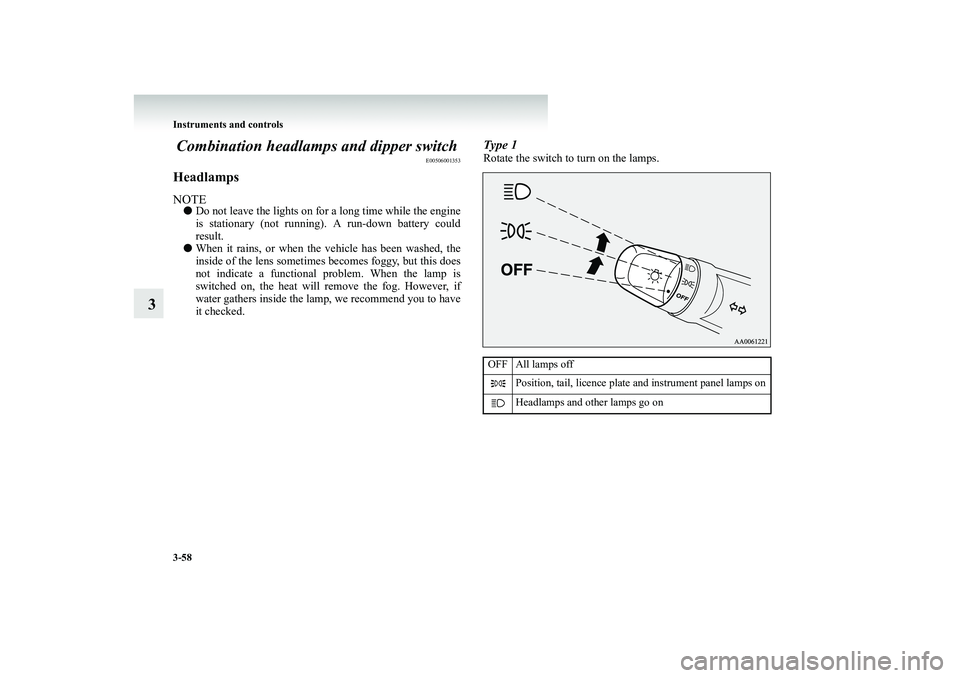
Type 1Rotate the switch to turn on the lamps.OFF All lamps off
Position, tail, licence plate and instrument panel lamps on Headlamps and other lamps go on
BK-BK2008E1ENUK.en-uk-Section6.fm Page
58 Wednesday, January 9, 2008 4:32 PM
Page 183 of 538
Instruments and controls
3-59
3
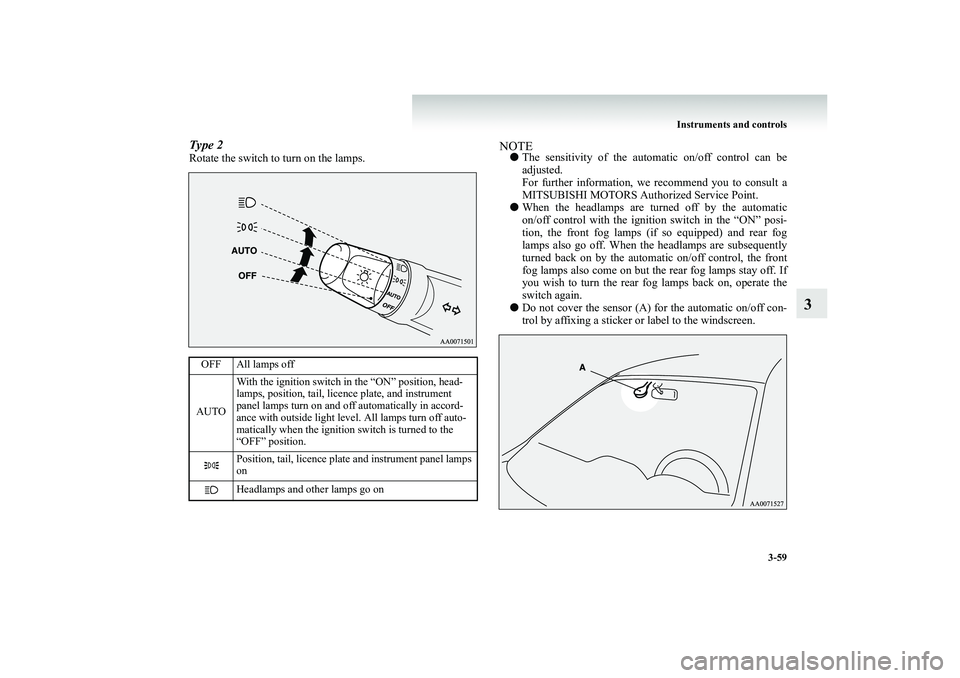
Type 2Rotate the switch to turn on the lamps.
NOTE●
The sensitivity of the automatic on/off control can be adjusted. For further information, we recommend you to consult a MITSUBISHI MOTORS Auth
orized Service Point.
●
When the headlamps are turned off by the automatic on/off control with the ignition switch in the “ON” posi- tion, the front fog lamps (if so equipped) and rear foglamps also go off. When the headlamps are subsequently turned back on by the automatic on/off control, the front fog lamps also come on but the rear fog lamps stay off. Ifyou wish to turn the rear fo
g lamps back on, operate the
switch again.
●
Do not cover the sensor (A) for the automatic on/off con- trol by affixing a sticker or label to the windscreen.
OFF All lamps off AUTO
With the ignition switch in the “ON” position, head- lamps, position, tail, licence plate, and instrument panel lamps turn on and off automatically in accord-ance with outside light level. All lamps turn off auto-matically when the ignition switch is turned to the “OFF” position. Position, tail, licence plate and instrument panel lamps on Headlamps and other lamps go on
BK-BK2008E1ENUK.en-uk-Section6.fm Page
59 Wednesday, January 9, 2008 4:32 PM
Page 185 of 538
Instruments and controls
3-61
3
Dipper (High/Low beam change)
E00506200055
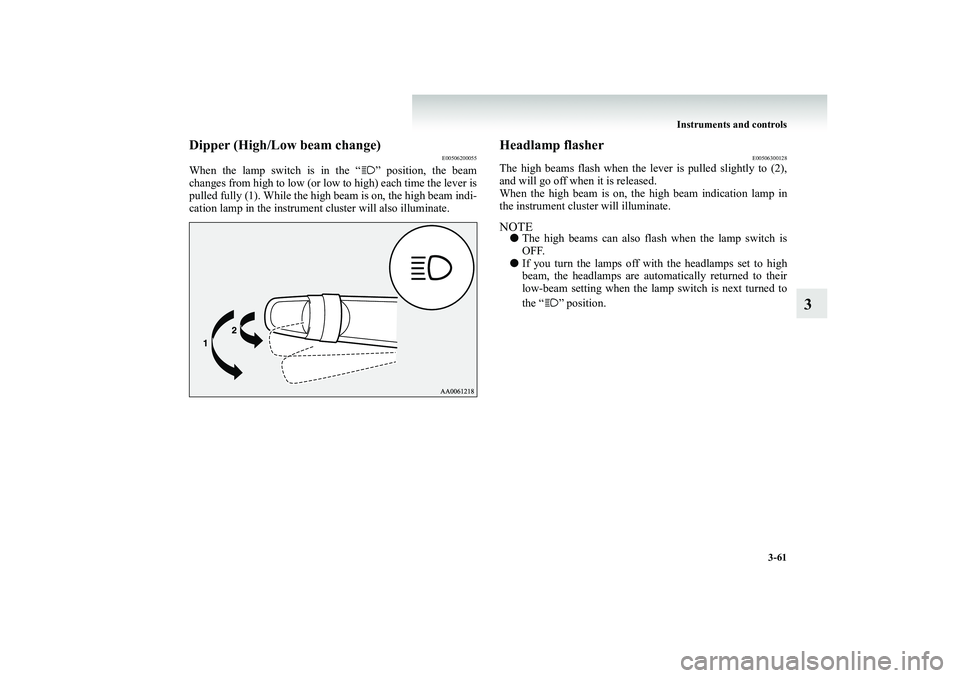
When the lamp switch is in the “ ” position, the beam changes from high to low (or low
to high) each time the lever is
pulled fully (1). While the high b
eam is on, the high beam indi-
cation lamp in the instrument cluster will also illuminate.
Headlamp flasher
E00506300128
The high beams flash when the lever is pulled slightly to (2), and will go off when it is released. When the high beam is on, th
e high beam indication lamp in
the instrument cluster will illuminate.NOTE●
The high beams can also flash when the lamp switch is OFF.
●
If you turn the lamps off with the headlamps set to high beam, the headlamps are automa
tically returned to their
low-beam setting when the lamp
switch is next turned to
the “ ” position.
BK-BK2008E1ENUK.en-uk-Section6.fm Page
61 Wednesday, January 9, 2008 4:32 PM
Page 189 of 538
Instruments and controls
3-65
3
Turn-signal lever
E00506500771
NOTE●
If the lamp flashes unusually quickly, the bulb in a turn- signal lamp may have burned out. We recommend you to have the vehicle inspected.
●
It is possible to activate the following functions. For fur- ther information, we recommend you to consult a MIT- SUBISHI MOTORS Author
ized Service Point.
• Sounding of a buzzer as the turn-signal lamps flash• Flashing of the turn-signal lamps when the lever is oper- ated with the ignition switch in the “ACC” position • The turn signal-lamps 3-flash function for lane changescan be deactivated. • The time required to operate the lever for the 3-flash function can be adjusted.
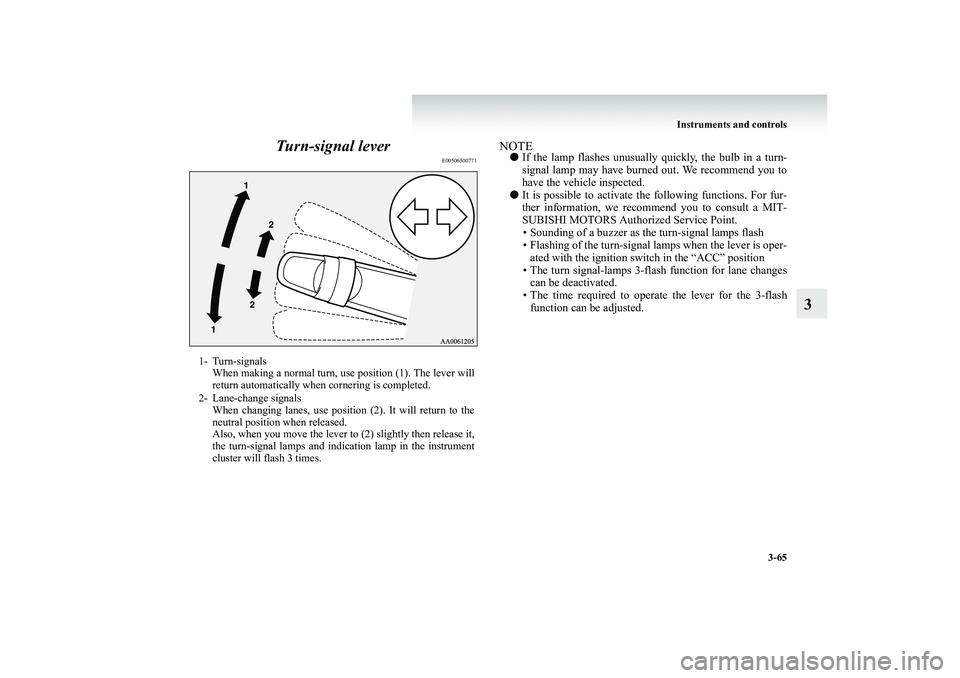
1- Turn-signals
When making a normal turn, use position (1). The lever willreturn automatically when cornering is completed.
2- Lane-change signals
When changing lanes, use position (2). It will return to theneutral position when released.Also, when you move the lever to (2) slightly then release it,the turn-signal lamps and indication lamp in the instrumentcluster will flash 3 times.
BK-BK2008E1ENUK.en-uk-Section6.fm Page
65 Wednesday, January 9, 2008 4:32 PM
Page 204 of 538
4-2 Starting and driving
4
Economical driving
E00600100561
For economical driving, there ar
e some technical requirements
that have to be met. The prerequisite for low fuel consumption is a properly adjusted engine. In order to achieve longer life ofthe vehicle and the most econo
mical operation, we recommend
you to have the vehicle checked
at regular intervals in accord-
ance with the service standards.Fuel economy and generation of exhaust gas and noise are highly influenced by personal driving habits as well as the par- ticular operating conditions. The following points should beobserved in order to minimize w
ear of brakes, tyres and engine
as well as to reduce environmental pollution.StartingAvoid rapid acceleration and sudden starts; such operation will result in higher fuel consumption.ShiftingShift only at an appropriate
speed and engine speed. Always
use the highest gear possible. The transfer shift lever should be set to “2H” when driving on normal roads and express ways to obtain best possible fueleconomy.City trafficFrequent starting and stopping
increases the average fuel con-
sumption. Use roads with smooth
traffic flow whenever possi-
ble. When driving on congested
roads, avoid use of a low gear
at high engine speeds.
IdlingThe vehicle consumes fuel even during idling. Avoid extended idling whenever possible.SpeedAt higher vehicle speed, more fu
el is consumed. Avoid driving
at full speed. Even a slight re
lease of the accelerator pedal will
save a significant amount of fuel.Tyre inflation pressureCheck the tyre inflation pressure
s at regular intervals. Low tyre
inflation pressure increases ro
ad resistance and fuel consump-
tion. In addition, low tyre pres
sures adversely affect tyre wear
and driving stability.LoadDo not drive with unnecessary articles in the luggage compart- ment. Especially during city dr
iving where frequent starting
and stopping is necessary, the increased weight of the vehicle will greatly affect fuel consumption. Also avoid driving with unnecessary luggage or carriers,
etc., on the roof; the increased
air resistance will increase fuel consumption.Cold engine startingStarting of a cold engine consumes more fuel. Unnecessary fuel consumption
is also caused by keeping a hot
engine running. After the engine is started, commence driving as soon as possible.Air conditioningThe use of the air conditioning
will increase the fuel consump-
tion.
BK-BK2008E1ENUK.en-uk-Section7.fm Page 2 Wednesday, January 9, 2008 4:36 PM