stop start MITSUBISHI SHOGUN 2016 (in English) User Guide
[x] Cancel search | Manufacturer: MITSUBISHI, Model Year: 2016, Model line: SHOGUN, Model: MITSUBISHI SHOGUN 2016Pages: 404, PDF Size: 18.95 MB
Page 150 of 404
NOTElBe careful not to get your hands trapped
while a mirror is moving.
l If you move a mirror by hand or it moves af-
ter hitting a person or object, you may not be
able to return it to its original position using the mirror retractor switch. If this happens,
push the mirror retractor switch to place the mirror in its retracted position and then push
the switch again to return the mirror to its original position.
l If the battery voltage is low and you start the
engine while extending the mirrors, the mir- rors may stop part-way. If this happens, push
the mirror retractor switch to retract the mir- rors and then push the switch again to extend
them.
l When freezing has occurred and mirrors fail
to operate as intended, please refrain from
repeated pushing of the retractor switch as
this action can result in burn-out of the mir- ror motor circuits.
Automatic extension of mirrors
If the engine is stopped and started with the
mirrors retracted, the mirrors automatically
extend for safety when the vehicle speed rea-
ches 30 km/h (19 mph).
Heated mirror*
E00601200312
To demist or defrost the outside rear-view
mirrors, press the rear window demister
switch.
The indication lamp (C) will illuminate while
the demister is on.
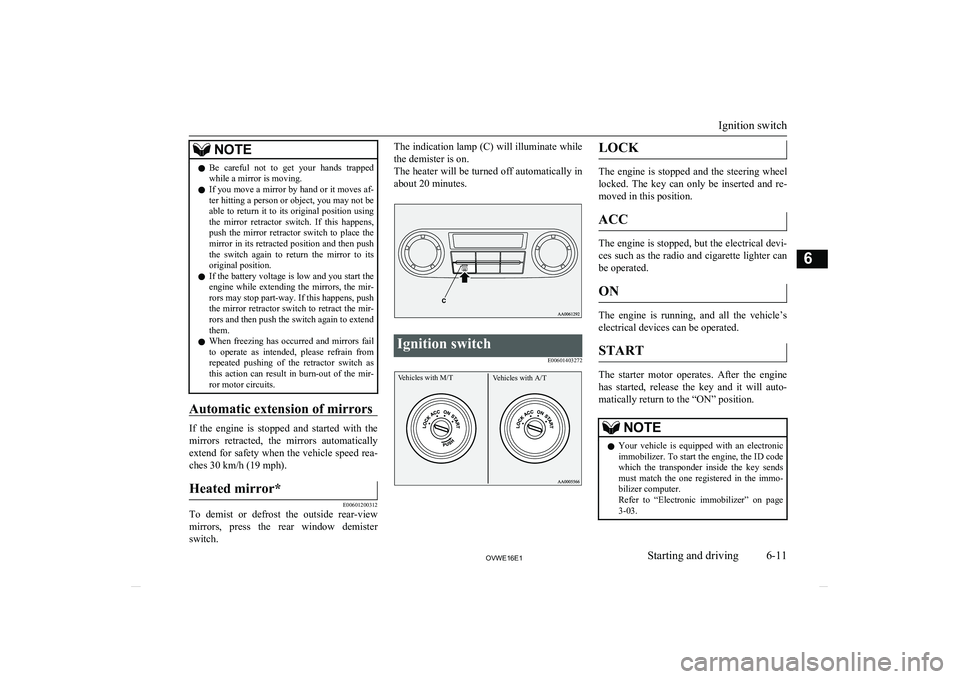
The heater will be turned off automatically in about 20 minutes.Ignition switch
E00601403272
Vehicles with M/TVehicles with A/TLOCK
The engine is stopped and the steering wheel
locked. The key can only be inserted and re- moved in this position.
ACC
The engine is stopped, but the electrical devi-
ces such as the radio and cigarette lighter can be operated.
ON
The engine is running, and all the vehicle’s
electrical devices can be operated.
START
The starter motor operates. After the engine has started, release the key and it will auto- matically return to the “ON” position.
NOTEl Your vehicle is equipped with an electronic
immobilizer. To start the engine, the ID codewhich the transponder inside the key sends must match the one registered in the immo-
bilizer computer.
Refer to “Electronic immobilizer” on page
3-03.
Ignition switch
6-11OVWE16E1Starting and driving6
Page 152 of 404
CAUTIONlDo not remove the ignition key from the ig-
nition switch while driving. The steeringwheel will be locked, causing loss of con-
trol.
l If the engine is stopped while driving, the
brake servomechanism will cease to function and braking efficiency will deteriorate. Also,
the power steering system will not function
and it will require greater manual effort to
operate the steering.
l Do not leave the key in the “ON” position
for a long time when the engine is not run-
ning, doing so will cause the battery to be discharged.
l Do not turn the key to the “START” position
when the engine is running, doing so could damage the starter motor.Steering wheel lock
E00601500298
To lock
Remove the key at the “LOCK” position.
Turn the steering wheel until it is locked.
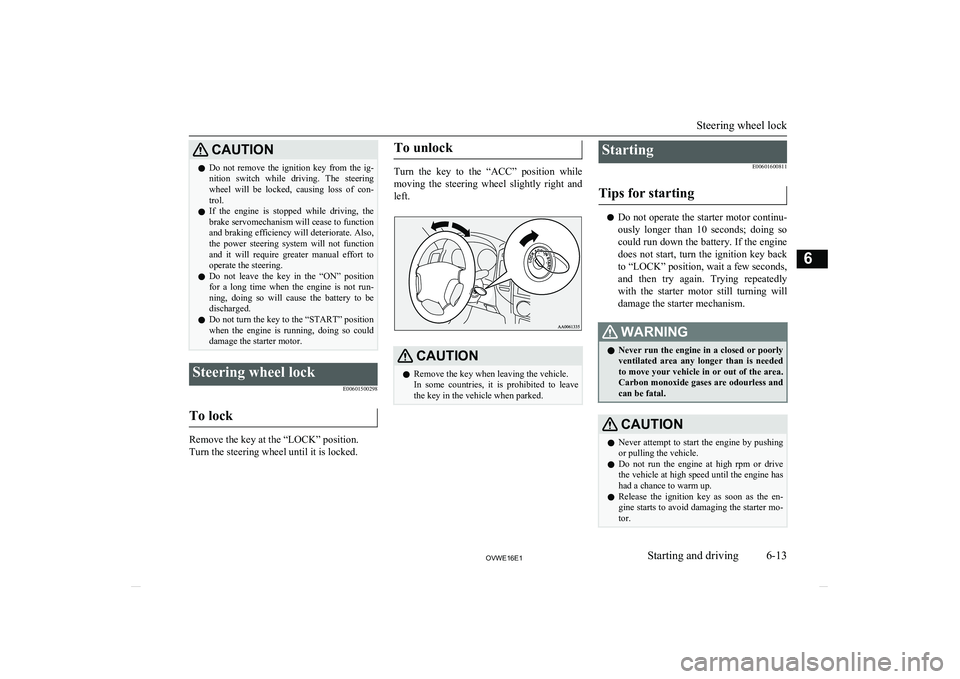
To unlock
Turn the key to the “ACC” position while
moving the steering wheel slightly right and left.
CAUTIONl Remove the key when leaving the vehicle.
In some countries, it is prohibited to leave the key in the vehicle when parked.Starting
E00601600811
Tips for starting
l Do not operate the starter motor continu-
ously longer than 10 seconds; doing so
could run down the battery. If the engine
does not start, turn the ignition key back to “LOCK” position, wait a few seconds,and then try again. Trying repeatedly with the starter motor still turning will
damage the starter mechanism.
WARNINGl Never run the engine in a closed or poorly
ventilated area any longer than is needed to move your vehicle in or out of the area.Carbon monoxide gases are odourless and
can be fatal.CAUTIONl Never attempt to start the engine by pushing
or pulling the vehicle.
l Do not run the engine at high rpm or drive
the vehicle at high speed until the engine has had a chance to warm up.
l Release the ignition key as soon as the en-
gine starts to avoid damaging the starter mo-
tor.
Steering wheel lock
6-13OVWE16E1Starting and driving6
Page 153 of 404
CAUTIONlIf your vehicle is equipped with a turbo-
charger, do not stop the engine immediately
after high-speed or uphill driving. First al-
low the engine to idle to give the turbocharg-
er a chance to cool down.Starting the engine (petrol-
powered vehicles)
E00601703565
The starting procedure is as follows: 1. Insert the ignition key and fasten the seat
belt.
2. Make sure the parking brake is applied.
3. Depress and hold the brake pedal.
4. Fully depress the clutch pedal (M/T).
NOTEl On vehicles with
M/T, the starter will not
operate unless the clutch pedal is fully de- pressed (Clutch interlock).
5. On vehicles with M/T, place the gear-
shift lever in the “N” (Neutral) position.
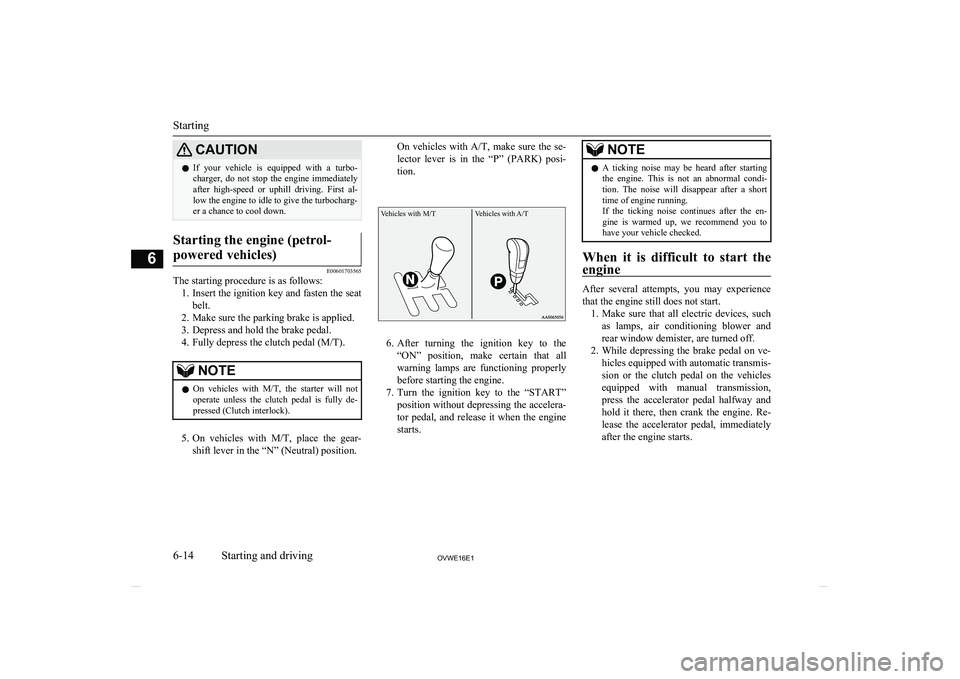
On vehicles with A/T, make sure the se-
lector lever is in the “P” (PARK) posi- tion.Vehicles with M/TVehicles with A/T
6. After turning the ignition key to the
“ON” position, make certain that all
warning lamps are functioning properly before starting the engine.
7. Turn the ignition key to the “START”
position without depressing the accelera-
tor pedal, and release it when the engine starts.
NOTEl A ticking noise may be heard after starting
the engine. This is not an abnormal condi-tion. The noise will disappear after a shorttime of engine running.
If the ticking noise continues after the en-
gine is warmed up, we recommend you to have your vehicle checked.
When it is difficult to start the
engine
After several attempts, you may experience that the engine still does not start. 1. Make sure that all electric devices, such
as lamps, air conditioning blower and
rear window demister, are turned off.
2. While depressing the brake pedal on ve-
hicles equipped with automatic transmis- sion or the clutch pedal on the vehiclesequipped with manual transmission,
press the accelerator pedal halfway and hold it there, then crank the engine. Re-
lease the accelerator pedal, immediately
after the engine starts.
Starting
6-14OVWE16E1Starting and driving6
Page 161 of 404
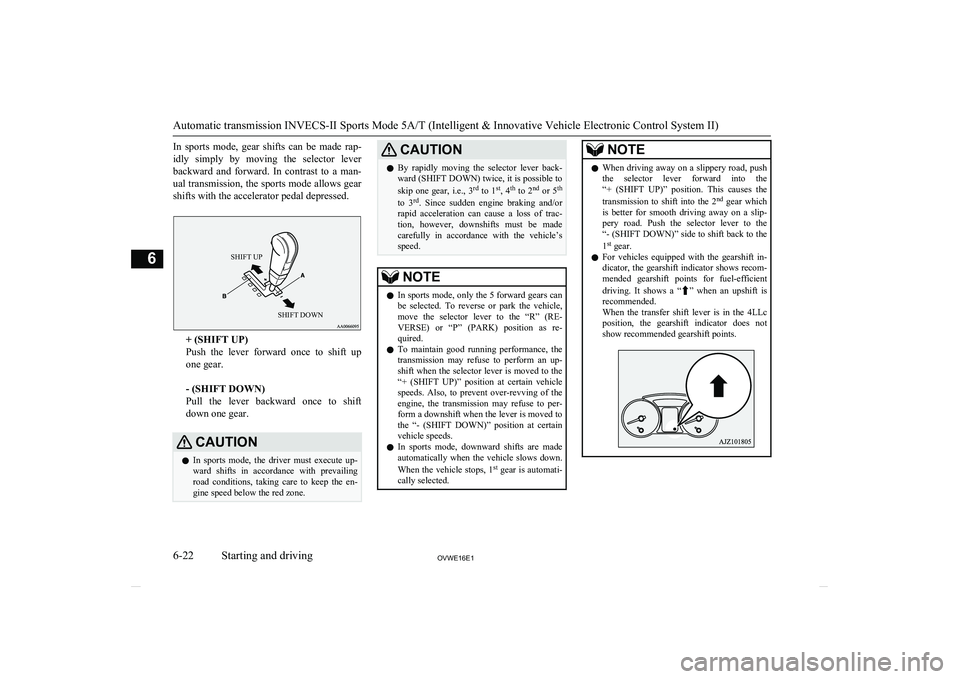
In sports mode, gear shifts can be made rap-idly simply by moving the selector leverbackward and forward. In contrast to a man-
ual transmission, the sports mode allows gear shifts with the accelerator pedal depressed.SHIFT UPSHIFT DOWN
+ (SHIFT UP)
Push the lever forward once to shift up
one gear.
- (SHIFT DOWN)
Pull the lever backward once to shift
down one gear.
CAUTIONl In sports mode, the driver must execute up-
ward shifts in accordance with prevailingroad conditions, taking care to keep the en-
gine speed below the red zone.CAUTIONl By rapidly moving the selector lever back-
ward (SHIFT DOWN) twice, it is possible to
skip one gear, i.e., 3 rd
to 1 st
, 4 th
to 2 nd
or 5 th
to 3 rd
. Since sudden engine braking and/or
rapid acceleration can cause a loss of trac-
tion, however, downshifts must be made carefully in accordance with the vehicle’s
speed.NOTEl In sports mode, only the 5 forward gears can
be selected. To reverse or park the vehicle, move the selector lever to the “R” (RE-
VERSE) or “P” (PARK) position as re- quired.
l To maintain good running performance, the
transmission may refuse to perform an up- shift when the selector lever is moved to the“+ (SHIFT UP)” position at certain vehicle
speeds. Also, to prevent over-revving of the engine, the transmission may refuse to per-
form a downshift when the lever is moved to
the “- (SHIFT DOWN)” position at certain vehicle speeds.
l In sports mode, downward shifts are made
automatically when the vehicle slows down.
When the vehicle stops, 1st
gear is automati-
cally selected.NOTEl When driving away on a slippery road, push
the selector lever forward into the“+ (SHIFT UP)” position. This causes the
transmission to shift into the 2nd
gear which
is better for smooth driving away on a slip-
pery road. Push the selector lever to the
“- (SHIFT DOWN)” side to shift back to the
1 st
gear.
l For vehicles equipped with the gearshift in-
dicator, the gearshift indicator shows recom-
mended gearshift points for fuel-efficient
driving. It shows a “
” when an upshift is
recommended.
When the transfer shift lever is in the 4LLc
position, the gearshift indicator does not show recommended gearshift points.
Automatic transmission INVECS-II Sports Mode 5A/T (Intelligent & Innovative Vehicle Electronic Control System II)
6-22OVWE16E1Starting and driving6
Page 162 of 404
Sports mode indicator
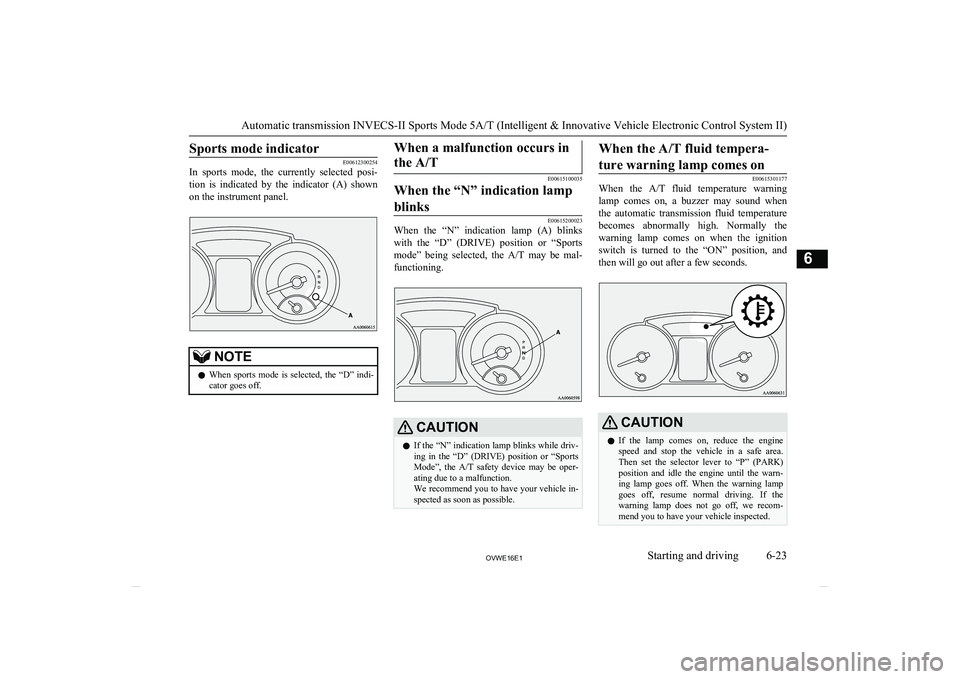
E00612300254
In sports mode, the currently selected posi-
tion is indicated by the indicator (A) shown
on the instrument panel.NOTEl When sports mode is selected, the “D” indi-
cator goes off.When a malfunction occurs in
the A/T
E00615100035
When the “N” indication lamp
blinks
E00615200023
When the “N” indication lamp (A) blinks
with the “D” (DRIVE) position or “Sports mode” being selected, the A/T may be mal-
functioning.
CAUTIONl If the “N” indication lamp blinks while driv-
ing in the “D” (DRIVE) position or “Sports
Mode”, the A/T safety device may be oper-
ating due to a malfunction.
We recommend you to have your vehicle in-
spected as soon as possible.When the A/T fluid tempera-
ture warning lamp comes on
E00615301177
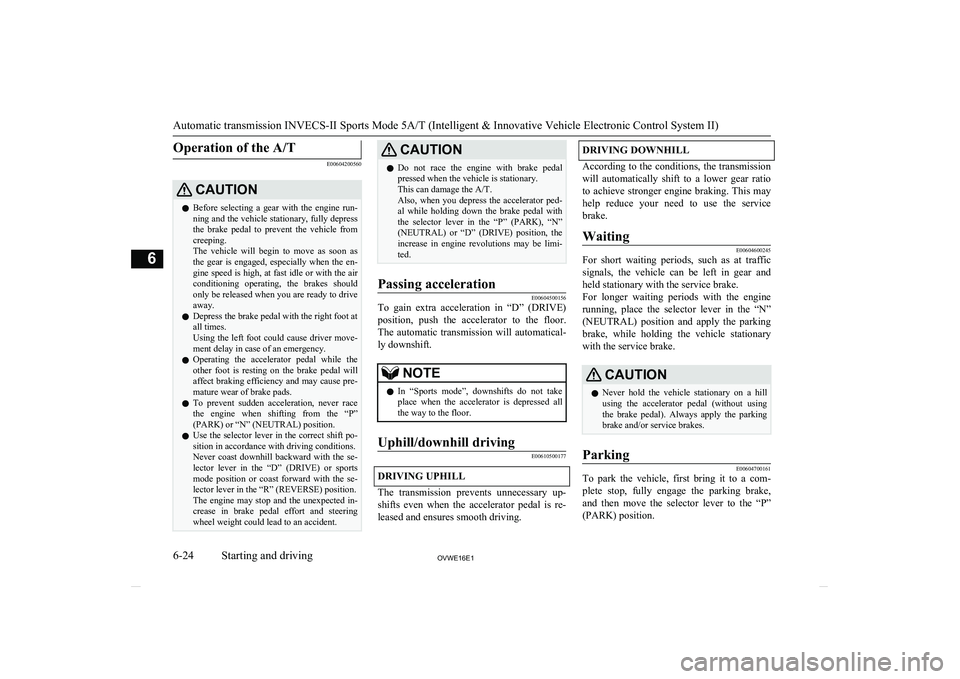
When the A/T fluid temperature warning
lamp comes on, a buzzer may sound when the automatic transmission fluid temperature
becomes abnormally high. Normally the
warning lamp comes on when the ignition
switch is turned to the “ON” position, and then will go out after a few seconds.
CAUTIONl If the lamp comes on, reduce the engine
speed and stop the vehicle in a safe area.Then set the selector lever to “P” (PARK)
position and idle the engine until the warn-
ing lamp goes off. When the warning lamp goes off, resume normal driving. If the
warning lamp does not go off, we recom- mend you to have your vehicle inspected.
Automatic transmission INVECS-II Sports Mode 5A/T (Intelligent & Innovative Vehicle Electronic Control System II)
6-23OVWE16E1Starting and driving6
Page 163 of 404
Operation of the A/T
E00604200560
CAUTIONlBefore selecting a gear with the engine run-
ning and the vehicle stationary, fully depressthe brake pedal to prevent the vehicle from
creeping.
The vehicle will begin to move as soon as the gear is engaged, especially when the en-
gine speed is high, at fast idle or with the air conditioning operating, the brakes should
only be released when you are ready to drive
away.
l Depress the brake pedal with the right foot at
all times.
Using the left foot could cause driver move- ment delay in case of an emergency.
l Operating the accelerator pedal while the
other foot is resting on the brake pedal will affect braking efficiency and may cause pre-
mature wear of brake pads.
l To prevent sudden acceleration, never race
the engine when shifting from the “P”
(PARK) or “N” (NEUTRAL) position.
l Use the selector lever in the correct shift po-
sition in accordance with driving conditions. Never coast downhill backward with the se- lector lever in the “D” (DRIVE) or sportsmode position or coast forward with the se-
lector lever in the “R” (REVERSE) position. The engine may stop and the unexpected in- crease in brake pedal effort and steering
wheel weight could lead to an accident.CAUTIONl Do not race the engine with brake pedal
pressed when the vehicle is stationary.
This can damage the A/T.
Also, when you depress the accelerator ped- al while holding down the brake pedal withthe selector lever in the “P” (PARK), “N”
(NEUTRAL) or “D” (DRIVE) position, the
increase in engine revolutions may be limi-
ted.Passing acceleration
E00604500156
To gain extra acceleration in “D” (DRIVE)
position, push the accelerator to the floor.The automatic transmission will automatical- ly downshift.
NOTEl In “Sports mode”, downshifts do not take
place when the accelerator is depressed all
the way to the floor.Uphill/downhill driving
E00610500177
DRIVING UPHILL
The transmission prevents unnecessary up-
shifts even when the accelerator pedal is re- leased and ensures smooth driving.
DRIVING DOWNHILL
According to the conditions, the transmission
will automatically shift to a lower gear ratio to achieve stronger engine braking. This mayhelp reduce your need to use the service brake.
Waiting
E00604600245
For short waiting periods, such as at trafficsignals, the vehicle can be left in gear and held stationary with the service brake.
For longer waiting periods with the engine
running, place the selector lever in the “N” (NEUTRAL) position and apply the parking
brake, while holding the vehicle stationary with the service brake.
CAUTIONl Never hold the vehicle stationary on a hill
using the accelerator pedal (without using
the brake pedal). Always apply the parking brake and/or service brakes.Parking
E00604700161
To park the vehicle, first bring it to a com-
plete stop, fully engage the parking brake,and then move the selector lever to the “P”
(PARK) position.
Automatic transmission INVECS-II Sports Mode 5A/T (Intelligent & Innovative Vehicle Electronic Control System II)
6-24OVWE16E1Starting and driving6
Page 166 of 404
To shift fromToProcedureVehicles with M/TVehicles with A/T2H4HThe transfer shift lever can be operated while the ve-
hicle is either moving or stationary.
When the vehicle is not in motion, shift the gearshift
lever to the “N” (Neutral) position before operating
the transfer shift lever.
When the vehicle is moving, and only while it can be
steered straight ahead, and release the accelerator ped- al before operating the transfer shift lever.The transfer shift lever can be operated while the
vehicle is either moving or stationary.
When the vehicle is not in motion, shift the selector
lever to the “N” (NEUTRAL) position before oper-
ating the transfer shift lever.
When the vehicle is moving, and only while it can
be steered straight ahead, shift the selector lever to
the “D” (DRIVE) position, and release the accelera-
tor pedal before operating the transfer shift lever.4H2H or 4HLc
4HLc4H
4HLc4LLcStop the vehicle, depress the clutch pedal to the floor
and operate the transfer shift lever.
Keep depressing the clutch pedal while the
2WD/4WD operation indication lamp continues to
blink.
Stop the vehicle, shift the selector lever to the “N”
(NEUTRAL) position, and operate the transfer shift
lever.4LLc4HLcNOTEl Shifting of the lever among “2H” ↔ “4H”
↔ “4HLc” should only be done at speedsbelow 100 km/h (62 mph).
l When shifting from “2H” to “4H” in cold
weather while the vehicle is in motion, the transmission gear may make some noise. In
cold weather, try to shift the gear while the
vehicle is stopped.NOTEl When the lever is shifted between “2H” ↔
“4H” or “4H” ↔ “4HLc” while the vehicle is stopped, the 2WD/4WD operation indica-
tion lamp blinks while the selection is in process. Drive slowly and normally afterconfirming that the lamp is illuminated. Re-
fer to “2WD/4WD operation indication lamp” on page 6-28.
l Do not move the selector lever while the
2WD/4WD operation indication lamp isblinking.NOTEl On vehicles with cruise control, when the
lever is shifted among “2H” ↔ “4H” ↔
“4HLc” while the cruise control is activated,
the transfer gear may make some noise.CAUTIONl Do not operate the transfer shift lever while
the rear wheels of the vehicle are slipping on snow or ice.
Super select 4WD II (SS4 II)
6-27OVWE16E1Starting and driving6
Page 169 of 404
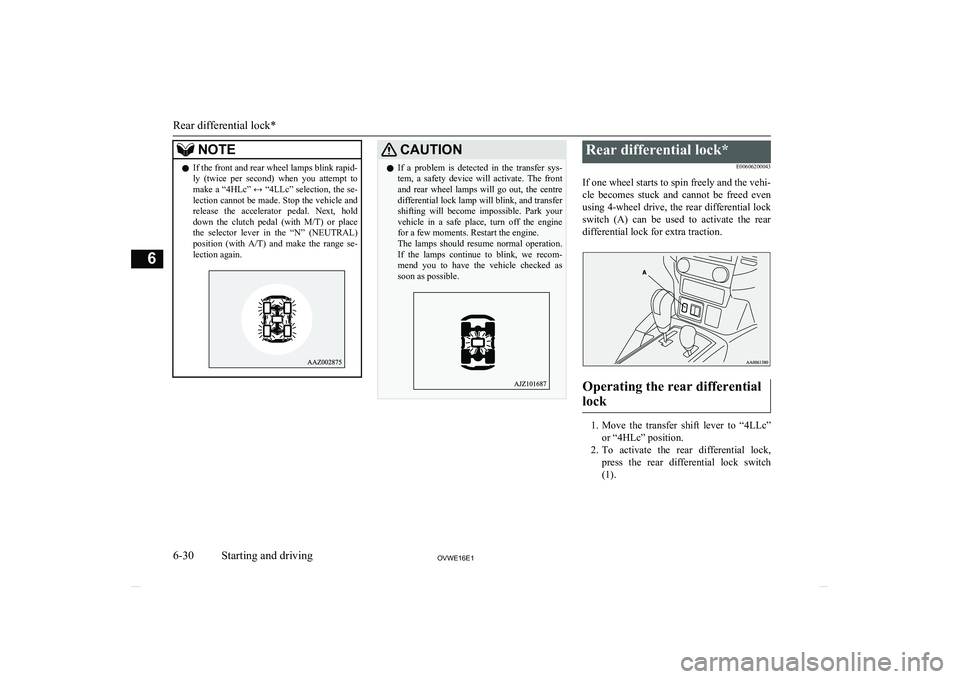
NOTElIf the front and rear wheel lamps blink rapid-
ly (twice per second) when you attempt to make a “4HLc” ↔ “4LLc” selection, the se- lection cannot be made. Stop the vehicle and
release the accelerator pedal. Next, hold
down the clutch pedal (with M/T) or place
the selector lever in the “N” (NEUTRAL)
position (with A/T) and make the range se-
lection again.CAUTIONl If a problem is detected in the transfer sys-
tem, a safety device will activate. The front and rear wheel lamps will go out, the centre
differential lock lamp will blink, and transfer shifting will become impossible. Park your vehicle in a safe place, turn off the engine
for a few moments. Restart the engine.
The lamps should resume normal operation. If the lamps continue to blink, we recom-
mend you to have the vehicle checked as soon as possible.Rear differential lock*
E00606200043
If one wheel starts to spin freely and the vehi-
cle becomes stuck and cannot be freed even using 4-wheel drive, the rear differential lock
switch (A) can be used to activate the rear differential lock for extra traction.
Operating the rear differential
lock
1. Move the transfer shift lever to “4LLc”
or “4HLc” position.
2. To activate the rear differential lock,
press the rear differential lock switch
(1).
Rear differential lock*
6-30OVWE16E1Starting and driving6
Page 170 of 404
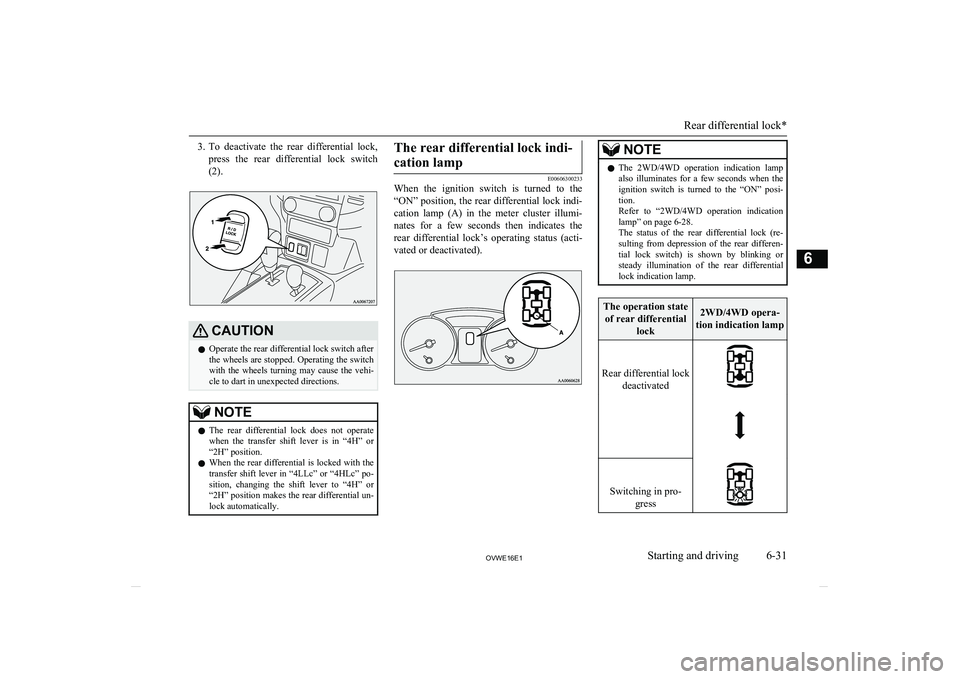
3.To deactivate the rear differential lock,
press the rear differential lock switch
(2).CAUTIONl Operate the rear differential lock switch after
the wheels are stopped. Operating the switch
with the wheels turning may cause the vehi- cle to dart in unexpected directions.NOTEl The rear differential lock does not operate
when the transfer shift lever is in “4H” or
“2H” position.
l When the rear differential is locked with the
transfer shift lever in “4LLc” or “4HLc” po- sition, changing the shift lever to “4H” or“2H” position makes the rear differential un- lock automatically.The rear differential lock indi-
cation lamp
E00606300233
When the ignition switch is turned to the
“ON” position, the rear differential lock indi- cation lamp (A) in the meter cluster illumi-nates for a few seconds then indicates the
rear differential lock’s operating status (acti-
vated or deactivated).
NOTEl The 2WD/4WD operation indication lamp
also illuminates for a few seconds when the
ignition switch is turned to the “ON” posi- tion.
Refer to “2WD/4WD operation indication
lamp” on page 6-28.
The status of the rear differential lock (re- sulting from depression of the rear differen-
tial lock switch) is shown by blinking or steady illumination of the rear differential
lock indication lamp.The operation state
of rear differential lock2WD/4WD opera-
tion indication lamp
Rear differential lock deactivated Switching in pro- gressRear differential lock*
6-31OVWE16E1Starting and driving6
Page 178 of 404
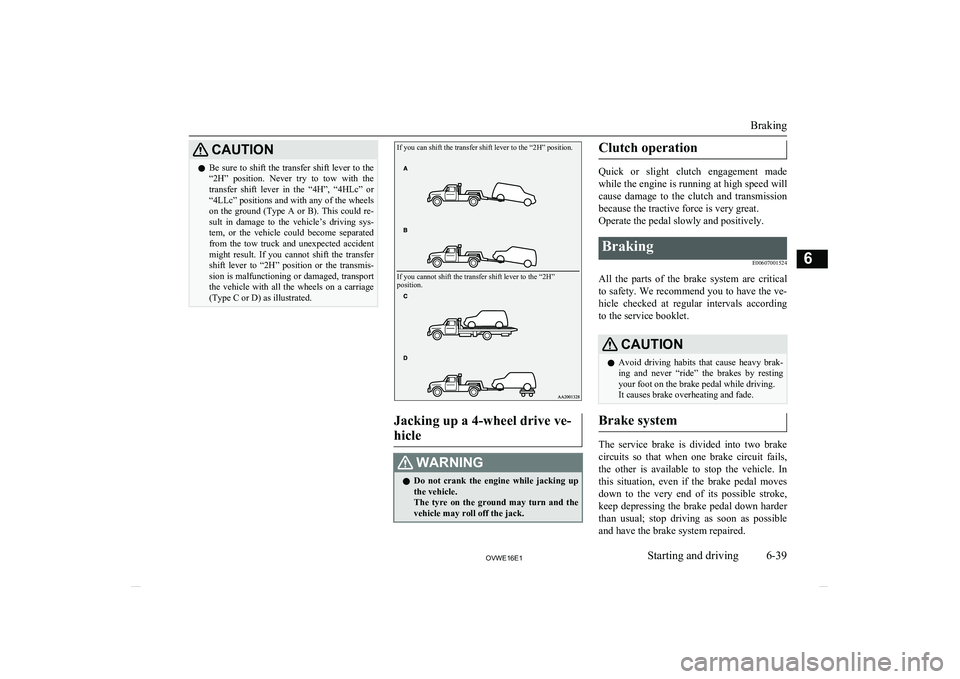
CAUTIONlBe sure to shift the transfer shift lever to the
“2H” position. Never try to tow with the transfer shift lever in the “4H”, “4HLc” or
“4LLc” positions and with any of the wheels
on the ground (Type A or B). This could re- sult in damage to the vehicle’s driving sys- tem, or the vehicle could become separated from the tow truck and unexpected accident
might result. If you cannot shift the transfer shift lever to “2H” position or the transmis-
sion is malfunctioning or damaged, transport the vehicle with all the wheels on a carriage (Type C or D) as illustrated.If you can shift the transfer shift lever to the “2H” position.If you cannot shift the transfer shift lever to the “2H”
position.
Jacking up a 4-wheel drive ve-
hicle
WARNINGl Do not crank the engine while jacking up
the vehicle.
The tyre on the ground may turn and the
vehicle may roll off the jack.Clutch operation
Quick or slight clutch engagement made
while the engine is running at high speed will
cause damage to the clutch and transmission because the tractive force is very great.
Operate the pedal slowly and positively.
Braking
E00607001524
All the parts of the brake system are critical
to safety. We recommend you to have the ve- hicle checked at regular intervals according
to the service booklet.
CAUTIONl Avoid driving habits that cause heavy brak-
ing and never “ride” the brakes by resting
your foot on the brake pedal while driving.
It causes brake overheating and fade.
Brake system
The service brake is divided into two brake
circuits so that when one brake circuit fails, the other is available to stop the vehicle. In
this situation, even if the brake pedal moves down to the very end of its possible stroke,
keep depressing the brake pedal down harder than usual; stop driving as soon as possible
and have the brake system repaired.
Braking
6-39OVWE16E1Starting and driving6