NISSAN ALMERA 2001 Service Manual
Manufacturer: NISSAN, Model Year: 2001, Model line: ALMERA, Model: NISSAN ALMERA 2001Pages: 2898, PDF Size: 60.76 MB
Page 2671 of 2898
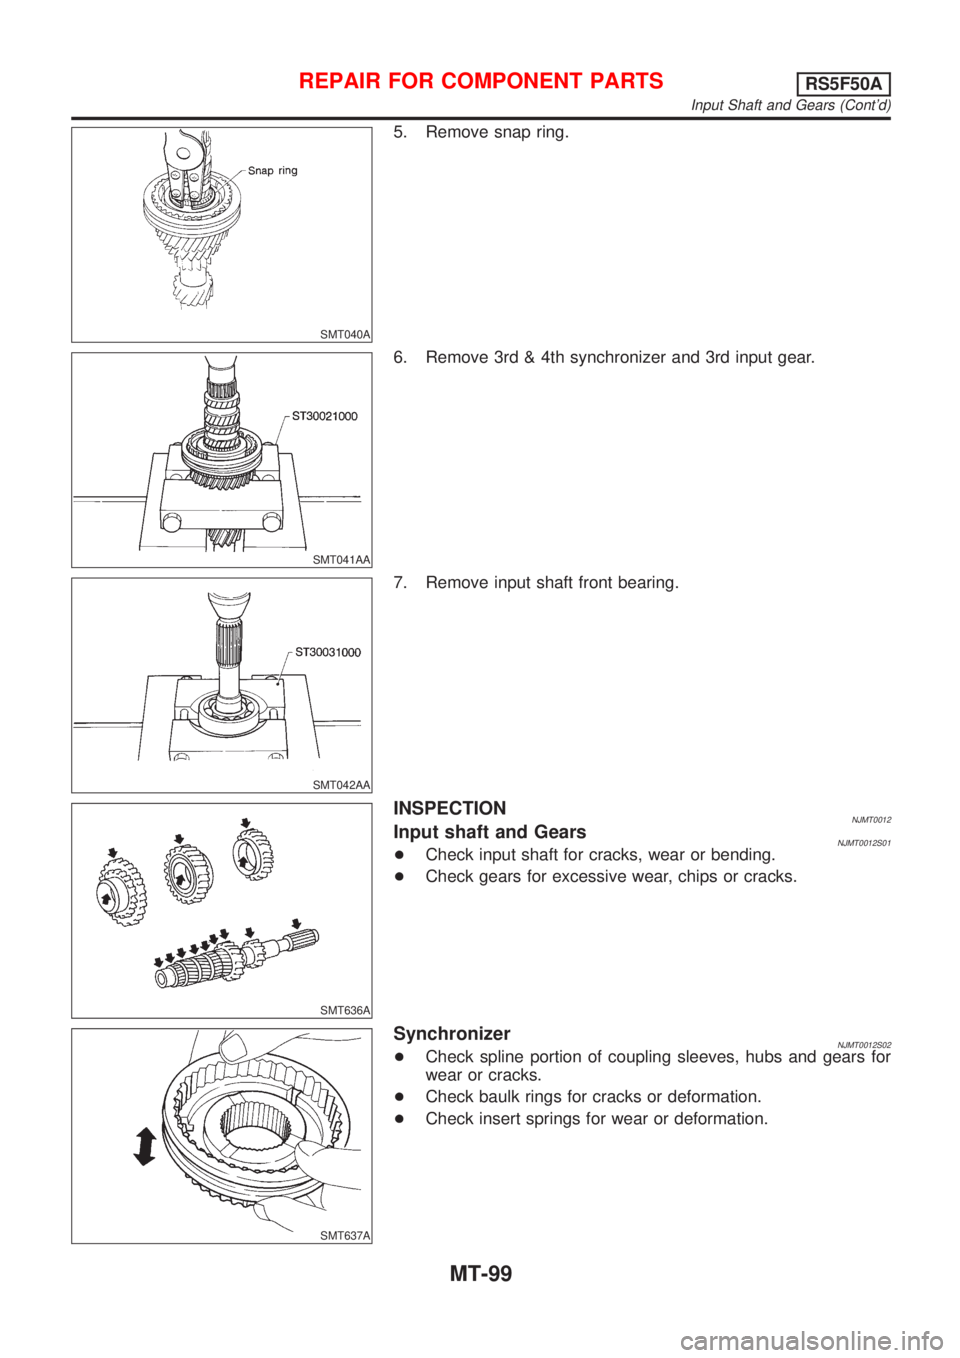
SMT040A
5. Remove snap ring.
SMT041AA
6. Remove 3rd & 4th synchronizer and 3rd input gear.
SMT042AA
7. Remove input shaft front bearing.
SMT636A
INSPECTIONNJMT0012Input shaft and GearsNJMT0012S01+Check input shaft for cracks, wear or bending.
+Check gears for excessive wear, chips or cracks.
SMT637A
SynchronizerNJMT0012S02+Check spline portion of coupling sleeves, hubs and gears for
wear or cracks.
+Check baulk rings for cracks or deformation.
+Check insert springs for wear or deformation.
REPAIR FOR COMPONENT PARTSRS5F50A
Input Shaft and Gears (Cont'd)
MT-99
Page 2672 of 2898
SMT140
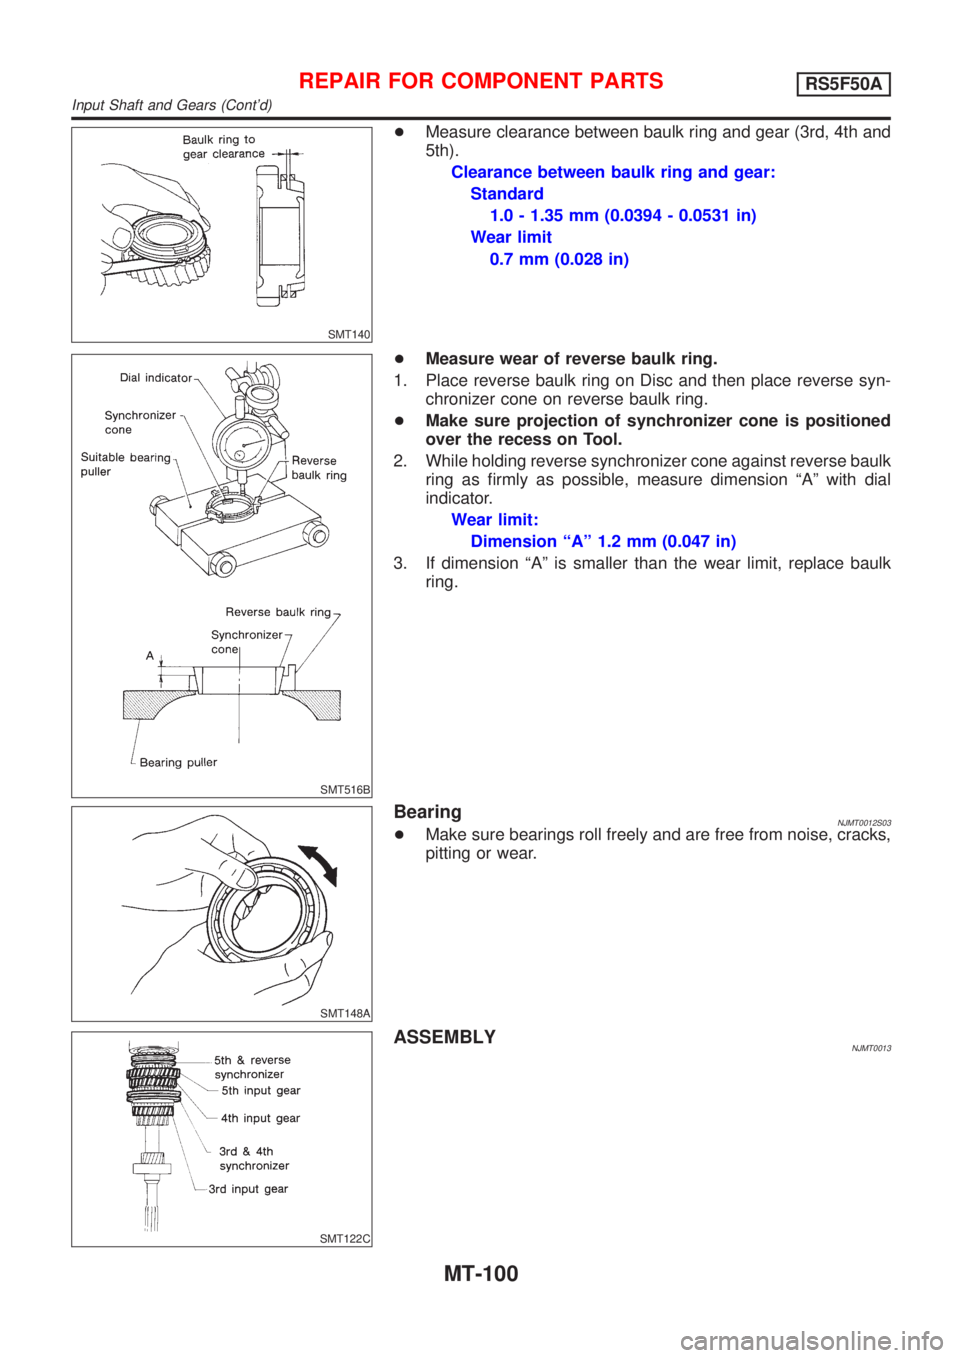
+Measure clearance between baulk ring and gear (3rd, 4th and
5th).
Clearance between baulk ring and gear:
Standard
1.0 - 1.35 mm (0.0394 - 0.0531 in)
Wear limit
0.7 mm (0.028 in)
SMT516B
+Measure wear of reverse baulk ring.
1. Place reverse baulk ring on Disc and then place reverse syn-
chronizer cone on reverse baulk ring.
+Make sure projection of synchronizer cone is positioned
over the recess on Tool.
2. While holding reverse synchronizer cone against reverse baulk
ring as firmly as possible, measure dimension ªAº with dial
indicator.
Wear limit:
Dimension ªAº 1.2 mm (0.047 in)
3. If dimension ªAº is smaller than the wear limit, replace baulk
ring.
SMT148A
BearingNJMT0012S03+Make sure bearings roll freely and are free from noise, cracks,
pitting or wear.
SMT122C
ASSEMBLYNJMT0013
REPAIR FOR COMPONENT PARTSRS5F50A
Input Shaft and Gears (Cont'd)
MT-100
Page 2673 of 2898
SMT441C
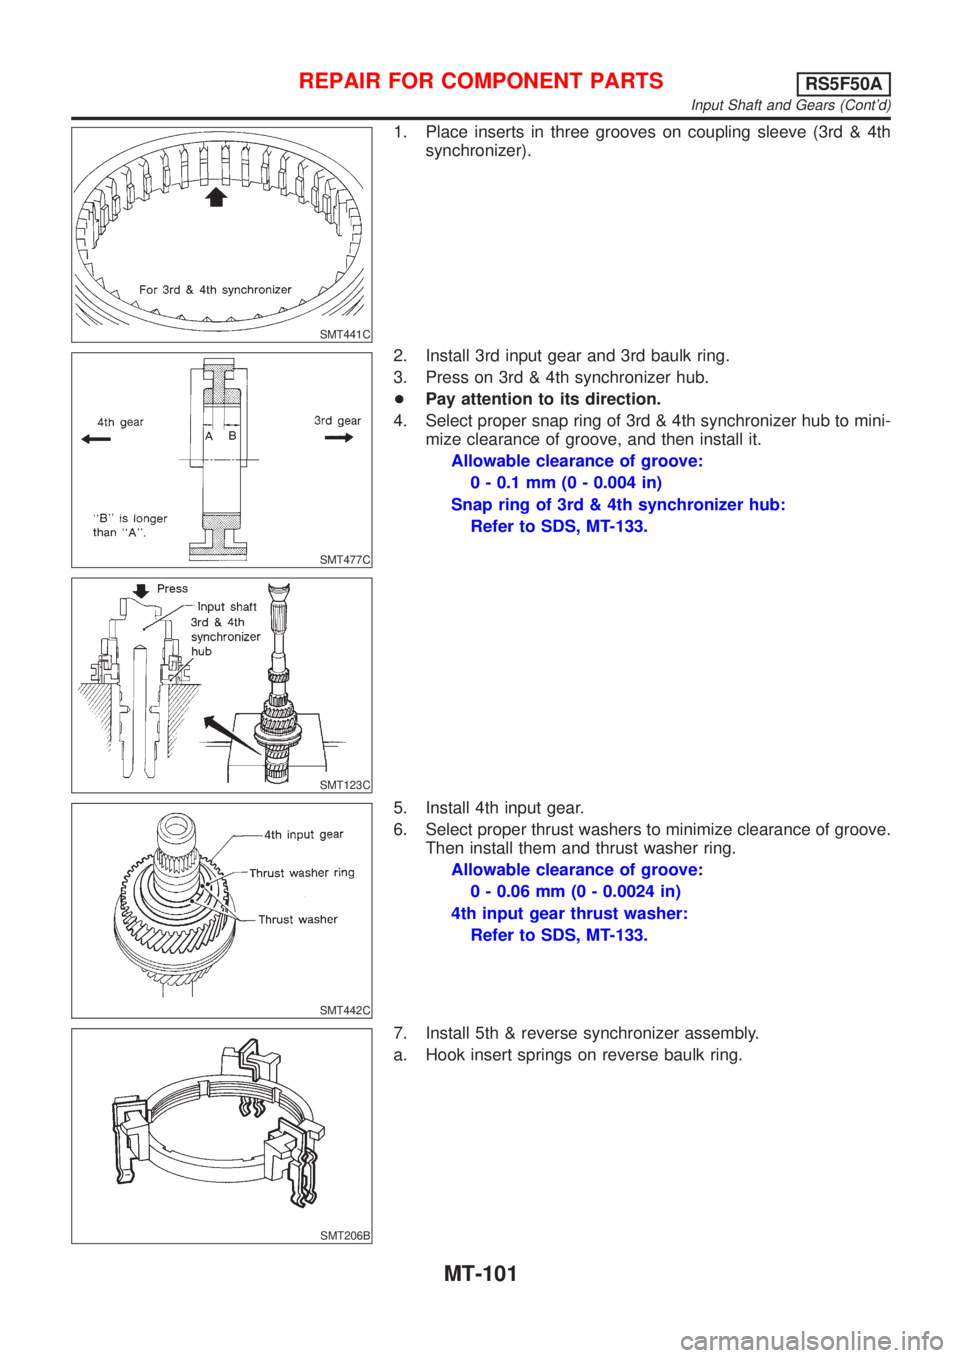
1. Place inserts in three grooves on coupling sleeve (3rd & 4th
synchronizer).
SMT477C
SMT123C
2. Install 3rd input gear and 3rd baulk ring.
3. Press on 3rd & 4th synchronizer hub.
+Pay attention to its direction.
4. Select proper snap ring of 3rd & 4th synchronizer hub to mini-
mize clearance of groove, and then install it.
Allowable clearance of groove:
0 - 0.1 mm (0 - 0.004 in)
Snap ring of 3rd & 4th synchronizer hub:
Refer to SDS, MT-133.
SMT442C
5. Install 4th input gear.
6. Select proper thrust washers to minimize clearance of groove.
Then install them and thrust washer ring.
Allowable clearance of groove:
0 - 0.06 mm (0 - 0.0024 in)
4th input gear thrust washer:
Refer to SDS, MT-133.
SMT206B
7. Install 5th & reverse synchronizer assembly.
a. Hook insert springs on reverse baulk ring.
REPAIR FOR COMPONENT PARTSRS5F50A
Input Shaft and Gears (Cont'd)
MT-101
Page 2674 of 2898
SMT752C
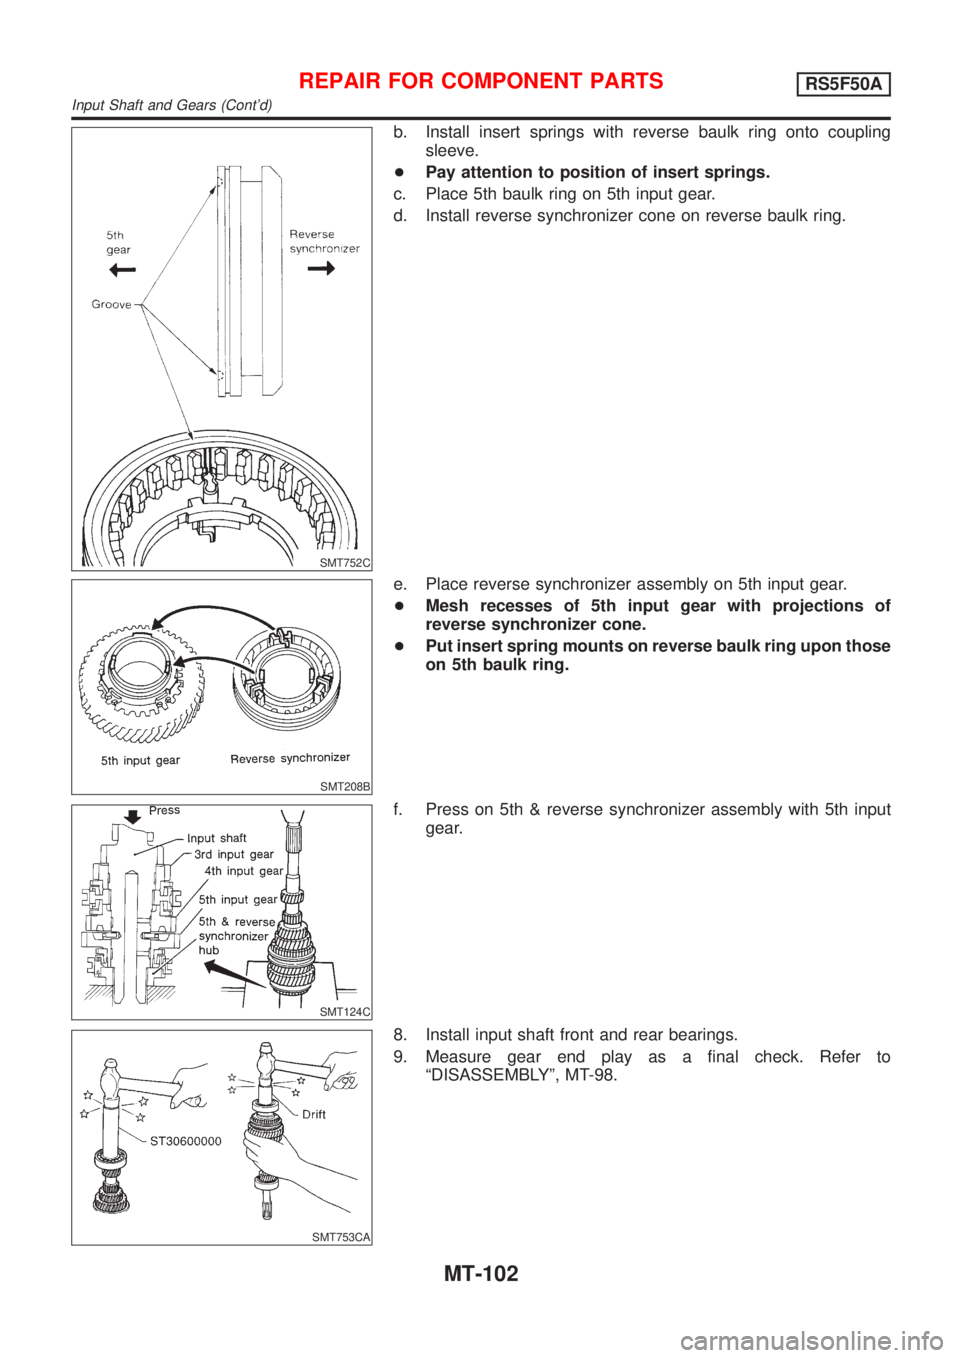
b. Install insert springs with reverse baulk ring onto coupling
sleeve.
+Pay attention to position of insert springs.
c. Place 5th baulk ring on 5th input gear.
d. Install reverse synchronizer cone on reverse baulk ring.
SMT208B
e. Place reverse synchronizer assembly on 5th input gear.
+Mesh recesses of 5th input gear with projections of
reverse synchronizer cone.
+Put insert spring mounts on reverse baulk ring upon those
on 5th baulk ring.
SMT124C
f. Press on 5th & reverse synchronizer assembly with 5th input
gear.
SMT753CA
8. Install input shaft front and rear bearings.
9. Measure gear end play as a final check. Refer to
ªDISASSEMBLYº, MT-98.
REPAIR FOR COMPONENT PARTSRS5F50A
Input Shaft and Gears (Cont'd)
MT-102
Page 2675 of 2898
SMT191A
Mainshaft and Gears
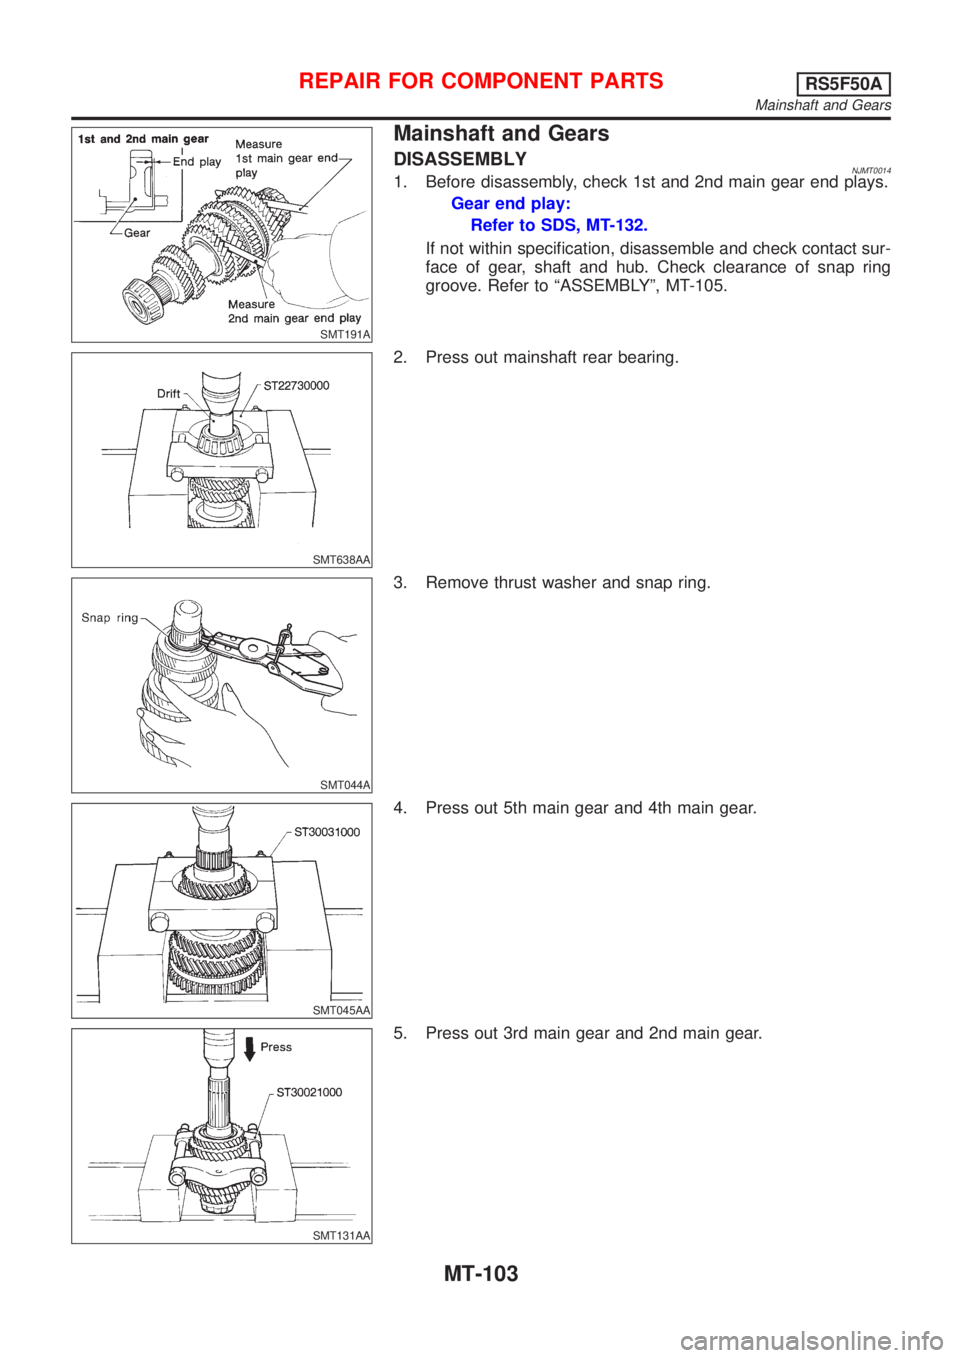
DISASSEMBLYNJMT00141. Before disassembly, check 1st and 2nd main gear end plays.
Gear end play:
Refer to SDS, MT-132.
If not within specification, disassemble and check contact sur-
face of gear, shaft and hub. Check clearance of snap ring
groove. Refer to ªASSEMBLYº, MT-105.
SMT638AA
2. Press out mainshaft rear bearing.
SMT044A
3. Remove thrust washer and snap ring.
SMT045AA
4. Press out 5th main gear and 4th main gear.
SMT131AA
5. Press out 3rd main gear and 2nd main gear.
REPAIR FOR COMPONENT PARTSRS5F50A
Mainshaft and Gears
MT-103
Page 2676 of 2898
SMT047A
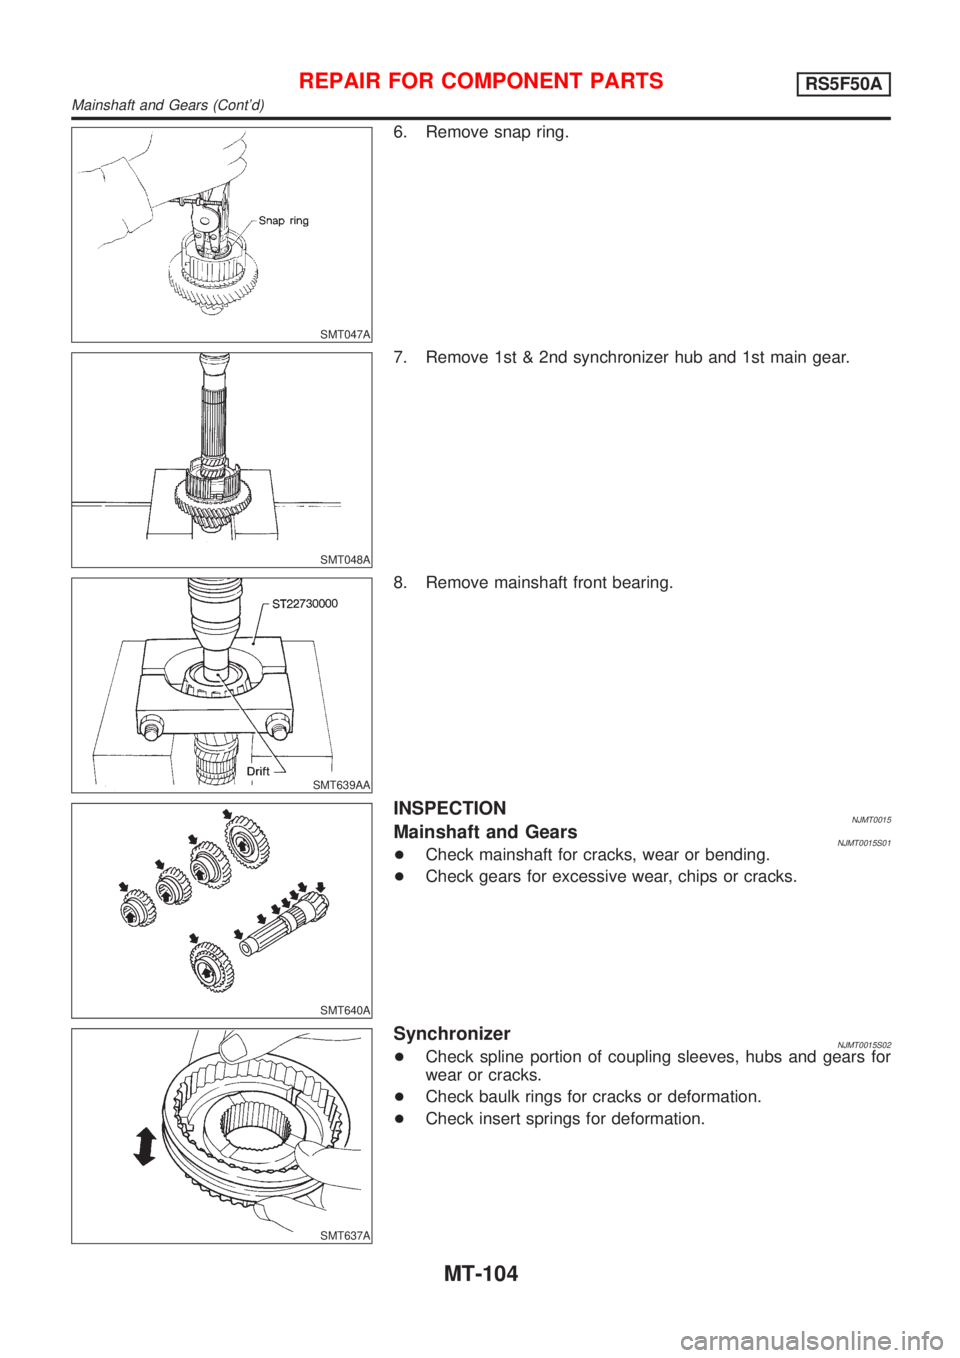
6. Remove snap ring.
SMT048A
7. Remove 1st & 2nd synchronizer hub and 1st main gear.
SMT639AA
8. Remove mainshaft front bearing.
SMT640A
INSPECTIONNJMT0015Mainshaft and GearsNJMT0015S01+Check mainshaft for cracks, wear or bending.
+Check gears for excessive wear, chips or cracks.
SMT637A
SynchronizerNJMT0015S02+Check spline portion of coupling sleeves, hubs and gears for
wear or cracks.
+Check baulk rings for cracks or deformation.
+Check insert springs for deformation.
REPAIR FOR COMPONENT PARTSRS5F50A
Mainshaft and Gears (Cont'd)
MT-104
Page 2677 of 2898
SMT420CA
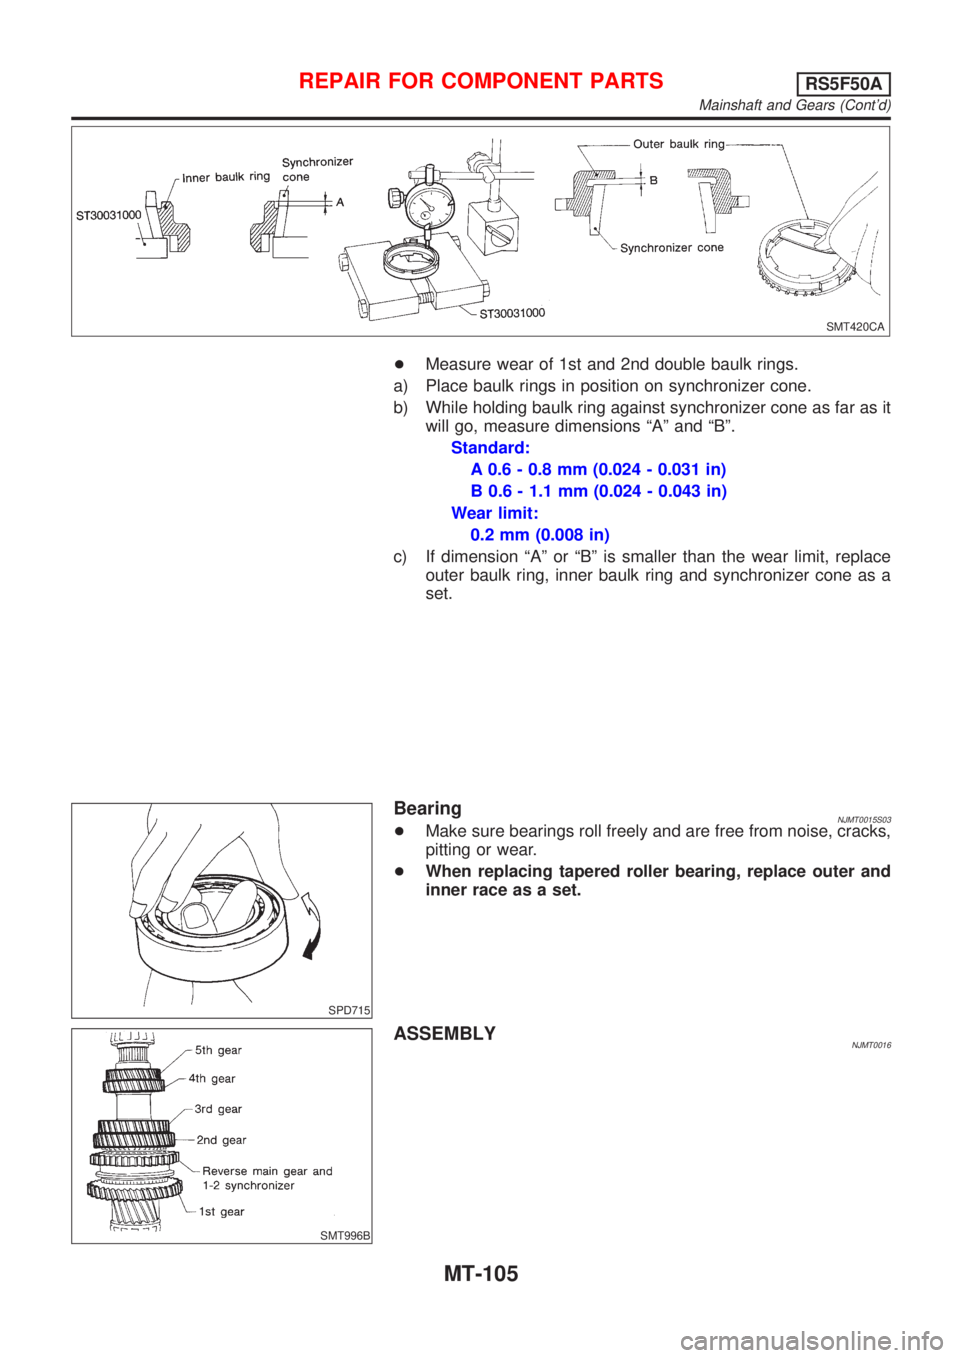
+Measure wear of 1st and 2nd double baulk rings.
a) Place baulk rings in position on synchronizer cone.
b) While holding baulk ring against synchronizer cone as far as it
will go, measure dimensions ªAº and ªBº.
Standard:
A 0.6 - 0.8 mm (0.024 - 0.031 in)
B 0.6 - 1.1 mm (0.024 - 0.043 in)
Wear limit:
0.2 mm (0.008 in)
c) If dimension ªAº or ªBº is smaller than the wear limit, replace
outer baulk ring, inner baulk ring and synchronizer cone as a
set.
SPD715
BearingNJMT0015S03+Make sure bearings roll freely and are free from noise, cracks,
pitting or wear.
+When replacing tapered roller bearing, replace outer and
inner race as a set.
SMT996B
ASSEMBLYNJMT0016
REPAIR FOR COMPONENT PARTSRS5F50A
Mainshaft and Gears (Cont'd)
MT-105
Page 2678 of 2898
SMT804BA
SMT472C
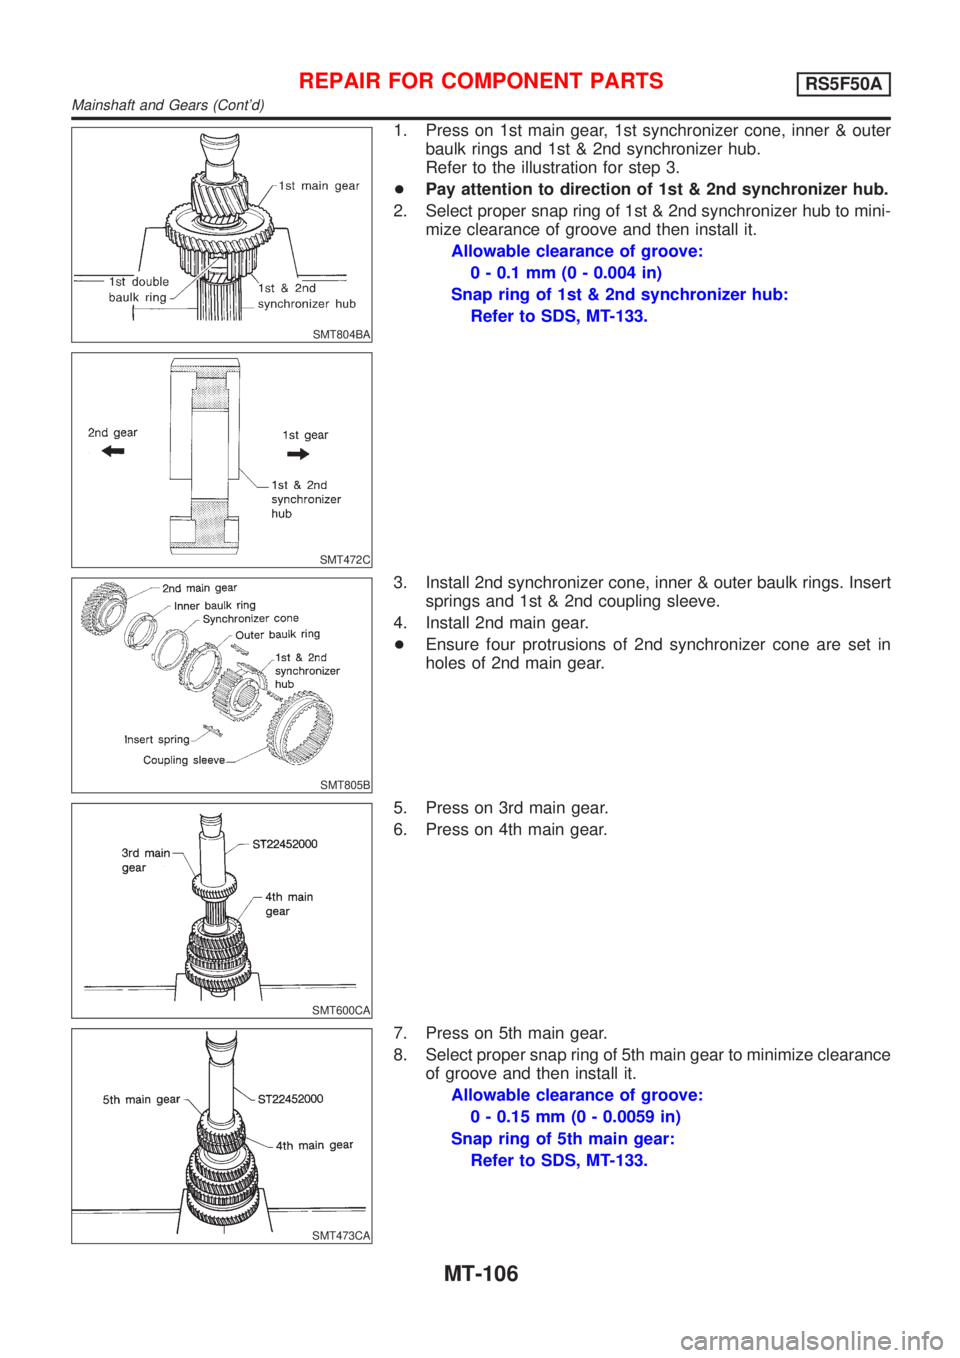
1. Press on 1st main gear, 1st synchronizer cone, inner & outer
baulk rings and 1st & 2nd synchronizer hub.
Refer to the illustration for step 3.
+Pay attention to direction of 1st & 2nd synchronizer hub.
2. Select proper snap ring of 1st & 2nd synchronizer hub to mini-
mize clearance of groove and then install it.
Allowable clearance of groove:
0 - 0.1 mm (0 - 0.004 in)
Snap ring of 1st & 2nd synchronizer hub:
Refer to SDS, MT-133.
SMT805B
3. Install 2nd synchronizer cone, inner & outer baulk rings. Insert
springs and 1st & 2nd coupling sleeve.
4. Install 2nd main gear.
+Ensure four protrusions of 2nd synchronizer cone are set in
holes of 2nd main gear.
SMT600CA
5. Press on 3rd main gear.
6. Press on 4th main gear.
SMT473CA
7. Press on 5th main gear.
8. Select proper snap ring of 5th main gear to minimize clearance
of groove and then install it.
Allowable clearance of groove:
0 - 0.15 mm (0 - 0.0059 in)
Snap ring of 5th main gear:
Refer to SDS, MT-133.
REPAIR FOR COMPONENT PARTSRS5F50A
Mainshaft and Gears (Cont'd)
MT-106
Page 2679 of 2898
SMT059A
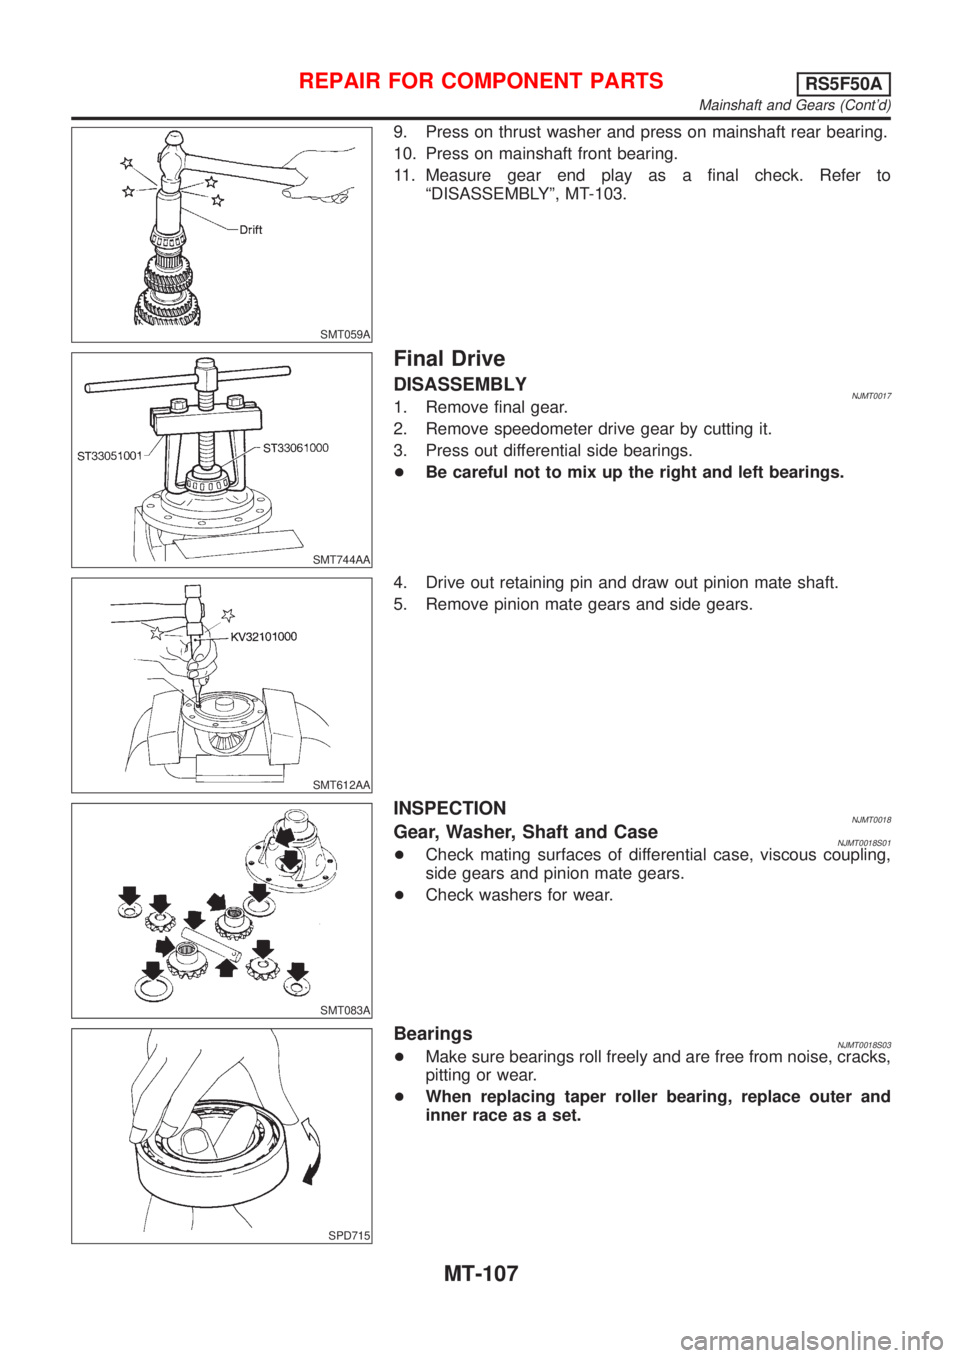
9. Press on thrust washer and press on mainshaft rear bearing.
10. Press on mainshaft front bearing.
11. Measure gear end play as a final check. Refer to
ªDISASSEMBLYº, MT-103.
SMT744AA
Final Drive
DISASSEMBLYNJMT00171. Remove final gear.
2. Remove speedometer drive gear by cutting it.
3. Press out differential side bearings.
+Be careful not to mix up the right and left bearings.
SMT612AA
4. Drive out retaining pin and draw out pinion mate shaft.
5. Remove pinion mate gears and side gears.
SMT083A
INSPECTIONNJMT0018Gear, Washer, Shaft and CaseNJMT0018S01+Check mating surfaces of differential case, viscous coupling,
side gears and pinion mate gears.
+Check washers for wear.
SPD715
BearingsNJMT0018S03+Make sure bearings roll freely and are free from noise, cracks,
pitting or wear.
+When replacing taper roller bearing, replace outer and
inner race as a set.
REPAIR FOR COMPONENT PARTSRS5F50A
Mainshaft and Gears (Cont'd)
MT-107
Page 2680 of 2898
SMT062A
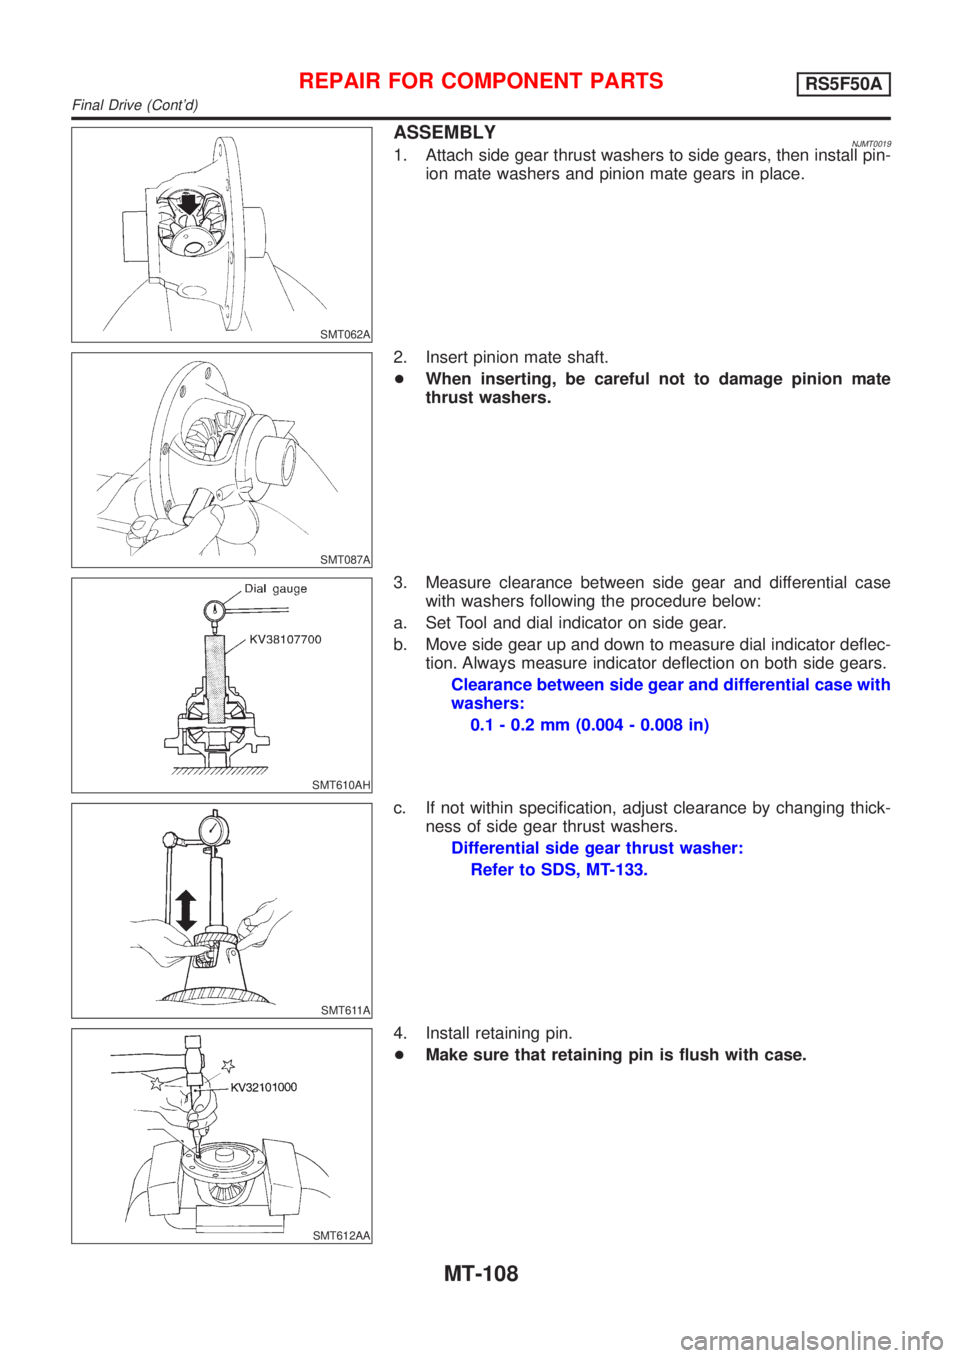
ASSEMBLYNJMT00191. Attach side gear thrust washers to side gears, then install pin-
ion mate washers and pinion mate gears in place.
SMT087A
2. Insert pinion mate shaft.
+When inserting, be careful not to damage pinion mate
thrust washers.
SMT610AH
3. Measure clearance between side gear and differential case
with washers following the procedure below:
a. Set Tool and dial indicator on side gear.
b. Move side gear up and down to measure dial indicator deflec-
tion. Always measure indicator deflection on both side gears.
Clearance between side gear and differential case with
washers:
0.1 - 0.2 mm (0.004 - 0.008 in)
SMT611A
c. If not within specification, adjust clearance by changing thick-
ness of side gear thrust washers.
Differential side gear thrust washer:
Refer to SDS, MT-133.
SMT612AA
4. Install retaining pin.
+Make sure that retaining pin is flush with case.
REPAIR FOR COMPONENT PARTSRS5F50A
Final Drive (Cont'd)
MT-108