battery NISSAN LEAF 2015 1.G Dismantling Guide
[x] Cancel search | Manufacturer: NISSAN, Model Year: 2015, Model line: LEAF, Model: NISSAN LEAF 2015 1.GPages: 45, PDF Size: 1.63 MB
Page 15 of 45
Please contact following number if the Li-ion battery cannot be discharged.
• Nissan EV Customer Support: 1-877-664-2738 (Hours of operation are Monday - Friday 7am -
7pm, Saturday 8am - 4:30pm Central time zone)
• Nissan Consumer Affairs: 1-800-647-7261 (US) or 1-800-387-0122 (Canada) (Hours of operation are 8am - 5pm (Monday - Friday) Eastern, Central and Pacific time zones)
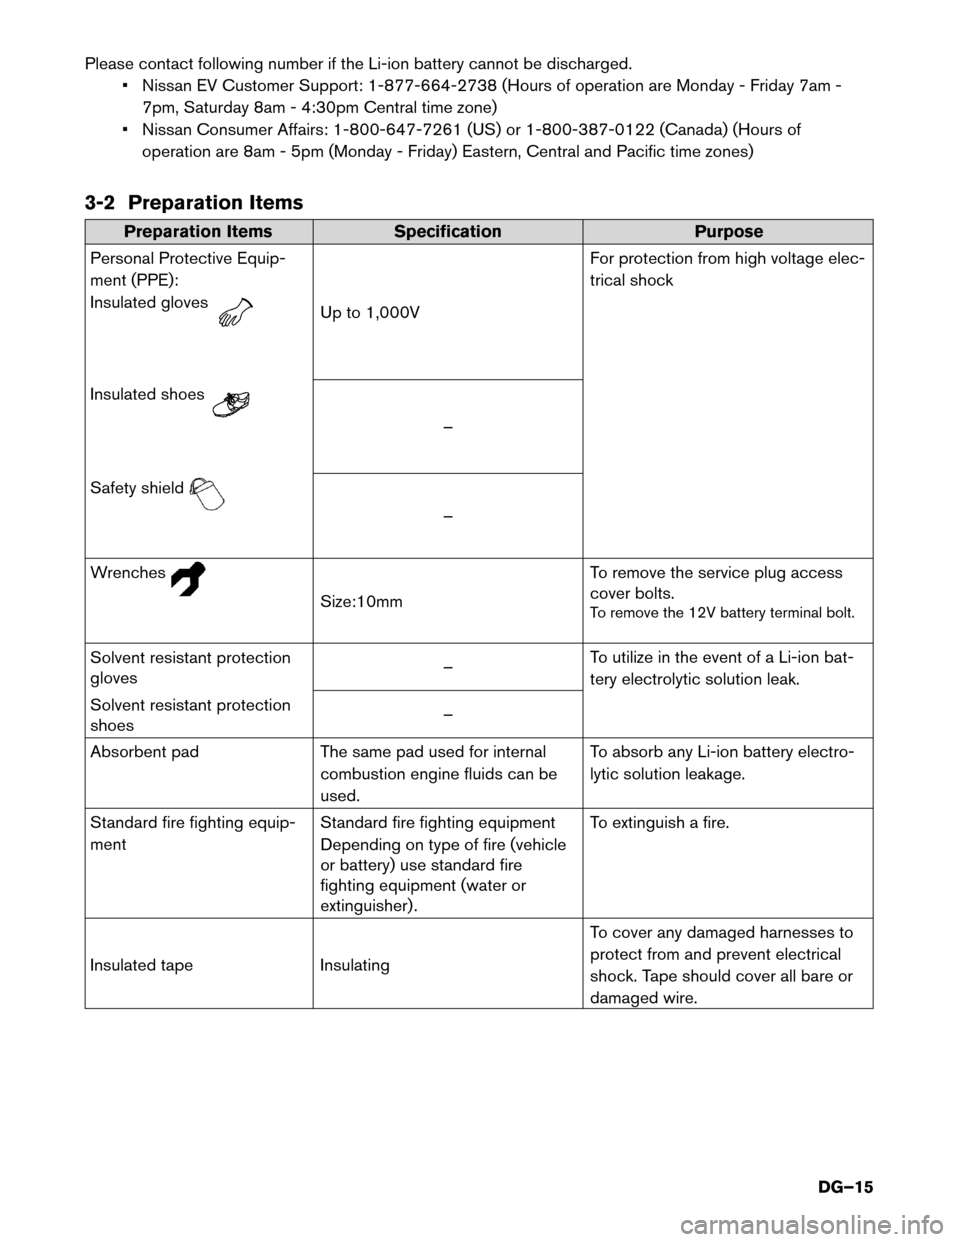
3-2 Preparation Items Preparation Items
Specification Purpose
Personal
Protective Equip-
ment (PPE):
Insulated gloves Up to 1,000V
For
protection from high voltage elec-
trical shock
Insulated shoes –
Safety
shield –
W
renches Size:10mm
T
o remove the service plug access
cover bolts.
To remove the 12V battery terminal bolt.
Solvent resistant protection
gloves –
To utilize in the event of a Li-ion bat-
tery electrolytic solution leak.
Solvent resistant protection
shoes –
Absorbent pad The same pad used for internal
combustion engine fluids can be
used. To absorb any Li-ion battery electro-
lytic solution leakage.
Standard fire fighting equip-
ment Standard fire fighting equipment
Depending on type of fire (vehicle
or battery) use standard fire
fighting equipment (water or
extinguisher) . To extinguish a fire.
Insulated tape Insulating To cover any damaged harnesses to
protect from and prevent electrical
shock. Tape should cover all bare or
damaged wire.
DG–15
Page 16 of 45
3-3 Personal Protective Equipment (PPE) and Insulated Tools
3-3.1
Personal Protective Equipment (PPE) Protective Wear Control
Perform an inspection of the Personal Protective Equipment (PPE) items before beginning work. Do not use
any damaged PPE items.
3-3.2 Daily Inspection
This inspection is performed before and after use. The worker who will be using the items should perform
the inspection and check for deterioration and damage. • Insulated rubber gloves should be inspected for scratches, holes and tears. (Visual check and airleakage test)
• Insulated safety boots should be inspected for holes, damage, nails, metal pieces, wear or other problems on the soles. (Visual check)
• Insulated rubber sheet should be inspected for tears. (Visual check)
3-3.3 Insulated Tools
When performing work at locations where high voltage is applied (such as terminals) , use insulated tools
meeting 1,000V/300A specifications.
3-4 High Voltage System Shut-Down Procedures
Once the high voltage battery is properly discharged, any of the following procedures can shut down and
isolate the high voltage system. The dismantling operation can only begin after shutting down the high
voltage system. If the vehicle is heavily damaged, for example the Li-ion battery is deformed, broken or
cracked, appropriate Personal Protective Equipment (PPE) must always be used and the Li-ion battery and
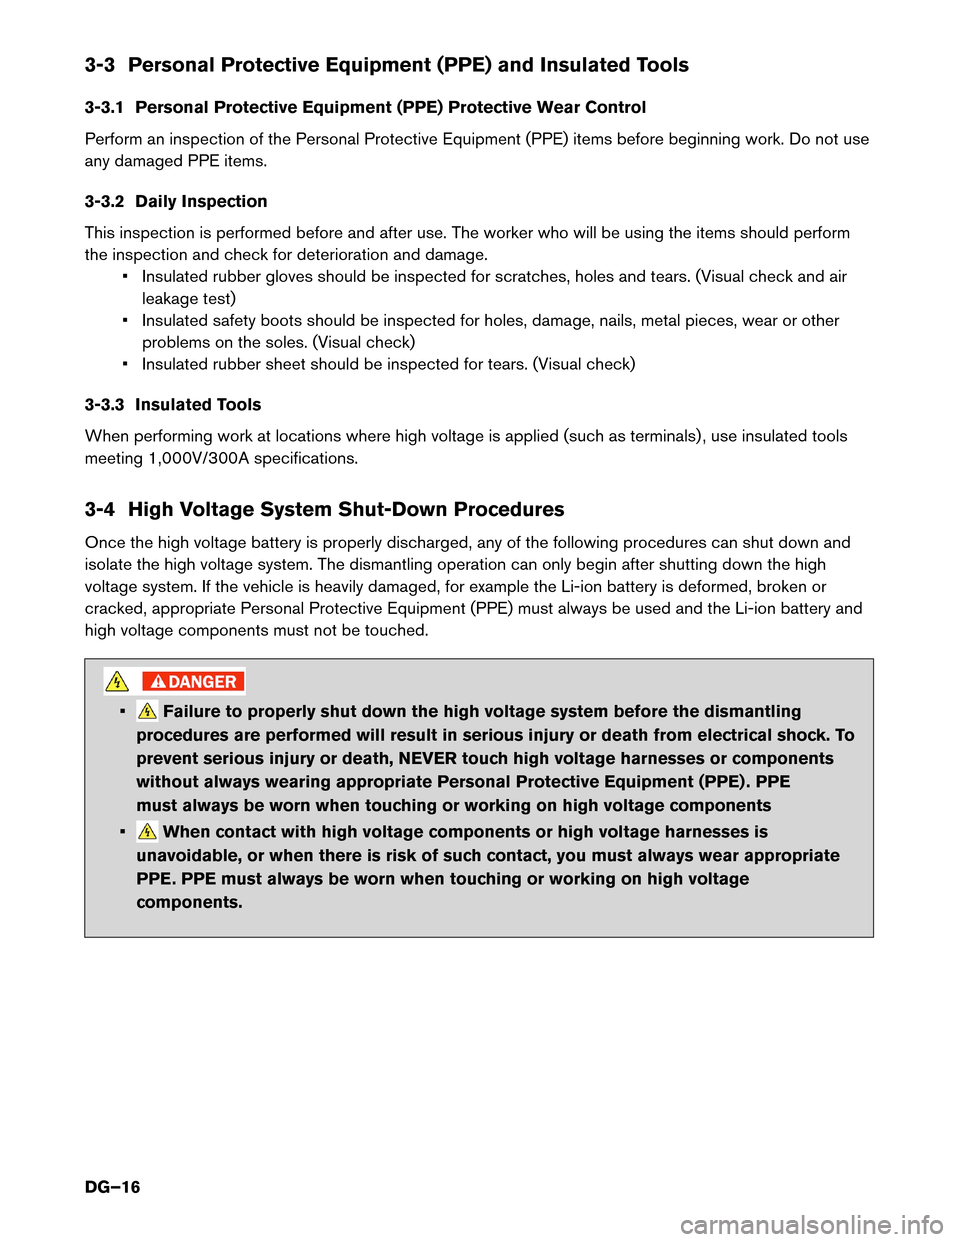
high voltage components must not be touched. • Failure to properly shut down the high voltage system before the dismantling
procedures
are performed will result in serious injury or death from electrical shock. To
prevent serious injury or death, NEVER touch high voltage harnesses or components
without always wearing appropriate Personal Protective Equipment (PPE) . PPE
must always be worn when touching or working on high voltage components
• When contact with high voltage components or high voltage harnesses is
unavoidable,
or when there is risk of such contact, you must always wear appropriate
PPE. PPE must always be worn when touching or working on high voltage
components.
DG–16
Page 17 of 45
• If the charge connector is connected to the vehicle, remove it. Refer to
3-4.1 Removing the Charge Connector (DG–18).
• The vehicle contains parts that contain powerful magnets. If a person who is
wearing a pacemaker or other medical device is close to these parts, the medical
device may be affected by the magnets. Such persons must not perform work on the
vehicle.
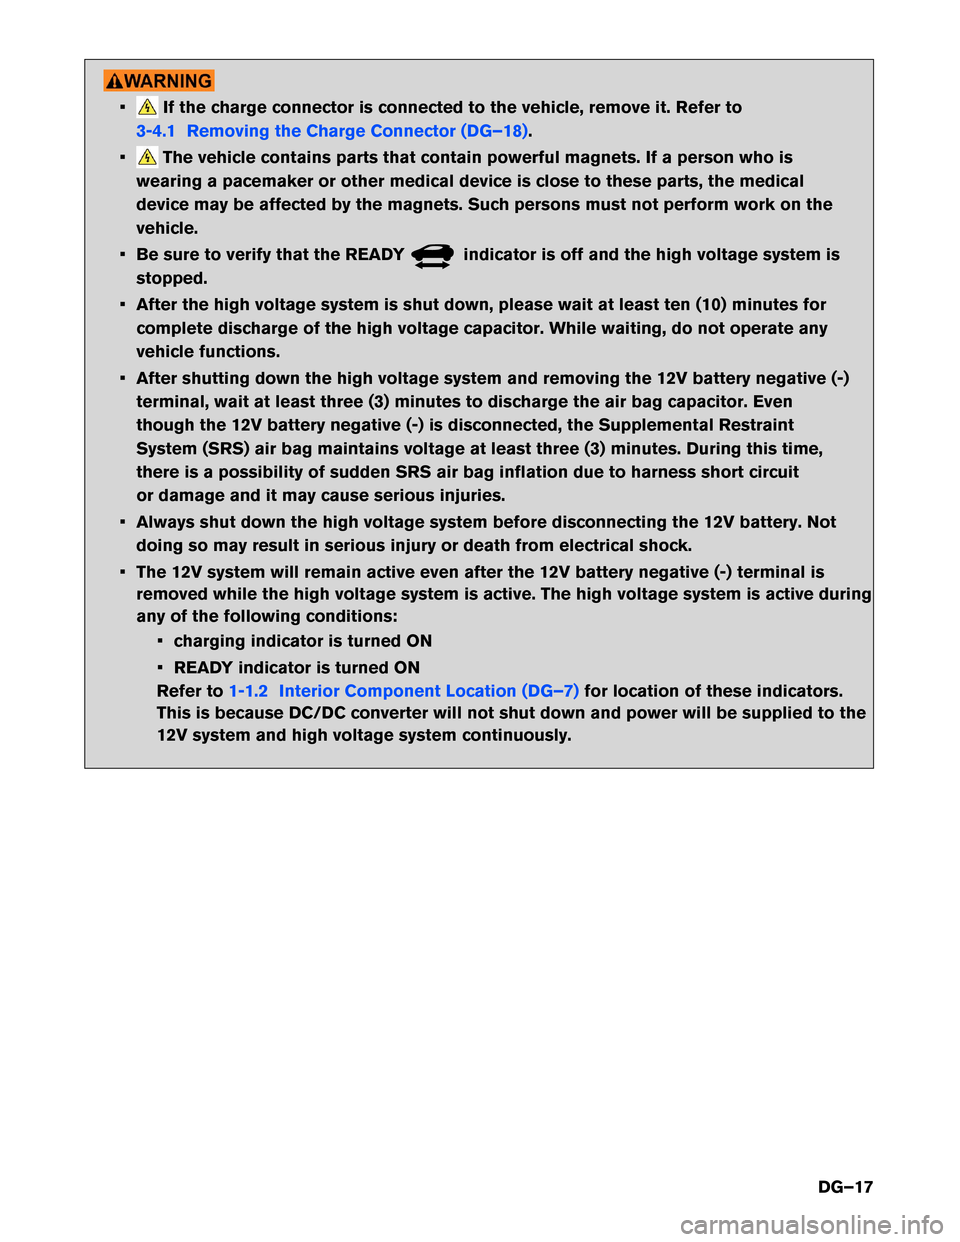
• Be sure to verify that the READY indicator is off and the high voltage system is
stopped.
•
After the high voltage system is shut down, please wait at least ten (10) minutes for
complete discharge of the high voltage capacitor. While waiting, do not operate any
vehicle functions.
• After shutting down the high voltage system and removing the 12V battery negative (-) terminal, wait at least three (3) minutes to discharge the air bag capacitor. Even
though the 12V battery negative (-) is disconnected, the Supplemental Restraint
System (SRS) air bag maintains voltage at least three (3) minutes. During this time,
there is a possibility of sudden SRS air bag inflation due to harness short circuit
or damage and it may cause serious injuries.
• Always shut down the high voltage system before disconnecting the 12V battery. Not doing so may result in serious injury or death from electrical shock.
• The 12V system will remain active even after the 12V battery negative (-) terminal is removed while the high voltage system is active. The high voltage system is active during
any of the following conditions:
• charging indicator is turned ON
• READY indicator is turned ON
Refer to 1-1.2 Interior Component Location (DG–7) for location of these indicators.
This
is because DC/DC converter will not shut down and power will be supplied to the
12V system and high voltage system continuously.
DG–17
Page 20 of 45
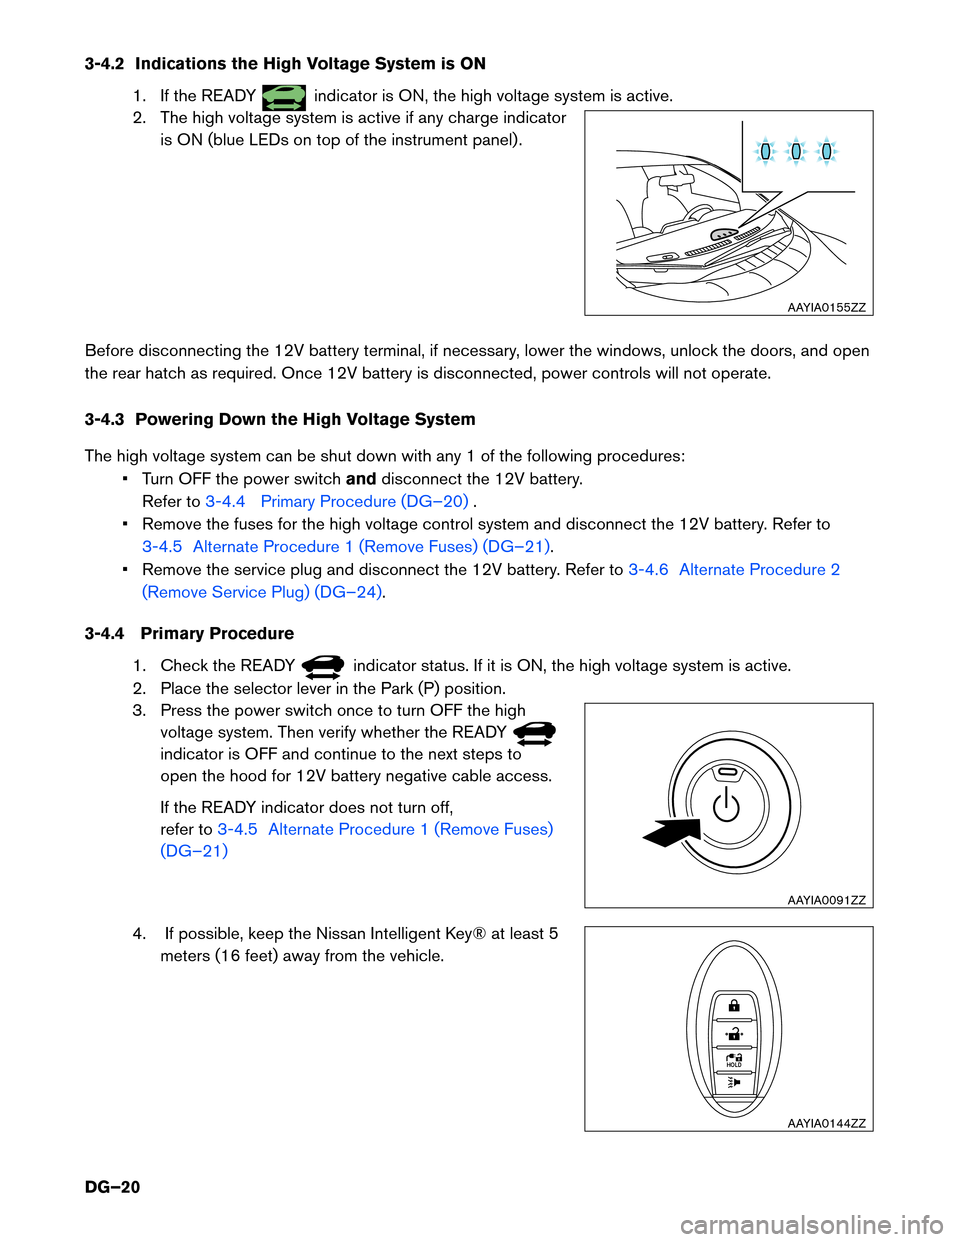
3-4.2 Indications the High Voltage System is ON
1. If the READY indicator is ON, the high voltage system is active.
2.
The high voltage system is active if any charge indicator
is ON (blue LEDs on top of the instrument panel) .
Before disconnecting the 12V battery terminal, if necessary, lower the windows, unlock the doors, and open
the rear hatch as required. Once 12V battery is disconnected, power controls will not operate.
3-4.3 Powering Down the High Voltage System
The high voltage system can be shut down with any 1 of the following procedures: • Turn OFF the power switch anddisconnect the 12V battery.
Refer to 3-4.4 Primary Procedure (DG–20) .
•
Remove the fuses for the high voltage control system and disconnect the 12V battery. Refer to
3-4.5 Alternate Procedure 1 (Remove Fuses) (DG–21).
•
Remove the service plug and disconnect the 12V battery. Refer to 3-4.6 Alternate Procedure 2
(Remove
Service Plug) (DG–24) .
3-4.4
Primary Procedure
1. Check the READY indicator status. If it is ON, the high voltage system is active.
2.
Place the selector lever in the Park (P) position.
3. Press the power switch once to turn OFF the high voltage system. Then verify whether the READY indicator is OFF and continue to the next steps to
open
the hood for 12V battery negative cable access.
If the READY indicator does not turn off,
refer to 3-4.5 Alternate Procedure 1 (Remove Fuses)
(DG–21)
4. If possible, keep the Nissan Intelligent Key® at least 5 meters
(16 feet) away from the vehicle. AAYIA0155ZZ
AAYIA0091ZZ
HOLD
AAYIA0144ZZ
DG–20
Page 21 of 45
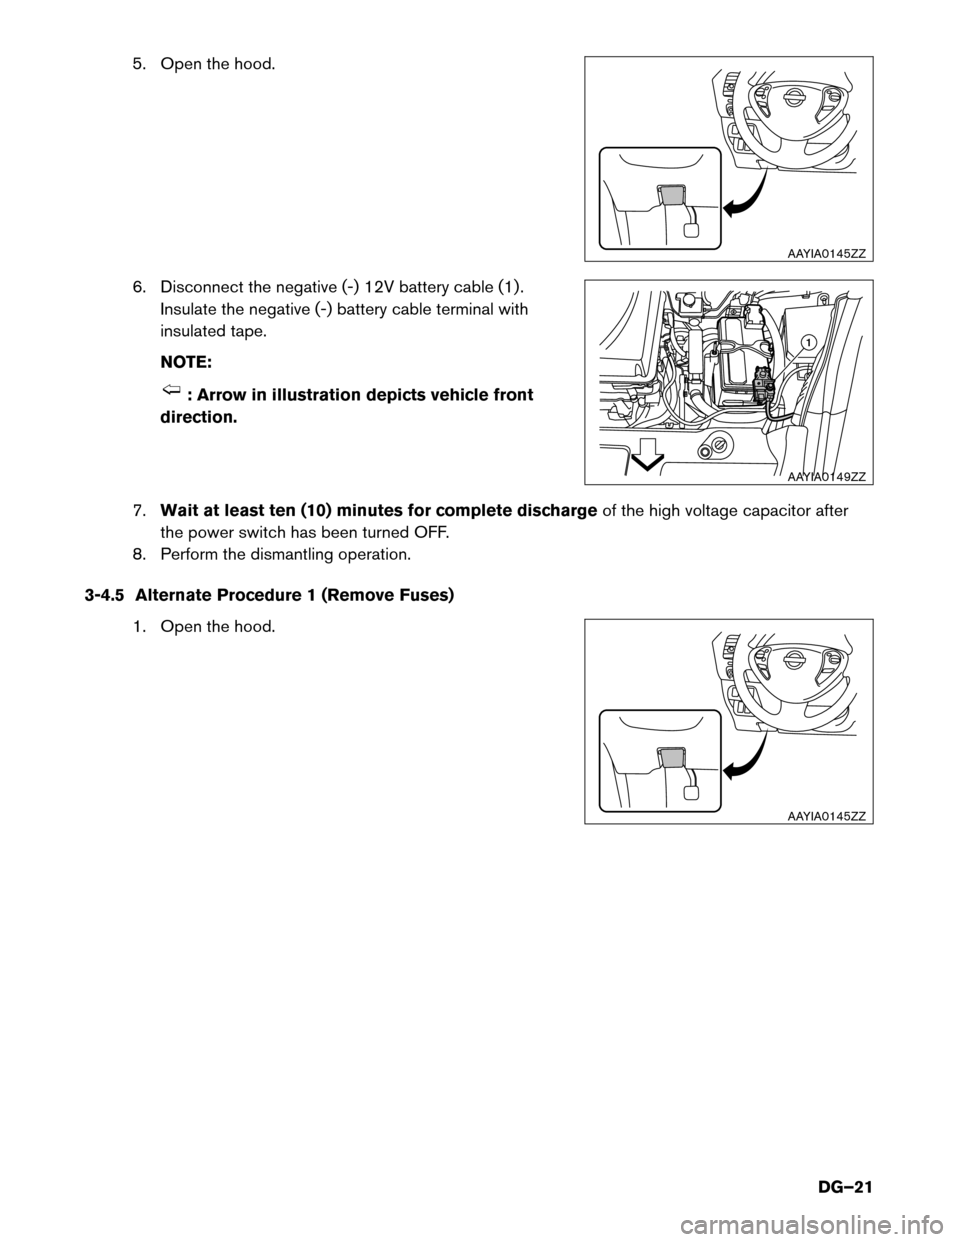
5. Open the hood.
6.
Disconnect the negative (-) 12V battery cable (1) .
Insulate the negative (-) battery cable terminal with
insulated tape.
NOTE: : Arrow in illustration depicts vehicle front
direction.
7. Wait
at least ten (10) minutes for complete discharge of the high voltage capacitor after
the power switch has been turned OFF.
8. Perform the dismantling operation.
3-4.5 Alternate Procedure 1 (Remove Fuses) 1. Open the hood. AAYIA0145ZZ
1
AAYIA0149ZZ AAYIA0145ZZ
DG–21
Page 23 of 45
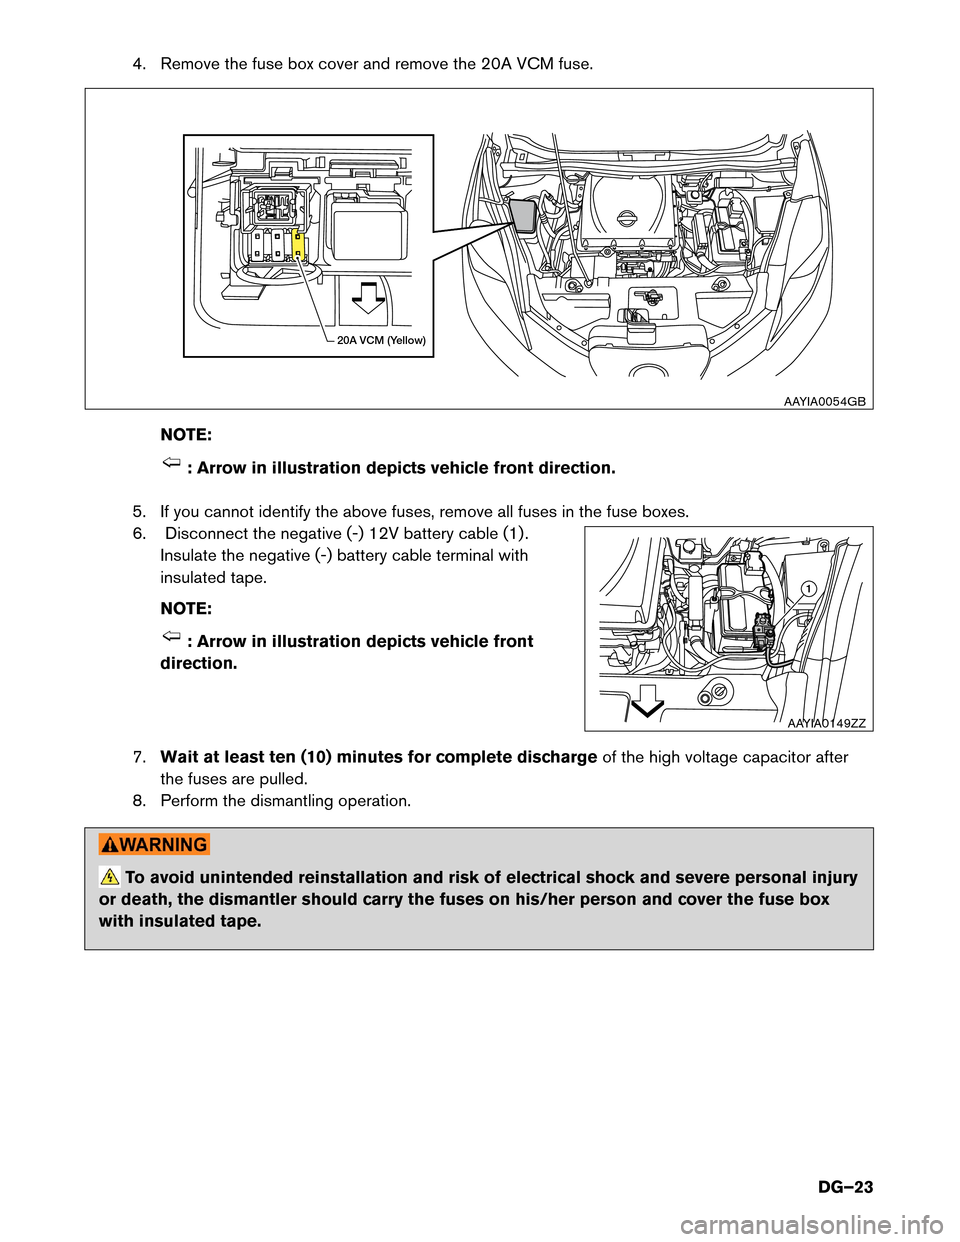
4. Remove the fuse box cover and remove the 20A VCM fuse.
NO TE: : Arrow in illustration depicts vehicle front direction.
5.
If you cannot identify the above fuses, remove all fuses in the fuse boxes.
6. Disconnect the negative (-) 12V battery cable (1) . Insulate the negative (-) battery cable terminal with
insulated tape.
NOTE: : Arrow in illustration depicts vehicle front
direction.
7. Wait
at least ten (10) minutes for complete discharge of the high voltage capacitor after
the fuses are pulled.
8. Perform the dismantling operation. To avoid unintended reinstallation and risk of electrical shock and severe personal injury
or
death, the dismantler should carry the fuses on his/her person and cover the fuse box
with insulated tape. 20A VCM (Yellow)
AAYIA0054GB 1
AAYIA0149ZZ
DG–23
Page 24 of 45
3-4.6 Alternate Procedure 2 (Remove Service Plug)
• Do not remove the service plug without always wearing appropriate Personal
Protective Equipment (PPE) to help protect the dismantler from serious injury or death
by electrical shock.
• Immediately cover the service plug socket with insulated tape. The Li-ion battery
retains
high voltage power even when the service plug is removed. To avoid electric
shock, NEVER touch the terminals inside the socket. To avoid unintended reinstallation and risk of electrical shock and severe personal injury
or
death, the dismantler should carry the service plug on his/her person while work is in
progress.
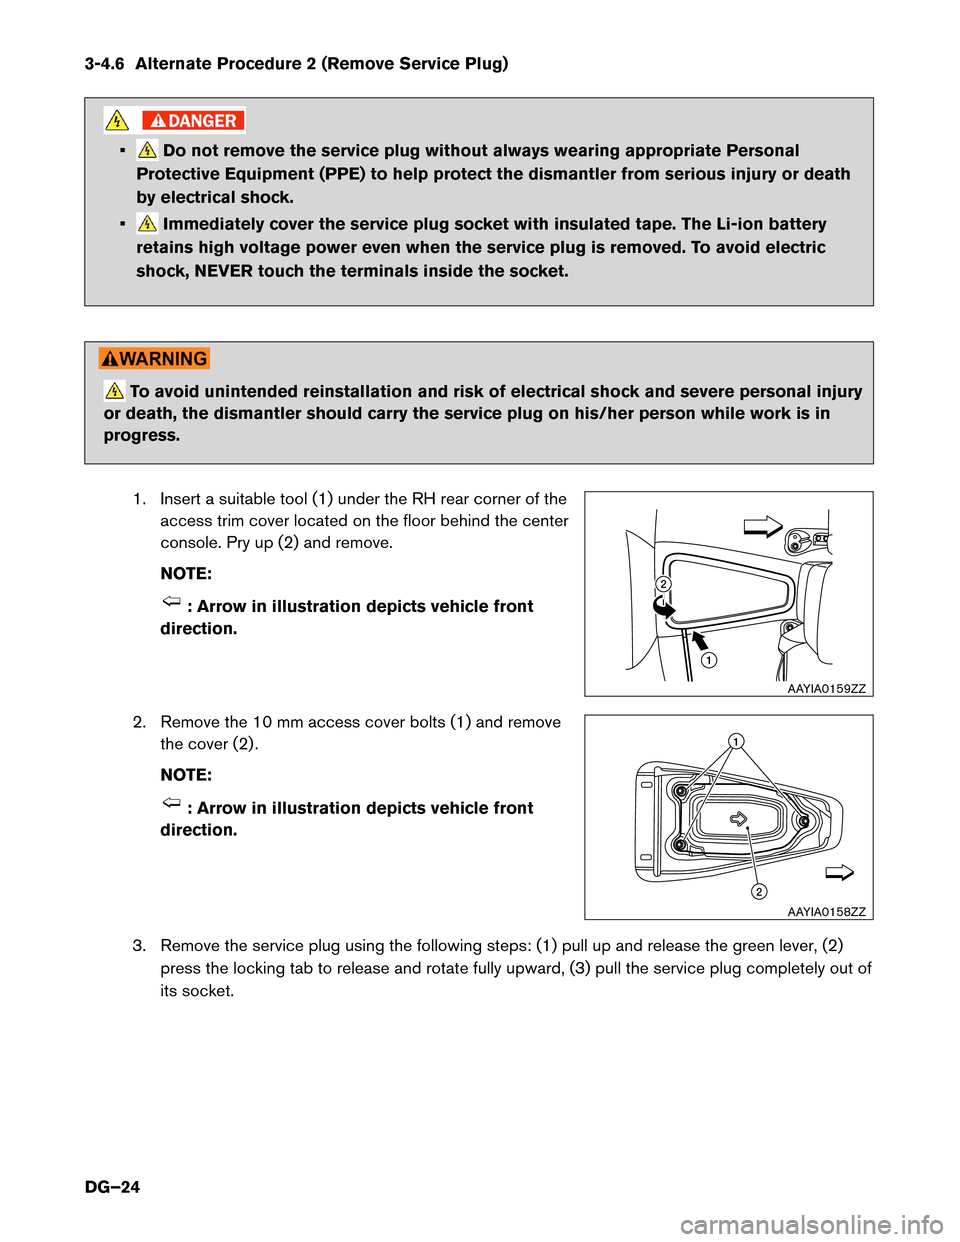
1. Insert a suitable tool (1) under the RH rear corner of theaccess trim cover located on the floor behind the center
console. Pry up (2) and remove.
NOTE: : Arrow in illustration depicts vehicle front
direction.
2.
Remove the 10 mm access cover bolts (1) and remove
the cover (2) .
NOTE: : Arrow in illustration depicts vehicle front
direction.
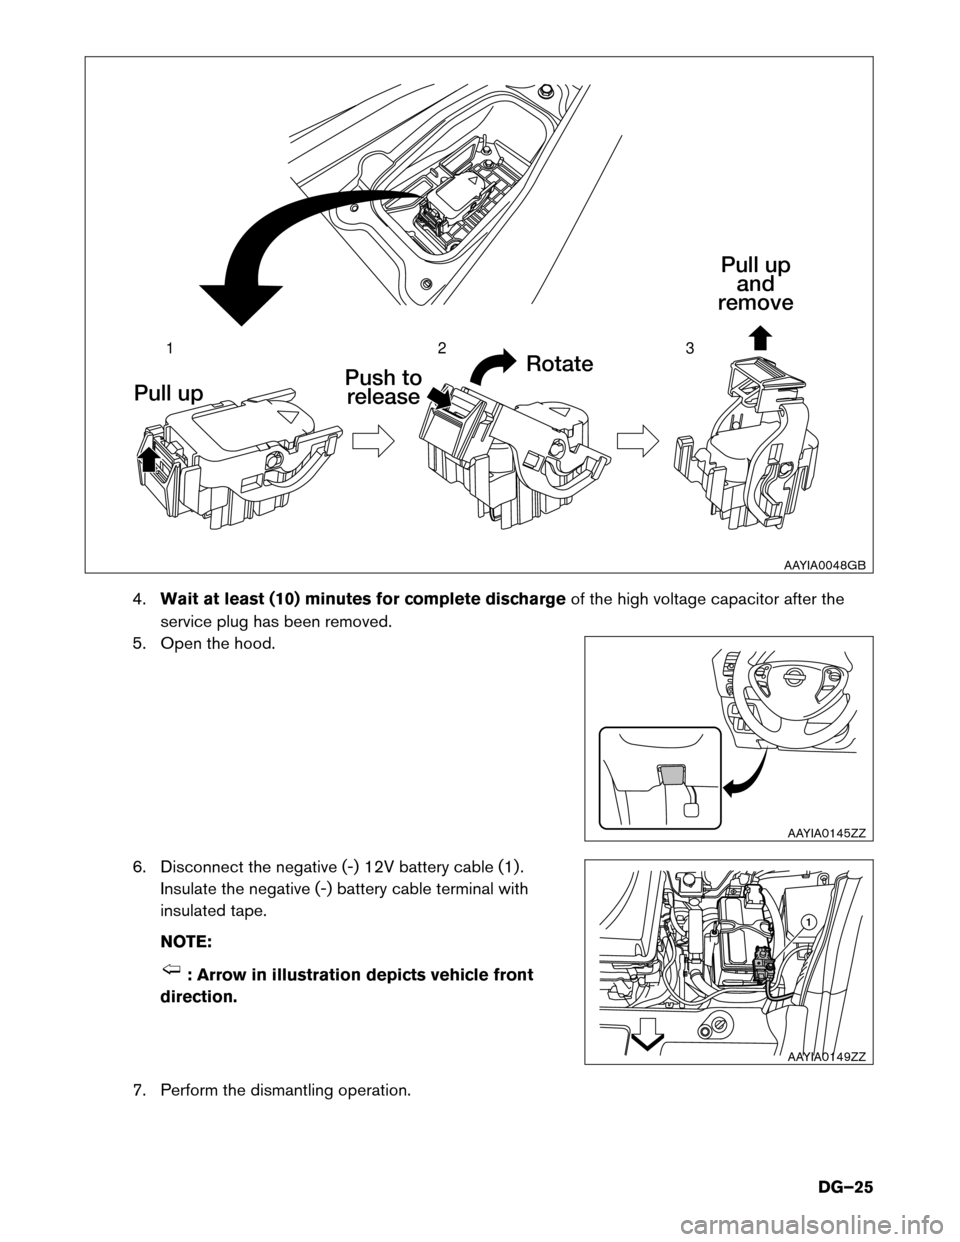
3.
Remove the service plug using the following steps: (1) pull up and release the green lever, (2)
press the locking tab to release and rotate fully upward, (3) pull the service plug completely out of
its socket. 12
AAYIA0159ZZ
1
2
AAYIA0158ZZ
DG–24
Page 25 of 45
4.
Waitat least (10) minutes for complete discharge of the high voltage capacitor after the
service plug has been removed.
5. Open the hood.
6. Disconnect the negative (-) 12V battery cable (1) . Insulate the negative (-) battery cable terminal with
insulated tape.
NOTE: : Arrow in illustration depicts vehicle front
direction.
7.
Perform the dismantling operation. 1
2
3
Pull up Rotate
Push to
release Pull up
and
remove
AAYIA0048GB AAYIA0145ZZ
1
AAYIA0149ZZ DG–25
Page 26 of 45
3-5 Cutting the Vehicle Body
• Do not cut into high voltage related areas to avoid severe personal injury or death.
• Do not cut into the Li-ion battery to avoid severe personal injury or death.
• When removing parts, NEVER touch the high voltage parts or the insides of the
exposed orange-colored high voltage cables to avoid severe personal injury or death.
Personal Protective Equipment (PPE) must always be worn when touching or
working on high voltage components. • To avoid unintended reinstallation and risk of electrical shock and severe personal injury
or
death, the dismantler should carry the fuses or service plug on his/her person while
work is in progress.
• Do not cut air bag parts to avoid unintended deployment of the air bags and the risk of severe personal injury or death.
If at least ten (10) minutes have passed since the dismantler shut down the high voltage system (refer to
3-4 High Voltage System Shut-Down Procedures (DG–16)) , then the dismantler can cut the vehicle
except
for the Li-ion battery. DO NOT cut the Li-ion battery due to possible electrocution risk and electrolyte solution
leakage.
DG–26
Page 27 of 45
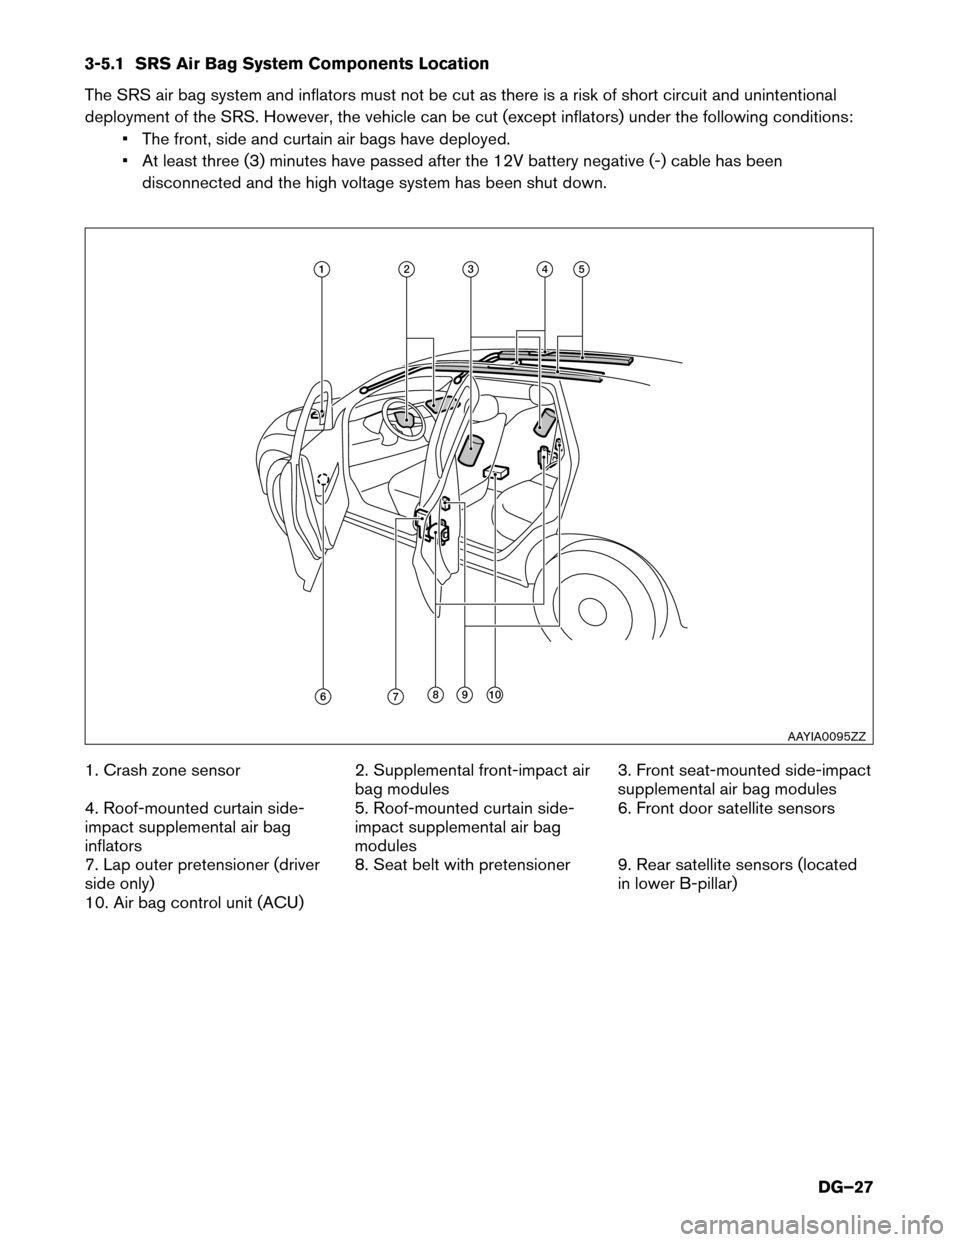
3-5.1 SRS Air Bag System Components Location
The
SRS air bag system and inflators must not be cut as there is a risk of short circuit and unintentional
deployment of the SRS. However, the vehicle can be cut (except inflators) under the following conditions: • The front, side and curtain air bags have deployed.
• At least three (3) minutes have passed after the 12V battery negative (-) cable has beendisconnected and the high voltage system has been shut down.
1. Crash zone sensor 2. Supplemental front-impact air
bag modules 3. Front seat-mounted side-impact
supplemental air bag modules
4. Roof-mounted curtain side-
impact supplemental air bag
inflators 5. Roof-mounted curtain side-
impact supplemental air bag
modules6. Front door satellite sensors
7. Lap outer pretensioner (driver
side only) 8. Seat belt with pretensioner 9. Rear satellite sensors (located
in lower B-pillar)
10. Air bag control unit (ACU) 11 2 3 4 5
6 7 8 9 10
AAYIA0095ZZ
DG–27