NISSAN NAVARA 2005 Repair Owners Manual
Manufacturer: NISSAN, Model Year: 2005, Model line: NAVARA, Model: NISSAN NAVARA 2005Pages: 3171, PDF Size: 49.59 MB
Page 91 of 3171
TROUBLE DIAGNOSIS
AT-83
D
E
F
G
H
I
J
K
L
MA
B
AT
DATA MONITOR MODE
Operation Procedure
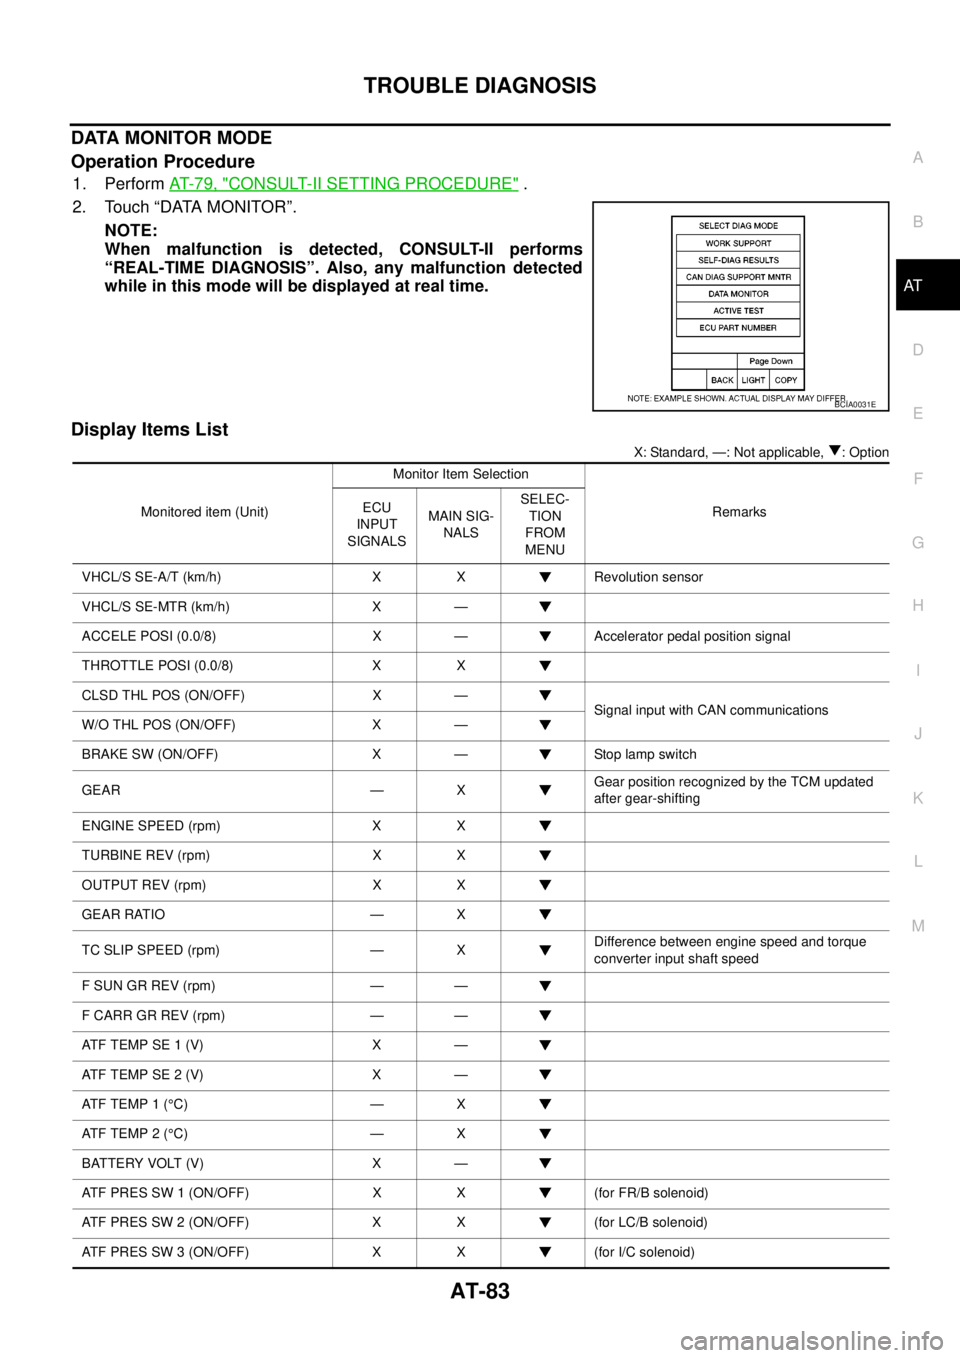
1. PerformAT-79, "CONSULT-II SETTING PROCEDURE".
2. Touch “DATA MONITOR”.
NOTE:
When malfunction is detected, CONSULT-II performs
“REAL-TIME DIAGNOSIS”. Also, any malfunction detected
while in this mode will be displayed at real time.
Display Items List
X: Standard, —: Not applicable, : Option
BCIA0031E
Monitored item (Unit)Monitor Item Selection
Remarks ECU
INPUT
SIGNALSMAIN SIG-
NALSSELEC-
TION
FROM
MENU
VHCL/S SE-A/T (km/h) X X Revolution sensor
VHCL/S SE-MTR (km/h) X —
ACCELE POSI (0.0/8) X — Accelerator pedal position signal
THROTTLE POSI (0.0/8) X X
CLSD THL POS (ON/OFF) X —
Signal input with CAN communications
W/O THL POS (ON/OFF) X —
BRAKE SW (ON/OFF) X — Stop lamp switch
GEAR — XGear position recognized by the TCM updated
after gear-shifting
ENGINE SPEED (rpm) X X
TURBINE REV (rpm) X X
OUTPUT REV (rpm) X X
GEAR RATIO — X
TC SLIP SPEED (rpm) — XDifference between engine speed and torque
converter input shaft speed
F SUN GR REV (rpm) — —
F CARR GR REV (rpm) — —
ATFTEMPSE1(V) X —
ATFTEMPSE2(V) X —
AT F T E M P 1 (°C) — X
AT F T E M P 2 (°C) — X
BATTERY VOLT (V) X —
ATF PRES SW 1 (ON/OFF) X X (for FR/B solenoid)
ATF PRES SW 2 (ON/OFF) X X (for LC/B solenoid)
ATF PRES SW 3 (ON/OFF) X X (for I/C solenoid)
Page 92 of 3171

AT-84
TROUBLE DIAGNOSIS
ATF PRES SW 5 (ON/OFF) X X (for D/C solenoid)
ATF PRES SW 6 (ON/OFF) X X (for HLR/C solenoid)
PNP SW 1 (ON/OFF) X —
PNP SW 2 (ON/OFF) X —
PNP SW 3 (ON/OFF) X —
PNP SW 4 (ON/OFF) X —
1 POSITION SW (ON/OFF) X — 1st position switch
SLCT LVR POSI — XSelector lever position is recognized by TCM.
For fail-safe operation, the specific value used
for control is displayed.
OD CONT SW (ON/OFF) X —
POWERSHIFT SW (ON/OFF) X —
Not mounted but displayed. HOLD SW (ON/OFF) X —
MANU MODE SW (ON/OFF) X —
NON M-MODE SW (ON/OFF) X —
UP SW LEVER (ON/OFF) X —
DOWN SW LEVER (ON/OFF) X —
SFTUPSTSW(ON/OFF) — —
SFT DWN ST SW (ON/OFF) — —
ASCD-OD CUT (ON/OFF) — —
ASCD-CRUISE (ON/OFF) — —
ABS SIGNAL (ON/OFF) — —
ACC OD CUT (ON/OFF) — —
Not mounted but displayed.
ACC SIGNAL (ON/OFF) — —
TCS GR/P KEEP (ON/OFF) — —
TCS SIGNAL 2 (ON/OFF) — —
TCS SIGNAL 1 (ON/OFF) — —
TCC SOLENOID (A) — X
LINE PRES SOL (A) — X
I/C SOLENOID (A) — X
FR/B SOLENOID (A) — X
D/C SOLENOID (A) — X
HLR/C SOL (A) — X
ON OFF SOL (ON/OFF) — — LC/B solenoid
TCC SOL MON (A) — —
L/P SOL MON (A) — —Monitored item (Unit)Monitor Item Selection
Remarks ECU
INPUT
SIGNALSMAIN SIG-
NALSSELEC-
TION
FROM
MENU
Page 93 of 3171

TROUBLE DIAGNOSIS
AT-85
D
E
F
G
H
I
J
K
L
MA
B
AT
I/C SOL MON (A) — —
FR/B SOL MON (A) — —
D/CSOLMON(A) — —
HLR/C SOL MON (A) — —
ONOFF SOL MON (ON/OFF) — — LC/B solenoid
P POSI IND (ON/OFF) — —
R POSI IND (ON/OFF) — —
N POSI IND (ON/OFF) — —
D POSI IND (ON/OFF) — —
4TH POSI IND (ON/OFF) — —
3RD POSI IND (ON/OFF) — —
2ND POSI IND (ON/OFF) — —
1ST POSI IND (ON/OFF) — —
MANU MODE IND (ON/OFF) — —
Not mounted but displayed.
POWER M LAMP (ON/OFF) — —
F-SAFE IND/L (ON/OFF) — —
ATF WARN LAMP (ON/OFF) — —
BACK-UPLAMP(ON/OFF) — —
STARTER RELAY (ON/OFF) — —
PNP SW3 MON (ON/OFF) — —
C/V CLB ID1 — —
C/V CLB ID2 — —
C/V CLB ID3 — —
UNIT CLB ID1 — —
UNIT CLB ID2 — —
UNIT CLB ID3 — —
TRGT GR RATIO — —
TRGT PRES TCC (kPa) — —
TRGT PRES L/P (kPa) — —
TRGT PRES I/C (kPa) — —
TRGTPREFR/B(kPa) — —
TRGT PRES D/C (kPa) — —
TRG PRE HLR/C (kPa) — —
SHIFT PATTERN — —
DRV CST JUDGE — —Monitored item (Unit)Monitor Item Selection
Remarks ECU
INPUT
SIGNALSMAIN SIG-
NALSSELEC-
TION
FROM
MENU
Page 94 of 3171
AT-86
TROUBLE DIAGNOSIS
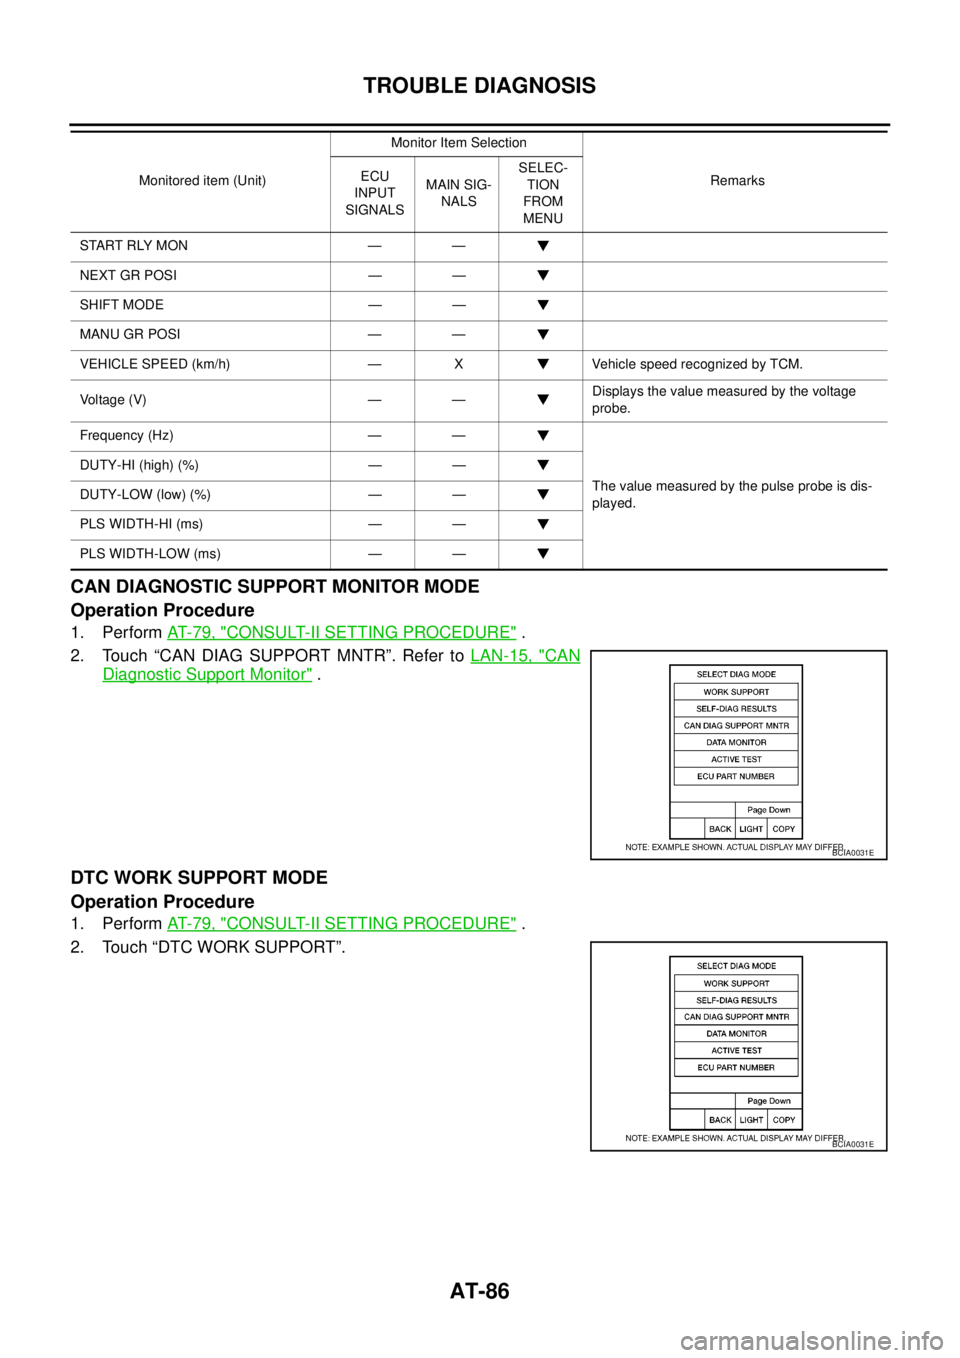
CAN DIAGNOSTIC SUPPORT MONITOR MODE
Operation Procedure
1. PerformAT- 7 9 , "CONSULT-II SETTING PROCEDURE".
2. Touch “CAN DIAG SUPPORT MNTR”. Refer toLAN-15, "
CAN
Diagnostic Support Monitor".
DTC WORK SUPPORT MODE
Operation Procedure
1. PerformAT- 7 9 , "CONSULT-II SETTING PROCEDURE".
2. Touch “DTC WORK SUPPORT”.
START RLY MON — —
NEXT GR POSI — —
SHIFT MODE — —
MANU GR POSI — —
VEHICLE SPEED (km/h) — X Vehicle speed recognized by TCM.
Vo l ta g e (V ) — —Displays the value measured by the voltage
probe.
Frequency (Hz) — —
The value measured by the pulse probe is dis-
played. DUTY-HI (high) (%) — —
DUTY-LOW (low) (%) — —
PLS WIDTH-HI (ms) — —
PLS WIDTH-LOW (ms) — —Monitored item (Unit)Monitor Item Selection
Remarks ECU
INPUT
SIGNALSMAIN SIG-
NALSSELEC-
TION
FROM
MENU
BCIA0031E
BCIA0031E
Page 95 of 3171
TROUBLE DIAGNOSIS
AT-87
D
E
F
G
H
I
J
K
L
MA
B
AT
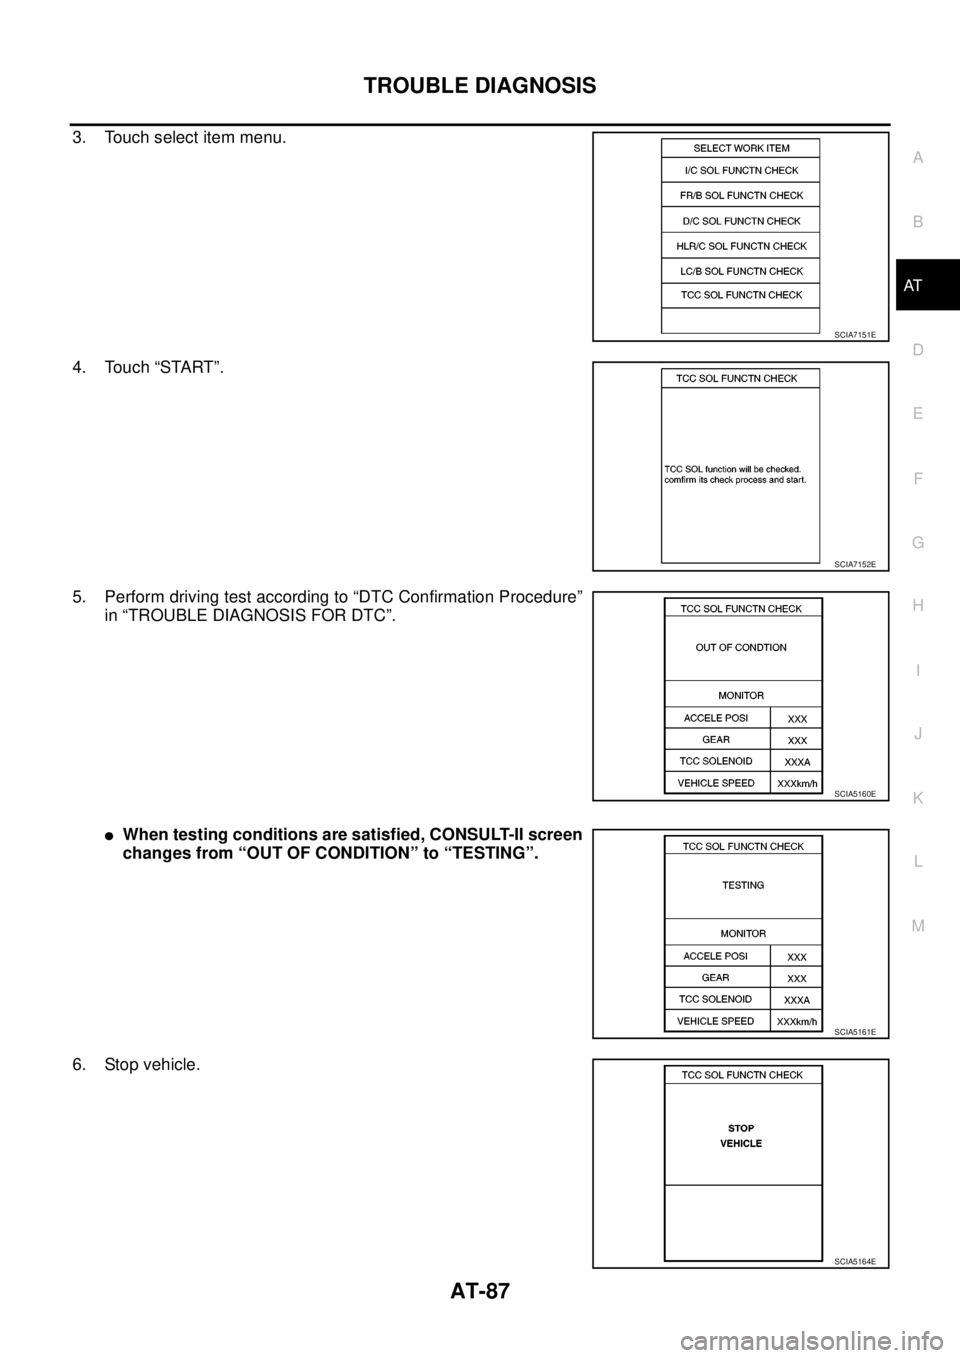
3. Touch select item menu.
4. Touch “START”.
5. Perform driving test according to “DTC Confirmation Procedure”
in “TROUBLE DIAGNOSIS FOR DTC”.
lWhen testing conditions are satisfied, CONSULT-II screen
changes from “OUT OF CONDITION” to “TESTING”.
6. Stop vehicle.
SCIA7151E
SCIA7152E
SCIA5160E
SCIA5161E
SCIA5164E
Page 96 of 3171
AT-88
TROUBLE DIAGNOSIS
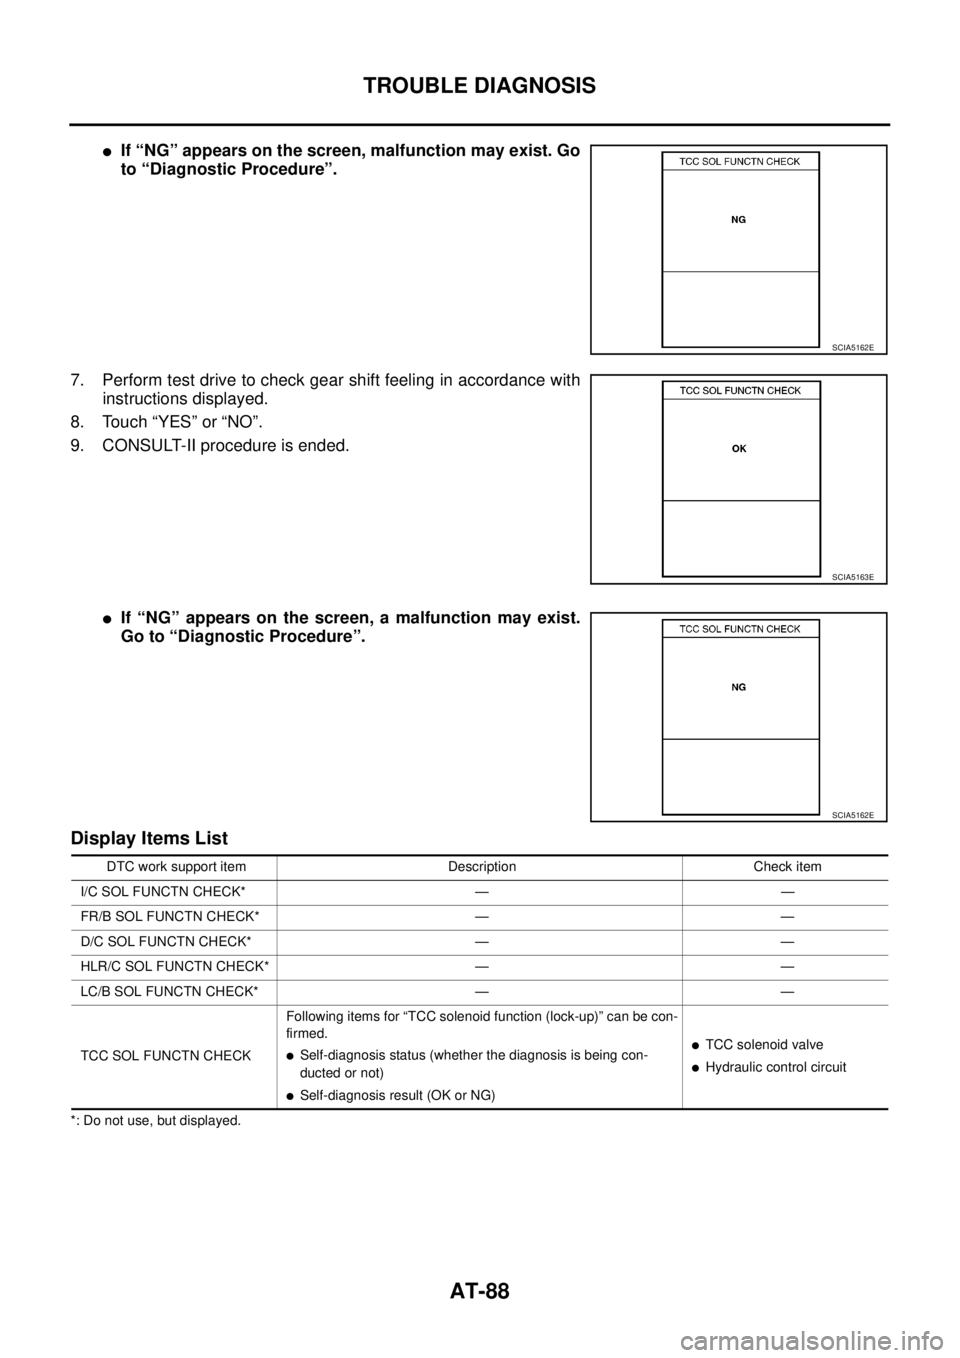
lIf “NG” appears on the screen, malfunction may exist. Go
to “Diagnostic Procedure”.
7. Perform test drive to check gear shift feeling in accordance with
instructions displayed.
8. Touch “YES” or “NO”.
9. CONSULT-II procedure is ended.
lIf “NG” appears on the screen, a malfunction may exist.
Go to “Diagnostic Procedure”.
Display Items List
*: Do not use, but displayed.
SCIA5162E
SCIA5163E
SCIA5162E
DTC work support item Description Check item
I/C SOL FUNCTN CHECK* — —
FR/B SOL FUNCTN CHECK* — —
D/C SOL FUNCTN CHECK* — —
HLR/C SOL FUNCTN CHECK* — —
LC/B SOL FUNCTN CHECK* — —
TCC SOL FUNCTN CHECKFollowing items for “TCC solenoid function (lock-up)” can be con-
firmed.
lSelf-diagnosis status (whether the diagnosis is being con-
ducted or not)
lSelf-diagnosis result (OK or NG)
lTCC solenoid valve
lHydraulic control circuit
Page 97 of 3171
TROUBLE DIAGNOSIS
AT-89
D
E
F
G
H
I
J
K
L
MA
B
AT
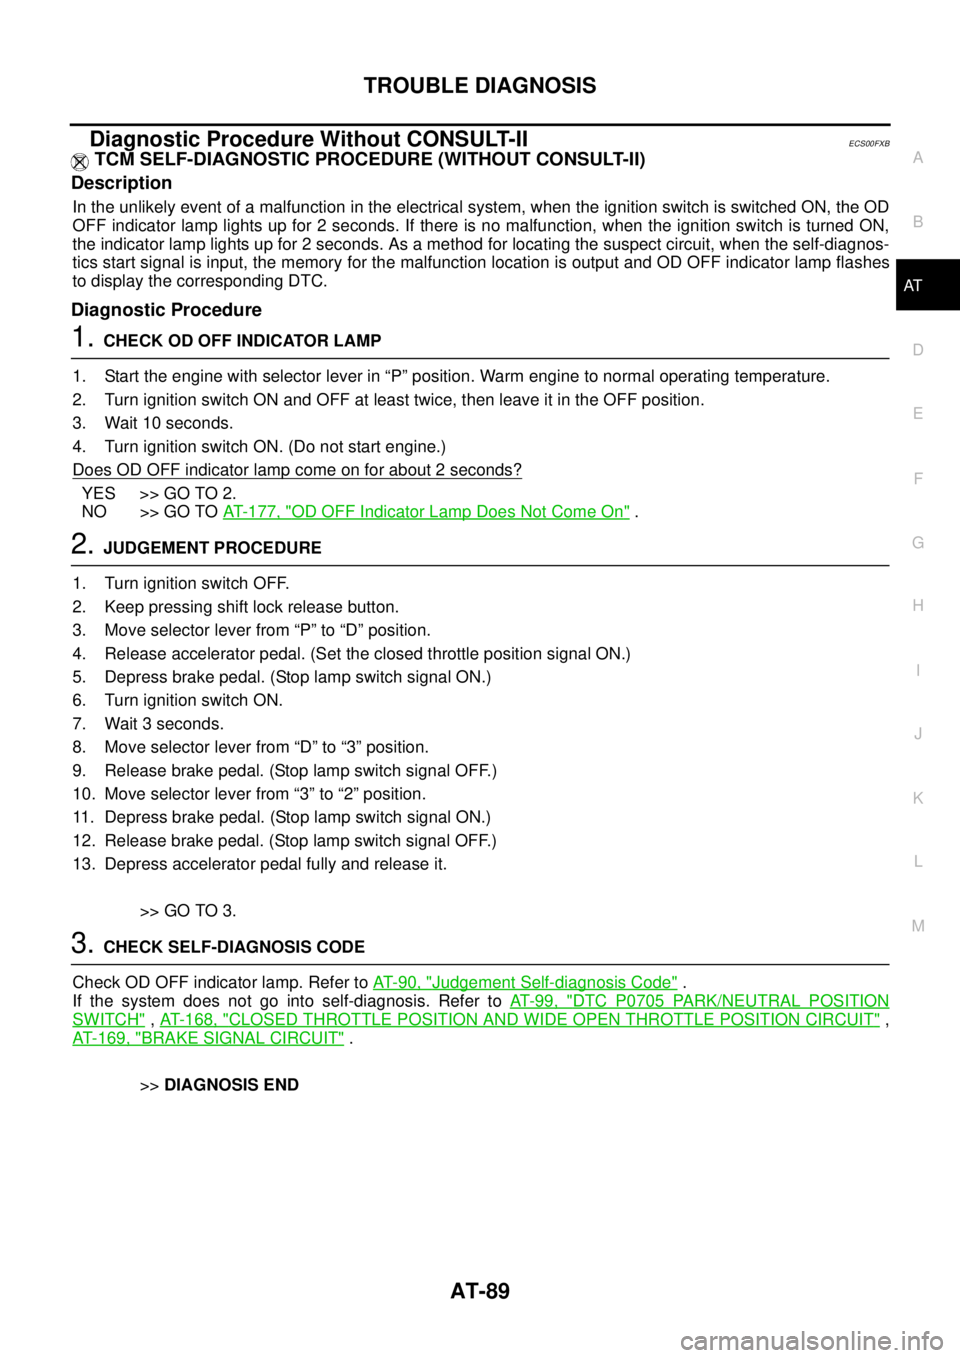
Diagnostic Procedure Without CONSULT-IIECS00FXB
TCM SELF-DIAGNOSTIC PROCEDURE (WITHOUT CONSULT-II)
Description
In the unlikely event of a malfunction in the electrical system, when the ignition switch is switched ON, the OD
OFF indicator lamp lights up for 2 seconds. If there is no malfunction, when the ignition switch is turned ON,
the indicator lamp lights up for 2 seconds. As a method for locating the suspect circuit, when the self-diagnos-
tics start signal is input, the memory for the malfunction location is output and OD OFF indicator lamp flashes
to display the corresponding DTC.
Diagnostic Procedure
1.CHECK OD OFF INDICATOR LAMP
1. Start the engine with selector lever in “P” position. Warm engine to normal operating temperature.
2. Turn ignition switch ON and OFF at least twice, then leave it in the OFF position.
3. Wait 10 seconds.
4. Turn ignition switch ON. (Do not start engine.)
Does OD OFF indicator lamp come on for about 2 seconds?
YES >> GO TO 2.
NO >> GO TOAT- 1 7 7 , "
OD OFF Indicator Lamp Does Not Come On".
2.JUDGEMENT PROCEDURE
1. Turn ignition switch OFF.
2. Keep pressing shift lock release button.
3. Move selector lever from “P” to “D” position.
4. Release accelerator pedal. (Set the closed throttle position signal ON.)
5. Depress brake pedal. (Stop lamp switch signal ON.)
6. Turn ignition switch ON.
7. Wait 3 seconds.
8. Move selector lever from “D” to “3” position.
9. Release brake pedal. (Stop lamp switch signal OFF.)
10. Move selector lever from “3” to “2” position.
11. Depress brake pedal. (Stop lamp switch signal ON.)
12. Release brake pedal. (Stop lamp switch signal OFF.)
13. Depress accelerator pedal fully and release it.
>> GO TO 3.
3.CHECK SELF-DIAGNOSIS CODE
Check OD OFF indicator lamp. Refer toAT-90, "
Judgement Self-diagnosis Code".
If the system does not go into self-diagnosis. Refer toAT-99, "
DTC P0705 PARK/NEUTRAL POSITION
SWITCH",AT- 1 6 8 , "CLOSED THROTTLE POSITION AND WIDE OPEN THROTTLE POSITION CIRCUIT",
AT- 1 6 9 , "
BRAKE SIGNAL CIRCUIT".
>>DIAGNOSIS END
Page 98 of 3171
AT-90
TROUBLE DIAGNOSIS
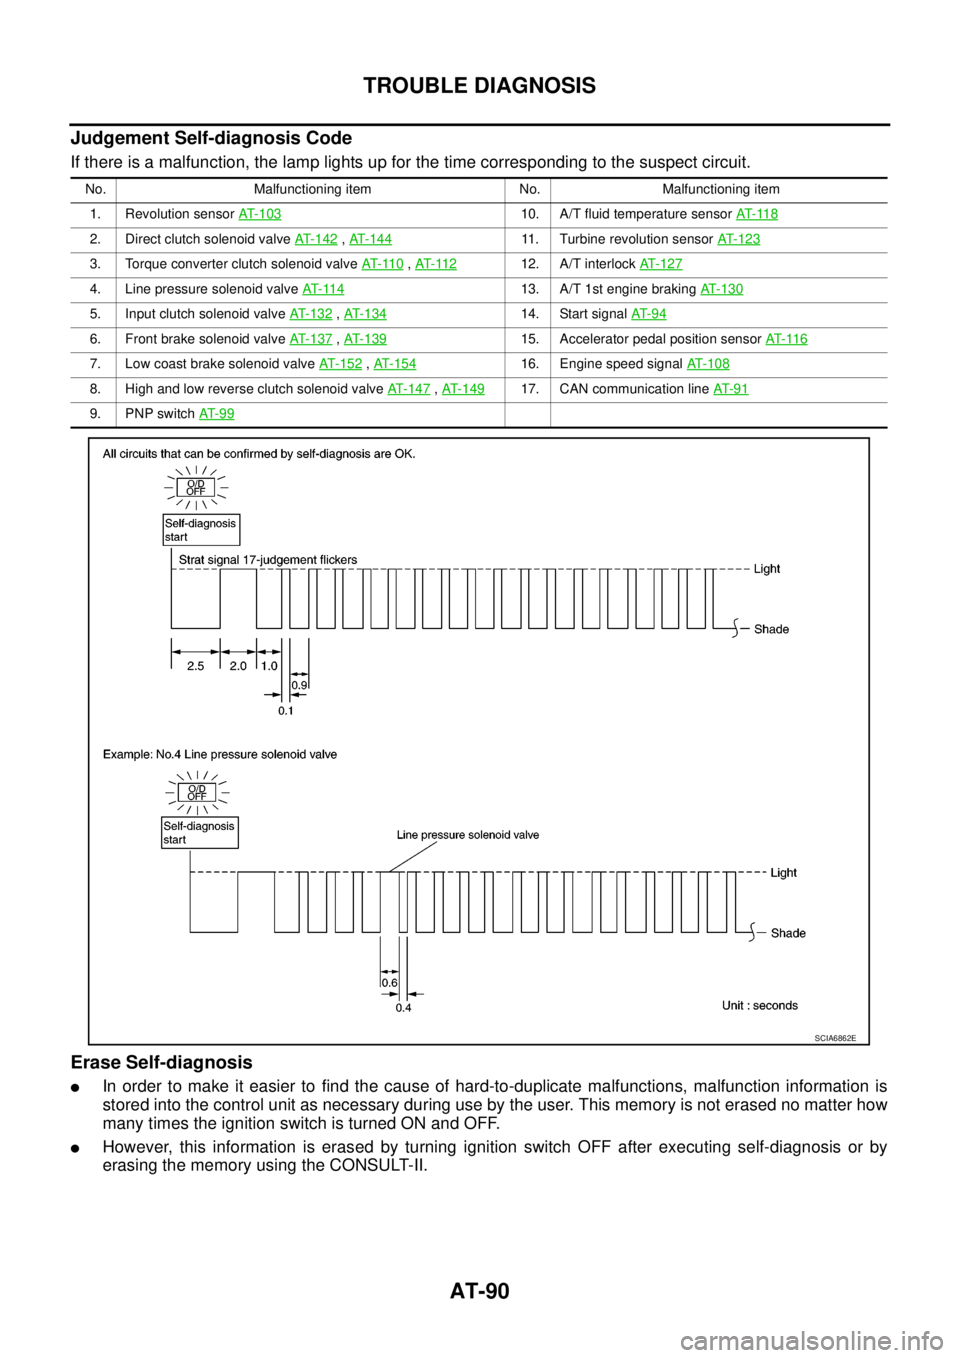
Judgement Self-diagnosis Code
If there is a malfunction, the lamp lights up for the time corresponding to the suspect circuit.
Erase Self-diagnosis
lIn order to make it easier to find the cause of hard-to-duplicate malfunctions, malfunction information is
stored into the control unit as necessary during use by the user. This memory is not erased no matter how
many times the ignition switch is turned ON and OFF.
lHowever, this information is erased by turning ignition switch OFF after executing self-diagnosis or by
erasing the memory using the CONSULT-II.
No. Malfunctioning item No. Malfunctioning item
1. Revolution sensorAT- 1 0 3
10. A/T fluid temperature sensorAT- 11 8
2. Direct clutch solenoid valveAT- 1 4 2,AT-14411. Turbine revolution sensorAT- 1 2 3
3. Torque converter clutch solenoid valveAT- 11 0,AT- 11 212. A/T interlockAT-127
4. Line pressure solenoid valveAT- 11 413. A/T 1st engine brakingAT-130
5. Input clutch solenoid valveAT- 1 3 2,AT- 1 3 414. Start signalAT- 9 4
6. Front brake solenoid valveAT-137,AT- 1 3 915. Accelerator pedal position sensorAT- 11 6
7. Low coast brake solenoid valveAT- 1 5 2,AT- 1 5 416. Engine speed signalAT-108
8. High and low reverse clutch solenoid valveAT-147,AT- 1 4 917. CAN communication lineAT- 9 1
9. PNP switchAT- 9 9
SCIA6862E
Page 99 of 3171
DTC U1000 CAN COMMUNICATION LINE
AT-91
D
E
F
G
H
I
J
K
L
MA
B
AT
DTC U1000 CAN COMMUNICATION LINEPFP:23710
DescriptionECS00FXC
CAN (Controller Area Network) is a serial communication line for real time application. It is an on-vehicle mul-
tiplex communication line with high data communication speed and excellent malfunction detection ability.
Many electronic control units are equipped onto a vehicle, and each control unit shares information and links
with other control units during operation (not independent). In CAN communication, control units are con-
nected with 2 communication lines (CAN H line, CAN L line) allowing a high rate of information transmission
with less wiring. Each control unit transmits/receives data but selectively reads required data only.
On Board Diagnosis LogicECS00FXD
Diagnostic trouble code “U1000 CAN COMM CIRCUIT” with CONSULT-II or 17th judgement flicker without
CONSULT-II is detected when TCM cannot communicate to other control units.
Possible CauseECS00FXE
Harness or connectors
(CAN communication line is open or shorted.)
DTC Confirmation ProcedureECS00FXF
NOTE:
If “DTC Confirmation Procedure” has been previously performed, always turn ignition switch OFF and
wait at least 10 seconds before performing the next test.
After the repair, perform the following procedure to confirm the malfunction is eliminated.
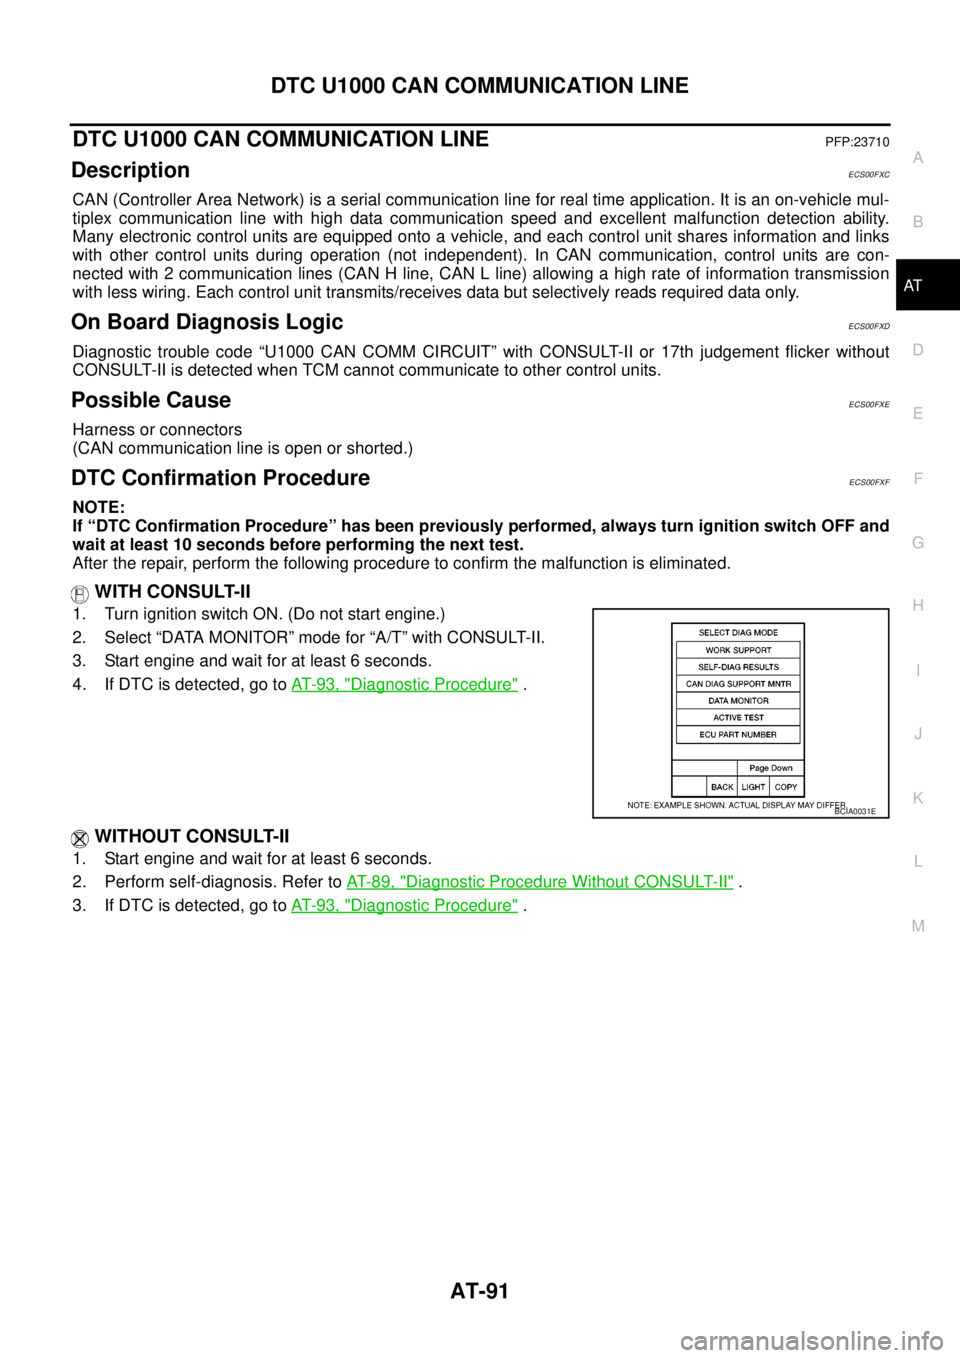
WITH CONSULT-II
1. Turn ignition switch ON. (Do not start engine.)
2. Select “DATA MONITOR” mode for “A/T” with CONSULT-II.
3. Start engine and wait for at least 6 seconds.
4. If DTC is detected, go toAT-93, "
Diagnostic Procedure".
WITHOUT CONSULT-II
1. Start engine and wait for at least 6 seconds.
2. Perform self-diagnosis. Refer toAT-89, "
Diagnostic Procedure Without CONSULT-II".
3. If DTC is detected, go toAT-93, "
Diagnostic Procedure".
BCIA0031E
Page 100 of 3171
AT-92
DTC U1000 CAN COMMUNICATION LINE
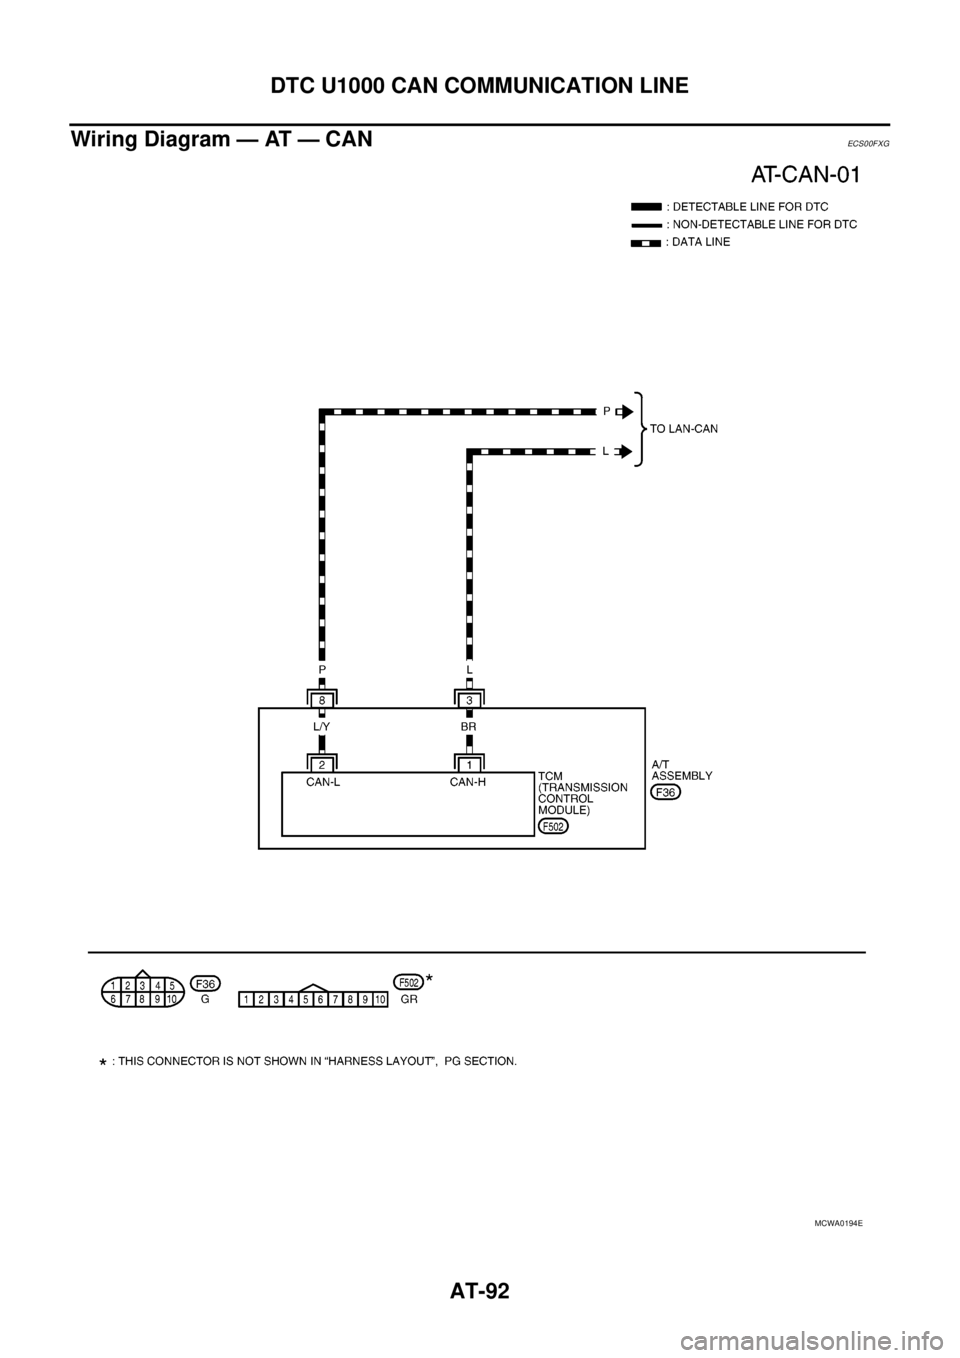
Wiring Diagram — AT — CAN
ECS00FXG
MCWA0194E