width NISSAN PATROL 1998 Y61 / 5.G Engine Mechanical Workshop Manual
[x] Cancel search | Manufacturer: NISSAN, Model Year: 1998, Model line: PATROL, Model: NISSAN PATROL 1998 Y61 / 5.GPages: 65, PDF Size: 2.4 MB
Page 2 of 65

Parts Requiring Angular Tightening
+Some important engine parts are tightened using an angular-
tightening method rather than a torque setting method.
+If these parts are tightened using a torque setting method, dis-
persal of the tightening force (axial bolt force) will be two or
three times that of the dispersal produced by using the correct
angular-tightening method.
+Although the torque setting values (described in this manual)
are equivalent to those used when bolts and nuts are tightened
with an angular-tightening method, they should be used for
reference only.
+To assure the satisfactory maintenance of the engine, bolts and
nuts must be tightened using an angular-tightening method.
+Before tightening the bolts and nuts, ensure that the thread and
seating surfaces are clean and then coated with engine oil.
+The bolts and nuts which require the angular-tightening method
are cylinder head bolts.
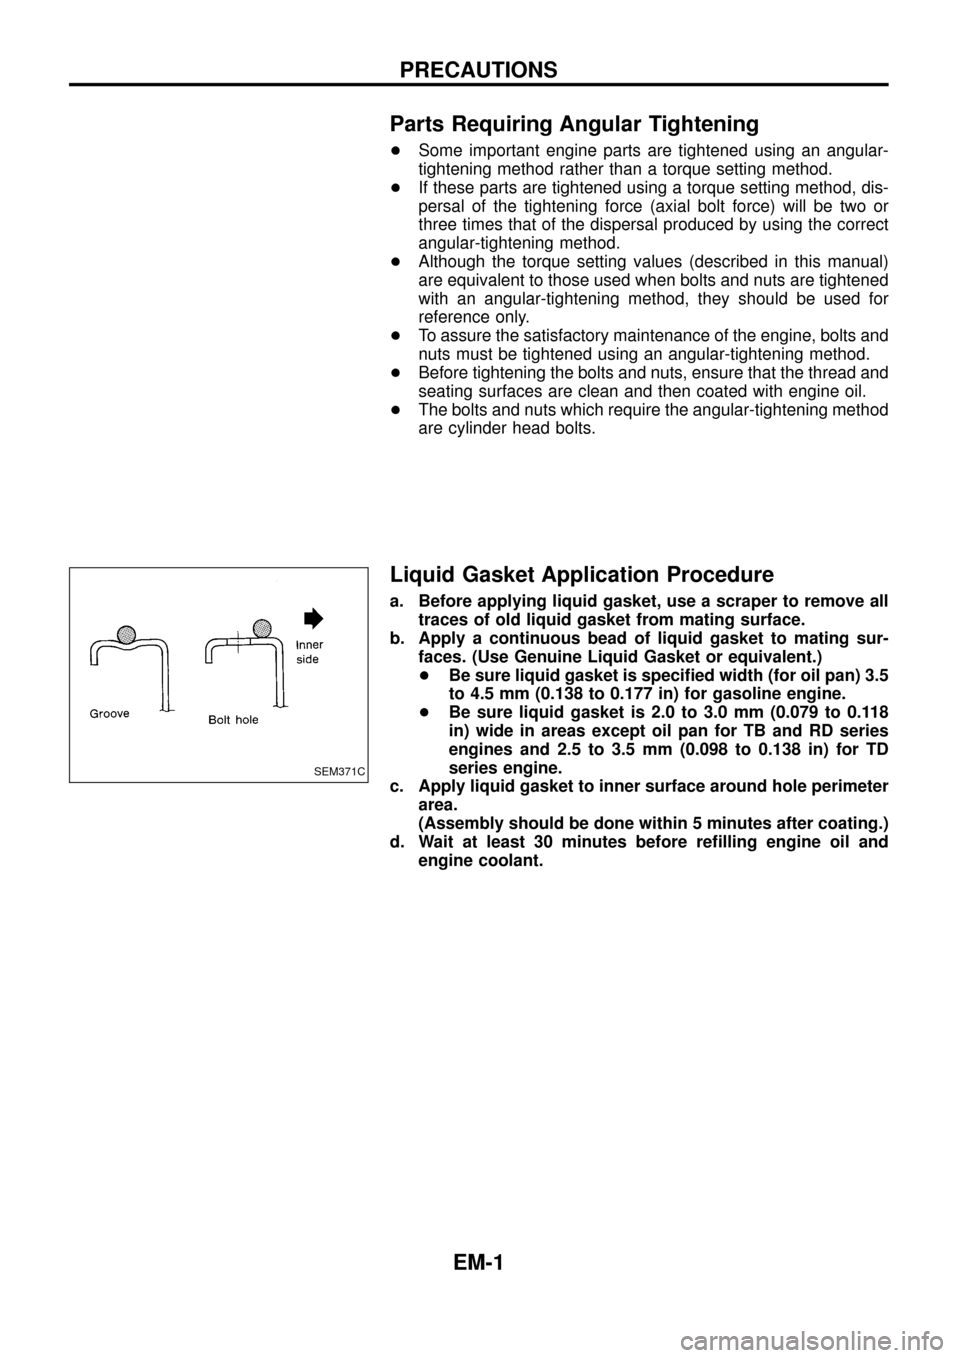
Liquid Gasket Application Procedure
a. Before applying liquid gasket, use a scraper to remove all
traces of old liquid gasket from mating surface.
b. Apply a continuous bead of liquid gasket to mating sur-
faces. (Use Genuine Liquid Gasket or equivalent.)
+Be sure liquid gasket is speci®ed width (for oil pan) 3.5
to 4.5 mm (0.138 to 0.177 in) for gasoline engine.
+Be sure liquid gasket is 2.0 to 3.0 mm (0.079 to 0.118
in) wide in areas except oil pan for TB and RD series
engines and 2.5 to 3.5 mm (0.098 to 0.138 in) for TD
series engine.
c. Apply liquid gasket to inner surface around hole perimeter
area.
(Assembly should be done within 5 minutes after coating.)
d. Wait at least 30 minutes before re®lling engine oil and
engine coolant.
SEM371C
PRECAUTIONS
EM-1
Page 64 of 65

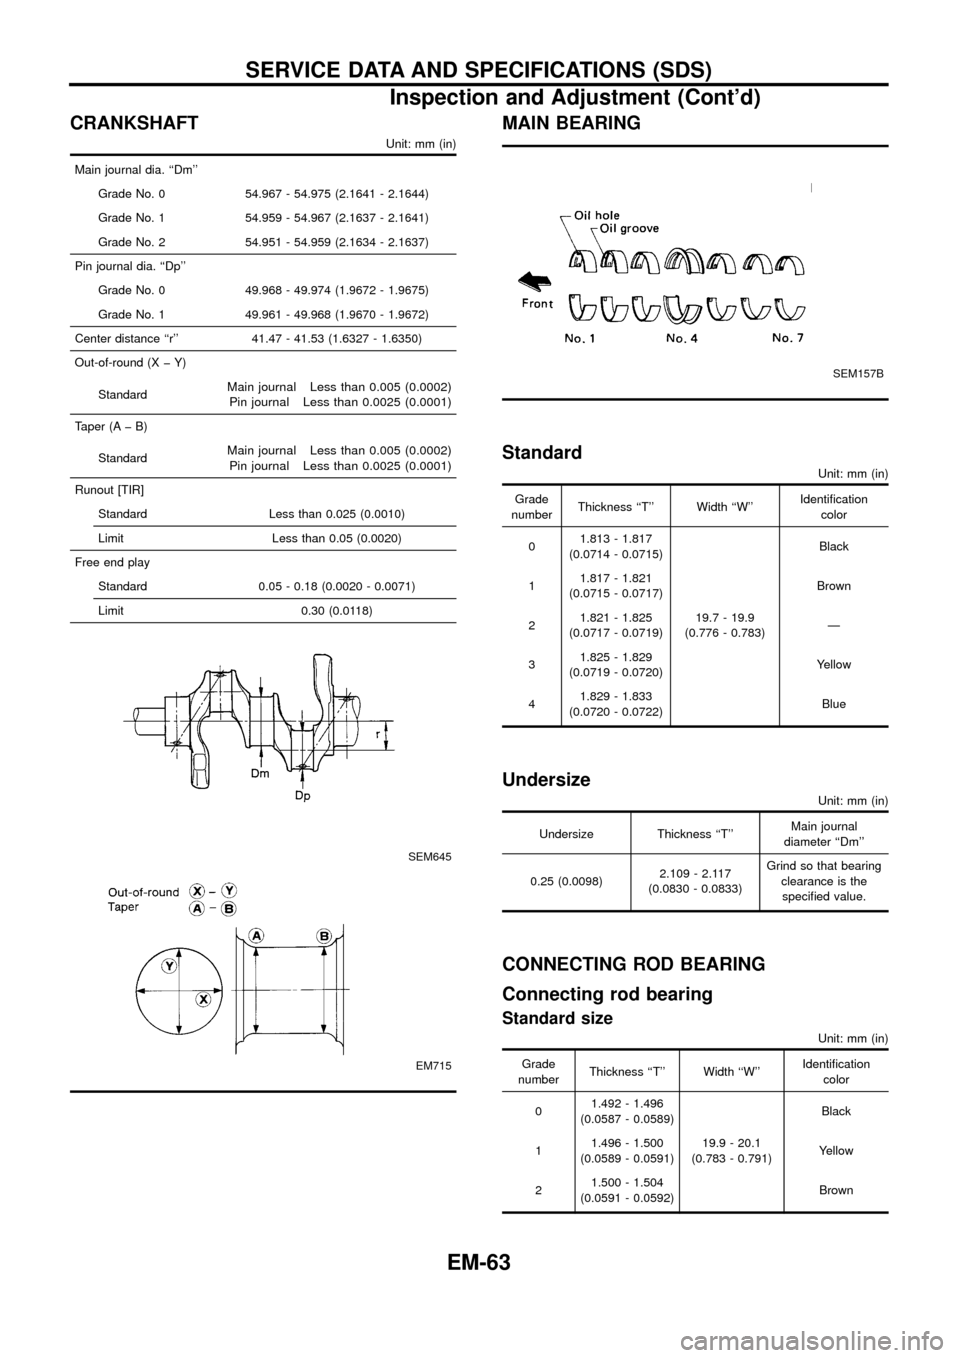
CRANKSHAFT
Unit: mm (in)
Main journal dia. ``Dm''
Grade No. 0 54.967 - 54.975 (2.1641 - 2.1644)
Grade No. 1 54.959 - 54.967 (2.1637 - 2.1641)
Grade No. 2 54.951 - 54.959 (2.1634 - 2.1637)
Pin journal dia. ``Dp''
Grade No. 0 49.968 - 49.974 (1.9672 - 1.9675)
Grade No. 1 49.961 - 49.968 (1.9670 - 1.9672)
Center distance ``r'' 41.47 - 41.53 (1.6327 - 1.6350)
Out-of-round (X þ Y)
Standard
Main journal Less than 0.005 (0.0002)
Pin journal Less than 0.0025 (0.0001)
Taper (A þ B)
Standard
Main journal Less than 0.005 (0.0002)
Pin journal Less than 0.0025 (0.0001)
Runout [TIR]
Standard Less than 0.025 (0.0010)
Limit Less than 0.05 (0.0020)
Free end play
Standard 0.05 - 0.18 (0.0020 - 0.0071)
Limit 0.30 (0.0118)
SEM645
EM715
MAIN BEARING
SEM157B
Standard
Unit: mm (in)
Grade
numberThickness ``T'' Width ``W''Identi®cation
color
01.813 - 1.817
(0.0714 - 0.0715)
19.7 - 19.9
(0.776 - 0.783)Black
11.817 - 1.821
(0.0715 - 0.0717)Brown
21.821 - 1.825
(0.0717 - 0.0719)Ð
31.825 - 1.829
(0.0719 - 0.0720)Yellow
41.829 - 1.833
(0.0720 - 0.0722)Blue
Undersize
Unit: mm (in)
Undersize Thickness ``T''Main journal
diameter ``Dm''
0.25 (0.0098)2.109 - 2.117
(0.0830 - 0.0833)Grind so that bearing
clearance is the
speci®ed value.
CONNECTING ROD BEARING
Connecting rod bearing
Standard size
Unit: mm (in)
Grade
numberThickness ``T'' Width ``W''Identi®cation
color
01.492 - 1.496
(0.0587 - 0.0589)
19.9 - 20.1
(0.783 - 0.791)Black
11.496 - 1.500
(0.0589 - 0.0591)Yellow
21.500 - 1.504
(0.0591 - 0.0592)Brown
SERVICE DATA AND SPECIFICATIONS (SDS)
Inspection and Adjustment (Cont'd)
EM-63