NISSAN PICK-UP 2001 Repair Manual
Manufacturer: NISSAN, Model Year: 2001, Model line: PICK-UP, Model: NISSAN PICK-UP 2001Pages: 1306, PDF Size: 31.7 MB
Page 621 of 1306

Diagnostic Procedure
1 CHECK ECM POWER SUPPLY CIRCUIT
1. Turn ignition switch ªOFFº.
2. Disconnect ECM relay.
SEC950C
3. Check voltage between ECM terminals 2, 7 and ground with CONSULT-II or tester.
SEC241D
OK or NG
OKcGO TO 3.
NGcGO TO 2.
2 DETECT MALFUNCTIONING PART
Check the following.
+20A fuse
+Harness for open and short between ECM relay and battery
cRepair open circuit or short to ground or short to power in harness or connectors.
3 CHECK ECM INPUT SIGNAL CIRCUIT FOR OPEN AND SHORT
1. Turn ignition switch ªOFFº.
2. Disconnect ECM harness connector.
3. Check harness continuity between ECM terminals 56, 61 and ECM relay terminal 6. Refer to Wiring Diagram.
Continuity should exist.
4. Also check harness for short to ground and short to power.
OK or NG
OKcGO TO 5.
NGcGO TO 4.
DTC 0902 ECM RLYYD25DDTi
EC-3596
Page 622 of 1306
4 DETECT MALFUNCTIONING PART
Check the following.
+Harness connectors E101, M5
+Harness connectors M47, F55 (RHD models)
+Harness for open or short between ECM and ECM relay
cRepair open circuit or short to ground or short to power in harness or connectors.
5 CHECK ECM OUTPUT SIGNAL CIRCUIT FOR OPEN AND SHORT
1. Check harness continuity between ECM terminal 4 and ECM relay terminal 1. Refer to Wiring Diagram.
Continuity should exist.
2. Also check harness for short to ground and short to power.
OK or NG
OKcGO TO 7.
NGcGO TO 6.
6 DETECT MALFUNCTIONING PART
Check the following.
+Harness connectors E101, M5
+Harness connectors M48, F54 (RHD models)
+Harness for open or short between ECM and ECM relay
cRepair open circuit or short to ground or short to power in harness or connectors.
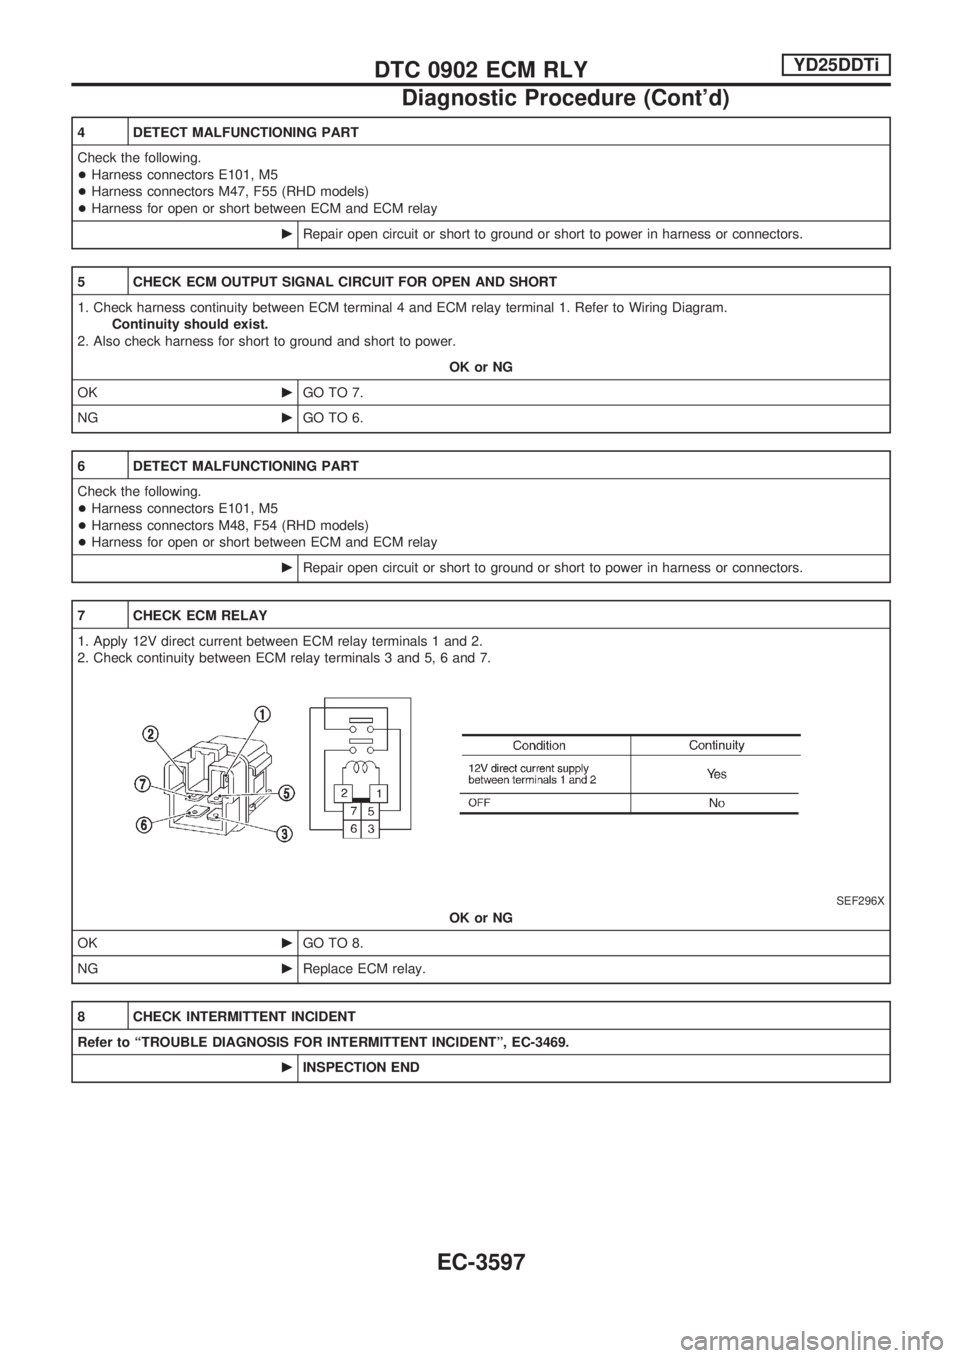
7 CHECK ECM RELAY
1. Apply 12V direct current between ECM relay terminals 1 and 2.
2. Check continuity between ECM relay terminals 3 and 5, 6 and 7.
SEF296X
OK or NG
OKcGO TO 8.
NGcReplace ECM relay.
8 CHECK INTERMITTENT INCIDENT
Refer to ªTROUBLE DIAGNOSIS FOR INTERMITTENT INCIDENTº, EC-3469.
cINSPECTION END
DTC 0902 ECM RLYYD25DDTi
Diagnostic Procedure (Cont'd)
EC-3597
Page 623 of 1306
Description
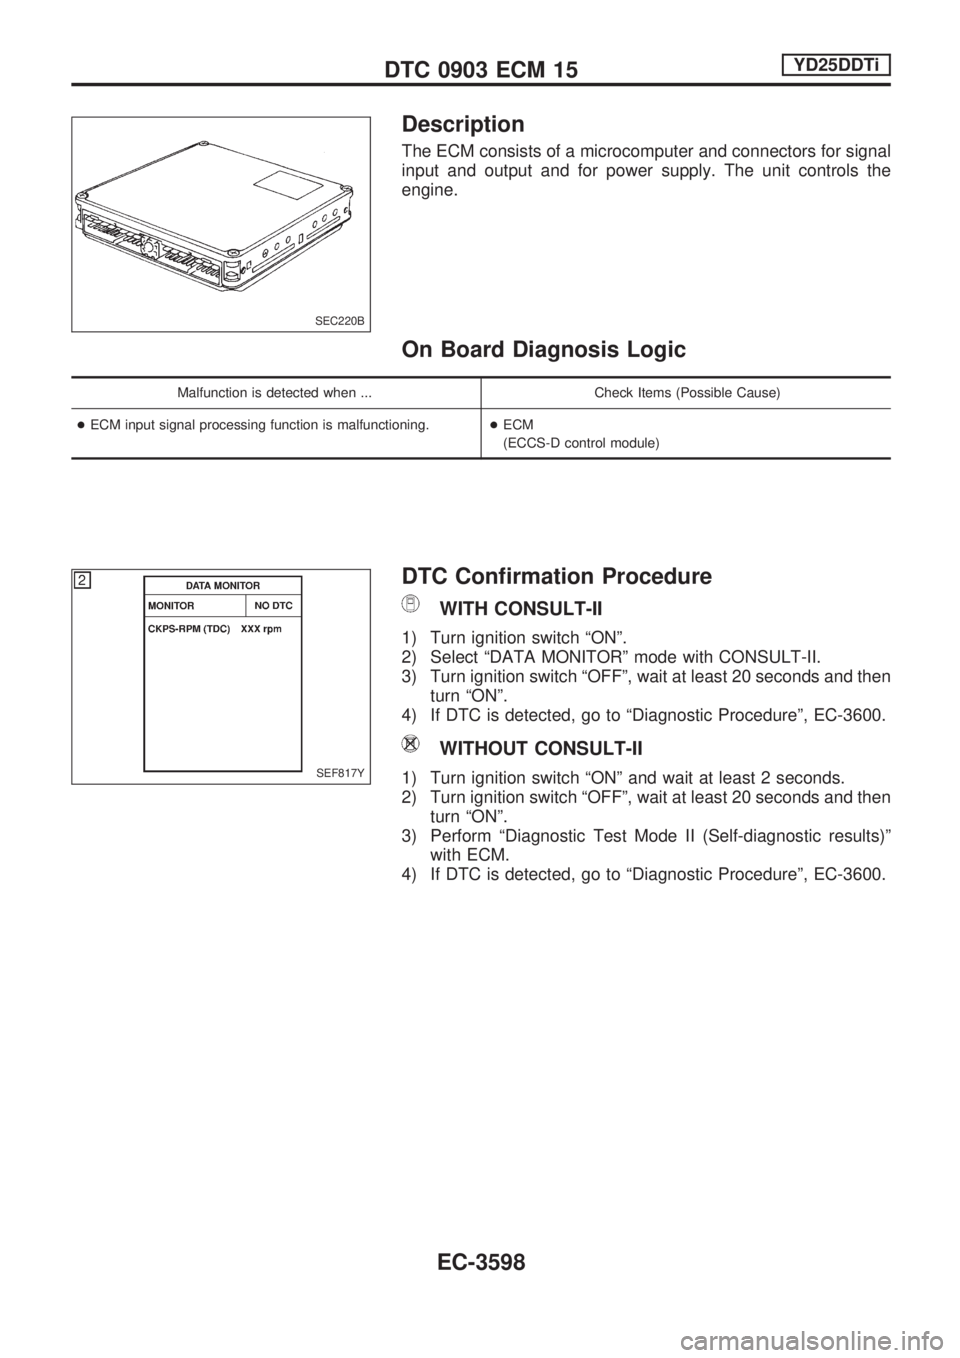
The ECM consists of a microcomputer and connectors for signal
input and output and for power supply. The unit controls the
engine.
On Board Diagnosis Logic
Malfunction is detected when ... Check Items (Possible Cause)
+ECM input signal processing function is malfunctioning.+ECM
(ECCS-D control module)
DTC Confirmation Procedure
WITH CONSULT-II
1) Turn ignition switch ªONº.
2) Select ªDATA MONITORº mode with CONSULT-II.
3) Turn ignition switch ªOFFº, wait at least 20 seconds and then
turn ªONº.
4) If DTC is detected, go to ªDiagnostic Procedureº, EC-3600.
WITHOUT CONSULT-II
1) Turn ignition switch ªONº and wait at least 2 seconds.
2) Turn ignition switch ªOFFº, wait at least 20 seconds and then
turn ªONº.
3) Perform ªDiagnostic Test Mode II (Self-diagnostic results)º
with ECM.
4) If DTC is detected, go to ªDiagnostic Procedureº, EC-3600.
SEC220B
SEF817Y
DTC 0903 ECM 15YD25DDTi
EC-3598
Page 624 of 1306
Diagnostic Procedure
1 INSPECTION START
With CONSULT-II
1. Turn ignition switch ªONº.
2. Select ªSELF DIAG RESULTSº mode with CONSULT-II.
3. Touch ªERASEº.
4. Perform ªDTC Confirmation Procedureº, EC-3598, again.
5. Is the malfunction displayed again?
Without CONSULT-II
1. Turn ignition switch ªONº.
2. Erase the Diagnostic Test Mode II (Self-diagnostic results) memory.
3. Perform ªDTC Confirmation Procedureº, EC-3598, again.
4. Perform ªDiagnostic Test Mode II (Self-diagnostic results)º.
5. Is the DTC 0903 displayed again?
Yes or No
YescGO TO 2.
NocINSPECTION END
2 REPLACE ECM
1. Replace ECM.
2. Perform intialization of NATS system and registration of all NATS ignition key IDs. Refer to EC-3429. (Models with NATS)
3. Perform ªAccelerator Position Sensor Idle Position Learningº of ªBASIC SERVICE PROCEDUREº. Refer to EC-3427.
cINSPECTION END
DTC 0903 ECM 15YD25DDTi
EC-3599
Page 625 of 1306
Component Description
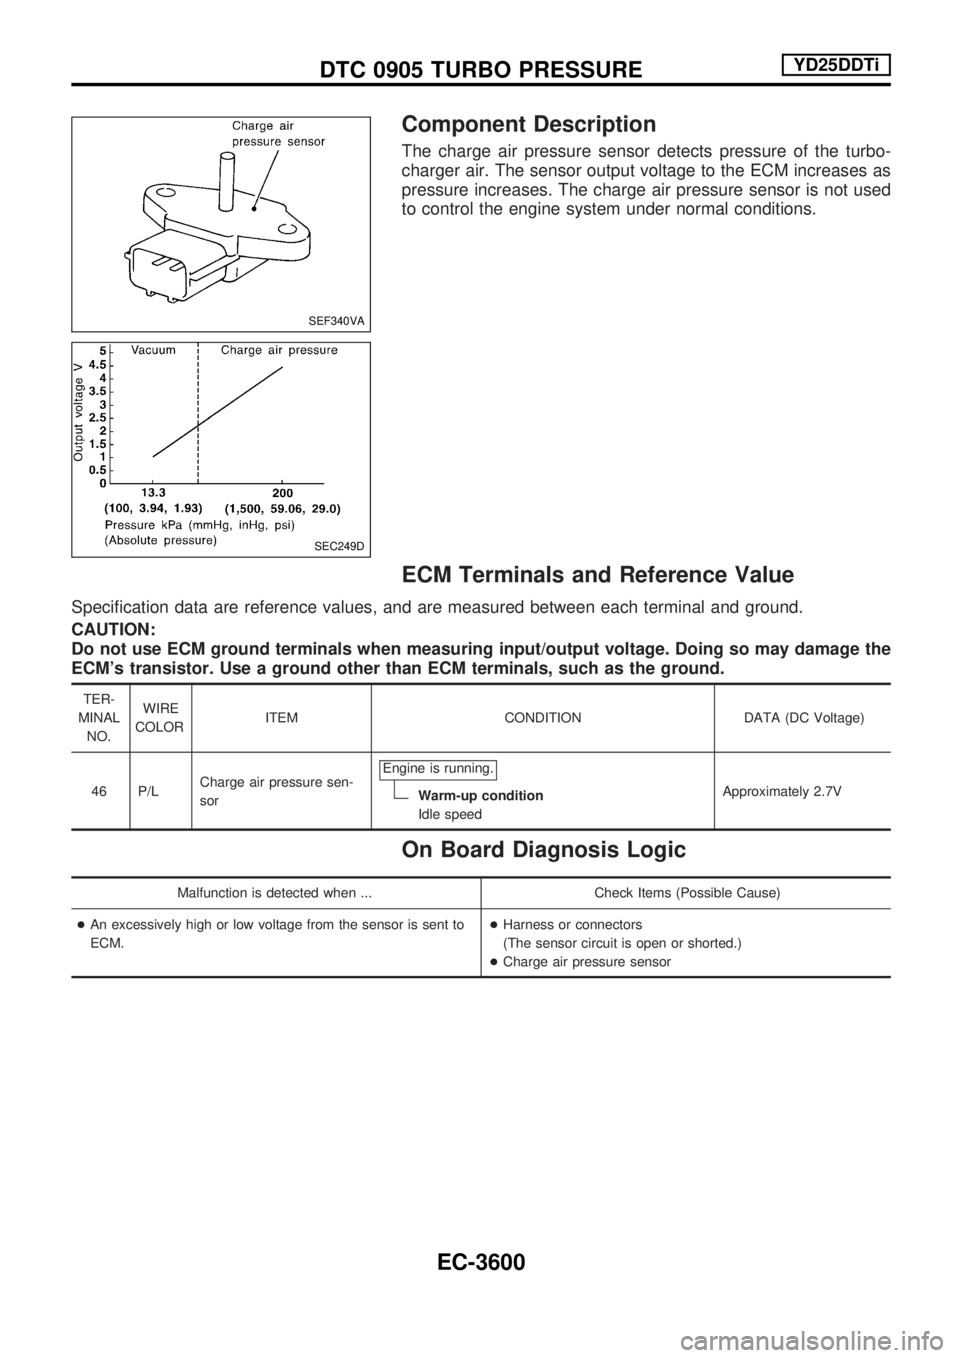
The charge air pressure sensor detects pressure of the turbo-
charger air. The sensor output voltage to the ECM increases as
pressure increases. The charge air pressure sensor is not used
to control the engine system under normal conditions.
ECM Terminals and Reference Value
Specification data are reference values, and are measured between each terminal and ground.
CAUTION:
Do not use ECM ground terminals when measuring input/output voltage. Doing so may damage the
ECM's transistor. Use a ground other than ECM terminals, such as the ground.
TER-
MINAL
NO.WIRE
COLORITEM CONDITION DATA (DC Voltage)
46 P/LCharge air pressure sen-
sorEngine is running.
Warm-up condition
Idle speedApproximately 2.7V
On Board Diagnosis Logic
Malfunction is detected when ... Check Items (Possible Cause)
+An excessively high or low voltage from the sensor is sent to
ECM.+Harness or connectors
(The sensor circuit is open or shorted.)
+Charge air pressure sensor
SEF340VA
SEC249D
DTC 0905 TURBO PRESSUREYD25DDTi
EC-3600
Page 626 of 1306

DTC Confirmation Procedure
WITH CONSULT-II
1) Turn ignition switch ªONº.
2) Select ªDATA MONITORº mode with CONSULT-II.
3) Wait at least 1 second.
4) If DTC is detected, go to ªDiagnostic Procedureº, EC-3604.
WITHOUT CONSULT-II
1) Turn ignition switch ªONº and wait at least 1 second.
2) Turn ignition switch ªOFFº, wait at least 5 seconds and then
turn ªONº.
3) Perform ªDiagnostic Test Mode II (Self-diagnostic results)º
with ECM.
4) If DTC is detected, go to ªDiagnostic Procedureº, EC-3604.SEF817Y
DTC 0905 TURBO PRESSUREYD25DDTi
EC-3601
Page 627 of 1306

Wiring Diagram
GEC283A
DTC 0905 TURBO PRESSUREYD25DDTi
EC-3602
Page 628 of 1306

Diagnostic Procedure
1 CHECK CHARGE AIR PRESSURE SENSOR POWER SUPPLY CIRCUIT
1. Stop engine.
2. Disconnect charge air pressure sensor harness connector.
SEC234D
3. Turn ignition switch ªONº.
4. Check voltage between charge air pressure sensor terminal 1 and ground with CONSULT-II or tester.
SEF306Z
OK or NG
OKcGO TO 2.
NGcRepair harness or connectors.
2 CHECK CHARGE AIR PRESSURE SENSOR GROUND CIRCUIT FOR OPEN AND SHORT
1. Turn ignition switch ªOFFº.
2. Check harness continuity between charge air pressure sensor terminal 3 and engine ground. Refer to Wiring Diagram.
Continuity should exist.
3. Also check harness for short to power.
OK or NG
OKcGO TO 3.
NGcRepair open circuit or short to ground or short to power in harness or connectors.
3 CHECK CHARGE AIR PRESSURE SENSOR INPUT SIGNAL CIRCUIT FOR OPEN AND SHORT
1. Disconnect ECM harness connector.
2. Check harness continuity between ECM terminal 46 and charge air pressure sensor terminal 2. Refer to Wiring Diagram.
Continuity should exist.
3. Also check harness for short to ground and short to power.
OK or NG
OKcGO TO 4.
NGcRepair open circuit or short to ground or short to power in harness or connectors.
DTC 0905 TURBO PRESSUREYD25DDTi
EC-3603
Page 629 of 1306

4 CHECK CHARGE AIR PRESSURE SENSOR
1. Remove charge air pressure sensor with its harness connector connected.
2. Turn ignition switch ªONº.
3. Use pump to apply pressure to charge air pressure sensor as shown in the figure.
CAUTION:
+Always calibrate the pressure pump gauge when using it.
+Inspection should be done at room temperature [10 - 30ÉC (50 - 86ÉF)].
4. Check the output voltage between charge air pressure sensor terminal 2 and engine ground.
SEF449Z
OK or NG
OKcGO TO 5.
NGcReplace charge air pressure sensor.
5 CHECK INTERMITTENT INCIDENT
Refer to ªTROUBLE DIAGNOSIS FOR INTERMITTENT INCIDENTº, EC-3469.
cINSPECTION END
DTC 0905 TURBO PRESSUREYD25DDTi
Diagnostic Procedure (Cont'd)
EC-3604
Page 630 of 1306
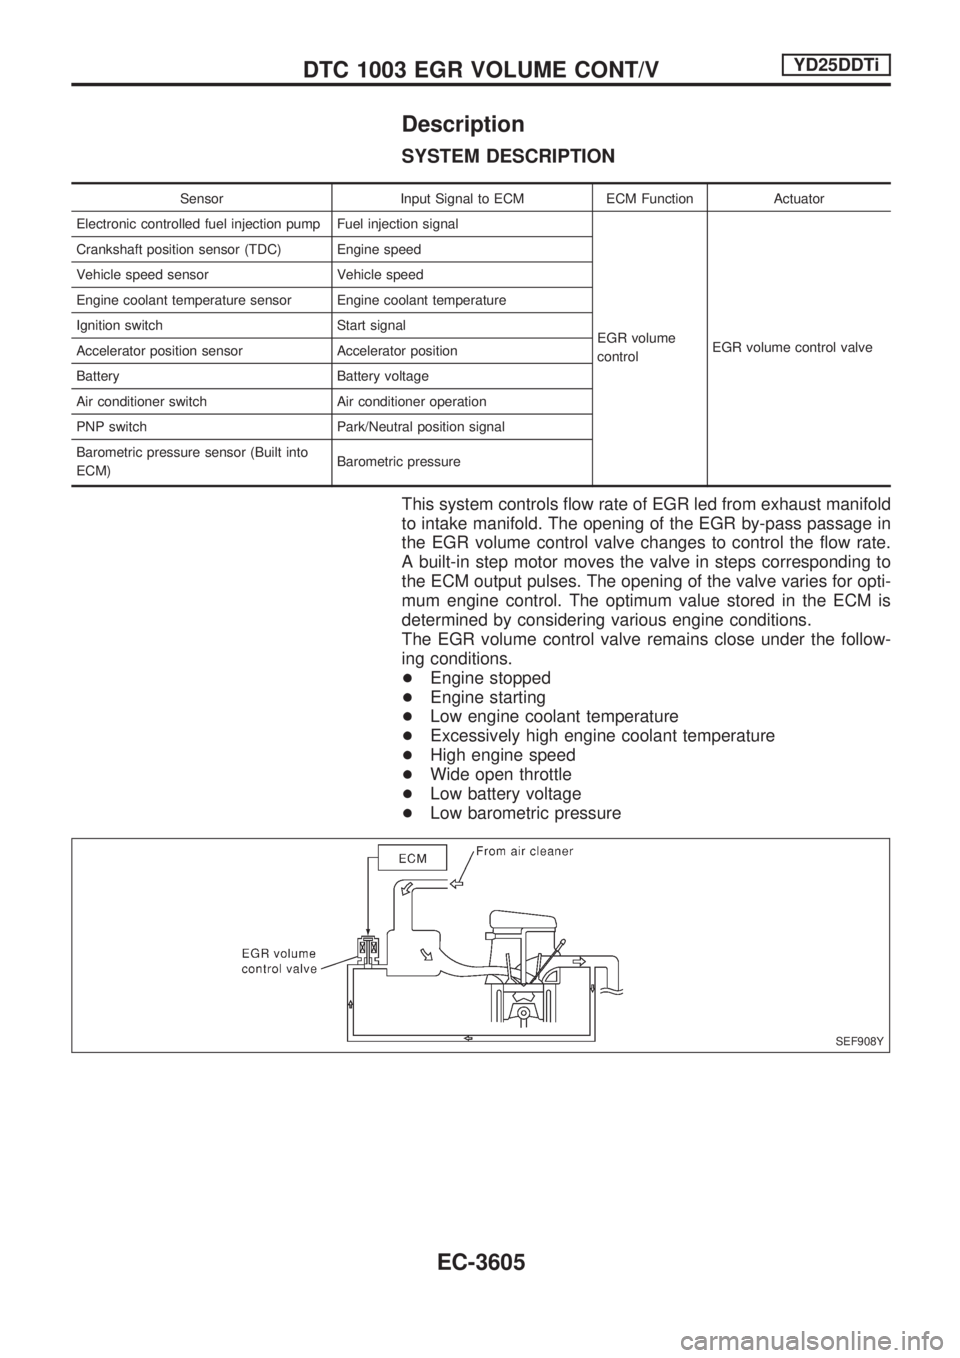
Description
SYSTEM DESCRIPTION
Sensor Input Signal to ECM ECM Function Actuator
Electronic controlled fuel injection pump Fuel injection signal
EGR volume
controlEGR volume control valve Crankshaft position sensor (TDC) Engine speed
Vehicle speed sensor Vehicle speed
Engine coolant temperature sensor Engine coolant temperature
Ignition switch Start signal
Accelerator position sensor Accelerator position
Battery Battery voltage
Air conditioner switch Air conditioner operation
PNP switch Park/Neutral position signal
Barometric pressure sensor (Built into
ECM)Barometric pressure
This system controls flow rate of EGR led from exhaust manifold
to intake manifold. The opening of the EGR by-pass passage in
the EGR volume control valve changes to control the flow rate.
A built-in step motor moves the valve in steps corresponding to
the ECM output pulses. The opening of the valve varies for opti-
mum engine control. The optimum value stored in the ECM is
determined by considering various engine conditions.
The EGR volume control valve remains close under the follow-
ing conditions.
+Engine stopped
+Engine starting
+Low engine coolant temperature
+Excessively high engine coolant temperature
+High engine speed
+Wide open throttle
+Low battery voltage
+Low barometric pressure
SEF908Y
DTC 1003 EGR VOLUME CONT/VYD25DDTi
EC-3605