high NISSAN TEANA 2014 User Guide
[x] Cancel search | Manufacturer: NISSAN, Model Year: 2014, Model line: TEANA, Model: NISSAN TEANA 2014Pages: 4801, PDF Size: 51.2 MB
Page 287 of 4801
PRECAUTIONS IN REPAIRING HIGH STRENGTH STEELBRM-9
< PRECAUTION >
C
D E
F
G H
I
J
L
M A
B
BRM
N
O P
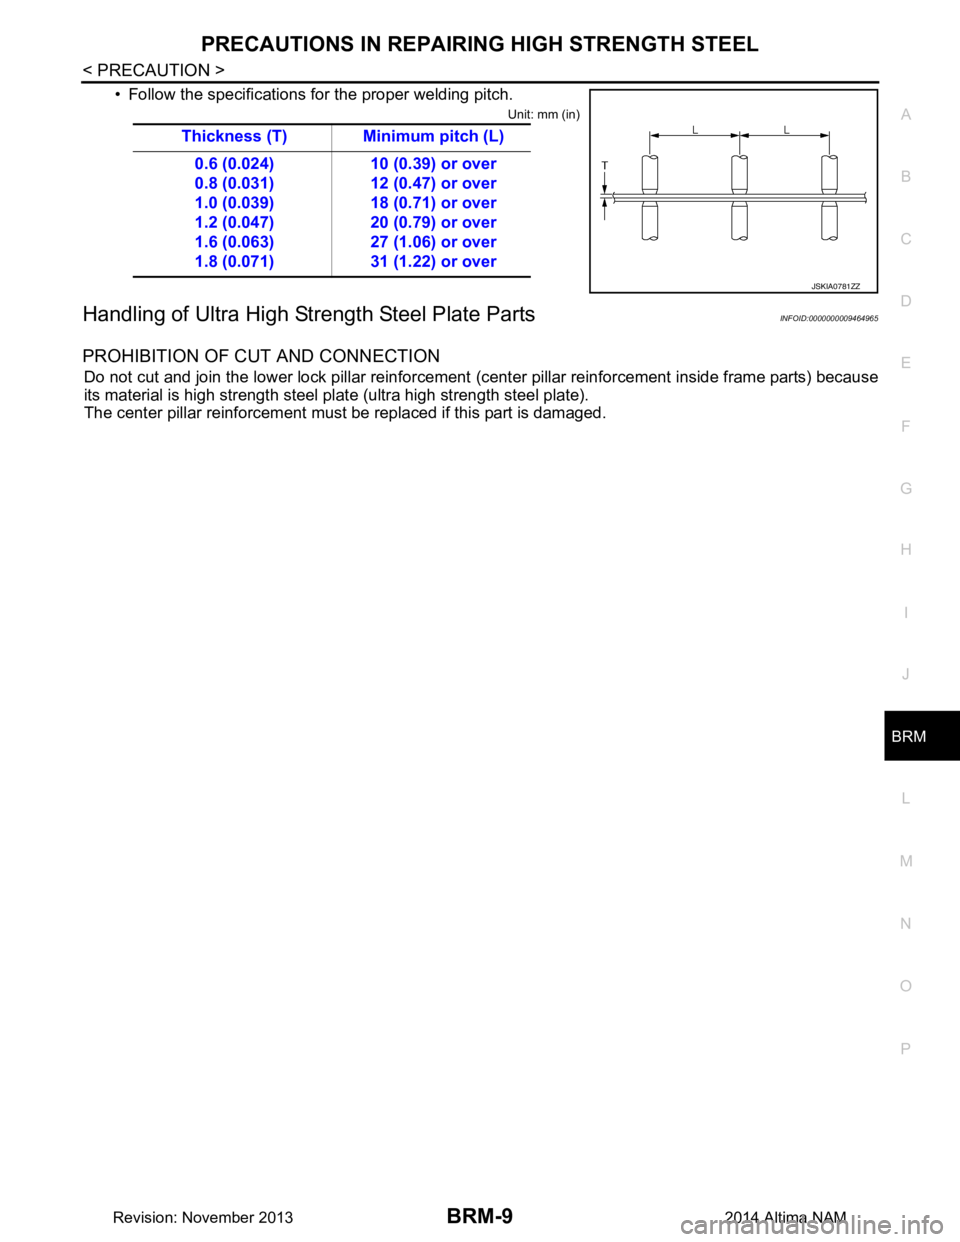
• Follow the specifications for the proper welding pitch.
Unit: mm (in)
Handling of Ultra High Str ength Steel Plate PartsINFOID:0000000009464965
PROHIBITION OF CUT AND CONNECTION
Do not cut and join the lower lock pillar reinforcement (center pillar reinforcement inside frame parts) because
its material is high strength steel pl ate (ultra high strength steel plate).
The center pillar reinforcement must be replaced if this part is damaged. Thickness (T) Minimum pitch (L)
0.6 (0.024)
0.8 (0.031)
1.0 (0.039)
1.2 (0.047)
1.6 (0.063)
1.8 (0.071) 10 (0.39) or over
12 (0.47) or over
18 (0.71) or over
20 (0.79) or over
27 (1.06) or over
31 (1.22) or over
JSKIA0781ZZ
Revision: November 20132014 Altima NAM
Page 301 of 4801

REPLACEMENT OPERATIONSBRM-23
< REMOVAL AND INSTALLATION >
C
D E
F
G H
I
J
L
M A
B
BRM
N
O P
REPLACEMENT OPERATIONS
DescriptionINFOID:0000000009464973
This section is prepared for technicians who have attai ned a high level of skill and experience in repairing col-
lision-damaged vehicles and also use modern servic e tools and equipment. Persons unfamiliar with body
repair techniques should not attempt to repair collision-damaged vehicles by using this section.
Technicians are also encouraged to read Body Repair M anual (Fundamentals) in order to ensure that the orig-
inal functions and quality of the vehicle can be mainta ined. The Body Repair Manual (Fundamentals) contains
additional information, including cautions and warning, that are not including in this manual. Technicians
should refer to both manuals to ensure proper repairs.
Please note that these information are prepared for wo rldwide usage, and as such, certain procedures might
not apply in some regions or countries.
Revision: November 20132014 Altima NAM
Page 364 of 4801

CHG
DIAGNOSIS AND REPAIR WORKFLOWCHG-19
< BASIC INSPECTION >
C
D E
F
G H
I
J
K L
B
A
O P
N
>> GO TO 2.
2.STOP POWER GENERATION VOLT
AGE VARIABLE CONTROL SYSTEM
Stop the operation of the power generation voltage variabl e control in either of the following procedures.
• After selecting “ENGINE” using CONSULT, set the DUTY value of “ALTERNATOR DUTY” to 0 % by select- ing “ALTERNATOR DUTY” of “Active Test”. Continue “Active Test” until the end of inspection. (When the
DUTY value is 0 or 100 %, the normal power generation is performed according to the characteristic of the
IC regulator of the generator.)
• Turn the ignition switch OFF, and disconnect the batte ry current sensor connector. [However, DTC (P1550–
P1554) of the engine might remain. After finishing the inspection, connect the battery current sensor connec-
tor and erase the self diagnosis results history of the engine using CONSULT.]
>> GO TO 3.
3.DIAGNOSIS WITH EXP-800 NI OR GR8-1200 NI
Perform the charging system test using Multitasking battery and electrical diagnostic station GR8-1200 NI or
Battery and electrical diagnostic analyzer EXP-800 NI. Re fer to the applicable Instruction Manual for proper
testing procedures.
Test result
NO PROBLEMS>>Charging system is normal and will also show “DIODE RIPPLE” test result.
NO VOLTAGE>>GO TO 4.
LOW VOLTAGE>>GO TO 12.
HIGH VOLTAGE>>GO TO 14.
EXCESSIVE RIPPLE, OPEN PHASE, OPEN DIODE or SHORTED DIODE>>Replace the generator. Refer
to CHG-32, "Removal and Installation"
. Perform “DIODE RIPPLE” test again using Multitasking
battery and electrical diagnostic station GR8-1200 NI or Battery and electrical diagnostic analyzer
EXP-800 NI to confirm repair.
4.INSPECTION WITH CHARGE WARNING LAMP (IGNITION SWITCH IS ON)
Turn the ignition switch ON.
Does the charge warning lamp illuminate?
YES >> GO TO 6.
NO >> GO TO 5.
5.“L” TERMINAL CIRCUIT (OPEN) INSPECTION
Check “L” terminal circuit (open). Refer to CHG-27, "Diagnosis Procedure"
.
Is the
“L” terminal circuit normal?
YES >> Replace generator. Refer to CHG-32, "Removal and Installation".
NO >> Repair as needed.
6.INSPECTION WITH CHARGE WARNING LAMP (IDLING)
Start the engine and run it at idle.
Does the charge warning lamp turn OFF?
YES >> GO TO 9.
NO >> GO TO 7.
7.“L” TERMINAL CIRCUIT (SHORT) INSPECTION
Check “L” terminal circuit (short). Refer to CHG-29, "Diagnosis Procedure"
.
Is the
“L” terminal circuit normal?
YES >> GO TO 8.
NO >> Repair as needed.
8.“S” TERMINAL CIRCUIT INSPECTION
Check “S” terminal circuit. Refer to CHG-30, "Diagnosis Procedure"
.
Is the
“S” terminal circuit normal?
YES >> GO TO 10.
Revision: November 20132014 Altima NAMRevision: November 20132014 Altima NAM
Page 389 of 4801

OVERHEATING CAUSE ANALYSISCO-9
< SYSTEM DESCRIPTION > [QR25DE]
C
D E
F
G H
I
J
K L
M A
CO
NP
O
OVERHEATING CAUSE ANALYSIS
Troubleshooting ChartINFOID:0000000009460389
Symptom Check items
Cooling sys-
tem parts
malfunction Poor heat transfer
Water pump malfunction Worn or loose drive belt
—
Thermostat stuck closed Coolant circulation
Damaged fins Dust contamination or rock
clogging
Mechanical damage
Clogged radiator cooling
tube Excess foreign material
(rust, dirt, sand, etc.)
Reduced air flow Cooling fan does not oper-
ate
Engine cooling fans —
High resistance to fan rota-
tion
Damaged fan blades
Damaged radiator shroud — Radiator shroud —
Improper coolant mixture
ratio — Coolant viscosity —
Poor coolant quality — Periodic maintenance —
Insufficient coolant Coolant leaks Cooling hose
Loose clamp
Cracked hose
Water pump Poor sealing
Radiator cap Loose
Poor sealing
Radiator O-ring for damage, deterio-
ration or improper fitting
Cracked radiator tank
Cracked radiator core
Reservoir tank Cracked reservoir tank
Overflowing reservoir tank Exhaust gas leaks into cool-
ing system Cylinder head deterioration
Cylinder head gasket deteri-
oration
Revision: November 20132014 Altima NAM
Page 390 of 4801

CO-10
< SYSTEM DESCRIPTION >[QR25DE]
OVERHEATING CAUSE ANALYSIS
Except cool-
ing system
parts mal-
function — Overload on engine
Abusive driving
High engine rpm under no
load
Driving in low gear for ex-
tended time
Driving at extremely high
speed
Powertrain sy stem malfunc-
tion
—
Installed improper size
wheels and tires
Dragging brakes
Improper ignition timing
Blocked or restricted air
flow Blocked radiator grille Installed car brassiere
—
Mud contamination or paper
clogging
Blocked bumper
Blocked radiator
Blocked condenser
Installed large fog lamp
Symptom Check items
Revision: November 20132014 Altima NAM
Page 391 of 4801

ENGINE COOLANTCO-11
< PERIODIC MAINTENANCE > [QR25DE]
C
D E
F
G H
I
J
K L
M A
CO
NP
O
PERIODIC MAINTENANCE
ENGINE COOLANT
System InspectionINFOID:0000000009460390
WARNING:
Do not remove the radiator cap when the engine is hot. Serious burns could occur from high-pressure
engine coolant escaping from the radiator. Wrap a thick cloth around the cap. Slowly push down and
turn it a quarter turn to allow built-up pressure to escape. Carefully remove the cap by pushing it down
and turning it all the way.
CHECKING COOLING SYSTEM HOSES
Check hoses for the following:
• Improper attachment
• Leaks
•Cracks
• Damage
• Loose connections
• Chafing
• Deterioration
CHECKING RESERVOIR LEVEL
• Check if the reservoir tank coolant level is within MIN to MAX when
the engine is cool.
• Adjust coolant level if it is too much or too little.
CHECKING COOLING SYSTEM FOR LEAKS
To check for leakage, apply pressure to the cooling system using
suitable tool (A) and Tool (B).
WARNING:
Do not remove the radiator cap wh en the engine is hot. Serious
burns could occur from high pressure coolant escaping from
the radiator.
CAUTION:
Higher pressure than specified may cause radiator damage.
CHECKING RADIATOR CAP
1. Inspect the radiator cap. • Replace the cap if the metal plunger cannot be seen around the edge of the black rubber gasket.
• Replace the cap if deposits of waxy residue or other foreign material are on the black rubber gasket or
the metal retainer.
NOTE:
Thoroughly wipe out the radiator filler neck to remove any waxy residue or foreign material.
SMA412B
Tool number : EG17650301 (J-33984-A)
Testing pressure : Refer to CO-26, "Radiator"
.
AWBIA0740ZZ
Revision: November 20132014 Altima NAM
Page 392 of 4801

CO-12
< PERIODIC MAINTENANCE >[QR25DE]
ENGINE COOLANT
2. Pull the negative-pressure valve to open it and check that it
closes completely when released.
• Check that there is no dirt or damage on the valve seat of the
radiator cap negative-pressure valve.
• Check that there are no abnormalities in the opening and clos- ing conditions of the negative-pressure valve.
3. Check radiator cap relief pressure using suitable tool and Tool. • When connecting the radiator cap to the tester, apply water orcoolant to the cap seal surface.
• Replace the radiator cap if there is an abnormality in the nega-
tive-pressure valve, or if the open-valve pressure is outside of
the standard values.
CHECKING RADIATOR
Check radiator for mud or clogging. If necessary, clean radiator as follows.
CAUTION:
• Be careful not to bend or damage the radiator fins.
• When radiator is cleaned on-vehicle, remove surr ounding parts in order to access the radiator core.
Tape the harness and electrical connectors to prevent water from entering.
1. Spray water to the back side of the radiator co re using a side to side motion from the top down.
2. Stop spraying when debris no longer flows from radiator core.
3. Blow air into the back side of radiator core using a side to side motion from the top down.
• Use compressed air lower than 490 kPa (5 kg/cm
2, 71 psi) and keep distance more than 30 cm (11.8 in).
4. Continue to blow air until no water sprays out.
5. Check for coolant leaks. Repair as necessary.
Changing Engine CoolantINFOID:0000000009460391
WARNING:
Do not remove the radiator cap when the engine is hot. Serious burns could occur from high-pressure
engine coolant escaping from the radiator. Wrap a th ick cloth around the cap. Slowly push down and
turn it a quarter turn to allow built-up pressure to escape. Carefully remove the cap by pushing it down
and turning it all the way.
DRAINING ENGINE COOLANT
1. Remove the engine under cover. Refer to EXT-17, "Removal and Installation".
2. Open the radiator drain plug at the bottom of the radi ator and remove the radiator filler cap. This is the
only step required when partially draining the cooling system (radiator only).
CAUTION:
• Do not allow the coolant to contact the drive belt.
• Perform this step when engine is cold.
3. Follow this step for heater core removal/replac ement only. Disconnect the upper heater hose at the
engine side and apply moderate air pressure [103.46 kPa (1.055 kg/cm
2, 15 psi) maximum air pressure]
into the hose for 30 seconds to blow t he excess coolant out of the heater core.
4. When draining all of the coolant in the system, re move the reservoir tank and drain the coolant, then clean
the reservoir tank before installation.
SMA967B
Tool number : EG17650301 (J-33984-A)
Standard: Refer to CO-26, "Radiator"
.
WBIA0570E
Revision: November 20132014 Altima NAM
Page 393 of 4801

ENGINE COOLANTCO-13
< PERIODIC MAINTENANCE > [QR25DE]
C
D E
F
G H
I
J
K L
M A
CO
NP
O
CAUTION:
• Do not allow the coolant to contact the drive belt.
• Perform this step when engine is cold.
5. When draining all of the coolant in the system for engine removal or repair, open the drain plugs (A and B) on the cylinder
block.
: Front
6. Check the drained coolant for contaminants such as rust, corrosion or discoloration. If the coolant is contaminated, flush the engine cooling system.
REFILLING ENGINE COOLANT
1. Install the radiator drain plug. Install the reservoir tank and cylin-
der block drain plug, if removed for a total system drain or for
engine removal or repair.
• The radiator must be completely empty of coolant and
water.
• Apply sealant to the threads of the cylinder block drain
plug. Use Genuine High Pe rformance Thread Sealant or
equivalent. Refer to GI-21, "Recommended Chemical
Products and Sealants".
: Front
CAUTION:
Do not reuse copper sealing washers.
2. If disconnected, reattach the upper radiator hose at the engine side.
3. Set the vehicle heater controls to the full HOT and heat er ON position. Turn the vehicle ignition ON with
the engine OFF as necessary to activate the heater mode.
AWBIA1328GB
Radiator drain plug : Refer to CO-16, "Exploded View".
Cylinder block drain plug (A) : 54 Nm (5.5 kg-m, 40 ft-lb)
Cylinder block drain plug (B) : 9.8 N·m (1.0 kg-m, 87 in-lb)
AWBIA1328GB
Revision: November 20132014 Altima NAM
Page 394 of 4801

CO-14
< PERIODIC MAINTENANCE >[QR25DE]
ENGINE COOLANT
4. Install the Tool by installing the radiator cap adapter onto the
radiator neck opening. Then attach the gauge body assembly
with the refill tube and the venturi assembly to the radiator cap
adapter.
5. Insert the refill hose into the coolant mixture container that is placed at floor level. Make sure the ball valve is in the closed
position.
• Use recommended coolant or equivalent.
Refer to MA-11, "FOR USA AND CANADA : Fluids and Lubri-
cants".
CAUTION:
Do not use any cooling system additives such as radiator
sealer. Additives may clog th e cooling system and cause
damage to the engine, transm ission and/or cooling system.
6. Install an air hose to the venturi assembly, the air pressure must be within specification.
CAUTION:
The compressed air supply must be equipped with an air dryer.
7. The vacuum gauge will begin to rise and there will be an audible hissing noise. During this process open the ball valve on the refill hose slightly. Coolant will be vi sible rising in the refill hose. Once the refill hose is
full of coolant, close the ball valve. This will purge any air trapped in the refill hose.
8. Continue to draw the vacuum until the gauge reaches 28 inches of vacuum. The gauge may not reach 28 inches in high altitude
locations, use the vacuum specifications based on the altitude
above sea level.
9. When the vacuum gauge has reached the specifi ed amount, disconnect the air hose and wait 20 seconds
to see if the system loses any vacuum. If the vacuum level drops, perform any necessary repairs to the
system and repeat steps 6 - 8 to bring the vacuum to the specified amount. Recheck for any leaks.
10. Place the coolant container (with the refill hose insert ed) at the same level as the top of the radiator. Then
open the ball valve on the refill hose so the coolant will be drawn up to fill the cooling system. The cooling
system is full when the vacuum gauge reads zero.
CAUTION:
Do not allow the coolant container to get too low when filling, to avoid air from being drawn into
the cooling system.
11. Remove the Tool from the radiator neck opening.
12. Fill the cooling system reservoir tank to the specif ied level and install the radiator cap. Run the engine to
warm up the cooling system and t op up the system as necessary.
13. Install the engine under cover. Refer to EXT-17, "Removal and Installation"
.
FLUSHING COOLING SYSTEM
Tool number : KV991J0070 (J-45695)
Engine coolant capacity
(with reservoir tank) : Refer to
CO-26, "Capacity"
.
Compressed air
supply pressure : 549 - 824 kPa (5.6 - 8.4 kg/cm
2,
80 - 119 psi)
LLIA0058E
Altitude above sea level Vacuum gauge reading
0 - 100 m (328 ft) : 28 inches of vacuum
300 m (984 ft) : 27 inches of vacuum
500 m (1,641 ft) : 26 inches of vacuum
1,000 m (3,281 ft) : 24 - 25 inches of vacuum
LLIA0057E
Revision: November 20132014 Altima NAM
Page 396 of 4801

CO-16
< REMOVAL AND INSTALLATION >[QR25DE]
RADIATOR
REMOVAL AND INSTALLATION
RADIATOR
Exploded ViewINFOID:0000000009460392
WARNING:
Do not remove the radiator cap when the engine is hot. Serious burns could occur from high-pressure
engine coolant escaping from the radiator. Wrap a th ick cloth around the cap. Slowly push down and
turn it a quarter turn to allow built-up pressure to escape. Carefully remove the cap by pushing it down
and turning it all the way.
NOTE:
When removing components such as hoses, tubes/lines, etc. , cap or plug openings to prevent fluid from spill-
ing.
1. Radiator 2. CVT oil cooler hose 3. Radiator hose (upper)
4. Radiator hose (lower) 5. Radiator core support 6. Reservoir tank
7. Reservoir tank cap 8. Reservoir tank hose 9. Radiator filler cap
10. Filler neck 11. Filler neck hose A. To CVT
B. To water outlet C. To water inlet
AWBIA1321ZZ
Revision: November 20132014 Altima NAM