lock NISSAN TIIDA 2007 Service Repair Manual
[x] Cancel search | Manufacturer: NISSAN, Model Year: 2007, Model line: TIIDA, Model: NISSAN TIIDA 2007Pages: 5883, PDF Size: 78.95 MB
Page 1 of 5883
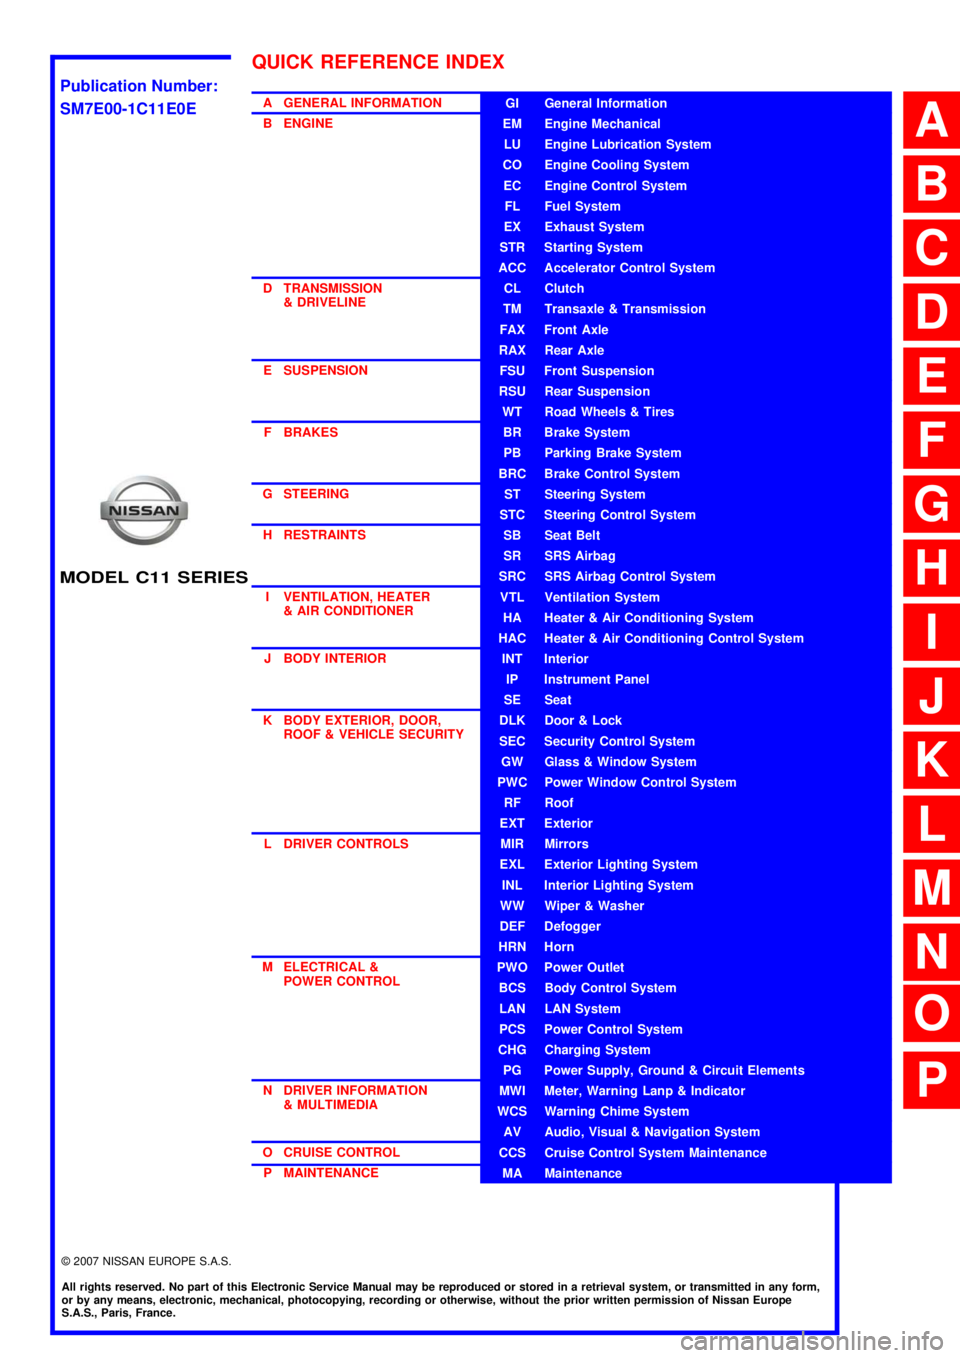
MODEL C11 SERIES
2007 NISSAN EUROPE S.A.S.
All rights reserved. No part of this Electronic Service Manual may be reproduced or stored in a retrieval system, or transmitted in any form,
or by any means, electronic, mechanical, photocopying, recording or otherwise, without the prior written permission of Nissan Europe
S.A.S., Paris, France.
A GENERAL INFORMATION
B ENGINE
D TRANSMISSION& DRIVELINE
E SUSPENSION F BRAKES
G STEERING H RESTRAINTS
I VENTILATION, HEATER & AIR CONDITIONER
J BODY INTERIOR
K BODY EXTERIOR, DOOR, ROOF & VEHICLE SECURITY
L DRIVER CONTROLS
M ELECTRICAL & POWER CONTROL
N DRIVER INFORMATION & MULTIMEDIA
O CRUISE CONTROL P MAINTENANCEGI General Information
EM Engine Mechanical
LU Engine Lubrication System
CO Engine Cooling System
EC Engine Control System
FL Fuel System
EX Exhaust System
STR Starting System
ACC Accelerator Control System
CL Clutch
TM Transaxle & Transmission
FAX Front Axle
RAX Rear Axle
FSU Front Suspension
RSU Rear Suspension
WT Road Wheels & Tires
BR Brake System
PB Parking Brake System
BRC Brake Control System
ST Steering System
STC Steering Control System
SB Seat Belt
SR SRS Airbag
SRC SRS Airbag Control System
VTL Ventilation System
HA Heater & Air Conditioning System
HAC Heater & Air Conditioning Control System
INT Interior
IP Instrument Panel
SE Seat
DLK Door & Lock
SEC Security Control System
GW Glass & Window System
PWC Power Window Control System
RF Roof
EXT Exterior
MIR Mirrors
EXL Exterior Lighting System
INL Interior Lighting System
WW Wiper & Washer
DEF Defogger
HRN Horn
PWO Power Outlet
BCS Body Control System
LAN LAN System
PCS Power Control System
CHG Charging System
PG Power Supply, Ground & Circuit Elements
MWI Meter, Warning Lanp & Indicator
WCS Warning Chime System
AV Audio, Visual & Navigation System
CCS Cruise Control System Maintenance
MA Maintenance
QUICK REFERENCE INDEX
A
B
C
D
E
F
G
H
I
J
K
L
M
N
O
P
M
Publication Number:
SM7E00-1C11E0E
Page 12 of 5883
![NISSAN TIIDA 2007 Service Repair Manual AV
AUDIO SYSTEM
AV-7
< FUNCTION DIAGNOSIS >[AUDIO WITHOUT NAVIGATION]
C
D
E
F
G
H
I
J
K
L
MB A
O
P Description
The link with the NATS IMMU implies that the AV control unit can basically only be operat NISSAN TIIDA 2007 Service Repair Manual AV
AUDIO SYSTEM
AV-7
< FUNCTION DIAGNOSIS >[AUDIO WITHOUT NAVIGATION]
C
D
E
F
G
H
I
J
K
L
MB A
O
P Description
The link with the NATS IMMU implies that the AV control unit can basically only be operat](/img/5/57395/w960_57395-11.png)
AV
AUDIO SYSTEM
AV-7
< FUNCTION DIAGNOSIS >[AUDIO WITHOUT NAVIGATION]
C
D
E
F
G
H
I
J
K
L
MB A
O
P Description
The link with the NATS IMMU implies that the AV control unit can basically only be operated if connected to the
matching NATS IMMU to which the AV control unit was initially fitted on the production line.
Since radio operation is impossible after the link with the NATS is disrupted, theft of the AV control unit is basi-
cally useless since special equipment is required to reset the AV control unit.
Initialization Process for AV control units That Are Linked to the NATS IMMU
New AV control units will be delivered to the factories in the “NEW” state, i.e. ready to be linked with the vehi-
cle's NATS. When the AV control unit in “NEW” state is first switched on at the factory, it will start up communi-
cation with the vehicle's immobilizer control unit (IMMU) and send a code (the “AV control unit Code”) to the
IMMU. The IMMU will then store this code, which is unique to each AV control unit, in its (permanent) memory.
Upon receipt of the code by the IMMU, the NATS will confirm correct receipt of the AV control unit code to the
AV control unit. Hereafter, the AV control unit will operate as normal.
During the initialization process, “NEW” is displayed on the AV control unit display. Normally though, communi-
cation between AV control unit and IMMU takes such a short time (300 ms) that the AV control unit seems to
switch on directly without showing “NEW” on its display.
Normal Operation
Each time the AV control unit is switched on afterwards, the AV control unit code will be verified between the
AV control unit and the NATS before the AV control unit becomes operational. During the code verification pro-
cess, “WAIT” is shown on the AV control unit display. Again, the communication takes such a short time (300
ms) that the AV control unit seems to switch on directly without showing “WAIT” on its display.
When The Radio Is Locked
In case of the AV control unit being linked with the vehicle's NATS (immobilizer system), disconnection of the
link between the AV control unit and the IMMU will cause the AV control unit to switch into the lock
(“SECURE”) mode in which the AV control unit is fully inoperative. Hence, repair of the AV control unit is basi-
cally impossible, unless the AV control unit is reset to the “NEW” state for which special decoding equipment is
required.
Clarion has provided their authorized service representatives with so called “decoder boxes” which can bring
the AV control unit back to the “NEW” state, enabling the AV control unit to be switched on after which repair
can be performed. Subsequently, when the repaired AV control unit is delivered to the final user again, it will
be in the “NEW” state to enable re-linking the AV control unit to the vehicle's immobilizer system. As a result of
the above, repair of the AV control unit can only be done by an authorized Clarion representative (when the
owner of the vehicle requests repair and can show personal identification).
Service Procedure
Item Service procedure Description
Battery disconnection No additional action required. –
Radio needs repair Repair needs to be done by authorized rep-
resentative of radio manufacturer since ra-
dio cannot be operated unless it is reset to
NEW state, using special decoding equip-
ment.–
Replacement of radio by new part No additional action required. Radio is delivered in “NEW” state.
Transferring radio to another vehicle/re-
placement of radio by an old partRadio needs to be reset to NEW state by
authorized representative of radio manu-
facturer.–
Replacement of IMMU Radio needs to be reset to NEW state by
authorized representative of Clarion.After switching on the radio, it will display
“SECURE” after 1 minute.
No communication from IMMU to radio 1. Check NATS system if NATS is mal-
functioning.
2. Reset radio to “NEW” state by autho-
rized representative of Clarion after
NATS is repaired.The radio will display “SECURE” after 1
minute after switching on the radio. Further
use of radio is impossible until communica-
tion is established again, or after radio is re-
set by authorized representative of Clarion.
When initialized between ECM and IMMU. Radio needs to be reset to “NEW” status by
authorized representative of Clarion.It will display “SECURE” after 1 minute after
switching on the radio.
Page 25 of 5883
![NISSAN TIIDA 2007 Service Repair Manual AV-20
< SYMPTOM DIAGNOSIS >[AUDIO WITHOUT NAVIGATION]
NORMAL OPERATING CONDITION
NORMAL OPERATING CONDITION
DescriptionINFOID:0000000001728625
RELATED TO AUDIO
The majority of the audio malfunctions NISSAN TIIDA 2007 Service Repair Manual AV-20
< SYMPTOM DIAGNOSIS >[AUDIO WITHOUT NAVIGATION]
NORMAL OPERATING CONDITION
NORMAL OPERATING CONDITION
DescriptionINFOID:0000000001728625
RELATED TO AUDIO
The majority of the audio malfunctions](/img/5/57395/w960_57395-24.png)
AV-20
< SYMPTOM DIAGNOSIS >[AUDIO WITHOUT NAVIGATION]
NORMAL OPERATING CONDITION
NORMAL OPERATING CONDITION
DescriptionINFOID:0000000001728625
RELATED TO AUDIO
The majority of the audio malfunctions are the result of outside causes (bad CD, electromagnetic interfer-
ence, etc.). Check the symptoms below to diagnose the malfunction.
The vehicle itself can be a source of noise if noise prevention parts or electrical equipment is malfunctioning.
Check that noise is caused and/or changed by engine speed, ignition switch turned to each position, and
operation of each piece of electrical equipment. Then determine the cause.
NOTE:
CD-R is not guaranteed to play because they can contain compressed audio (MP3, WMA) or could be incor-
rectly mastered by the customer on a computer.
Check that the CDs carry the Compact Disc Logo. If not, the disc is not mastered to the red book Compact
Disc Standard and may not play.
Noise resulting from variations in field strength, such as fading noise and multi-path noise, or external noise from trains and other
sources, is not a malfunction.
NOTE:
Fading noise: This noise occurs because of variations in the field strength in a narrow range due to mountains or buildings blocking
the signal.
Multi-path noise: This noise results from a time difference between the broadcast waves directly from the station arriving at the
antenna and the waves reflected by mountains or buildings.
RELATED TO TELEPHONE
Symptoms Cause and Counter measure
Cannot playCheck that the CD was inserted correctly.
Check that the CD is scratched or dirty.
Check that there is condensation inside the player, and if there is, wait until the condensation is
gone (about 1 hour) before using the player.
The player will play correctly after it returns to the normal temperature if there is a temperature
increase error.
Only the music CD files (CD-DA data) will be played if there is a mixture of music CD files (CD-
DA data) and MP3/WMA files on a CD.
Files with extensions other than “.MP3”, “.WMA”, “.mp3”, or “.wma” cannot be played.
Check that the finalization process, such as session close and disc close, is done for the disc.
Check that the CD is protected by copyright.
Poor sound quality Check that the CD is scratched or dirty.
It takes a relatively long time before
the music starts playing.If there are many folder or file levels on the MP3/WMA CD, or if it is a multisession disc, some
time may be required before the music starts playing.
The songs do not play back in the
desired order.The playback order is the order in which the files were written by the software, so the files might
not play in the desired order.
Symptom Possible cause Possible solution
The system does not recognize the
command.
The system recognizes the com-
mand incorrectly.The interior of the vehicle is too noisy.Close the windows or have other occupants
be quiet.
The volume of the voice is too low. Speak louder.
Pronunciation is unclear. Speak clearly.
Voice recognition mode is not yet ready to speak.Push the release “ ” on the steering
switch, and speak a command after the
tone sounds.
5 seconds or more have passed after pushed and
released “ ” on the steering switch.Make sure to speak a command within
5seconds after push and release “ ” on
the steering switch.
Page 45 of 5883
![NISSAN TIIDA 2007 Service Repair Manual AV-40
< FUNCTION DIAGNOSIS >[AUDIO WITH NAVIGATION]
DIAGNOSIS SYSTEM (NAVI CONTROL UNIT)
3. Turn the volume control dial clockwise or counterclockwise for
40 clicks or more while pushing the “SETTIN NISSAN TIIDA 2007 Service Repair Manual AV-40
< FUNCTION DIAGNOSIS >[AUDIO WITH NAVIGATION]
DIAGNOSIS SYSTEM (NAVI CONTROL UNIT)
3. Turn the volume control dial clockwise or counterclockwise for
40 clicks or more while pushing the “SETTIN](/img/5/57395/w960_57395-44.png)
AV-40
< FUNCTION DIAGNOSIS >[AUDIO WITH NAVIGATION]
DIAGNOSIS SYSTEM (NAVI CONTROL UNIT)
3. Turn the volume control dial clockwise or counterclockwise for
40 clicks or more while pushing the “SETTING” button. (A short
beep will be heard when the self-diagnosis mode is started.)
Shifting from current screen to previous screen is performed
by pushing “BACK” button.
4. The trouble diagnosis initial screen is displayed, and then the
items of “Self Diagnosis” and “Confirmation / Adjustment” can be
selected.
Self-diagnosis mode
1. Start the self-diagnosis function. Then select “Self Diagnosis”.
- Self-diagnosis subdivision screen is displayed, and the self-
diagnosis mode starts.
- The bar graph visible on the center of the self-diagnosis subdivi-
sion screen indicates progress of the trouble diagnosis.
2. Diagnosis results are displayed after the self-diagnosis is com-
pleted. The unit names and the connection lines are color-coded
according to the diagnostic results.
NOTE:
Only the control unit (NAVI control unit) is displayed in red.
- The screen switch colors are determined according to the following order of priority: red > yellow > gray if
multiple errors occur at the same time for a single unit.
JPNIA0173GB
SKIB3961E
SKIB3657E
Diagnosis results Unit Connection
line
Normal Green Green
Connection malfunction Gray Yellow
DVD drive undiagnosed Gray Green
DVD-ROM and DVD-ROM
drive malfunctionYellow Green
Unit malfunction
NoteRed Green
ALNIA0883GB
Page 136 of 5883
BCS
BCS-1
ELECTRICAL & POWER CONTROL
C
D
E
F
G
H
I
J
K
L B
SECTION BCS
A
O
P N
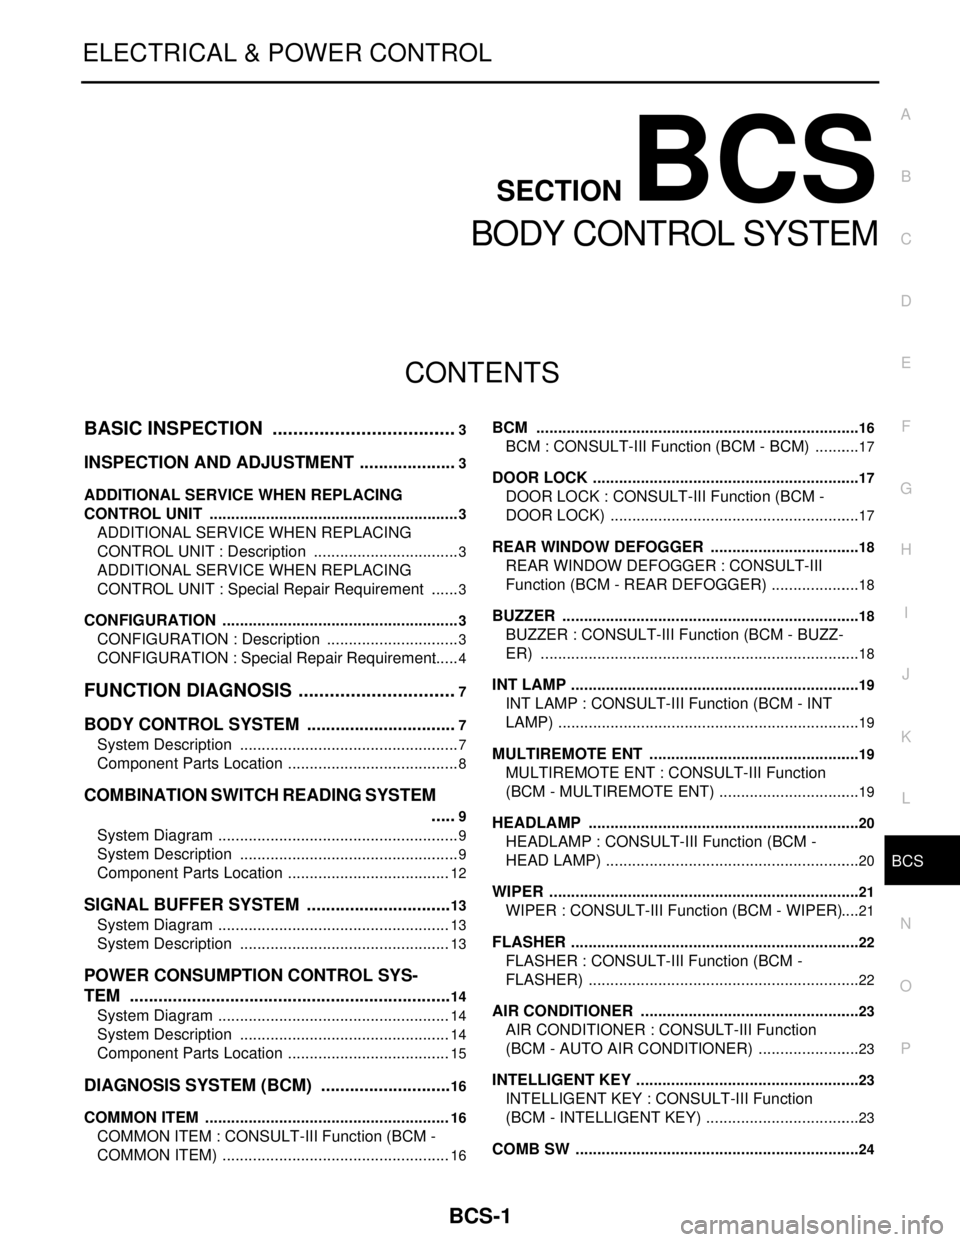
CONTENTS
BODY CONTROL SYSTEM
BASIC INSPECTION ....................................3
INSPECTION AND ADJUSTMENT .....................3
ADDITIONAL SERVICE WHEN REPLACING
CONTROL UNIT ..........................................................
3
ADDITIONAL SERVICE WHEN REPLACING
CONTROL UNIT : Description ..................................
3
ADDITIONAL SERVICE WHEN REPLACING
CONTROL UNIT : Special Repair Requirement .......
3
CONFIGURATION .......................................................3
CONFIGURATION : Description ...............................3
CONFIGURATION : Special Repair Requirement ......4
FUNCTION DIAGNOSIS ...............................7
BODY CONTROL SYSTEM ................................7
System Description ...................................................7
Component Parts Location ........................................8
COMBINATION SWITCH READING SYSTEM
.....
9
System Diagram ........................................................9
System Description ...................................................9
Component Parts Location ......................................12
SIGNAL BUFFER SYSTEM ...............................13
System Diagram ......................................................13
System Description .................................................13
POWER CONSUMPTION CONTROL SYS-
TEM ....................................................................
14
System Diagram ......................................................14
System Description .................................................14
Component Parts Location ......................................15
DIAGNOSIS SYSTEM (BCM) ............................16
COMMON ITEM .........................................................16
COMMON ITEM : CONSULT-III Function (BCM -
COMMON ITEM) .....................................................
16
BCM ...........................................................................16
BCM : CONSULT-III Function (BCM - BCM) ...........17
DOOR LOCK ..............................................................17
DOOR LOCK : CONSULT-III Function (BCM -
DOOR LOCK) ..........................................................
17
REAR WINDOW DEFOGGER ...................................18
REAR WINDOW DEFOGGER : CONSULT-III
Function (BCM - REAR DEFOGGER) .....................
18
BUZZER .....................................................................18
BUZZER : CONSULT-III Function (BCM - BUZZ-
ER) ..........................................................................
18
INT LAMP ...................................................................19
INT LAMP : CONSULT-III Function (BCM - INT
LAMP) ......................................................................
19
MULTIREMOTE ENT .................................................19
MULTIREMOTE ENT : CONSULT-III Function
(BCM - MULTIREMOTE ENT) .................................
19
HEADLAMP ...............................................................20
HEADLAMP : CONSULT-III Function (BCM -
HEAD LAMP) ...........................................................
20
WIPER ........................................................................21
WIPER : CONSULT-III Function (BCM - WIPER) ....21
FLASHER ...................................................................22
FLASHER : CONSULT-III Function (BCM -
FLASHER) ...............................................................
22
AIR CONDITIONER ...................................................23
AIR CONDITIONER : CONSULT-III Function
(BCM - AUTO AIR CONDITIONER) ........................
23
INTELLIGENT KEY ....................................................23
INTELLIGENT KEY : CONSULT-III Function
(BCM - INTELLIGENT KEY) ....................................
23
COMB SW ..................................................................24
Page 139 of 5883

BCS-4
< BASIC INSPECTION >
INSPECTION AND ADJUSTMENT
When replacing BCM, you must perform WRITE CONFIGURATION with CONSULT-III.
Complete the procedure of WRITE CONFIGURATION in order.
If you set incorrect WRITE CONFIGURATION, incidents will occur.
Configuration is different for each vehicle model. Confirm configuration of each vehicle model.
CONFIGURATION : Special Repair RequirementINFOID:0000000001451452
1. WRITING VEHICLE SPECIFICATION
Perform “WRITE CONFIGURATION” with CONSULT-III.
When writing saved data>>GO TO 2
When writing manually>>GO TO 3
2. PERFORM “WRITE CONFIGURATION - CONFIG FILE”
Perform “WRITE CONFIGURATION - Config file” with CONSULT-III.
>> WORK END
3. PERFORM “WRITE CONFIGURATION - MANUAL SELECTION”
For “WRITE CONFIGURATION - Manual selection”, using the following flow chart, identify the correct model
and configuration list.
Confirm and/or change setting value for each item according to the configuration list.
Depending on CONSULT-III software version being used, some or all of the write configuration items shown in
the following configuration lists may be displayed. If an item does not display on the CONSULT-III “WRITE
CONFIGURATION - Manual selection” screen, then it is an auto setting item and it cannot be manually set or
changed.
Gasoline engine models (RHD)
Gasoline engine models (LHD)
MANUAL SETTING ITEM
Items Setting value
HANDLE RHD
PTC HEATER WITHOUT
AUTO LIGHT WITH⇔WITHOUT
KEYLESS ENTRY WITH⇔WITHOUT
DTRL WITHOUT
THEFT ALARM WITH⇔WITHOUT
AUTO SETTING ITEM
RAIN SENSOR WITH or WITHOUT
H/L WSR SWTRG FR WSR SW
H/L_BULB H4 HALOGEN or DEFAULT
FR FOG LAMP WITH or WITHOUT
DONGLE WITH or WITHOUT
SUPER LOCK WITH
I-KEY WITH or WITHOUT
DOOR/L SPEED WITH
H/L BAT SAVER WITH
KEY WARNING MODE1
R LAMP LOGIC MODE2
Page 140 of 5883
BCS
INSPECTION AND ADJUSTMENT
BCS-5
< BASIC INSPECTION >
C
D
E
F
G
H
I
J
K
L B A
O
P N
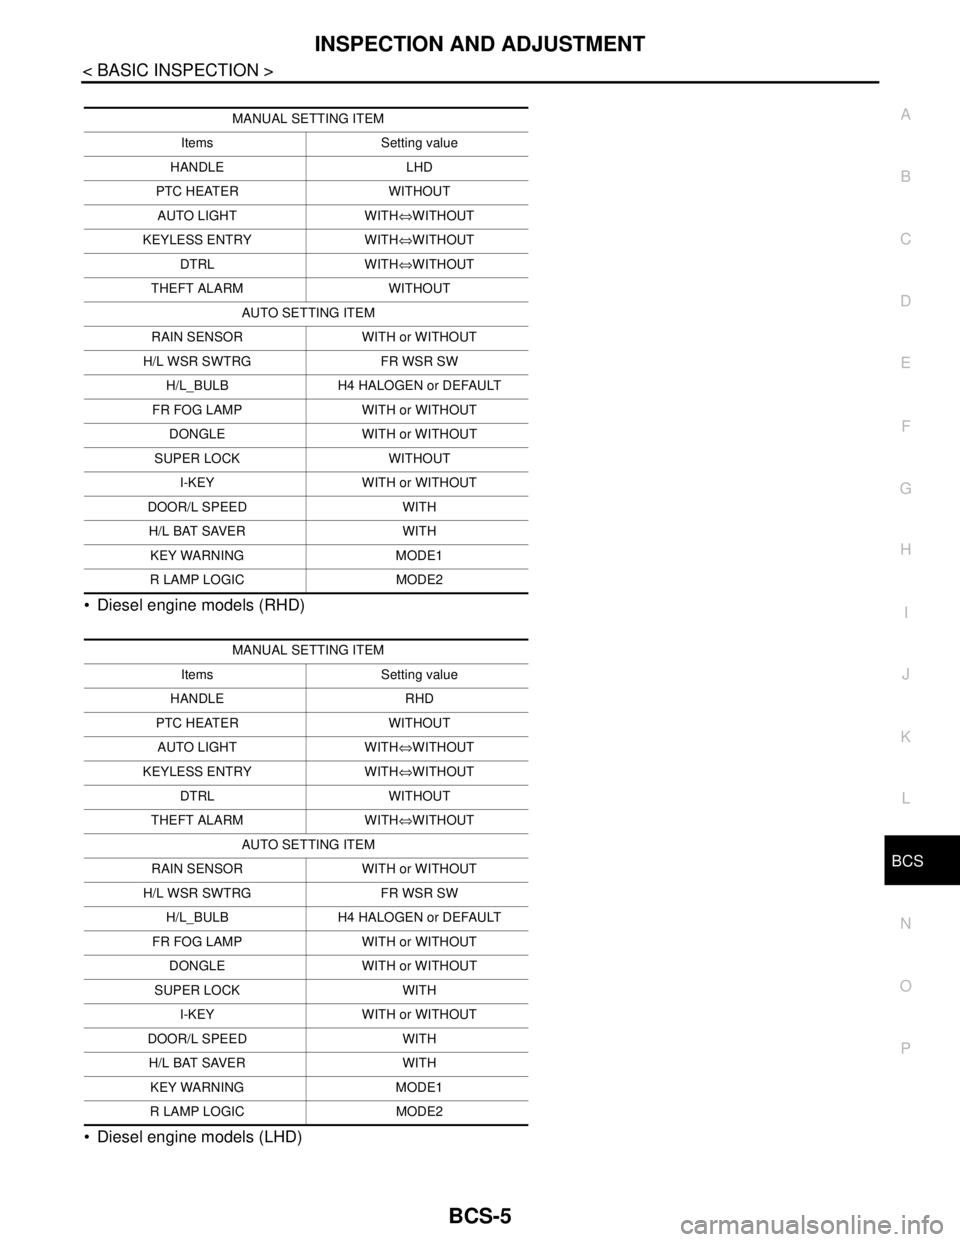
Diesel engine models (RHD)
Diesel engine models (LHD)
MANUAL SETTING ITEM
Items Setting value
HANDLE LHD
PTC HEATER WITHOUT
AUTO LIGHT WITH⇔WITHOUT
KEYLESS ENTRY WITH⇔WITHOUT
DTRL WITH⇔WITHOUT
THEFT ALARM WITHOUT
AUTO SETTING ITEM
RAIN SENSOR WITH or WITHOUT
H/L WSR SWTRG FR WSR SW
H/L_BULB H4 HALOGEN or DEFAULT
FR FOG LAMP WITH or WITHOUT
DONGLE WITH or WITHOUT
SUPER LOCK WITHOUT
I-KEY WITH or WITHOUT
DOOR/L SPEED WITH
H/L BAT SAVER WITH
KEY WARNING MODE1
R LAMP LOGIC MODE2
MANUAL SETTING ITEM
Items Setting value
HANDLE RHD
PTC HEATER WITHOUT
AUTO LIGHT WITH⇔WITHOUT
KEYLESS ENTRY WITH⇔WITHOUT
DTRL WITHOUT
THEFT ALARM WITH⇔WITHOUT
AUTO SETTING ITEM
RAIN SENSOR WITH or WITHOUT
H/L WSR SWTRG FR WSR SW
H/L_BULB H4 HALOGEN or DEFAULT
FR FOG LAMP WITH or WITHOUT
DONGLE WITH or WITHOUT
SUPER LOCK WITH
I-KEY WITH or WITHOUT
DOOR/L SPEED WITH
H/L BAT SAVER WITH
KEY WARNING MODE1
R LAMP LOGIC MODE2
Page 141 of 5883

BCS-6
< BASIC INSPECTION >
INSPECTION AND ADJUSTMENT
>> WORK END
MANUAL SETTING ITEM
Items Setting value
HANDLE LHD
PTC HEATER 2 PTC
AUTO LIGHT WITH⇔WITHOUT
KEYLESS ENTRY WITH⇔WITHOUT
DTRL WITH⇔WITHOUT
THEFT ALARM WITHOUT
AUTO SETTING ITEM
RAIN SENSOR WITH or WITHOUT
H/L WSR SWTRG FR WSR SW
H/L_BULB H4 HALOGEN or DEFAULT
FR FOG LAMP WITH or WITHOUT
DONGLE WITH or WITHOUT
SUPER LOCK WITHOUT
I-KEY WITH or WITHOUT
DOOR/L SPEED WITH
H/L BAT SAVER WITH
KEY WARNING MODE1
R LAMP LOGIC MODE2
Page 142 of 5883
BCS
BODY CONTROL SYSTEM
BCS-7
< FUNCTION DIAGNOSIS >
C
D
E
F
G
H
I
J
K
L B A
O
P N
FUNCTION DIAGNOSIS
BODY CONTROL SYSTEM
System DescriptionINFOID:0000000001451453
OUTLINE
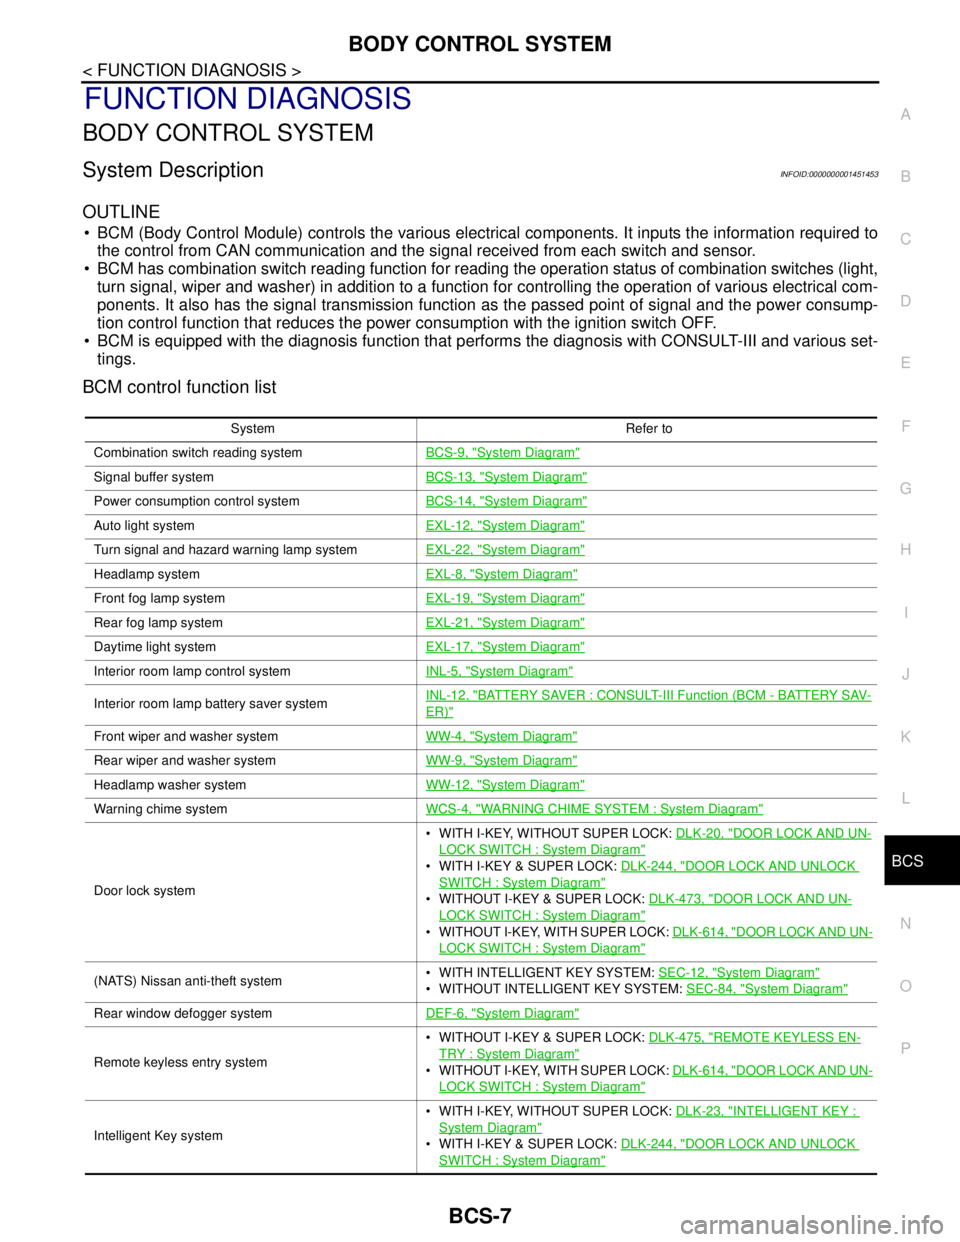
BCM (Body Control Module) controls the various electrical components. It inputs the information required to
the control from CAN communication and the signal received from each switch and sensor.
BCM has combination switch reading function for reading the operation status of combination switches (light,
turn signal, wiper and washer) in addition to a function for controlling the operation of various electrical com-
ponents. It also has the signal transmission function as the passed point of signal and the power consump-
tion control function that reduces the power consumption with the ignition switch OFF.
BCM is equipped with the diagnosis function that performs the diagnosis with CONSULT-III and various set-
tings.
BCM control function list
System Refer to
Combination switch reading systemBCS-9, "
System Diagram"
Signal buffer systemBCS-13, "System Diagram"
Power consumption control systemBCS-14, "System Diagram"
Auto light systemEXL-12, "System Diagram"
Turn signal and hazard warning lamp systemEXL-22, "System Diagram"
Headlamp systemEXL-8, "System Diagram"
Front fog lamp systemEXL-19, "System Diagram"
Rear fog lamp systemEXL-21, "System Diagram"
Daytime light systemEXL-17, "System Diagram"
Interior room lamp control systemINL-5, "System Diagram"
Interior room lamp battery saver systemINL-12, "BATTERY SAVER : CONSULT-III Function (BCM - BATTERY SAV-
ER)"
Front wiper and washer systemWW-4, "System Diagram"
Rear wiper and washer systemWW-9, "System Diagram"
Headlamp washer systemWW-12, "System Diagram"
Warning chime systemWCS-4, "WARNING CHIME SYSTEM : System Diagram"
Door lock system WITH I-KEY, WITHOUT SUPER LOCK: DLK-20, "
DOOR LOCK AND UN-
LOCK SWITCH : System Diagram"
WITH I-KEY & SUPER LOCK: DLK-244, "DOOR LOCK AND UNLOCK
SWITCH : System Diagram"
WITHOUT I-KEY & SUPER LOCK: DLK-473, "DOOR LOCK AND UN-
LOCK SWITCH : System Diagram"
WITHOUT I-KEY, WITH SUPER LOCK: DLK-614, "DOOR LOCK AND UN-
LOCK SWITCH : System Diagram"
(NATS) Nissan anti-theft system WITH INTELLIGENT KEY SYSTEM: SEC-12, "System Diagram"
WITHOUT INTELLIGENT KEY SYSTEM: SEC-84, "System Diagram"
Rear window defogger systemDEF-6, "System Diagram"
Remote keyless entry system WITHOUT I-KEY & SUPER LOCK: DLK-475, "
REMOTE KEYLESS EN-
TRY : System Diagram"
WITHOUT I-KEY, WITH SUPER LOCK: DLK-614, "DOOR LOCK AND UN-
LOCK SWITCH : System Diagram"
Intelligent Key system WITH I-KEY, WITHOUT SUPER LOCK: DLK-23, "
INTELLIGENT KEY :
System Diagram"
WITH I-KEY & SUPER LOCK: DLK-244, "DOOR LOCK AND UNLOCK
SWITCH : System Diagram"
Page 150 of 5883
BCS
POWER CONSUMPTION CONTROL SYSTEM
BCS-15
< FUNCTION DIAGNOSIS >
C
D
E
F
G
H
I
J
K
L B A
O
P N
Sleep condition
Wake-up operation
BCM transmits sleep wake up signal (wake up) to each unit when any condition listed below is established,
and then goes into normal mode from low power consumption mode.
Each unit starts transmissions with CAN communication by receiving sleep wake up signals. Each unit trans-
mits wake up signals to BCM with CAN communication to convey the start of CAN communication.
Wake-up condition
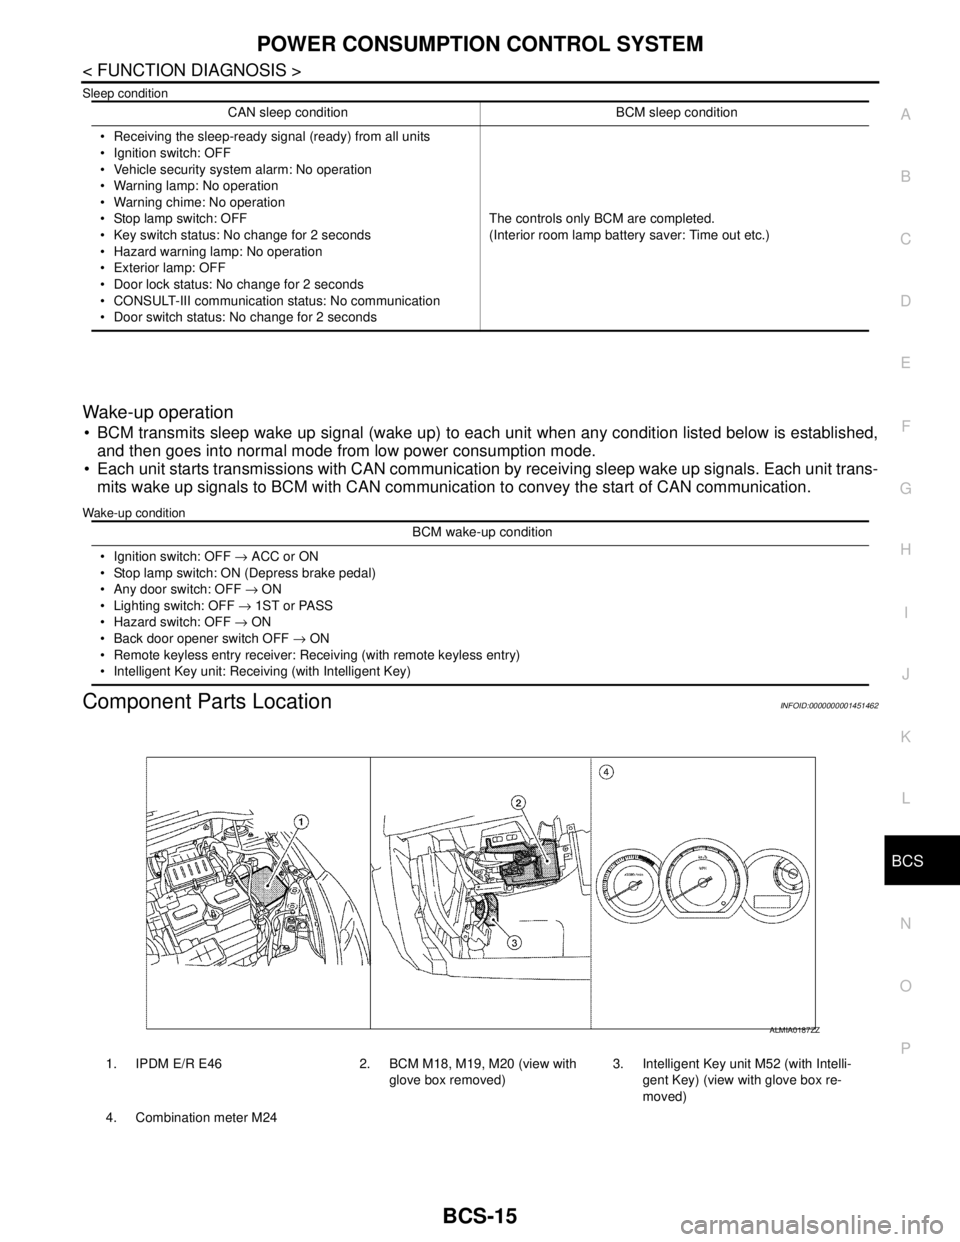
Component Parts LocationINFOID:0000000001451462
CAN sleep condition BCM sleep condition
Receiving the sleep-ready signal (ready) from all units
Ignition switch: OFF
Vehicle security system alarm: No operation
Warning lamp: No operation
Warning chime: No operation
Stop lamp switch: OFF
Key switch status: No change for 2 seconds
Hazard warning lamp: No operation
Exterior lamp: OFF
Door lock status: No change for 2 seconds
CONSULT-III communication status: No communication
Door switch status: No change for 2 secondsThe controls only BCM are completed.
(Interior room lamp battery saver: Time out etc.)
BCM wake-up condition
Ignition switch: OFF → ACC or ON
Stop lamp switch: ON (Depress brake pedal)
Any door switch: OFF → ON
Lighting switch: OFF → 1ST or PASS
Hazard switch: OFF → ON
Back door opener switch OFF → ON
Remote keyless entry receiver: Receiving (with remote keyless entry)
Intelligent Key unit: Receiving (with Intelligent Key)
1. IPDM E/R E46 2. BCM M18, M19, M20 (view with
glove box removed)3. Intelligent Key unit M52 (with Intelli-
gent Key) (view with glove box re-
moved)
4. Combination meter M24
ALMIA0187ZZ