NISSAN TIIDA 2009 Service Repair Manual
TIIDA 2009
NISSAN
NISSAN
https://www.carmanualsonline.info/img/5/57398/w960_57398-0.png
NISSAN TIIDA 2009 Service Repair Manual
Trending: wiring driver door, bumper, steering, engine control system, remote control, key, Cooler
Page 4311 of 4331
WW
N
O P
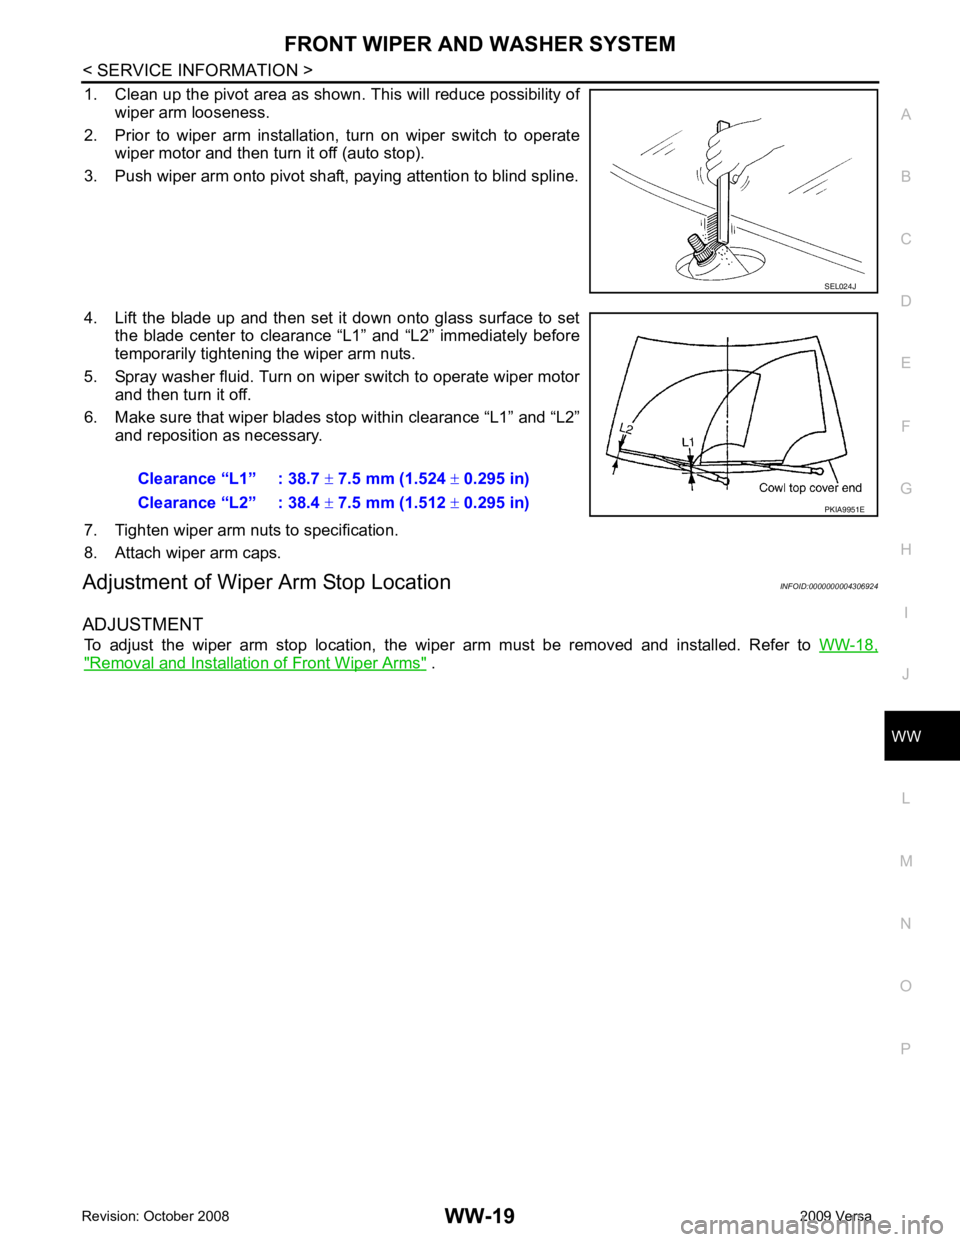
1. Clean up the pivot area as shown. This will reduce possibility of
wiper arm looseness.
2. Prior to wiper arm installation, turn on wiper switch to operate wiper motor and then turn it off (auto stop).
3. Push wiper arm onto pivot shaft, paying attention to blind spline.
4. Lift the blade up and then set it down onto glass surface to set the blade center to clearance “L1” and “L2” immediately before
temporarily tightening the wiper arm nuts.
5. Spray washer fluid. Turn on wiper switch to operate wiper motor and then turn it off.
6. Make sure that wiper blades stop within clearance “L1” and “L2” and reposition as necessary.
7. Tighten wiper arm nuts to specification.
8. Attach wiper arm caps.
Adjustment of Wiper Arm Stop Location INFOID:0000000004306924
ADJUSTMENT To adjust the wiper arm stop location, the wiper arm must be removed and installed. Refer to WW-18," Removal and Installation of Front Wiper Arms " .
Page 4312 of 4331
Removal and Installation of Front Wiper Arms " .
3. Remove cowl top cover. Refer to EI-22 .
4. Disconnect wiper motor connector.
5. Remove front wiper drive assembly bolts, and remove front wiper drive assembly.
INSTALLATION
1. Install front wiper drive assembly.
2. Connect wiper motor connector. Turn wiper switch on to operate wiper motor, then turn wiper switch off
(auto stop).
3. Install cowl top cover. Refer to EI-22 .
4. Install the wiper arms. Refer to WW-18, " Removal and Installation of Front Wiper Arms " .
Removal and Installation of Front Washer Nozzle INFOID:0000000004306926
REMOVAL
1. Remove cowl top cover. Refer to EI-22, " Removal and Installation " .
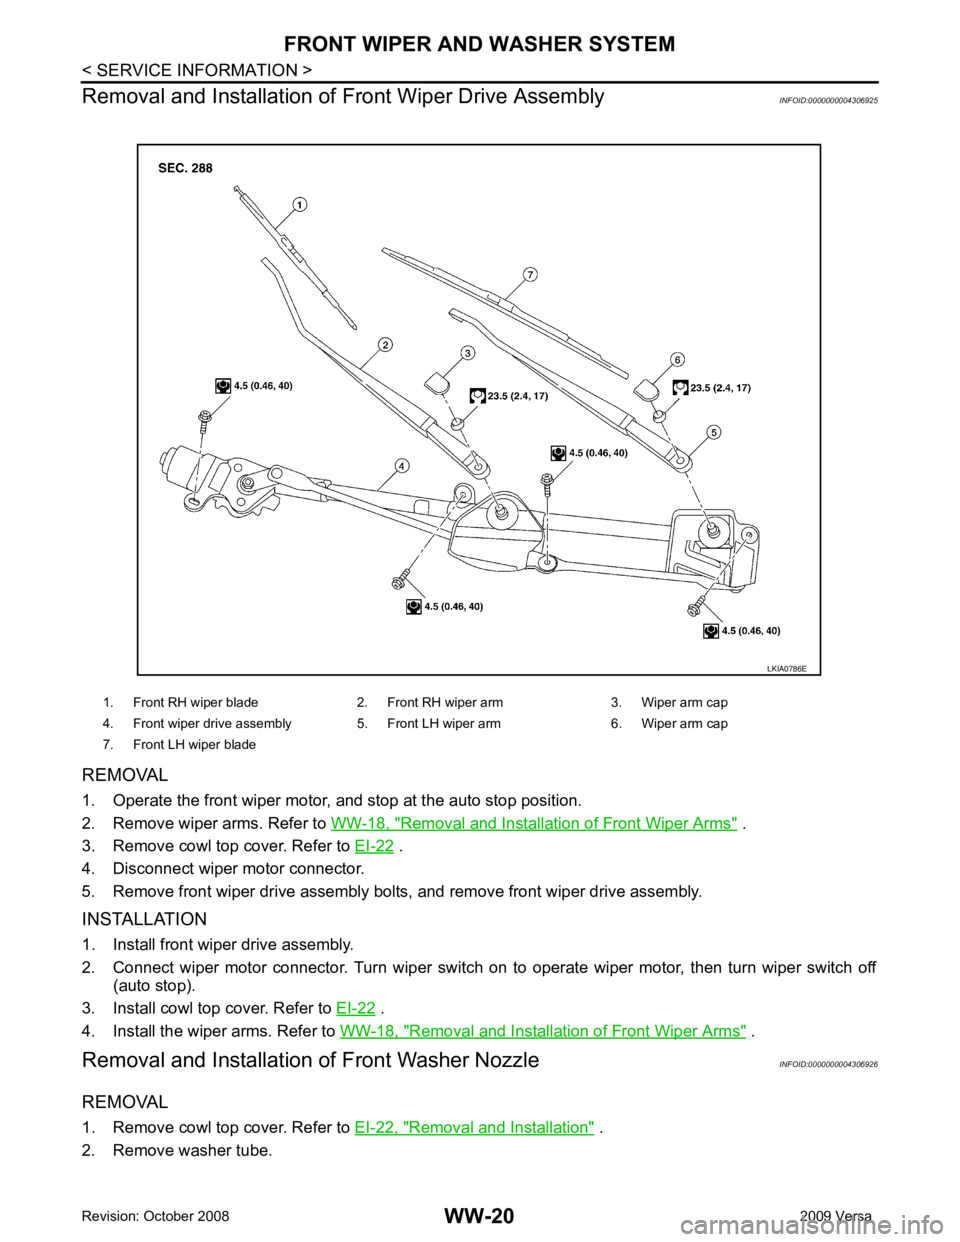
2. Remove washer tube. 1. Front RH wiper blade 2. Front RH wiper arm 3. Wiper arm cap
4. Front wiper drive assembly 5. Front LH wiper arm 6. Wiper arm cap
7. Front LH wiper blade
Page 4313 of 4331
WW
N
O P
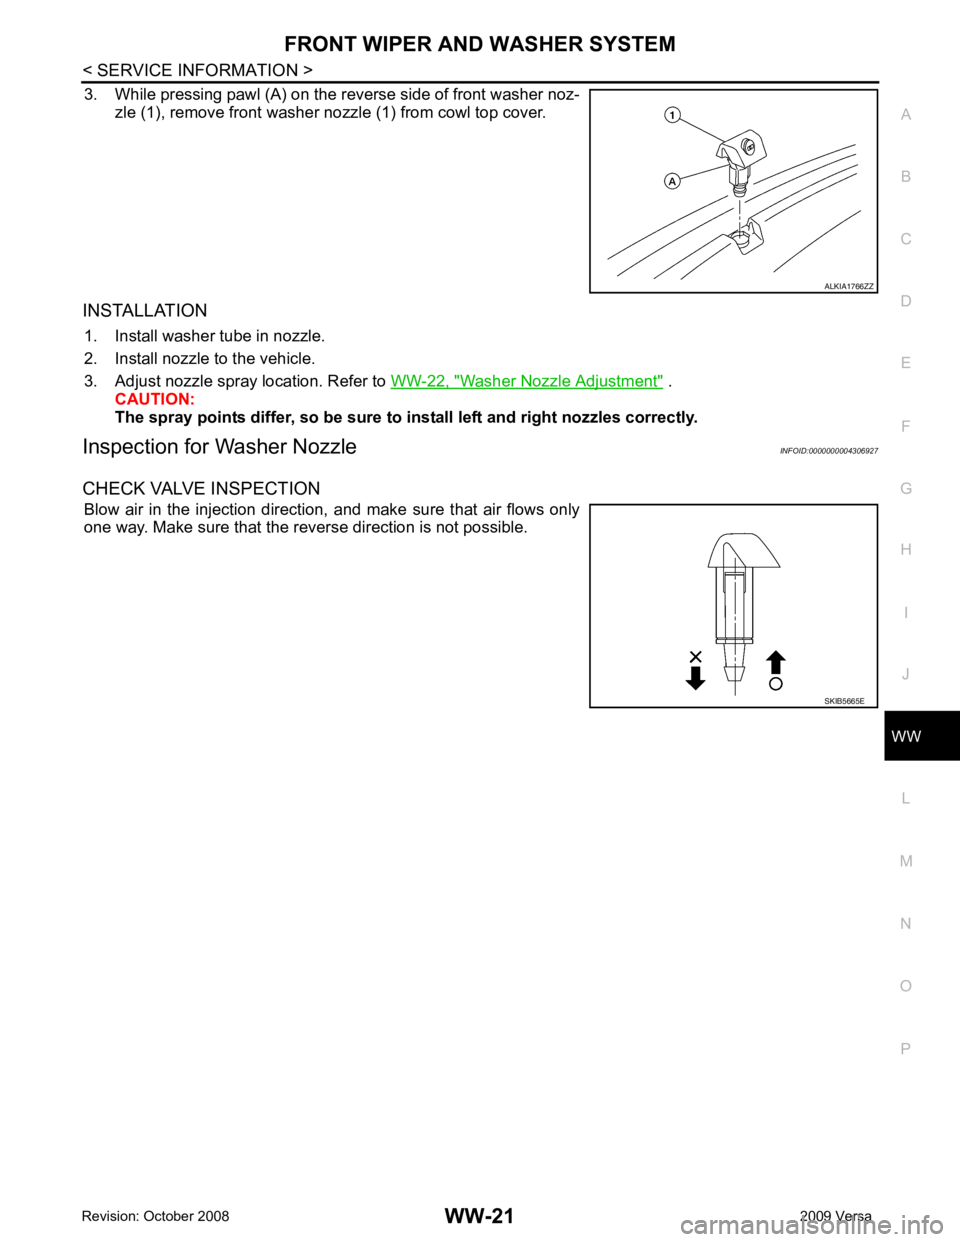
3. While pressing pawl (A) on the reverse side of front washer noz-
zle (1), remove front washer nozzle (1) from cowl top cover.
INSTALLATION 1. Install washer tube in nozzle.
2. Install nozzle to the vehicle.
3. Adjust nozzle spray location. Refer to WW-22, " Washer Nozzle Adjustment " .
CAUTION:
The spray points differ, so be sure to install left and right nozzles correctly.
Inspection for Washer Nozzle INFOID:0000000004306927
CHECK VALVE INSPECTION Blow air in the injection direction, and make sure that air flows only
one way. Make sure that the reverse direction is not possible.
Page 4314 of 4331
Page 4315 of 4331
WW
N
O P
Removal and Installation of
Front Wiper and Washer Switch INFOID:0000000004306930
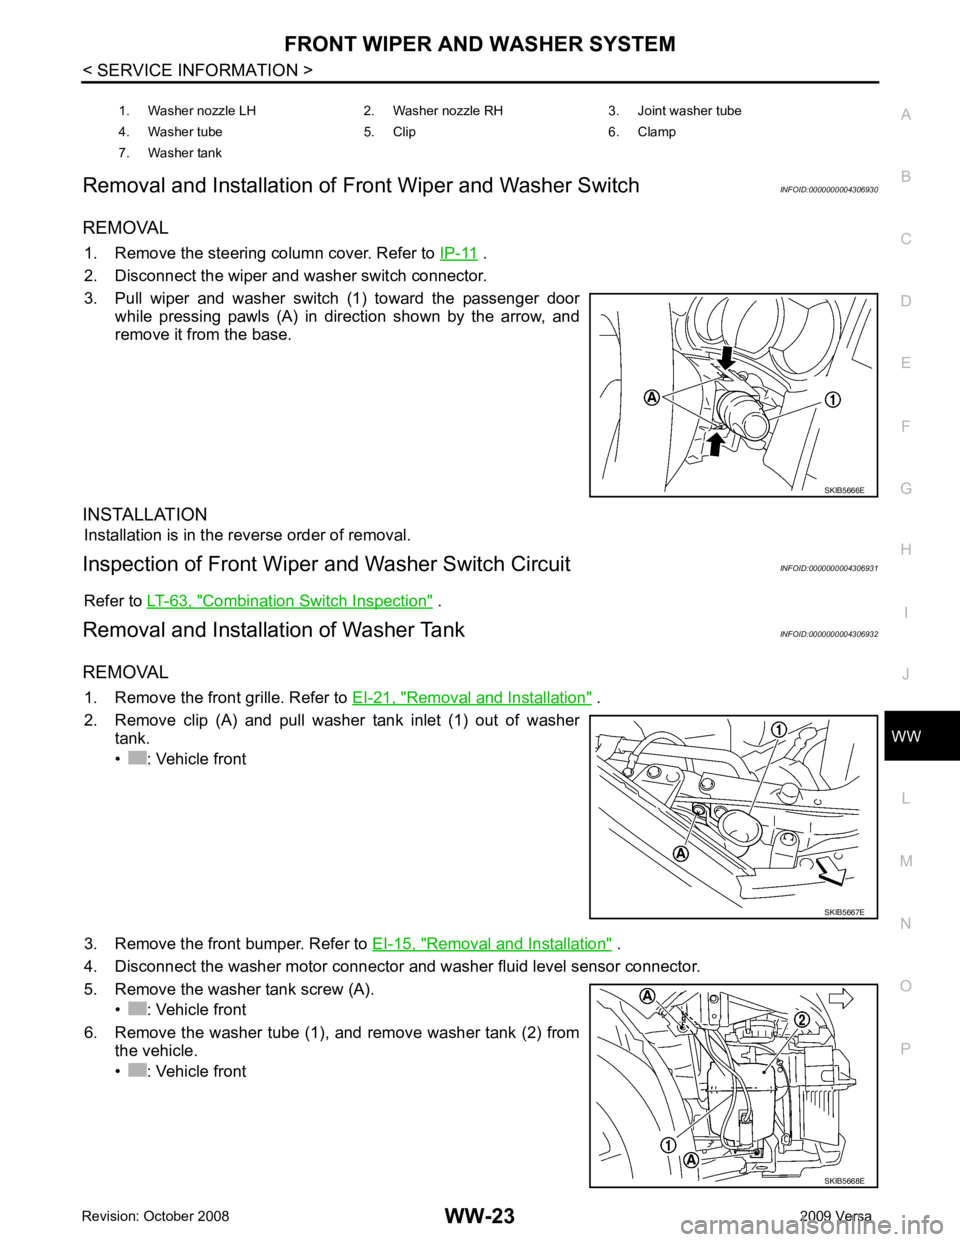
REMOVAL 1. Remove the steering column cover. Refer to IP-11 .
2. Disconnect the wiper and washer switch connector.
3. Pull wiper and washer switch (1) toward the passenger door while pressing pawls (A) in direction shown by the arrow, and
remove it from the base.
INSTALLATION Installation is in the reverse order of removal.
Inspection of Front Wiper and Washer Switch Circuit INFOID:0000000004306931
Refer to LT-63, " Combination Switch Inspection " .
Removal and Installation of Washer Tank INFOID:0000000004306932
REMOVAL 1. Remove the front grille. Refer to EI-21, " Removal and Installation " .
2. Remove clip (A) and pull washer tank inlet (1) out of washer tank.
• : Vehicle front
3. Remove the front bumper. Refer to EI-15, " Removal and Installation " .
4. Disconnect the washer motor connector and washer fluid level sensor connector.
5. Remove the washer tank screw (A). • : Vehicle front
6. Remove the washer tube (1), and remove washer tank (2) from the vehicle.
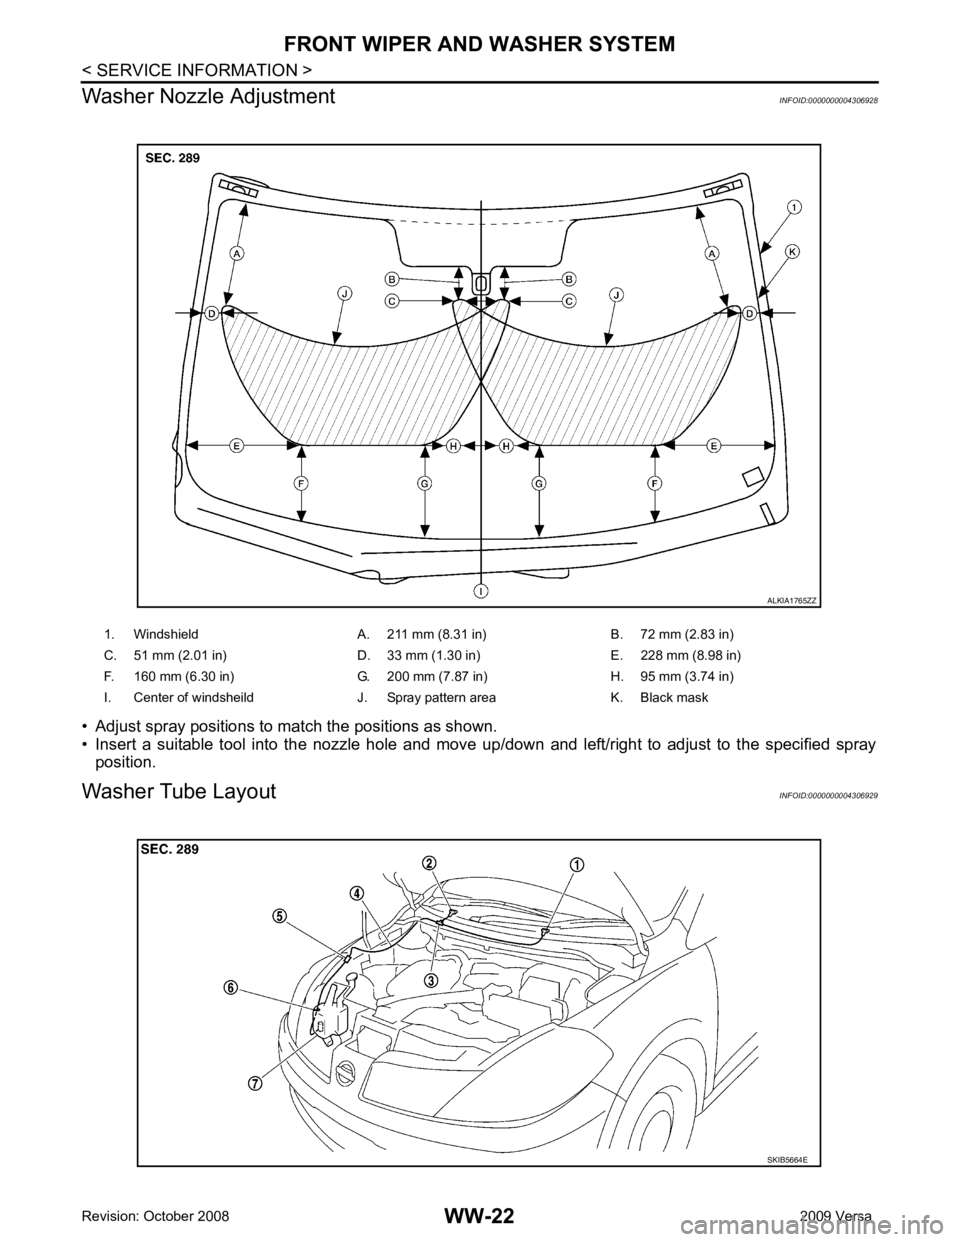
• : Vehicle front 1. Washer nozzle LH 2. Washer nozzle RH 3. Joint washer tube
4. Washer tube 5. Clip 6. Clamp
7. Washer tank
Page 4316 of 4331
.
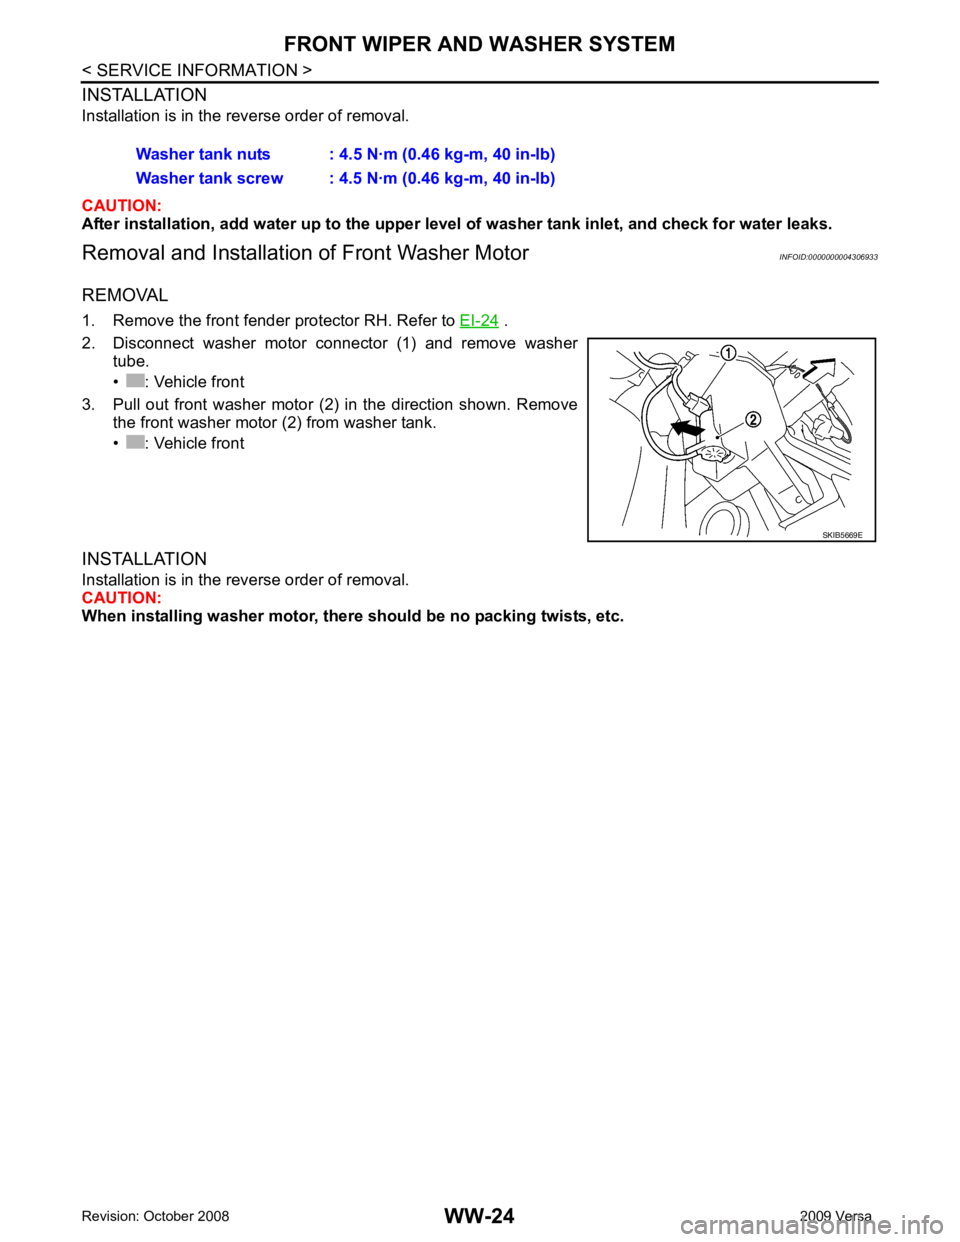
2. Disconnect washer motor connector (1) and remove washer tube.
• : Vehicle front
3. Pull out front washer motor (2) in the direction shown. Remove the front washer motor (2) from washer tank.
• : Vehicle front
INSTALLATION
Installation is in the reverse order of removal.
CAUTION:
When installing washer motor, there should be no packing twists, etc.
Washer tank nuts : 4.5 N·m (0.46 kg-m, 40 in-lb)
Washer tank screw : 4.5 N·m (0.46 kg-m, 40 in-lb)
Page 4317 of 4331
WW
N
O P
REAR WIPER AND WASHER SYSTEM
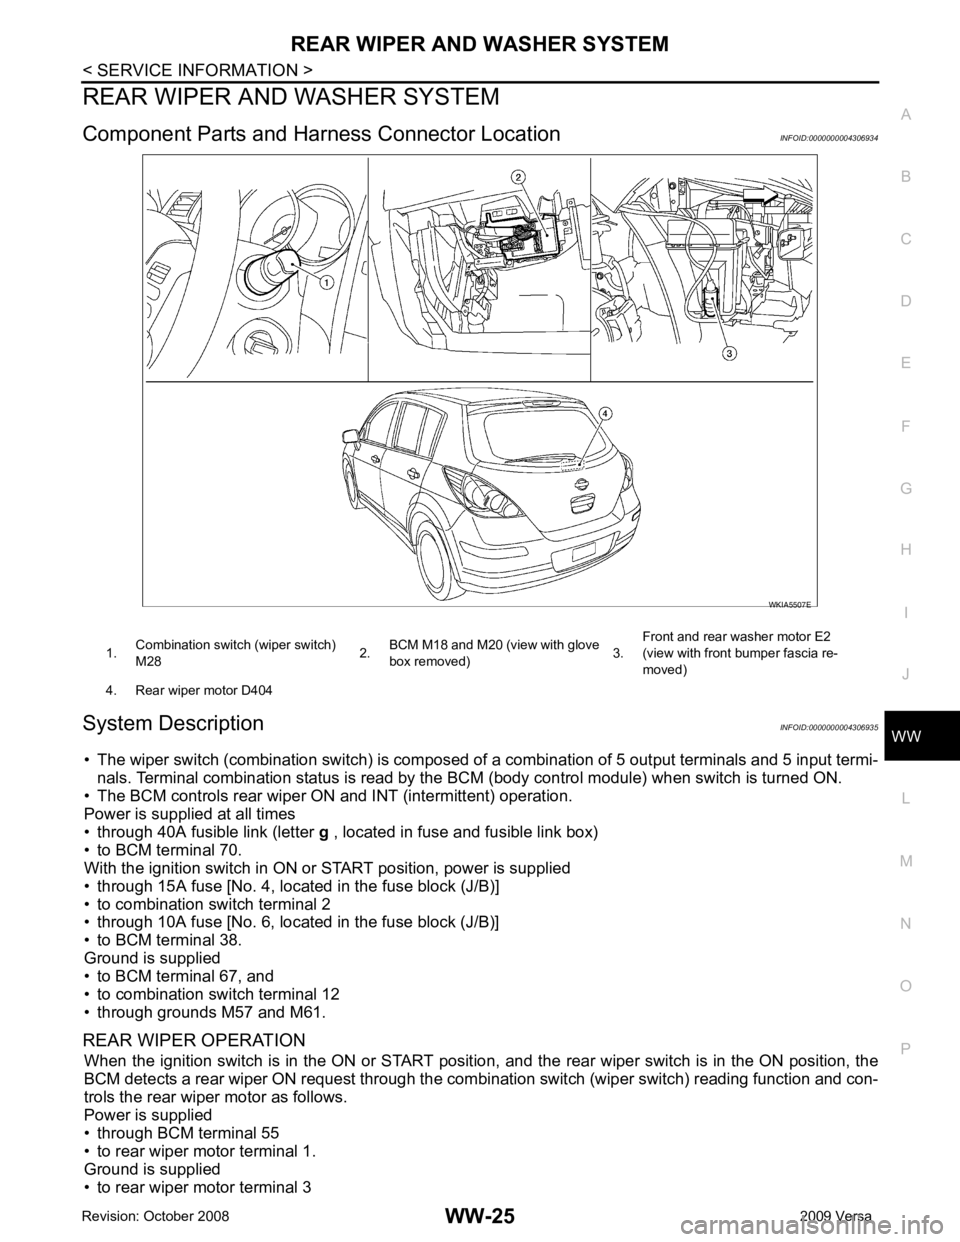
Component Parts and Har ness Connector Location INFOID:0000000004306934
System Description INFOID:0000000004306935
• The wiper switch (combination switch ) is composed of a combination of 5 output terminals and 5 input termi-
nals. Terminal combination status is read by the BCM (body control module) when switch is turned ON.
• The BCM controls rear wiper ON and INT (intermittent) operation.
Power is supplied at all times
• through 40A fusible link (letter g , located in fuse and fusible link box)
• to BCM terminal 70.
With the ignition switch in ON or START position, power is supplied
• through 15A fuse [No. 4, located in the fuse block (J/B)]
• to combination switch terminal 2
• through 10A fuse [No. 6, located in the fuse block (J/B)]
• to BCM terminal 38.
Ground is supplied
• to BCM terminal 67, and
• to combination switch terminal 12
• through grounds M57 and M61.
REAR WIPER OPERATION When the ignition switch is in the ON or START position, and the rear wiper switch is in the ON position, the
BCM detects a rear wiper ON request through the combi nation switch (wiper switch) reading function and con-
trols the rear wiper motor as follows.
Power is supplied
• through BCM terminal 55
• to rear wiper motor terminal 1.
Ground is supplied
• to rear wiper motor terminal 3
Page 4318 of 4331
Page 4319 of 4331
WW
N
O P
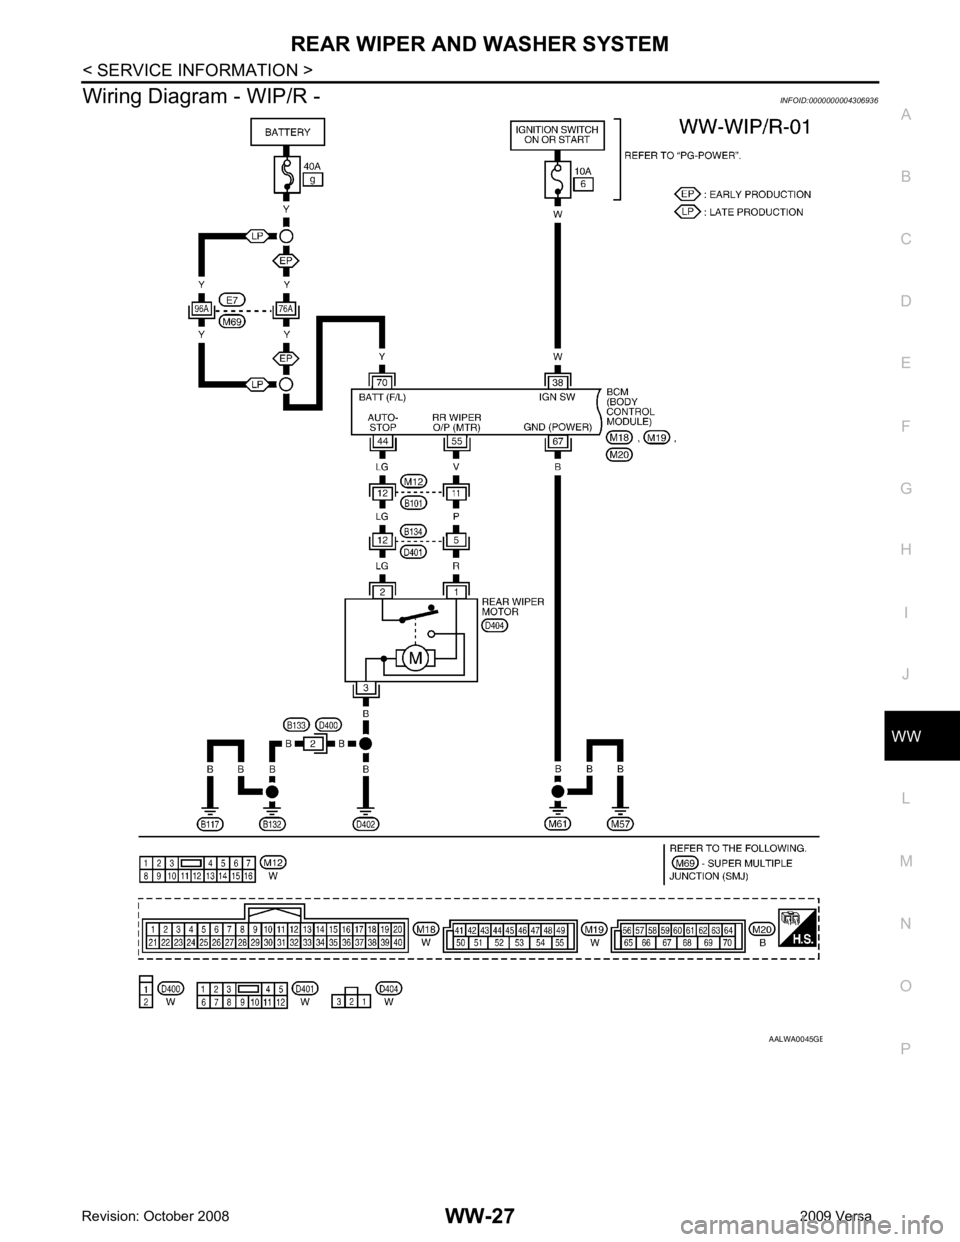
Wiring Diagram - WIP/R -
INFOID:0000000004306936 B
Page 4320 of 4331
Trending: ad blue, Master Control Switch, dimensions, run flat, GW-19, wheel bolt torque, parking brake
