NISSAN VERSA HATCHBACK 2010 1.G Quick Reference Guide
Manufacturer: NISSAN, Model Year: 2010, Model line: VERSA HATCHBACK, Model: NISSAN VERSA HATCHBACK 2010 1.GPages: 28, PDF Size: 4.25 MB
Page 11 of 28
9
TWIN TRIP ODOMETER
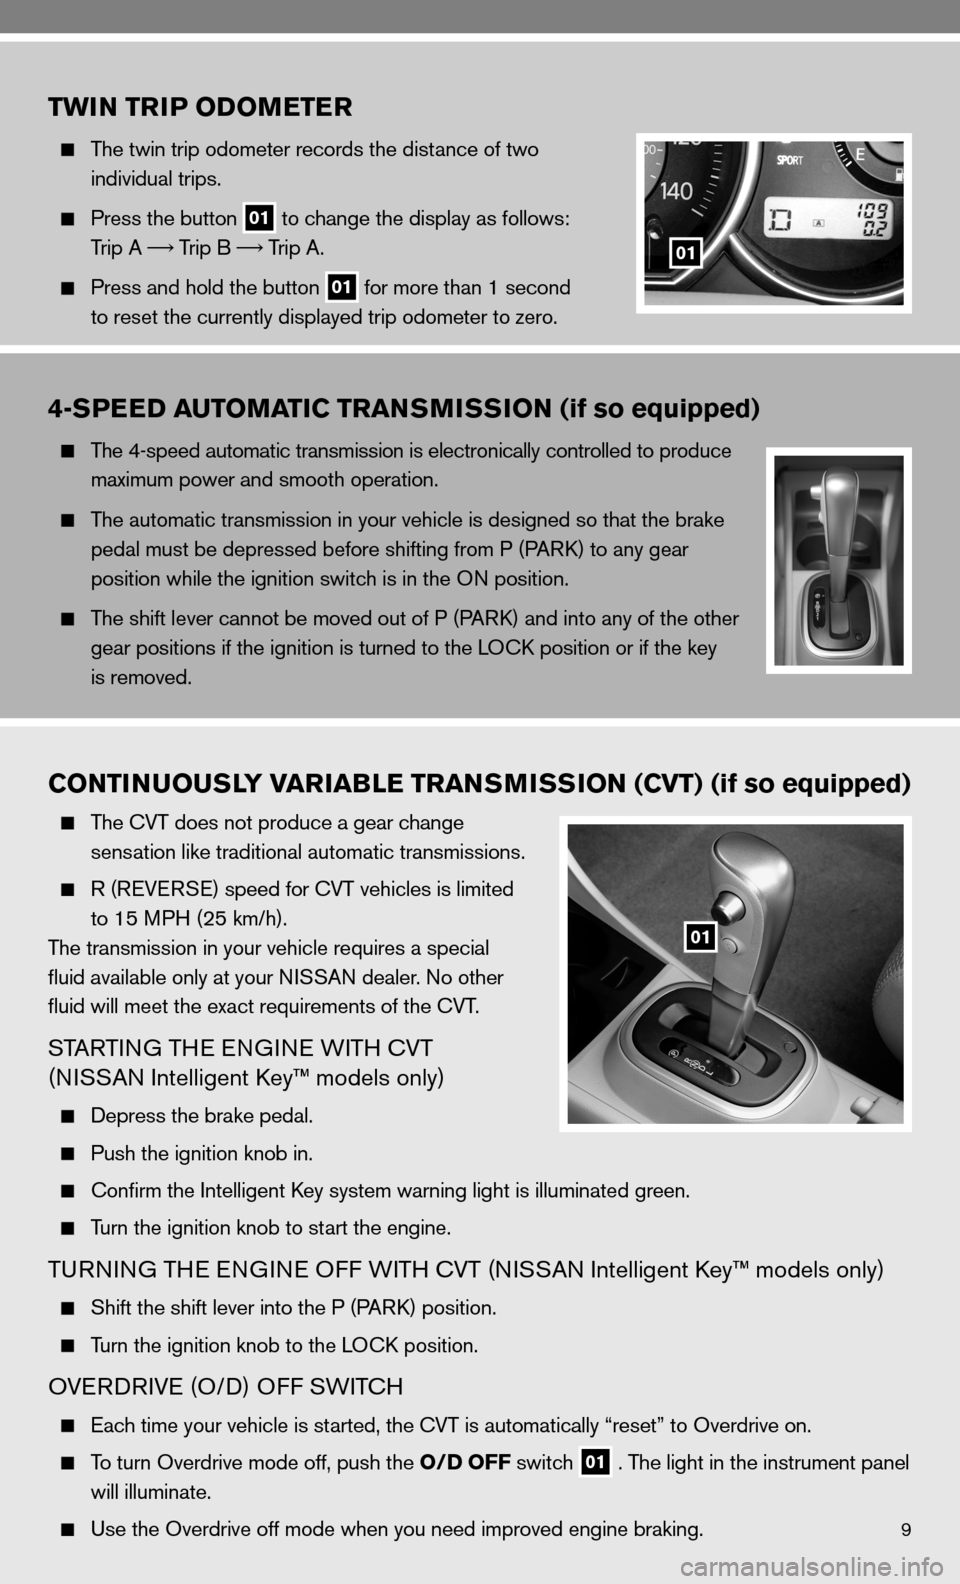
The twin trip odometer records the distance of two
individual trips.
Press the button
01 to change the display as follows:
Trip A
Trip B
Trip A.
Press and hold the button
01 for more than 1 second
to reset the currently displayed trip odometer to zero.
01
4-SPEED AUTOMATIC TRANSMISSION (if so equipped)
The 4-speed automatic transmission is electronically controlled to produce
maximum power and smooth operation.
The automatic transmission in your vehicle is designed so that the brake
pedal must be depressed before shifting from P (P ARk) to any gear
position while the ignition switch is in the O n position.
The shift lever cannot be moved out of P (P ARk) and into any of the other
gear positions if the ignition is turned to the LO ck position or if the key
is removed.
CONTINUOUSLY VARIABLE TRANSMISSION (CVT) (if so equipped)
The cVT does not produce a gear change
sensation like traditional automatic transmissions.
R (ReVe RSe) speed for cVT vehicles is limited
to 15 MPH (25 km/h).
The transmission in your vehicle requires a special
fluid available only at your ni SSAn dealer. no other
fluid will meet the exact requirements of the cVT.
STARTin G THe enGine W iTH cVT
(ni SSAn intelligent k ey™ models only)
depress the brake pedal.
Push the ignition knob in.
confirm the intelligent k ey system warning light is illuminated green.
Turn the ignition knob to start the engine.
Tu Rnin G TH e enGine O ff WiTH cVT (ni SSAn intelligent k ey™ models only)
Shift the shift lever into the P (P ARk) position.
Turn the ignition knob to the LO ck position.
OVeRd RiVe (O/ d) Off SW iTc H
each time your vehicle is started, the cVT is automatically “reset” to Overdrive on.
To turn Overdrive mode off, push the O/D OFF switch
01 . The light in the instrument panel
will illuminate.
use the Overdrive off mode when you need improved engine braking.
01
Page 12 of 28
10
VEHICLE DYNAMIC CONTROL (VDC) OFF SWITCH (if so equipped)
The Vehicle dynamic control (Vdc) system uses various sensors to monitor driver inputs and
vehicle motion. under certain driving situations, the system will control braking and engine output to
help keep the vehicle on its steered path. V dc may need to be temporarily shut off if you are trying
to free a vehicle stuck in snow or mud.
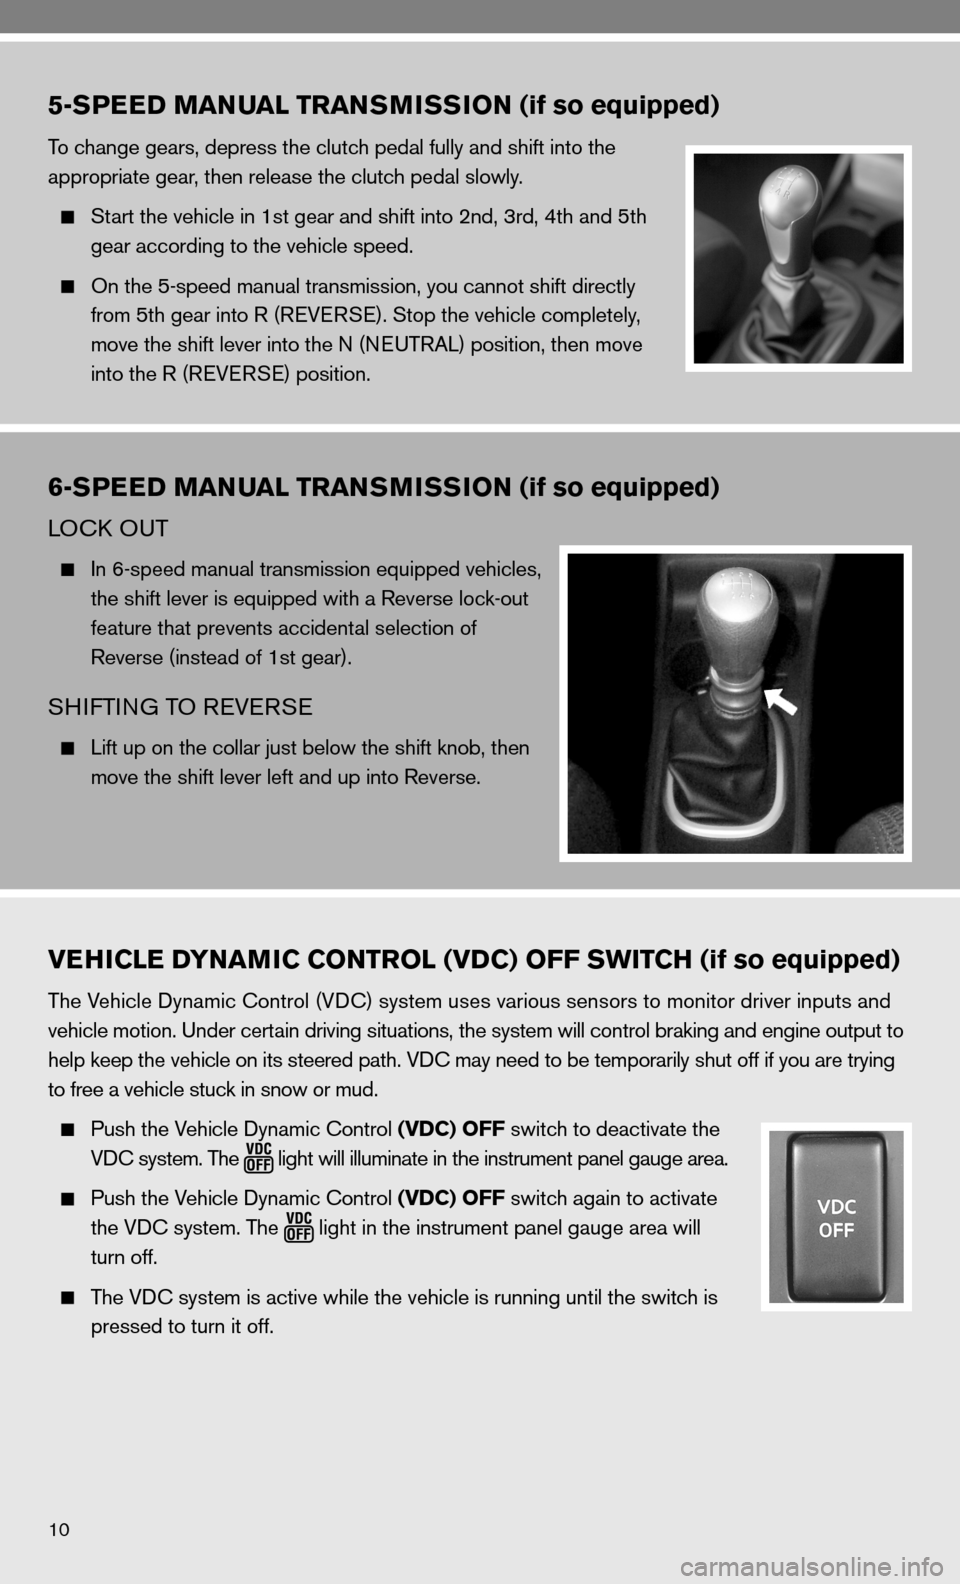
Push the Vehicle dynamic control (VDC) OFF switch to deactivate the
Vdc system. The
light
will illuminate in the instrument panel gauge area.
Push the Vehicle dynamic control (VDC) OFF switch again to activate
the Vdc system. The
light in the instrument panel gauge area will
turn off.
The V dc system is active while the vehicle is running until the switch is
pressed to turn it off.
5-SPEED MANUAL TRANSMISSION (if so equipped)
To change gears, depress the clutch pedal fully and shift into the
appropriate gear, then release the clutch pedal slowly.
Start the vehicle in 1st gear and shift into 2nd, 3rd, 4th and 5th
gear according to the vehicle speed.
On the 5-speed manual transmission, you cannot shift directly
from 5th gear into R (ReVe RSe). Stop the vehicle completely,
move the shift lever into the n (neuTRAL) position, then move
into the R (ReVe RSe) position.
6-SPEED MANUAL TRANSMISSION (if so equipped)
LOck O uT
in 6-speed manual transmission equipped vehicles,
the shift lever is equipped with a Reverse lock-out
feature that prevents accidental selection of
Reverse (instead of 1st gear).
SHifTin G TO R eVeRSe
Lift up on the collar just below the shift knob, then
move the shift lever left and up into Reverse.
Page 13 of 28
11
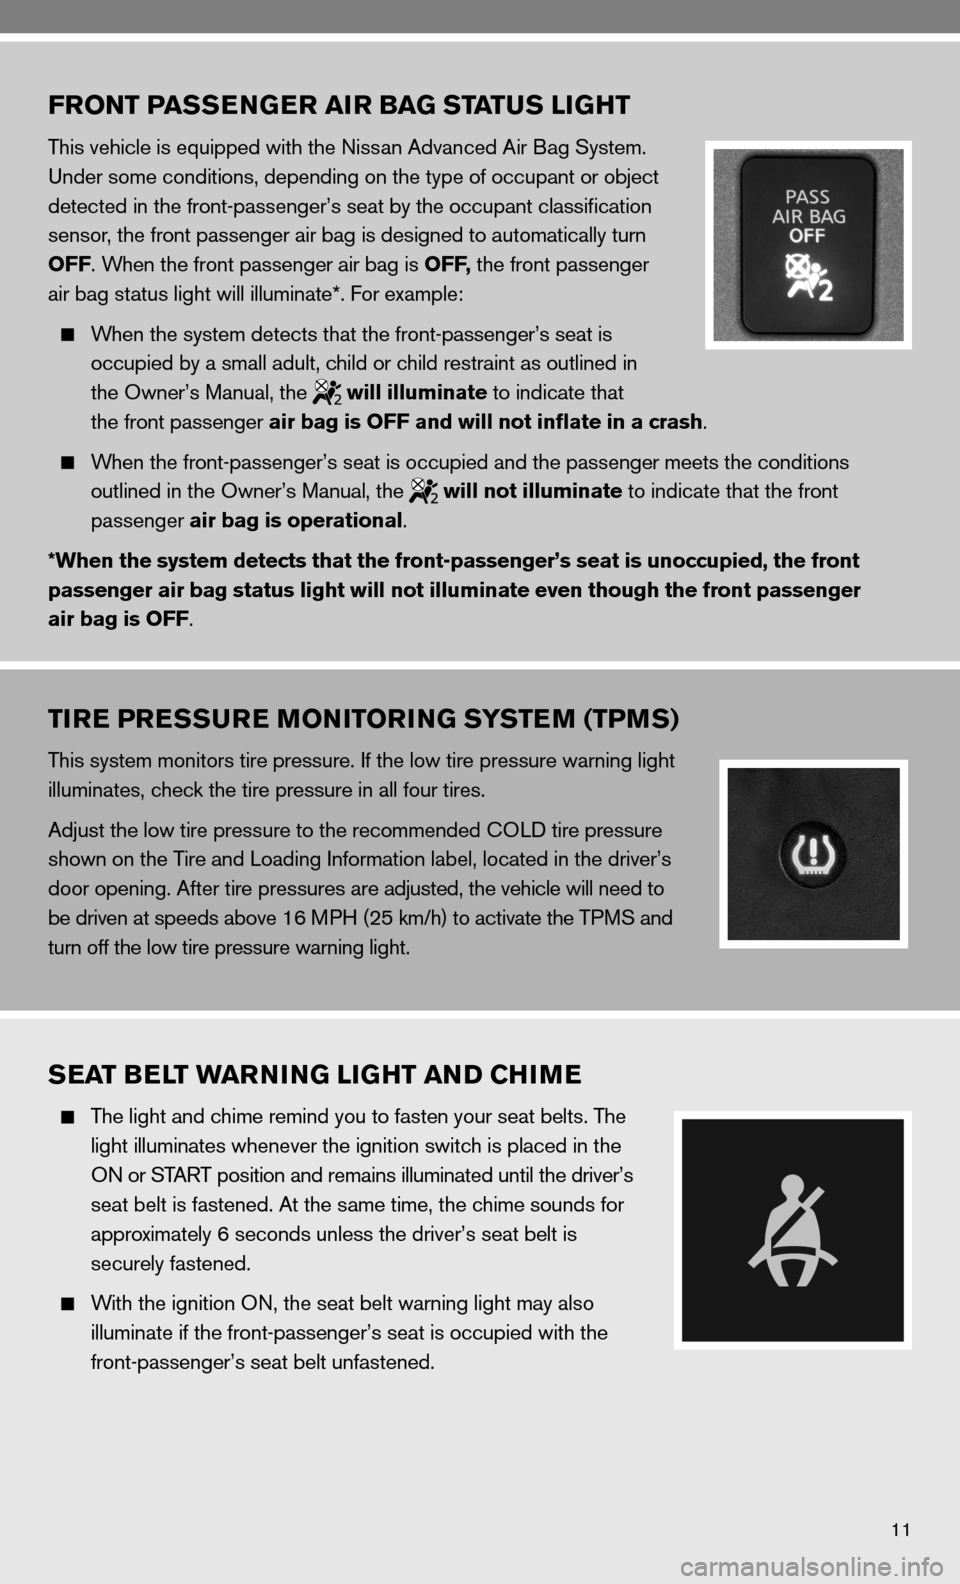
FRONT PASSENGER AIR BAG STATUS LIGHT
This vehicle is equipped with the nissan Advanced Air Bag System.
under some conditions, depending on the type of occupant or object
detected in the front-passenger’s seat by the occupant classification
sensor, the front passenger air bag is designed to automatically turn
OFF. When the front passenger air bag is OFF, the front passenger
air bag status light will illuminate*. f or example:
When the system detects that the front-passenger’s seat is
occupied by a small adult, child or child restraint as outlined in
the Owner’s Manual, the
will illuminate to indicate that
the front passenger air bag is OFF and will not inflate in a crash.
When the front-passenger’s seat is occupied and the passenger meets th\
e conditions
outlined in the Owner’s Manual, the
will not illuminate to indicate that the front
passenger air bag is operational.
*When the system detects that the front-passenger’s seat is unoccupie\
d, the front
passenger air bag status light will not illuminate even though the front\
passenger
air bag is OFF.
TIRE PRESSURE MONITORING SYSTEM (TPMS)
This system monitors tire pressure. if the low tire pressure warning light
illuminates, check the tire pressure in all four tires.
Adjust the low tire pressure to the recommended cOL d tire pressure
shown on the Tire and Loading information label, located in the driver’s
door opening. After tire pressures are adjusted, the vehicle will need to
be driven at speeds above 16 MPH (25 km/h) to activate the TPMS and
turn off the low tire pressure warning light.
SEAT BELT WARNING LIGHT AND CHIME
The light and chime remind you to fasten your seat belts. The
light illuminates whenever the ignition switch is placed in the
On or START position and remains illuminated until the driver’s
seat belt is fastened. At the same time, the chime sounds for
approximately 6 seconds unless the driver’s seat belt is
securely fastened.
With the ignition O n, the seat belt warning light may also
illuminate if the front-passenger’s seat is occupied with the
front-passenger’s seat belt unfastened.
Page 14 of 28
12
HIGH AND LOW TEMPERATURE INDICATOR
HiGH Te MPeRATu Re indic ATOR (Red)
When the ignition switch is in the O n position, the high temperature warning light
illuminates and then turns off.
LOW Te MPeRATu Re indic ATOR (Blue)
When the ignition switch is in the O n position, the low temperature indicator light illuminates and
then turns off after the engine coolant has warmed up.
CHILD SAFETY REAR DOOR LOCKS
The child safety lock levers are located on the edge of the
rear doors.
child safety locks help prevent the rear doors from being
opened accidentally, especially when small children are in
the vehicle.
When the lever is in the LO ck position, the door can only
be opened from the outside.
MOONROOF CONTROLS (if so equipped)
The ignition switch must be in the O n position to operate
the moonroof.
Ti LTin G TH e MOO nROO f
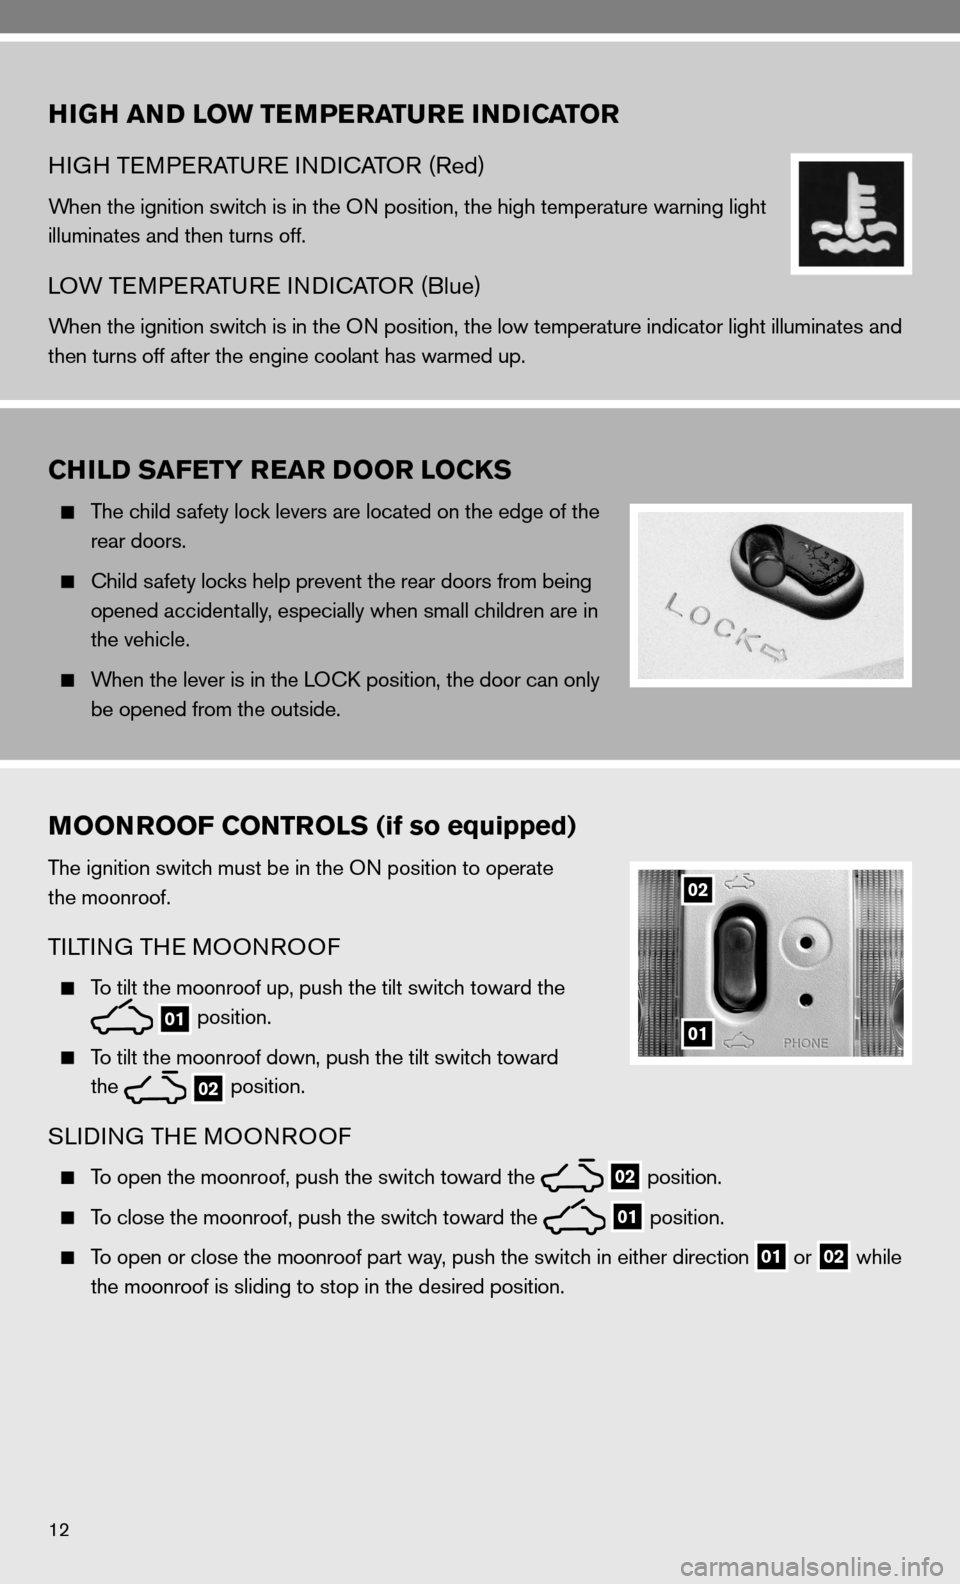
To tilt the moonroof up, push the tilt switch toward the
01 position.
To tilt the moonroof down, push the tilt switch toward
the
02 position.
SLidin
G THe MOO nROO f
To open the moonroof, push the switch toward the
02 position.
To close the moonroof, push the switch toward the
01 position.
To open or close the moonroof part way, push the switch in either direction 01 or
02 while
the moonroof is sliding to stop in the desired position.
01
02
Page 15 of 28
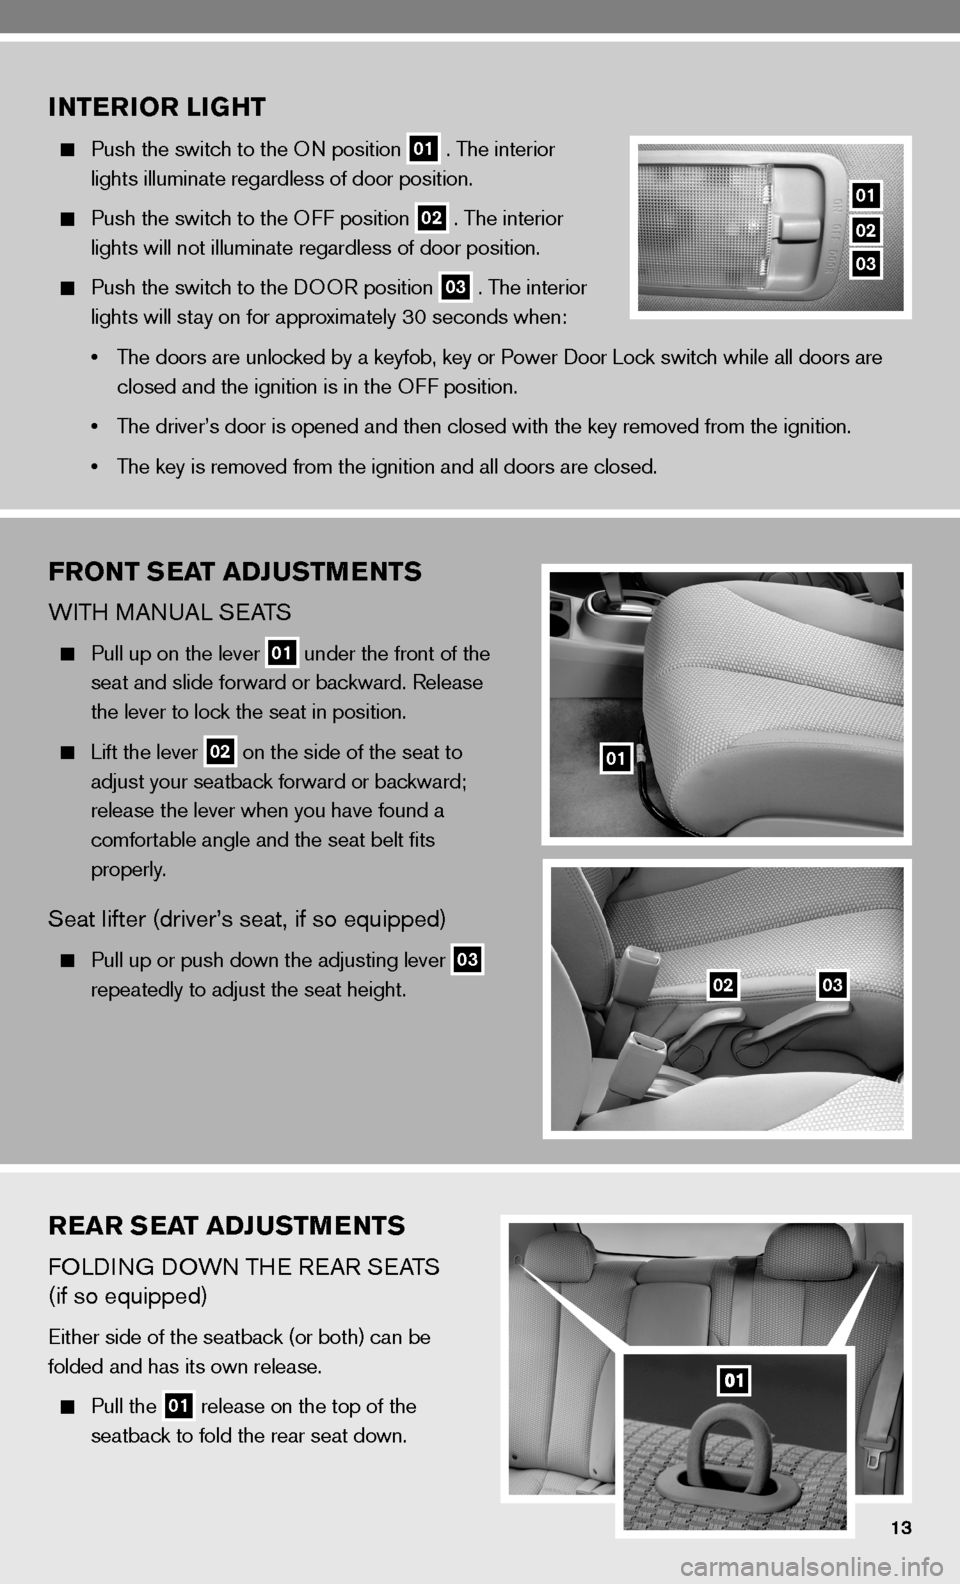
REAR SEAT ADJUSTMENTS
fOLdinG dOWn TH e ReAR S eATS
(if so equipped)
either side of the seatback (or both) can be
folded and has its own release.
Pull the 01 release on the top of the
seatback to fold the rear seat down.
INTERIOR LIGHT
Push the switch to the O n position 01 . The interior
lights illuminate regardless of door position.
Push the switch to the O ff position 02 . The interior
lights will not illuminate regardless of door position.
Push the switch to the d OOR position 03 . The interior
lights will stay on for approximately 30 seconds when:
• The doors are unlocked by a keyfob, key or Power door Lock switch while all doors are
closed and the ignition is in the O ff position.
• The driver’s door is opened and then closed with the key removed from \
the ignition.
• The key is removed from the ignition and all doors are closed.
FRONT SEAT ADJUSTMENTS
WiTH MAnu AL SeATS
Pull up on the lever 01 under the front of the
seat and slide forward or backward. Release
the lever to lock the seat in position.
Lift the lever 02 on the side of the seat to
adjust your seatback forward or backward;
release the lever when you have found a
comfortable angle and the seat belt fits
properly.
Seat lifter (driver’s seat, if so equipped)
Pull up or push down the adjusting lever 03
repeatedly to adjust the seat height.
01
0203
01
02
03
Page 16 of 28
14
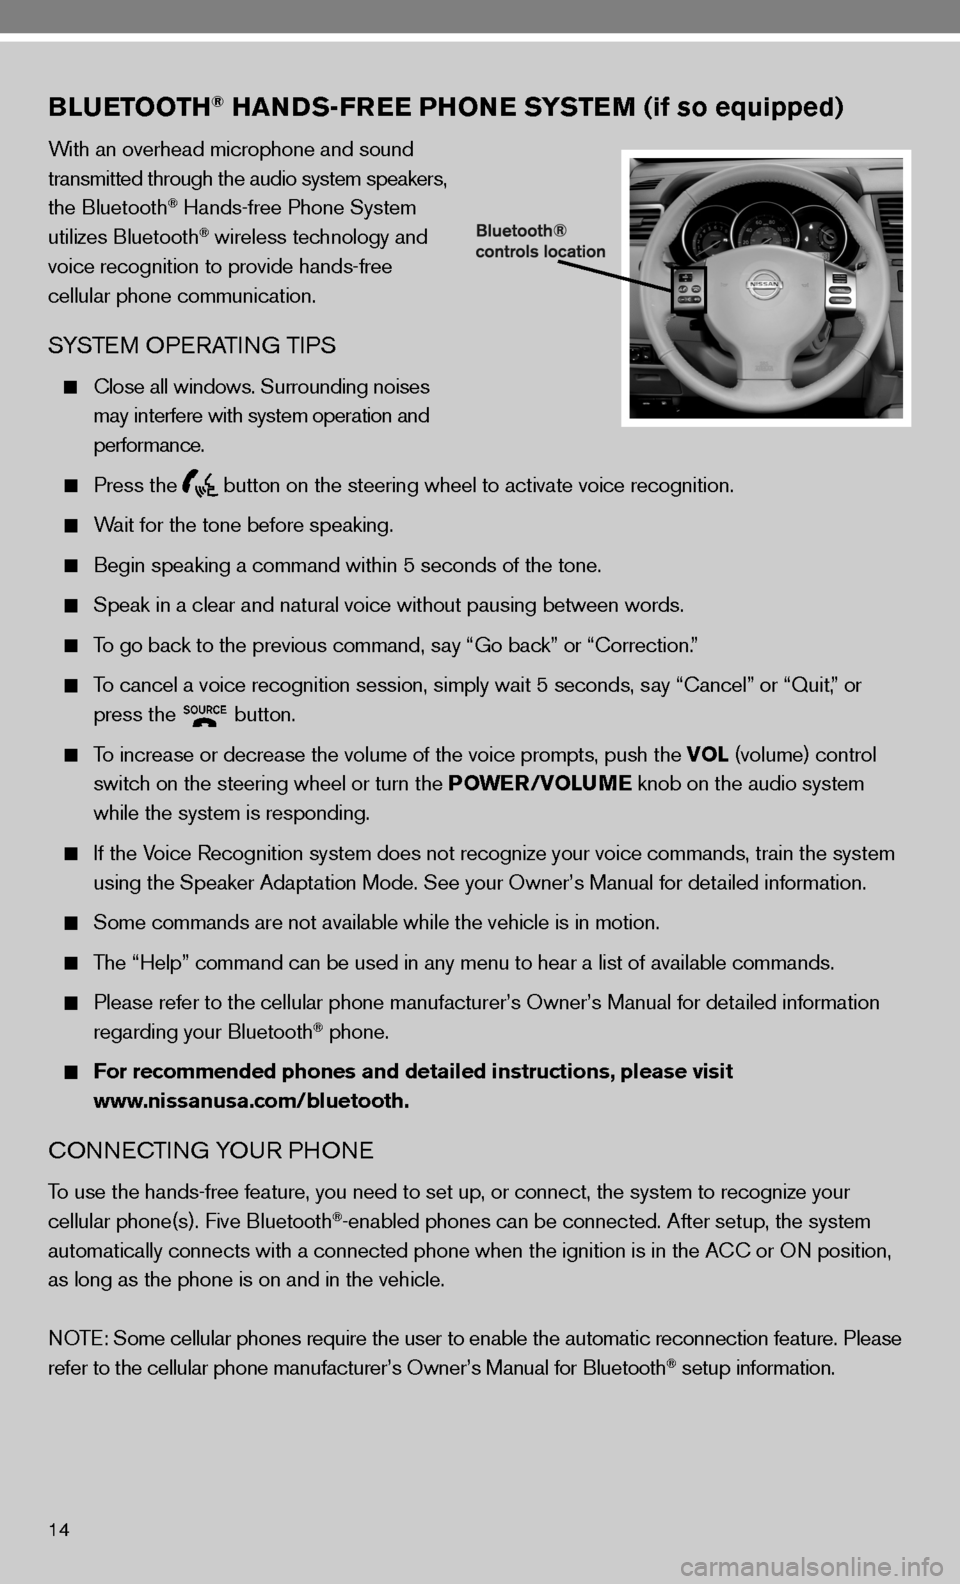
BLUETOOTH® HANDS-FREE PHONE SYSTEM (if so equipped)
With an overhead microphone and sound
transmitted through the audio system speakers,
the Bluetooth
® Hands-free Phone System
utilizes Bluetooth® wireless technology and
voice recognition to provide hands-free
cellular phone communication.
SYSTe M OPeRATin G TiPS
close all windows. Surrounding noises
may interfere with system operation and
performance.
Press the
button on the steering wheel to activate voice recognition.
Wait for the tone before speaking.
Begin speaking a command within 5 seconds of the tone.
Speak in a clear and natural voice without pausing between words.
To go back to the previous command, say “Go back” or “correction.”
To cancel a voice recognition session, simply wait 5 seconds, say “cancel” or “Quit,” or
press the
button.
To increase or decrease the volume of the voice prompts, push the VOL (volume) control
switch on the steering wheel or turn the POWER/VOLUME knob on the audio system
while the system is responding.
if the Voice Recognition system does not recognize your voice commands, train th\
e system
using the Speaker Adaptation Mode. See your Owner’s Manual for detailed information.
Some commands are not available while the vehicle is in motion.
The “Help” command can be used in any menu to hear a list of availa\
ble commands.
Please refer to the cellular phone manufacturer’s Owner’s Manual for detailed information
regarding your Bluetooth® phone.
For recommended phones and detailed instructions, please visit
www.nissanusa.com/bluetooth.
cO nnec Tin G YO uR PHO ne
To use the hands-free feature, you need to set up, or connect, the system to recognize your
cellular phone(s). five Bluetooth®-enabled phones can be connected. After setup, the system
automatically connects with a connected phone when the ignition is in th\
e A cc or On position,
as long as the phone is on and in the vehicle.
n OTe: Some cellular phones require the user to enable the automatic reconnec\
tion feature. Please
refer to the cellular phone manufacturer’s Owner’s Manual for Blue\
tooth
® setup information.
Page 17 of 28
15
cOnnecTinG PROcedu Re
n OTe: The vehicle must be stationary when connecting the phone.
1. Press the
button on the steering wheel. The system announces the available commands.
2. Say “connect Phone.”
3. The system acknowledges the previous command and announces the next set of available
commands. Say “Add phone.”
4. initiate connecting from the phone.
The connecting procedure varies according to each cellular phone model. for detailed
connecting instructions and a list of compatible phones, please visit
www.nissanusa.com/bluetooth.
When prompted for a Passkey code, enter “1234” from the handset. (The Passkey code is
assigned by ni SSAn and cannot be changed.)
5. Say a name for the phone when the system asks you to provide one. You can give the phone
a name of your choice.
MAkin G A PHO ne cALL
1. Press the
button.
2. After the tone, do one of the following:
Say “call.” After the system responds, say the name of the person in the phonebook.
Say “ call Phone number.” After waiting for the tone, say [number]. for example, say
“call Phone number.” After waiting for the tone, say “123-456-7891.”
Say “Redial” to redial the previous phone number.
Say “ call Phone number.” After the system responds, say “Special number” to dial more
than 10 digits or special characters.
You can say all the digits of a 7- or 10-digit phone number at one time.
f or a 10-digit number, saying the phone number in groups of 3, 3 and 4 digits may improve
recognition for some speakers. To use this group dialing method, say only the first 3 digits
of the phone number. After the system recognizes the number, it will request the next 3
digits and finally the last 4 digits.
i f a phone number is incorrectly recognized, you can try entering the phone number again
using the 3–3–4 group dialing procedure by saying “correction.”
When you have finished speaking the phone number wait for the system to repeat it back to
you, then say “dial.”
ReceiVin G/endin G A PHO ne cALL
When you receive a phone call, a ring tone sounds through the audio syste\
m.
To accept the call, press the
button. To reject the call, press the
button.
To hang up the phone at the end of a call or to disconnect during call pl\
acement, press
the
button.
Page 18 of 28
16
HOW TO SAY nuMBeRS
ni SSAn voice recognition permits numbers to be spoken in a variety of ways.
Say “zero” or “oh” for “0.” example: 1-800-662-6200 – Say “one eight zero zero six six two
six two oh oh.”
Say “pound” for “#.” Say “star” for “*” (available when using the “ call Phone number” then
“Special number” command and the “Send” command during a call).
Say “plus” for “+” (available only when using the “ call Phone number” then “Special
number” command).
Say “pause” for a 2-second pause.
uSinG YOu R PHOneBOOk
When a phone is connected to the system, the phonebook is automatically d\
ownloaded. This
allows you to access your phonebook from the Bluetooth® system to call contacts by name.
up to 1,000 contacts will be transferred. To access your phonebook:
1. Press the
button and wait for the tone.
2. Say “Phonebook.”
3. Wait for the tone, then say [a name] or say “List names.” The name must be said exactly as
it is entered in your phonebook for the system to recognize it. for example, say “Phonebook”
then after the system responds, say “Michelle.”
The phonebook can transfer multiple numbers for each entry. if you select a name with multiple
numbers, the system will ask you which number you want to dial.
The system allows for up to 40 voice tags to be recorded. You can record a voice tag for phone-
book entries that the system has difficulty recognizing or to directly\
dial an entry with multiple
numbers. To record a voice tag:
1. Press the
button and wait for the tone.
2. Say “Phonebook.”
3. Wait for the tone, then say [a name] or say “List names.” Select the name for which you want
to record a voice tag.
4. Say “Record name.”
Page 19 of 28
17
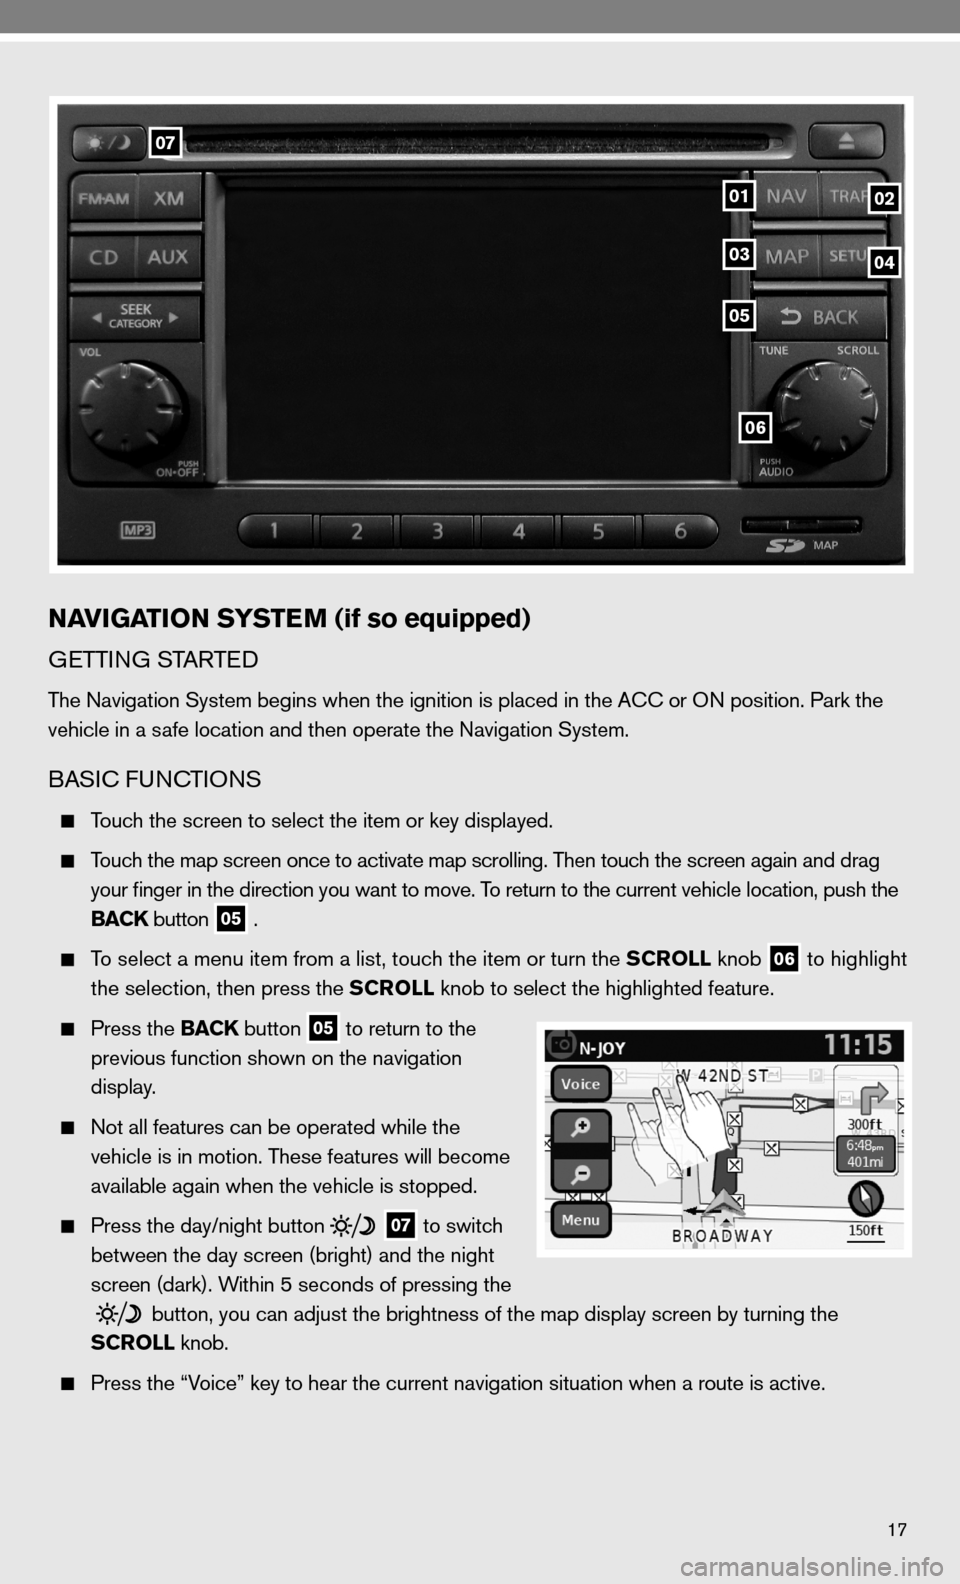
06
07
0102
05
0304
NAVIGATION SYSTEM (if so equipped)
GeTTin G STARTed
The navigation System begins when the ignition is placed in the A cc or O n position. Park the
vehicle in a safe location and then operate the navigation System.
BASic func TiOnS
Touch the screen to select the item or key displayed.
Touch the map screen once to activate map scrolling. Then touch the screen again and drag
your finger in the direction you want to move. To return to the current vehicle location, push the
BACK button
05 .
To select a menu item from a list, touch the item or turn the SCROLL knob
06 to highlight
the selection, then press the SCROLL knob to select the highlighted feature.
Press the BACK button
05 to return to the
previous function shown on the navigation
display.
not all features can be operated while the
vehicle is in motion. These features will become
available again when the vehicle is stopped.
Press the day/night button
07 to switch
between the day screen (bright) and the night
screen (dark). Within 5 seconds of pressing the
button, you can adjust the brightness of the map display screen by turning the
SCROLL knob.
Press the “Voice” key to hear the current navigation situation when a route is ac\
tive.
Page 20 of 28
18
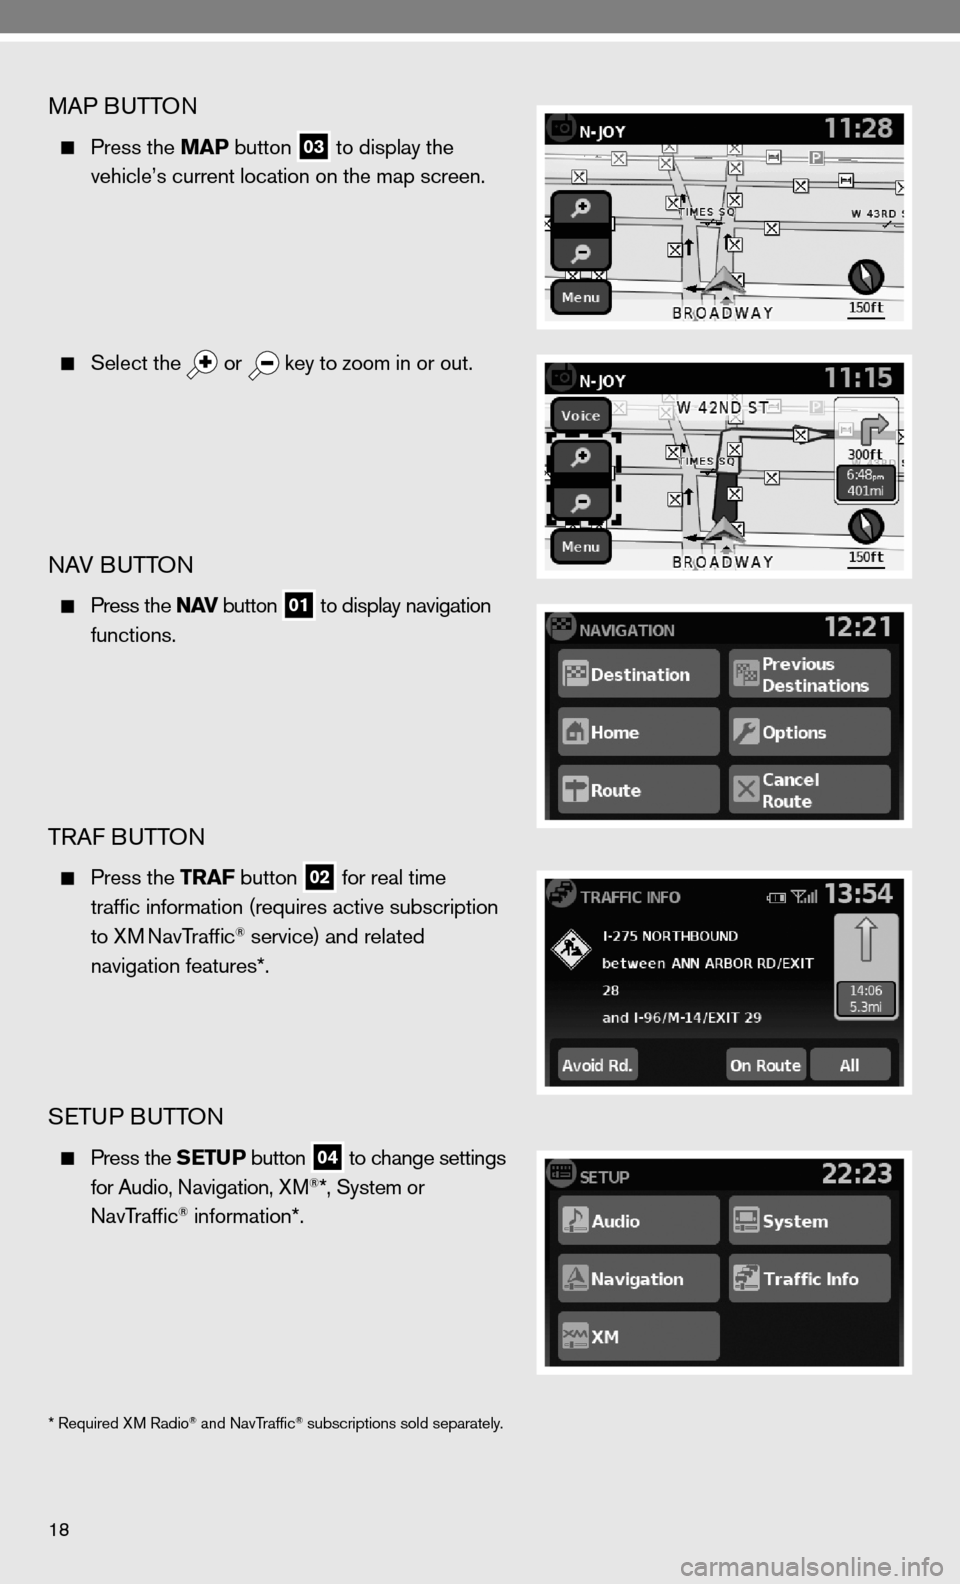
MAP BuTTOn
Press the MAP button
03 to display the
vehicle’s current location on the map screen.
Select the
or
key to zoom in or out.
nAV B
uTTOn
Press the N AV button
01 to display navigation
functions.
TRAf B uTTOn
Press the TRAF button
02 for real time
traffic information (requires active subscription
to XM
navTraffic® service) and related
navigation features*.
SeTu P BuTTO n
Press the SETUP button
04 to change settings
for Audio, navigation, XM®*, System or
navTraffic® information*.
* Required XM Radio® and navTraffic® subscriptions sold separately.