ECO mode NISSAN XTERRA 2009 Owner´s Manual
[x] Cancel search | Manufacturer: NISSAN, Model Year: 2009, Model line: XTERRA, Model: NISSAN XTERRA 2009Pages: 336, PDF Size: 4.52 MB
Page 203 of 336
MANUAL TRANSMISSION
The ignition switch includes a device that helps
prevent accidental removal of the key while driv-
ing.
The key can only be removed when the ignition
switch is in the LOCK position.
On manual transmission models, to turn the igni-
tion switch to LOCK position from the ACC or
ON position, turn the ignition switch to OFF, push
the key in, then turn the ignition switch to LOCK.
In order for the steering wheel to be locked, it
must be turned about 1/8 of a turn clockwise
from the straight up position.To lock the steering wheel, turn the ignition
switch to the LOCK position. Remove the
key. To unlock the steering wheel, insert
the key and turn it gently while rotating the
steering wheel slightly right and left.
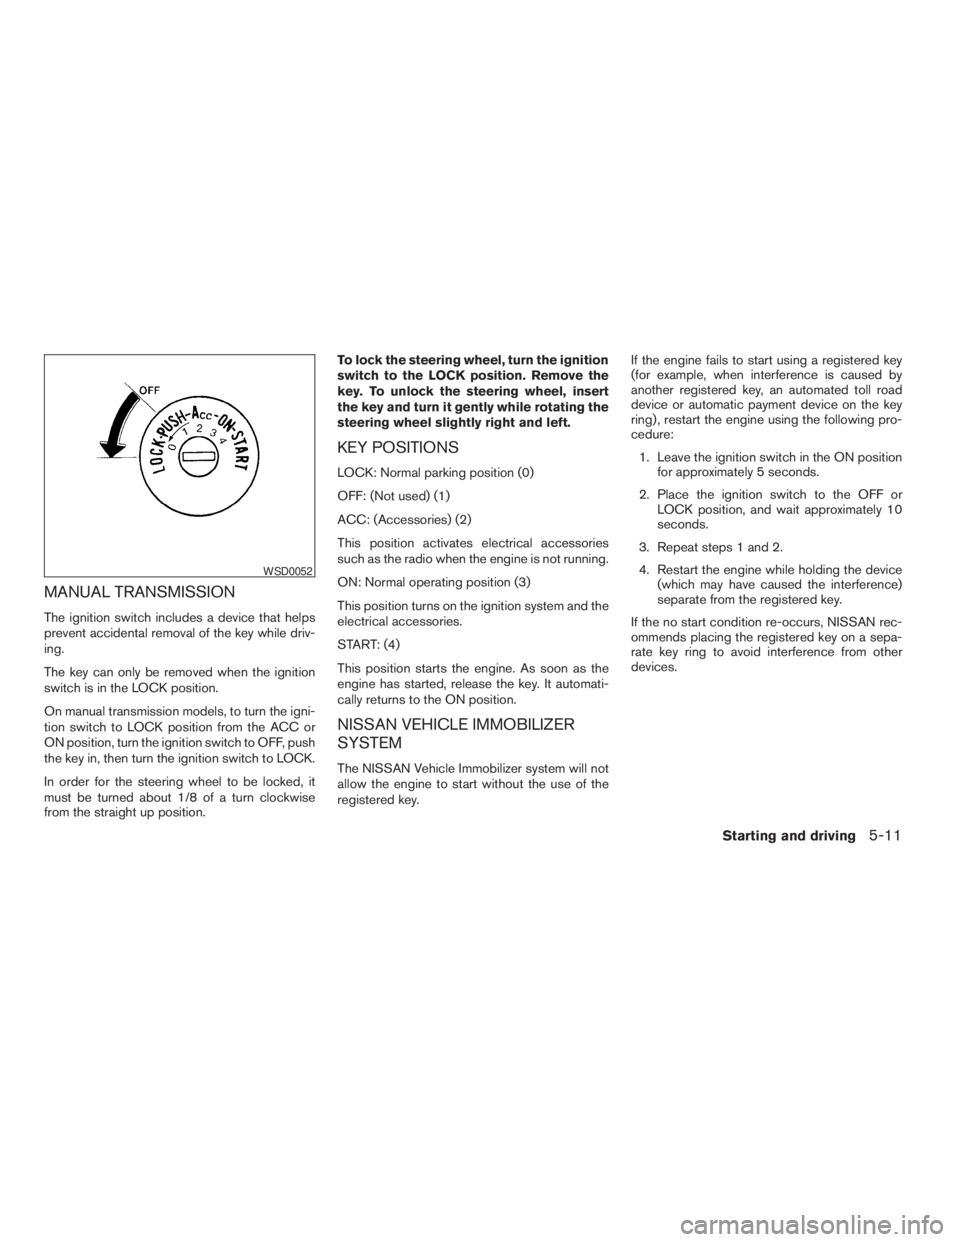
KEY POSITIONS
LOCK: Normal parking position (0)
OFF: (Not used) (1)
ACC: (Accessories) (2)
This position activates electrical accessories
such as the radio when the engine is not running.
ON: Normal operating position (3)
This position turns on the ignition system and the
electrical accessories.
START: (4)
This position starts the engine. As soon as the
engine has started, release the key. It automati-
cally returns to the ON position.
NISSAN VEHICLE IMMOBILIZER
SYSTEM
The NISSAN Vehicle Immobilizer system will not
allow the engine to start without the use of the
registered key.If the engine fails to start using a registered key
(for example, when interference is caused by
another registered key, an automated toll road
device or automatic payment device on the key
ring) , restart the engine using the following pro-
cedure:
1. Leave the ignition switch in the ON position
for approximately 5 seconds.
2. Place the ignition switch to the OFF or
LOCK position, and wait approximately 10
seconds.
3. Repeat steps 1 and 2.
4. Restart the engine while holding the device
(which may have caused the interference)
separate from the registered key.
If the no start condition re-occurs, NISSAN rec-
ommends placing the registered key on a sepa-
rate key ring to avoid interference from other
devices.
WSD0052
Starting and driving5-11
ZREVIEW COPYÐ2009 Xterra(xtr)
Owners ManualÐUSA_English(nna)
05/21/08Ðdebbie
X
Page 204 of 336

cMake sure the area around the vehicle is
clear.
cCheck fluid levels such as engine oil, cool-
ant, brake fluid, and window washer fluid as
frequently as possible, or at least whenever
you refuel.
cCheck that all windows and lights are clean.
cVisually inspect tires for their appearance
and condition. Also check tires for proper
inflation.
cCheck that all doors are closed.
cPosition seat and adjust head restraint.
cAdjust inside and outside mirrors.
cFasten seat belts and ask all passengers to
do likewise.
cCheck the operation of warning lights when
the ignition switch is turned to the ON (3)
position. See “Warning/indicator lights and
audible reminders” in the “Instruments and
controls” section of this manual.1. Apply the parking brake.
2.Automatic transmission:
Move the shift selector to P (Park) or N
(Neutral) . P (Park) is recommended.
The shift selector cannot be moved out
of P (Park) and into any of the other
gear positions if the ignition key is
turned to the OFF position or if the key
is removed from the ignition switch.
The starter is designed not to operate if
the shift selector is in any of the driving
positions.
Manual transmission:
Move the shift selector to N (Neutral) . De-
press the clutch pedal to the floor while
cranking the engine.
The starter is designed not to operate
unless the clutch pedal is fully de-
pressed.
3. Crank the enginewith your foot off the
accelerator pedalby turning the ignition
switch to START. Release the key when the
engine starts. If the engine starts, but fails to
run, repeat the above procedure.
cIf the engine is very hard to start in ex-
tremely cold weather or when restarting,depress the accelerator pedal a little (ap-
proximately 1/3 to the floor) and hold it
and then crank the engine. Release the
key and the accelerator pedal when the
engine starts.
cIf the engine is very hard to start because
it is flooded, depress the accelerator
pedal all the way to the floor and hold it.
Crank the engine for 5-6 seconds. After
cranking the engine, release the accel-
erator pedal. Crank the enginewith your
foot off the accelerator pedalby turn-
ing the ignition key to START. Release the
key when the engine starts. If the engine
starts, but fails to run, repeat the above
procedure.
CAUTION
Do not operate the starter for more than
15 seconds at a time. If the engine does
not start, turn the key off and wait 10
seconds before cranking again, otherwise
the starter could be damaged.
4. Allow the engine to idle for at least 30 sec-
onds after starting. Do not race the engine
while warming it up. Drive at moderate
speed for a short distance first, especially in
cold weather.
BEFORE STARTING THE ENGINE STARTING THE ENGINE
5-12Starting and driving
ZREVIEW COPYÐ2009 Xterra(xtr)
Owners ManualÐUSA_English(nna)
05/21/08Ðdebbie
X
Page 209 of 336
MANUAL TRANSMISSION (if so
equipped)
WARNING
cDo not downshift abruptly on slippery
roads. This may cause a loss of control.
cDo not over-rev the engine when shift-
ing to a lower gear. This may cause a
loss of control or engine damage.
CAUTION
cDo not rest your foot on the clutch pedal
while driving. This may cause clutch
damage.
cFully depress the clutch pedal before
shifting to help prevent transmission
damage.
cStop your vehicle completely before
shifting into R (Reverse) .
cWhen the vehicle is stopped with the
engine running (for example, at a stop
light) , shift to N (Neutral) and release
the clutch pedal with the foot brake
applied.
Shifting
To change gears, or when upshifting or down-
shifting, depress the clutch pedal fully, shift into
the appropriate gear, then release the clutch
slowly and smoothly.
To ensure smooth gear changes, fully depress
the clutch pedal before operating the shift selec-
tor. If the clutch pedal is not fully depressed
before the transmission is shifted, a gear noise
may be heard. Transmission damage could oc-
cur.
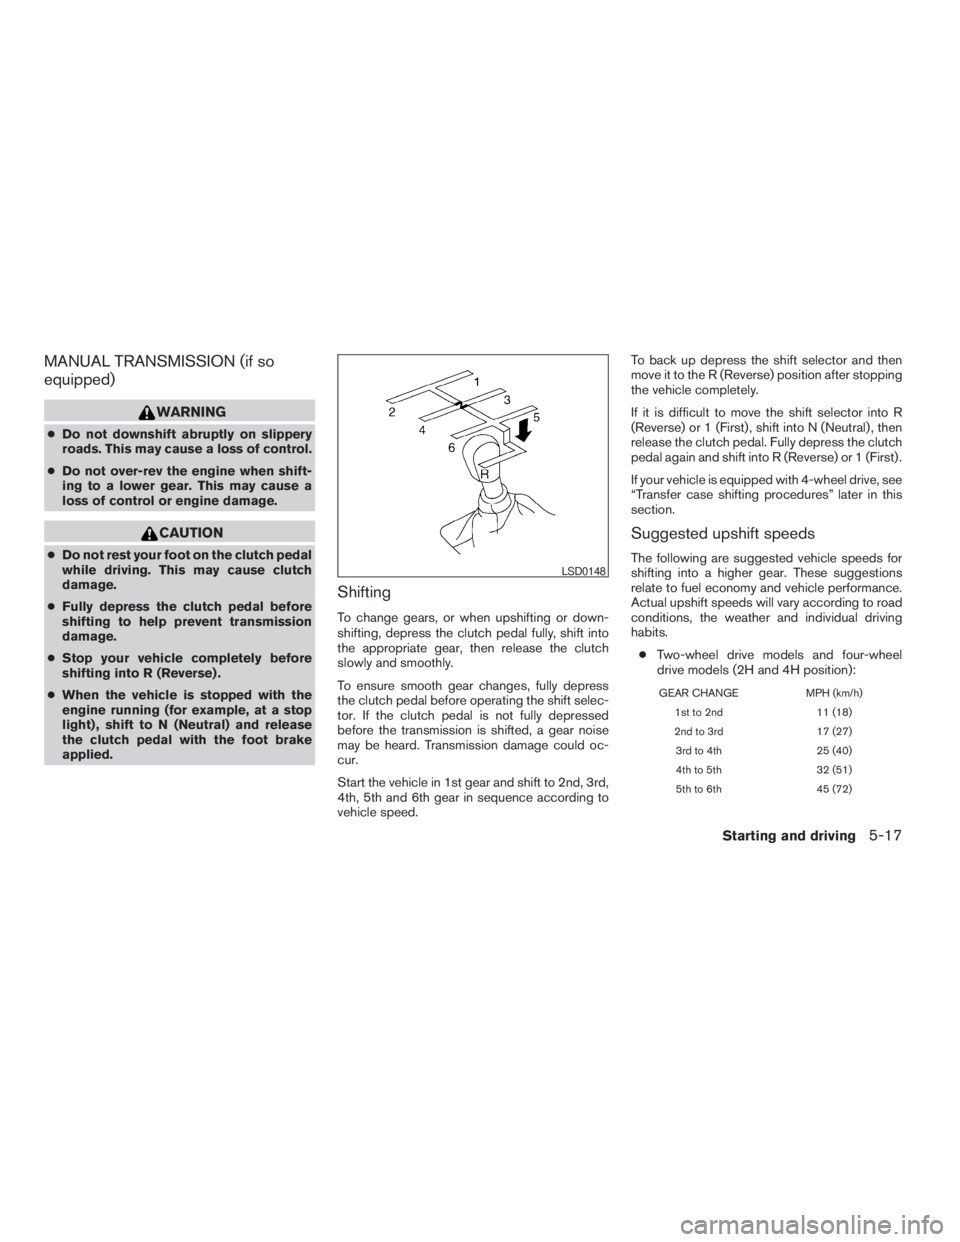
Start the vehicle in 1st gear and shift to 2nd, 3rd,
4th, 5th and 6th gear in sequence according to
vehicle speed.To back up depress the shift selector and then
move it to the R (Reverse) position after stopping
the vehicle completely.
If it is difficult to move the shift selector into R
(Reverse) or 1 (First) , shift into N (Neutral) , then
release the clutch pedal. Fully depress the clutch
pedal again and shift into R (Reverse) or 1 (First) .
If your vehicle is equipped with 4-wheel drive, see
“Transfer case shifting procedures” later in this
section.
Suggested upshift speeds
The following are suggested vehicle speeds for
shifting into a higher gear. These suggestions
relate to fuel economy and vehicle performance.
Actual upshift speeds will vary according to road
conditions, the weather and individual driving
habits.
cTwo-wheel drive models and four-wheel
drive models (2H and 4H position):
GEAR CHANGE MPH (km/h)
1st to 2nd 11 (18)
2nd to 3rd 17 (27)
3rd to 4th 25 (40)
4th to 5th 32 (51)
5th to 6th 45 (72)
LSD0148
Starting and driving5-17
ZREVIEW COPYÐ2009 Xterra(xtr)
Owners ManualÐUSA_English(nna)
05/21/08Ðdebbie
X
Page 214 of 336
cAccelerate slowly and smoothly. Maintain
cruising speeds with a constant accelerator
position.
cDrive at moderate speeds on the highway.
Driving at high speed lowers fuel economy.
cAvoid unnecessary stopping and braking.
Maintain a safe distance behind other ve-
hicles.
cUse a proper gear range which suits road
conditions. On level roads, shift into high
gear as soon as possible.
cAvoid unnecessary engine idling.
cKeep your engine tuned up.
cFollow the recommended periodic mainte-
nance schedule.
cKeep the tires inflated to the correct pres-
sure. Low tire pressure increases tire wear
and lowers fuel economy.
cKeep the front wheels in correct alignment.
Improper alignment increases tire wear and
lowers fuel economy.
cAir conditioner operation lowers fuel
economy. Use the air conditioner only when
necessary.cWhen cruising at highway speeds, it is more
economical to use the air conditioner and
leave the windows closed to reduce drag.
cFor vehicles equipped with
, use 4H
or 4L position only when necessary. Four-
wheel drive operation lowers fuel economy.
WARNING
cFor 4WD equipped vehicles, do not at-
tempt to raise two wheels off the
ground and shift the transmission to
any drive or reverse position with the
engine running. Doing so may result in
drivetrain damage or unexpected ve-
hicle movement which could result in
serious vehicle damage or personal
injury.
cDo not attempt to test a 4WD equipped
vehicle on a 2-wheel dynamometer
(such as the dynamometers used by
some states for emissions testing) , or
similar equipment even if the other two
wheels are raised off the ground. Make
sure you inform test facility personnel
that your vehicle is equipped with 4WD
before it is placed on a dynamometer.
Using the wrong test equipment may
result in drivetrain damage or unex-
pected vehicle movement which could
result in serious vehicle damage or per-
sonal injury.
INCREASING FUEL ECONOMYUSING FOUR WHEEL DRIVE
(4WD)
5-22Starting and driving
ZREVIEW COPYÐ2009 Xterra(xtr)
Owners ManualÐUSA_English(nna)
05/22/08Ðtbrooks
X
Page 218 of 336
The transfer case 4WD shift switch is used to
select either 2WD or 4WD depending on the
driving conditions. There are three types of drive
modes available, 2WD, 4H and 4LO.
The 4WD shift switch electronically controls the
transfer case operation. Rotate the switch to
move between each mode, 2WD, 4H and 4LO.
To change into or out of 4LO, the vehicle
MUST be stationary, shift the shift selector
to Neutral (N) , and for automatic transmis-
sion vehicles depress the brake pedal or
for manual transmission vehicles depress
the clutch pedal. The switch must be de-
pressed and turned when changing into or
out of 4LO.
WARNING
cWhen parking, apply the parking brake
before stopping the engine and make
sure that the 4WD shift indicator light is
on and the ATP warning light goes off.
Otherwise, the vehicle could unexpect-
edly move even if the automatic trans-
mission is in the P position.cThe 4LO indicator light must stop blink-
ing and remain illuminated or turn off
before shifting the transmission into
gear. If the shift selector or shift lever is
shifted from the (N) position to any
other gear when the 4LO indicator light
is blinking, the vehicle may move
unexpectedly.
CAUTION
cNever shift the 4WD shift switch be-
tween 4LO and 4H while driving.
cThe 4H position provides greater trac-
tion. Avoid excessive speed, as it will
cause increased fuel consumption and
higher oil temperatures, and could
damage drivetrain components.
Speeds over 62.5 MPH (100 km/h) in 4H
is not recommended.
cThe 4LO position provides maximum
power and traction. Avoid raising ve-
hicle speed excessively, as the maxi-
mum speed is approximately 31 MPH
(50 km/h) .
cWhen driving straight, shift the 4WD
shift switch to the 2WD or 4H position.
Do not move the 4WD shift switch when
making a turn or reversing.cDo not shift the 4WD shift switch (be-
tween 2WD and 4H) while driving on
steep downhill grades. Use the engine
brake and low automatic transmission
gears (D1 or D2) or manual transmis-
sion (1st gear or 2nd gear) for engine
braking.
cDo not operate the 4WD shift switch
(between 2WD and 4H) with the rear
wheels spinning.
cDo not drive on dry hard surface roads
in the 4H or 4LO position. Driving on dry
hard surfaces in 4H or 4LO may cause
unnecessary noise and tire wear.
NISSAN recommends driving in the
2WD position under these conditions.
cThe 4WD transfer case may not be
shifted between 4H and 4LO at low am-
bient temperatures and the transfer
4LO position indicator light may blink
even when the 4WD shift switch is
shifted. After driving for a while you can
change the 4WD transfer case between
4H and 4LO.
When driving on rough roads,
cSet the 4WD shift switch to 4H or 4LO.
cDrive carefully according to the road surface
conditions.
5-26Starting and driving
ZREVIEW COPYÐ2009 Xterra(xtr)
Owners ManualÐUSA_English(nna)
05/21/08Ðdebbie
X
Page 220 of 336
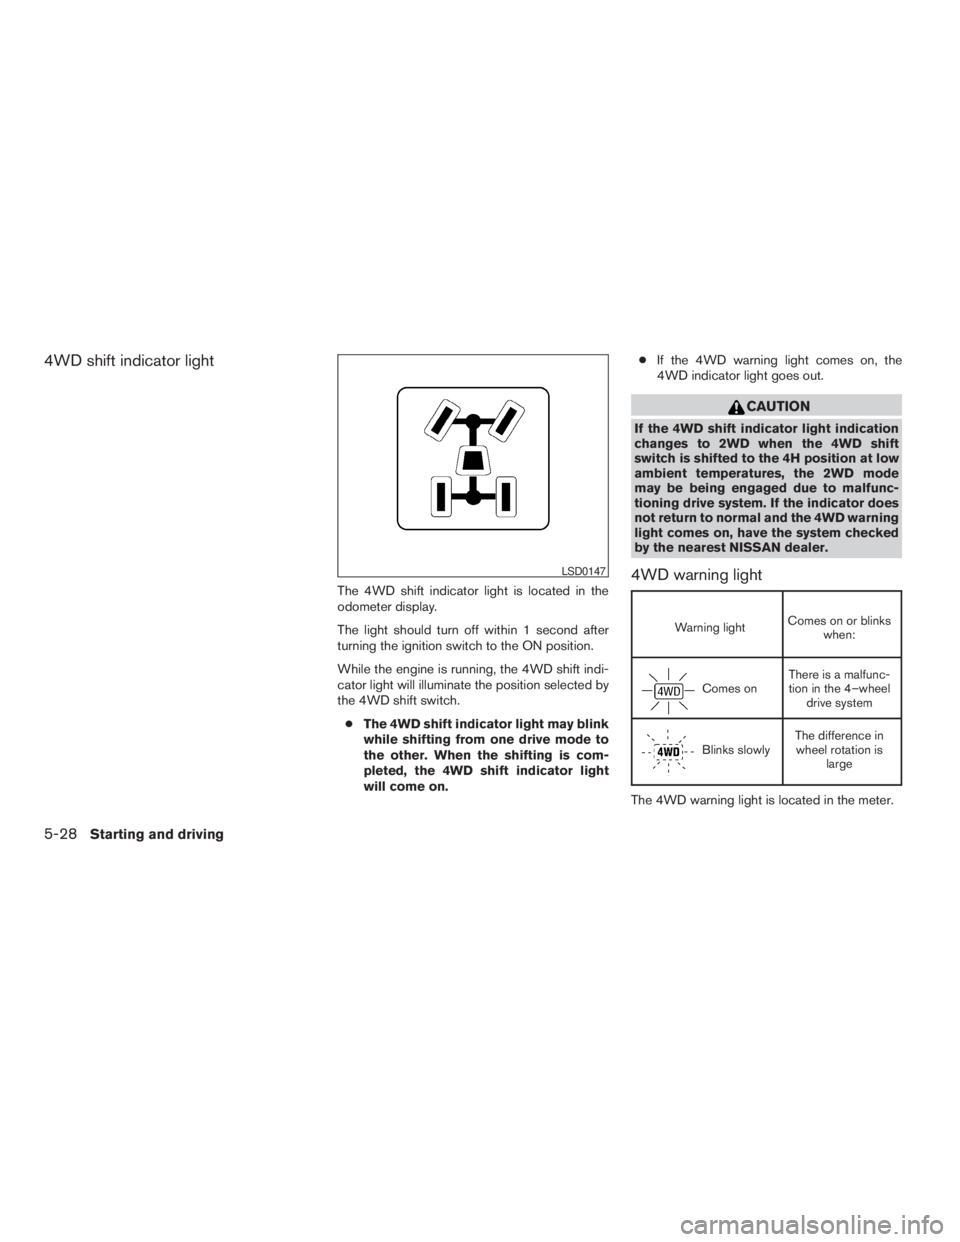
4WD shift indicator light
The 4WD shift indicator light is located in the
odometer display.
The light should turn off within 1 second after
turning the ignition switch to the ON position.
While the engine is running, the 4WD shift indi-
cator light will illuminate the position selected by
the 4WD shift switch.
cThe 4WD shift indicator light may blink
while shifting from one drive mode to
the other. When the shifting is com-
pleted, the 4WD shift indicator light
will come on.cIf the 4WD warning light comes on, the
4WD indicator light goes out.
CAUTION
If the 4WD shift indicator light indication
changes to 2WD when the 4WD shift
switch is shifted to the 4H position at low
ambient temperatures, the 2WD mode
may be being engaged due to malfunc-
tioning drive system. If the indicator does
not return to normal and the 4WD warning
light comes on, have the system checked
by the nearest NISSAN dealer.
4WD warning light
Warning lightComes on or blinks
when:
Comes onThere is a malfunc-
tion in the 4–wheel
drive system
Blinks slowlyThe difference in
wheel rotation is
large
The 4WD warning light is located in the meter.
LSD0147
5-28Starting and driving
ZREVIEW COPYÐ2009 Xterra(xtr)
Owners ManualÐUSA_English(nna)
05/21/08Ðdebbie
X
Page 221 of 336
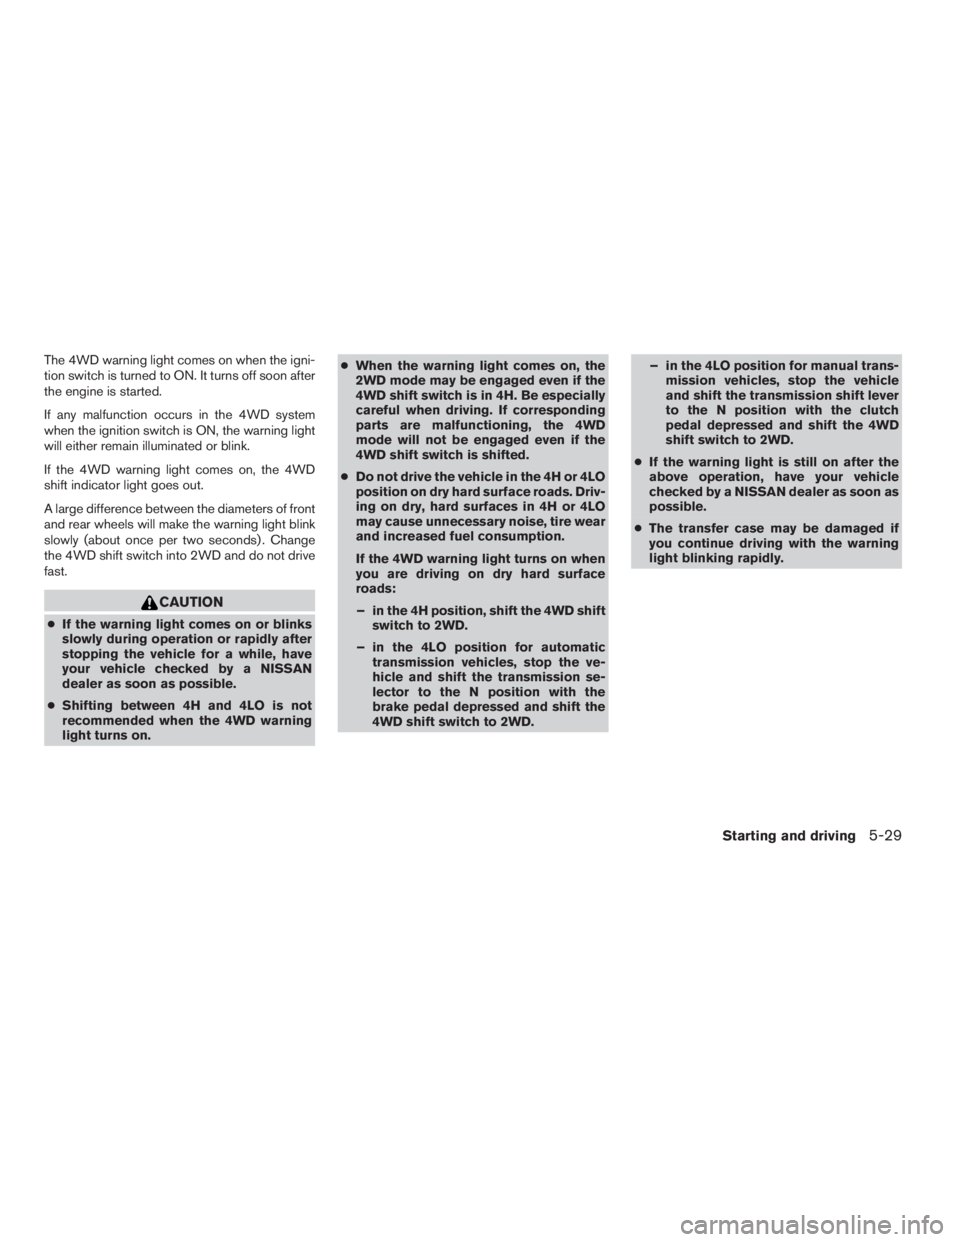
The 4WD warning light comes on when the igni-
tion switch is turned to ON. It turns off soon after
the engine is started.
If any malfunction occurs in the 4WD system
when the ignition switch is ON, the warning light
will either remain illuminated or blink.
If the 4WD warning light comes on, the 4WD
shift indicator light goes out.
A large difference between the diameters of front
and rear wheels will make the warning light blink
slowly (about once per two seconds) . Change
the 4WD shift switch into 2WD and do not drive
fast.
CAUTION
cIf the warning light comes on or blinks
slowly during operation or rapidly after
stopping the vehicle for a while, have
your vehicle checked by a NISSAN
dealer as soon as possible.
cShifting between 4H and 4LO is not
recommended when the 4WD warning
light turns on.cWhen the warning light comes on, the
2WD mode may be engaged even if the
4WD shift switch is in 4H. Be especially
careful when driving. If corresponding
parts are malfunctioning, the 4WD
mode will not be engaged even if the
4WD shift switch is shifted.
cDo not drive the vehicle in the 4H or 4LO
position on dry hard surface roads. Driv-
ing on dry, hard surfaces in 4H or 4LO
may cause unnecessary noise, tire wear
and increased fuel consumption.
If the 4WD warning light turns on when
you are driving on dry hard surface
roads:
– in the 4H position, shift the 4WD shift
switch to 2WD.
– in the 4LO position for automatic
transmission vehicles, stop the ve-
hicle and shift the transmission se-
lector to the N position with the
brake pedal depressed and shift the
4WD shift switch to 2WD.– in the 4LO position for manual trans-
mission vehicles, stop the vehicle
and shift the transmission shift lever
to the N position with the clutch
pedal depressed and shift the 4WD
shift switch to 2WD.
cIf the warning light is still on after the
above operation, have your vehicle
checked by a NISSAN dealer as soon as
possible.
cThe transfer case may be damaged if
you continue driving with the warning
light blinking rapidly.
Starting and driving5-29
ZREVIEW COPYÐ2009 Xterra(xtr)
Owners ManualÐUSA_English(nna)
05/21/08Ðdebbie
X
Page 223 of 336
WARNING
cDo not stop or park the vehicle over
flammable materials such as dry grass,
waste paper or rags. They may ignite
and cause a fire.
cSafe parking procedures require that
both the parking brake be set and the
transmission placed into P (Park) for
automatic transmission models or in an
appropriate gear for manual transmis-
sion models. Failure to do so could
cause the vehicle to move unexpectedly
or roll away and result in an accident.Make sure the shift lever has been
pushed as far forward as it can go and
cannot be moved without depressing
the foot brake pedal.
cNever leave the engine running while
the vehicle is unattended.
cDo not leave children unattended inside
the vehicle. They could unknowingly ac-
tivate switches or controls. Unattended
children could become involved in seri-
ous accidents.1. Firmly apply the parking brake.
2.Manual transmission models:
Place the shift lever in the R (Reverse) posi-
tion. When parking on an uphill grade, place
the shift lever in 1st gear.
Automatic transmission models:
Move the shift selector to the P (Park) position.
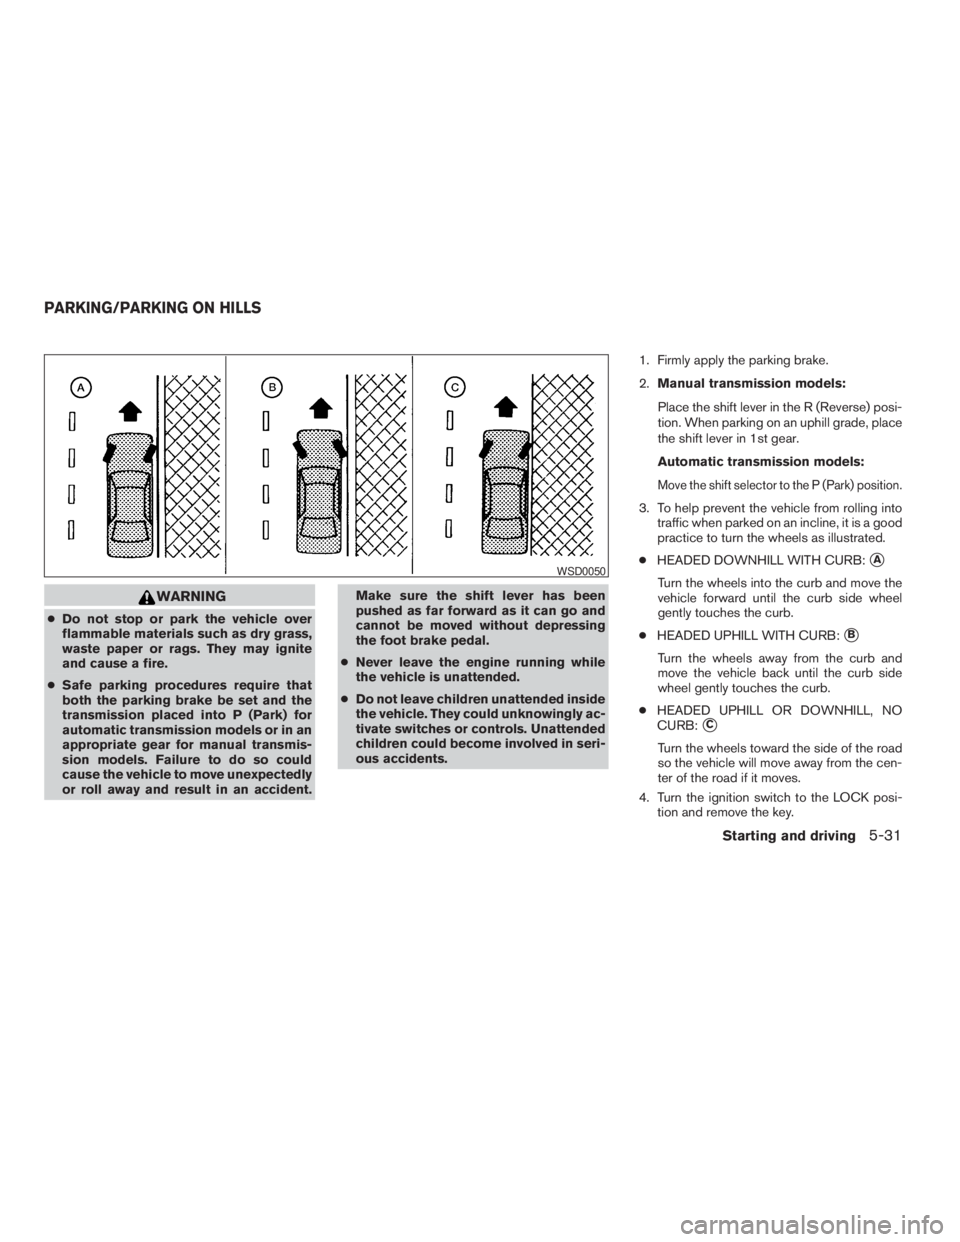
3. To help prevent the vehicle from rolling into
traffic when parked on an incline, it is a good
practice to turn the wheels as illustrated.
cHEADED DOWNHILL WITH CURB:
sA
Turn the wheels into the curb and move the
vehicle forward until the curb side wheel
gently touches the curb.
cHEADED UPHILL WITH CURB:
sB
Turn the wheels away from the curb and
move the vehicle back until the curb side
wheel gently touches the curb.
cHEADED UPHILL OR DOWNHILL, NO
CURB:
sC
Turn the wheels toward the side of the road
so the vehicle will move away from the cen-
ter of the road if it moves.
4. Turn the ignition switch to the LOCK posi-
tion and remove the key.
WSD0050
PARKING/PARKING ON HILLS
Starting and driving5-31
ZREVIEW COPYÐ2009 Xterra(xtr)
Owners ManualÐUSA_English(nna)
05/21/08Ðdebbie
X
Page 226 of 336

pedal. This is normal and does not indicate a
malfunction. If the computer senses a malfunc-
tion, it switches the ABS off and illuminates the
ABS warning light on the instrument panel. The
brake system then operates normally, but without
anti-lock assistance.
If the ABS warning light illuminates during the
self-test or while driving, have the vehicle
checked by a NISSAN dealer.cABLS is a form of traction control using
sensors from the Anti-lock Brake System
(ABS) to transfer power from a slipping drive
wheel to a wheel with more traction. The
ABLS system applies braking to the slipping
wheel, which helps redirect power to an-
other wheel.
cOn 4WD models the ABLS system operates
in both 4H and 4LO modes. If 4WD mode is
engaged, the ABLS system will operate for
both drive axles. On 2WD vehicles, the
ABLS system operates on the drive axle
only.
cThe ABLS system is always ON unless the
system detects brake pad overheating. If
high brake pad temperature is detected, it
will turn OFF, but normal brake function will
continue. ABLS will function even when the
VDC system (if so equipped) is turned OFF.
WARNING
The ABLS system provides increased trac-
tion, but will not prevent accidents due to
abrupt steering operation or by careless
driving or dangerous driving practices.
Reduce vehicle speed and be especially
careful when driving and cornering on
slippery surfaces, and always drive
carefully.The Vehicle Dynamic Control (VDC) system uses
various sensors to monitor driver inputs and ve-
hicle motion. Under certain driving situations, the
system will control braking and engine output to
help keep the vehicle on its steered path.
cWhen the Vehicle Dynamic Control (VDC)
system is operating, theSLIPindicator in
the instrument panel blinks.
cIf the 4WD transfer case is shifted into 4LO
the
indicator light will come on and
the VDC system will be turned off. See
“Transfer case shifting procedures” earlier in
this section.
cIf the SLIP indicator blinks, the road condi-
tions may be slippery. Be sure to adjust your
speed and driving to these conditions. See
“Slip indicator light”, and “Vehicle Dynamic
Control (VDC) off indicator light” in the “In-
struments and controls” section.
If the battery is removed or discharged, the Trac-
tion Control System may be disabled and the
SLIPand
indicator lights will not turn off
after 2 seconds when the ignition switch is turned
to the ON position.
Perform the following procedure to reset the
system:
cStart the engine and set the steering wheel
in the straight forward position.
ACTIVE BRAKE LIMITED SLIP (ABLS)
SYSTEM (if so equipped)VEHICLE DYNAMIC CONTROL (VDC)
SYSTEM
5-34Starting and driving
ZREVIEW COPYÐ2009 Xterra(xtr)
Owners ManualÐUSA_English(nna)
05/21/08Ðdebbie
X
Page 244 of 336
TOWING RECOMMENDED BY
NISSANTwo-wheel drive models
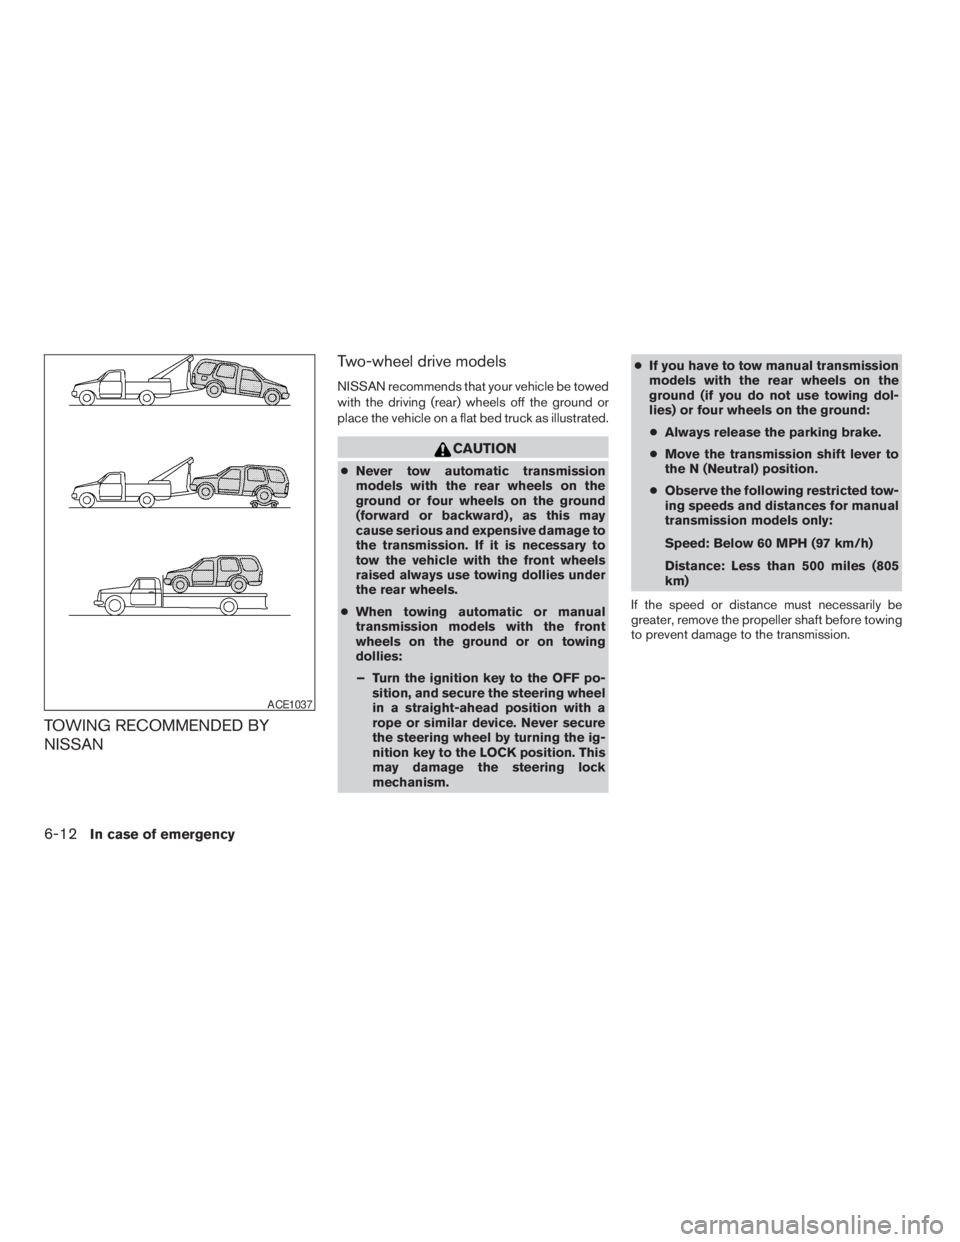
NISSAN recommends that your vehicle be towed
with the driving (rear) wheels off the ground or
place the vehicle on a flat bed truck as illustrated.
CAUTION
cNever tow automatic transmission
models with the rear wheels on the
ground or four wheels on the ground
(forward or backward) , as this may
cause serious and expensive damage to
the transmission. If it is necessary to
tow the vehicle with the front wheels
raised always use towing dollies under
the rear wheels.
cWhen towing automatic or manual
transmission models with the front
wheels on the ground or on towing
dollies:
– Turn the ignition key to the OFF po-
sition, and secure the steering wheel
in a straight-ahead position with a
rope or similar device. Never secure
the steering wheel by turning the ig-
nition key to the LOCK position. This
may damage the steering lock
mechanism.cIf you have to tow manual transmission
models with the rear wheels on the
ground (if you do not use towing dol-
lies) or four wheels on the ground:
cAlways release the parking brake.
cMove the transmission shift lever to
the N (Neutral) position.
cObserve the following restricted tow-
ing speeds and distances for manual
transmission models only:
Speed: Below 60 MPH (97 km/h)
Distance: Less than 500 miles (805
km)
If the speed or distance must necessarily be
greater, remove the propeller shaft before towing
to prevent damage to the transmission.
ACE1037
6-12In case of emergency
ZREVIEW COPYÐ2009 Xterra(xtr)
Owners ManualÐUSA_English(nna)
05/21/08Ðdebbie
X