key NISSAN XTERRA 2013 N50 / 2.G LC2 Navigation Manual
[x] Cancel search | Manufacturer: NISSAN, Model Year: 2013, Model line: XTERRA, Model: NISSAN XTERRA 2013 N50 / 2.GPages: 104, PDF Size: 1.27 MB
Page 51 of 104
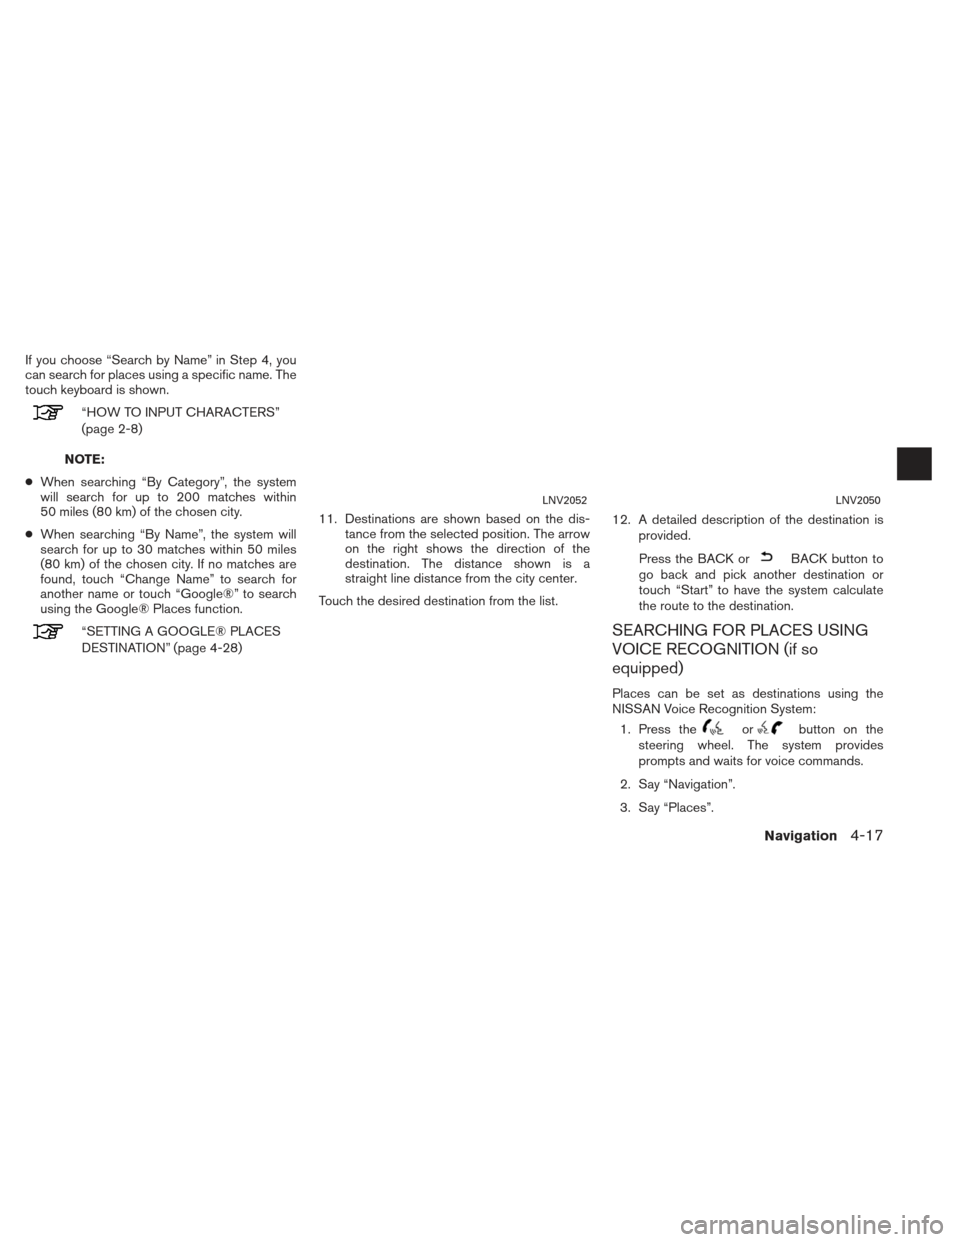
If you choose “Search by Name” in Step 4, you
can search for places using a specific name. The
touch keyboard is shown.
“HOW TO INPUT CHARACTERS”
(page 2-8)
NOTE:
● When searching “By Category”, the system
will search for up to 200 matches within
50 miles (80 km) of the chosen city.
● When searching “By Name”, the system will
search for up to 30 matches within 50 miles
(80 km) of the chosen city. If no matches are
found, touch “Change Name” to search for
another name or touch “Google®” to search
using the Google® Places function.
“SETTING A GOOGLE® PLACES
DESTINATION” (page 4-28) 11. Destinations are shown based on the dis-
tance from the selected position. The arrow
on the right shows the direction of the
destination. The distance shown is a
straight line distance from the city center.
Touch the desired destination from the list. 12. A detailed description of the destination is
provided.
Press the BACK or
BACK button to
go back and pick another destination or
touch “Start” to have the system calculate
the route to the destination.
SEARCHING FOR PLACES USING
VOICE RECOGNITION (if so
equipped)
Places can be set as destinations using the
NISSAN Voice Recognition System:
1. Press the
orbutton on the
steering wheel. The system provides
prompts and waits for voice commands.
2. Say “Navigation”.
3. Say “Places”.
LNV2052LNV2050
Navigation4-17
Page 59 of 104
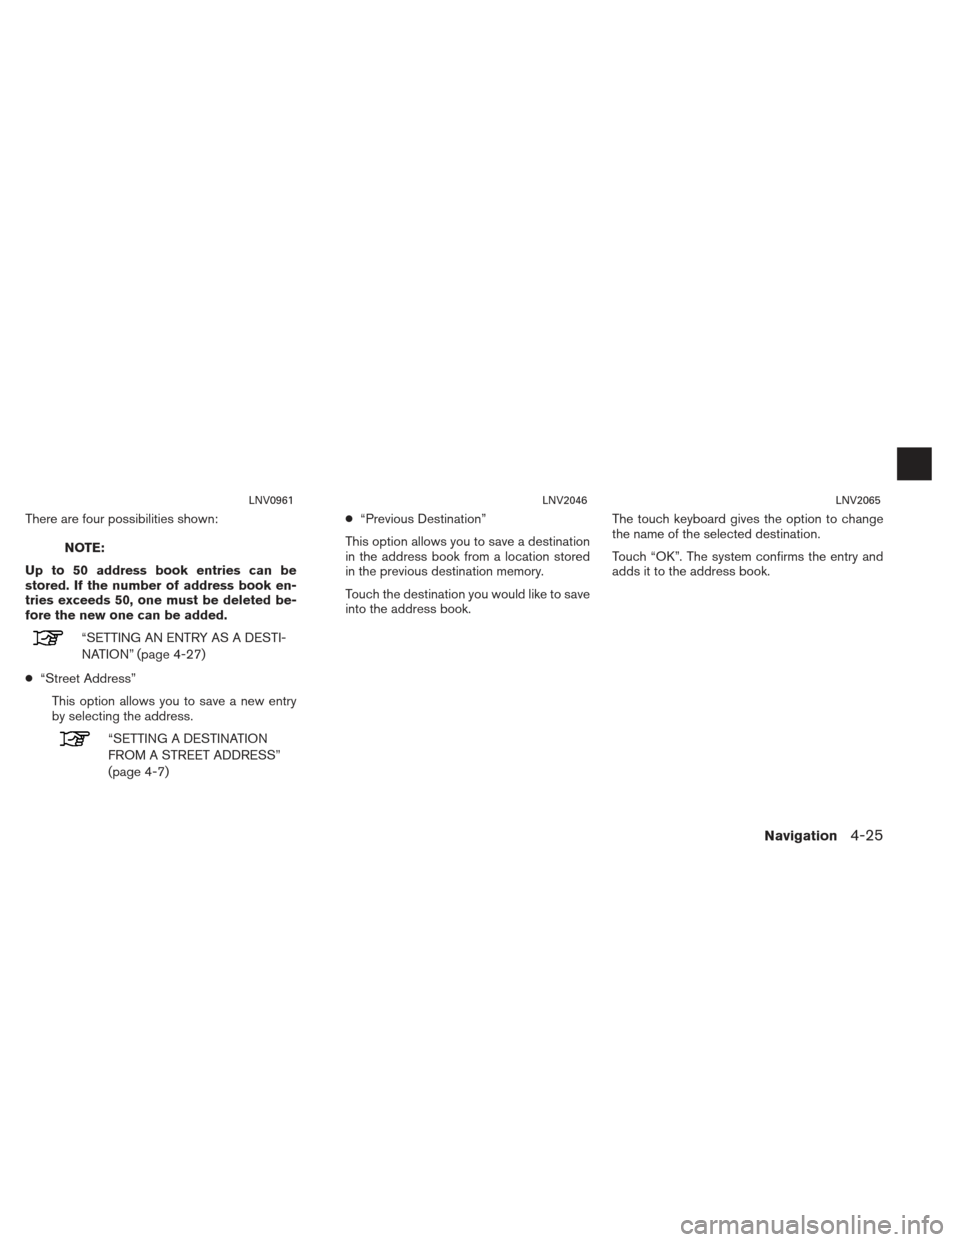
There are four possibilities shown:
NOTE:
Up to 50 address book entries can be
stored. If the number of address book en-
tries exceeds 50, one must be deleted be-
fore the new one can be added.
“SETTING AN ENTRY AS A DESTI-
NATION” (page 4-27)
● “Street Address”
This option allows you to save a new entry
by selecting the address.
“SETTING A DESTINATION
FROM A STREET ADDRESS”
(page 4-7) ●
“Previous Destination”
This option allows you to save a destination
in the address book from a location stored
in the previous destination memory.
Touch the destination you would like to save
into the address book. The touch keyboard gives the option to change
the name of the selected destination.
Touch “OK”. The system confirms the entry and
adds it to the address book.
LNV0961LNV2046LNV2065
Navigation4-25
Page 60 of 104
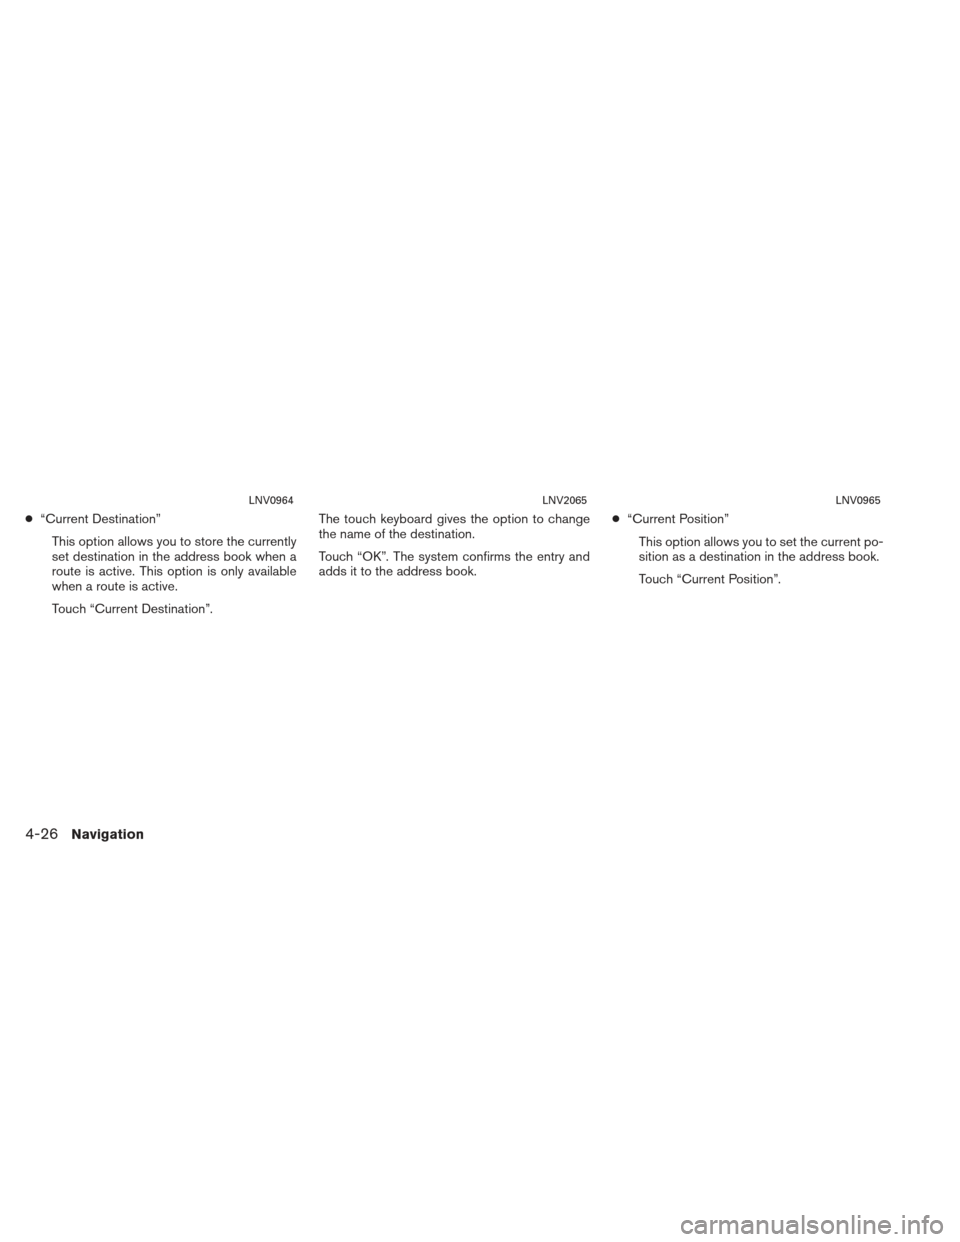
●“Current Destination”
This option allows you to store the currently
set destination in the address book when a
route is active. This option is only available
when a route is active.
Touch “Current Destination”. The touch keyboard gives the option to change
the name of the destination.
Touch “OK”. The system confirms the entry and
adds it to the address book.
●
“Current Position”
This option allows you to set the current po-
sition as a destination in the address book.
Touch “Current Position”.
LNV0964LNV2065LNV0965
4-26Navigation
Page 61 of 104
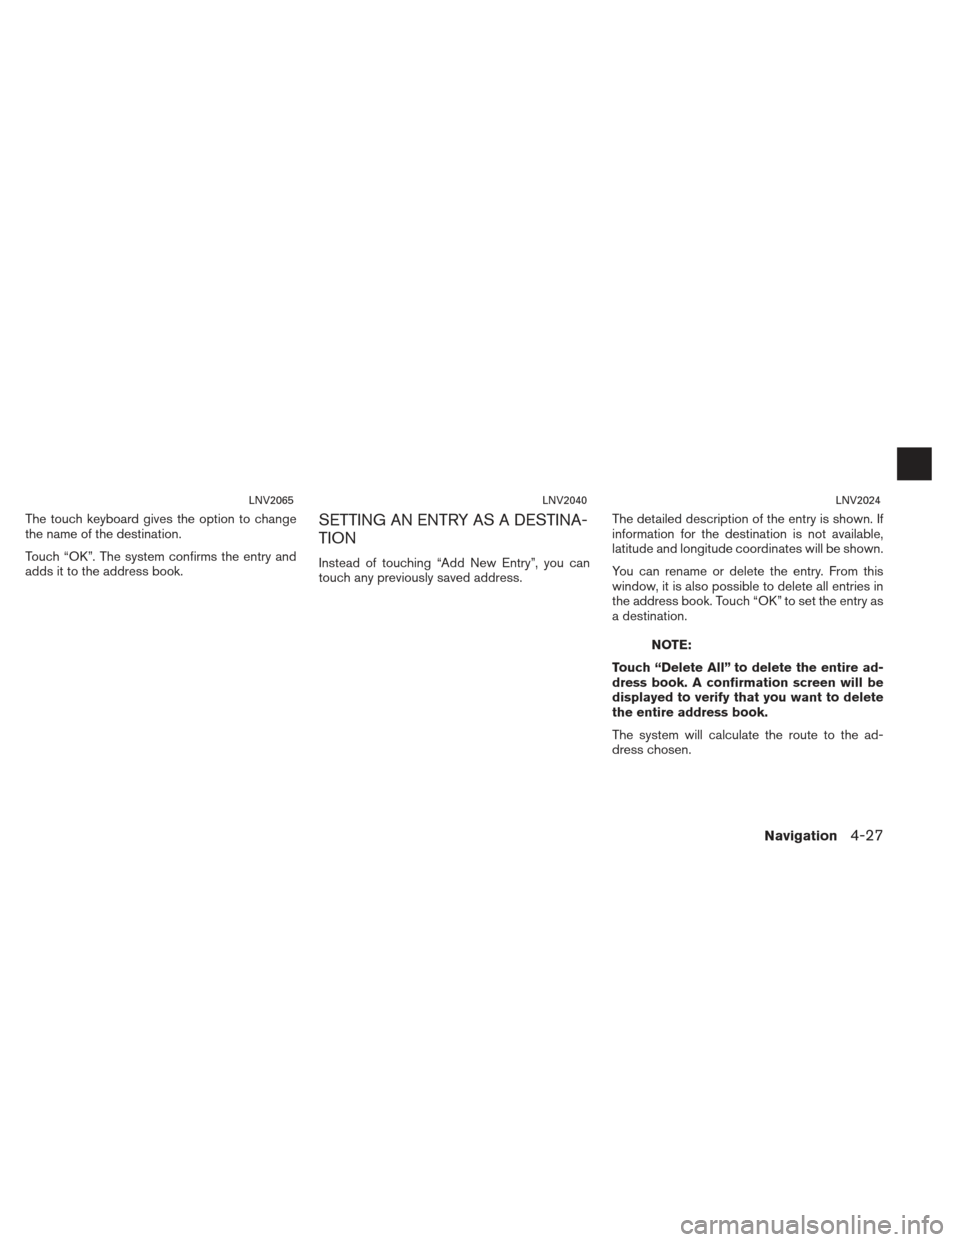
The touch keyboard gives the option to change
the name of the destination.
Touch “OK”. The system confirms the entry and
adds it to the address book.SETTING AN ENTRY AS A DESTINA-
TION
Instead of touching “Add New Entry”, you can
touch any previously saved address.The detailed description of the entry is shown. If
information for the destination is not available,
latitude and longitude coordinates will be shown.
You can rename or delete the entry. From this
window, it is also possible to delete all entries in
the address book. Touch “OK” to set the entry as
a destination.
NOTE:
Touch “Delete All” to delete the entire ad-
dress book. A confirmation screen will be
displayed to verify that you want to delete
the entire address book.
The system will calculate the route to the ad-
dress chosen.
LNV2065LNV2040LNV2024
Navigation4-27
Page 62 of 104
SETTING A DESTINATION FROM
THE ADDRESS BOOK USING
VOICE RECOGNITION (if so
equipped)
Entries in the address book can be set as desti-
nations using the NISSAN Voice Recognition
System:1. Press the
orbutton on the
steering wheel. The system provides
prompts and waits for voice commands.
2. Say “Navigation”.
3. Say “Address Book”.
4. Say the number of the entry in the address book displayed on the screen.
If a route is active, say “Replace Destination” to
replace the current destination with the address
book entry or say “Set as Waypoint” to set ad-
dress book entry as a waypoint on the current
route.
If a route is not set, route guidance is calculated
to the address book entry.
Say “Show on Map” to display the location of the
address book entry on the map.
For more information about the NISSAN Voice
Recognition System, see the vehicle Owner’s
Manual.
NOTE:
Certain remote functions require compat-
ible phone, not included with vehicle. Cel-
lular network provided by independent cel-
lular companies not within Nissan’s
control. Cellular network not available in
all areas. NissanConnect Google™ services
require subscription and owner consent to
activate, subscription service for a period
of time is included in vehicle price, sub-
scription available for purchase thereafter.
Standard text rates, voice minutes, roam-
ing charges and/or data usage may apply.
A destination can be entered using Google™
search results. In order for this feature to be
used, an account must first be registered from
the Info Services settings screen.
“INFO SERVICES SETTINGS”
(page 5-6)
1. Press the NAV button.
2. Touch the “Destination” key.
LNV2212
SETTING A DESTINATION FROM
POIS POWERED BY GOOGLE™
4-28Navigation
Page 63 of 104
3. Touch the “POIs Powered by Google™” key.
NOTE:
The NISSAN Voice Recognition System (if
so equipped) can also be used to access
this feature. Press the
orbut-
ton on the steering wheel, then when
prompted, say “Navigation” and “POIs
Powered by Google™”. Manual controls
are then used to continue. 4. The display shows the touch keyboard. En-
ter the search term.
“HOW TO INPUT CHARAC-
TERS” (page 2-8)
5. A list of search results is displayed. Touch the desired entry. 6. A detailed description of the destination is
provided.
● Press the BACK orBACK button to go
back and pick another destination.
● Touch “Store” to store the destination in the
address book.
● Touch “Call” to call the destination (if a phone
number is available) using the Bluetooth®
Hands-Free Phone System. See the vehicle
Owner’s Manual for more information about
the Bluetooth® Hands-Free Phone System.
● Touch “Map” to show a map of the
destination.
● Touch “Start” to calculate the route to the
destination.
LNV2377LNV2064LNV2050
Navigation4-29
Page 65 of 104
5. Touch “Change State/Province” if the stateor province displayed is not correct. 6. If necessary, enter the name of the state or
province.
The display shows the touch keyboard.
“HOW TO INPUT CHARACTERS”
(page 2-8) 7. Press “List” at any time and a list of remain-
ing cities will be shown. Touch the desired
city.
LNV2226LNV2066LNV0953
Navigation4-31
Page 66 of 104
8. Touch “Street”.The display shows the touch keyboard.
“HOW TO INPUT CHARAC-
TERS” (page 2-8) 9. Touch the name of the desired street.
10. A list of intersecting streets will be shown if six or less exist. Otherwise, the touch key-
board will be displayed again so that the
name of the second street in the intersec-
tion can be entered. Enter the second street
name.
11. Select the intersecting street. 12. Touch “Start”.
The route to the intersection will be
calculated.
LNV2067LNV0955LNV2229
4-32Navigation
Page 67 of 104
The center of a city can be set as a destination.
To set a city center as a destination:1. Press the NAV button.
2. Touch “Destination”.
3. Touch “Next Page”.
4. Touch “City Center”.
5. If the state shown is not correct, touch “Change State or Province”. Otherwise,
proceed to step 7. 6. Enter the name of the state or province. The
display shows the touch keyboard.
“HOW TO INPUT CHARAC-
TERS” (page 2-8)
The keyboard has an intelligent spelling
setting, so it excludes non-existing
combinations. On the top right of the
screen, the number of matches is shown.
7. Touch “City”
8. Enter the name of the first street. The dis- play shows the touch keyboard. 9. Touch “Start” to calculate the route to the
city center.
LNV2227LNV2066LNV2229
SETTING A CITY CENTER AS A DES-
TINATION
Navigation4-33
Page 68 of 104
This method allows you to search for a destina-
tion by scrolling the map, then have the system
calculate a route to the destination or store the
position in the address book.1. Press the NAV button.
2. Touch “Destination”.
3. Touch “Next Page”.
4. Touch “Map”.
The system is automatically set to the 2D, North
Up setting. 5. Scroll the map and touch the screen at the
preferred location.
6. Touch the position data.
7. Touch “OK”.
Choose “Store” to store the location in the ad-
dress book. The touch keyboard is displayed so
that a name for the entry can be stored. Choose “Start” to calculate the route and begin
route guidance to the chosen location.
LNV2230LNV2231LNV2229
SETTING DESTINATION BY MAP
4-34Navigation